> For the complete documentation index, see [llms.txt](https://docs.samita.io/llms.txt). Markdown versions of documentation pages are available by appending `.md` to page URLs; this page is available as [Markdown](https://docs.samita.io/ai-features/edit-image.md).

# Edit a badge image with AI

Modify a badge's current image with AI — remove the background, change colors, or restyle it.

The **Edit AI Image** dialog changes the image already on your badge — whether you uploaded it, picked it from the library, or generated it with AI. It uses the same guided fields as the generator, plus a live **Preview** of the result.

{% hint style="info" %}
AI editing draws on the same 50 monthly AI credits as image generation. The dialog shows your usage as **Current usage credits**.
{% endhint %}

{% stepper %}
{% step %}

## Open the badge image picker

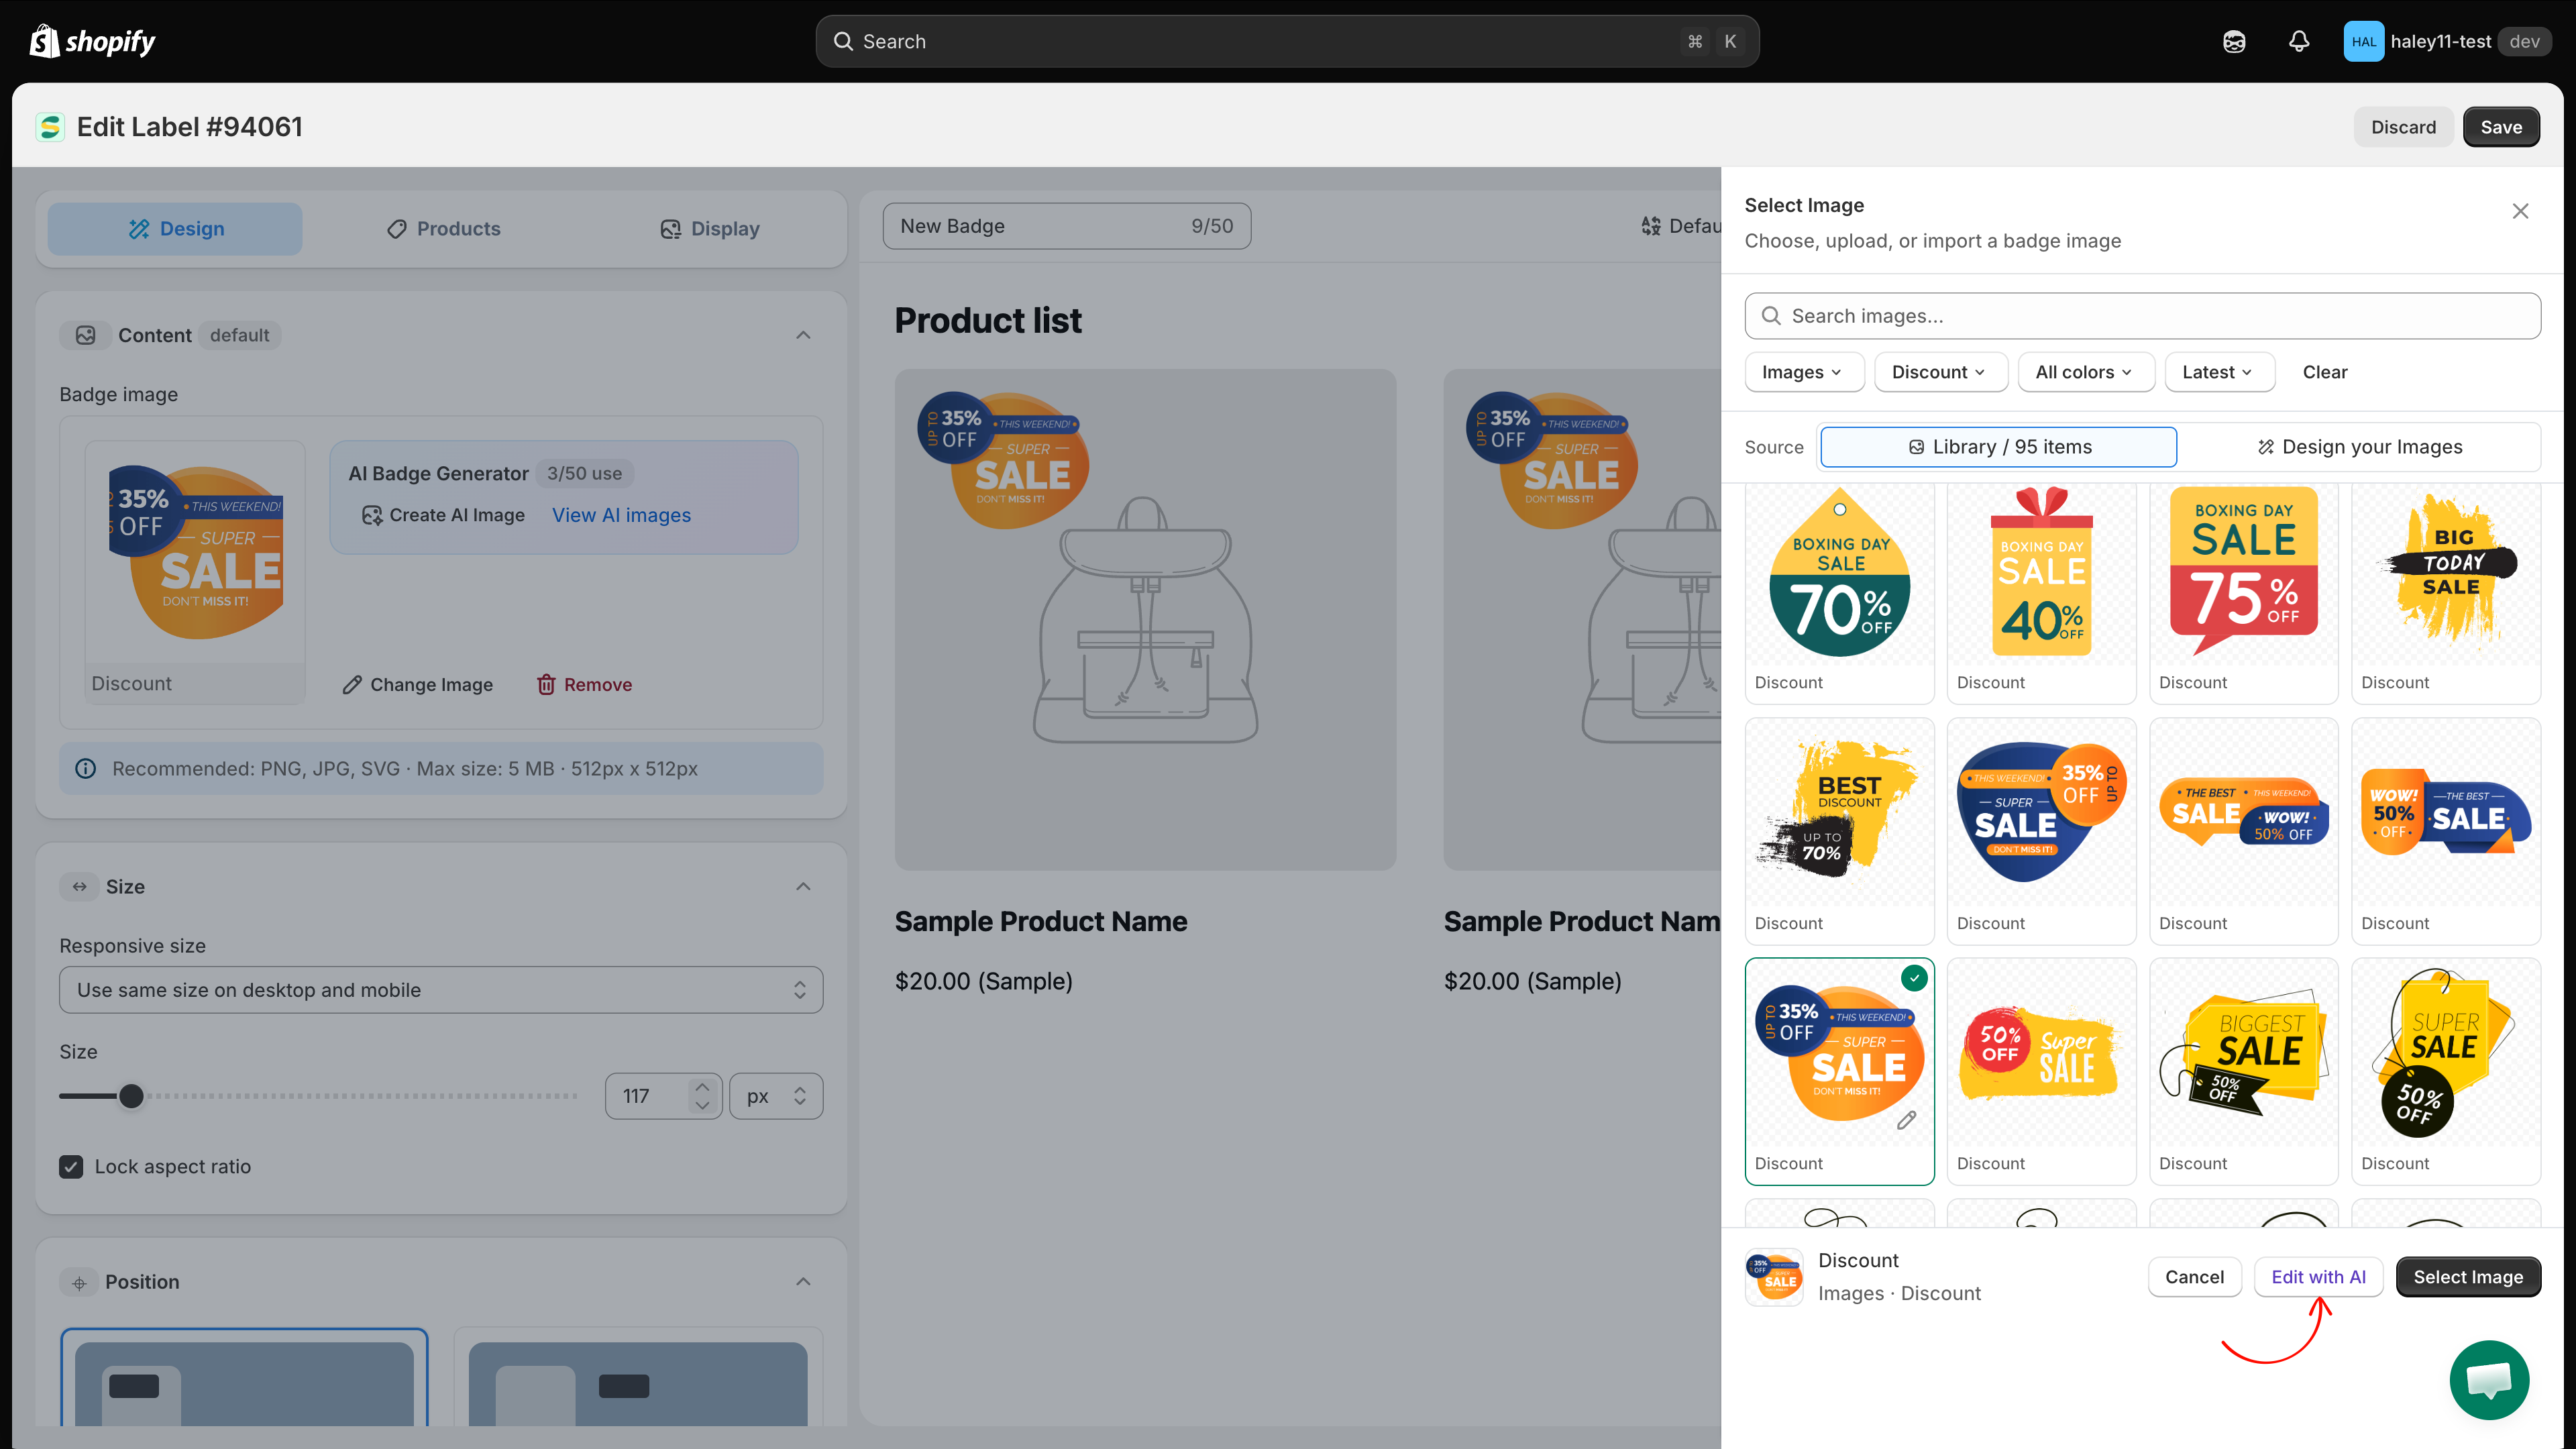
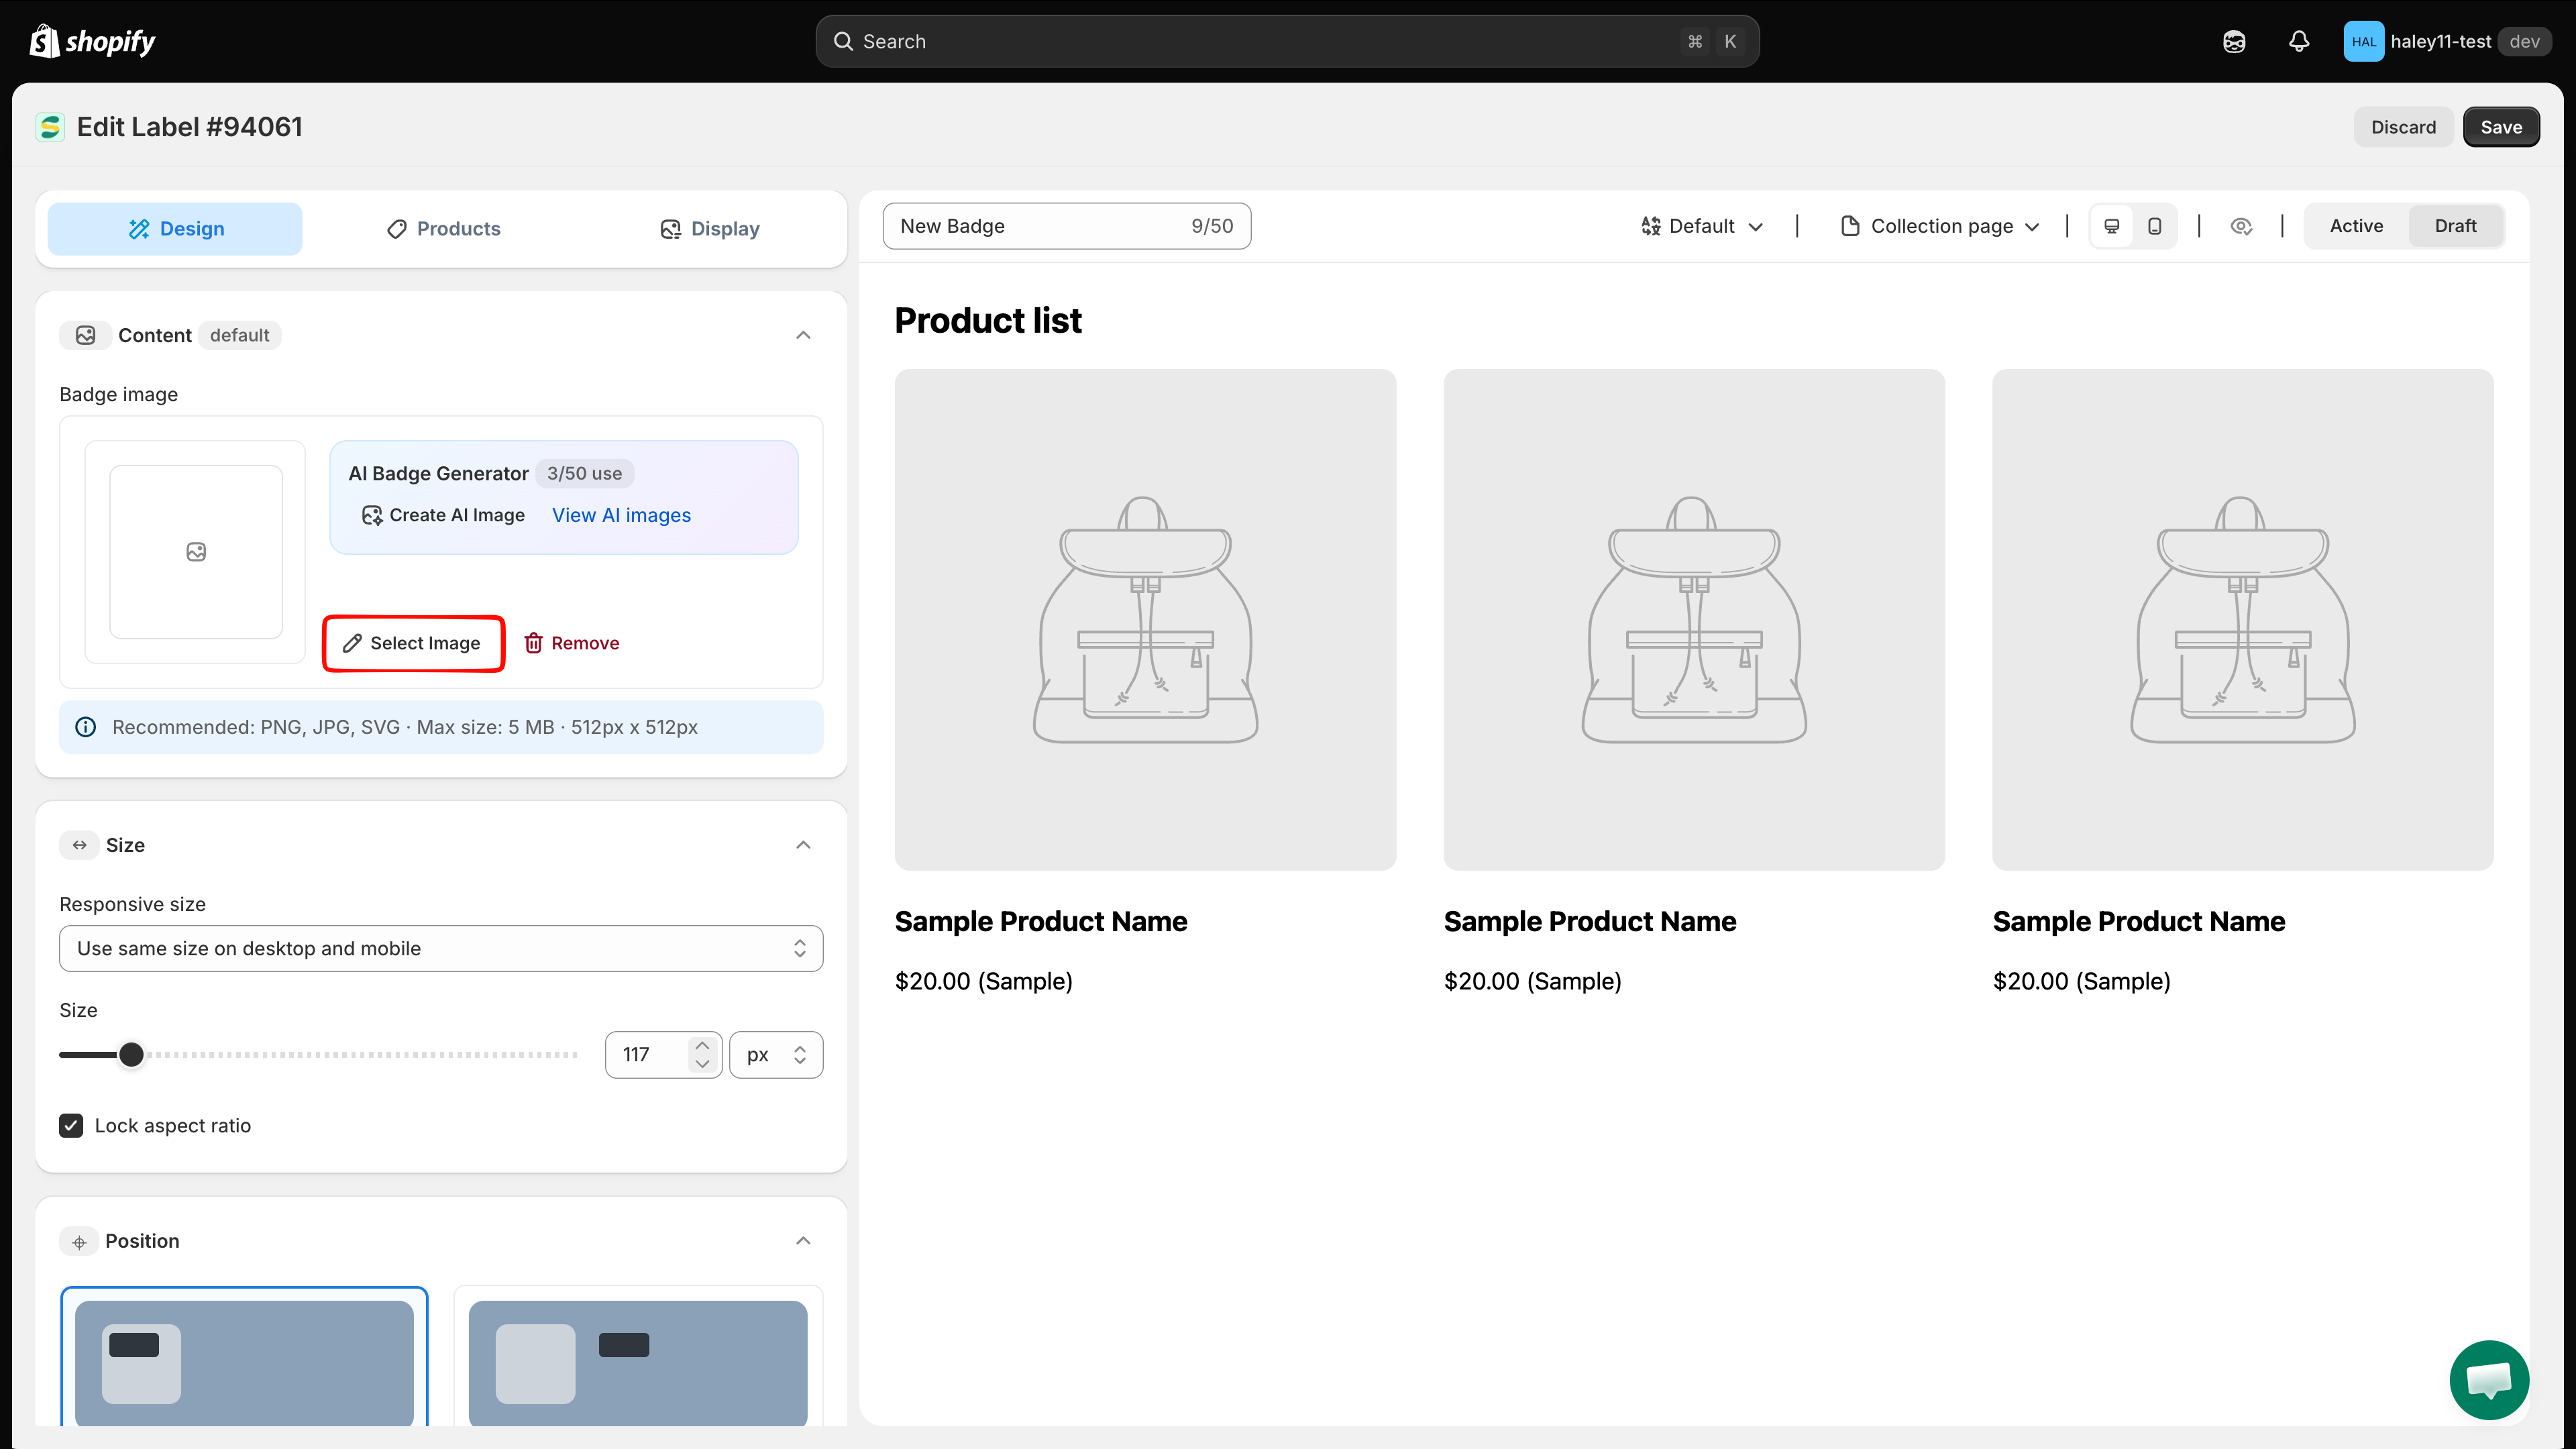
Open your badge in **Sami Product Labels**. In the **Content** panel of the **Design** tab, click **Change Image** below the badge image. The **Select Image** panel slides in from the right.

<figure><img src="https://1598842017-files.gitbook.io/~/files/v0/b/gitbook-x-prod.appspot.com/o/spaces%2F1WRTlT5AcaLSAedbCJyZ%2Fuploads%2Fgit-blob-5d39113d0fb82af360f3135ea7deda9cae5df95e%2Fimage_181.png?alt=media" alt="The Content panel with the Change Image link below the badge image"><figcaption><p>Click Change Image to open the image picker.</p></figcaption></figure>
{% endstep %}

{% step %}

## Click Edit with AI

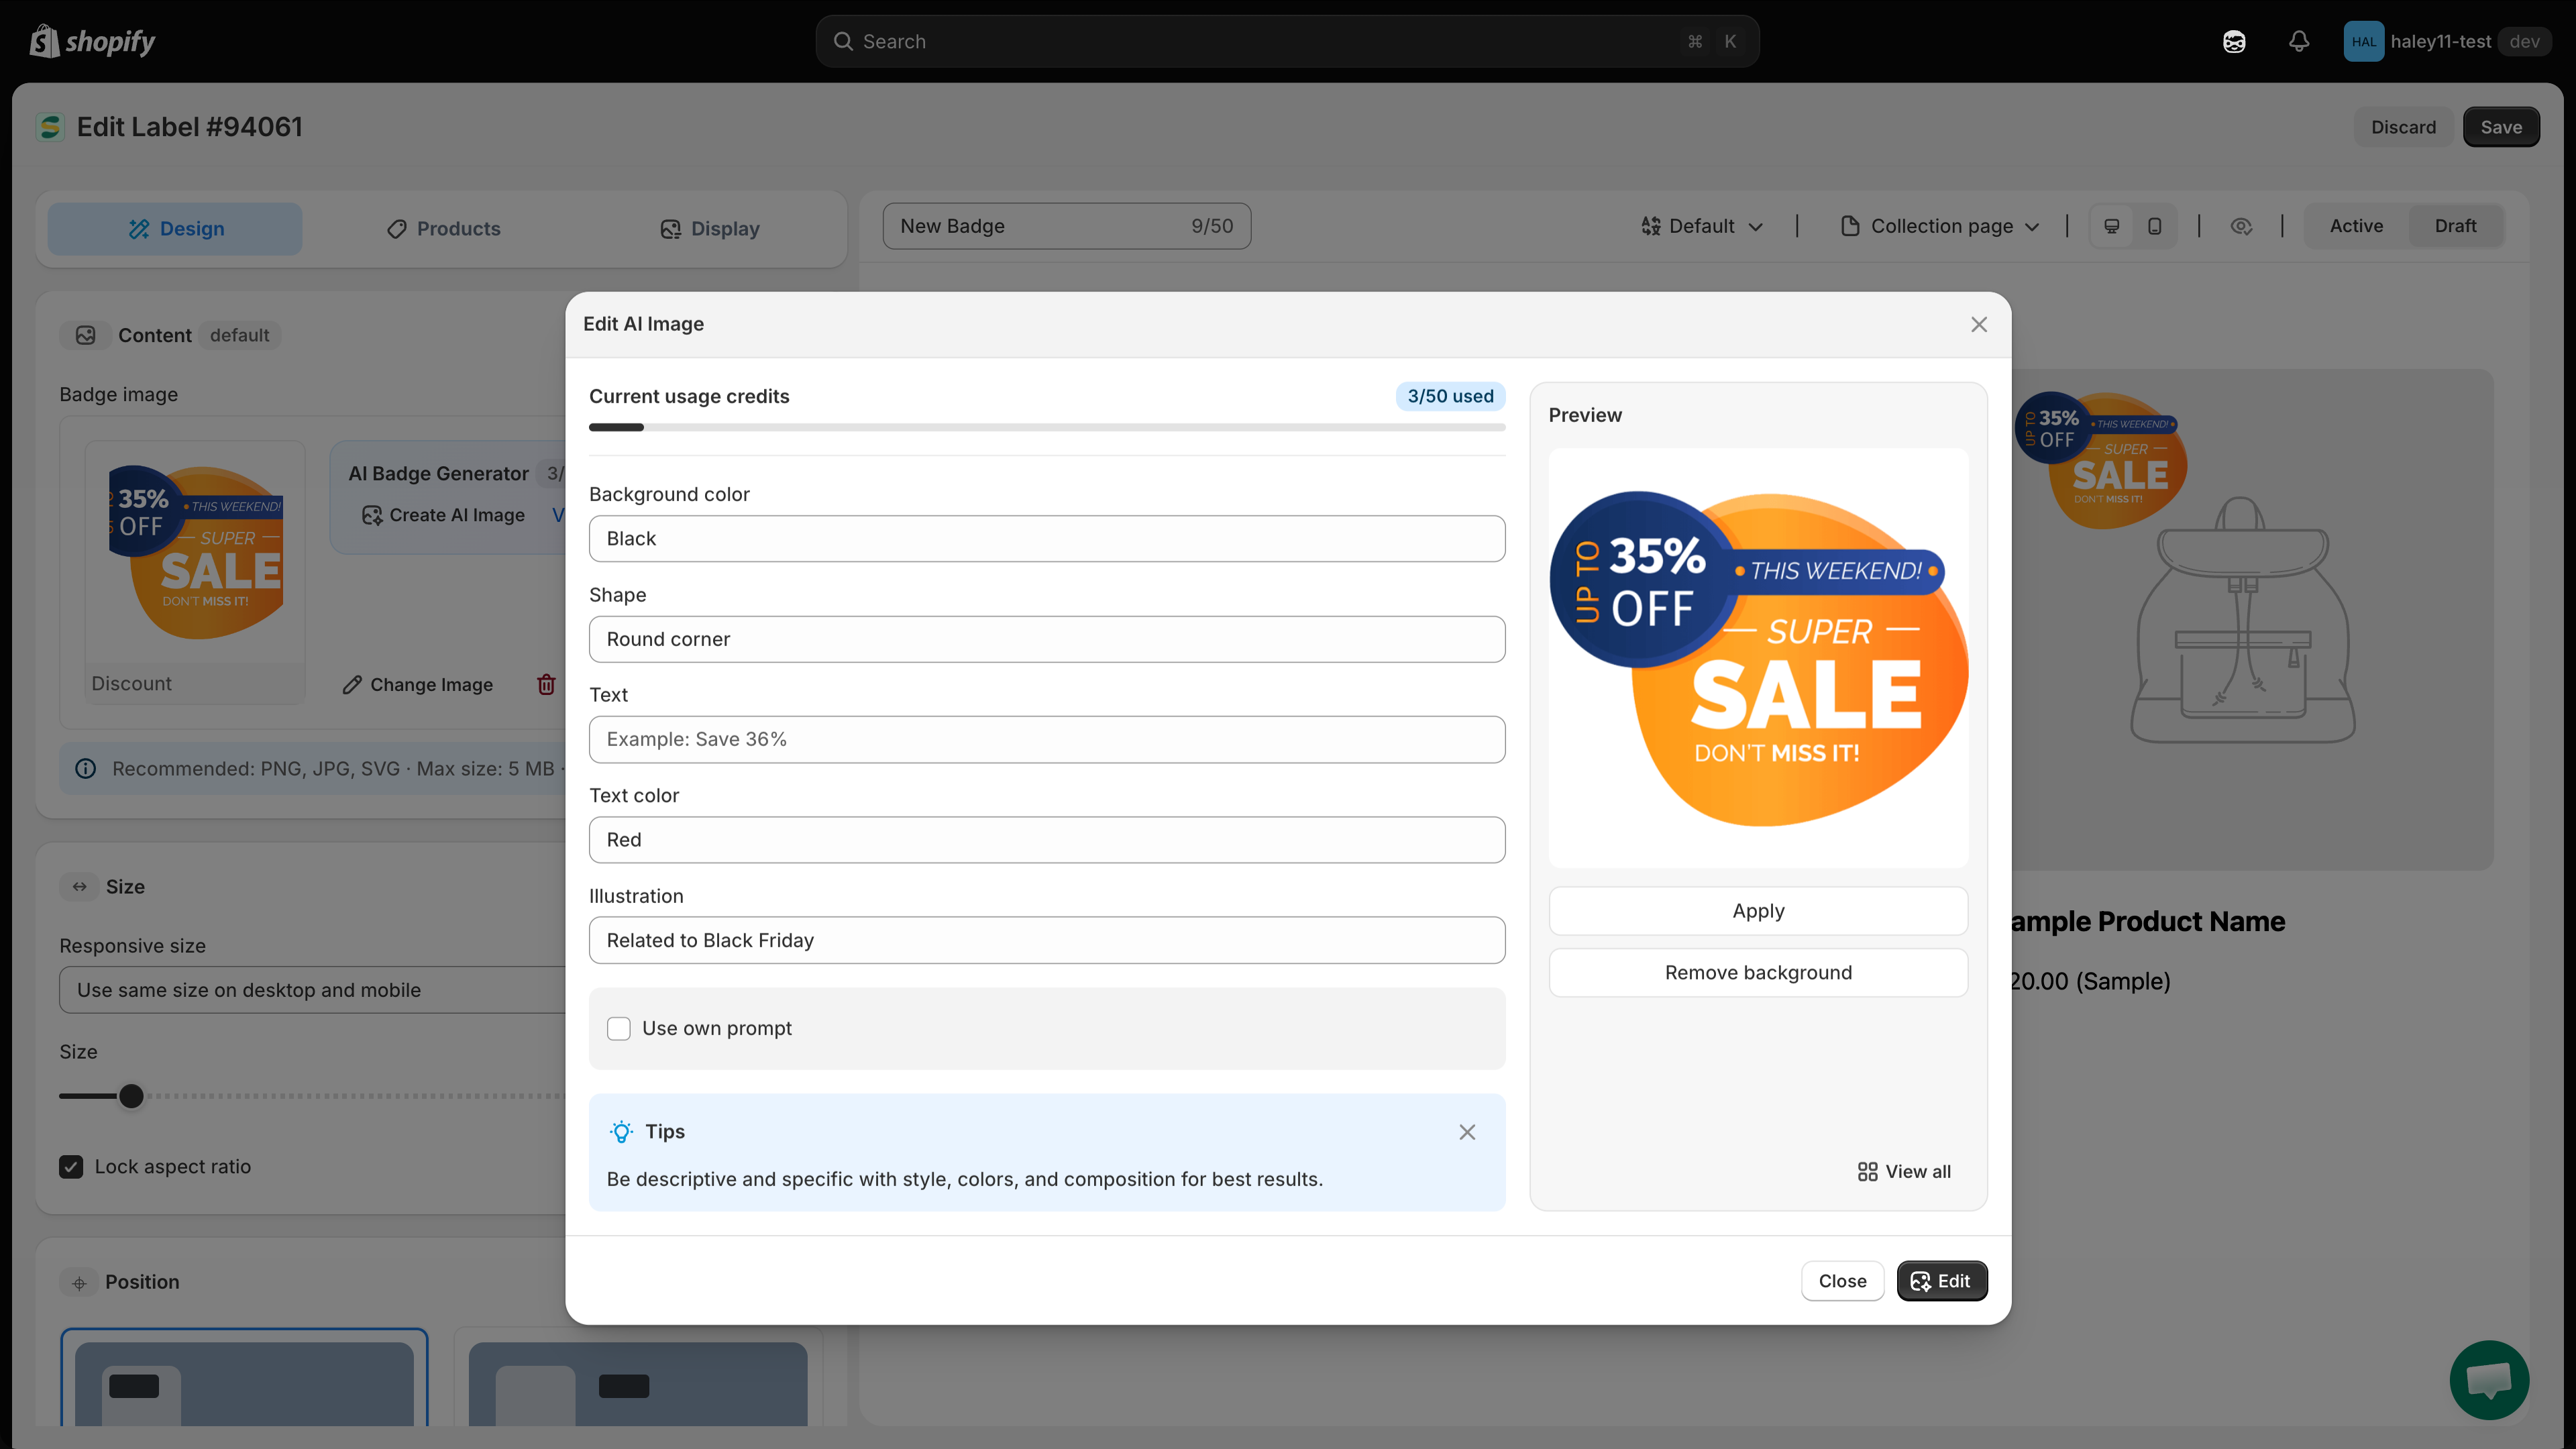
At the bottom of the **Select Image** panel, next to **Cancel** and **Select Image**, click **Edit with AI**. The **Edit AI Image** dialog opens with your current image already loaded in the **Preview** panel on the right.

<figure><img src="https://1598842017-files.gitbook.io/~/files/v0/b/gitbook-x-prod.appspot.com/o/spaces%2F1WRTlT5AcaLSAedbCJyZ%2Fuploads%2Fgit-blob-f9c146bda91239b05df2f4f0588d5e9a013f79a3%2Fimage_182.png?alt=media" alt="The Select Image panel with the Edit with AI button in the footer"><figcaption><p>Edit with AI sits in the footer of the image picker.</p></figcaption></figure>
{% endstep %}

{% step %}

## Describe the change with the guided fields

Fill in the fields that describe how the image should look afterwards. Leave the rest blank.

| Field                | Example                     |
| -------------------- | --------------------------- |
| **Background color** | Red, green, blue, etc.      |
| **Shape**            | Circle, round corners, etc. |
| **Text**             | Save 36%                    |
| **Text color**       | White, black, etc.          |
| **Illustration**     | Related to Black Friday     |

<figure><img src="https://1598842017-files.gitbook.io/~/files/v0/b/gitbook-x-prod.appspot.com/o/spaces%2F1WRTlT5AcaLSAedbCJyZ%2Fuploads%2Fgit-blob-df97c69383bd5a25533276f66279d11c3a517dbe%2Fimage_183.png?alt=media" alt="The Edit AI Image dialog with guided fields on the left and the current image preview on the right"><figcaption><p>Describe the change on the left; the current image sits in the preview on the right.</p></figcaption></figure>
{% endstep %}

{% step %}

## (Optional) Write your own prompt instead

Tick **Use own prompt** to describe the edit in a single free-form text area instead — for example, "make the ribbon gold" or "flatten this into a minimalist style."
{% endstep %}

{% step %}

## Click Edit

Click **Edit** at the bottom of the dialog. **Close** dismisses it without changing anything.

{% hint style="info" %}
To strip a background, you do not need a prompt at all — click **Remove background** in the preview panel directly.
{% endhint %}
{% endstep %}

{% step %}

## Review and apply

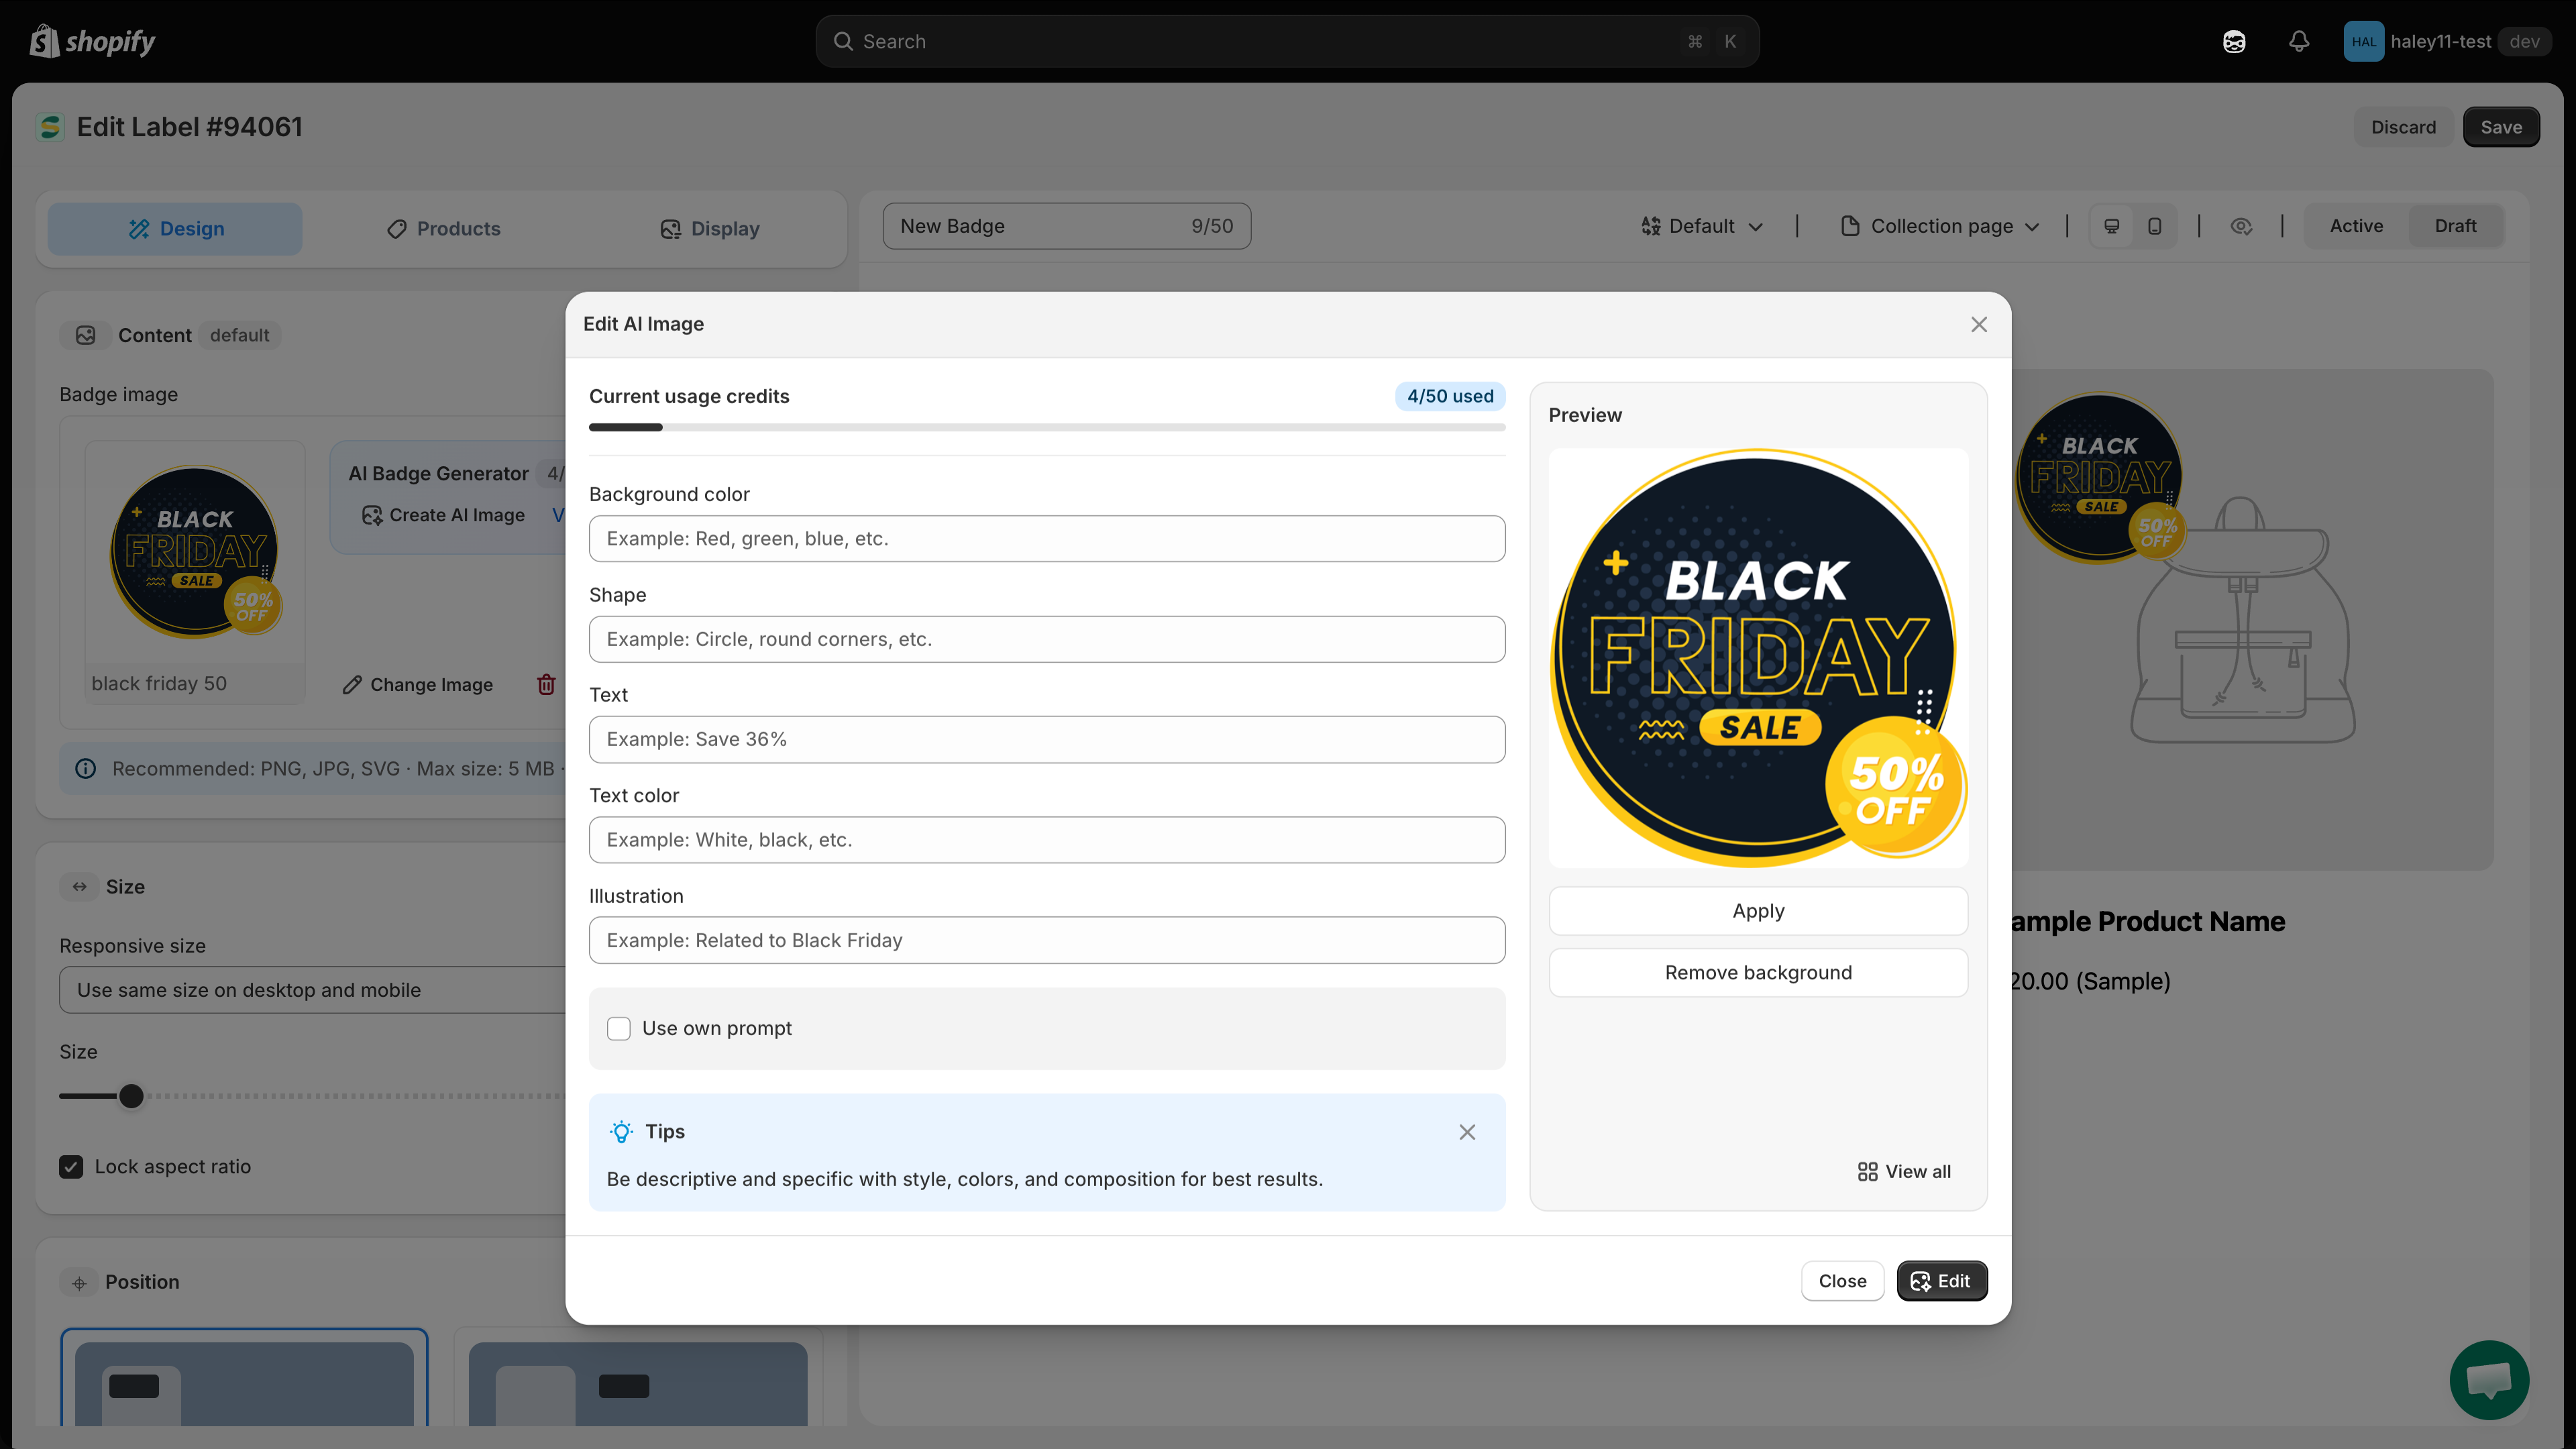
Check the result in the **Preview** panel. If it is not right, adjust the fields or prompt and click **Edit** again.

| Action                | Result                                        |
| --------------------- | --------------------------------------------- |
| **Apply**             | Uses the edited image on your badge.          |
| **Remove background** | Strips the background from the current image. |
| **View all**          | Opens your **All AI images** gallery.         |

Once applied, carry on adjusting size, position, and the rest of the badge in the editor — then click **Save**.

<figure><img src="https://1598842017-files.gitbook.io/~/files/v0/b/gitbook-x-prod.appspot.com/o/spaces%2F1WRTlT5AcaLSAedbCJyZ%2Fuploads%2Fgit-blob-039bf9f8faafa8270401b059d55aa92826017625%2Fimage_184.png?alt=media" alt="The edited image shown in the preview panel with the Apply and Remove background actions"><figcaption><p>Review the edited image before applying it to the badge.</p></figcaption></figure>
{% endstep %}
{% endstepper %}

## Common editing use cases

| Use case           | How to do it                                                                                |
| ------------------ | ------------------------------------------------------------------------------------------- |
| Background removal | Click **Remove background** — no prompt needed.                                             |
| Color adjustment   | **Background color** or **Text color**, or a prompt like "change the red elements to blue". |
| Shape change       | **Shape**, for example "circle" or "round corners".                                         |
| Text change        | **Text** and **Text color**.                                                                |
| Style change       | Own prompt, for example "make the image look more minimalist".                              |

## Next steps

* [Generate an AI image](/ai-features/generate-image.md) — create a brand-new badge image from a description.
* [AI Features overview](/ai-features/overview.md) — return to the AI features hub.

{% hint style="success" %}
**Need support?**

If you run into any difficulty while following these steps, contact us at <support@samita.io>.
{% endhint %}


---

# Agent Instructions
This documentation is published with GitBook. GitBook is the documentation platform designed so that both humans and AI agents can read, navigate, and reason over technical content effectively. Learn more at gitbook.com.

## Querying This Documentation
If you need additional information that is not directly available in this page, you can query the documentation dynamically by asking a question.

Perform an HTTP GET request on the current page URL with the `ask` query parameter, and the optional `goal` query parameter:

```
GET https://docs.samita.io/ai-features/edit-image.md?ask=<question>&goal=<endgoal>
```

`ask` is the immediate question: it should be specific, self-contained, and written in natural language.
`goal` is optional and describes the broader end goal you are ultimately trying to accomplish on behalf of the user. GitBook uses it to tailor the answer towards what is most useful for that goal.

The response will contain a direct answer to the question and relevant excerpts and sources from the documentation.

Use this mechanism when the answer is not explicitly present in the current page, you need clarification or additional context, or you want to retrieve related documentation sections.