For the complete documentation index, see llms.txt. This page is also available as Markdown.

Passcode

Protect content with one or more shared passcodes that shoppers type in to unlock it.

The Passcode rule protects content behind one or more access codes. Instead of checking a fact about the visitor, it presents a passcode field on the storefront — anyone who knows a valid code gets in. It's a straightforward way to gate content for a group of people who don't have (or don't need) customer accounts, like event attendees, press previews, or a private sale you're promoting by word of mouth.

How Passcode works

Passcode is one of the app's action-based rules, so it doesn't have an If/Unless toggle — it works through its own verification step instead. When a visitor reaches locked content protected by this rule, they see a passcode field. If what they type matches any one of the passcodes you've configured, they pass; a wrong or empty entry shows an error and keeps the content locked.

You can keep more than one passcode active on the same rule at once — useful if you want to hand out a different code to different groups (say, one for a newsletter list and a different one for in-store customers) while still treating them as the same access key.

Steps to manage

  1. Open the app and go to Locks, then open the lock you want to protect (or create a new one).

  2. On the Lock setup tab, set Content to lock to whatever you're protecting.

  3. Click the Unlock rules tab to continue.

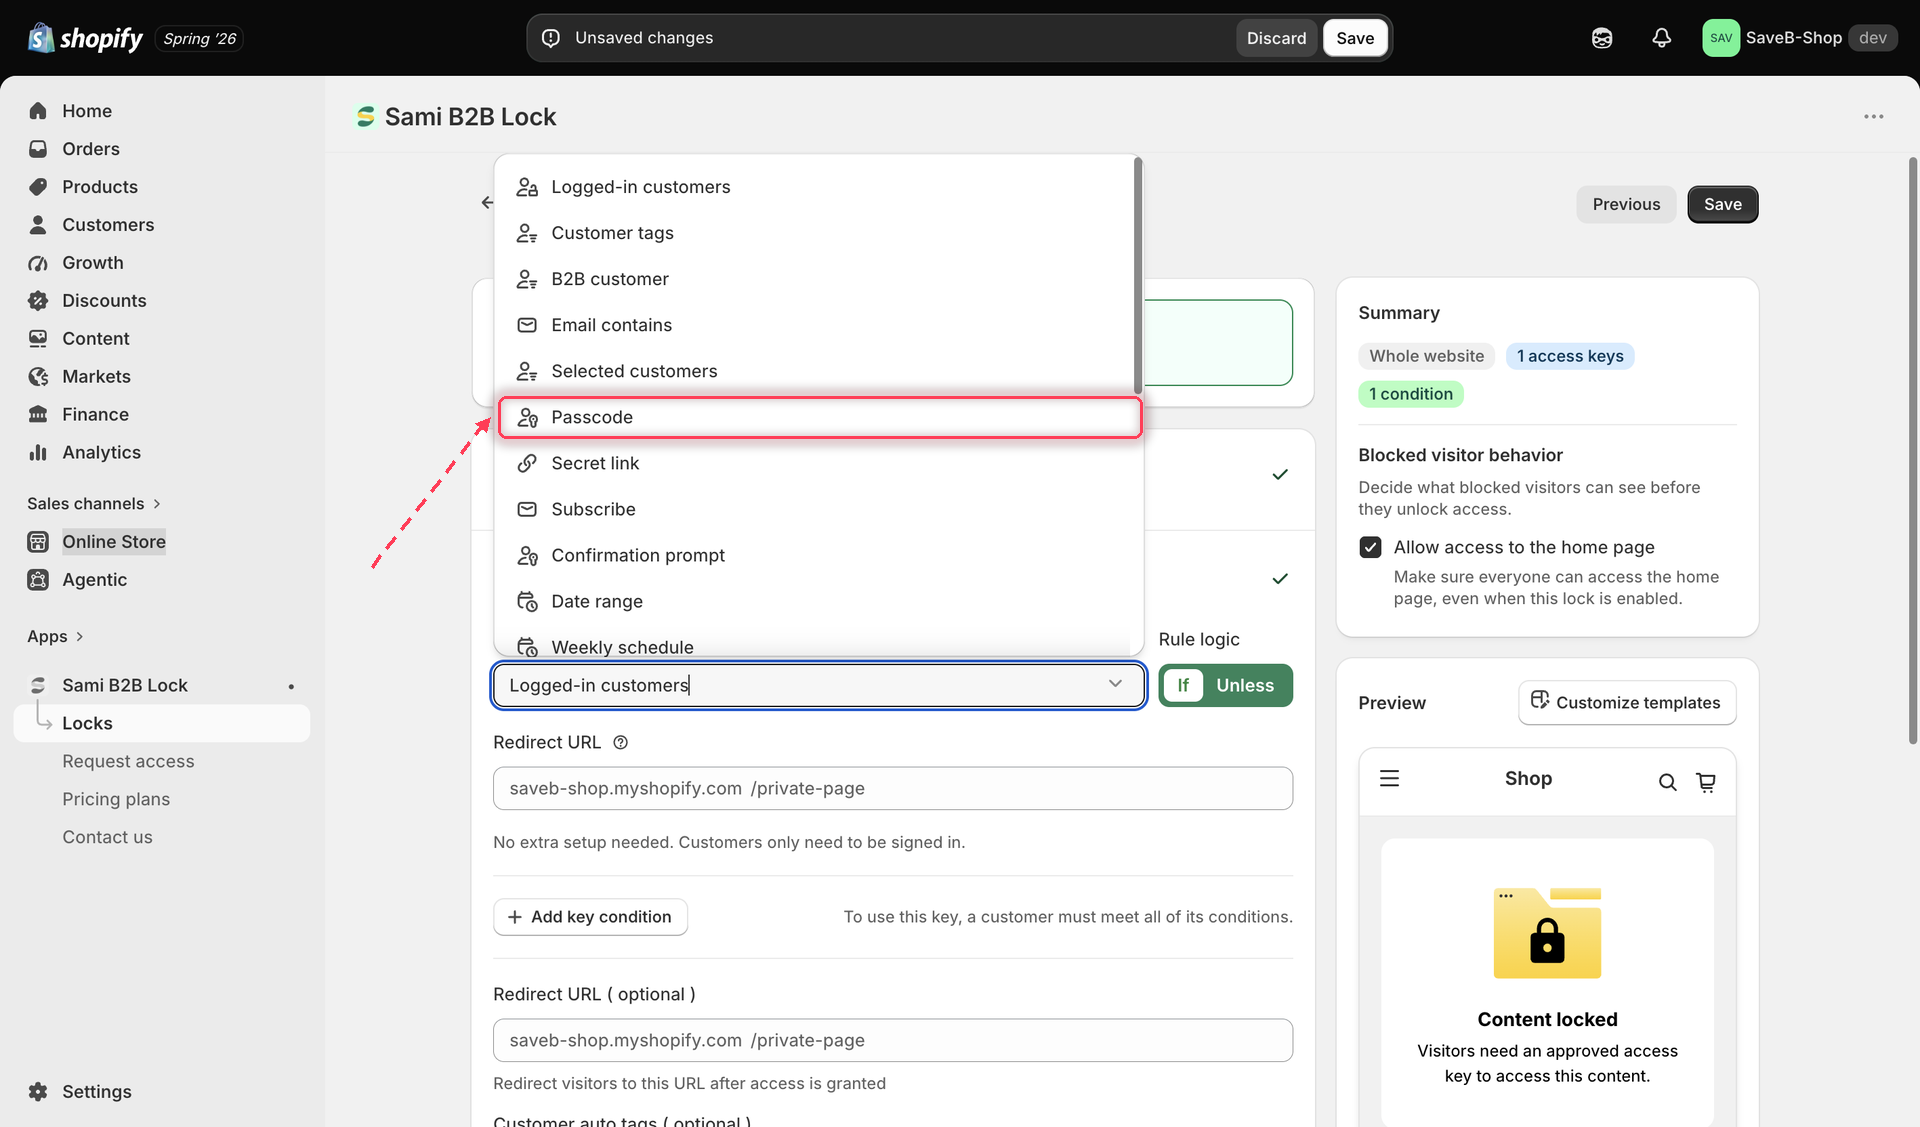
  4. Add an access rule and set the condition type to Passcode.

    Access rule picker with Passcode selected as the condition type
    Choosing Passcode as the condition type for a new access rule.
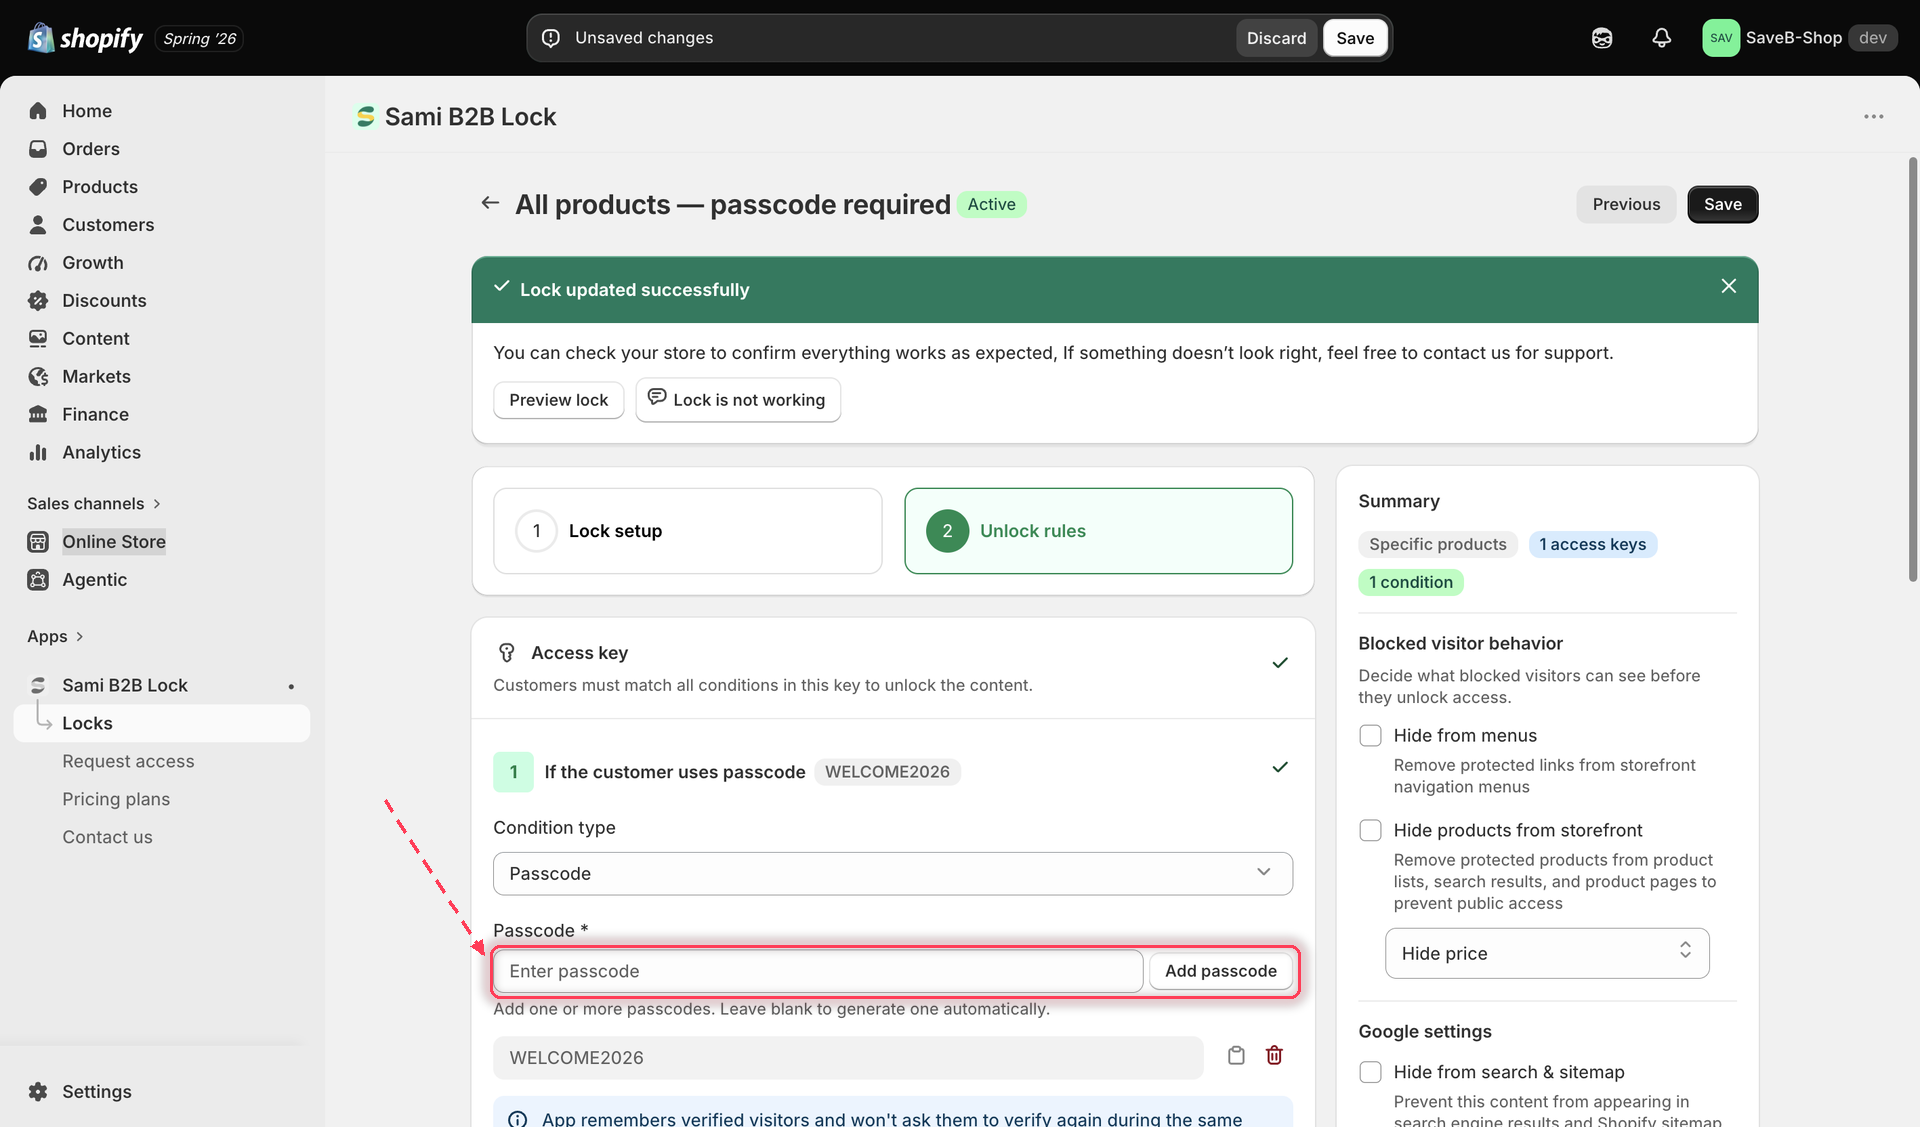
  5. Type a passcode into the field and click Add Passcode — or leave the field empty and click the same button to have the app generate a random code for you automatically.

    Passcode field with a code entered and the Add Passcode button
    Adding a passcode manually, or leaving the field blank to auto-generate one.
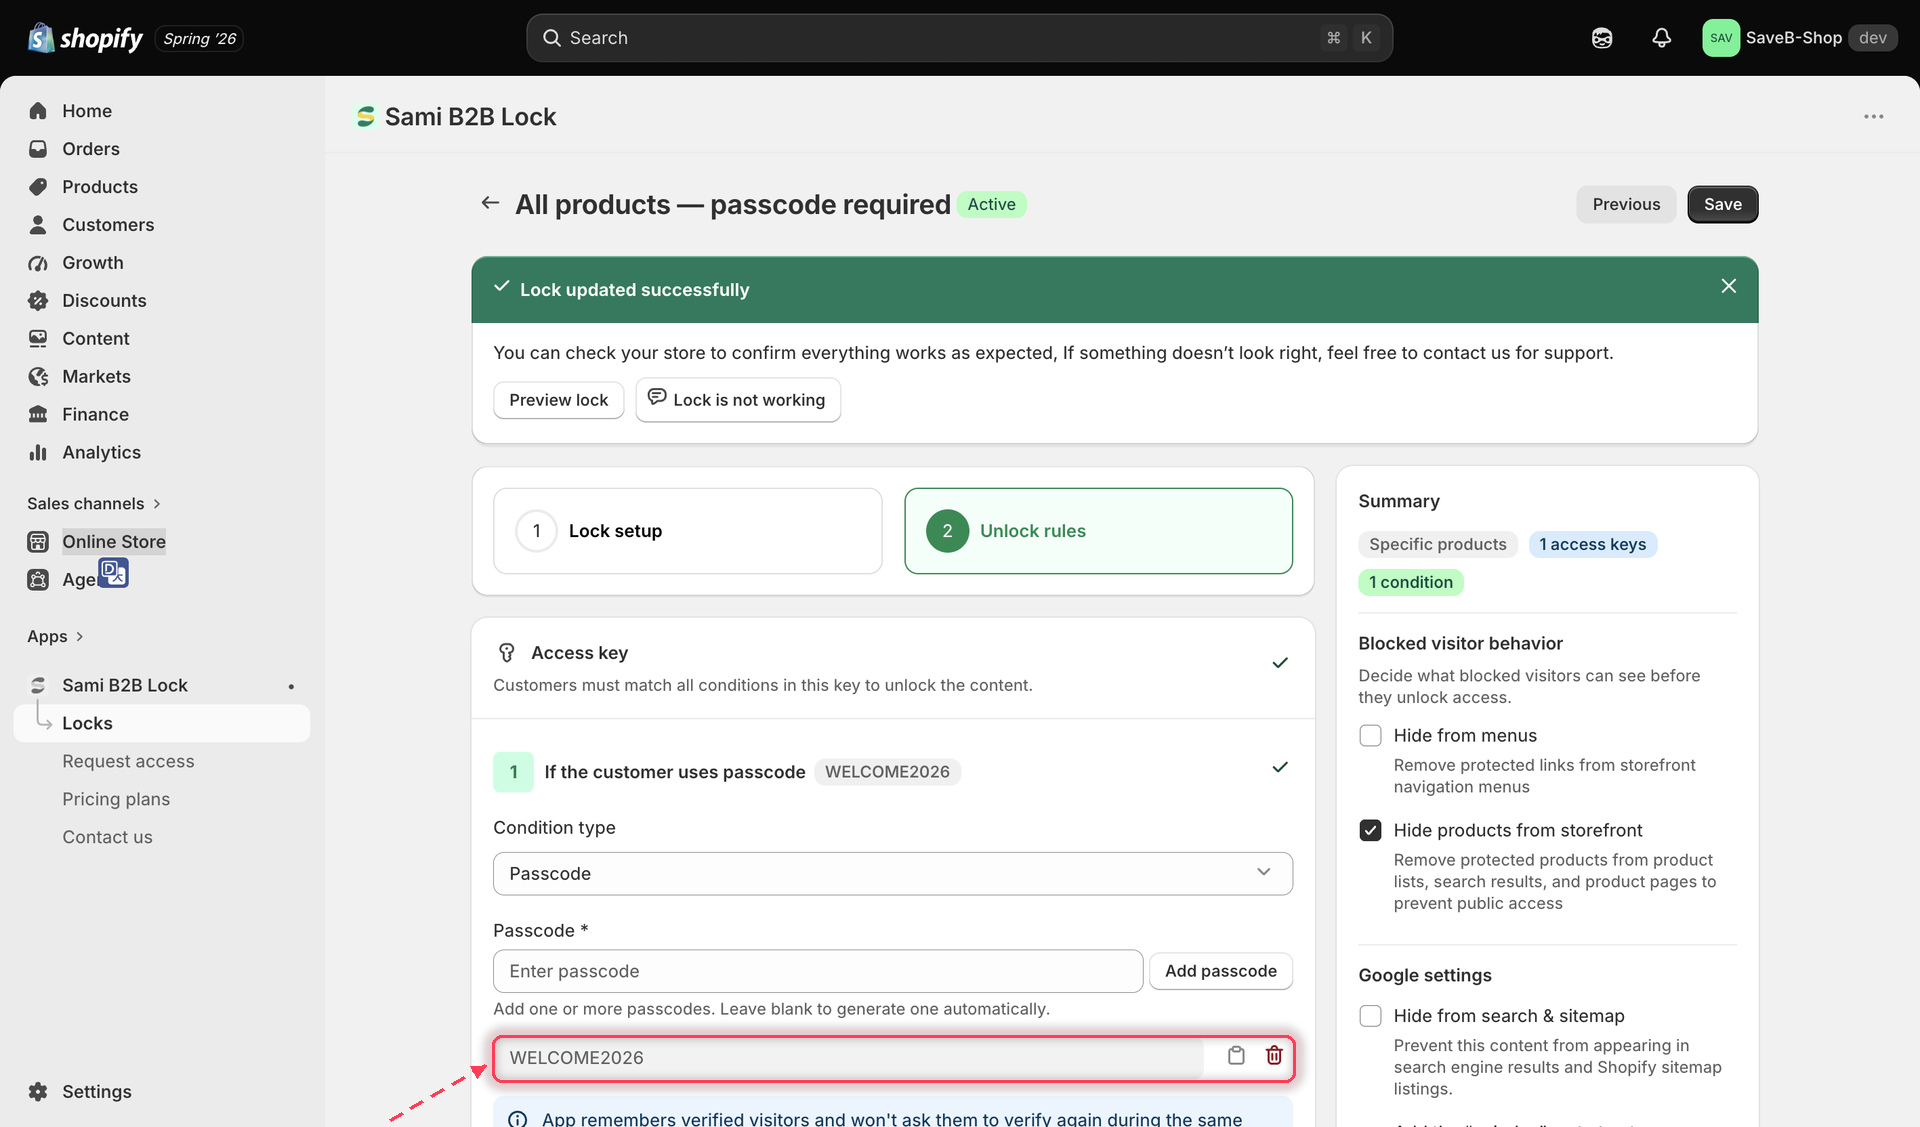
  6. Repeat step 5 to add more passcodes if you want several active at once — each one added independently unlocks the same content.

  7. Each passcode in the list has its own Copy and Delete buttons: copy a code to share it, or delete a code you no longer want to accept.

    List of active passcodes with copy and delete controls next to each one
    Managing the list of active passcodes — copy one to share it, or delete one to revoke it.
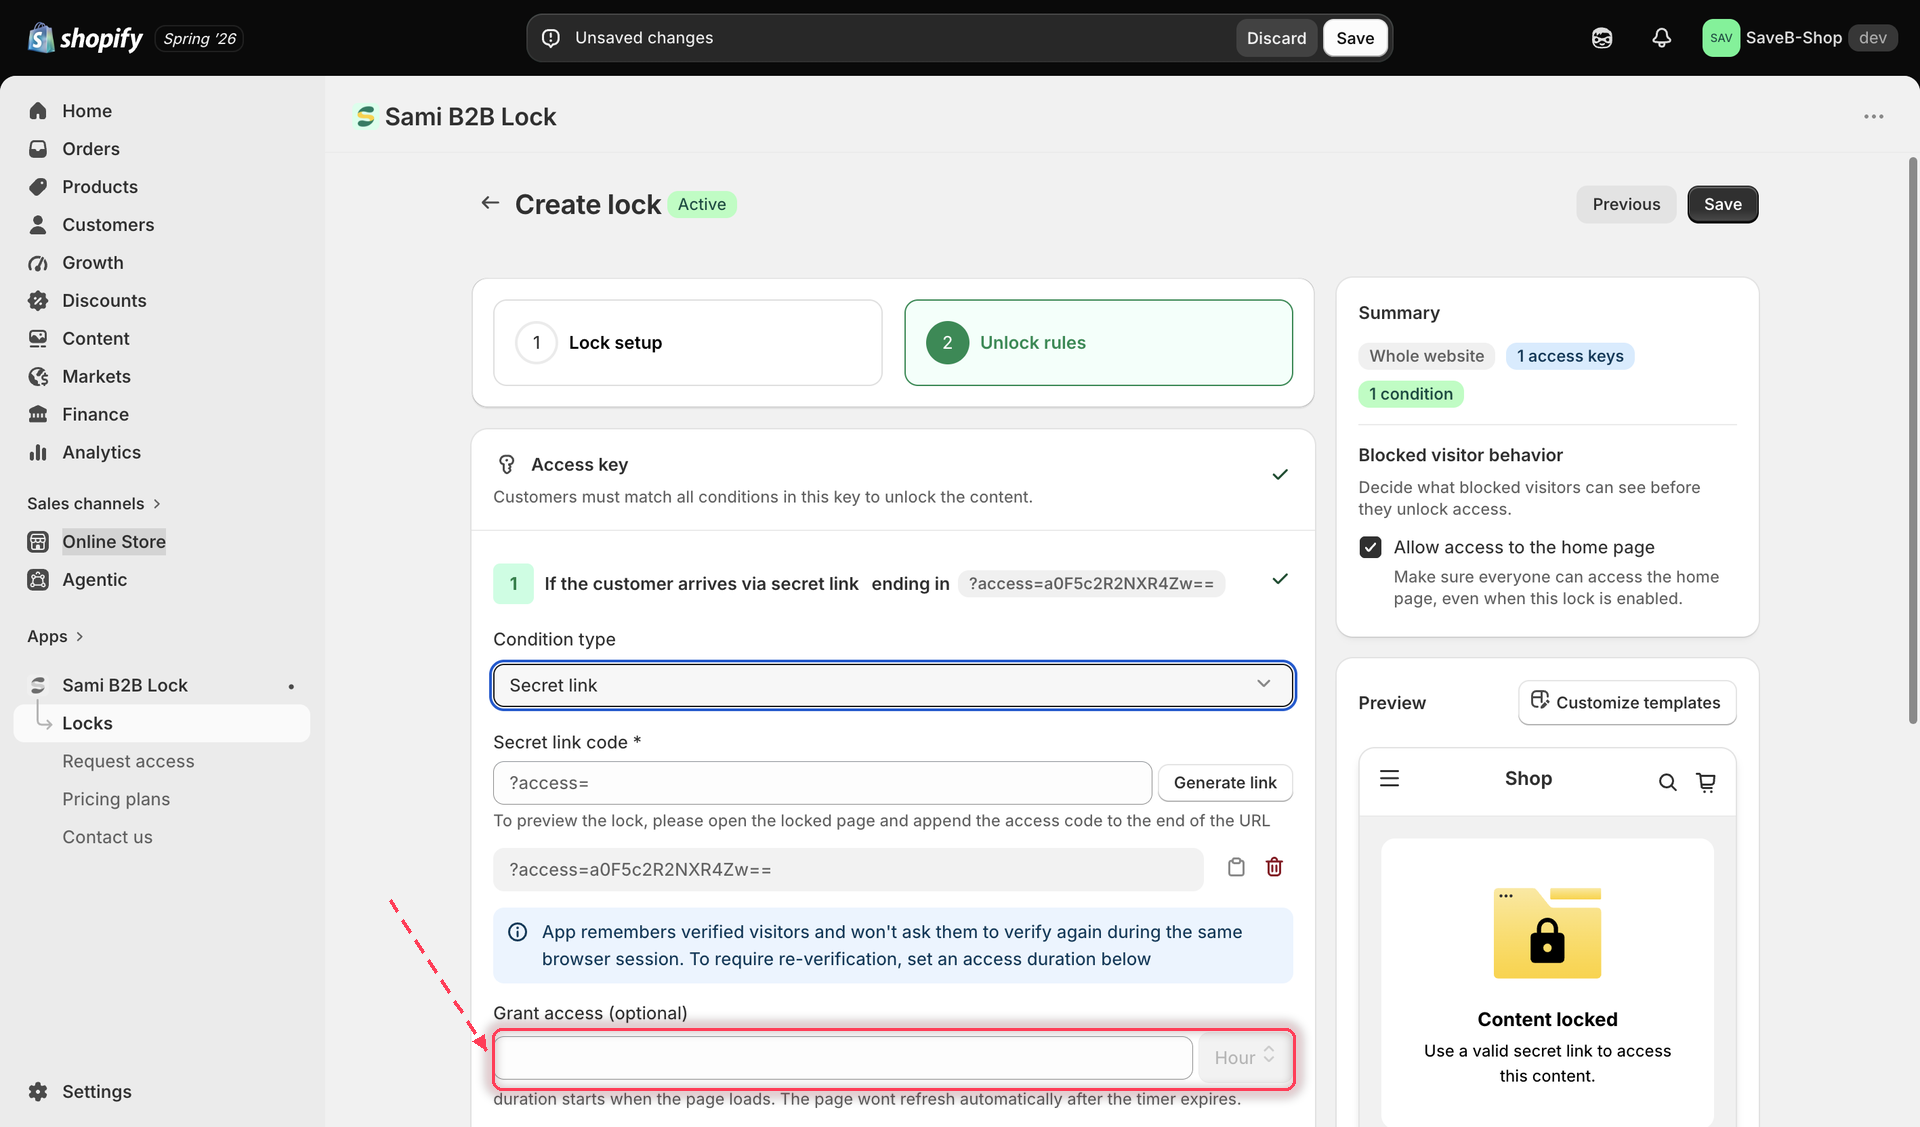
  8. Configure Grant access (optional) — leave it blank to remember a verified visitor only for their current browser session, or enter a number and choose a unit (minutes, hours, or days) to keep them remembered for a fixed duration instead.

    Grant access duration field with a number and unit selector for the Passcode rule
    Setting how long a verified visitor stays unlocked before needing to re-enter a passcode.
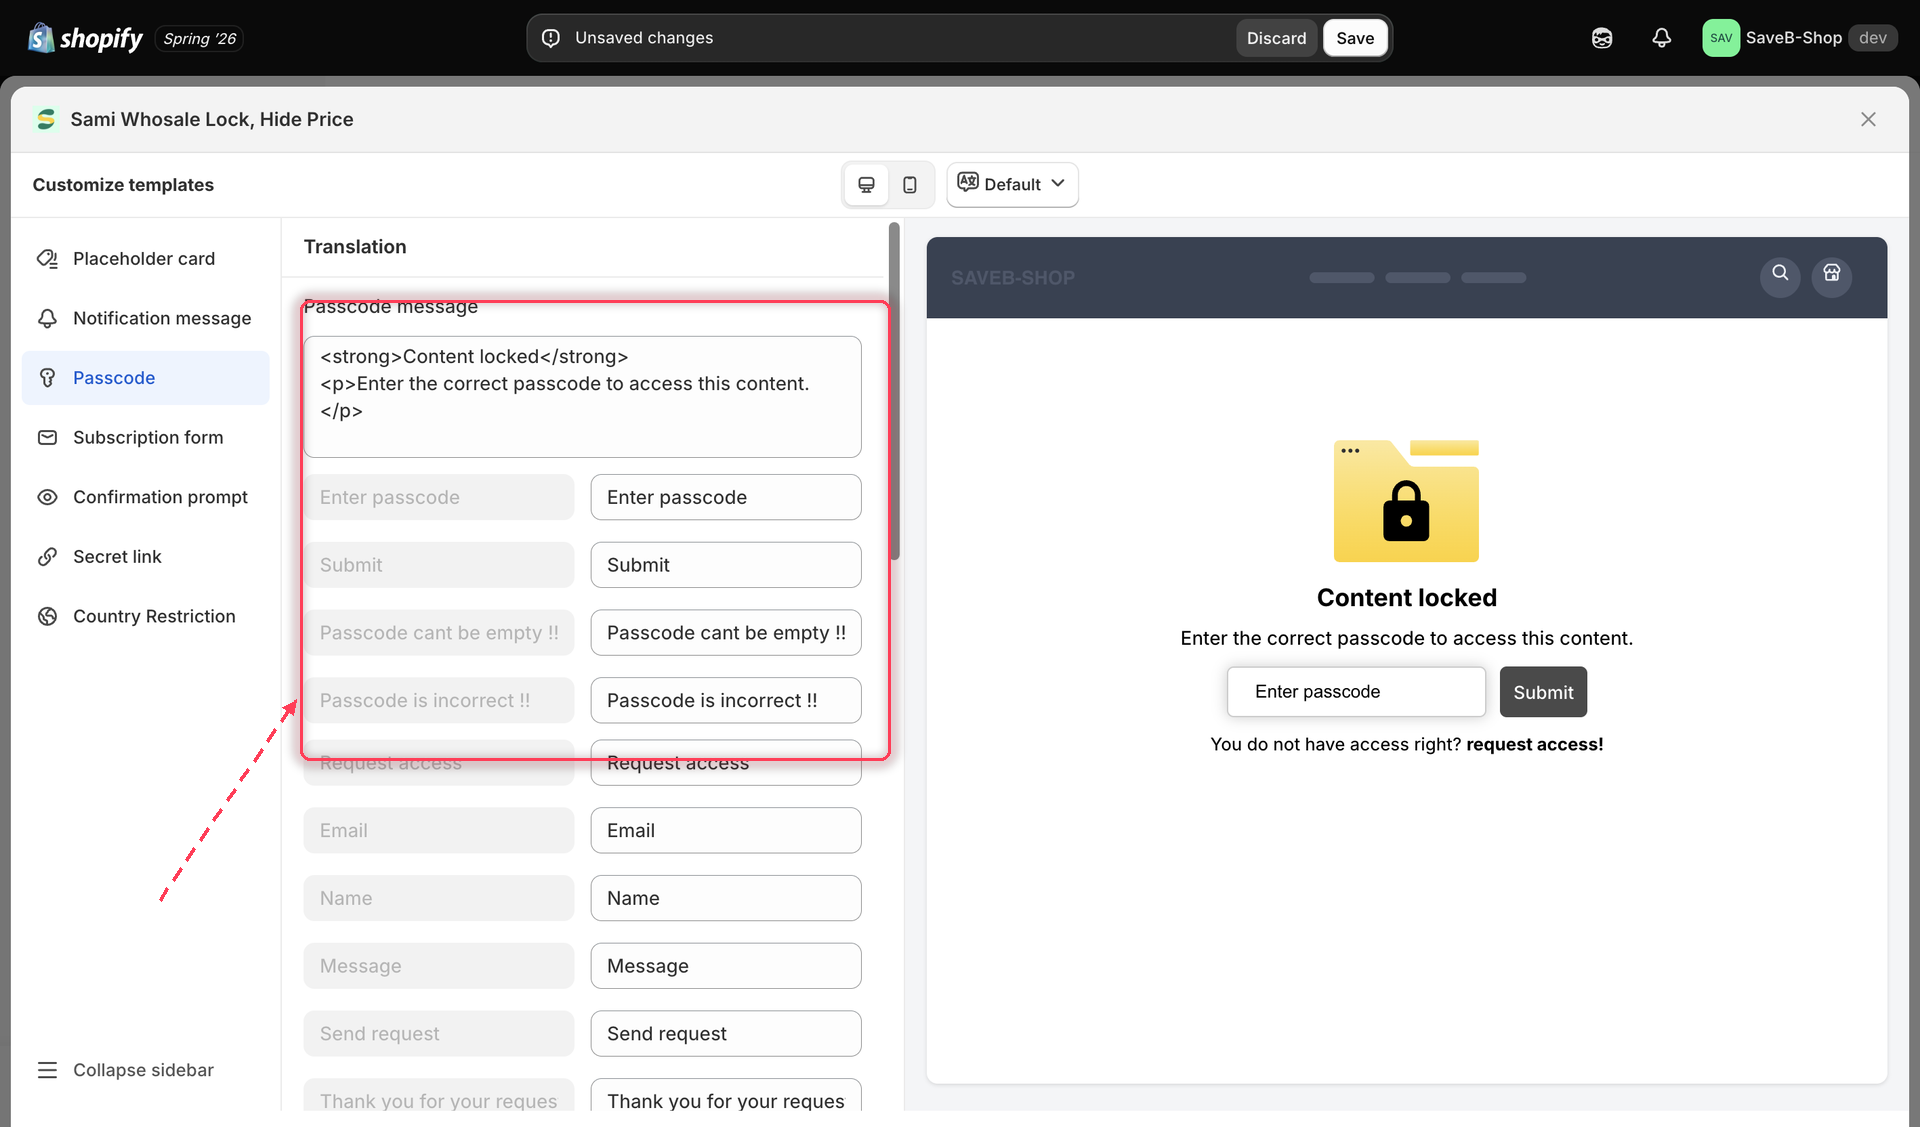
  9. Customize the passcode message and any other translated copy for this lock, per storefront language, from the lock's Messages section.

    Passcode message field in the lock's translation and messages settings
    Editing the passcode prompt copy shown to shoppers.
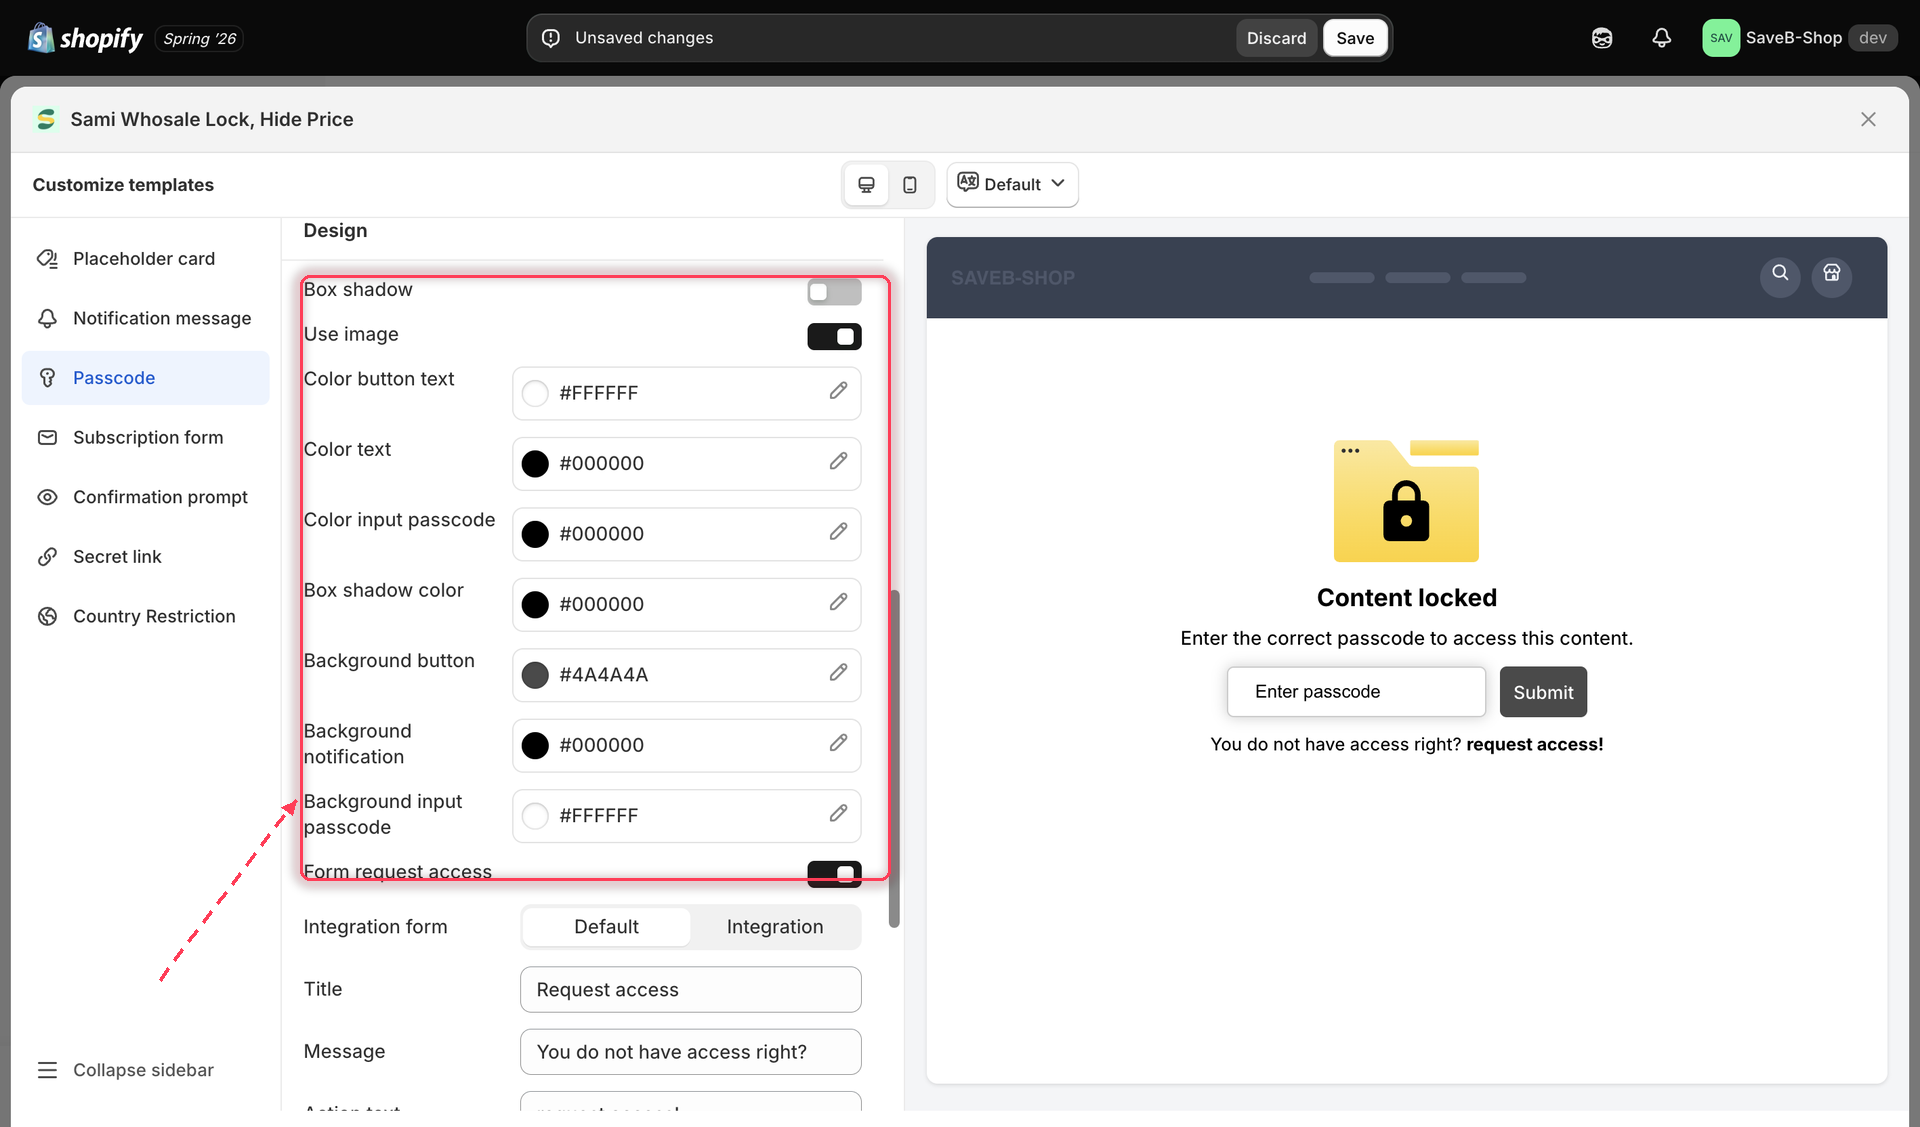
  10. Customize the design of the passcode input and surrounding lock screen (colors, button style) from the lock's Design section if you want it to match your theme.

    Design settings panel showing passcode input color options
    Adjusting the passcode input's colors from the lock's Design settings.
  11. Click Save.

Passcode is one of only two access rules that support Request access — a built-in form shoppers without a code can use to ask you for one. See Request access overview for how to turn it on and manage submissions.

Customer experience on the storefront

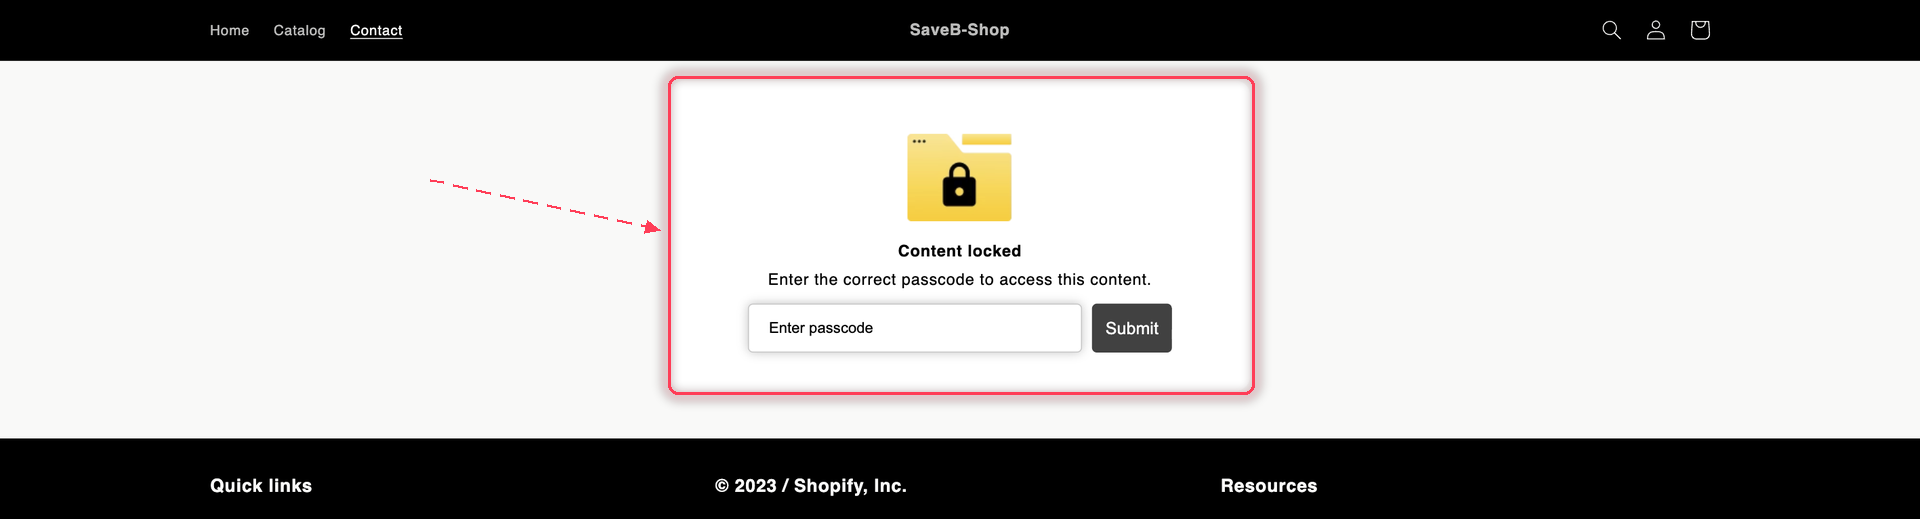
A shopper who reaches passcode-protected content sees a "Content locked" message with a passcode field and a Submit button. If they submit an empty field, they see "Passcode cant be empty !!"; if they enter a code that doesn't match any active passcode, they see "Passcode is incorrect !!". Once they enter a correct code, the content unlocks immediately, and the app remembers them for the rest of their session (or for your configured grant-access duration) so they aren't asked again on that same browser.

All of this copy is editable per lock and per storefront language from the Messages section — see Translate lock messages.

A locked storefront page replaced by the app's Content locked card with a passcode field and Submit button.
A visitor without the code gets the passcode card instead of the page.

Last updated

Was this helpful?