For the complete documentation index, see llms.txt. This page is also available as Markdown.

Create a label group

Bundle several labels into one group that sits on top of the product image.

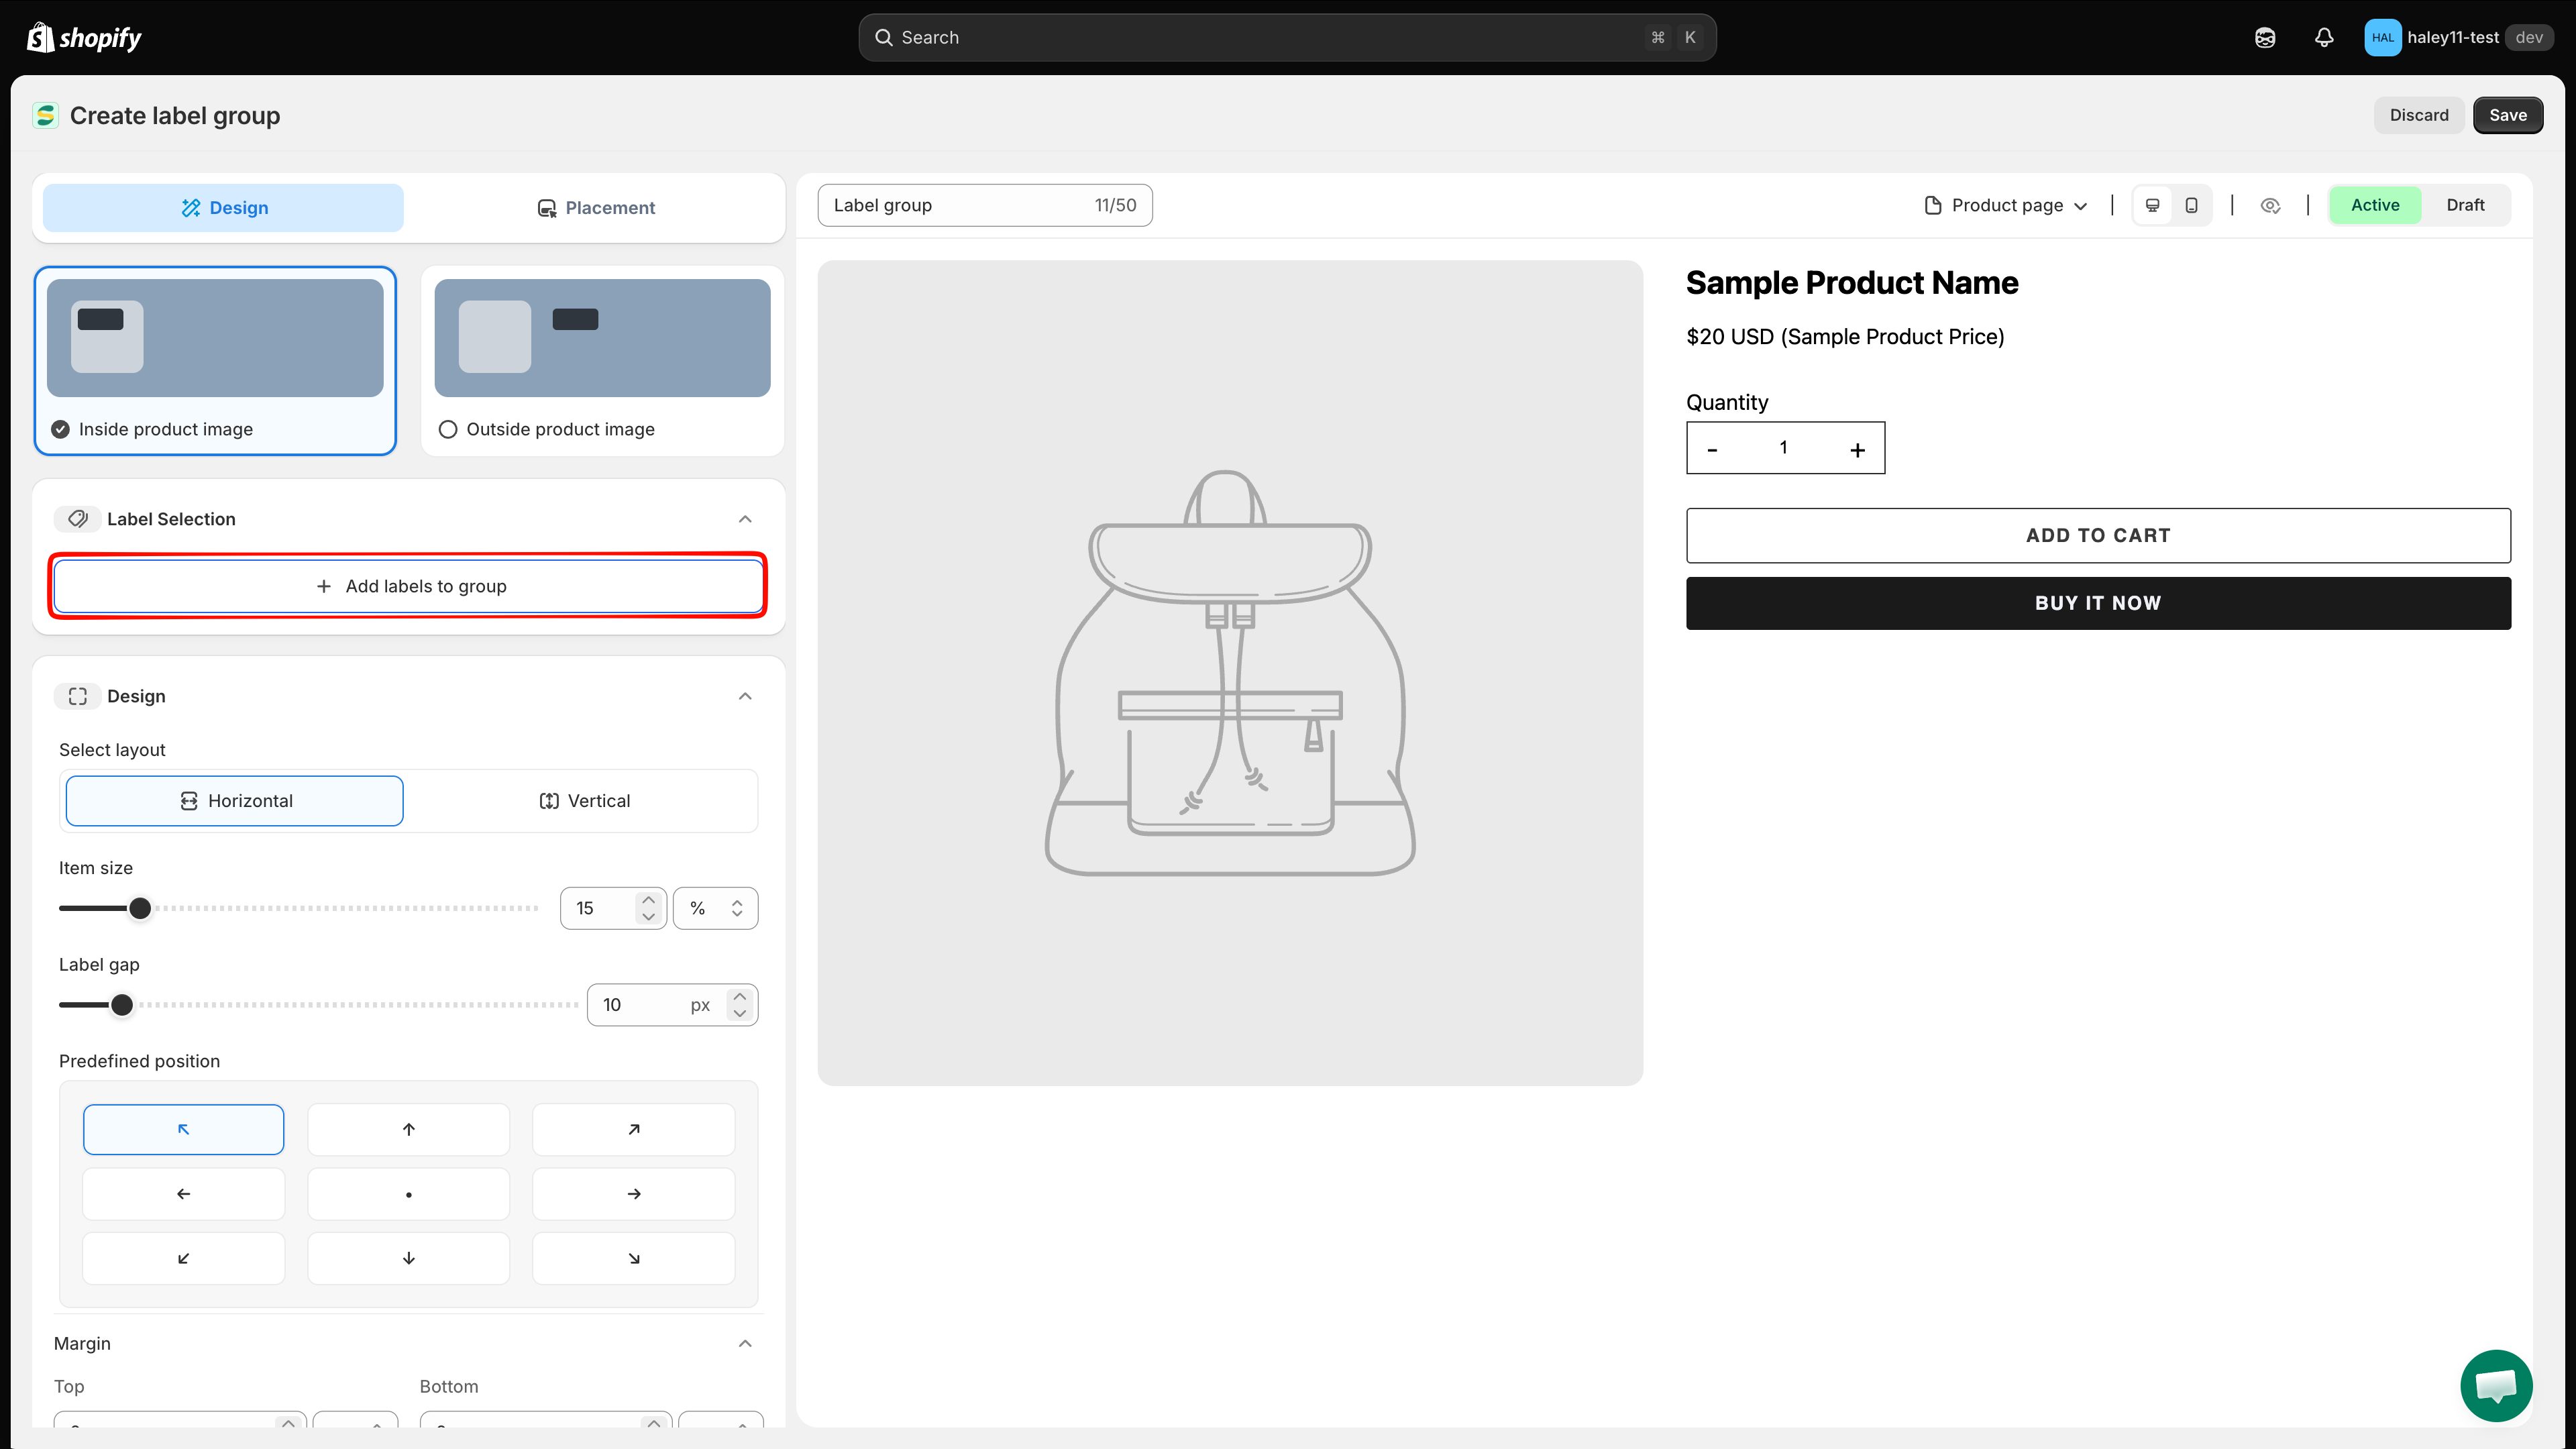
Choose Inside product image when the group should overlay the product photo — the usual choice for "Sale", "New", or "Best seller" labels stacked in a corner of the image.

Create your labels first in Badges & Labels. The group only bundles labels that already exist.

1

Open Badge groups

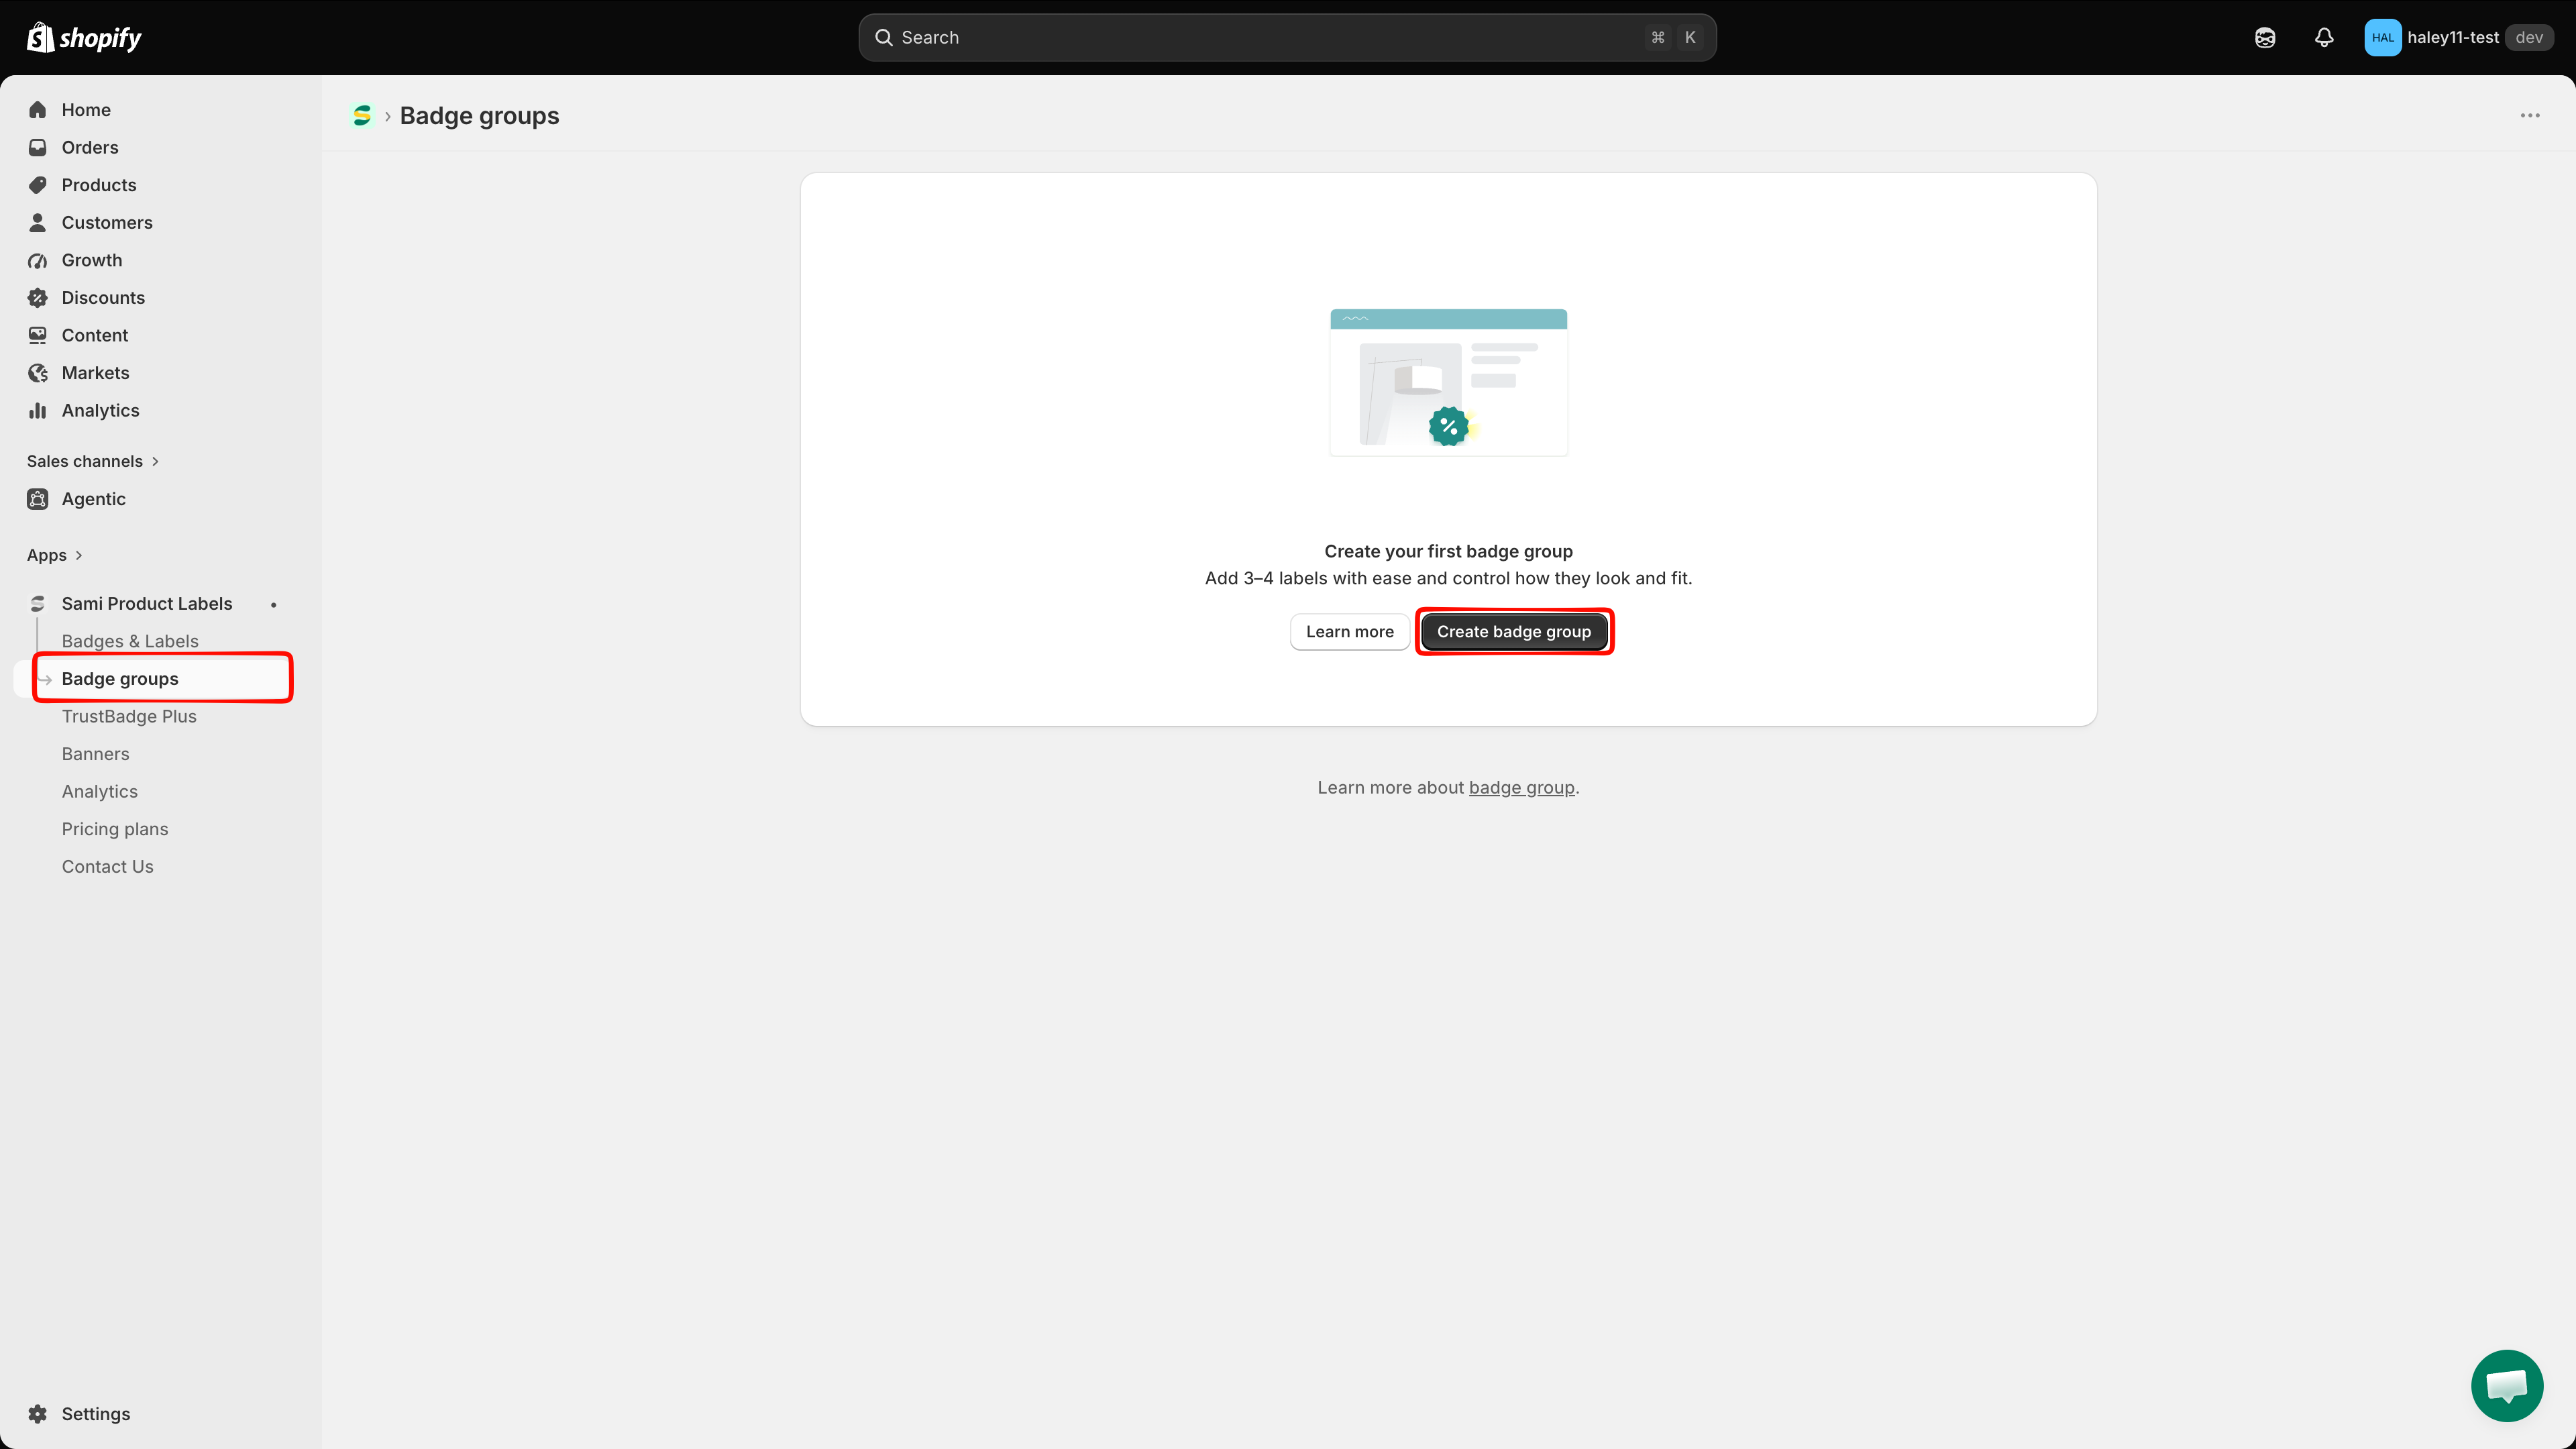
In your Shopify admin, open Sami Product Labels and click Badge groups in the app sidebar.

App sidebar with Badge groups selected
Badge groups sits between Badges & Labels and Extra Features in the sidebar.
2

Click Create badge group

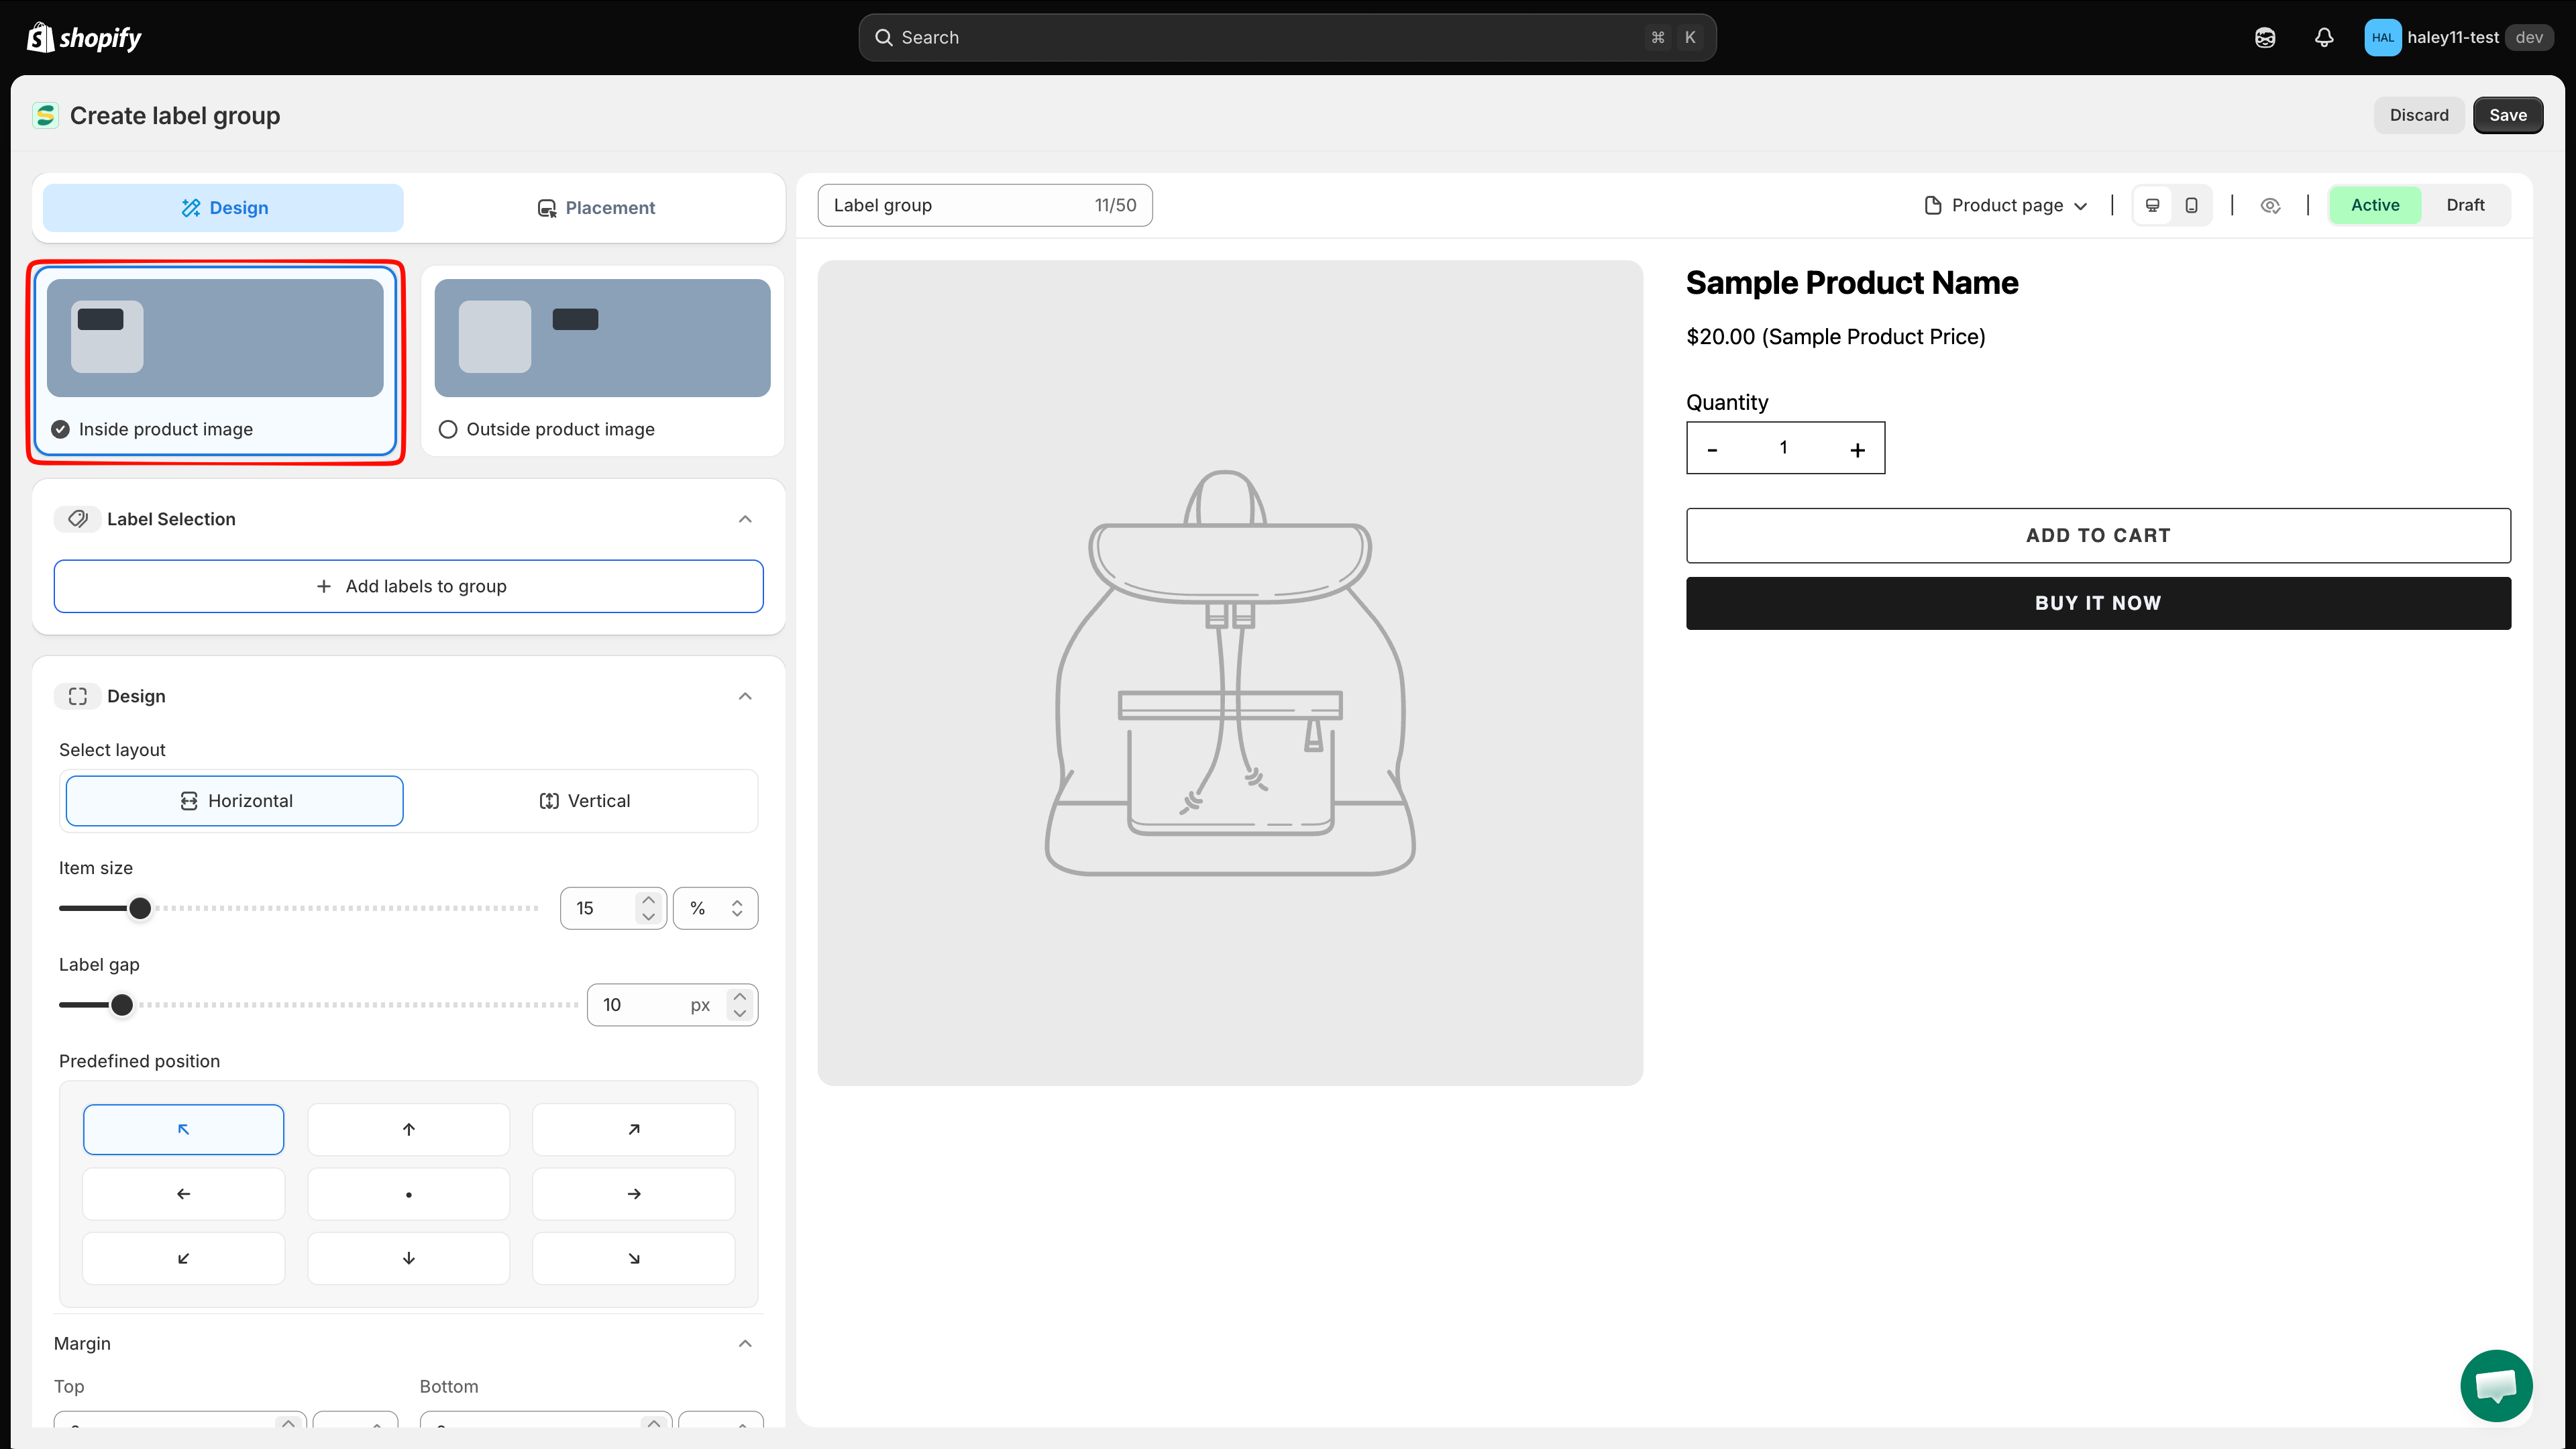
On an empty store you'll see Create your first badge group. Click Create badge group to open the editor.

Badge groups empty state
Click Create badge group to open the group editor.
3

Select Inside product image

At the top of the Design tab, pick Inside product image. The group will be positioned over the product photo.

4

Name the group

The group is called Label group by default. Open the menu above the preview, click Rename, and type a name of up to 50 characters — for example "Summer sale labels".

5

Add labels to the group

In Label Selection, click Add labels to group. Search by name, tick the labels you want, then click Select.

Add labels to group dialog
Tick each label to include, then click Select.
6

Design the group

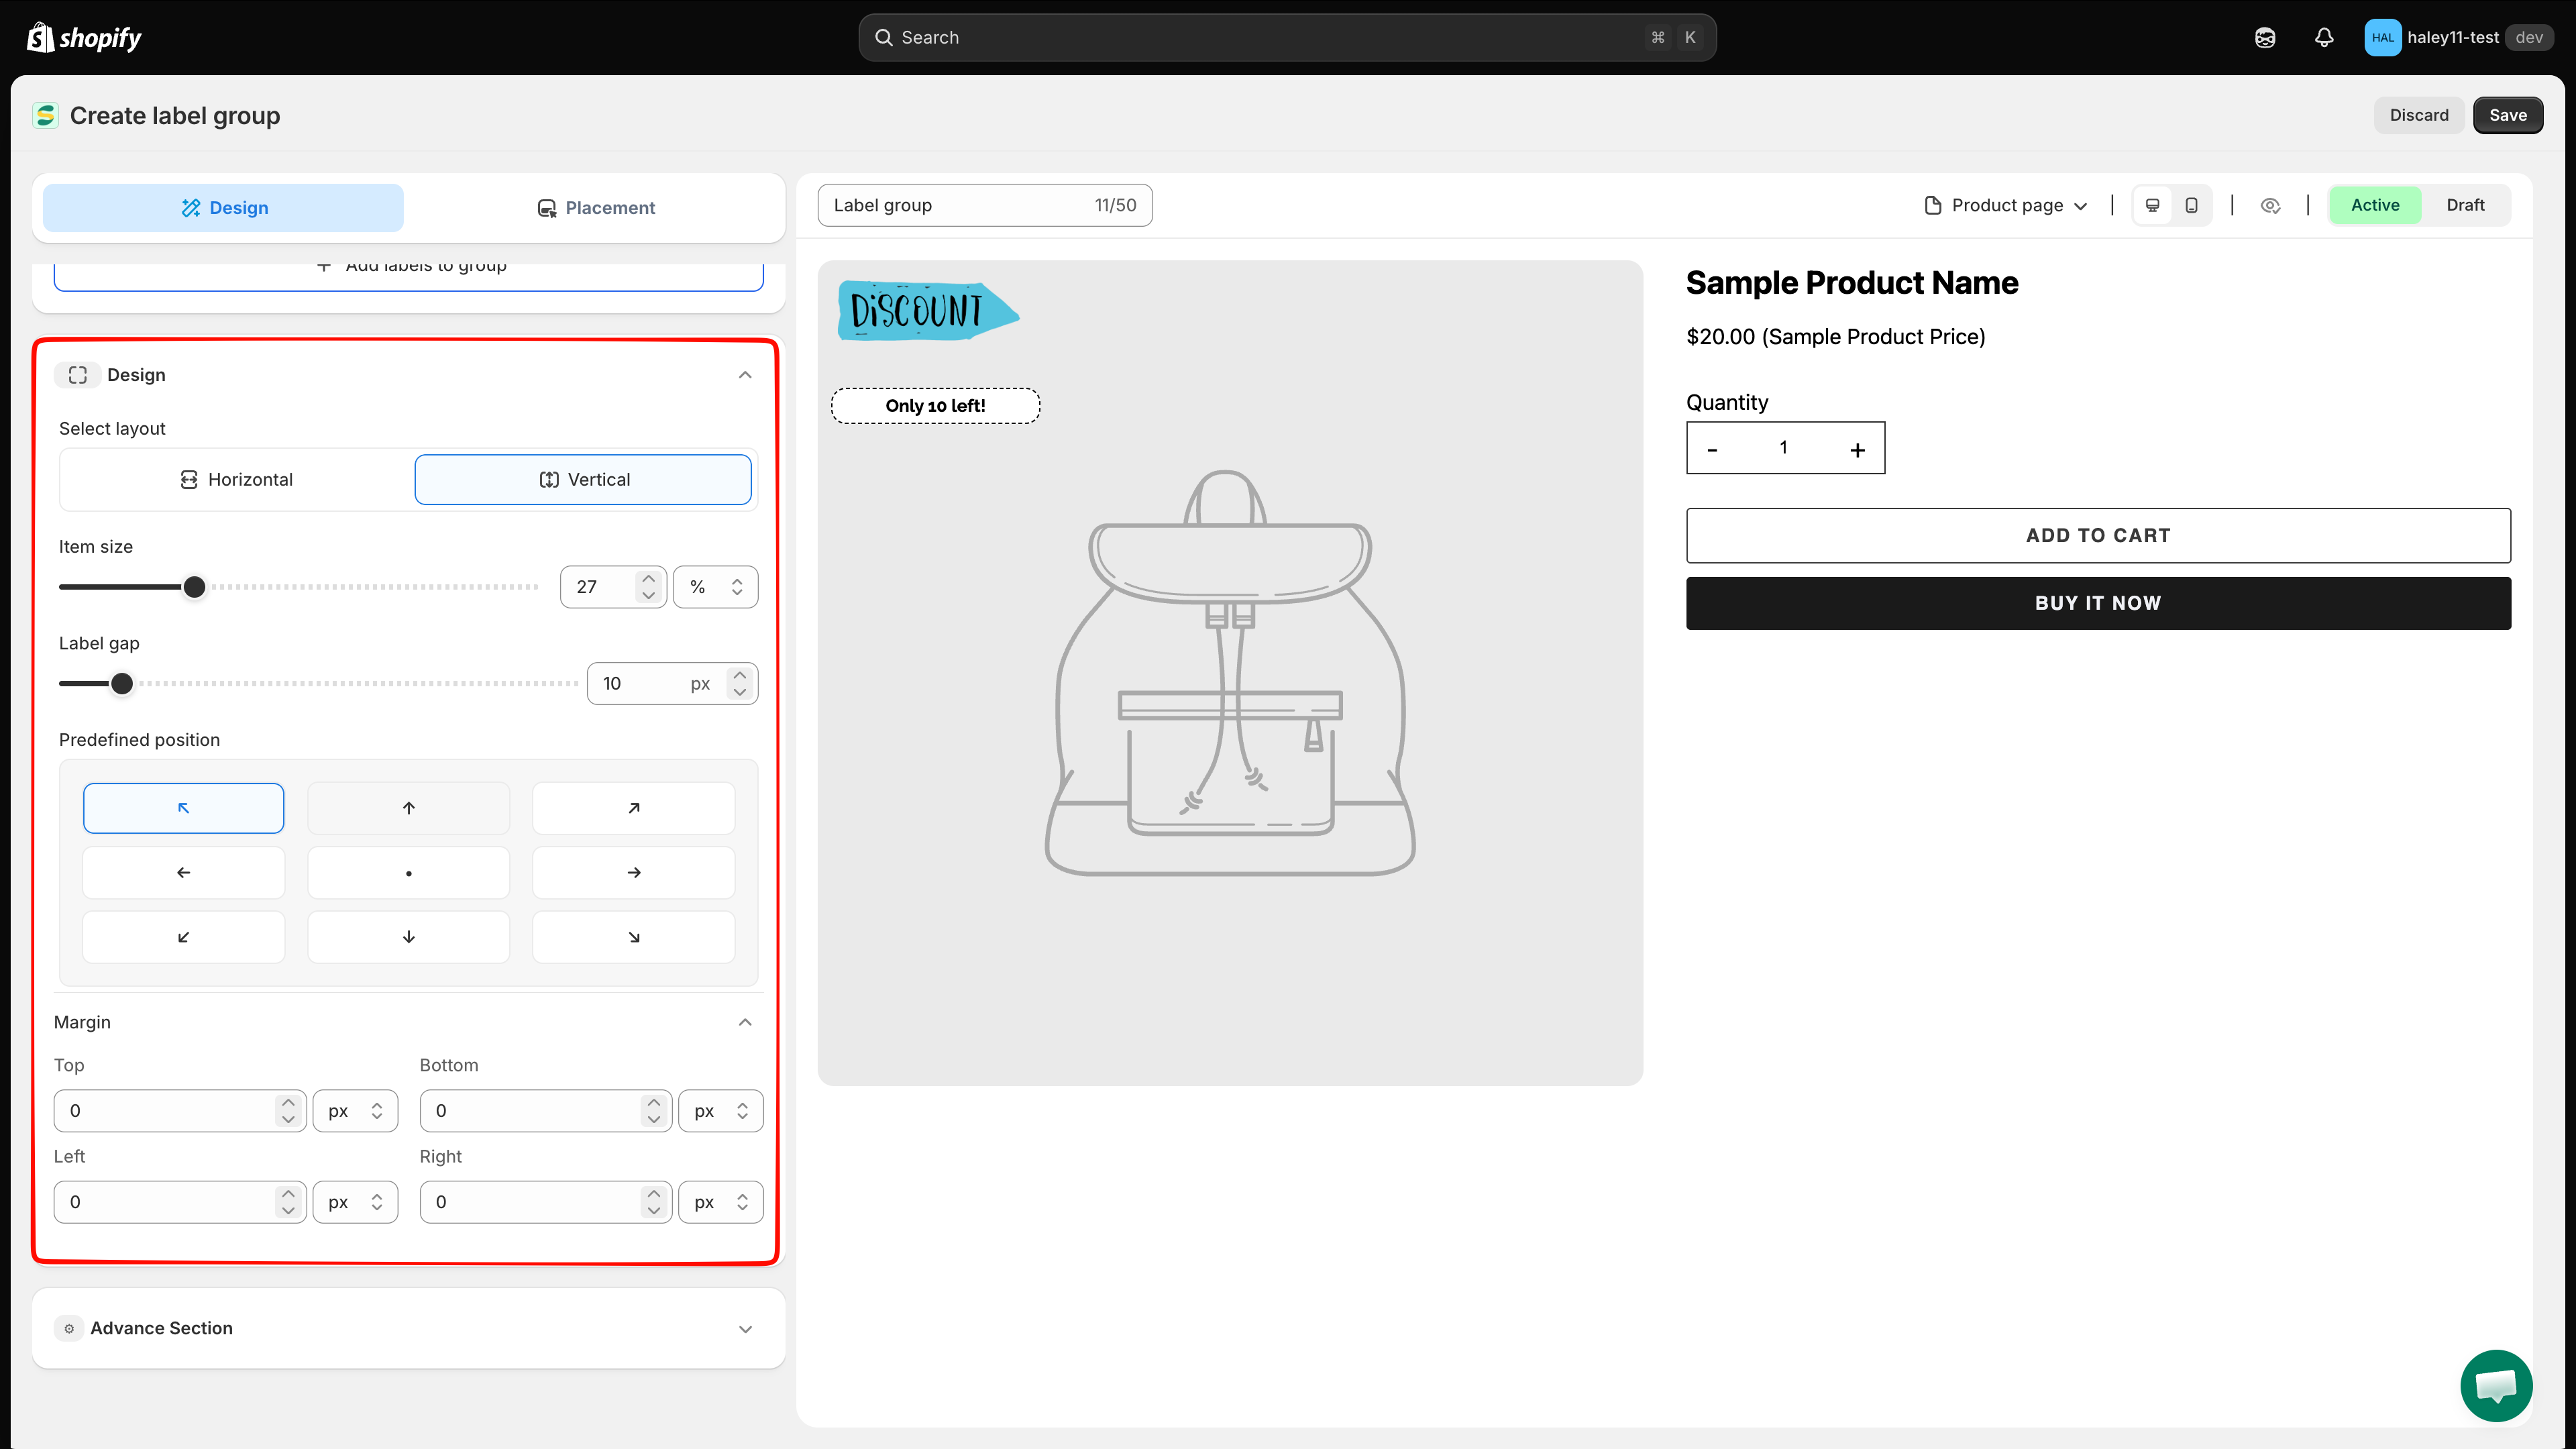
Open the Design section and set how the labels look together:

Setting
What it controls

Select layout

Horizontal or Vertical stacking.

Item size

The size of each label, as a percentage or a fixed value.

Label gap

The spacing between labels, in pixels.

Predefined position

One of nine anchor points on the product image (corners, edges, center).

Margin

Top, bottom, left, and right offset from the anchor.

Check the live preview on the right while you adjust. Use the Product page / Collection page menu and the desktop/mobile icons to see the group in each context.

Design section with layout, size, gap, and the nine-point position grid
The nine-point grid anchors the whole group on the product image.
7

Add custom CSS (optional)

Expand Advance Section to add your own CSS for the group. Skip this unless you need styling the settings above can't produce.

8

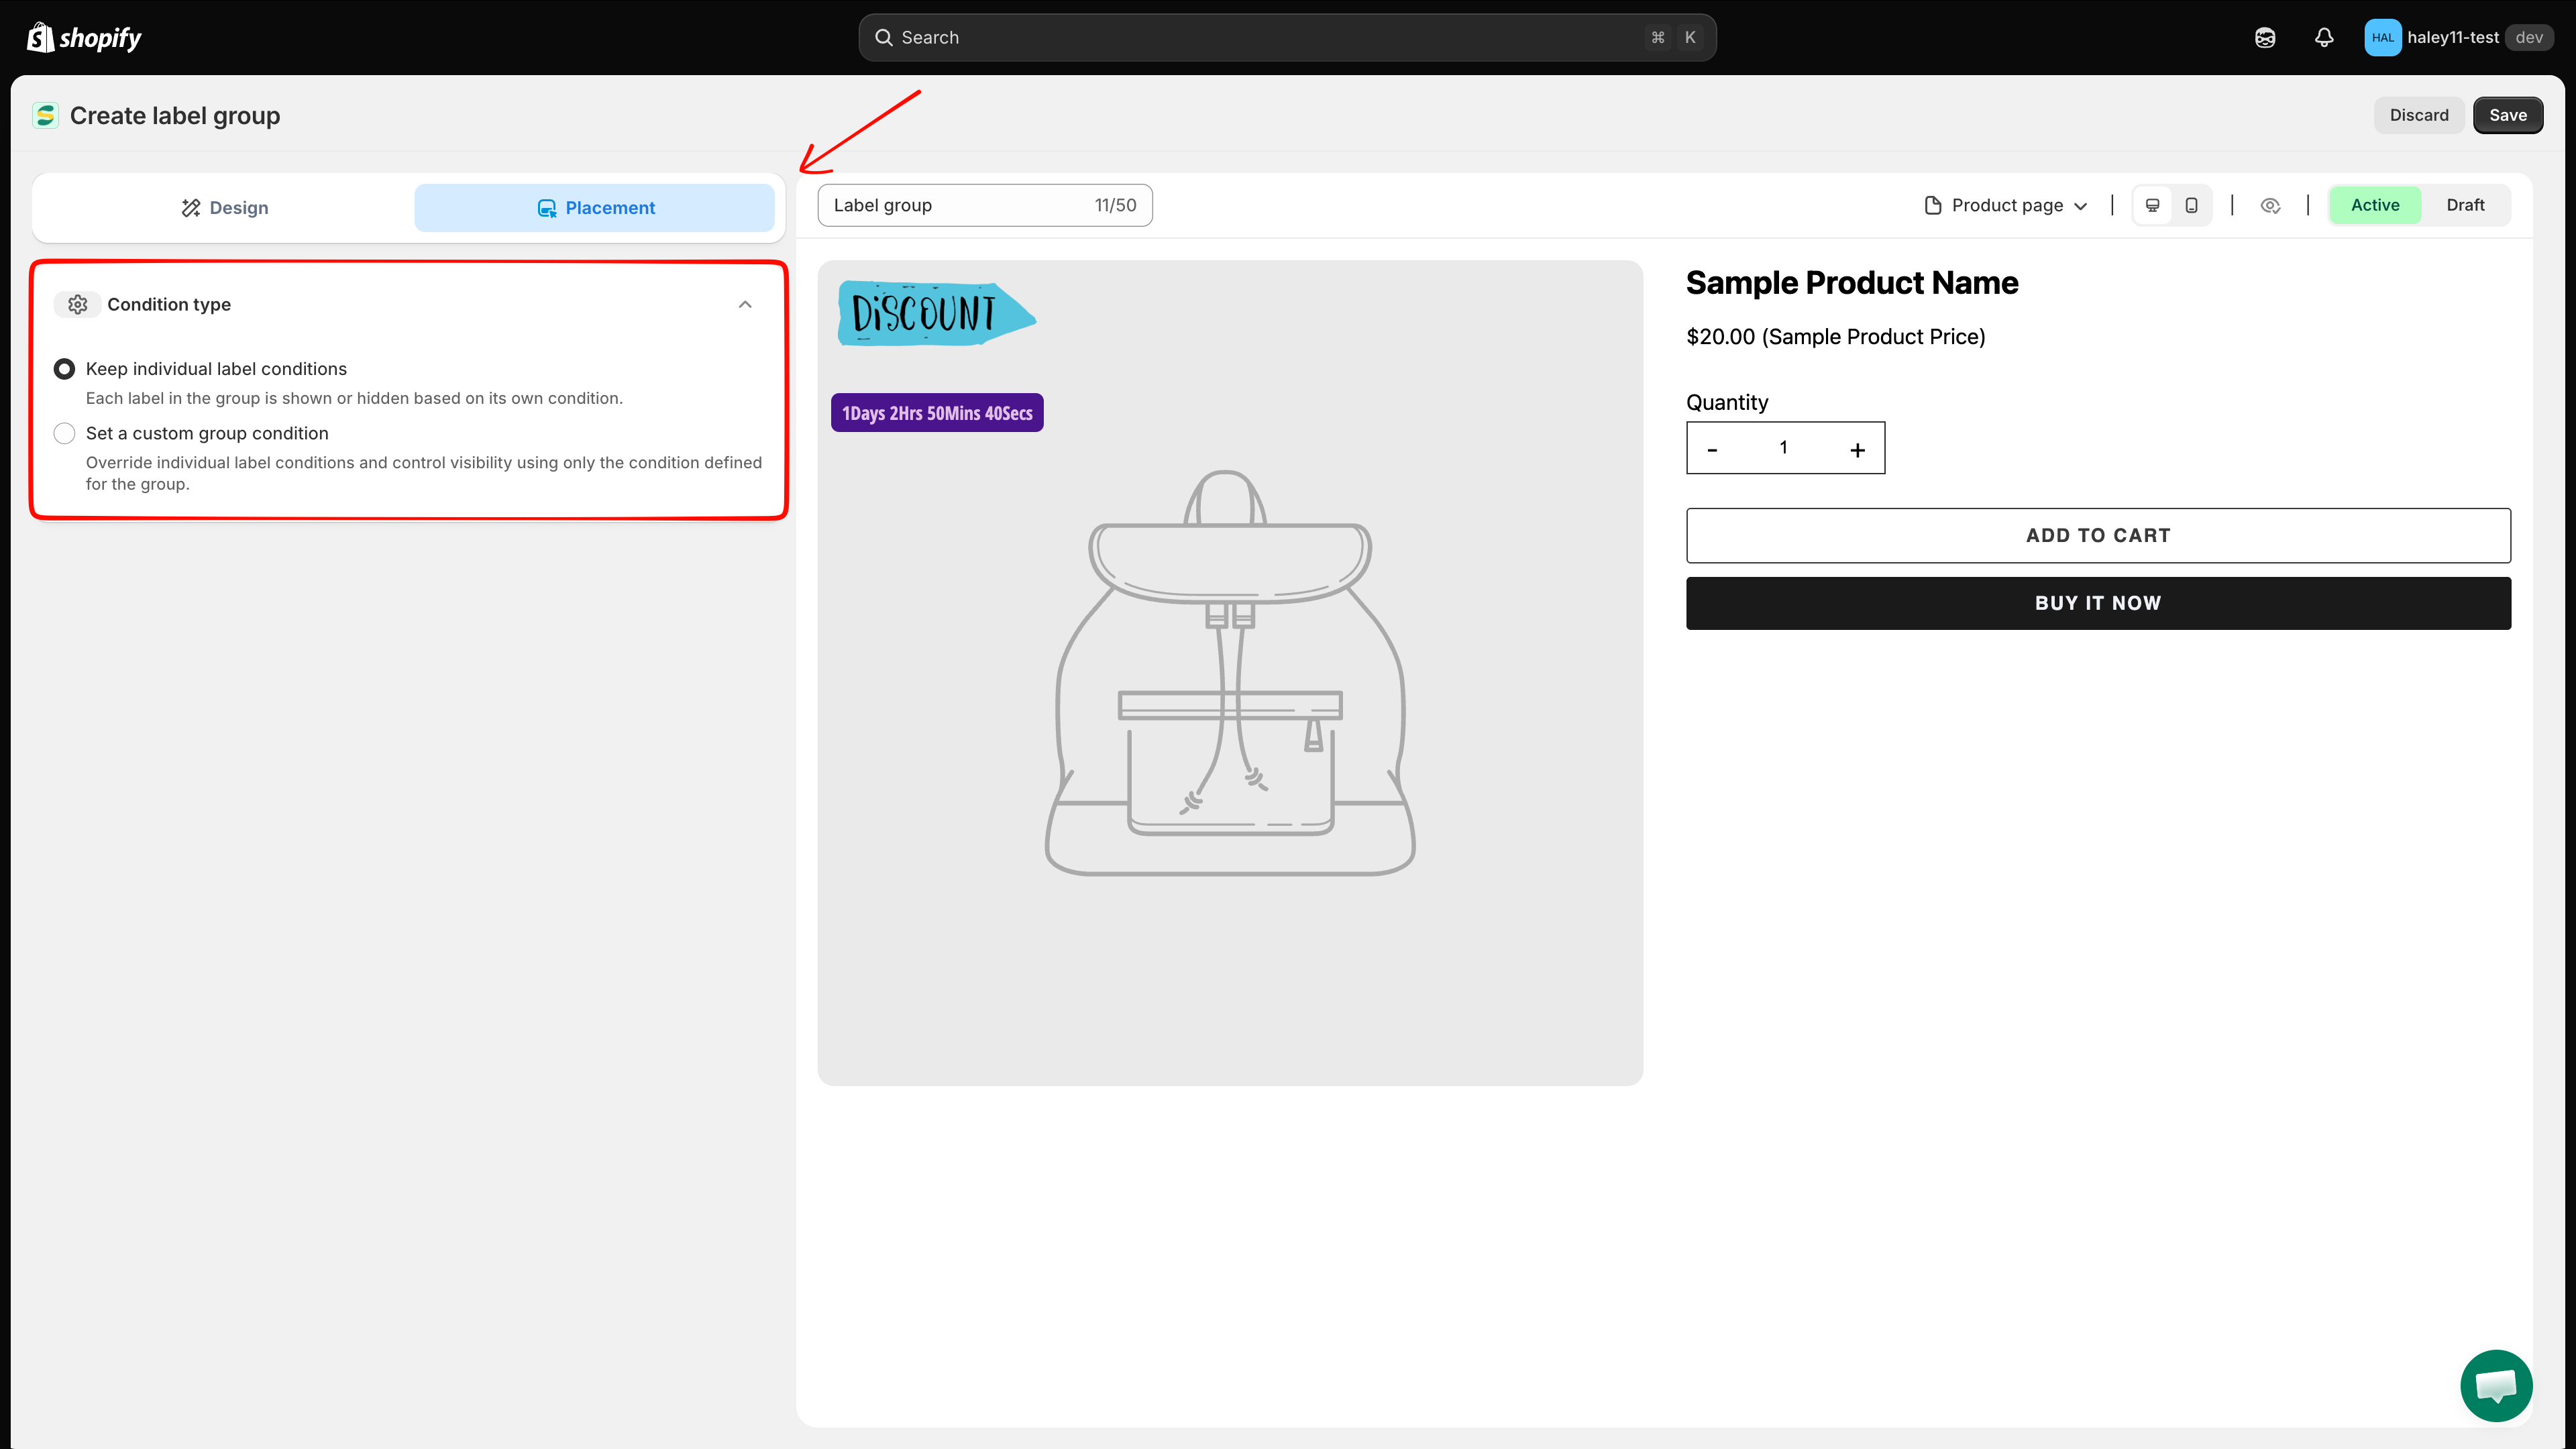
Choose how the group is targeted

Switch to the Placement tab and pick a Condition type:

Option
Behavior

Keep individual label conditions

Each label is shown or hidden by its own targeting rules.

Set a custom group condition

Ignores the individual rules and uses one condition for the whole group.

Choosing the second option reveals Product, Customer, Page, Language, Country, and Other conditions for the group — see Set up group conditions.

Placement tab with the two condition types
Use a custom group condition when the whole set should follow one rule.
9

Save the group

Click Save in the top-right corner. The group appears on matching product pages immediately.

Next steps

Last updated

Was this helpful?