For the complete documentation index, see llms.txt. This page is also available as Markdown.

Set up group conditions

Use one set of rules to control when a whole badge group appears, instead of relying on each label's own targeting.

The Placement tab of the group editor decides when and where the group appears. By default every label in the group keeps its own targeting; a group condition replaces all of it with one rule set.

Choose a condition type

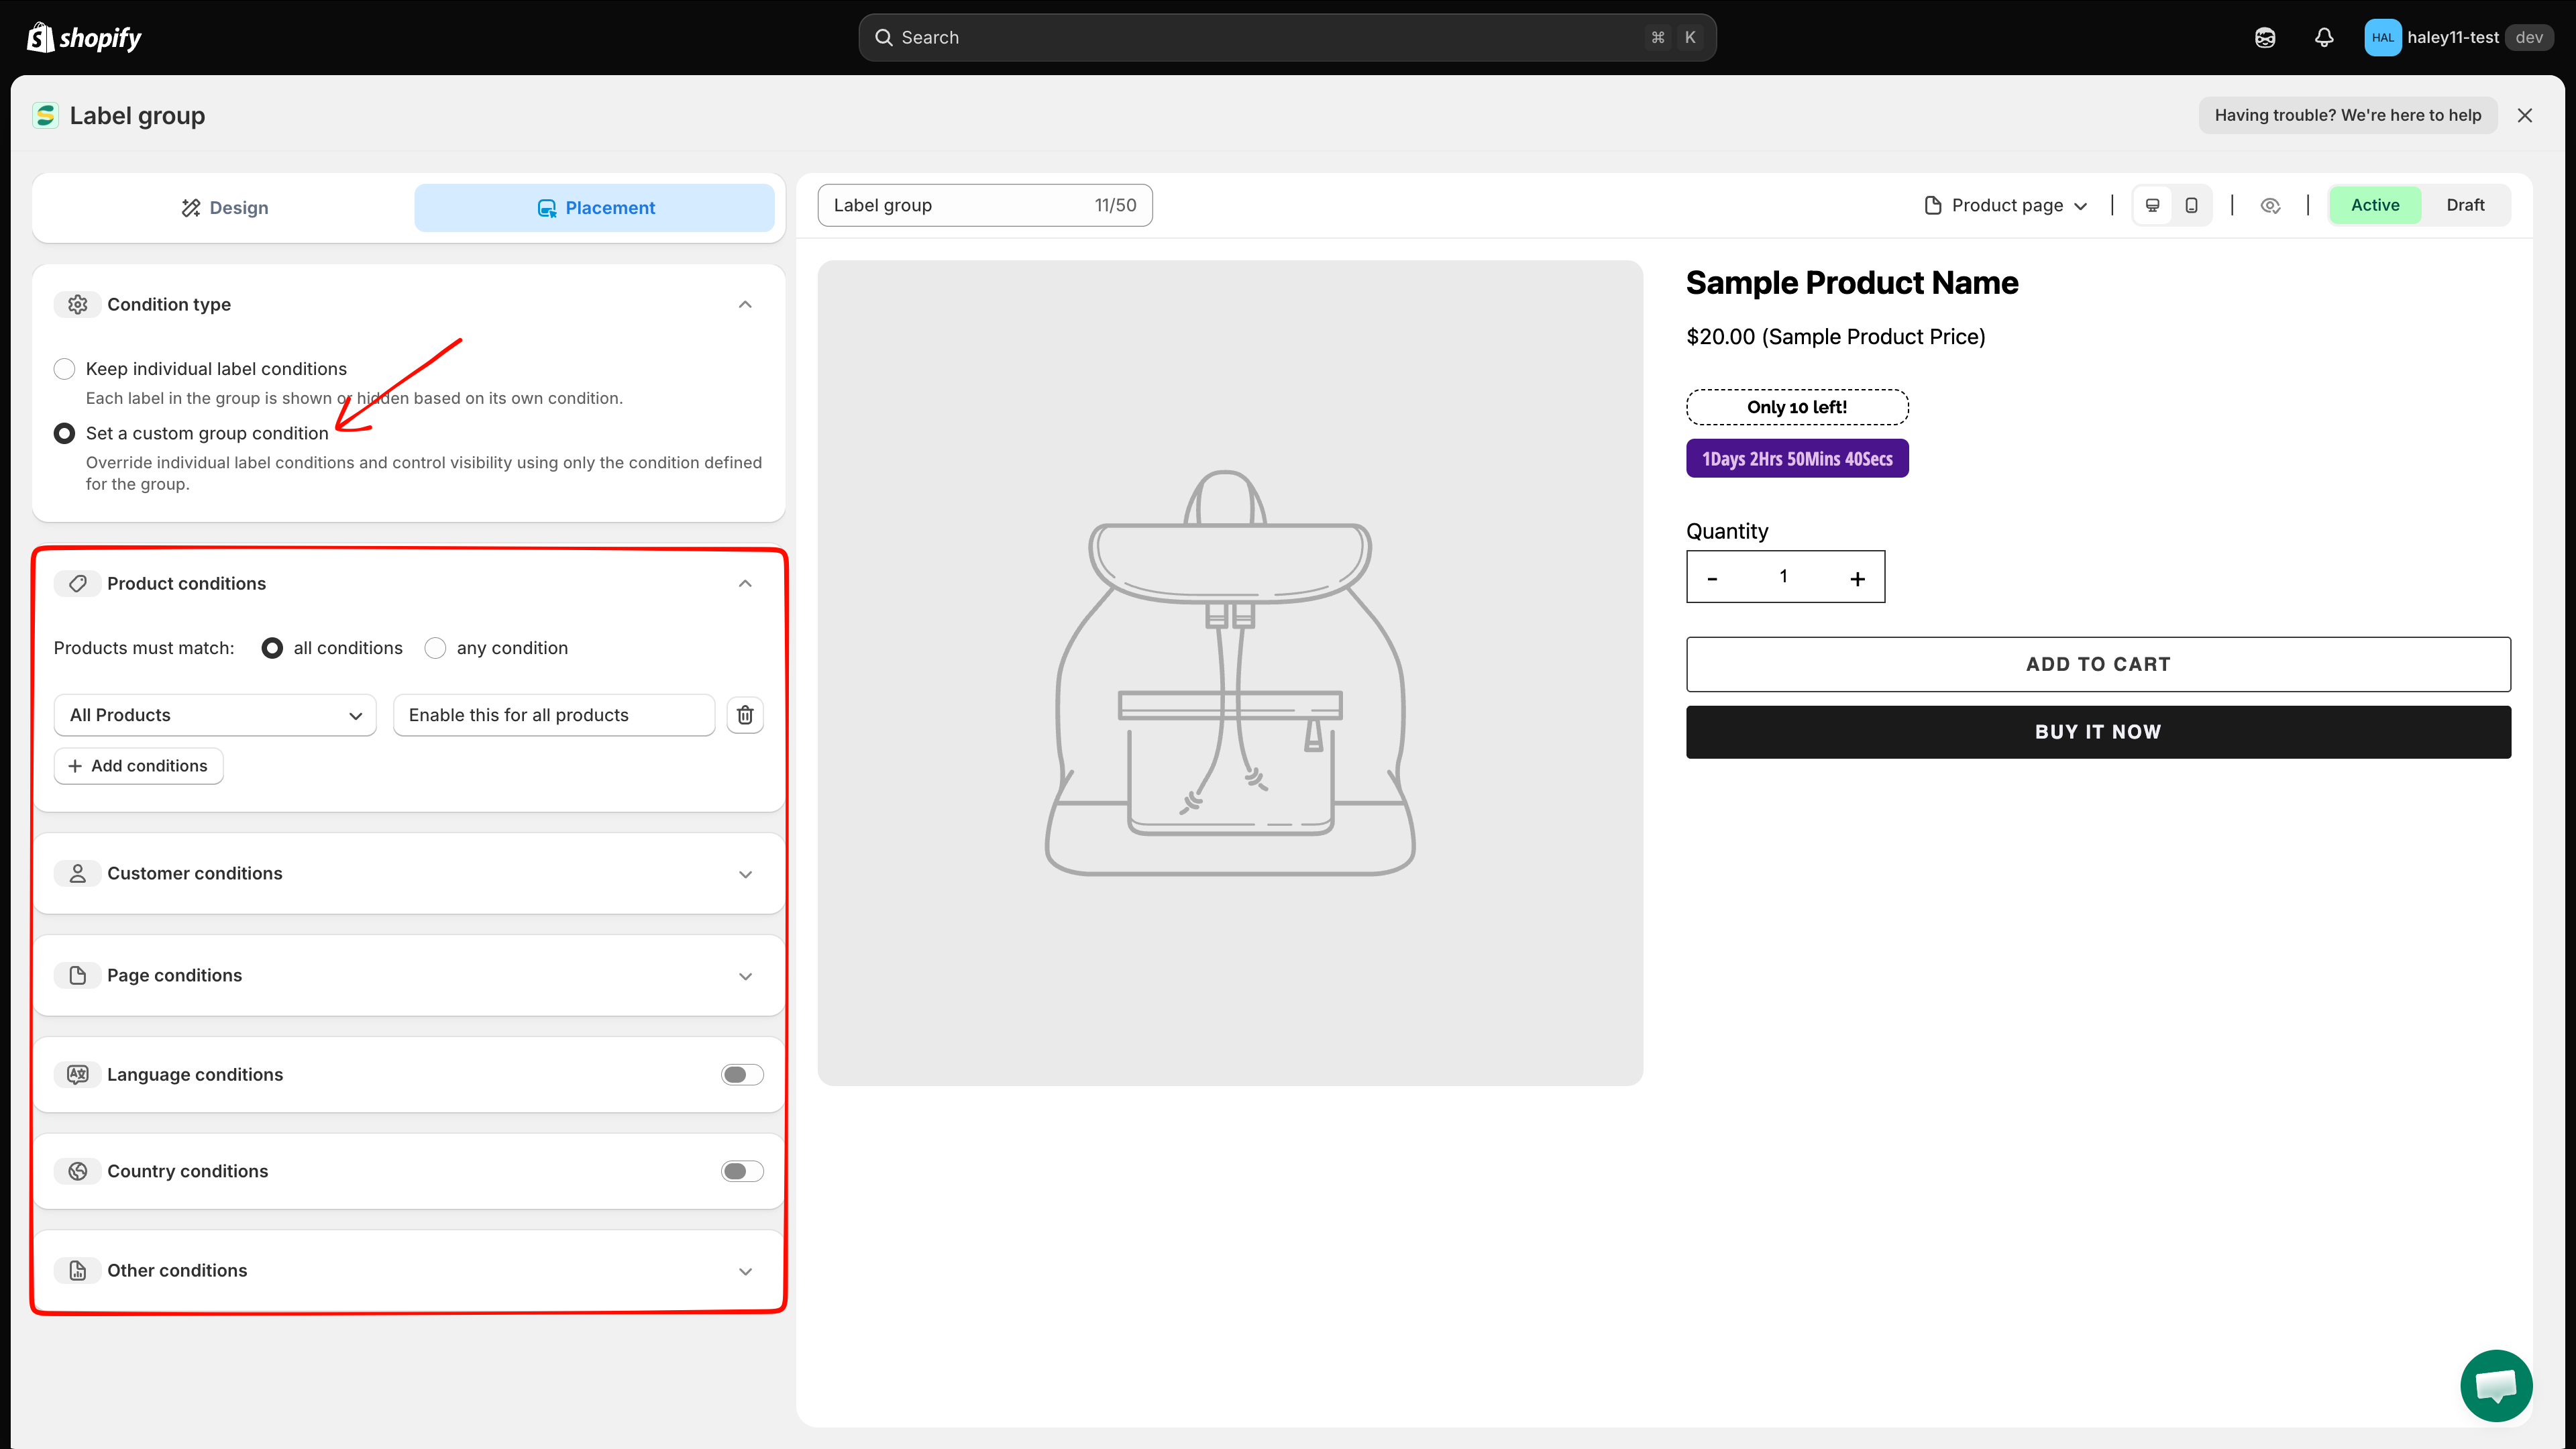
Open the group, click the Placement tab, and pick a Condition type:

Option
Behavior
Use it when

Keep individual label conditions

Each label in the group is shown or hidden based on its own condition.

The labels already target the right products and you only want to share a layout.

Set a custom group condition

Overrides the individual label conditions and controls visibility using only the condition defined for the group.

The whole set belongs to one campaign — one audience, one product scope.

Condition type section with the two options
Selecting Set a custom group condition reveals the condition sections below.
The condition sections

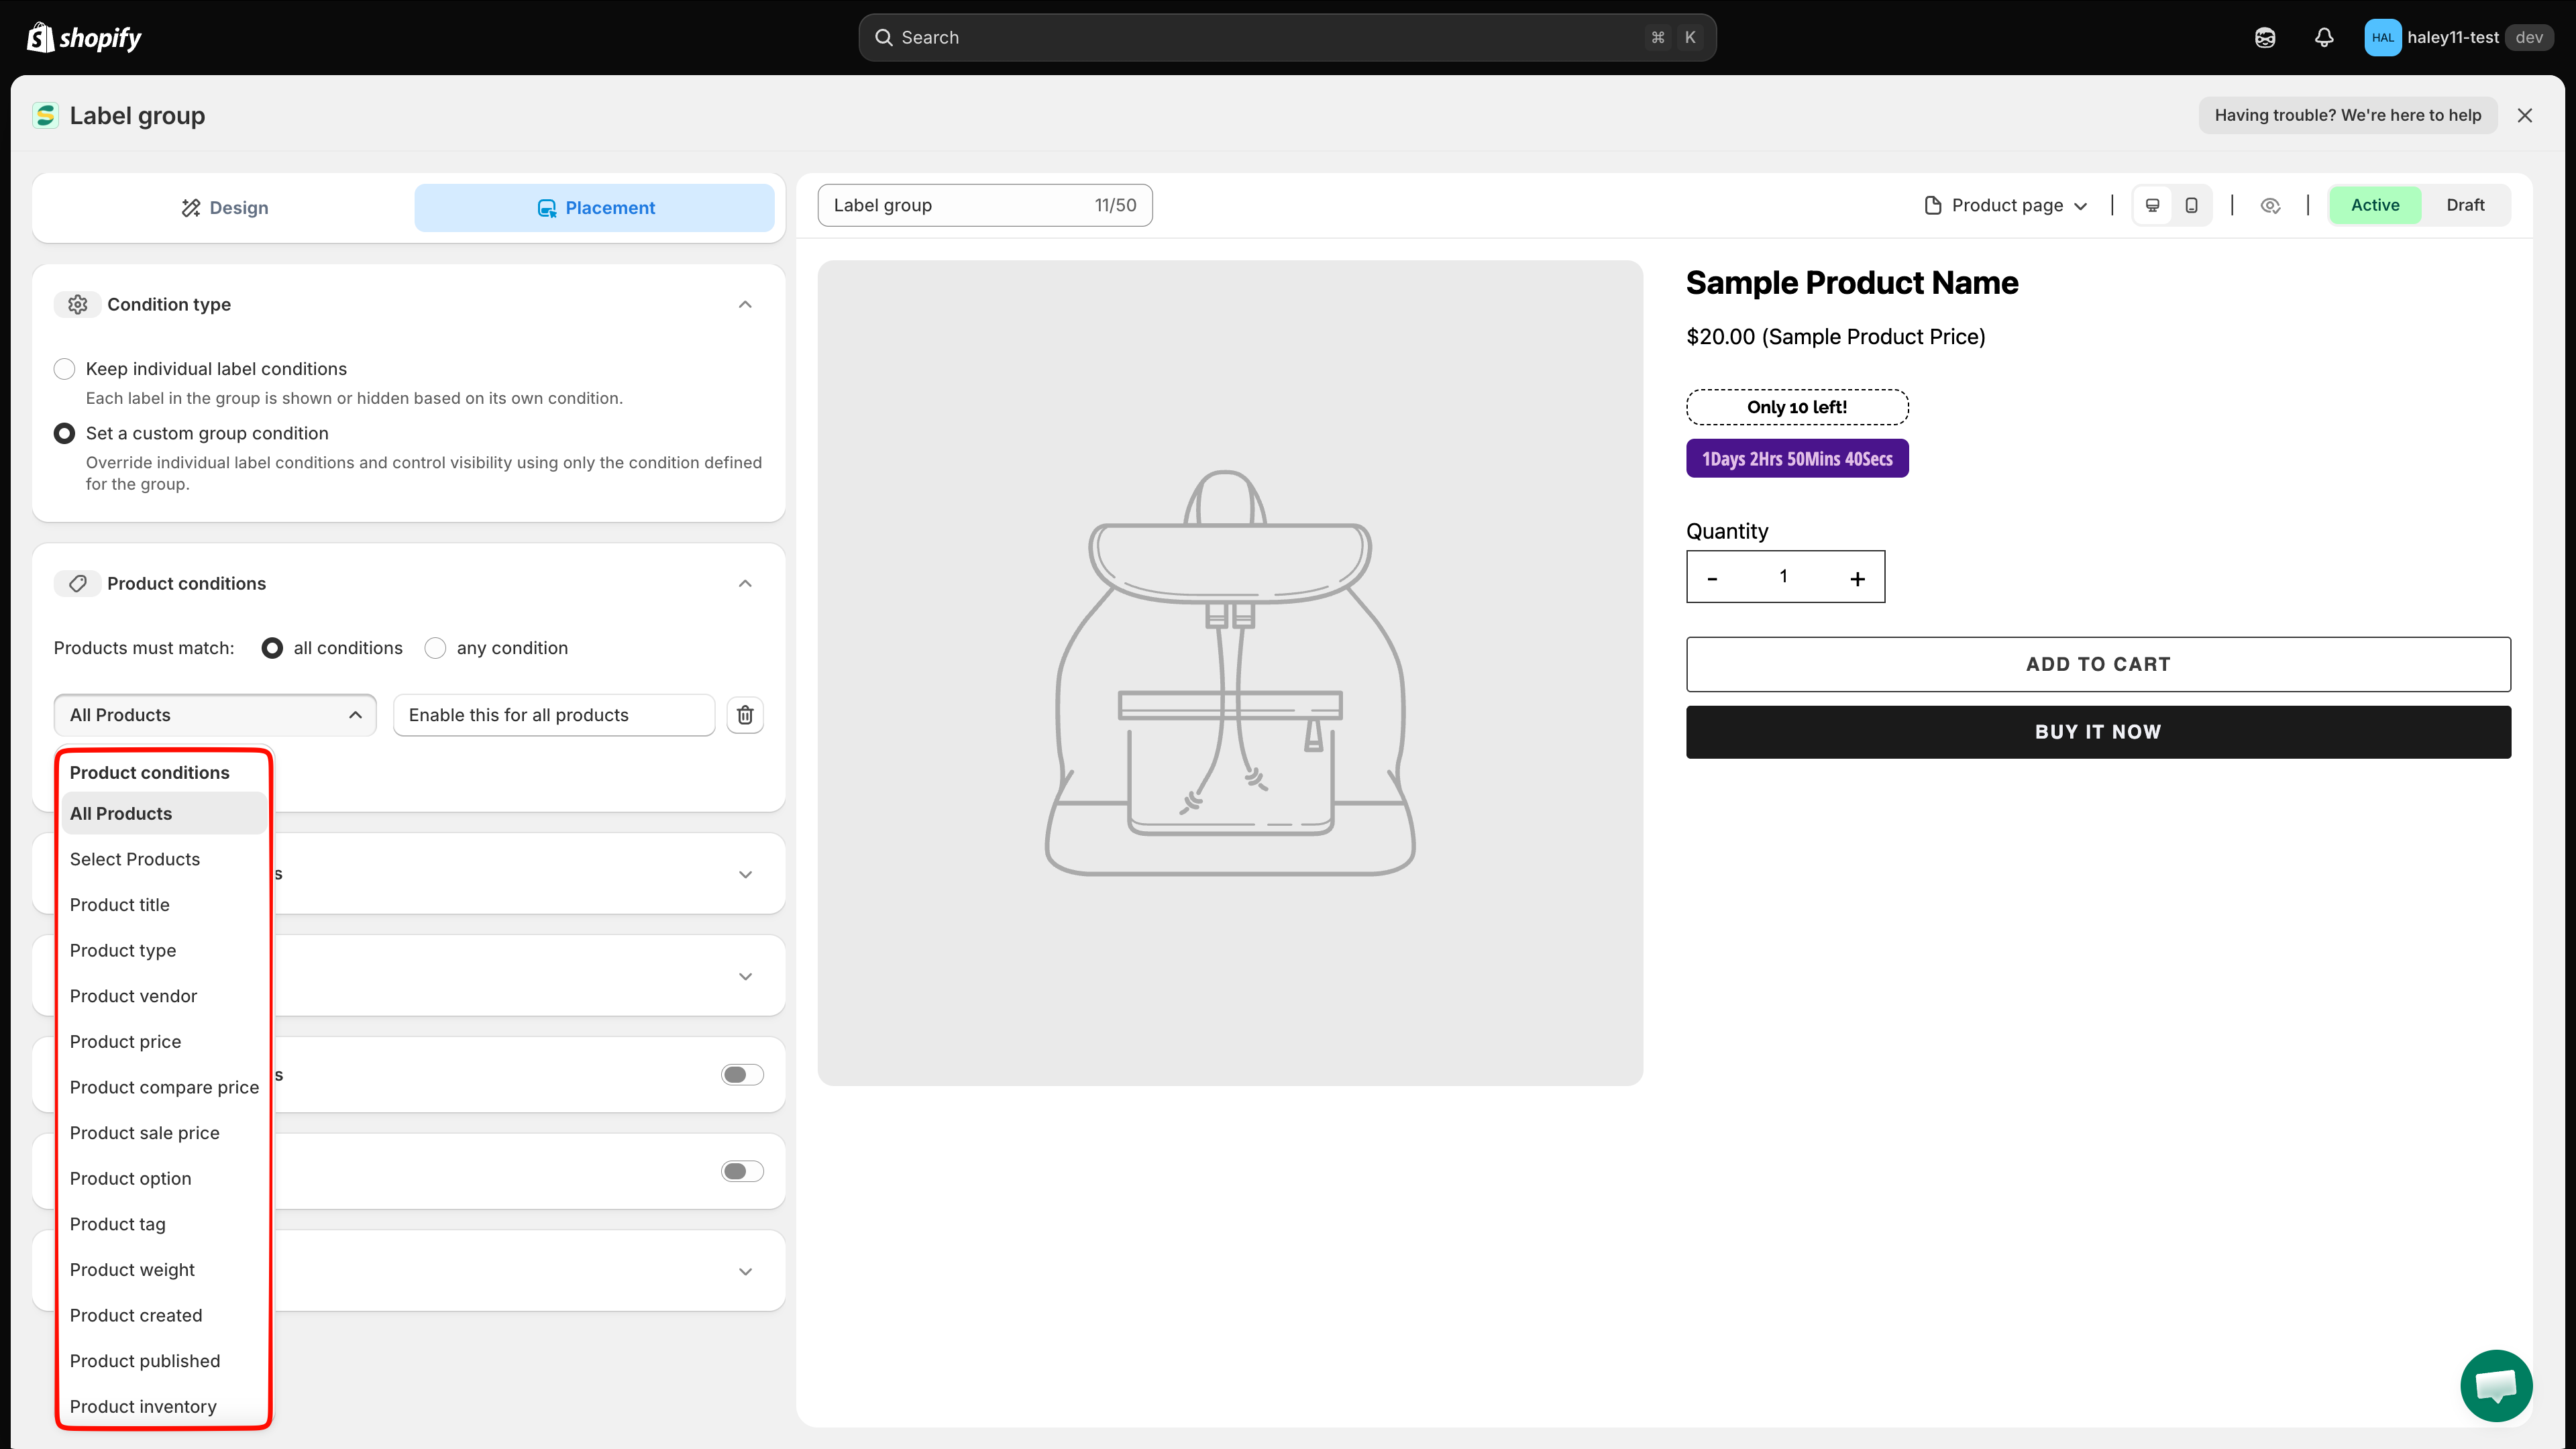
Choosing Set a custom group condition reveals six sections. Sections with a chevron (⌄) expand; Language and Country have a switch that must be turned on first.

Section
Controls

Product conditions

Which products the group appears on

Customer conditions

Which shoppers see it

Page conditions

Which page types it appears on

Language conditions

The storefront language the visitor is browsing in

Country conditions

The visitor's country

Other conditions

Product image, device, and excluded theme elements

Group conditions have no scheduling or priority settings. Start and end dates stay on the individual labels — see Schedule visibility.

Product conditions

The section starts with one row: All Products with the note Enable this for all products. Leave it as is to show the group on your whole catalog, or change the row to narrow the scope.

1

Choose how rows combine

Set Products must match to all conditions (every row must be true) or any condition (one row is enough).

2

Pick a condition

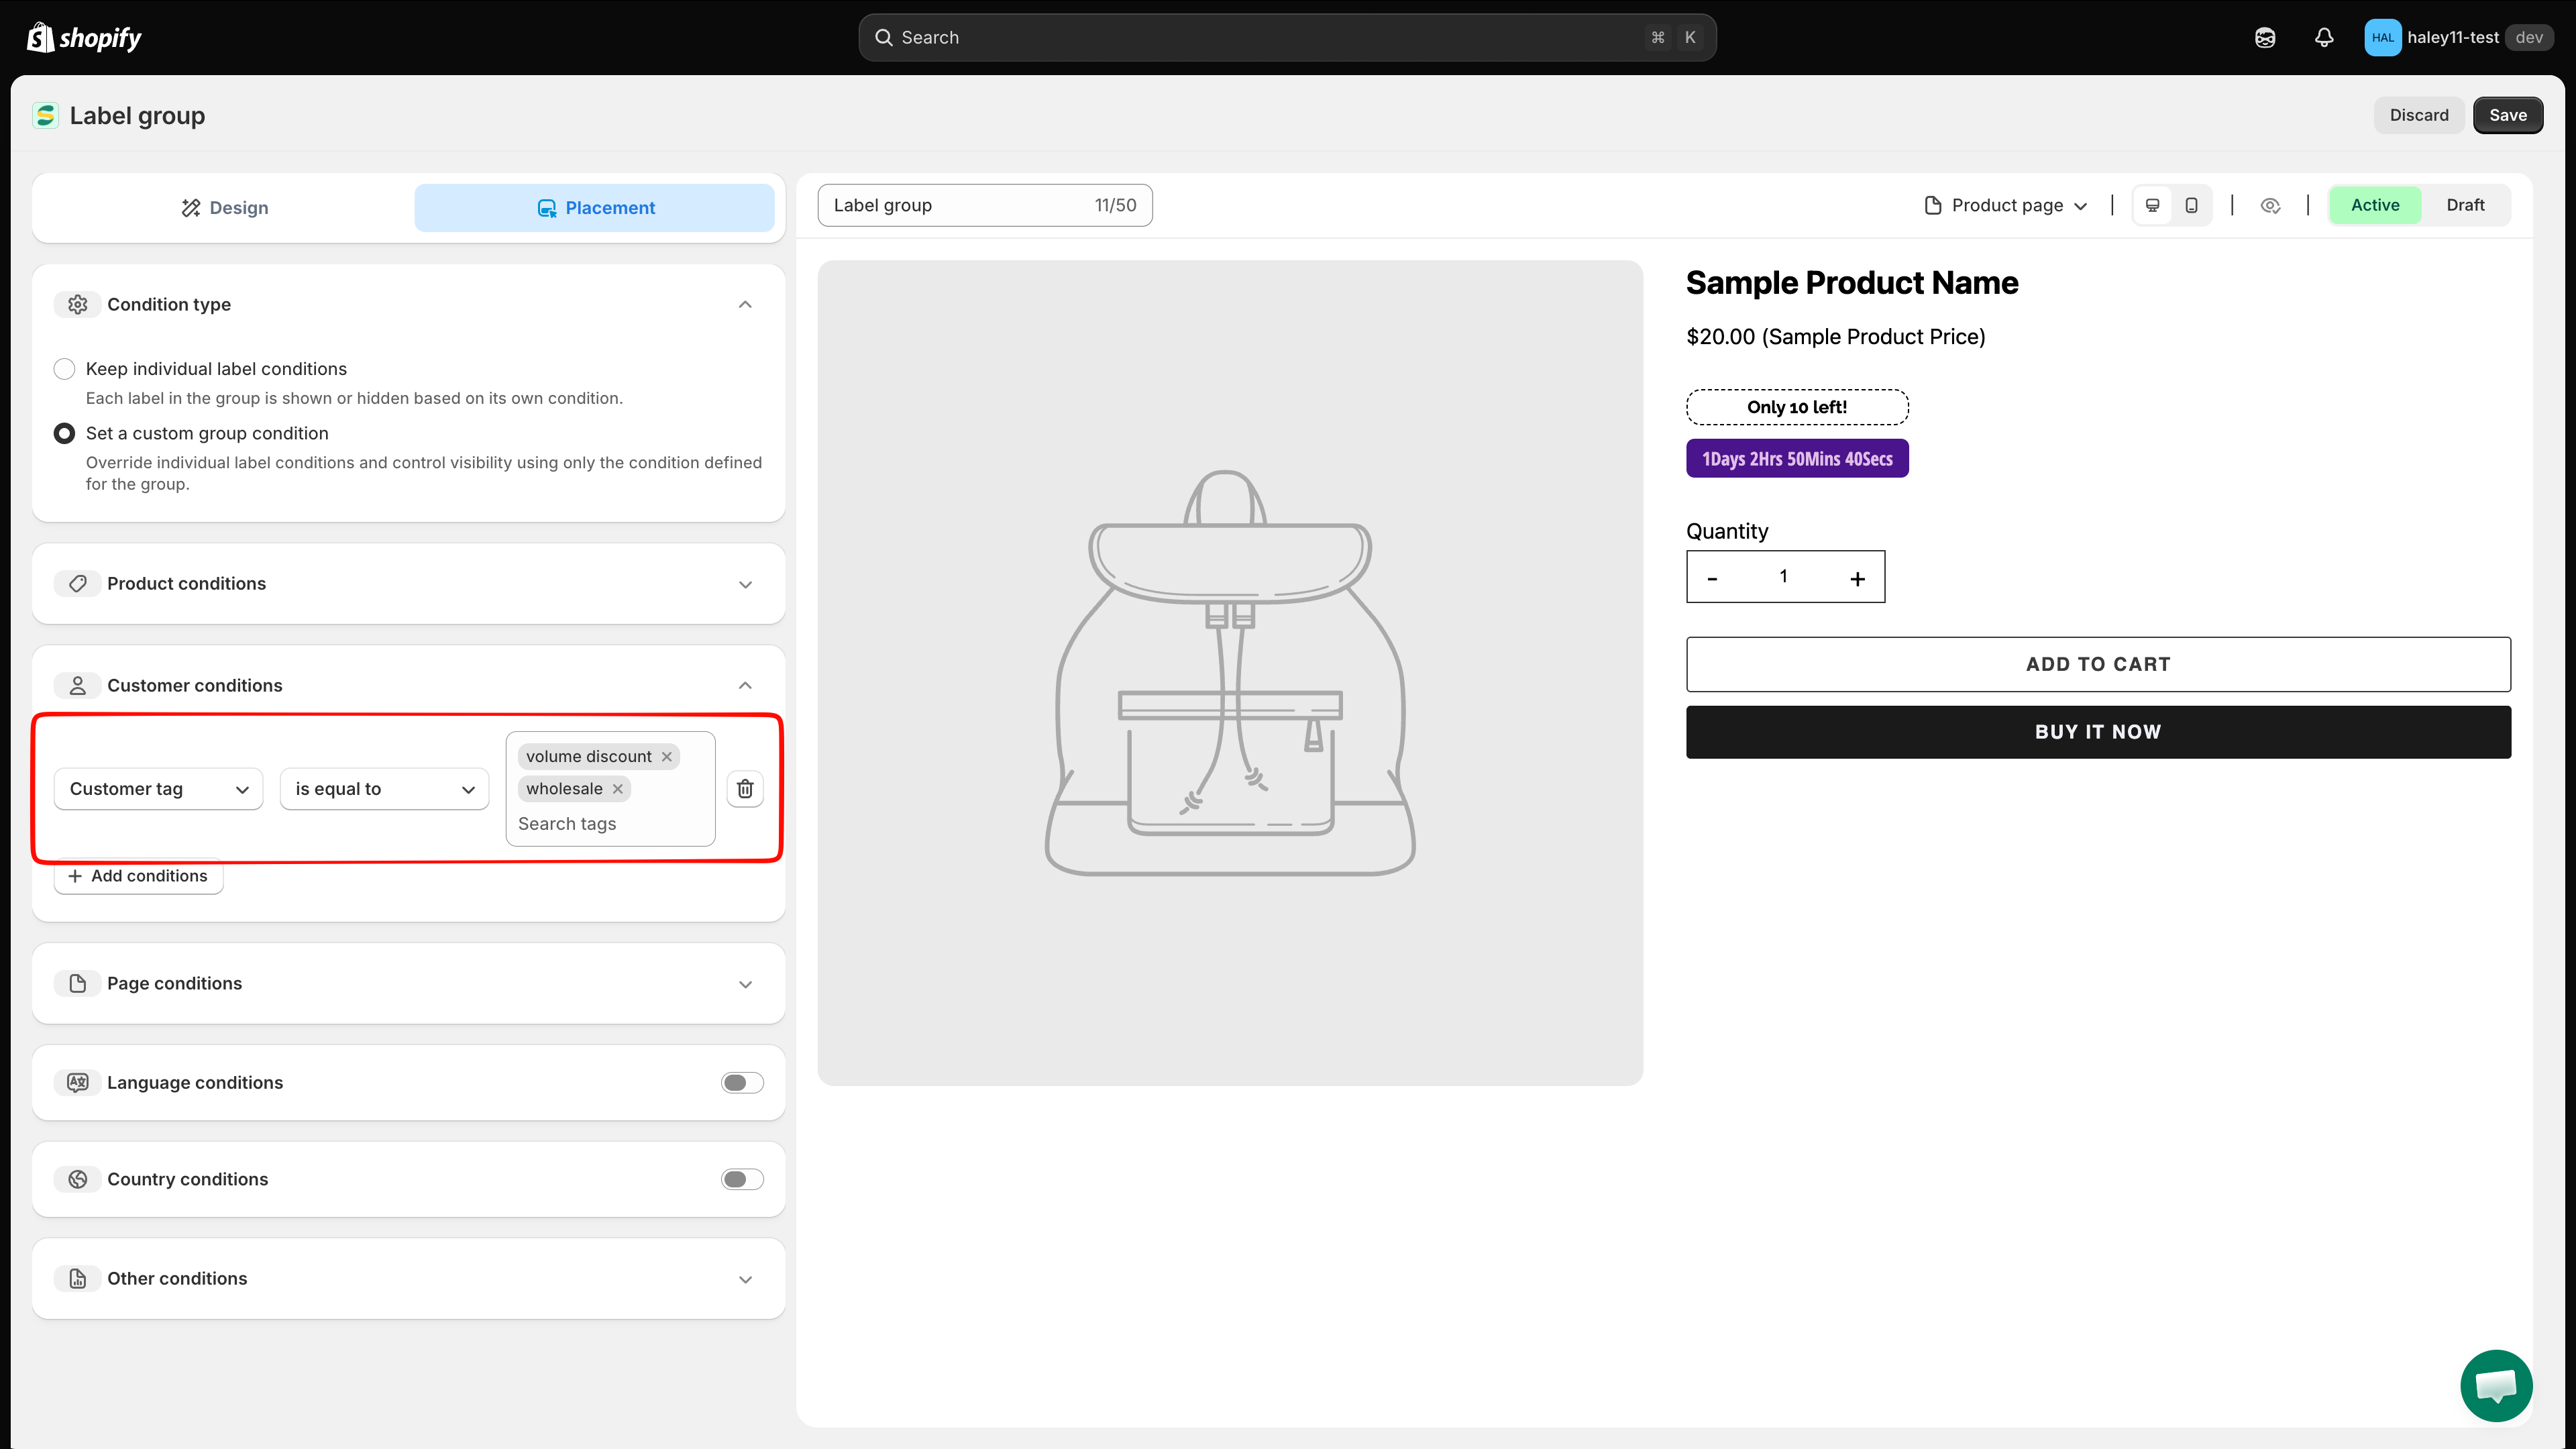
Open the first dropdown and choose a field. The list is grouped:

Group
Options

Product conditions

All Products, Select Products, Product title, Product type, Product vendor, Product price, Product compare price, Product sale price, Product option, Product tag, Product weight, Product created, Product published, Product inventory, Product metafield

Variant conditions

Product variants, Variant inventory, Variant metafield

Collection conditions

Collections

Product condition dropdown showing the grouped option list
Product, variant, and collection fields all live in the same dropdown.
3

Set the operator and value

The fields beside the condition change with your choice — a text value for Product title, a number for Product price, a picker for Select Products or Collections.

4

Add or remove rows

Click + Add conditions for another row, or the trash icon at the end of a row to delete it.

Customer conditions

Expand Customer conditions and click + Add conditions. A row appears with the defaults Customer Is Logged In.

Condition
Targets by

Customer

Login state — Is Logged In or Not Logged In

Customer tag

Tags on the customer record

Customer order count

How many orders the customer has placed

Customer total spent

Lifetime spend

Customer purchase

Products the customer has bought

Customer company name

The company on a B2B customer record

Customer conditions with a condition row
Each row pairs a customer field with its own operator and value.
Page conditions

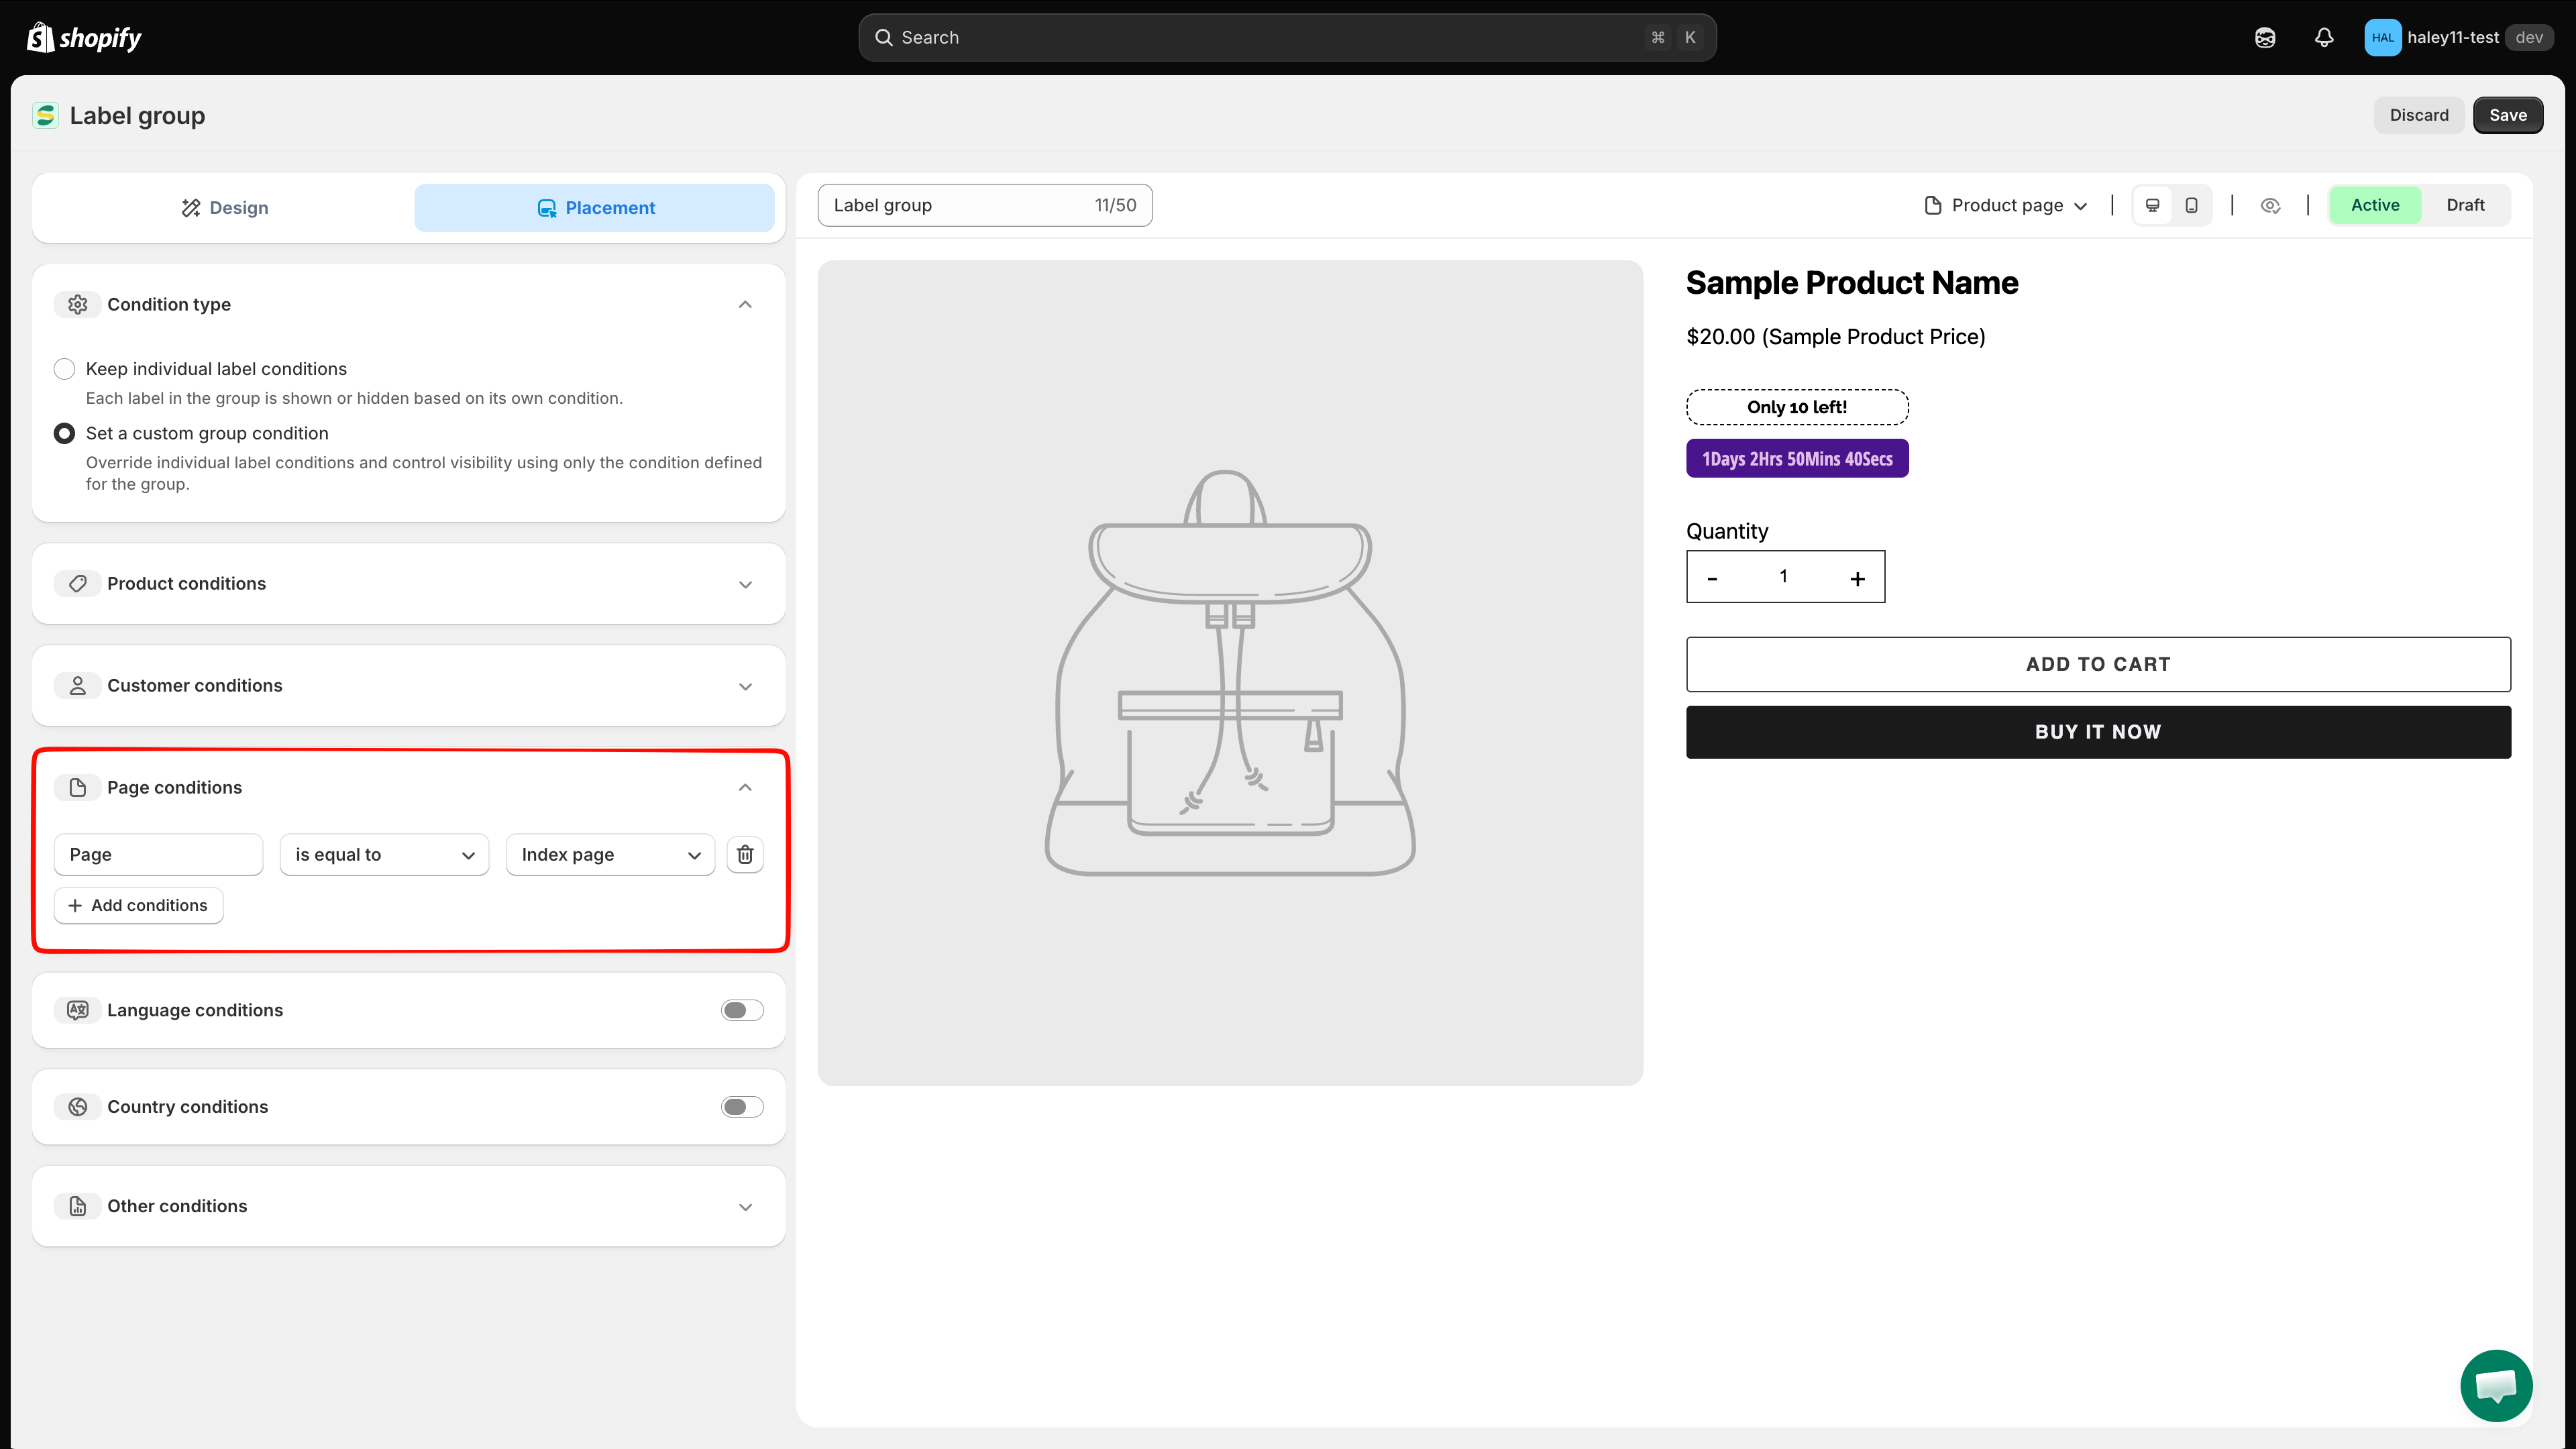
Expand Page conditions and click + Add conditions. A row appears with the defaults Page is equal to Index page.

  • is equal to — show the group only on that page type.

  • is not equal to — show it everywhere except that page type.

The page types are the same ones used for individual badges (Index, Collection, Product, Article, Blog, Cart, Search, Specific pages) — see Display by device & page for what each one covers.

Page conditions row with Page, is equal to, and Index page
Add one row per page type you want to include or exclude.
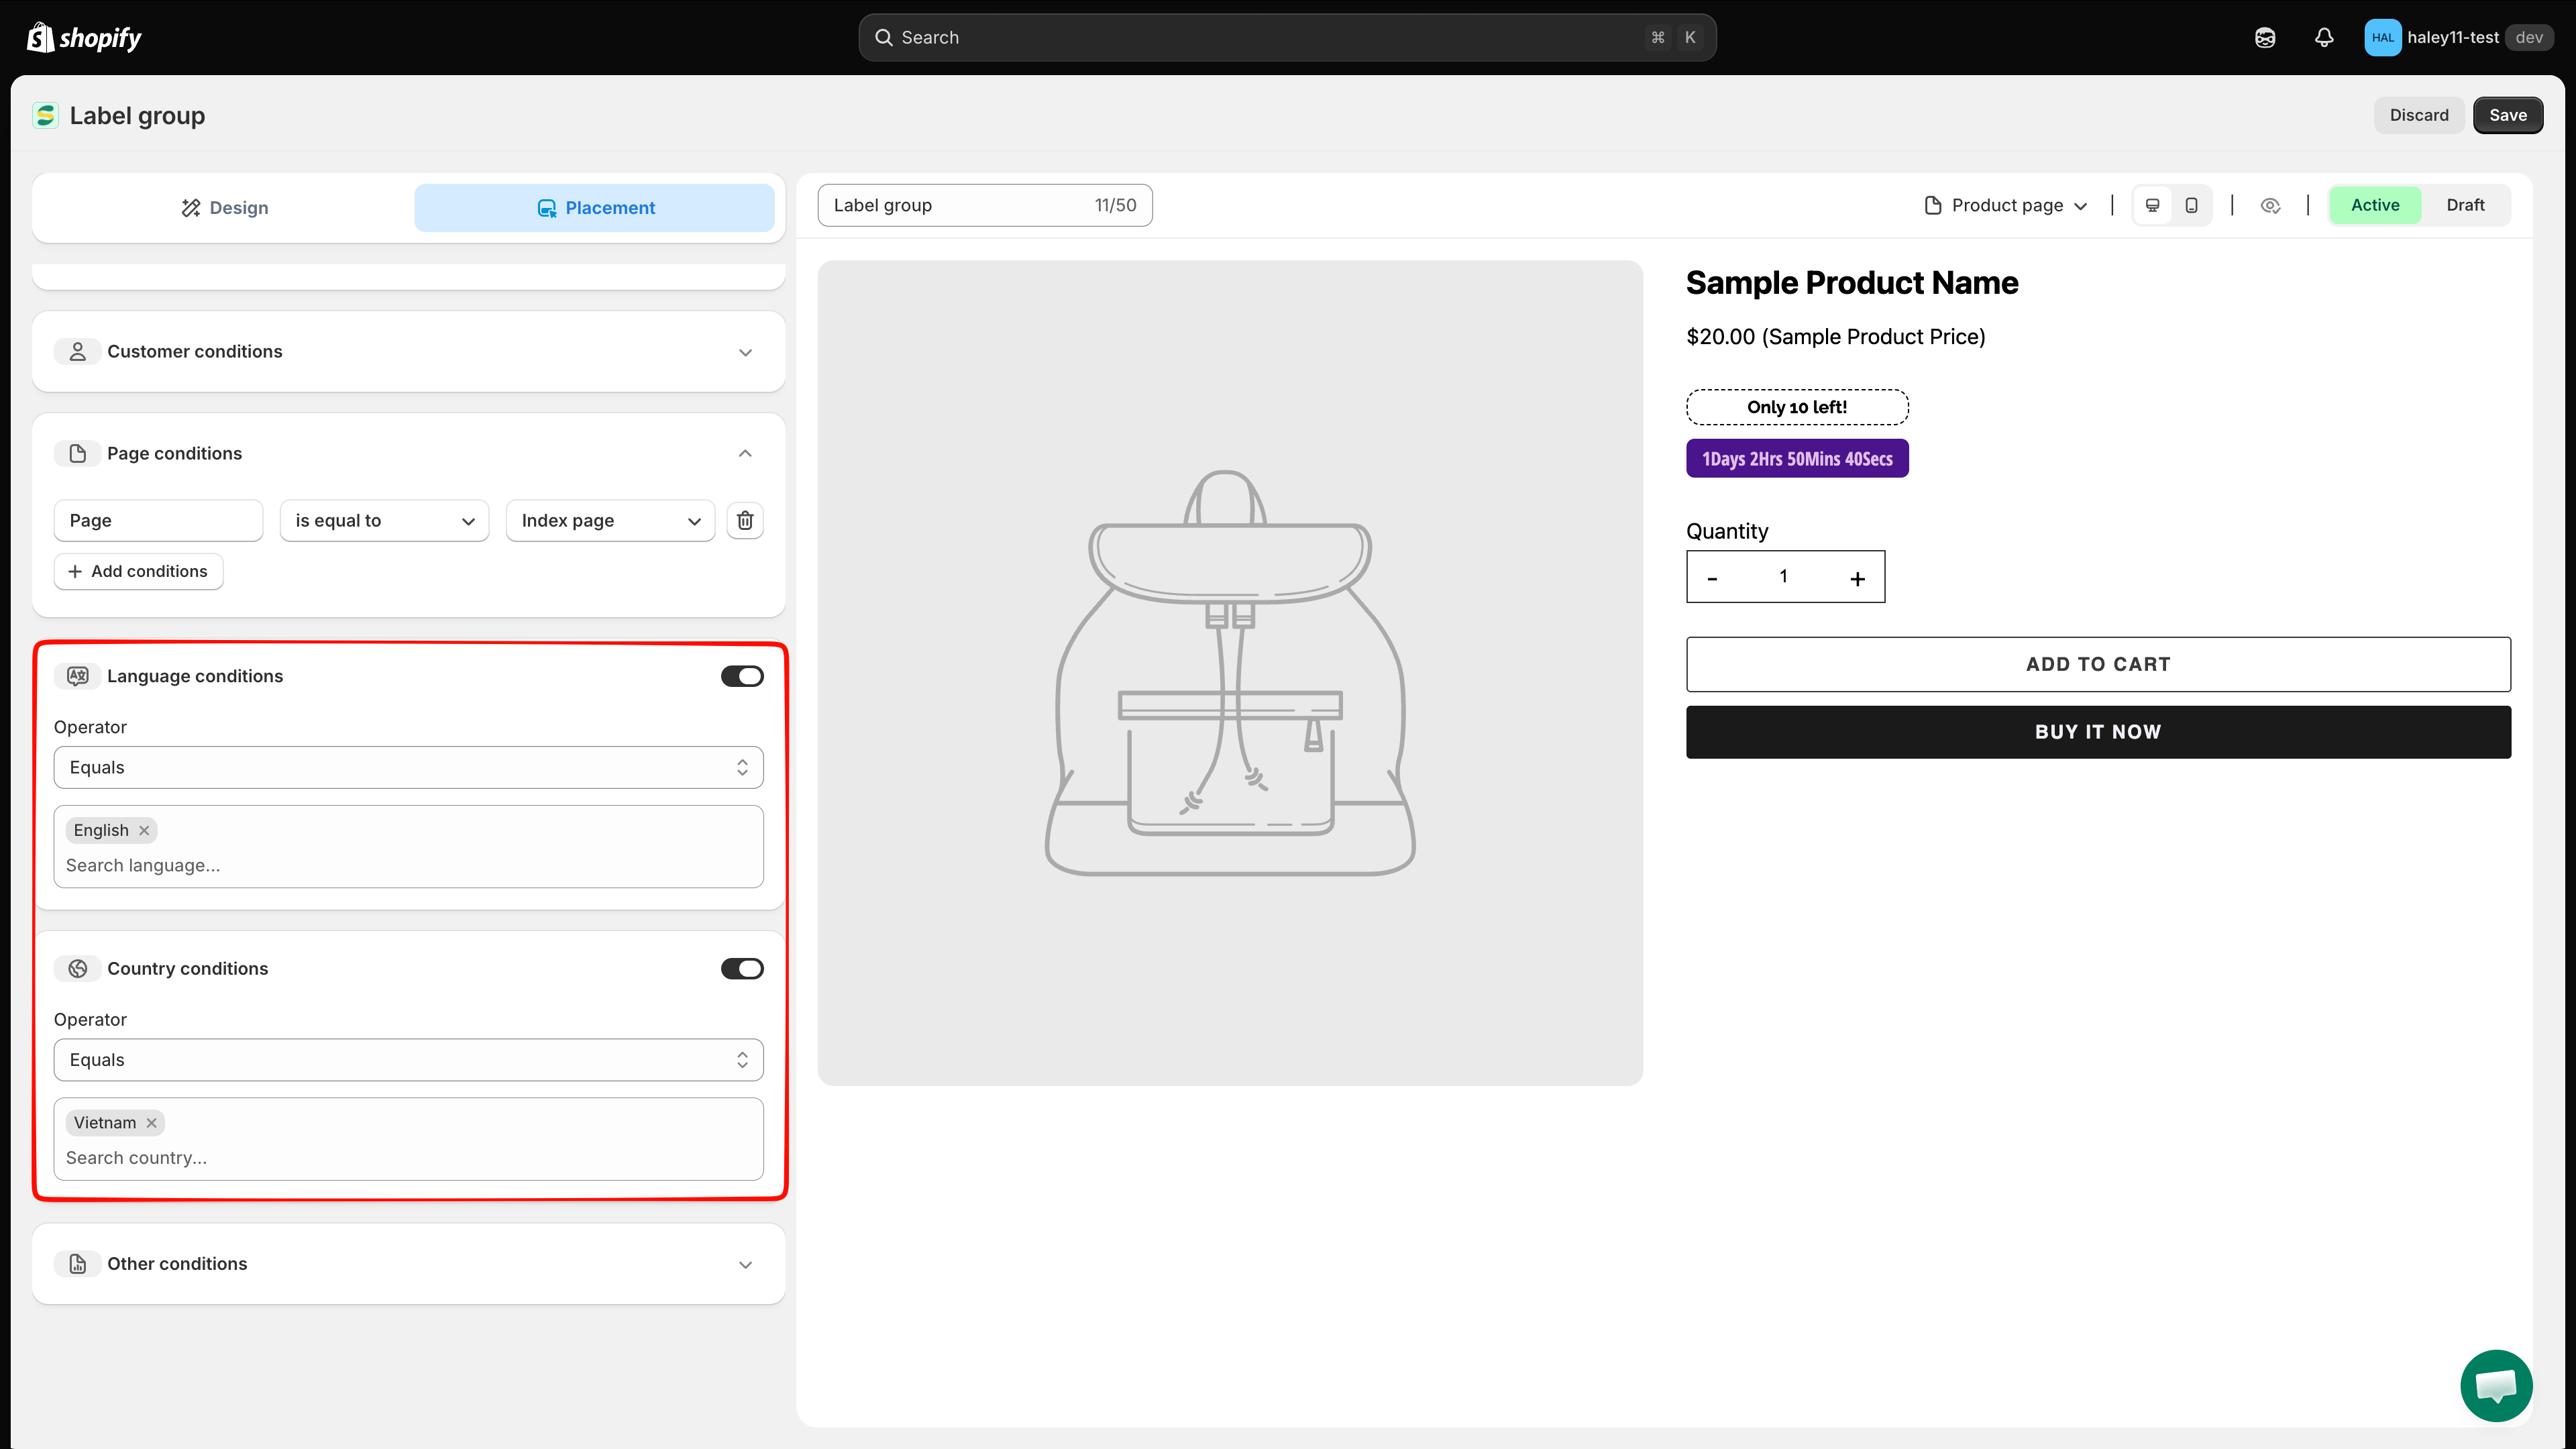
Language and Country conditions

Turn on the switch on the Language conditions or Country conditions row. Each shows an Operator (default Equals) and a search field — type to find a language or country and select it.

Language and Country conditions turned on with operator and search fields
Both sections stay inactive until you turn the switch on.
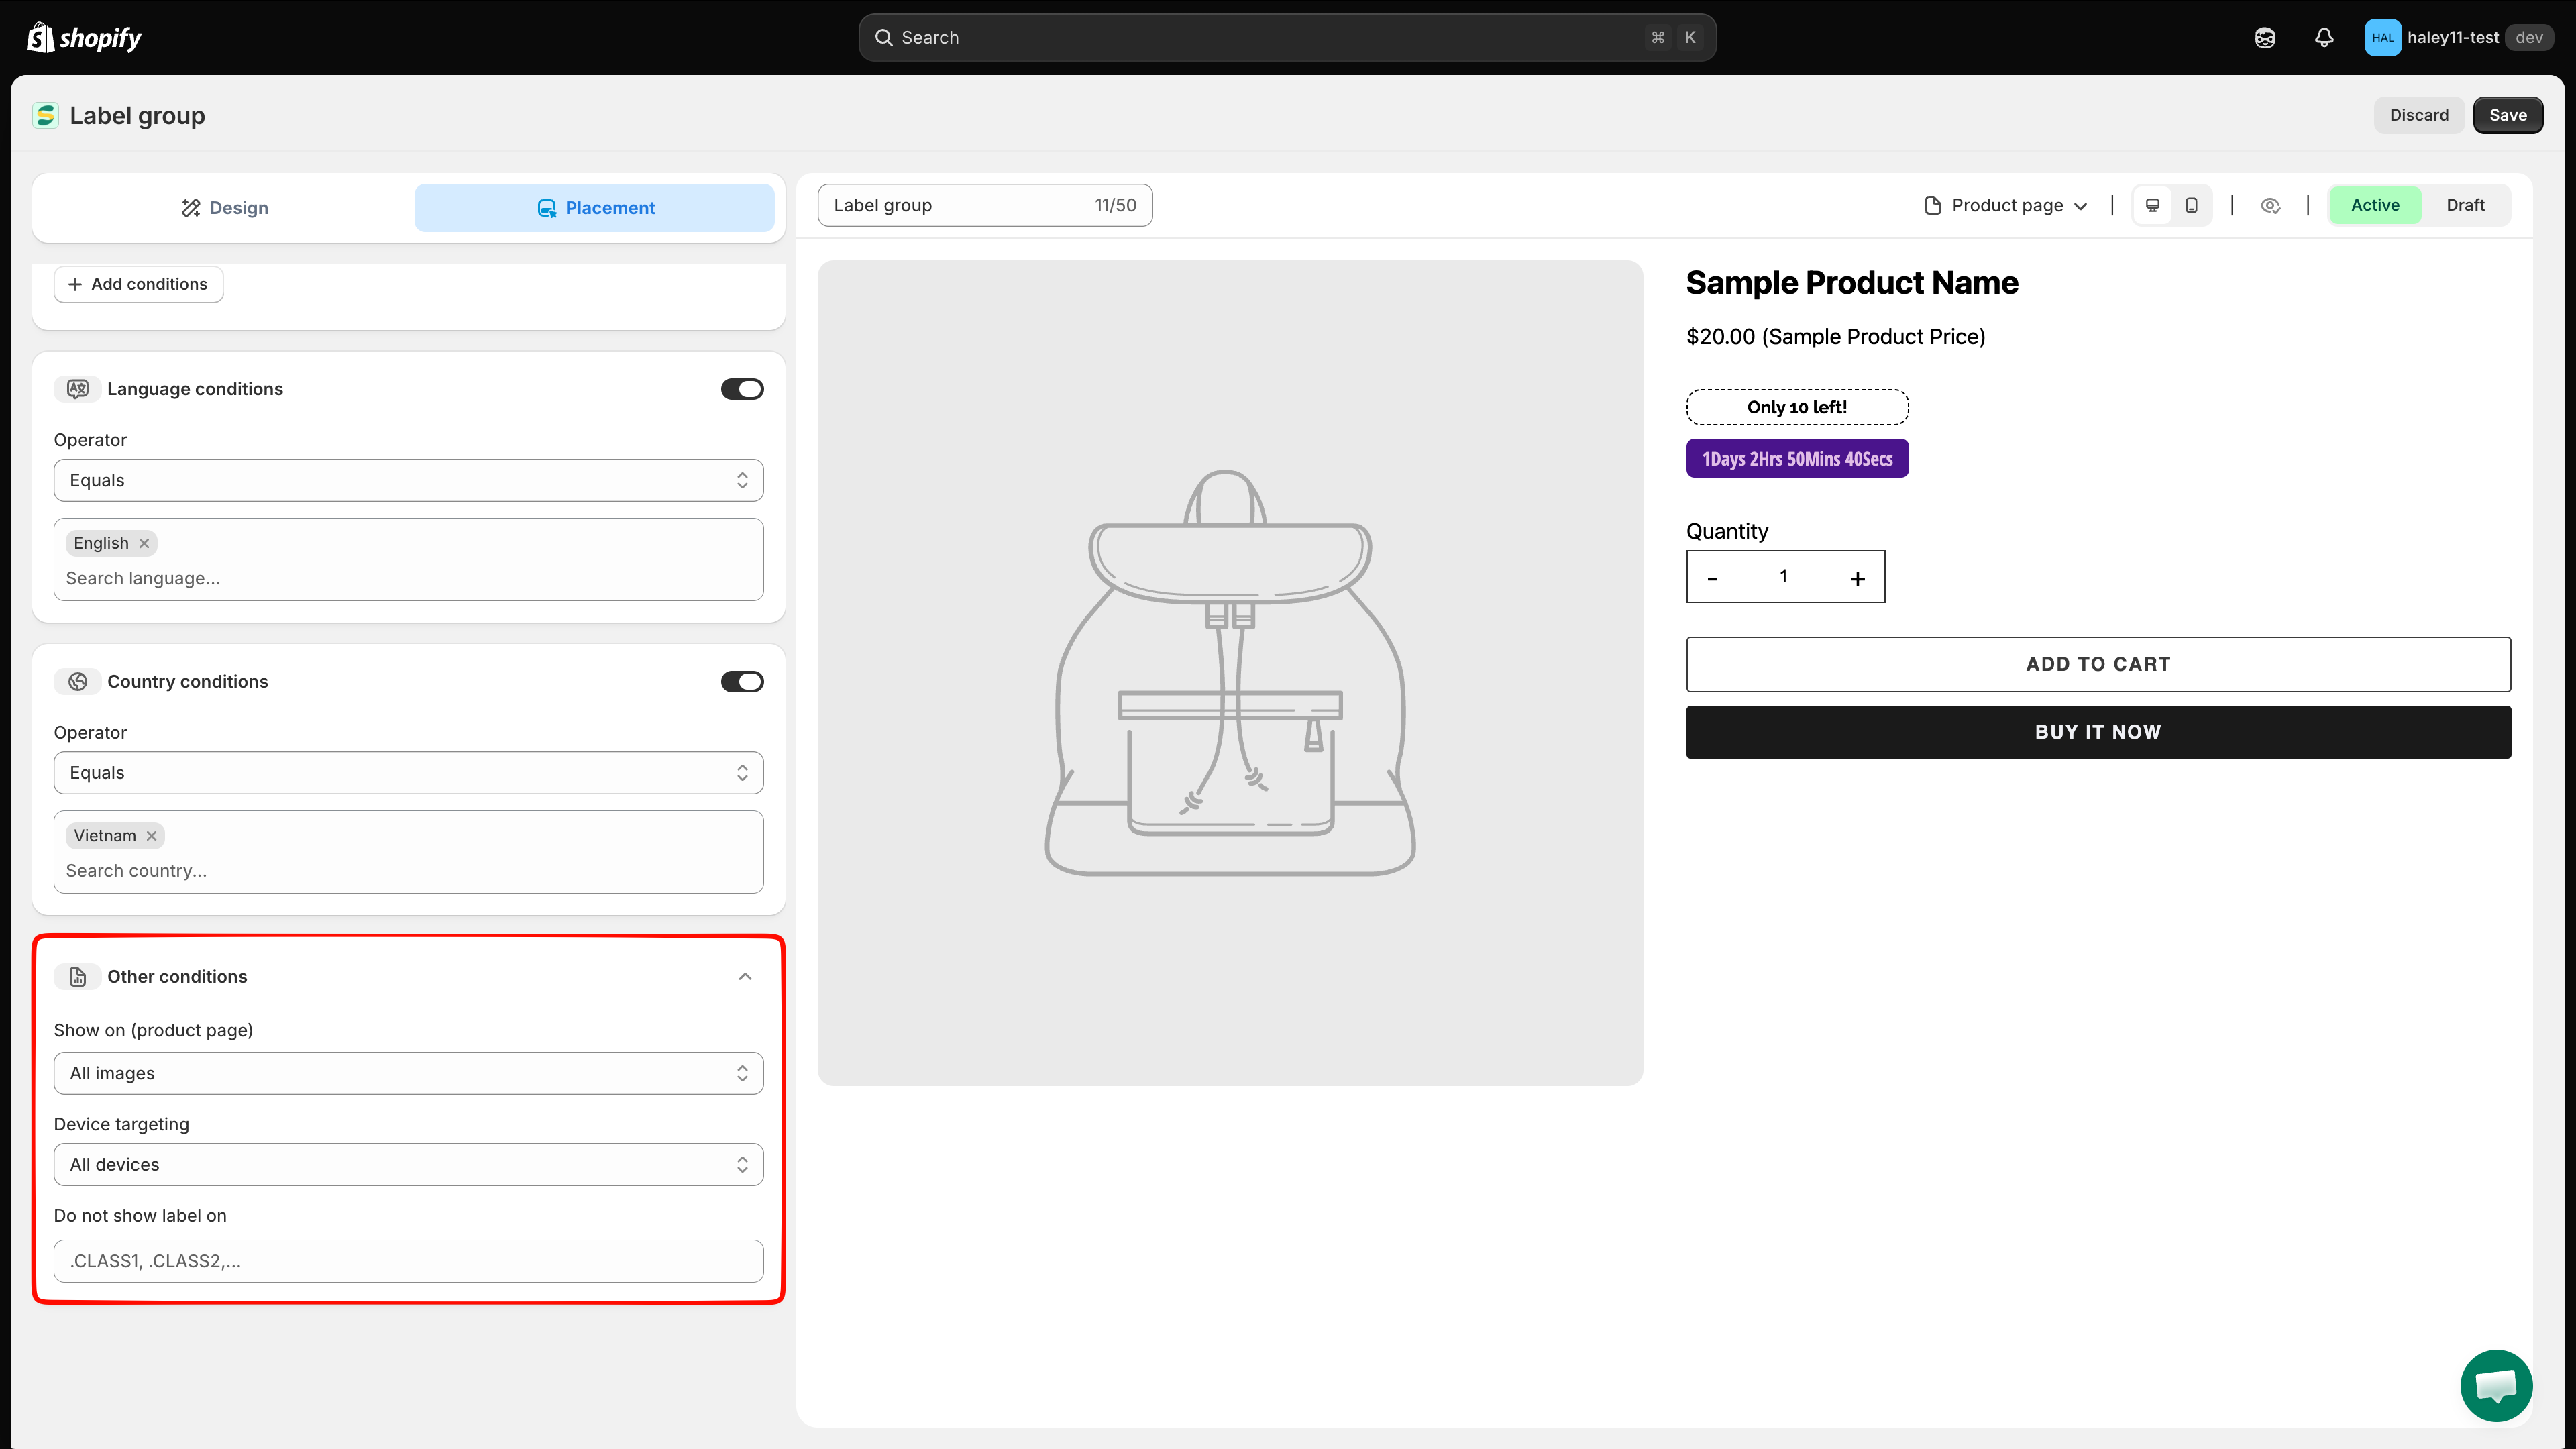
Language targeting relies on your store's localized versions. See Target by country & language.

Other conditions

Setting
Options
Behavior

Show on (product page)

All images / First image

Show the group on every gallery image, or only on the first one.

Device targeting

All devices / Desktop / Mobile

Limit the group to desktop or mobile shoppers.

Do not show label on

CSS class list — .CLASS1, .CLASS2,...

Skip any theme element matching these classes, such as a slider or quick-view block.

Other conditions with image, device, and exclusion fields
Image, device, and exclusion settings for the whole group.

Save

Click Save in the top-right corner. The group appears on matching product pages immediately.

Next steps

Last updated

Was this helpful?