Change badge position
Place a badge inside or outside the product image, use preset or custom positions, and fine-tune its spacing.
Use the Position section to place a text or image badge over the product image, below a product-page element, or next to a custom theme element.
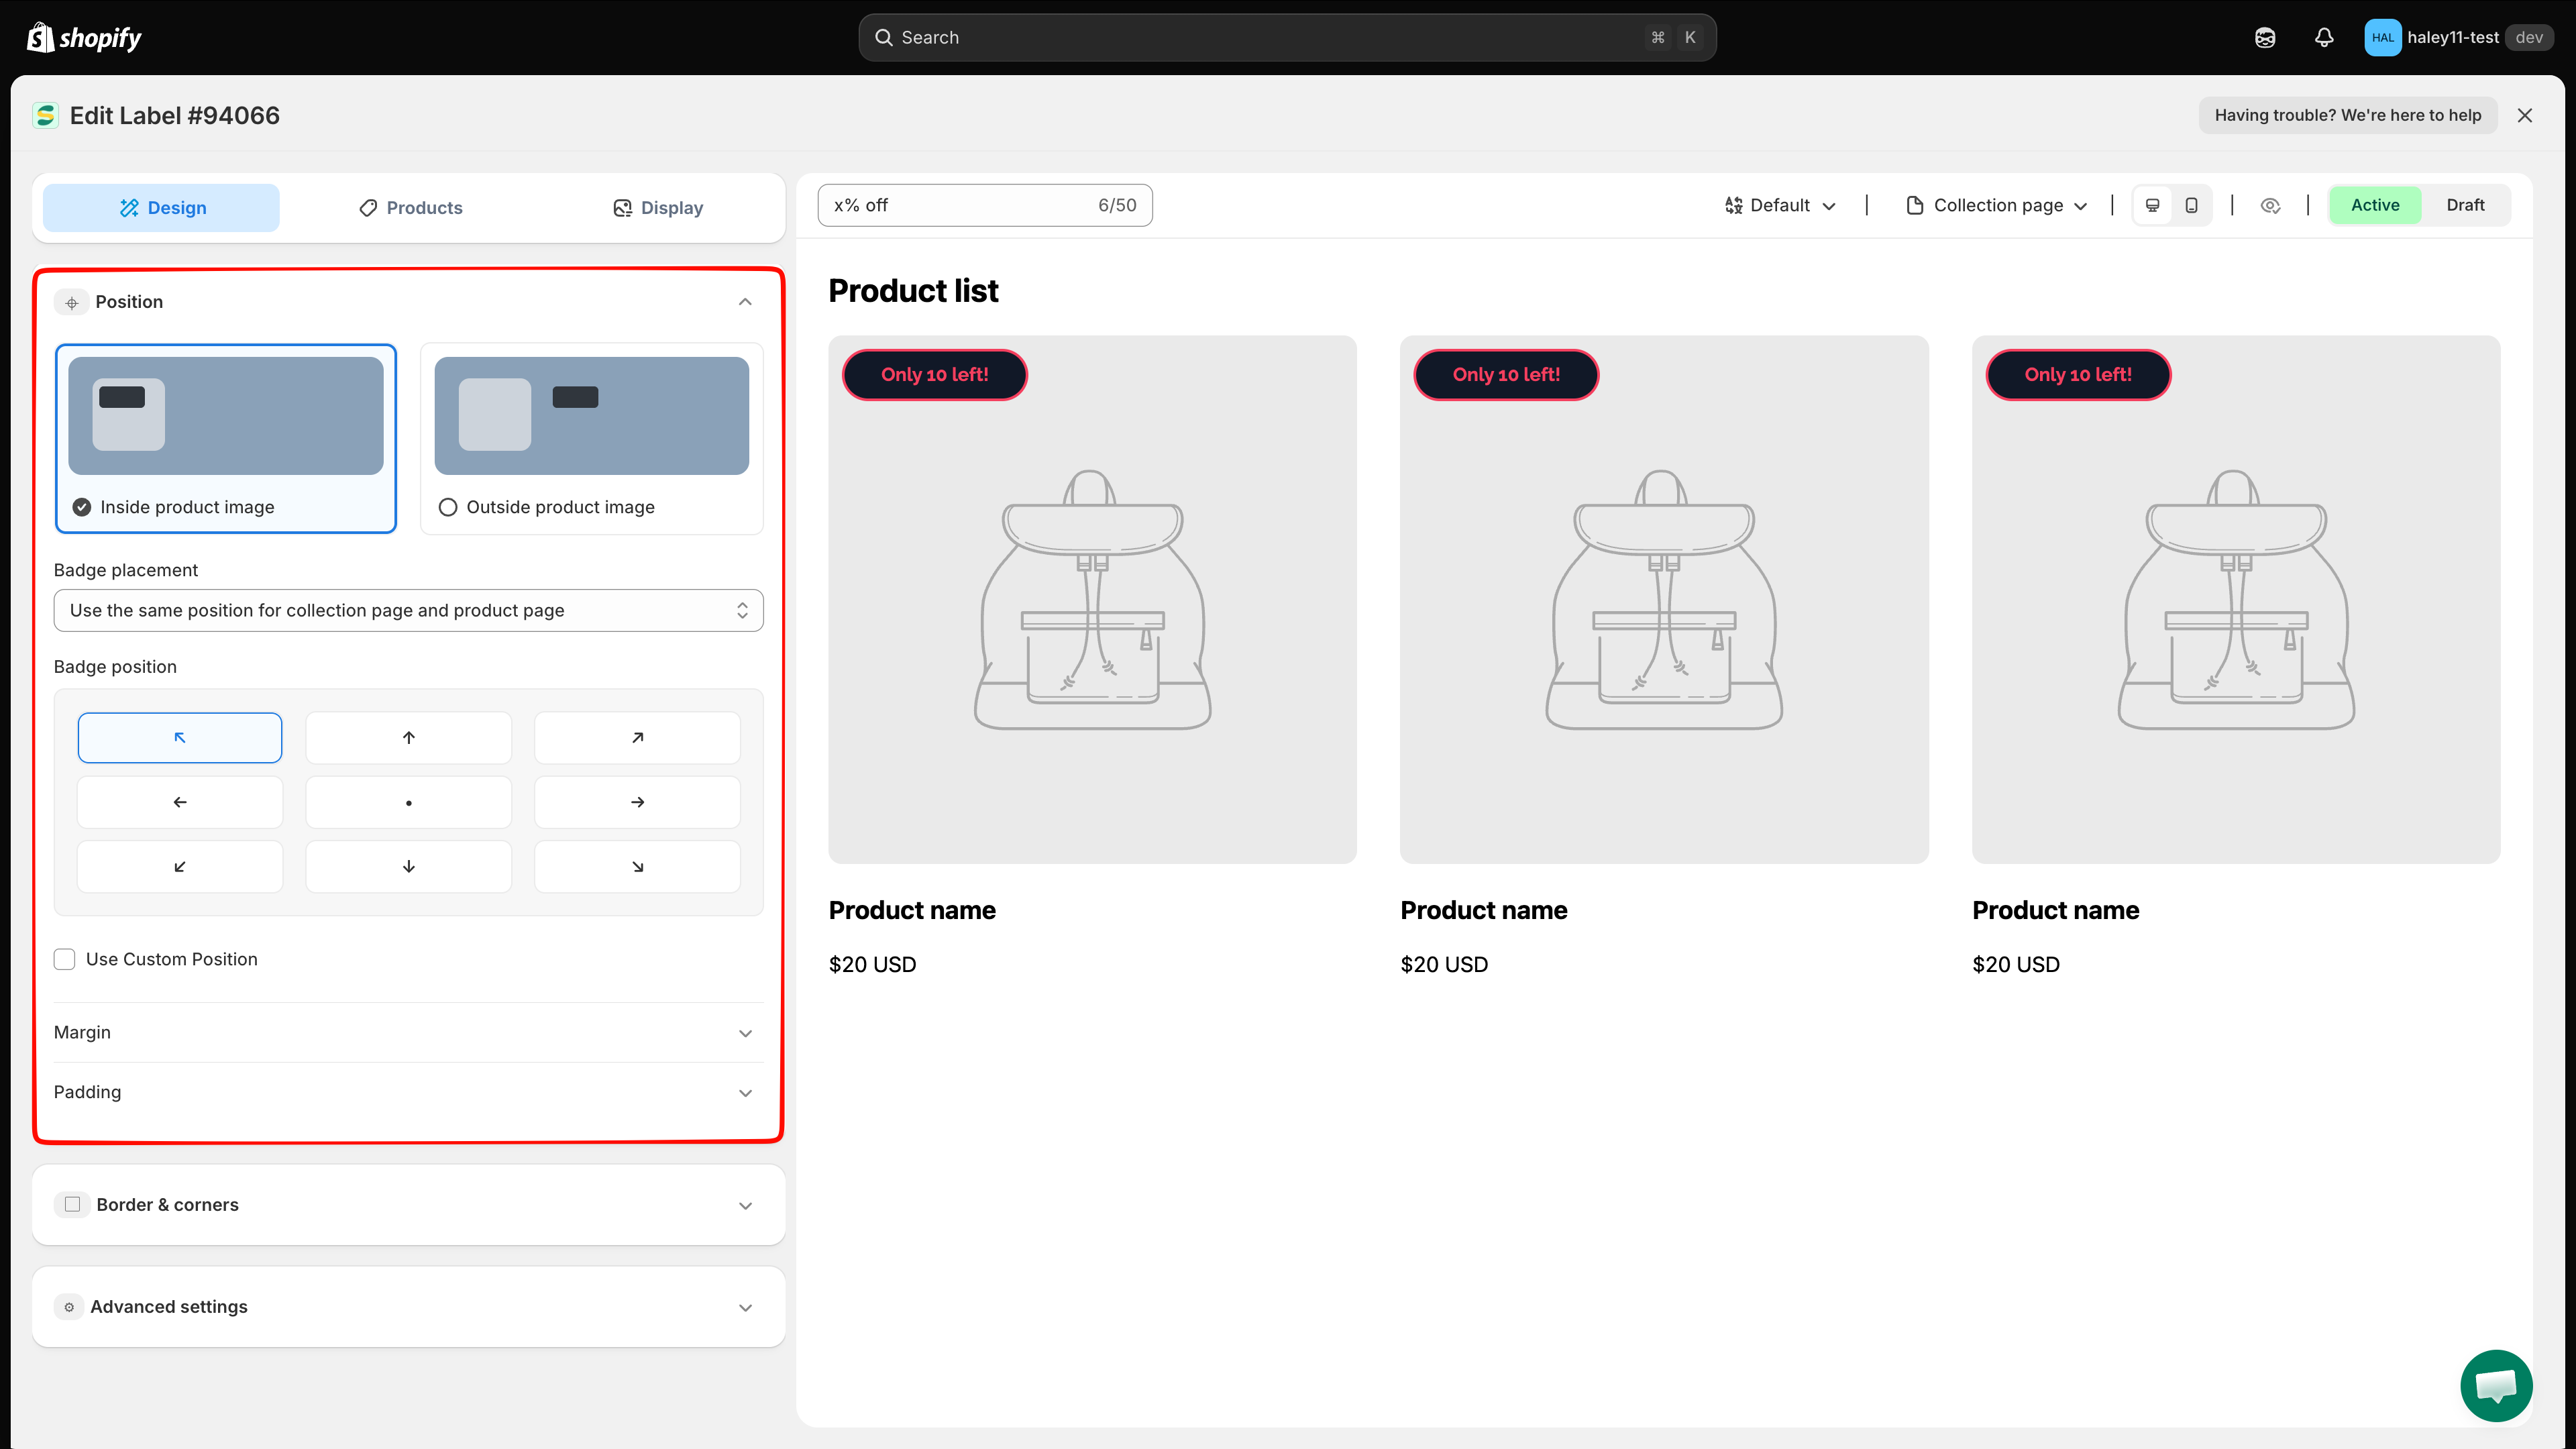
Open the Position section
Place the badge inside the product image
Select Inside product image when the badge should overlay the product image.
Choose where the setting applies
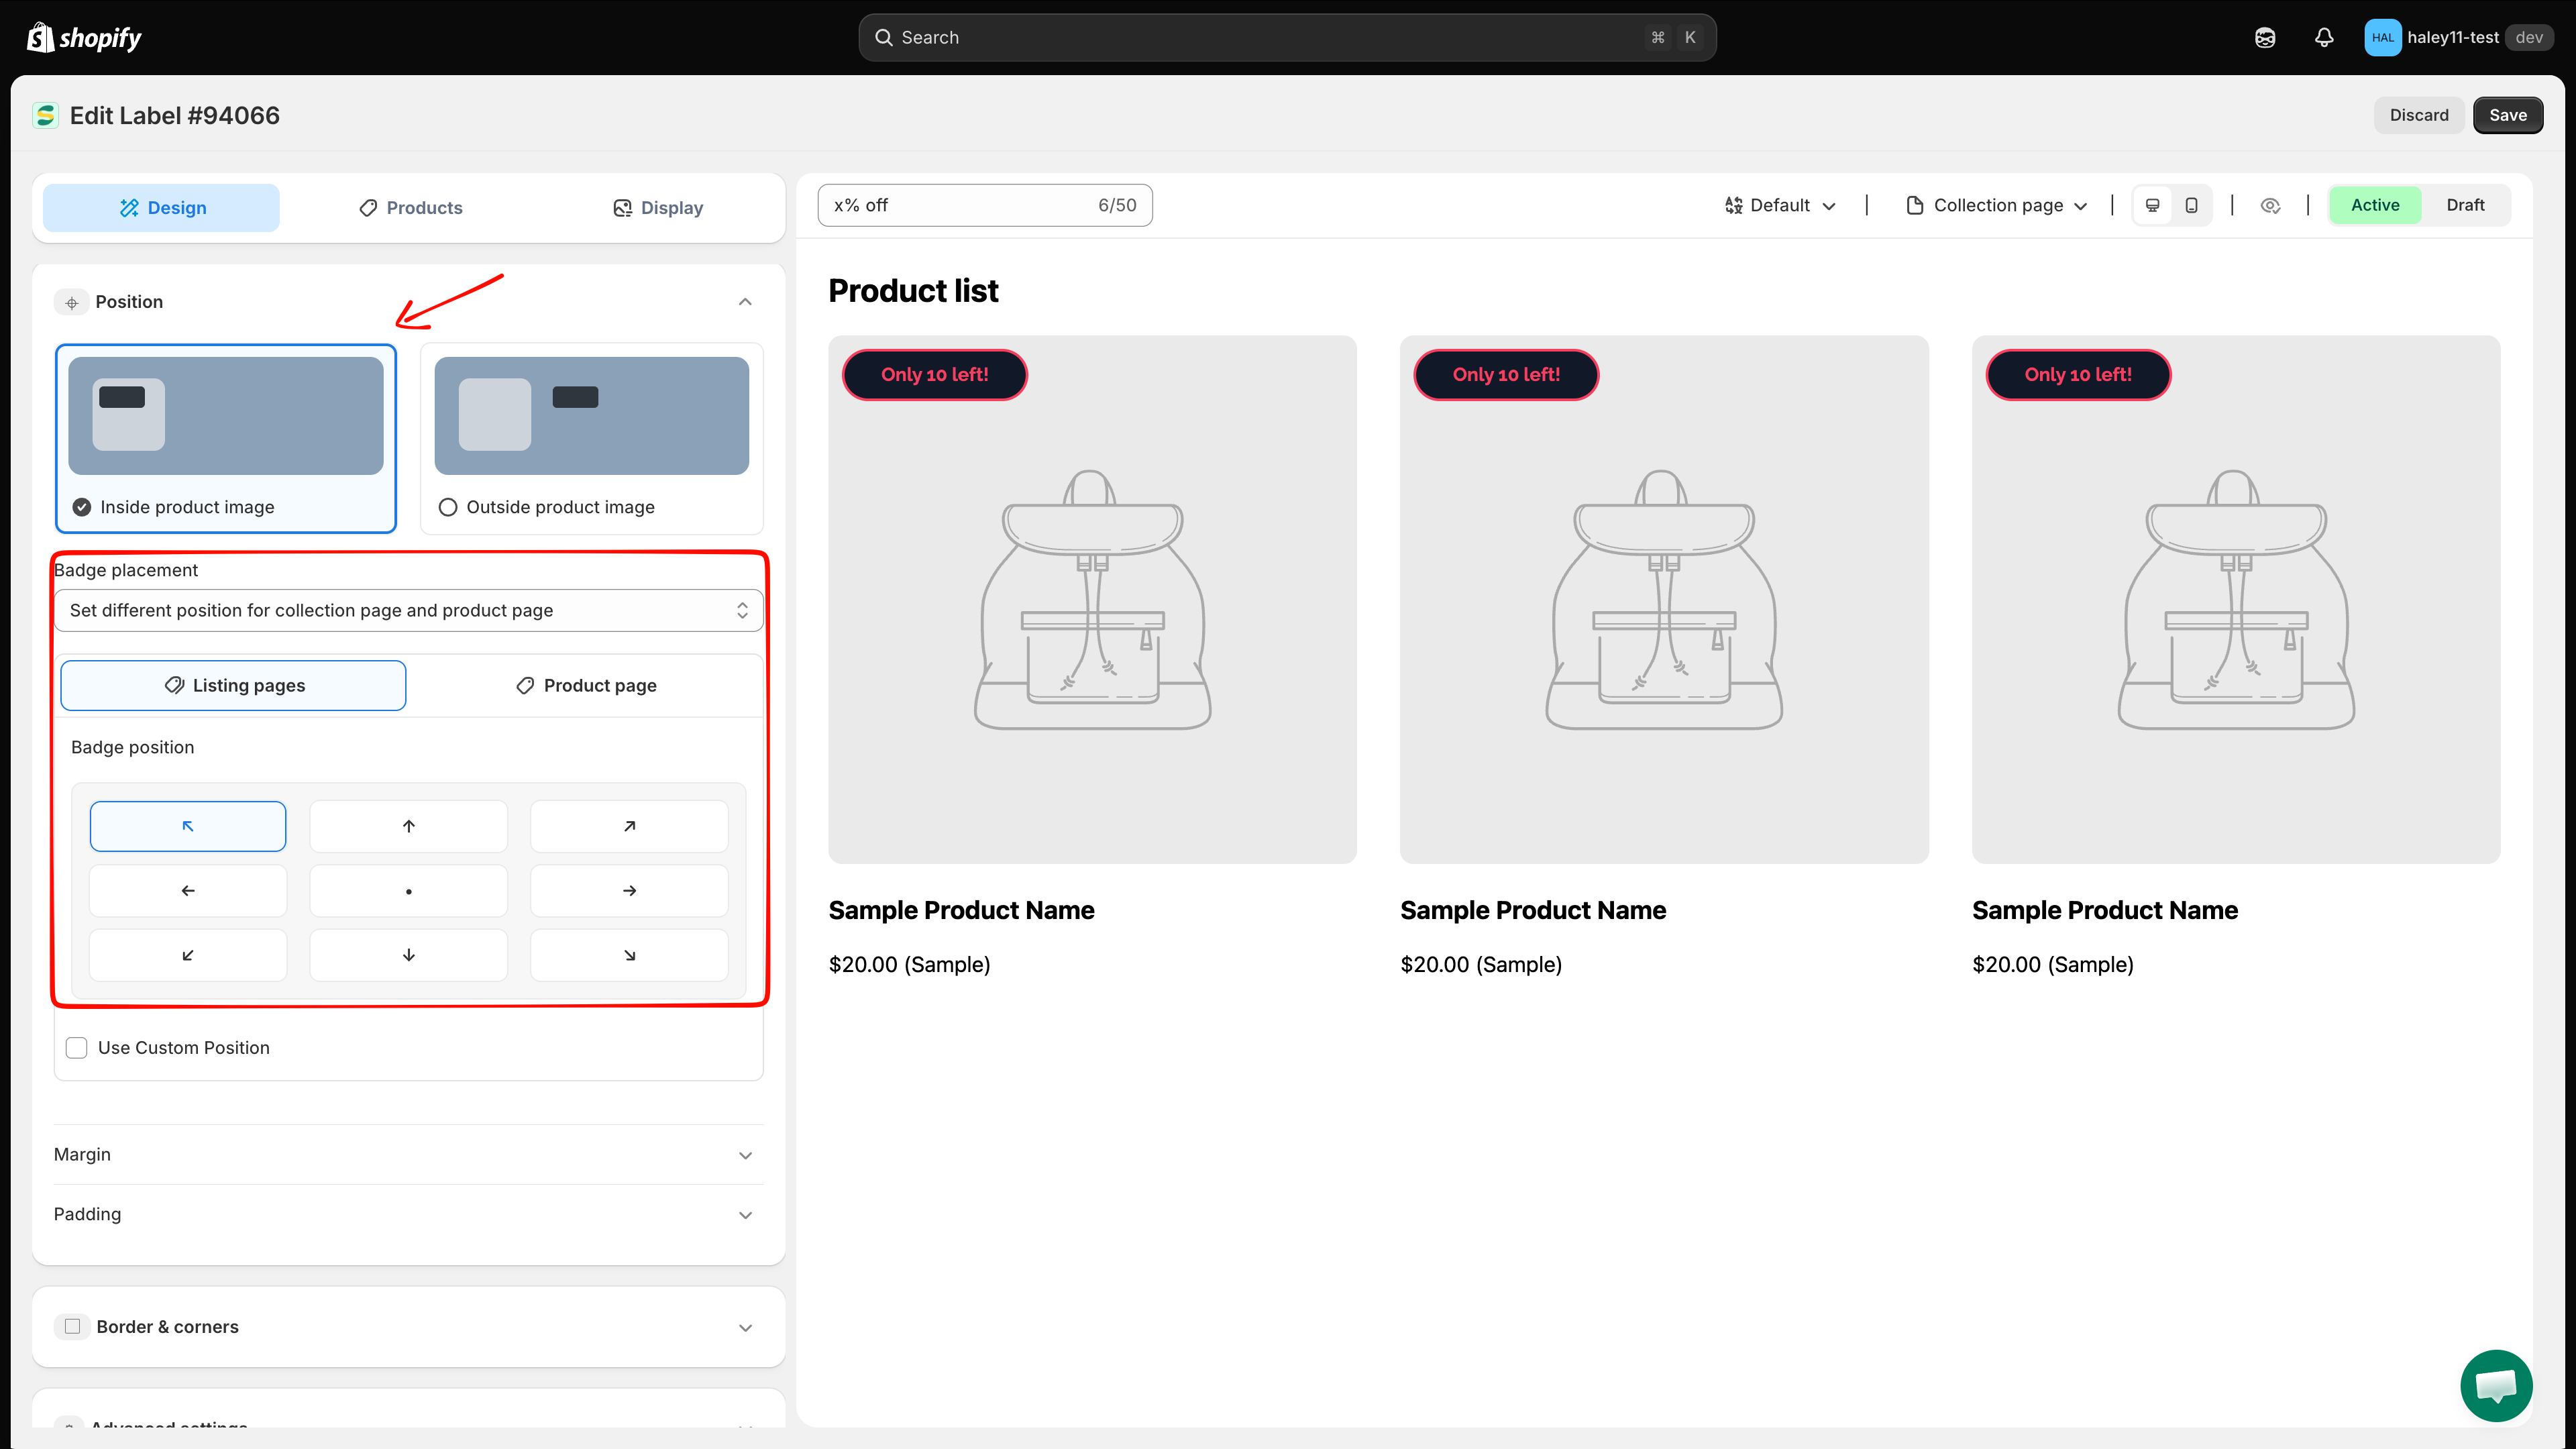
Use Badge placement to choose one of these modes:
Use the same position for collection page and product page — One position applies to both page types.
Set different position for collection page and product page — Use the Listing pages and Product page tabs to configure each position separately.

Choose a preset position
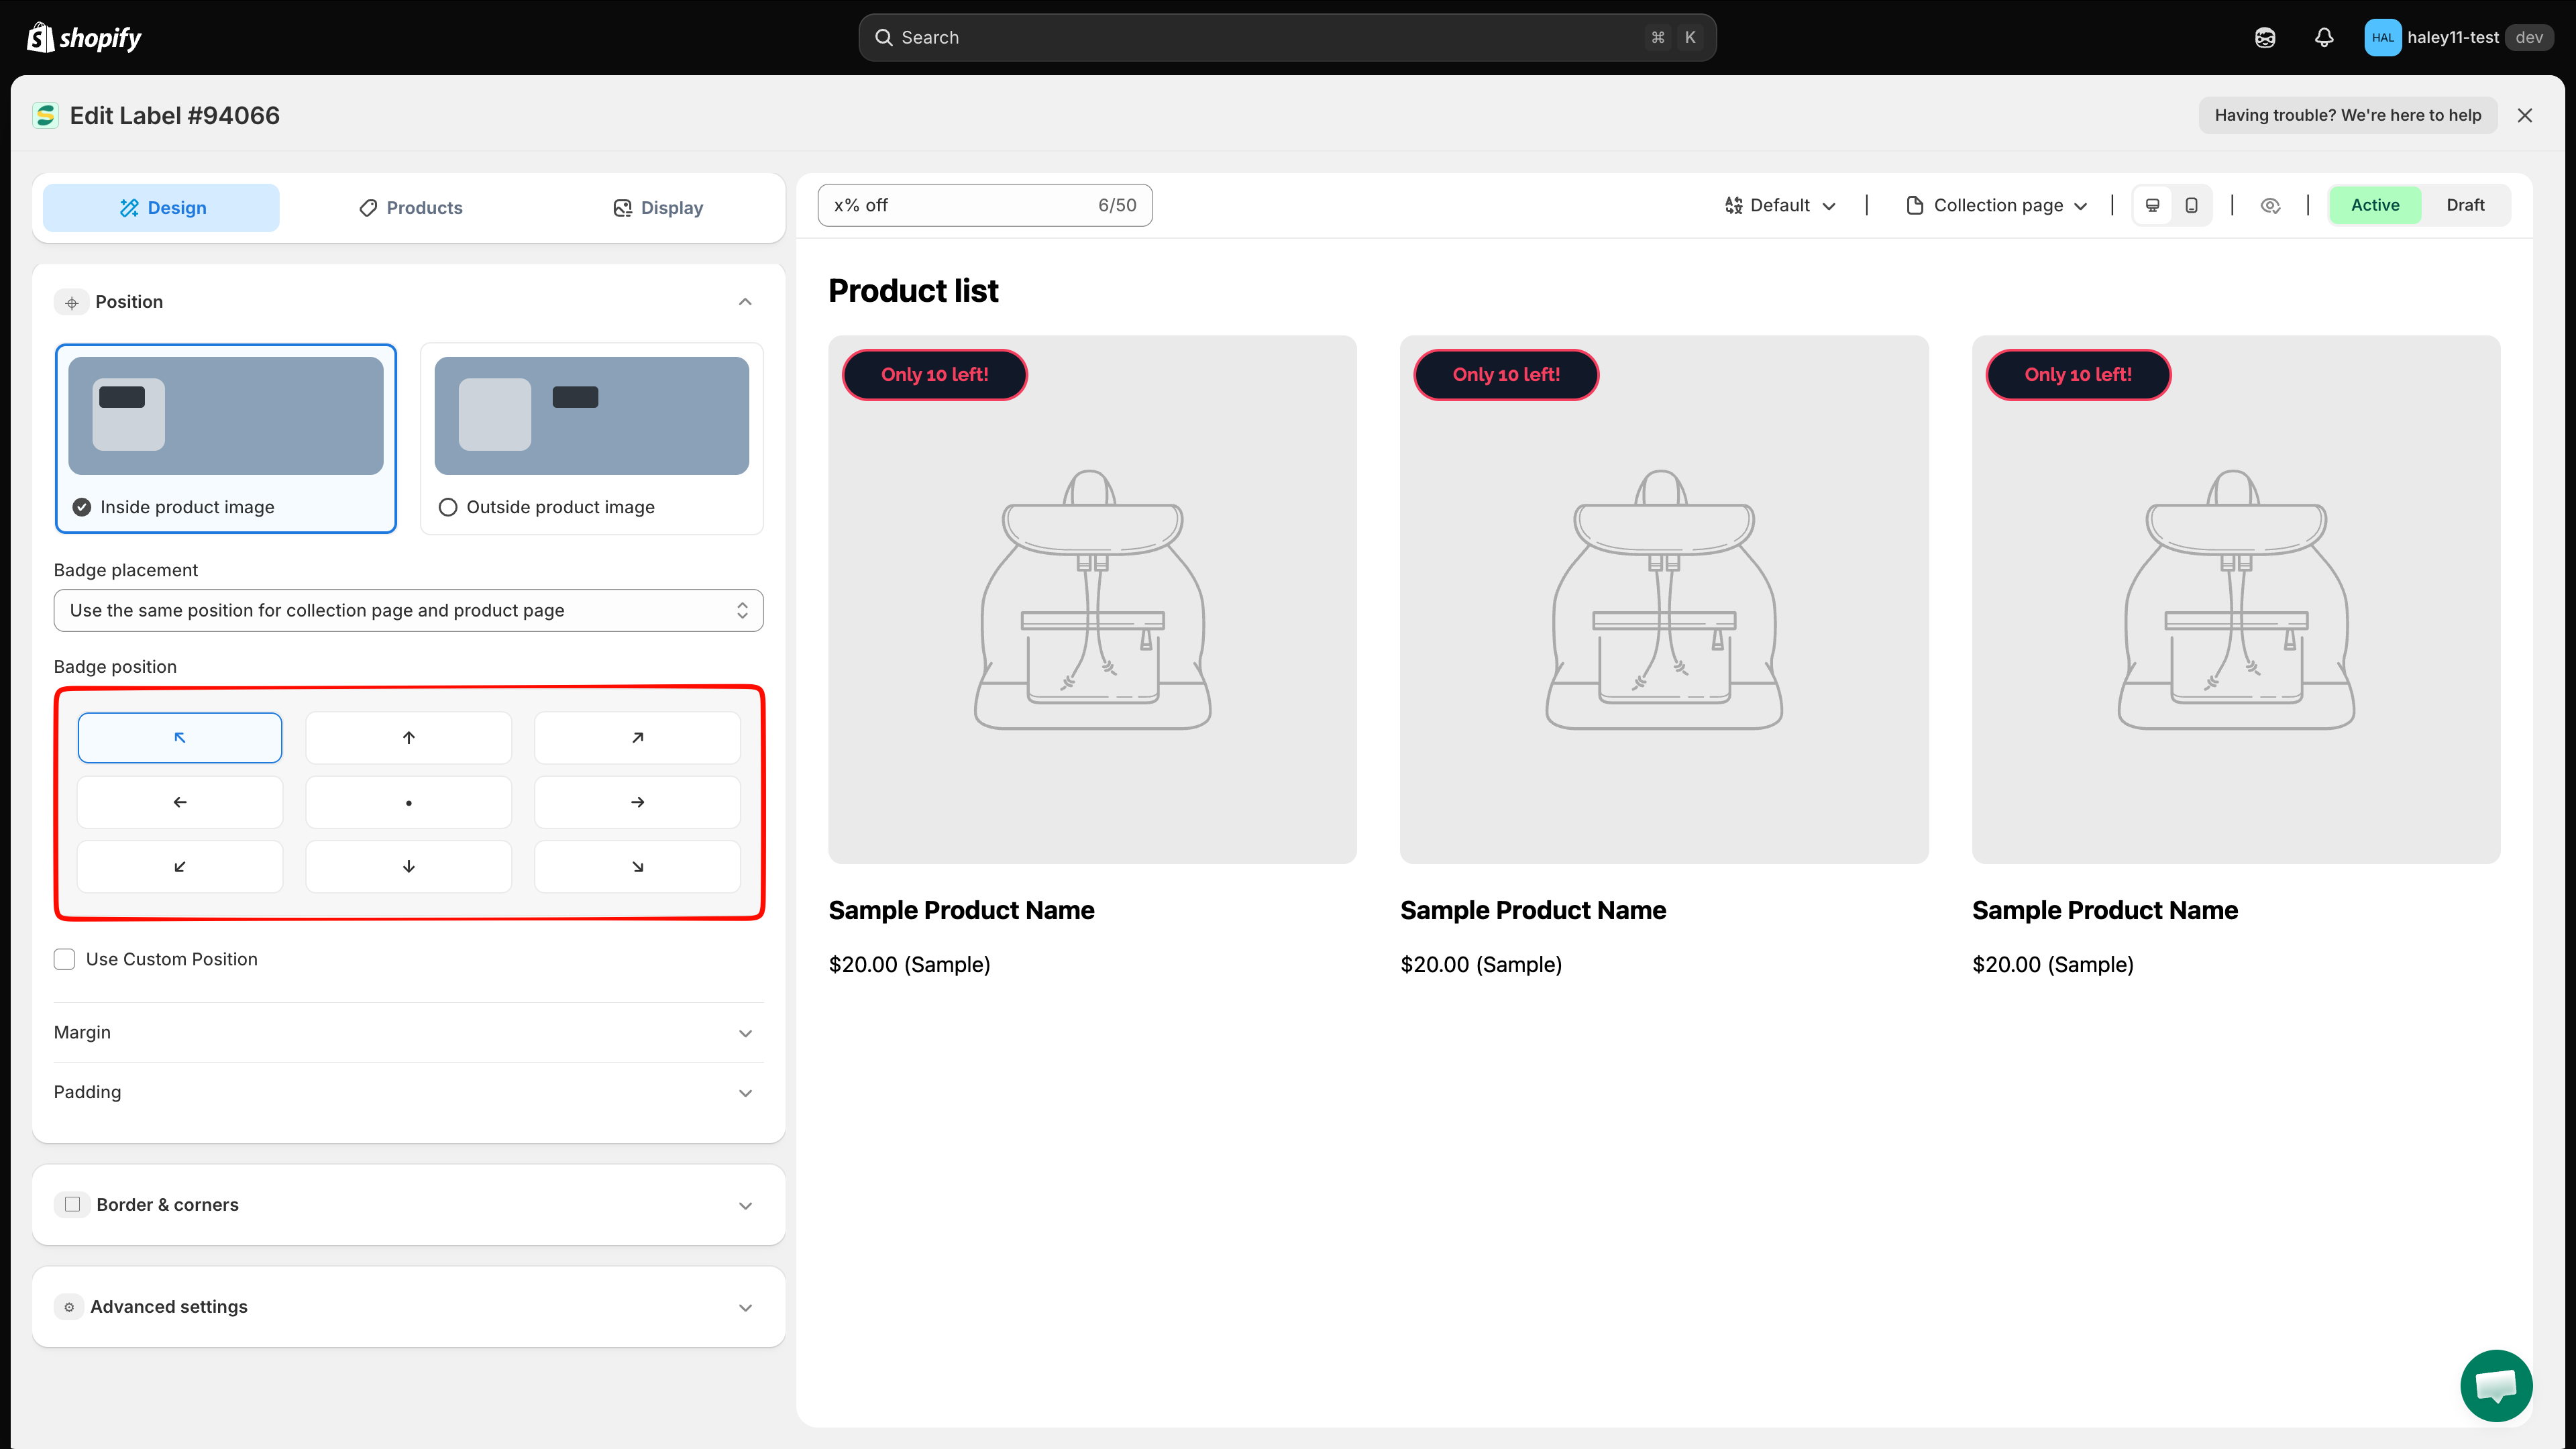
Under Badge position, select one of the nine points in the position grid.
Top left
Upper-left corner
Top center
Center of the top edge
Top right
Upper-right corner
Center left
Center of the left edge
Center
Center of the image
Center right
Center of the right edge
Bottom left
Lower-left corner
Bottom center
Center of the bottom edge
Bottom right
Lower-right corner

Set a custom position by percentage
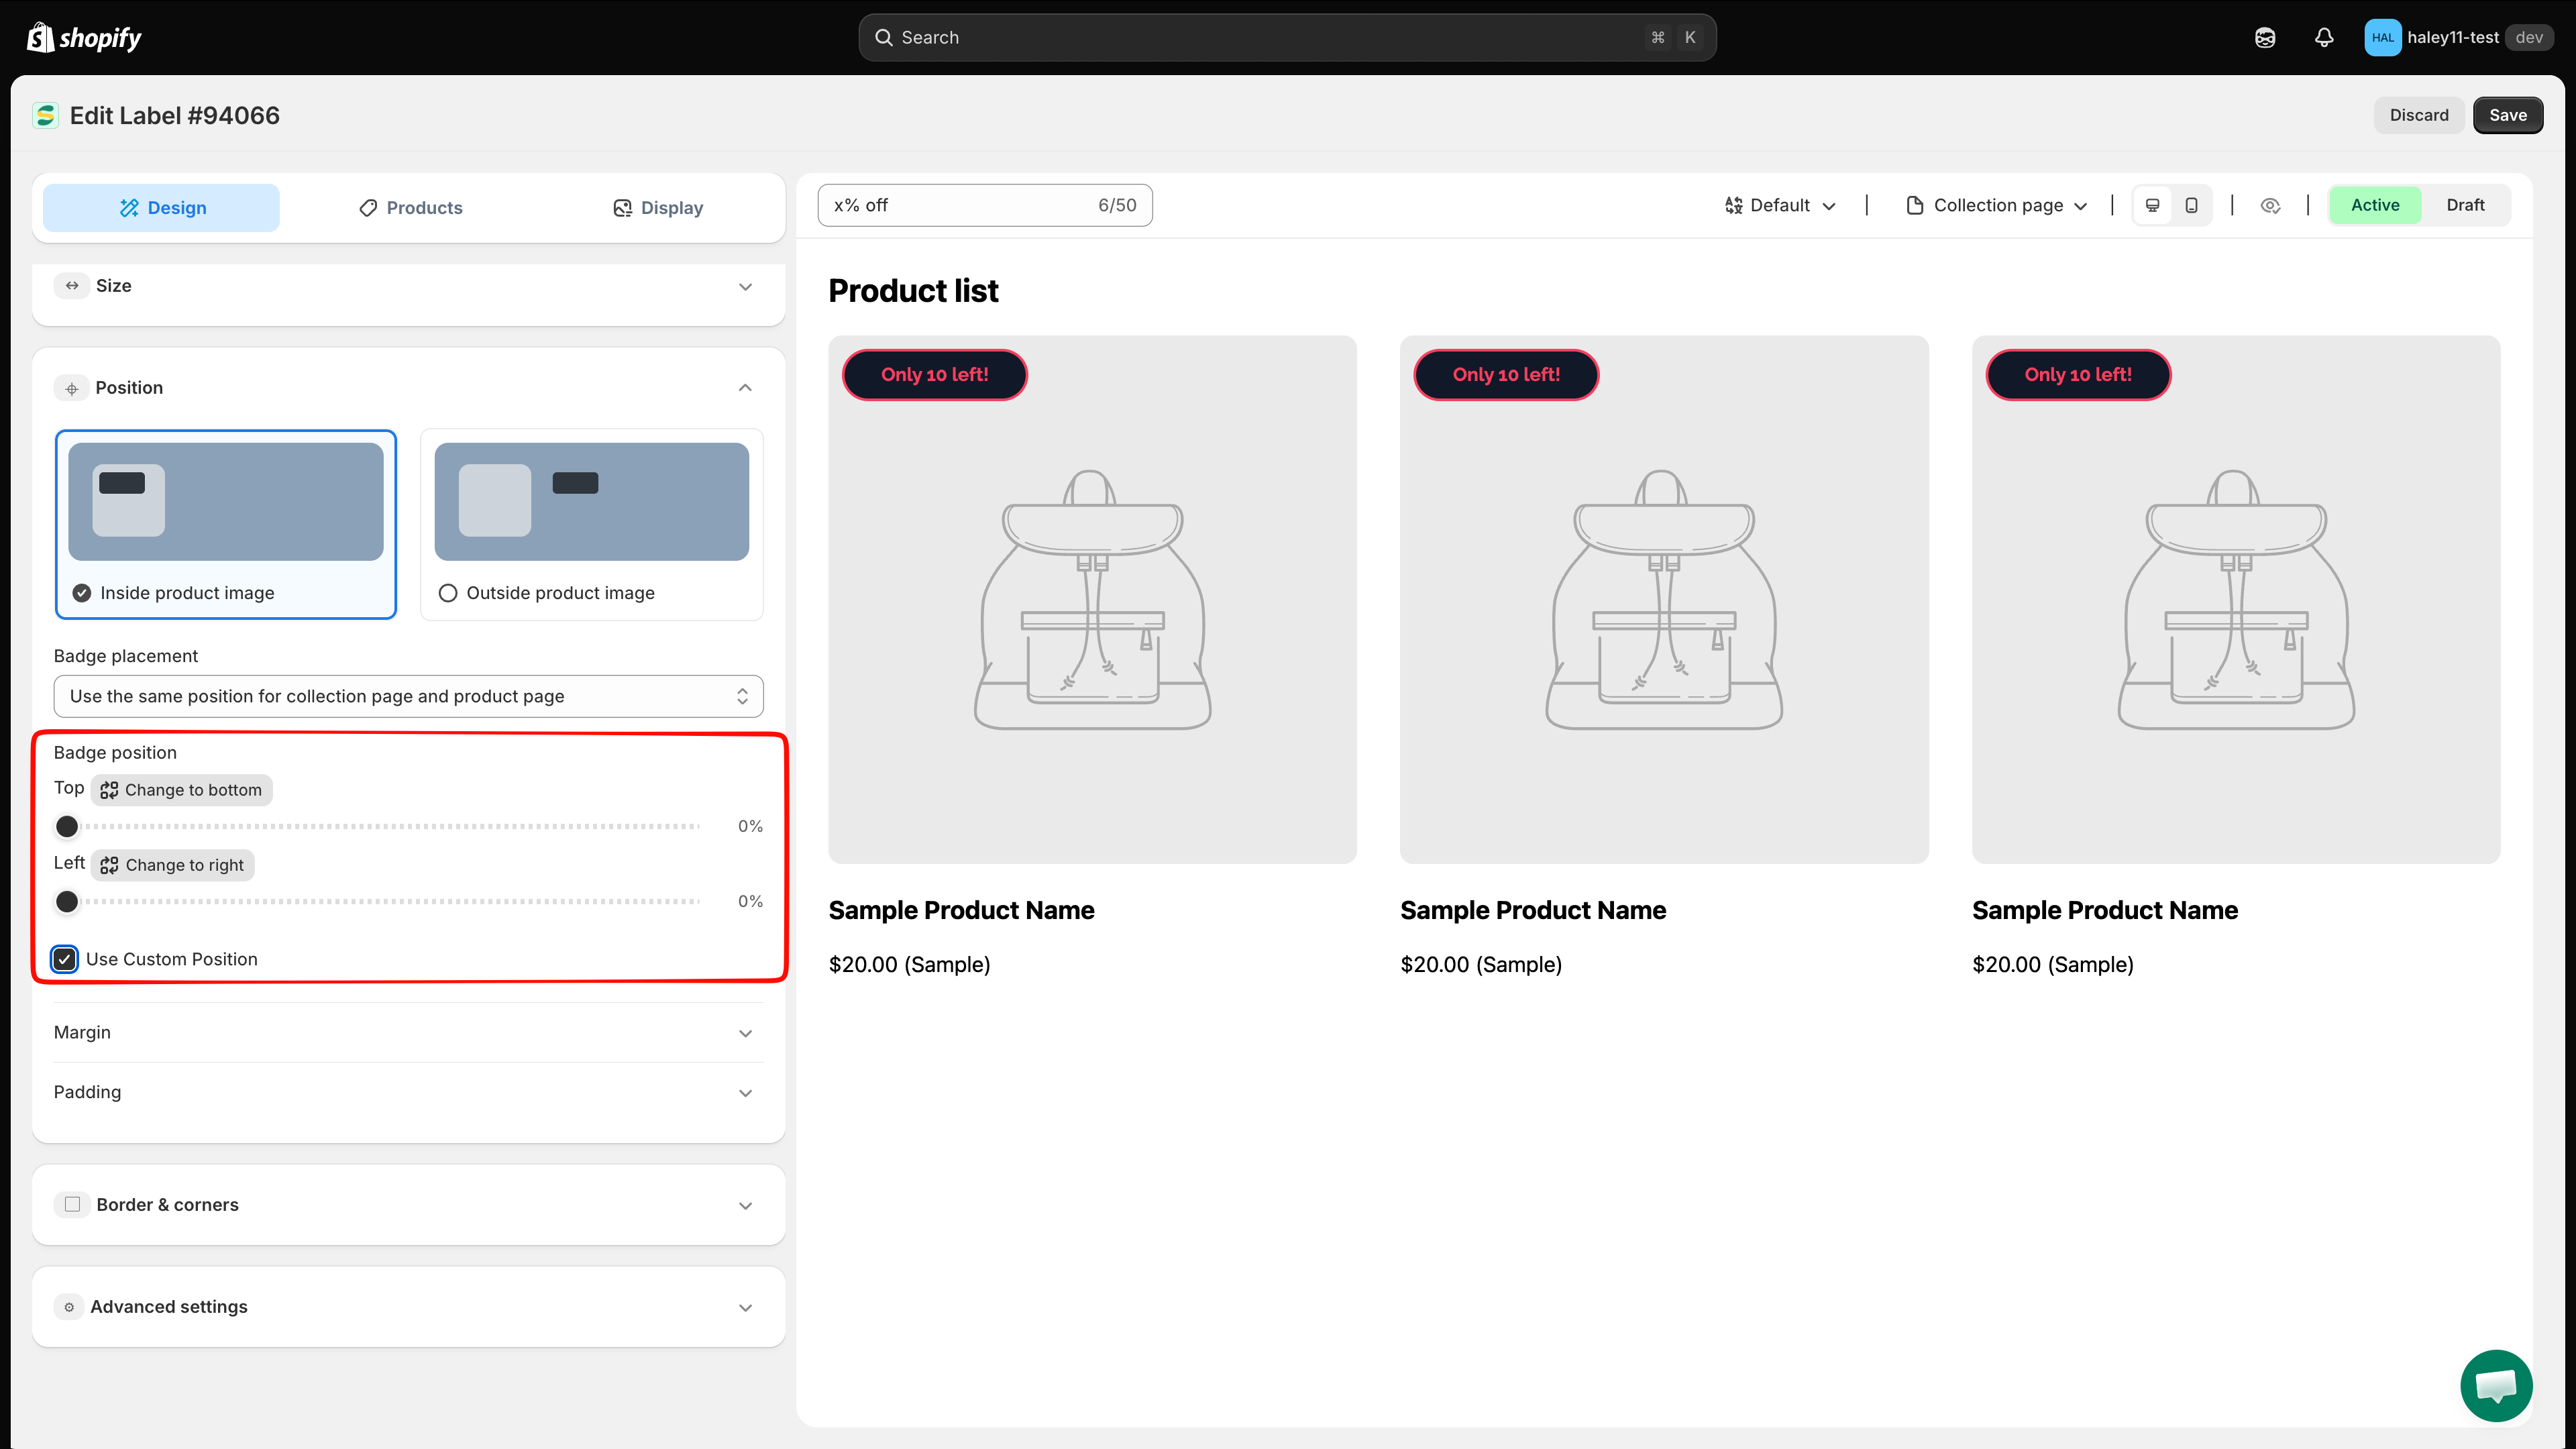
Turn on Use Custom Position when the nine presets are not precise enough. The editor replaces the grid with:
A vertical anchor: Top or Bottom.
A horizontal anchor: Left or Right.
A percentage slider for the offset from each selected anchor.
Use the change-position buttons to switch anchors, then adjust the sliders while checking the preview.

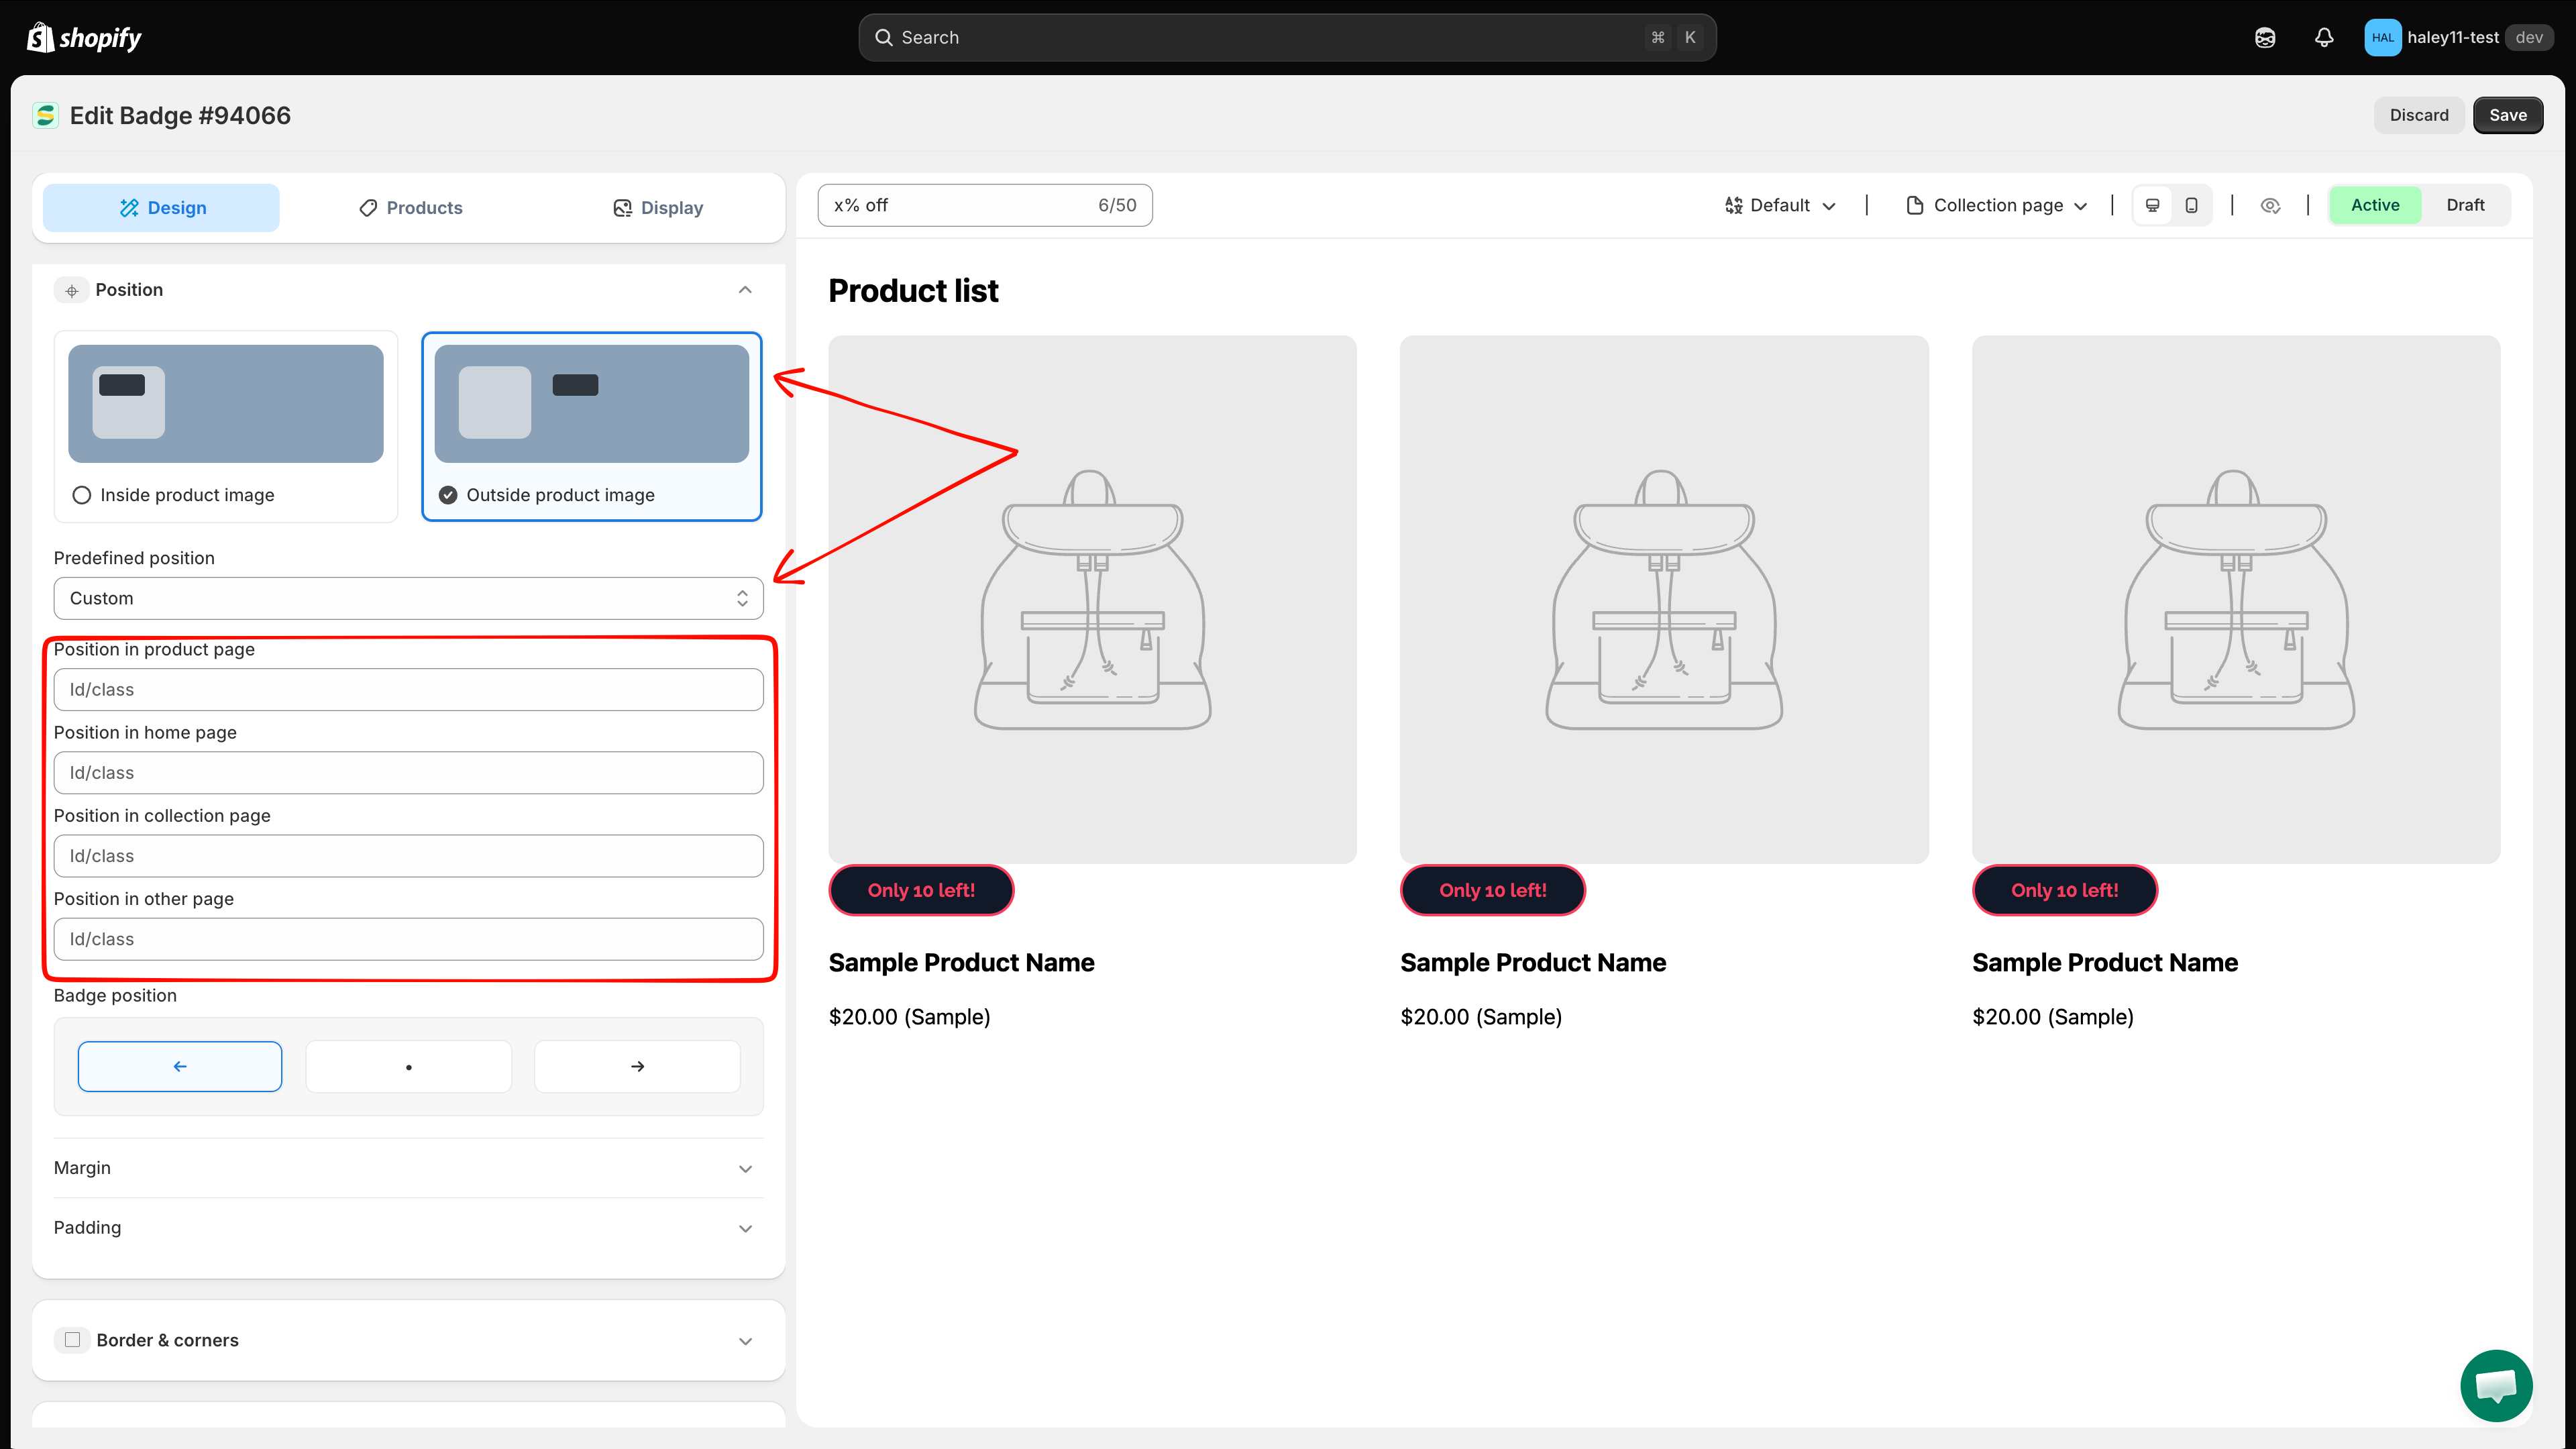
Place the badge outside the product image
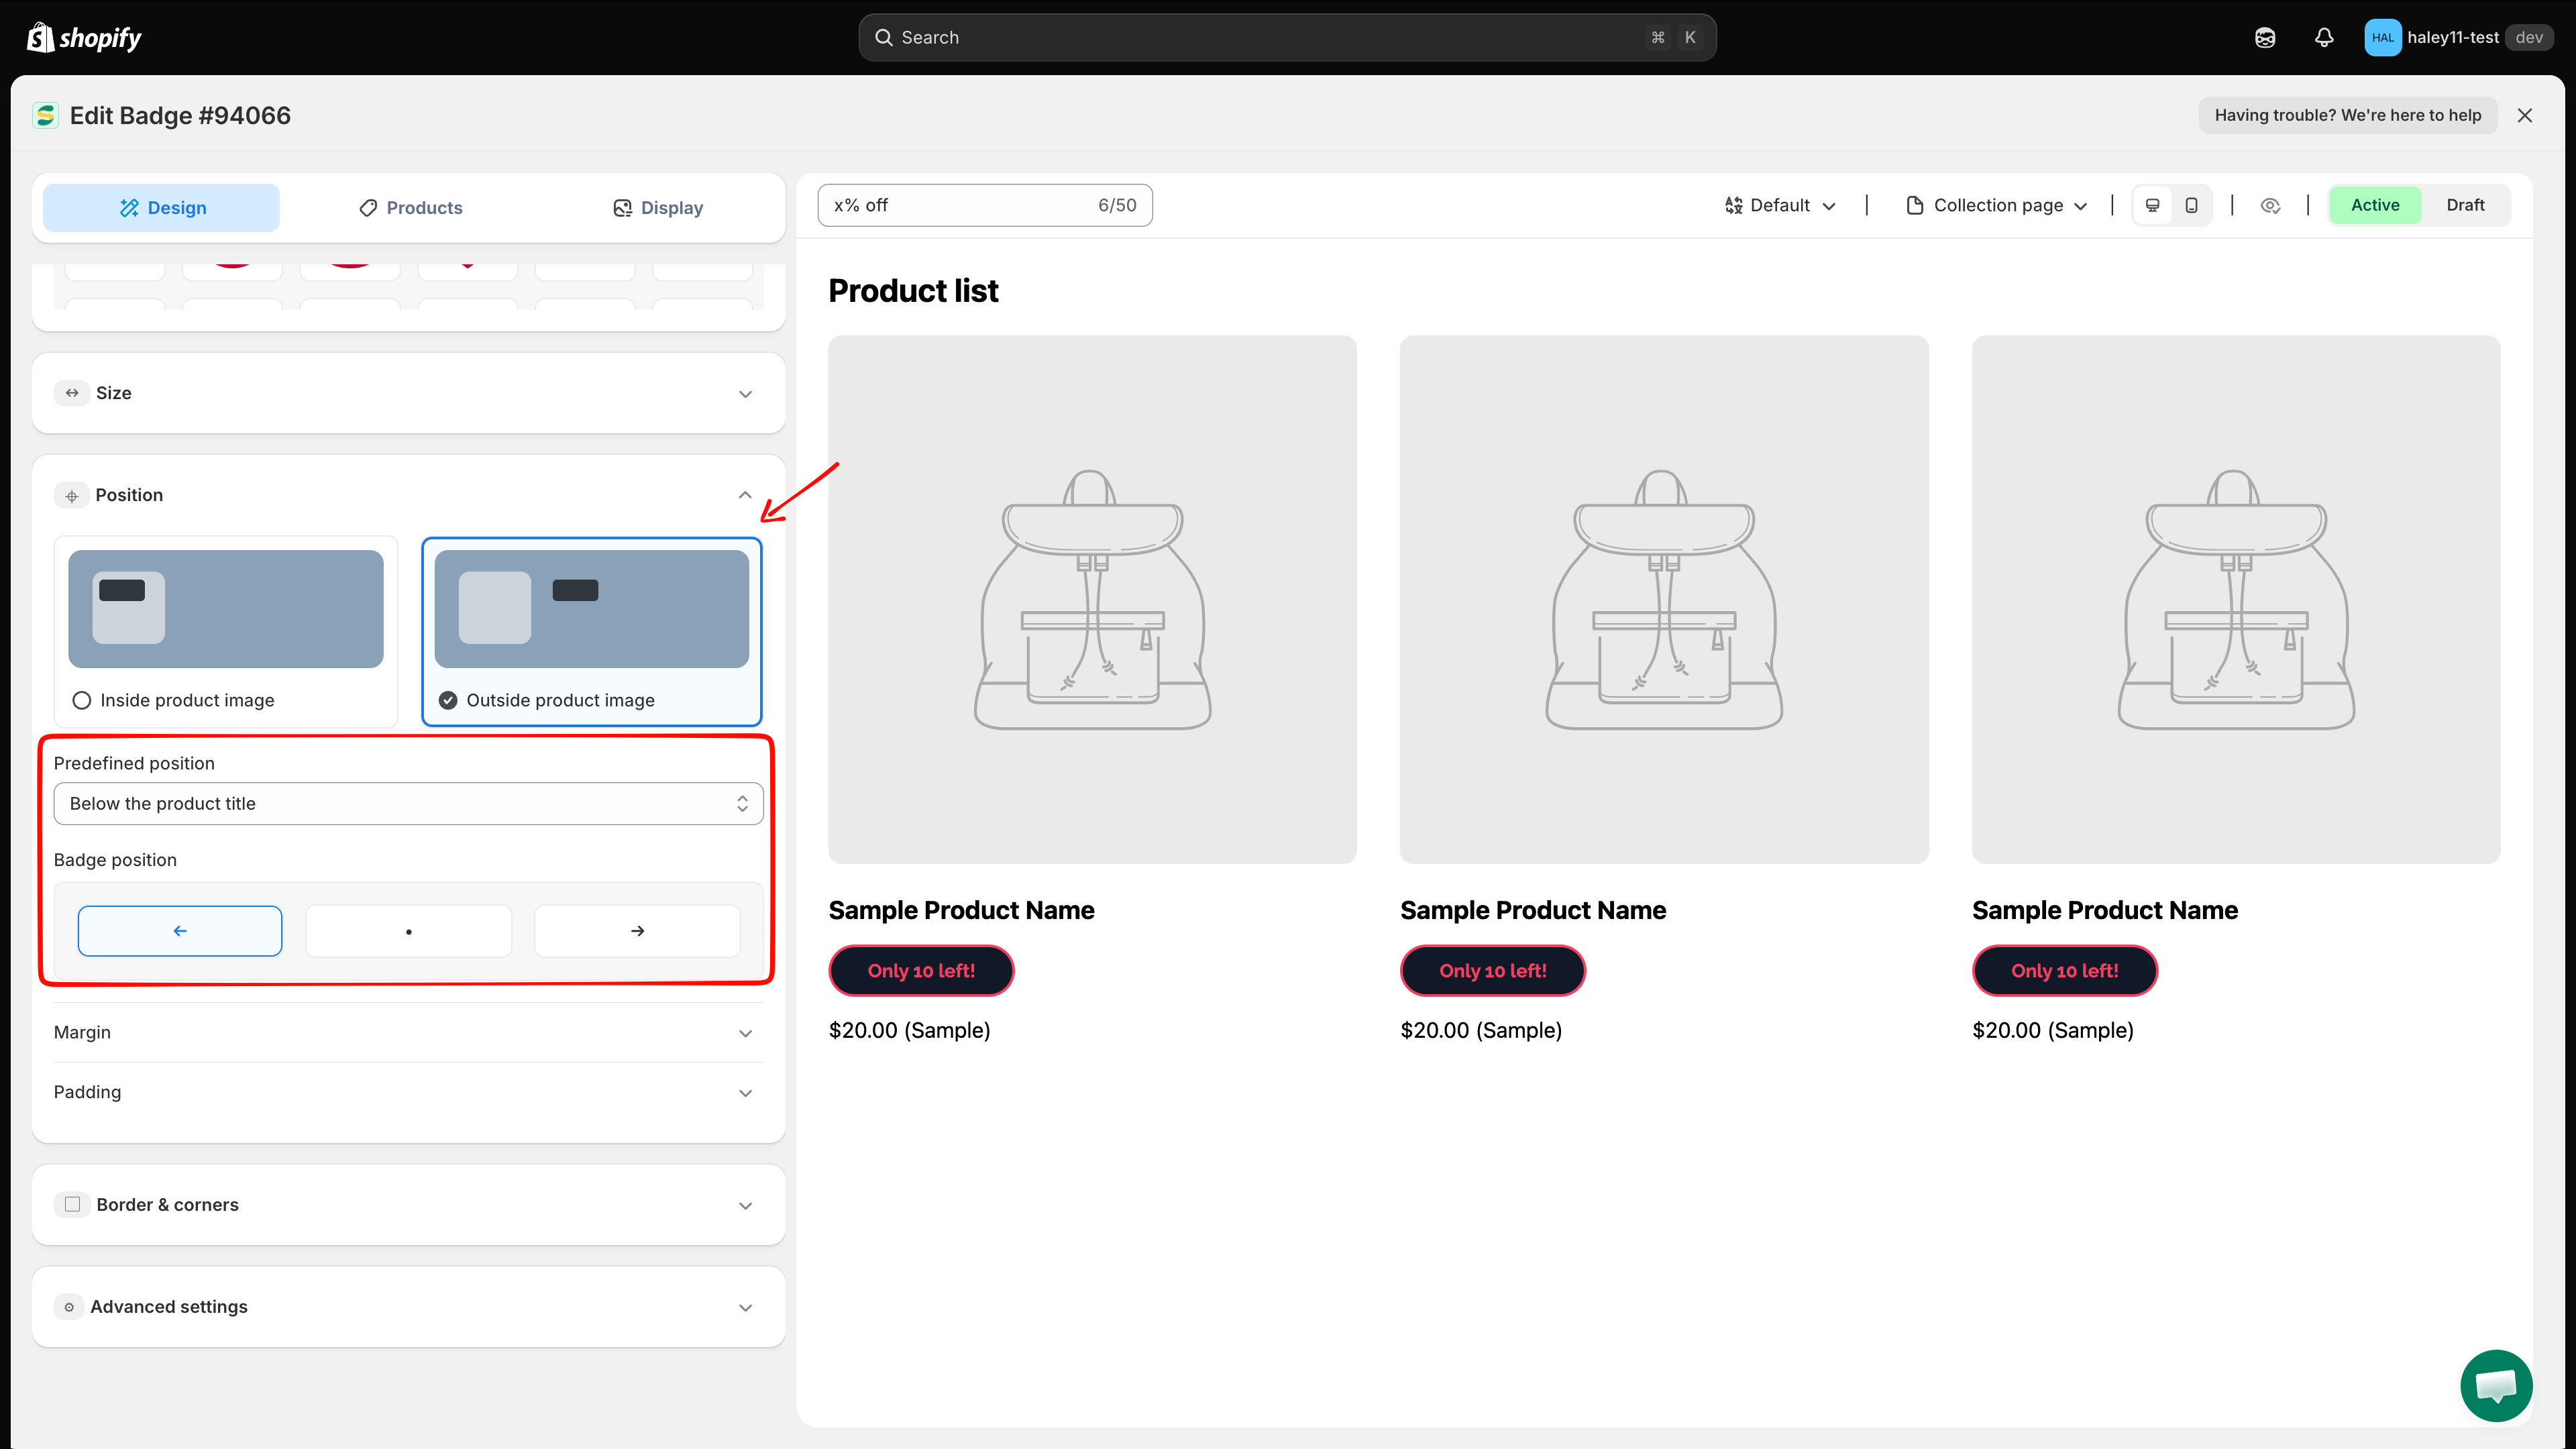
Select Outside product image when the badge should appear beside product information instead of overlaying the image.
Open Predefined position and choose one of these options:
Below the product image
Directly below the product image
Below the product title
Directly below the product title
Below the product price
Directly below the product price
Below the product quantity
Directly below the quantity control
Below the add to cart button
Directly below the add-to-cart button
Below the buy now button
Directly below the buy-now button
Custom
Next to an element identified by an ID or class in your theme
Under Badge position, choose left, center, or right alignment for the badge.

Place the badge with a theme selector
Choose Custom from Predefined position to target an element from your theme. Enter the relevant ID or class in any field you need:
Position in product page
Product pages
Position in home page
Home page
Position in collection page
Collection pages
Position in other page
Other page types
For example, enter .product-form for a class or #ProductInfo for an ID. Add a value for each page type where the badge needs this custom placement.
Theme IDs and classes vary. Inspect your storefront theme to find a stable selector, then verify the result on every page type where the badge should appear.

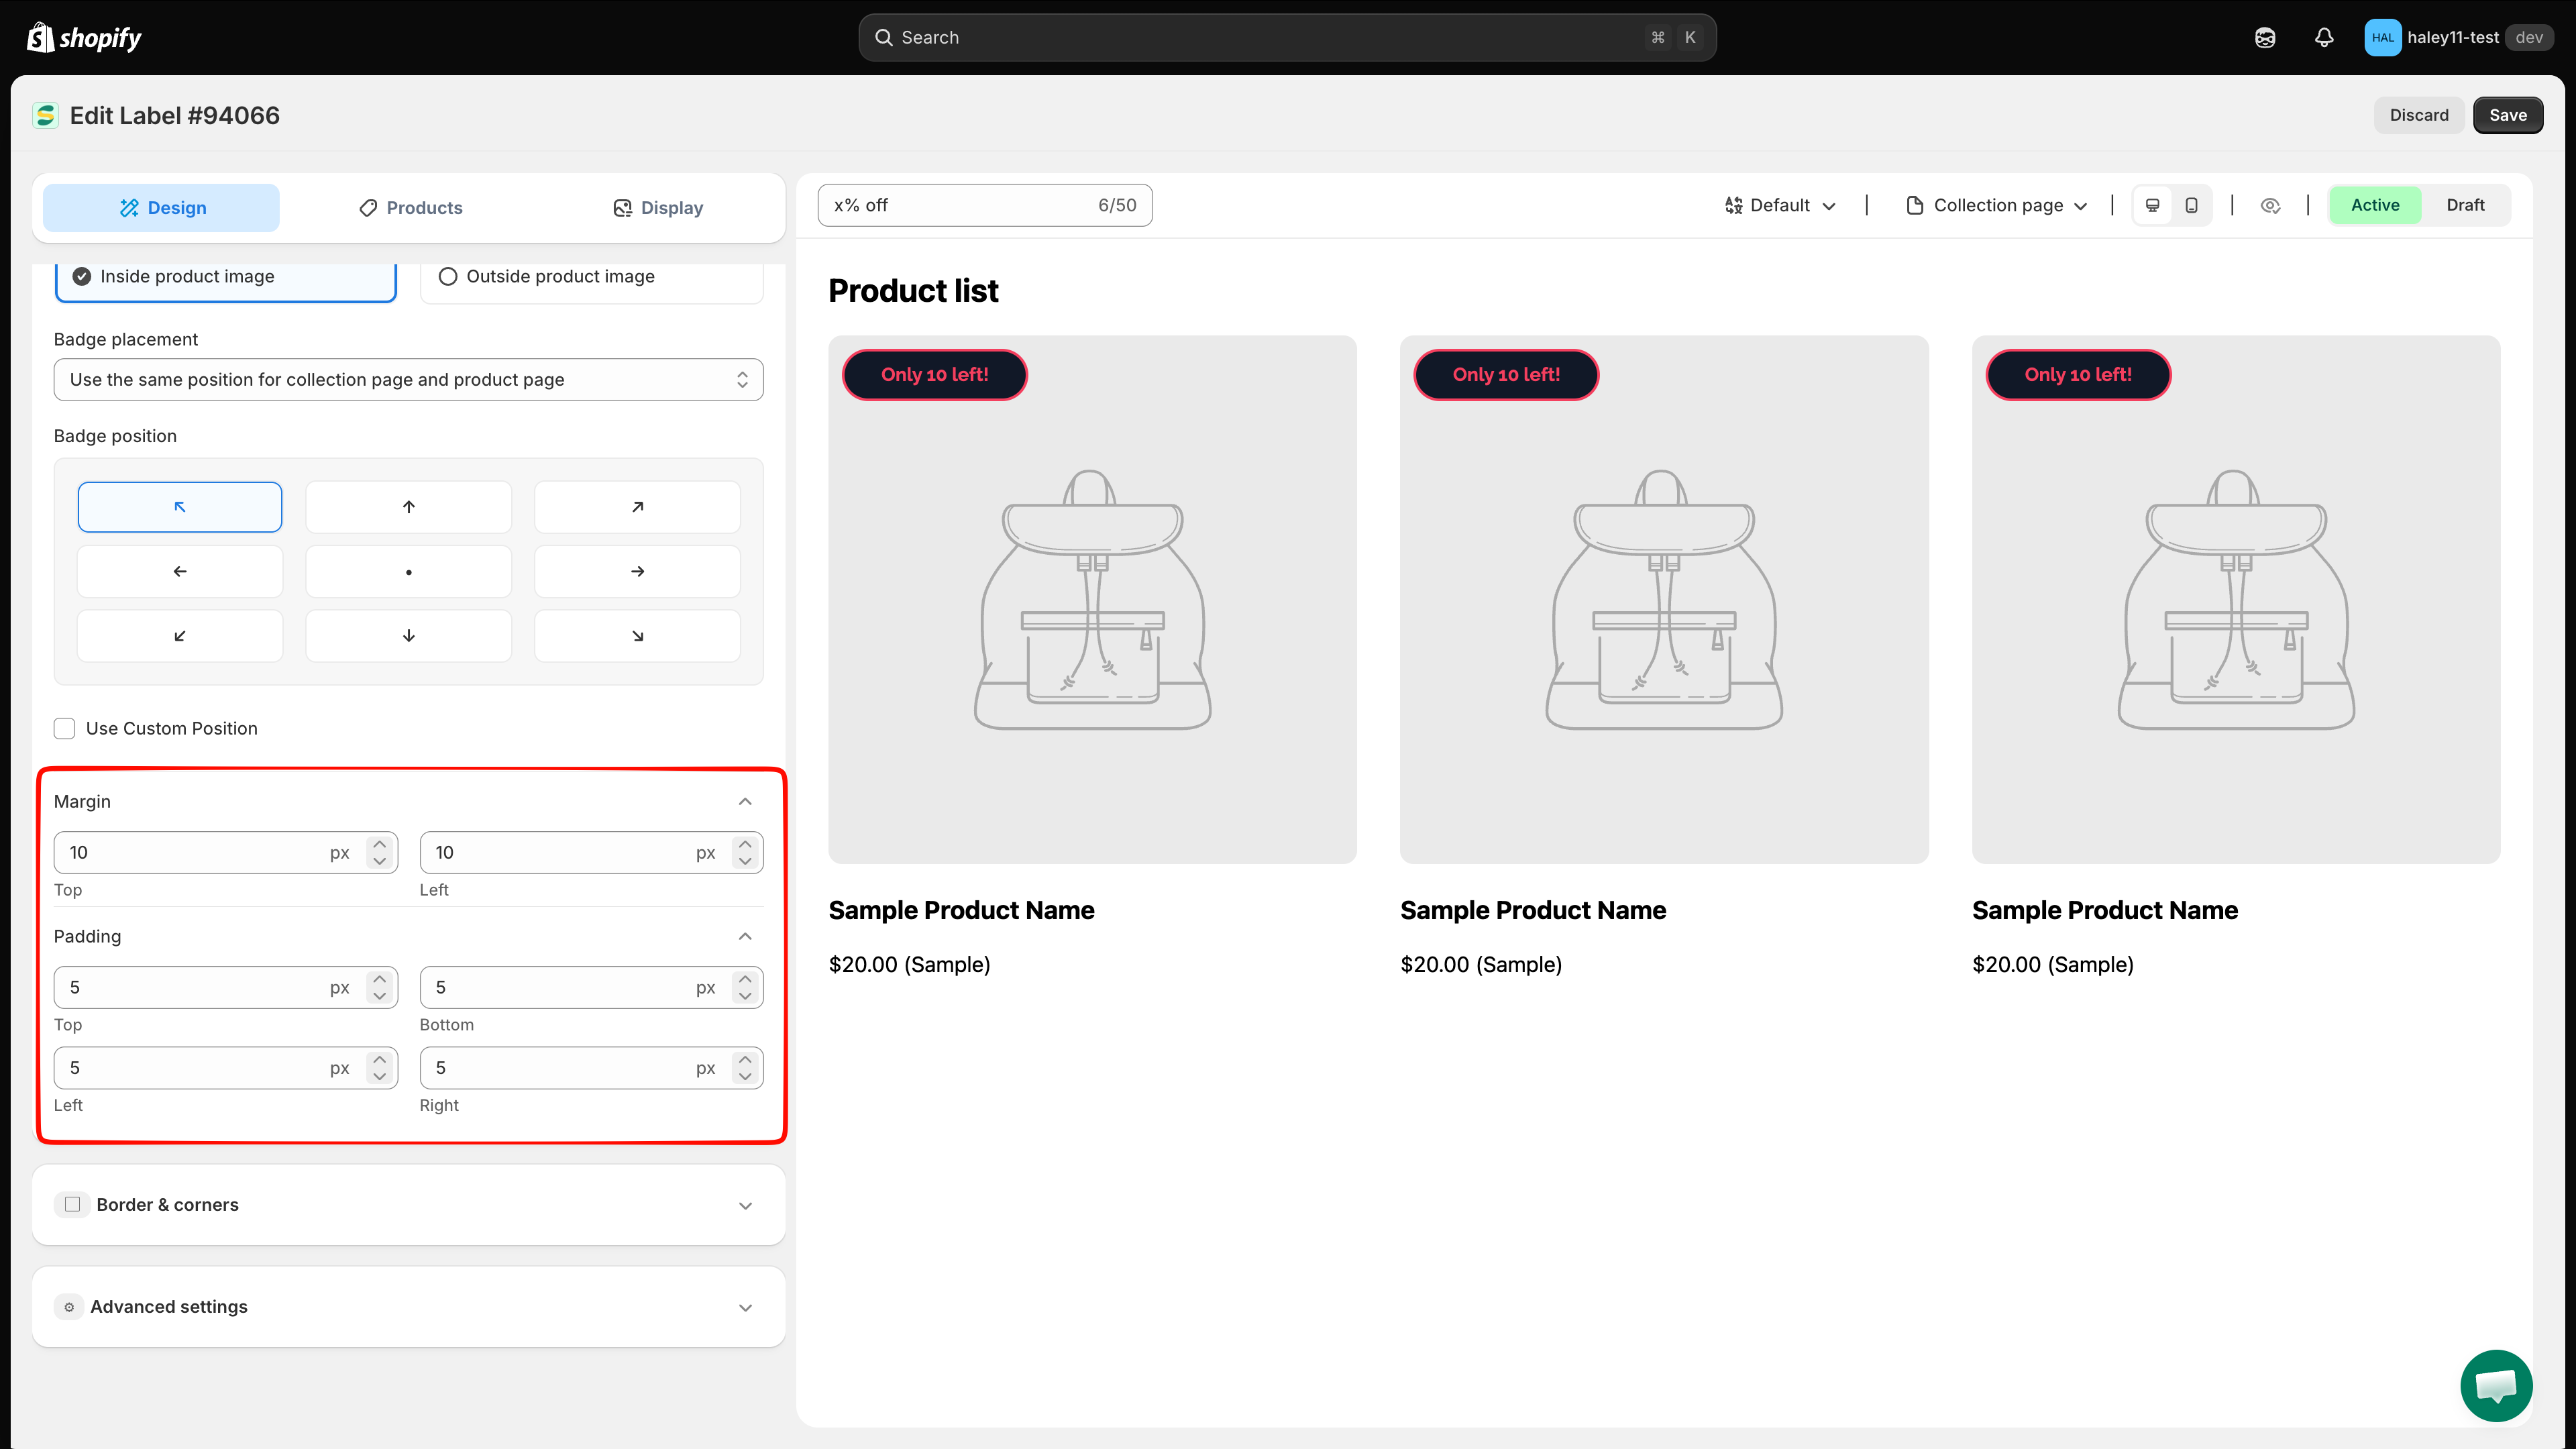
Adjust margin and padding
Expand Margin to change the outside spacing in pixels. The editor shows the sides relevant to the selected position.
Expand Padding to change the space between the badge content and its edges. You can set the top, bottom, left, and right values independently.

Preview and save
Use the preview controls to check Collection page and Product page, then switch between Desktop view and Mobile view. When the badge appears in the intended location, click Save.
Next steps
Change Badge Size — Resize the badge for different viewports and page types.
Change Badge Style — Customize fonts, colors, borders, and backgrounds.
Display by Device & Page — Control which devices and pages show the badge.
Need support?
If you run into any difficulty while following these steps, contact us at support@samita.io.
Last updated
Was this helpful?