> For the complete documentation index, see [llms.txt](https://docs.samita.io/llms.txt). Markdown versions of documentation pages are available by appending `.md` to page URLs; this page is available as [Markdown](https://docs.samita.io/badges-and-labels/create-image-badge.md).

# Create an image badge

Step-by-step guide to creating an image badge using the library, your own upload, or AI generation.

Image badges display a graphic on your product images instead of text. Pick from a library of pre-designed badges, upload your own image, or generate one with AI.

{% stepper %}
{% step %}

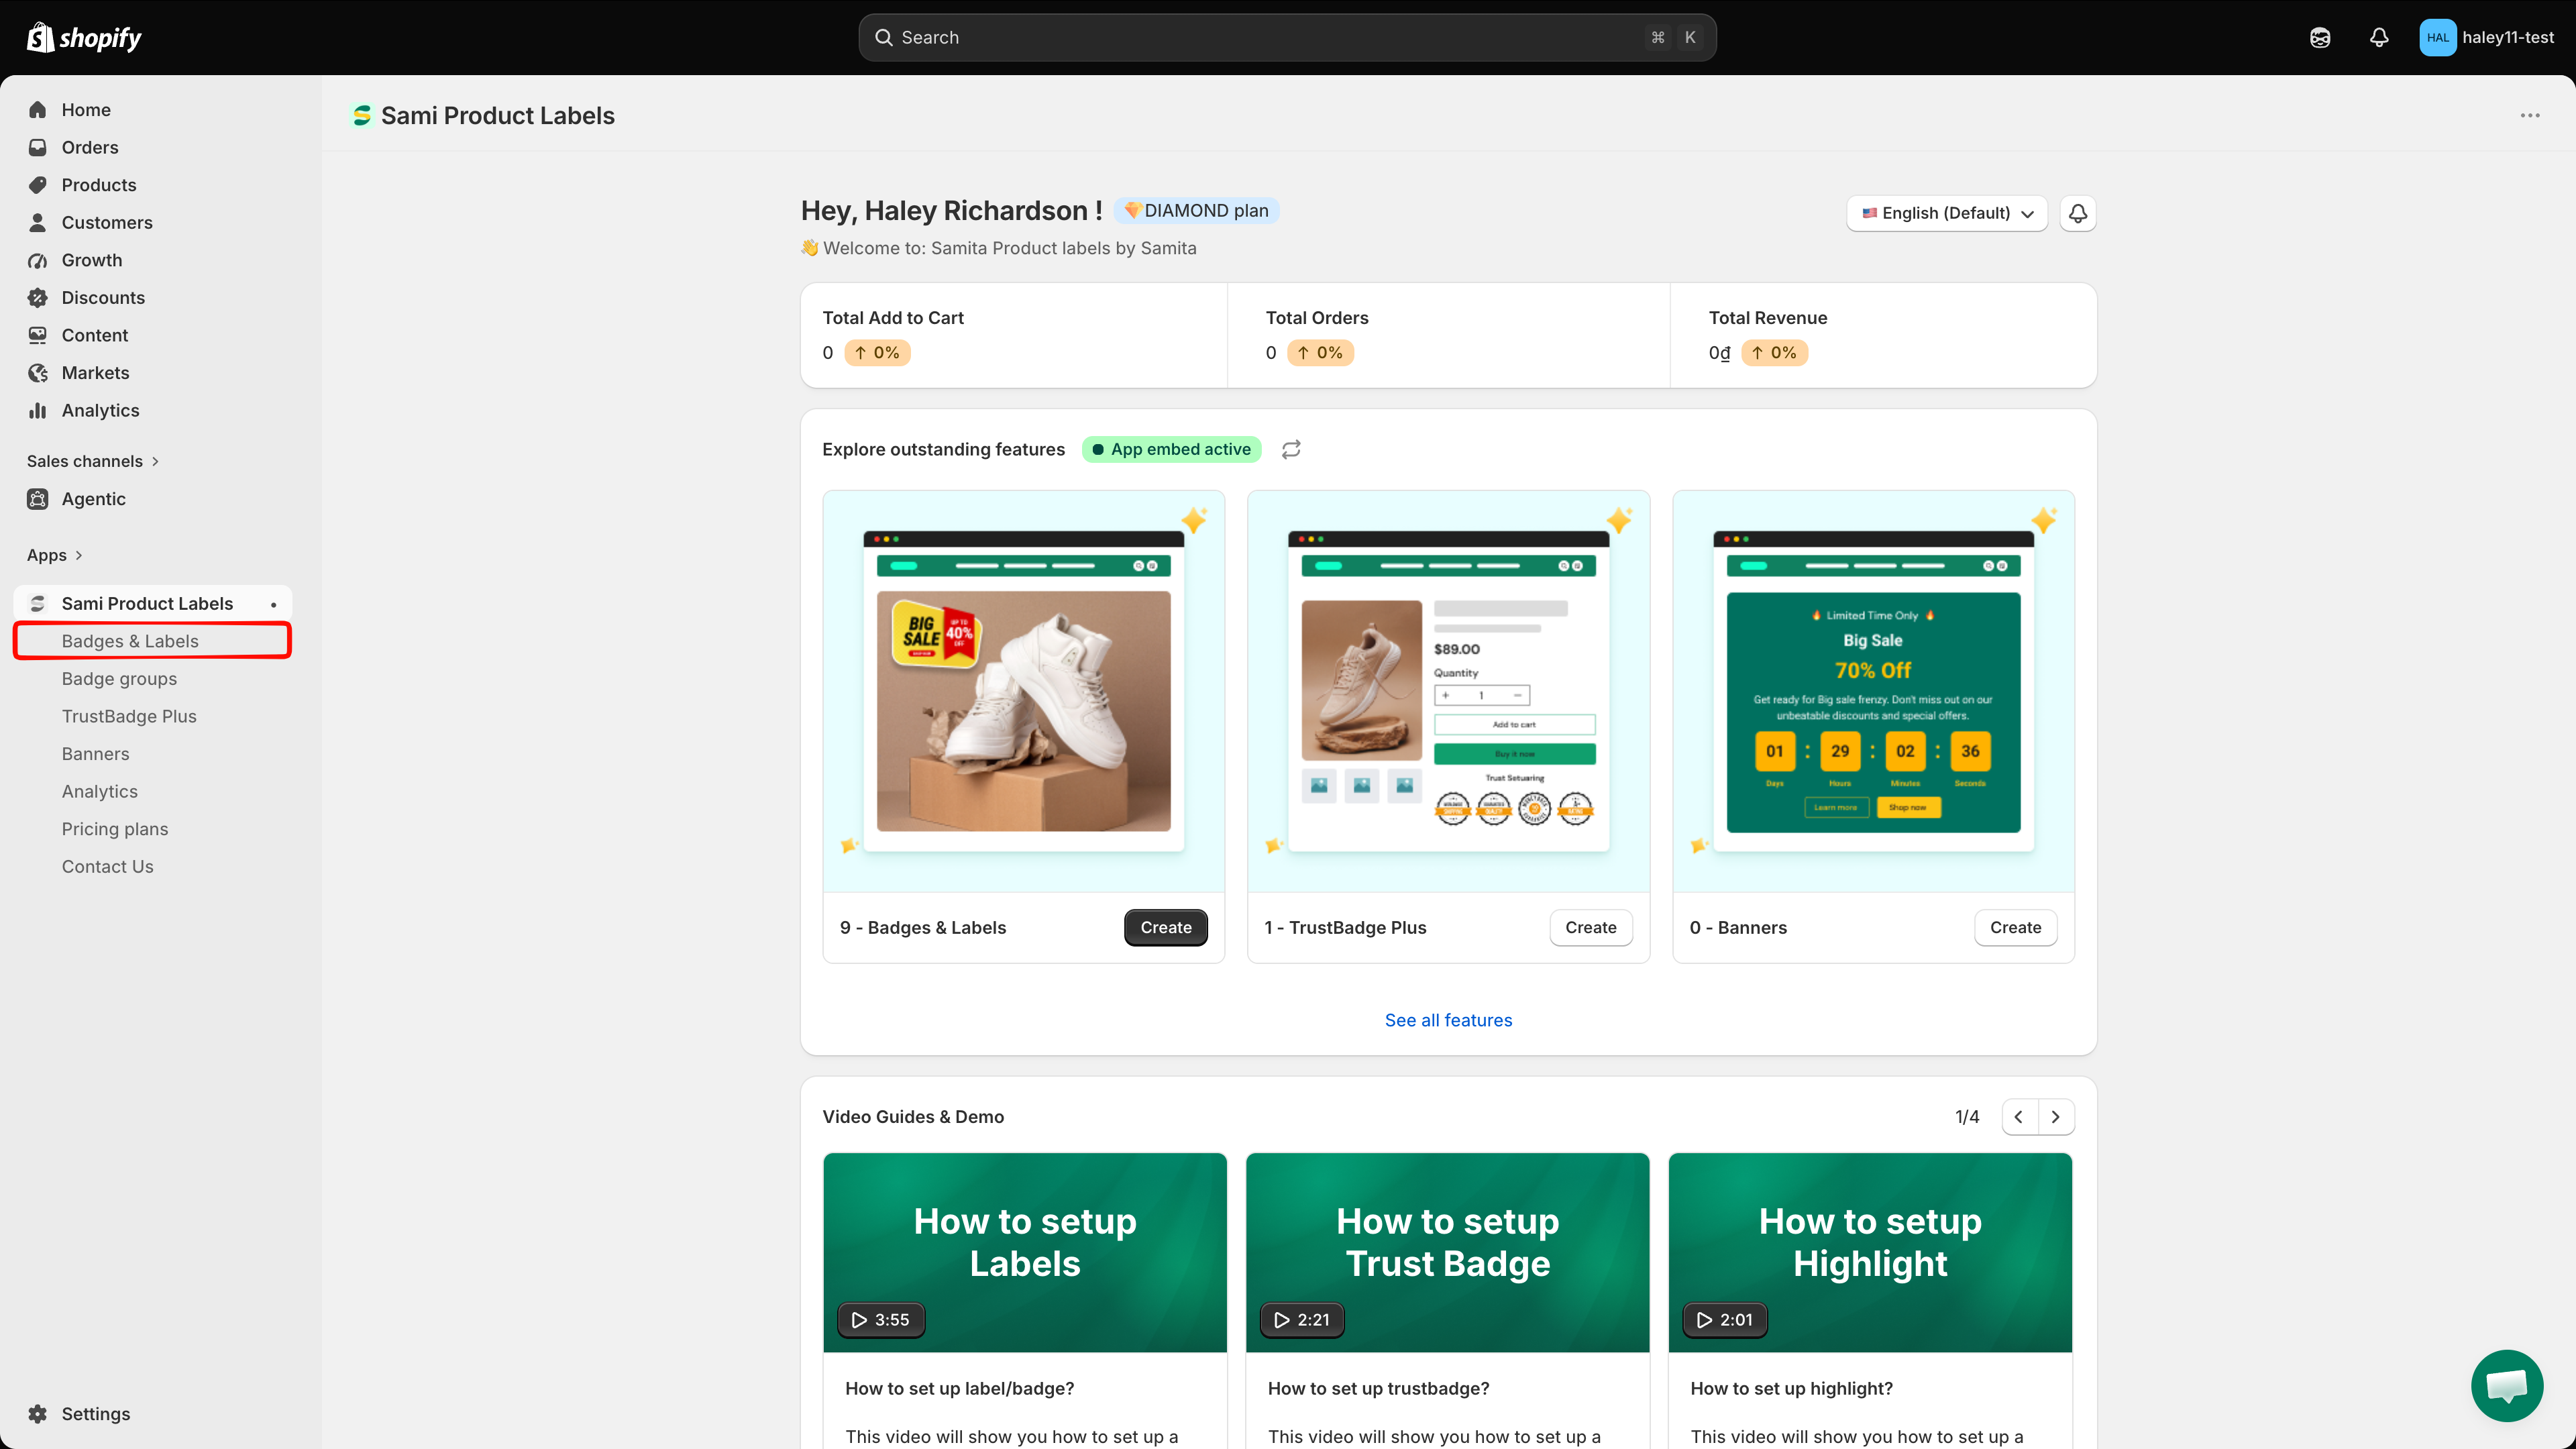
## Go to Badges & Labels

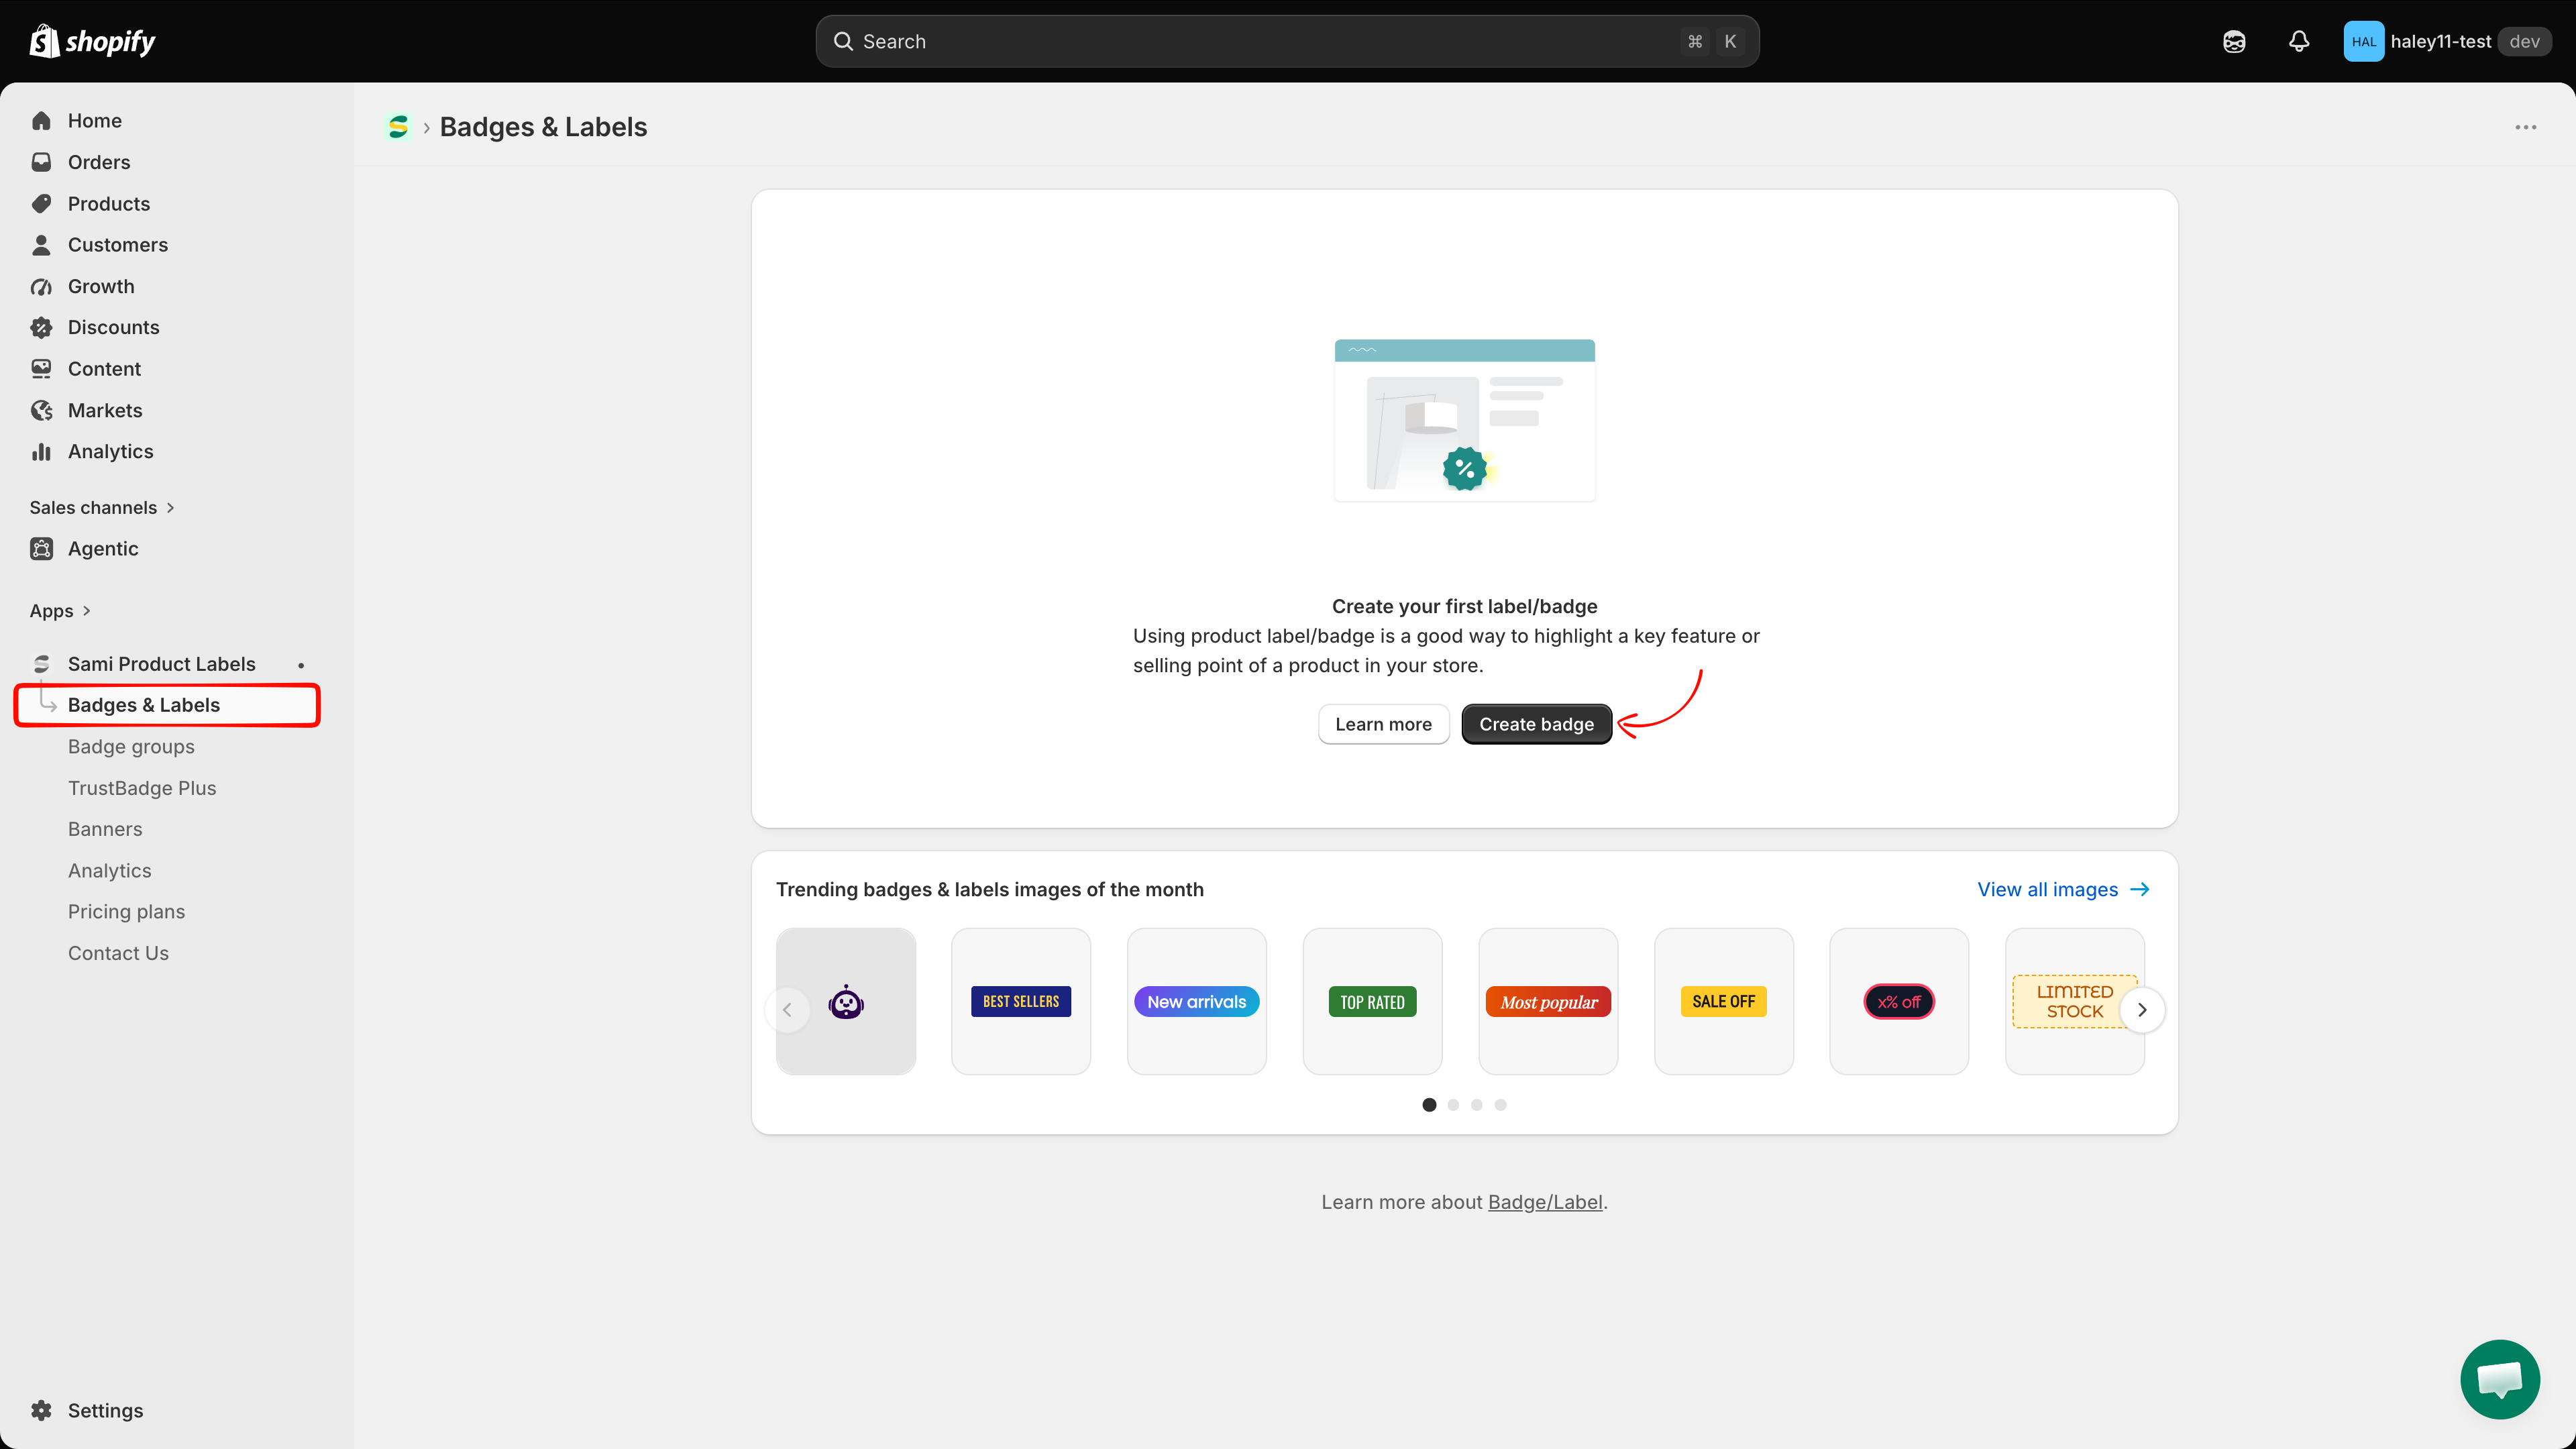
In the Sami Product Labels navigation, click **Badges & Labels** to open the badges list page.

<figure><img src="https://1598842017-files.gitbook.io/~/files/v0/b/gitbook-x-prod.appspot.com/o/spaces%2F1WRTlT5AcaLSAedbCJyZ%2Fuploads%2Fgit-blob-6e2860856e5914a5e4877ccb54bcd567c005afe7%2Fimage_10.png?alt=media" alt="Sidebar with Badges and Labels highlighted"><figcaption><p>Select Badges &#x26; Labels from the sidebar navigation.</p></figcaption></figure>
{% endstep %}

{% step %}

## Start a new badge

If the list is empty, click **Add a new label/badge**. If you already have badges, click **Create badge**.

<figure><img src="https://1598842017-files.gitbook.io/~/files/v0/b/gitbook-x-prod.appspot.com/o/spaces%2F1WRTlT5AcaLSAedbCJyZ%2Fuploads%2Fgit-blob-6d76efb43d54d741fa188b39333b1820d1986eed%2Fimage_187.png?alt=media" alt="Create button on the badges list page"><figcaption><p>Click Create to start building a new badge.</p></figcaption></figure>
{% endstep %}

{% step %}

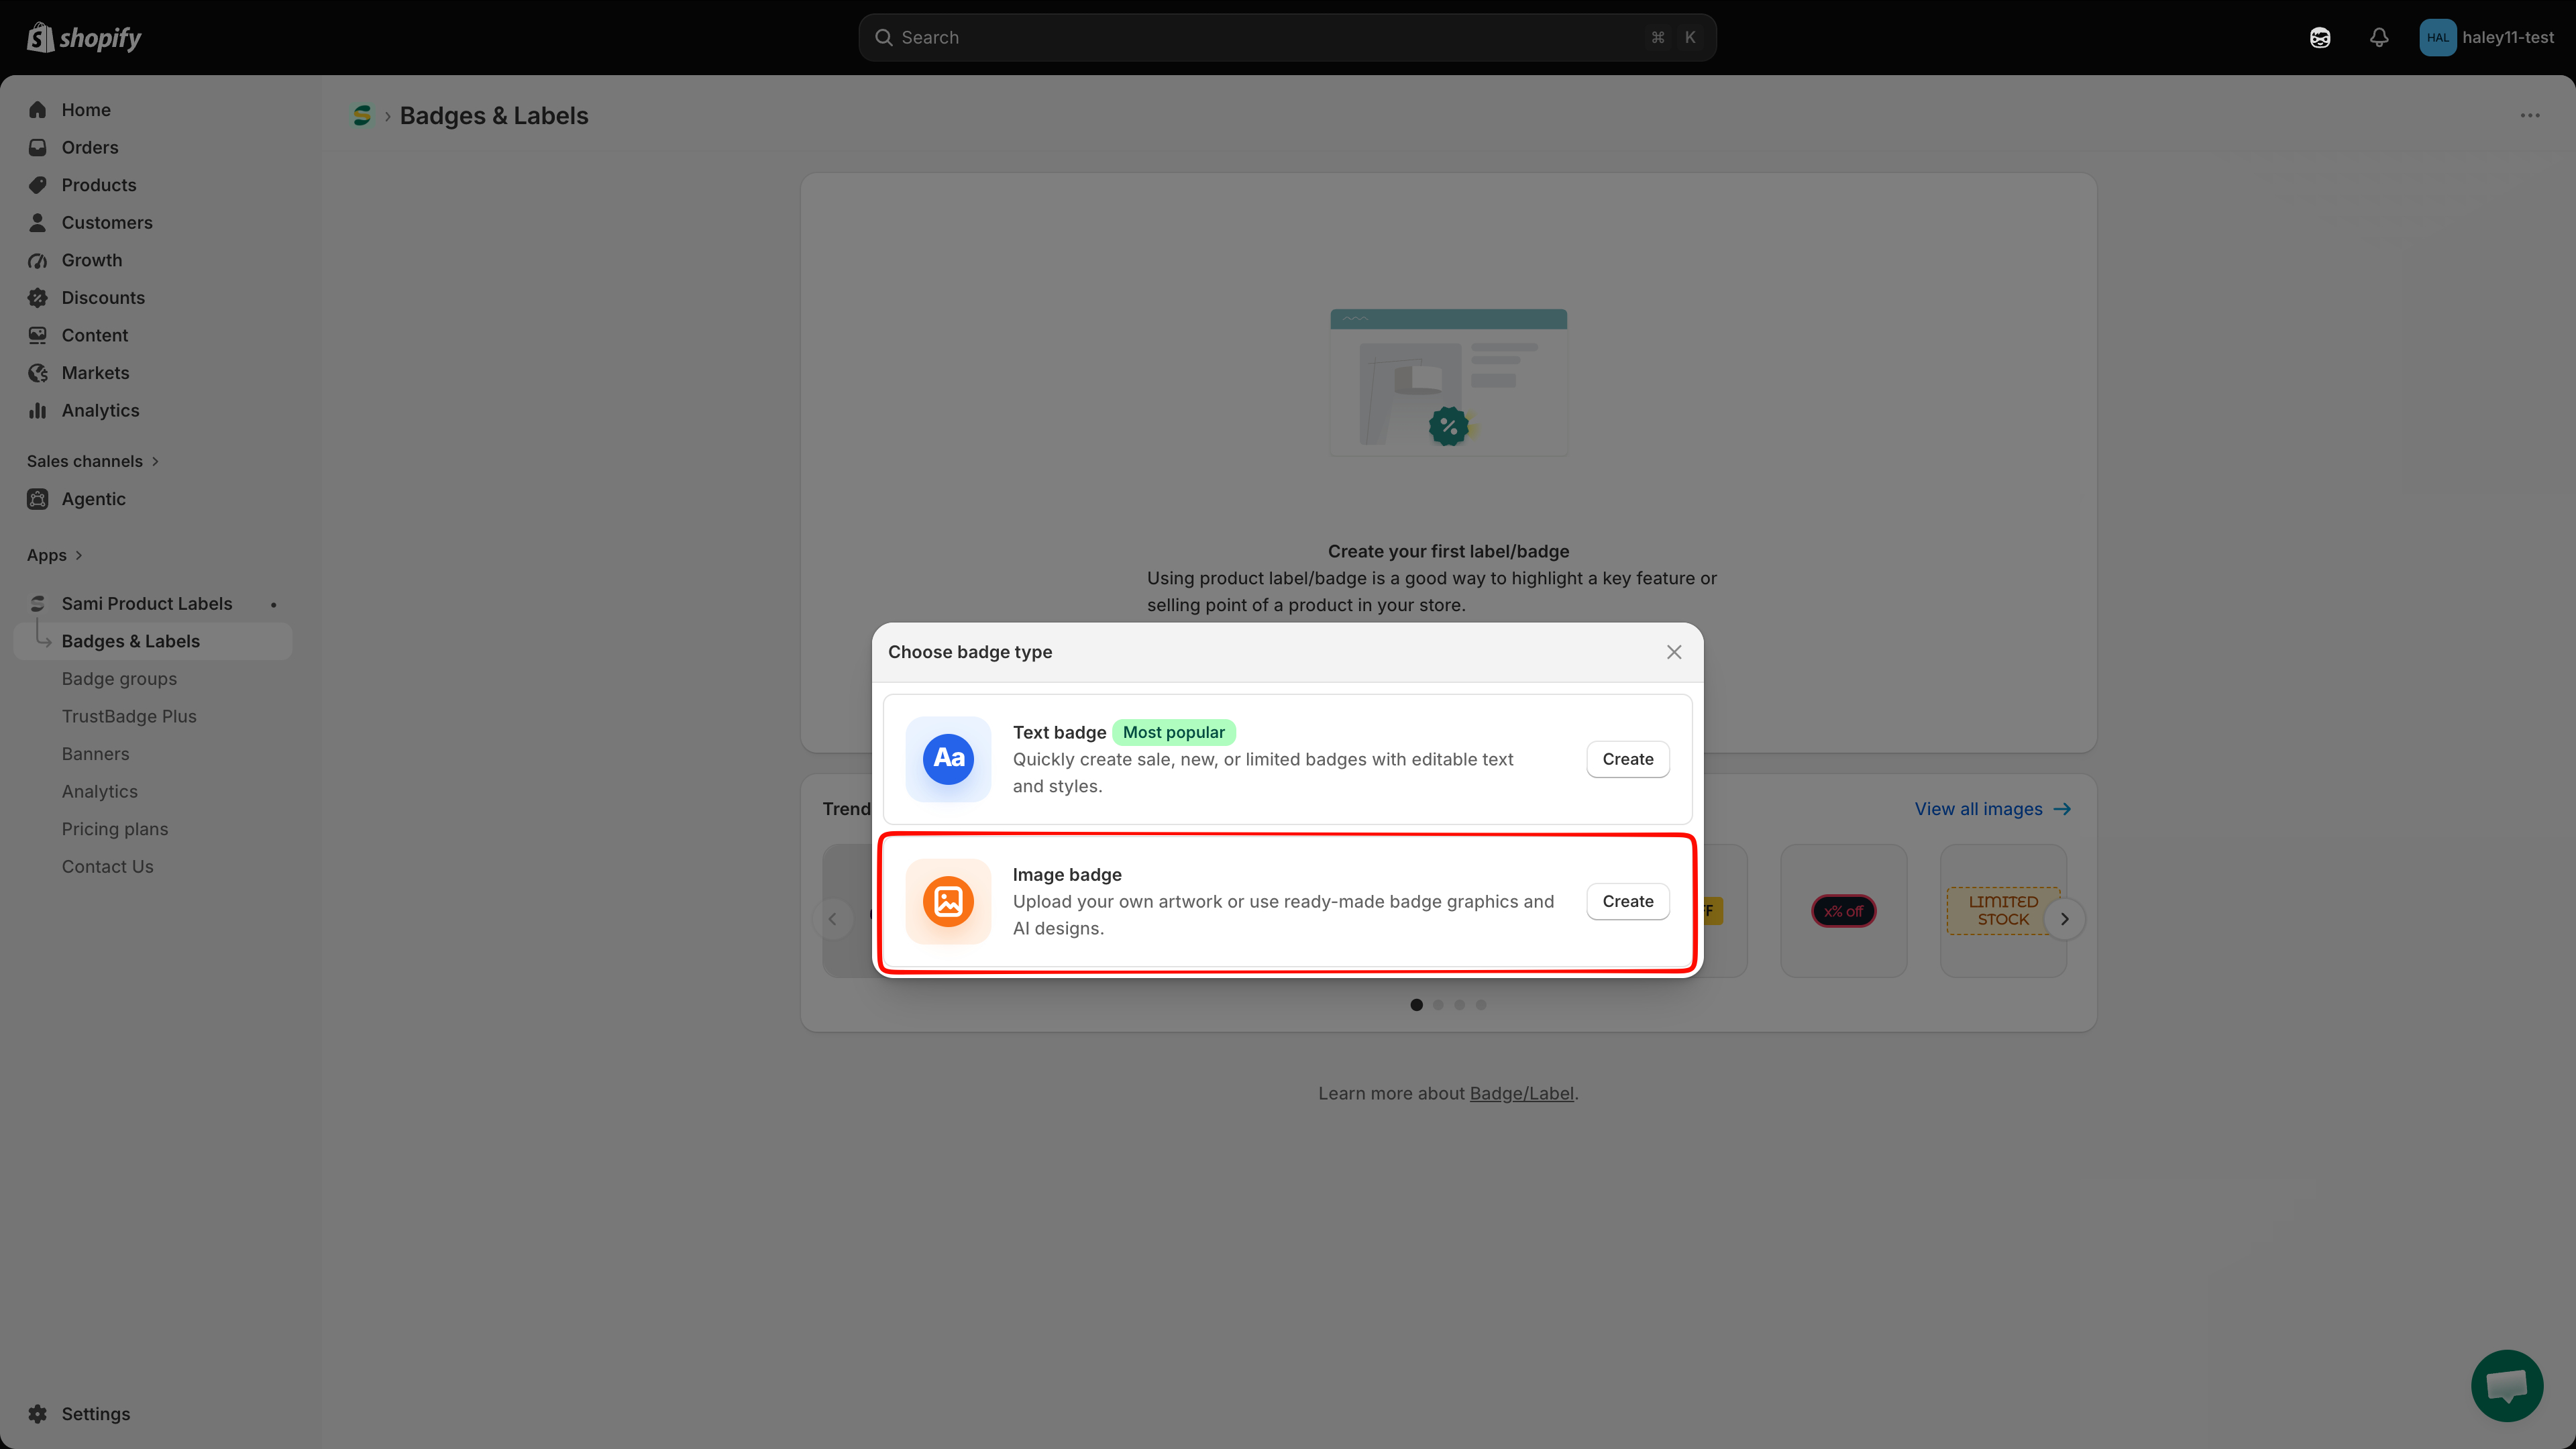
## Select "Image badge"

In **Choose badge type**, find **Image badge** and click **Create**.

<figure><img src="https://1598842017-files.gitbook.io/~/files/v0/b/gitbook-x-prod.appspot.com/o/spaces%2F1WRTlT5AcaLSAedbCJyZ%2Fuploads%2Fgit-blob-5b6f2838adc415745dd0c92494d1460f42fcbf36%2Fimage_11.png?alt=media" alt="Badge type selection with Image option"><figcaption><p>Choose Image to create an image-based badge.</p></figcaption></figure>
{% endstep %}

{% step %}

## Choose an image

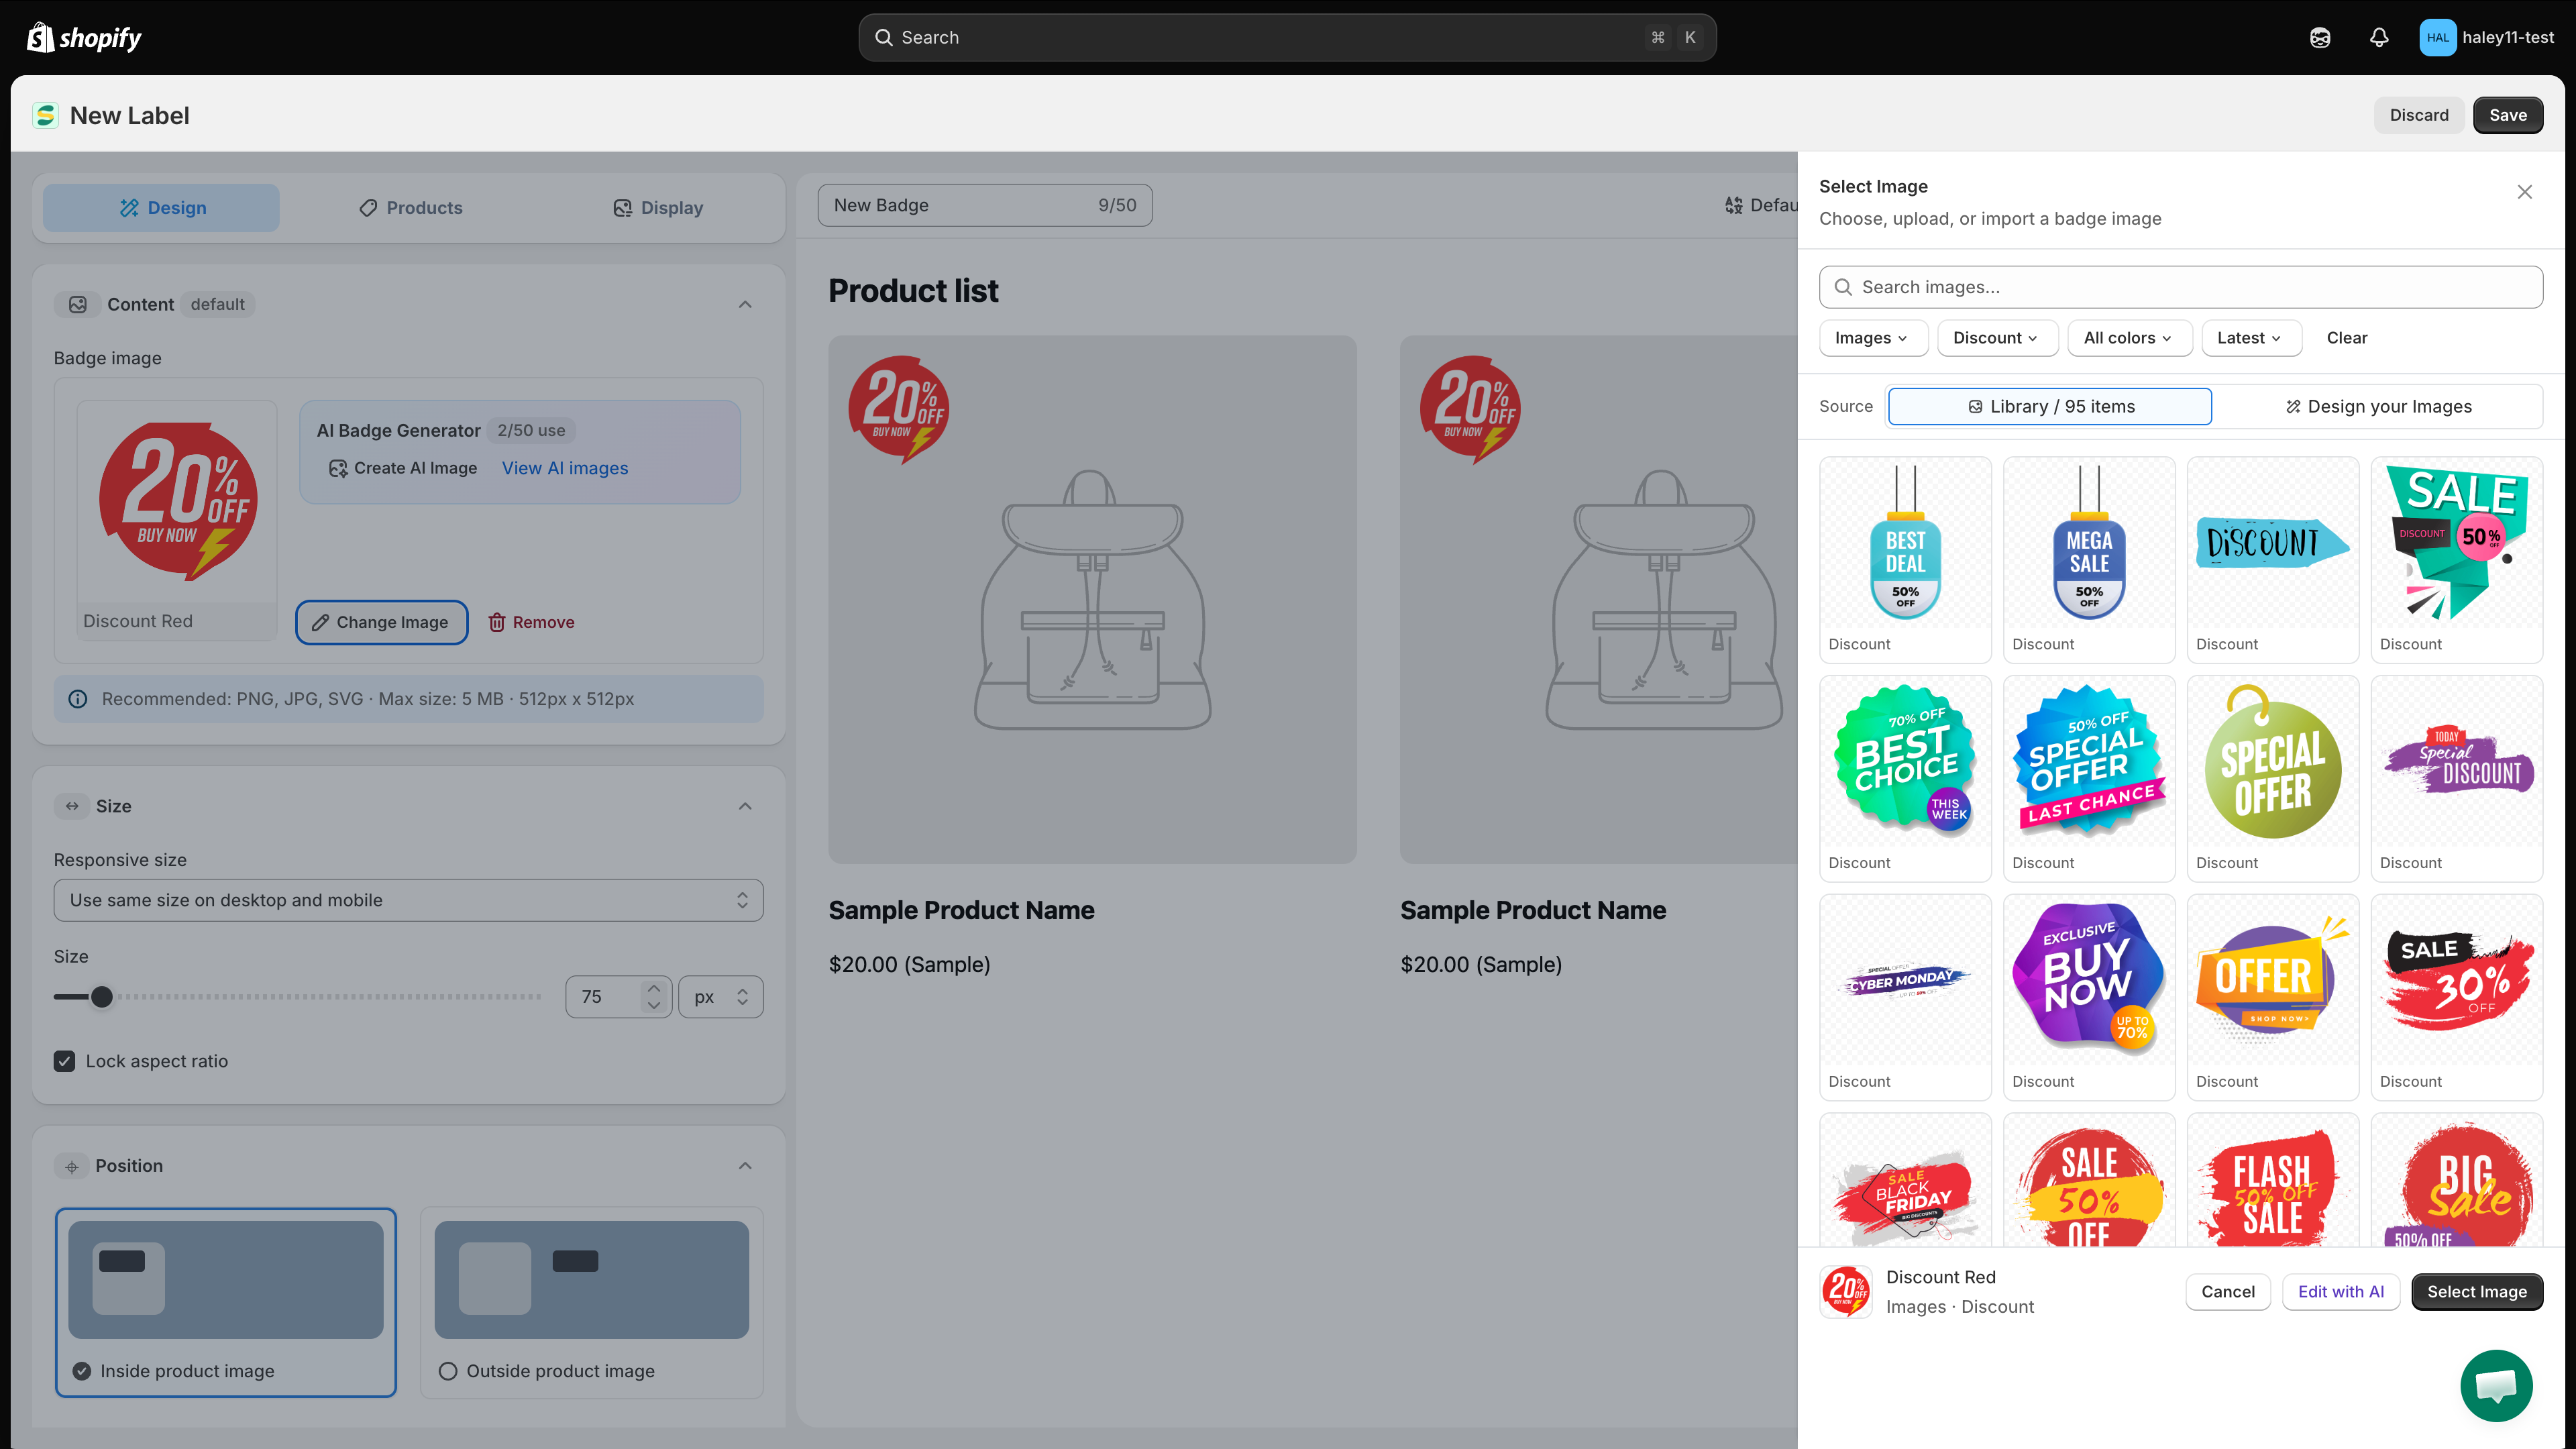
The **Select Image** dialog lets you choose, upload, or import a badge image:

**Browse the image library**

Use **Library** to browse pre-designed images. Search by name, filter by image type, category, or color, and change the sort order. Select an image, then click **Select Image** to apply it to the badge.

**Upload your own image**

Open **Design your Images** to use your own artwork: click **Upload image** to pick a file from your computer, or **Upload from URL** to import a direct image link. The editor recommends PNG, JPG, or SVG files up to 5 MB and 512 × 512 px. A transparent PNG usually works best on product images. See [Upload your own badge image](/badges-and-labels/upload-badge-image.md) for the detailed steps.

**Create or reuse an AI image**

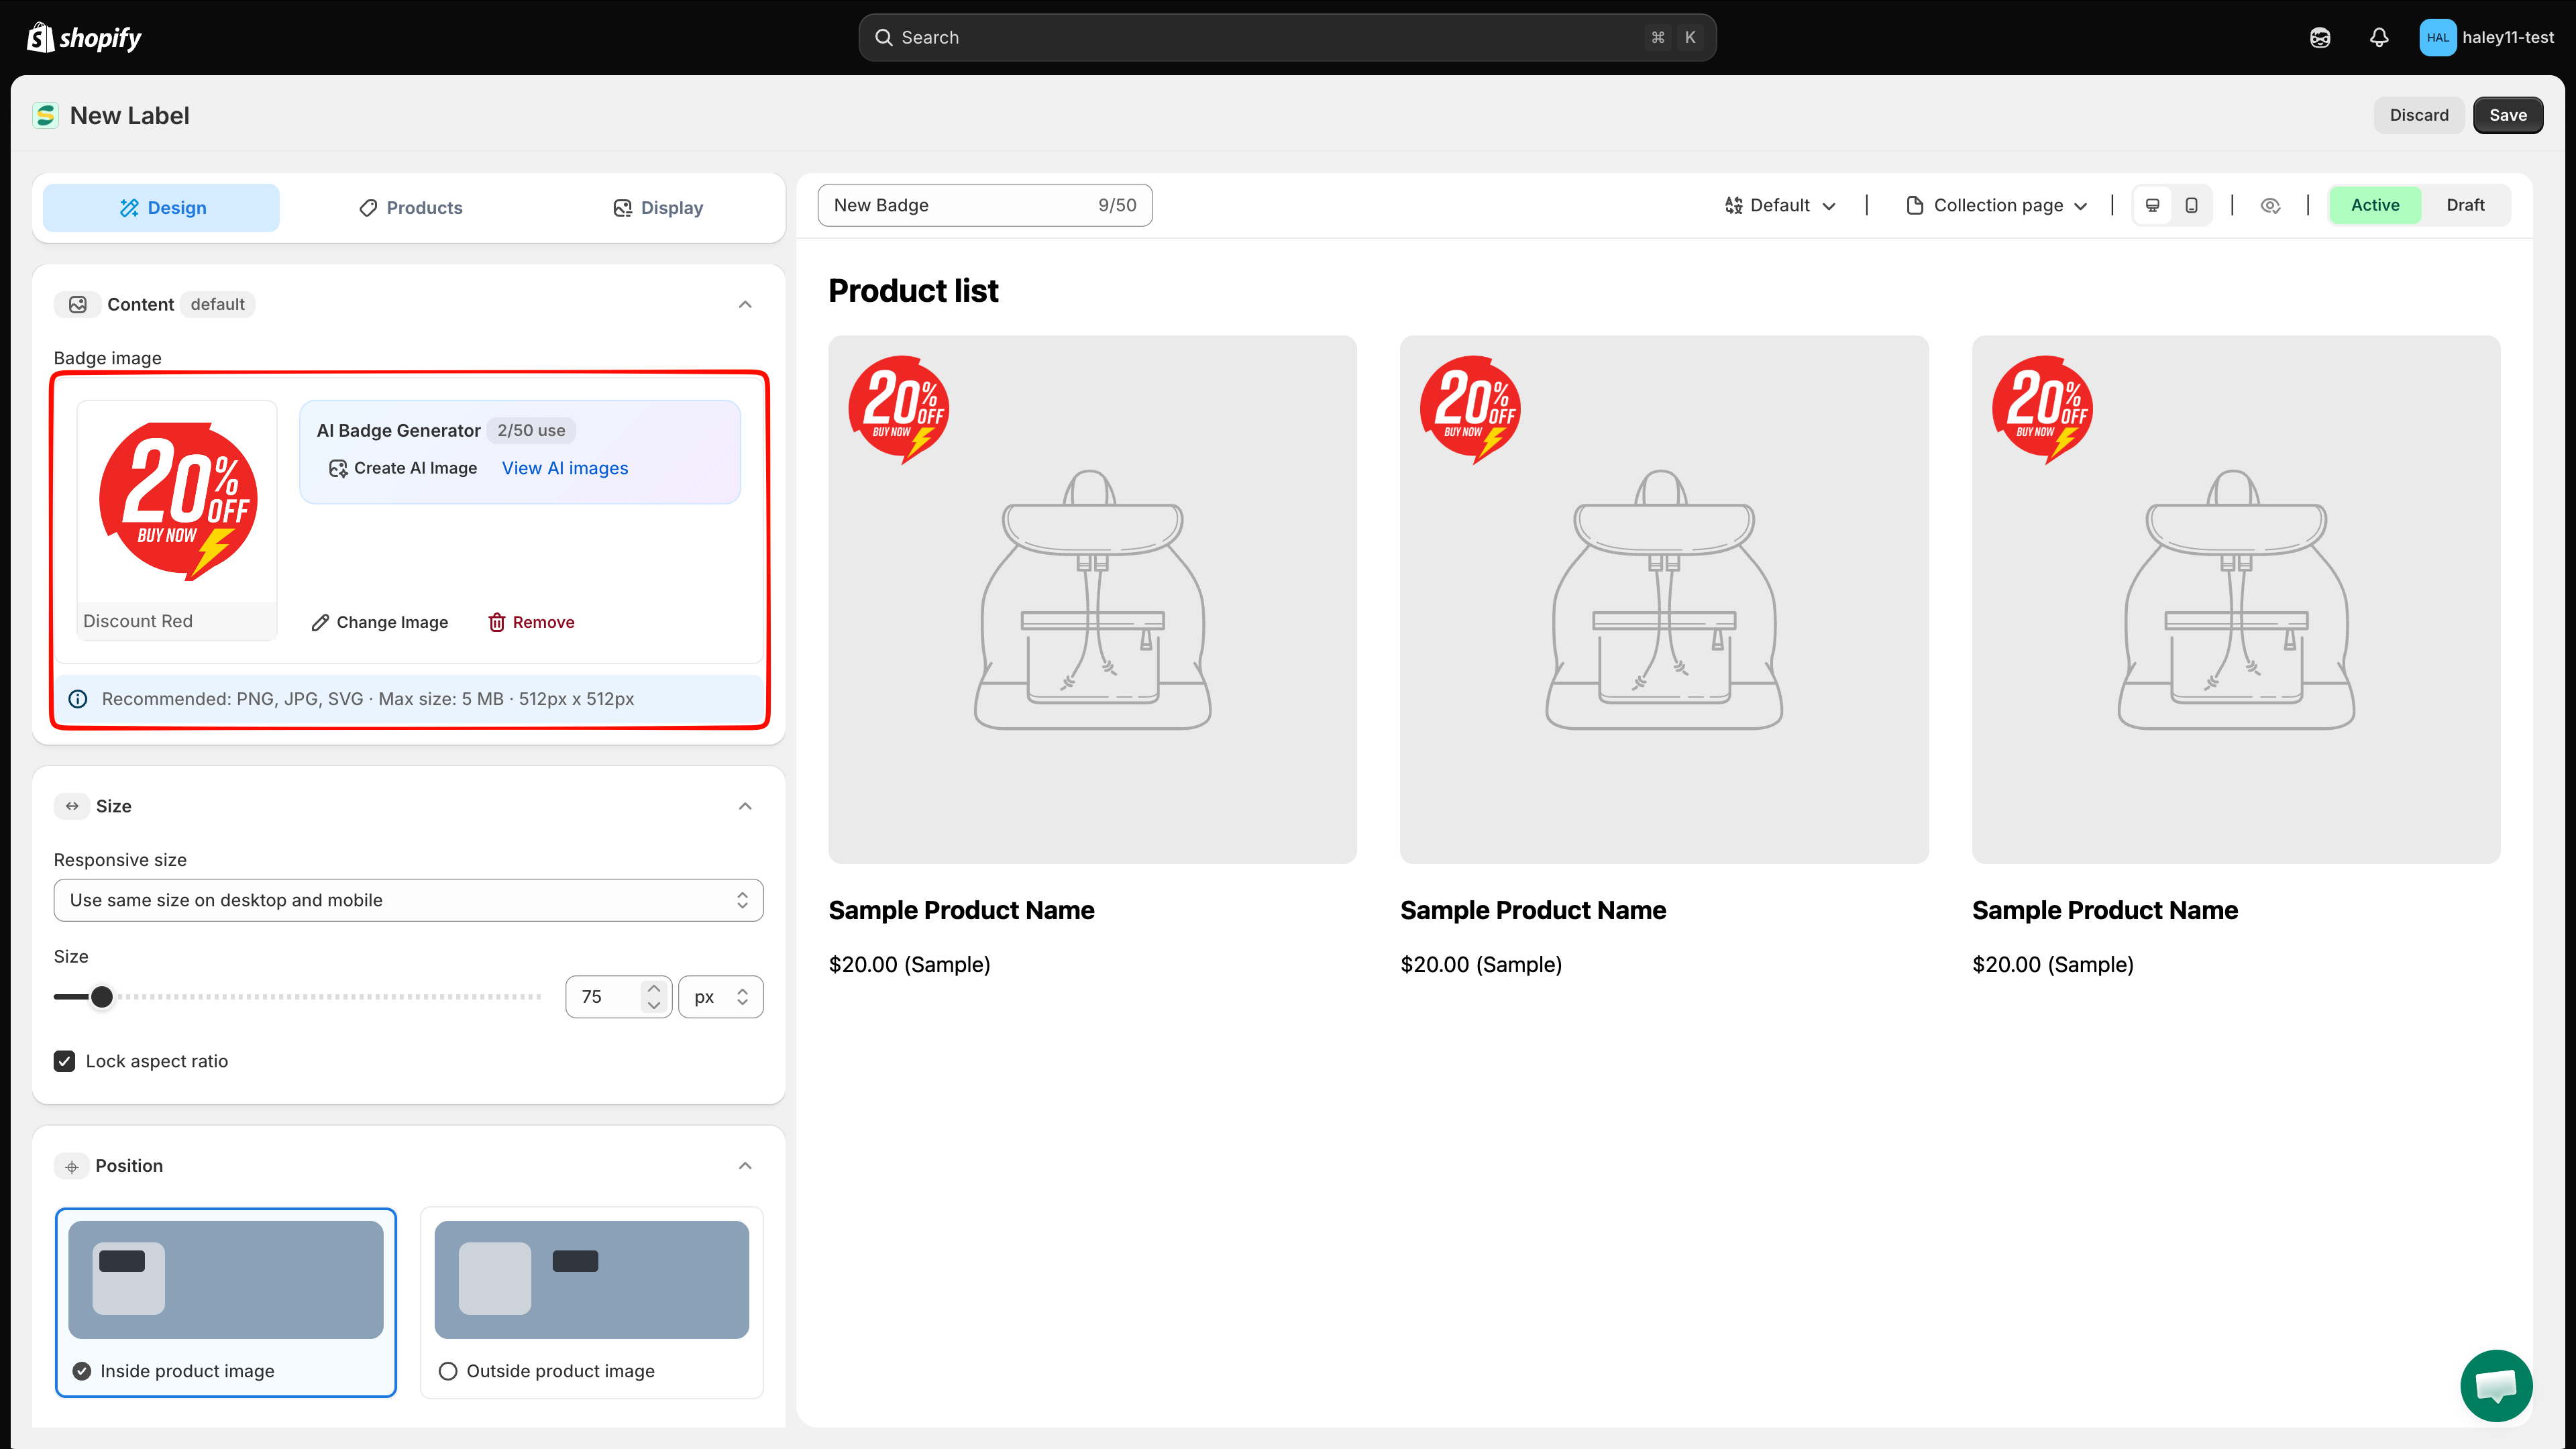
Use **Create AI Image** to generate a new badge image or **View AI images** to reuse an existing result. The usage counter shown beside **AI Badge Generator** reflects the allowance for the current store.

<figure><img src="https://1598842017-files.gitbook.io/~/files/v0/b/gitbook-x-prod.appspot.com/o/spaces%2F1WRTlT5AcaLSAedbCJyZ%2Fuploads%2Fgit-blob-adcddc254f66a743143010ba000da5ad0b1d175b%2Fimage_12.png?alt=media" alt="Selected badge image with Create AI Image, View AI images, Change Image, and Remove controls"><figcaption><p>Manage the selected image or open the AI image tools from the Content section.</p></figcaption></figure>

<figure><img src="https://1598842017-files.gitbook.io/~/files/v0/b/gitbook-x-prod.appspot.com/o/spaces%2F1WRTlT5AcaLSAedbCJyZ%2Fuploads%2Fgit-blob-087cdac62244d4aca5b29cd4d3e704963cf6f1e9%2Fimage_13.png?alt=media" alt="Select Image dialog with Library and Design your Images sources"><figcaption><p>Search the library or open Design your Images to use your own artwork.</p></figcaption></figure>
{% endstep %}

{% step %}

## Adjust the size

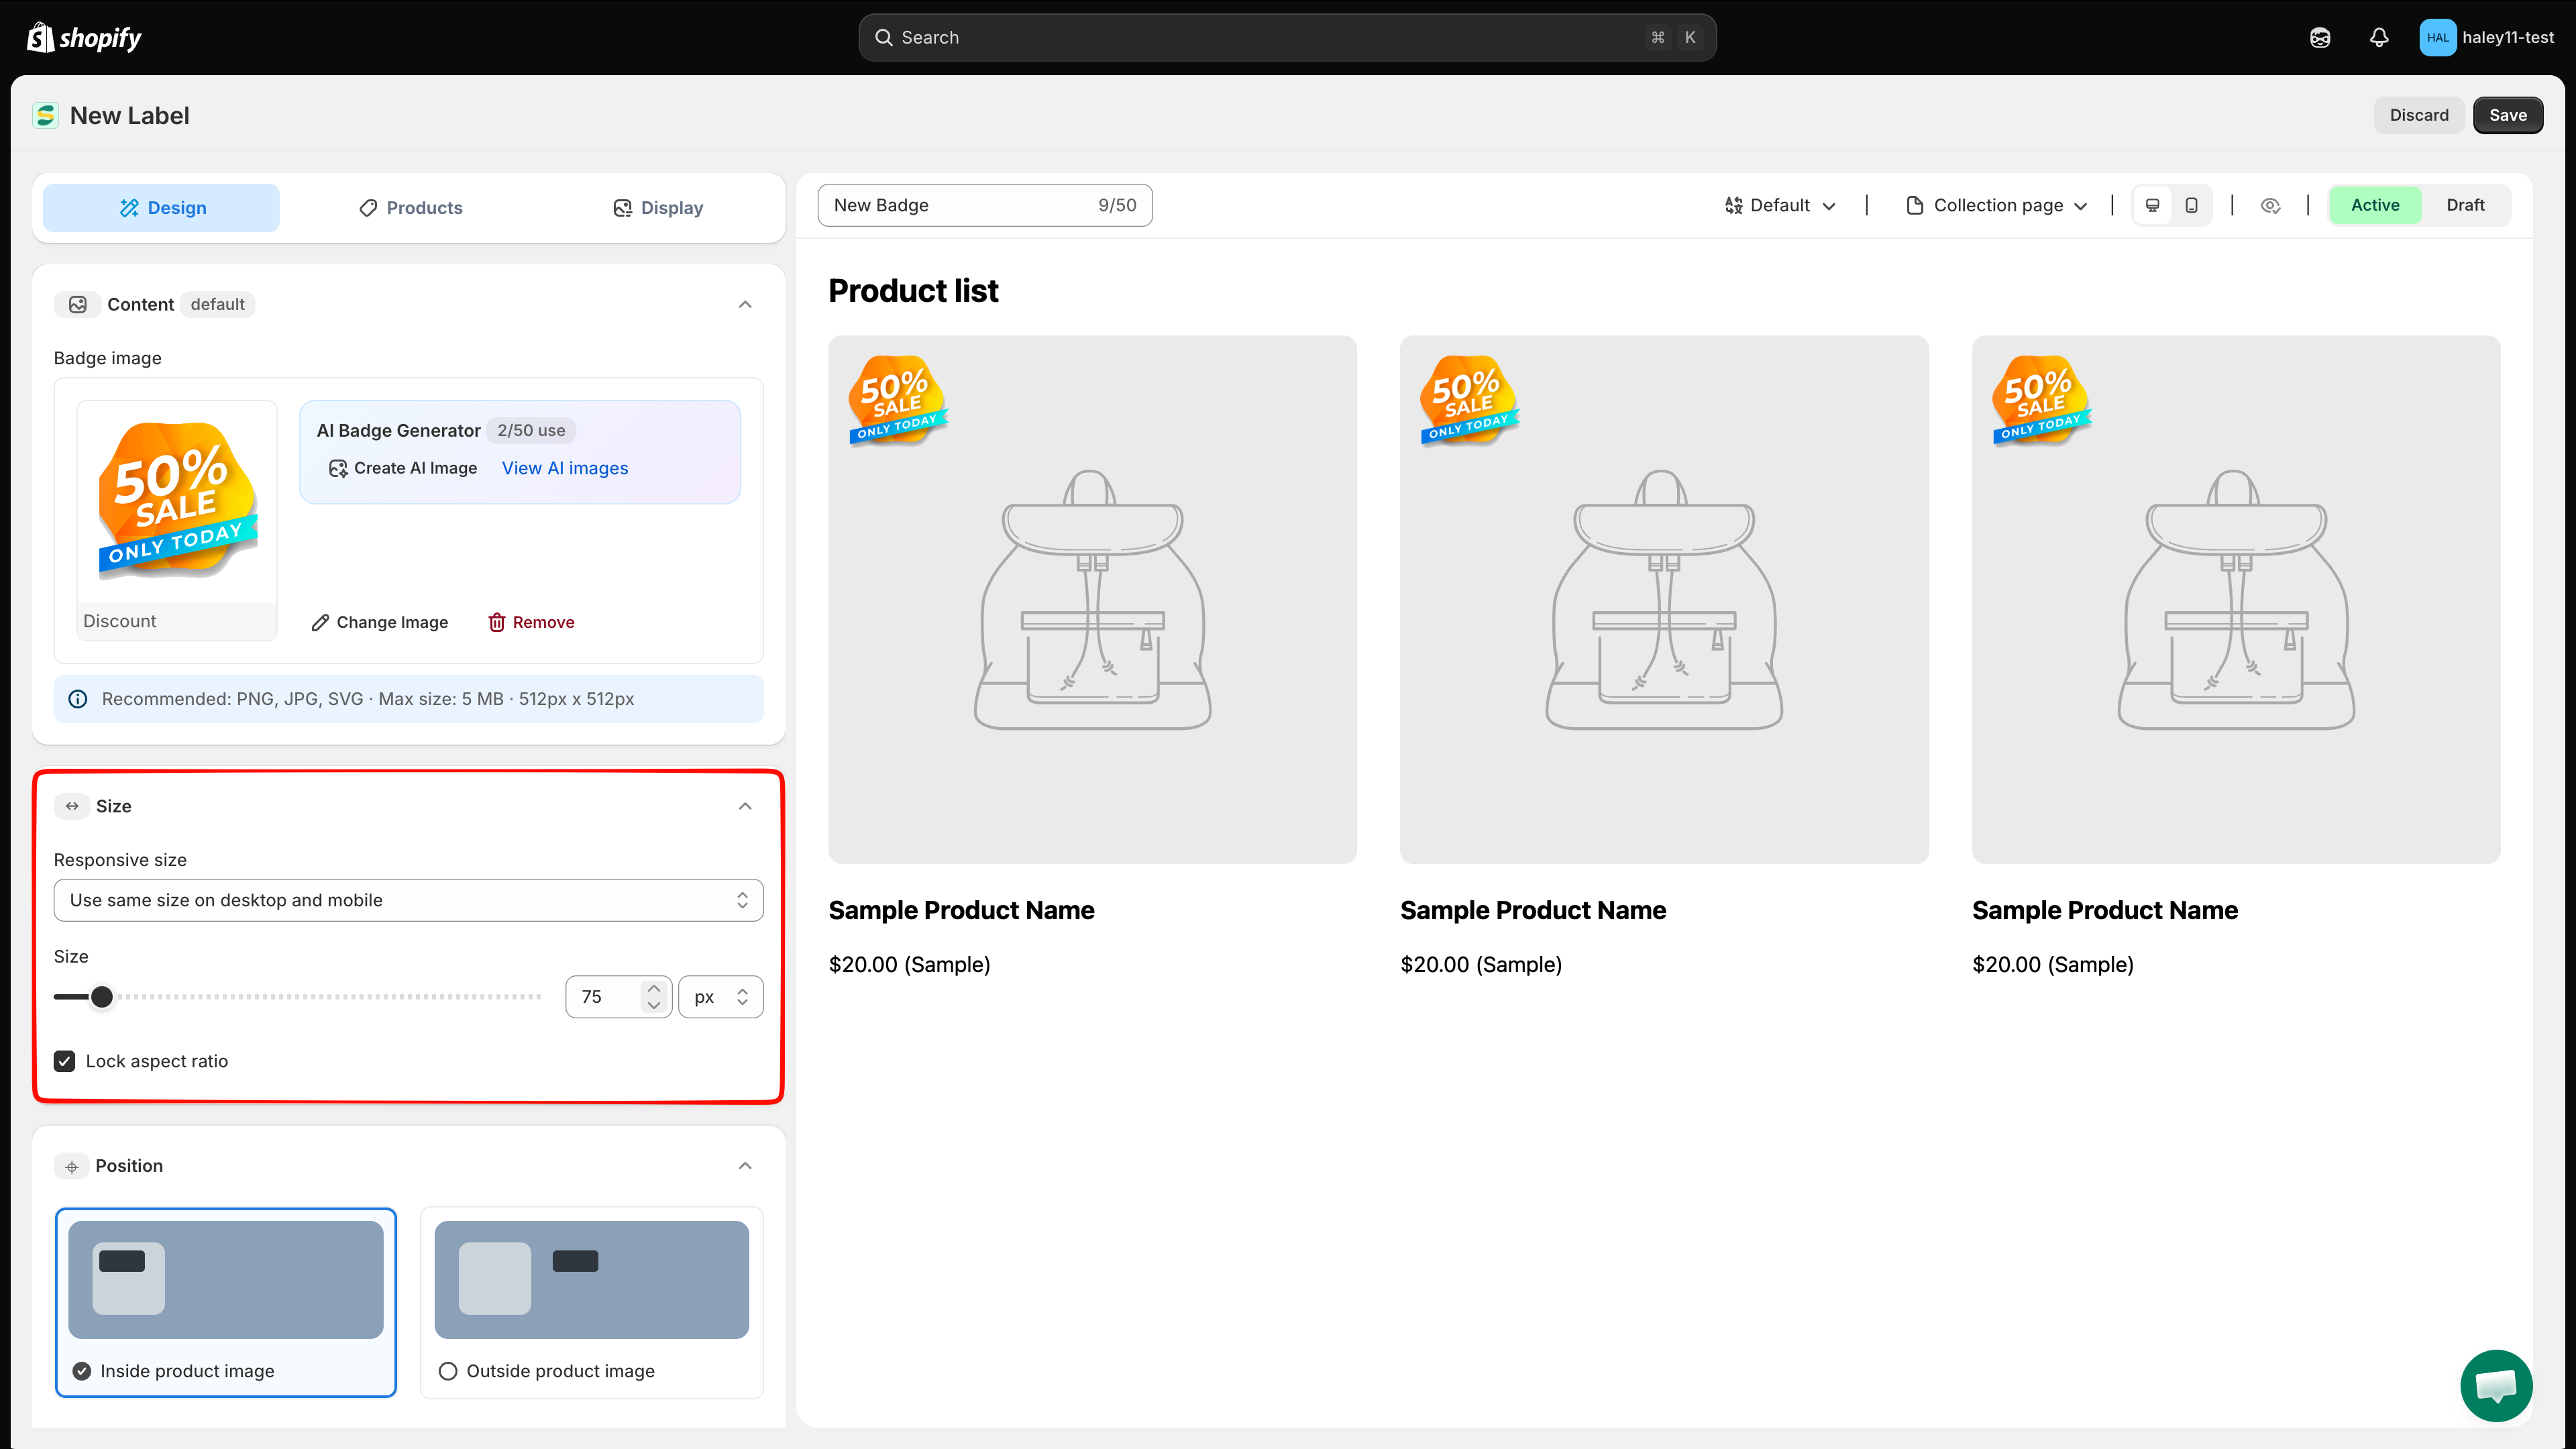
Use the **Size** slider or **Width** field, then choose `px` or `%`. Keep **Lock aspect ratio** enabled to preserve the image proportions.

<figure><img src="https://1598842017-files.gitbook.io/~/files/v0/b/gitbook-x-prod.appspot.com/o/spaces%2F1WRTlT5AcaLSAedbCJyZ%2Fuploads%2Fgit-blob-067402b7d19807576b51c828c3418fcb4db5003d%2Fimage_14.png?alt=media" alt="Image badge size controls with Lock aspect ratio enabled"><figcaption><p>Adjust the image width and keep the aspect ratio locked to avoid distortion.</p></figcaption></figure>
{% endstep %}

{% step %}

## Set the badge position

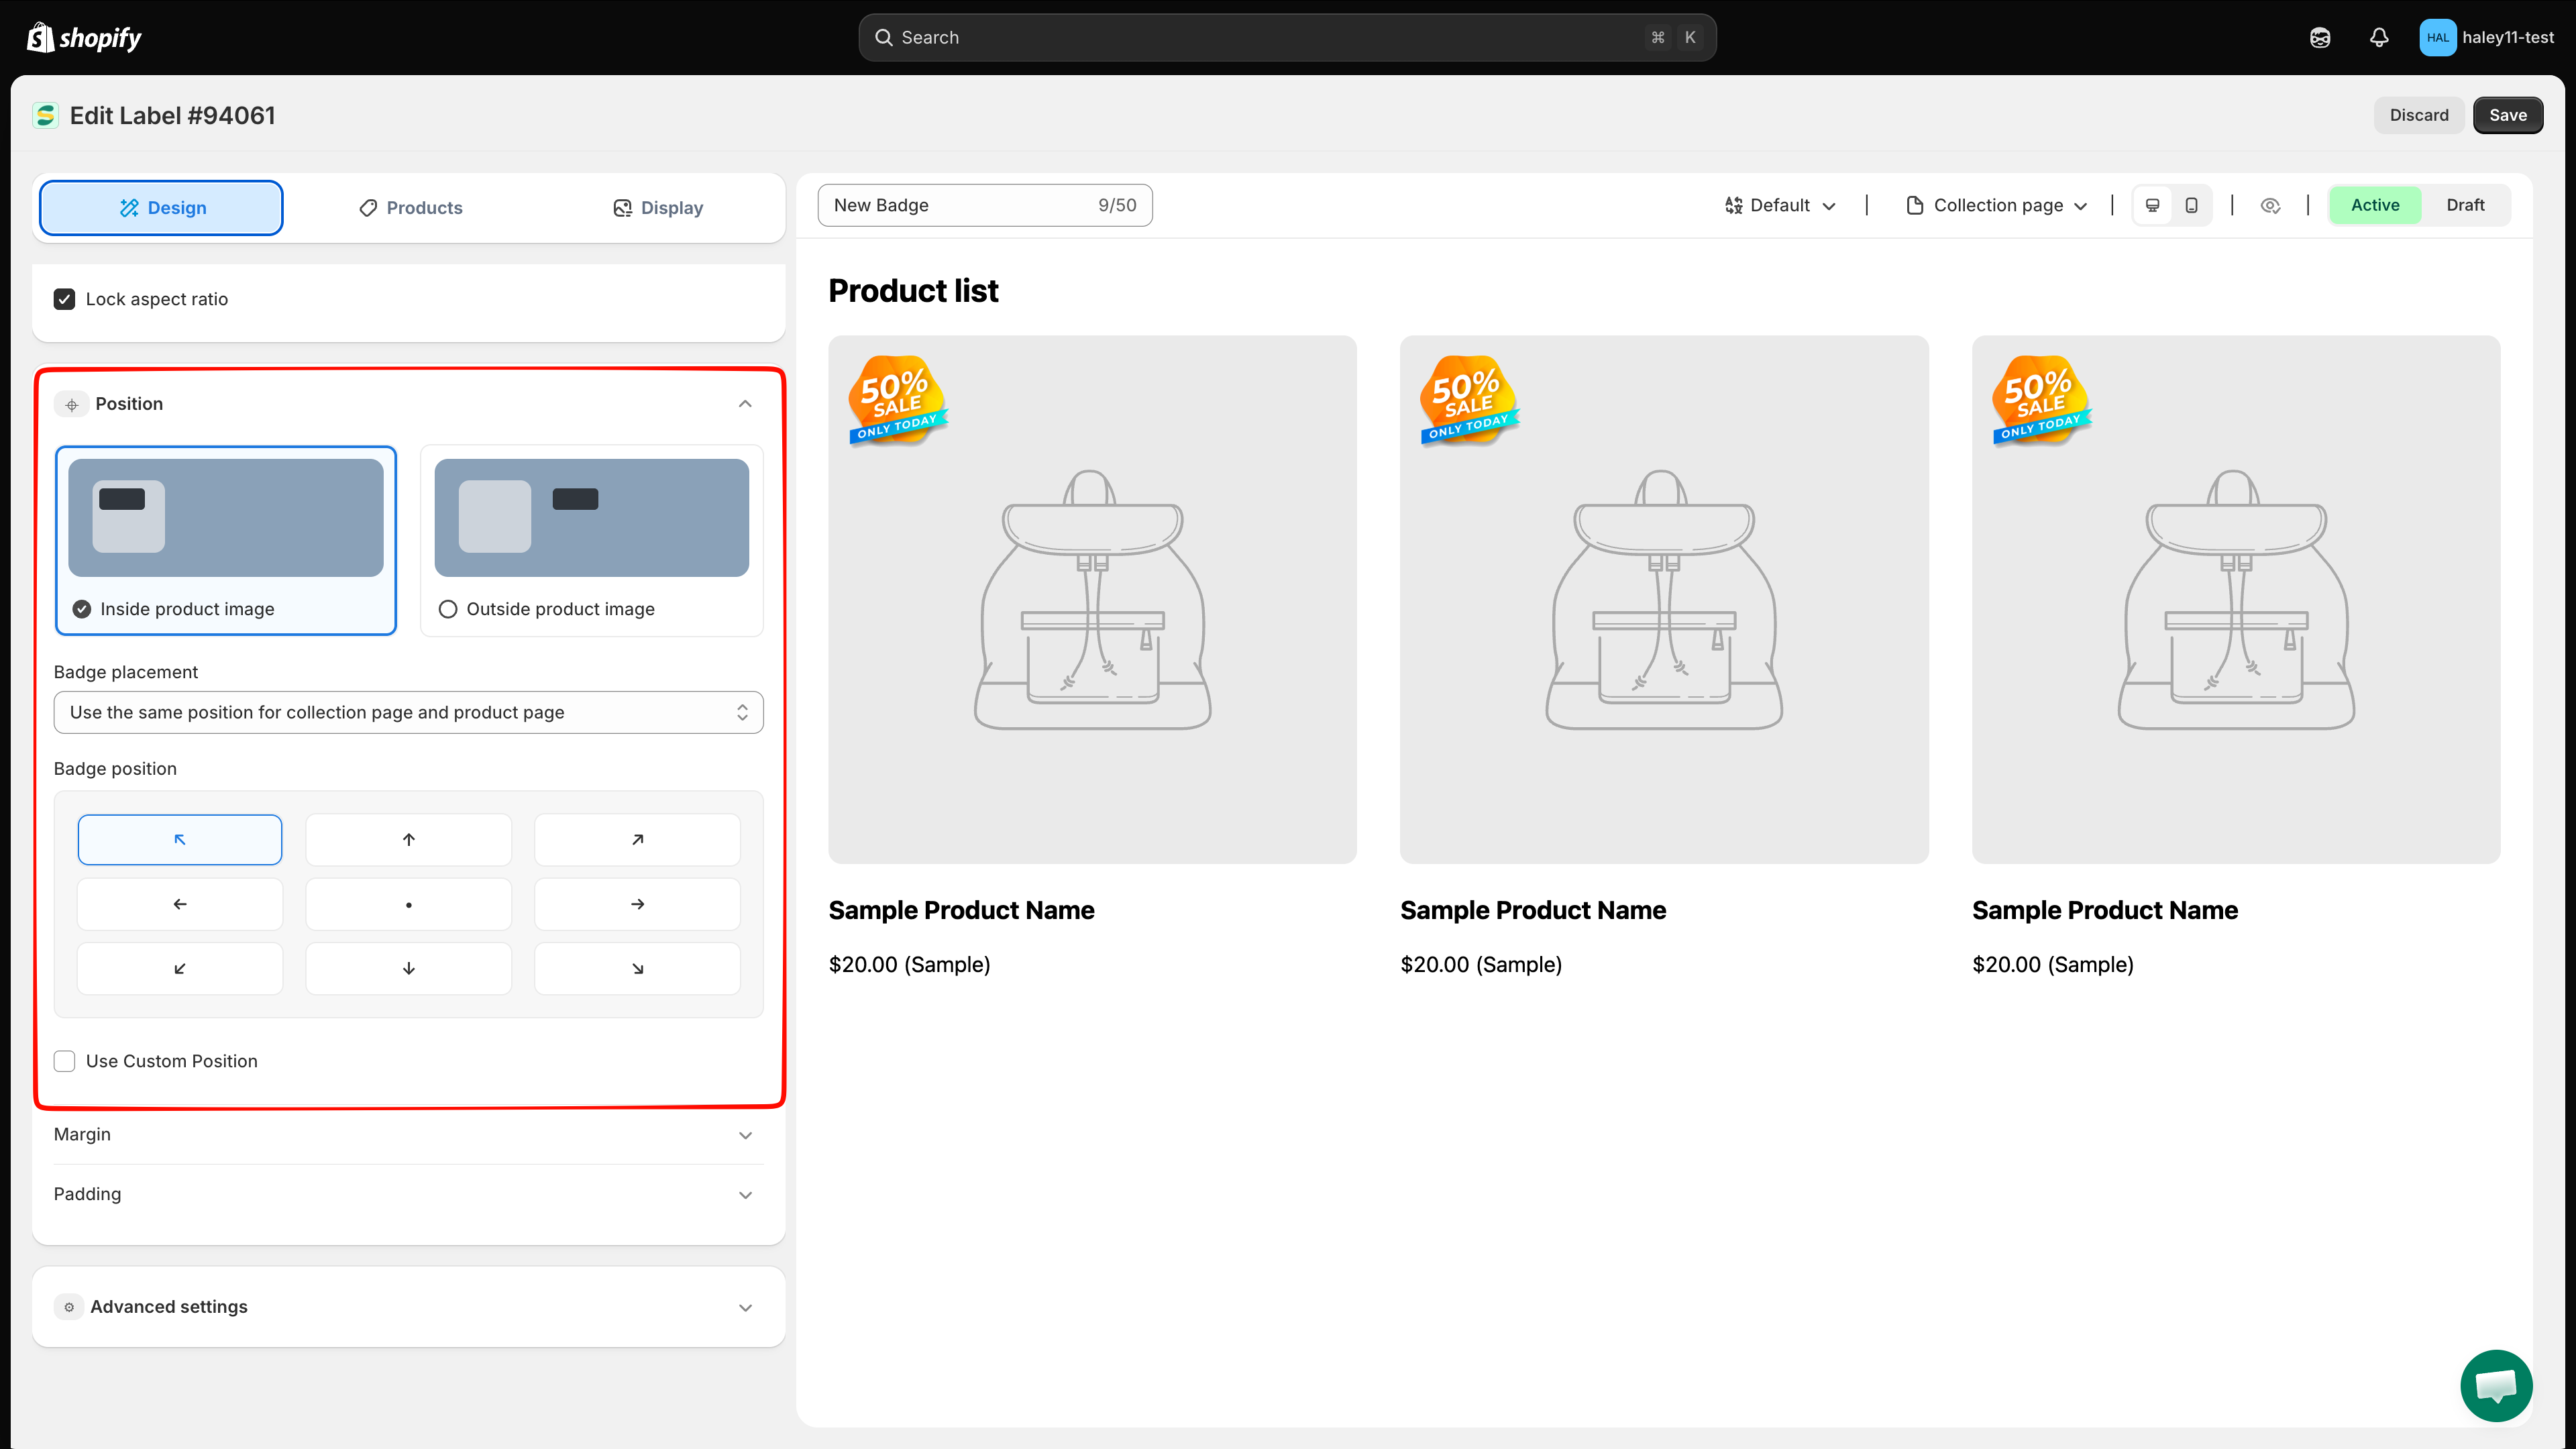
Expand **Position**, then choose **Inside product image** or **Outside product image**.

For an image overlay, keep **Inside product image** selected and choose one of the nine preset positions. Use **Badge placement** to apply the same position to collection and product pages, or configure each page type separately. Enable **Use Custom Position** or adjust **Margin** and **Padding** when you need finer control.

<figure><img src="https://1598842017-files.gitbook.io/~/files/v0/b/gitbook-x-prod.appspot.com/o/spaces%2F1WRTlT5AcaLSAedbCJyZ%2Fuploads%2Fgit-blob-cd662d54f587f4974071151ade7e72b82c7bacf9%2Fimage_15.png?alt=media" alt="Image badge Position section with placement options and the nine-position grid"><figcaption><p>Choose where the image badge appears and whether collection and product pages share the same position.</p></figcaption></figure>
{% endstep %}

{% step %}

## Choose which products show the badge

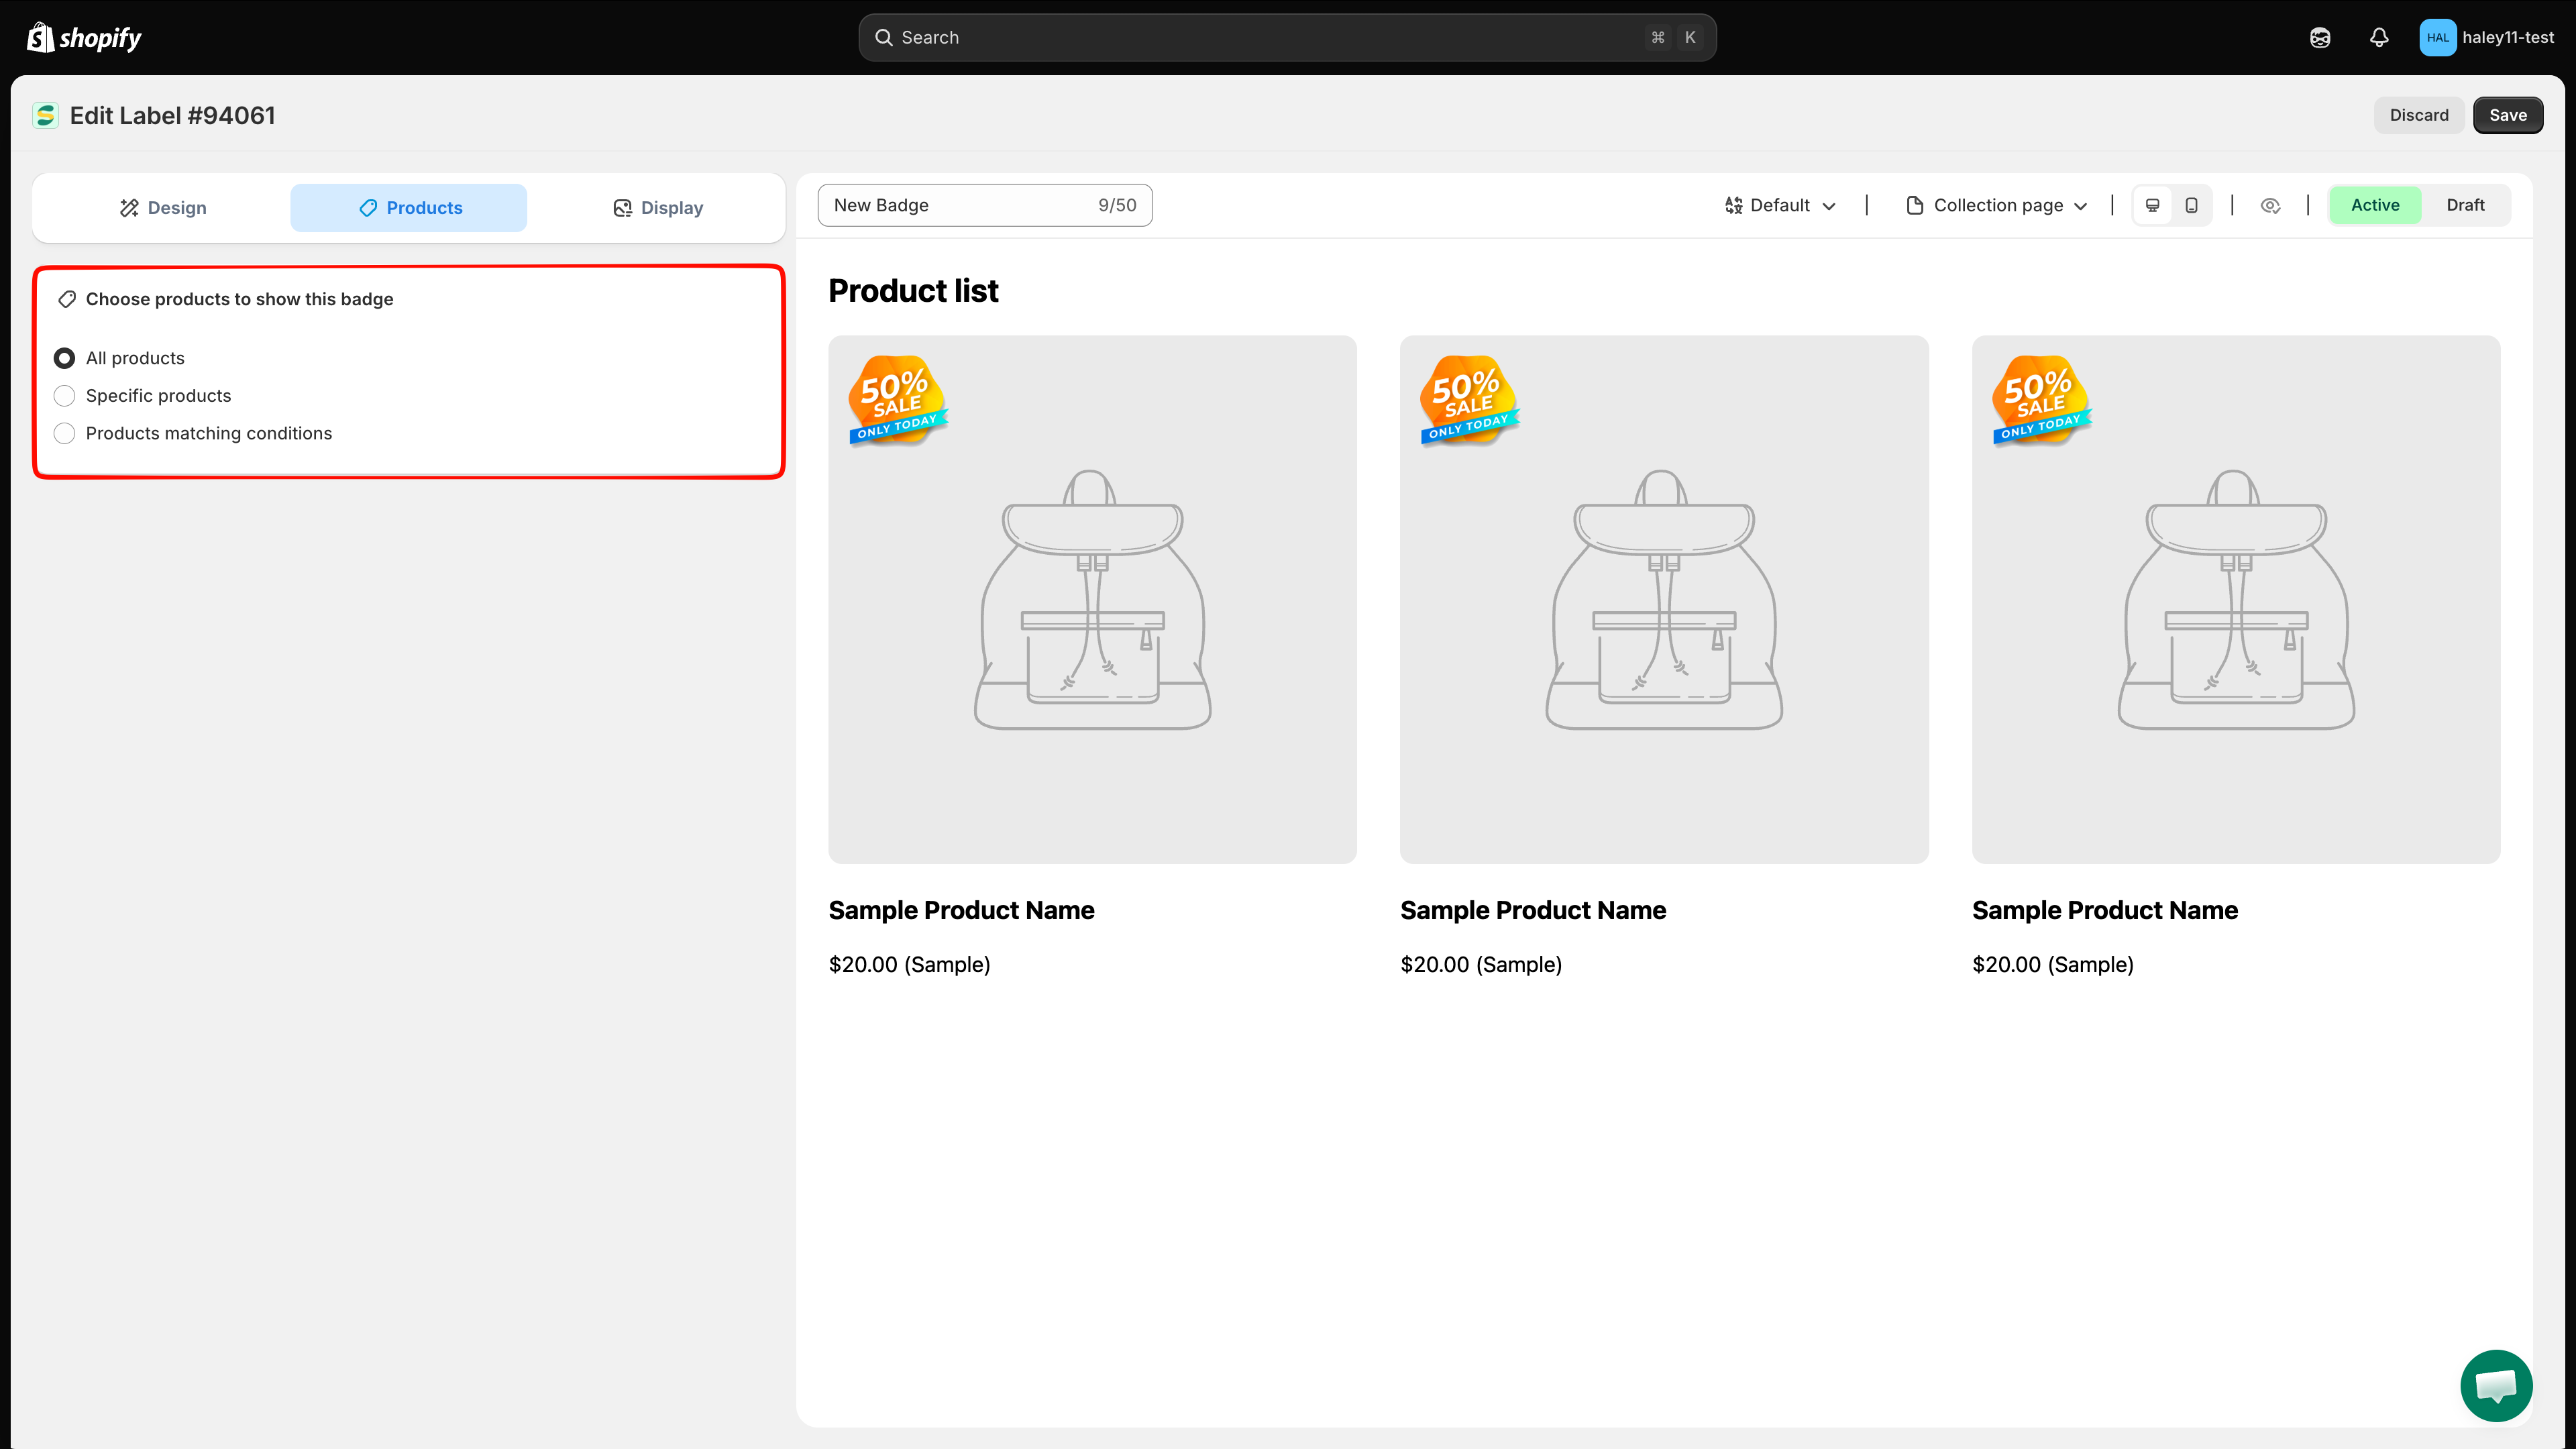
Open **Products**, then choose one targeting mode:

* **All products** — Show the image badge on every product.
* **Specific products** — Click **Browse**, select the product checkboxes, then click **Select**.
* **Products matching conditions** — Click **Add conditions**, create one or more rules, then choose whether products must match **all conditions** or **any condition**.

<figure><img src="https://1598842017-files.gitbook.io/~/files/v0/b/gitbook-x-prod.appspot.com/o/spaces%2F1WRTlT5AcaLSAedbCJyZ%2Fuploads%2Fgit-blob-330e62269004c105131a105768f27637c3e43cc3%2Fimage_16.png?alt=media" alt="Products tab showing All products, Specific products, and Products matching conditions"><figcaption><p>Choose the products that should display the image badge.</p></figcaption></figure>

{% hint style="info" %}
If you choose **Specific products**, select at least one product. An empty selection does not apply the badge to all products. See [Target specific products](/badges-and-labels/target-products.md) for more examples.
{% endhint %}
{% endstep %}

{% step %}

## Configure display conditions

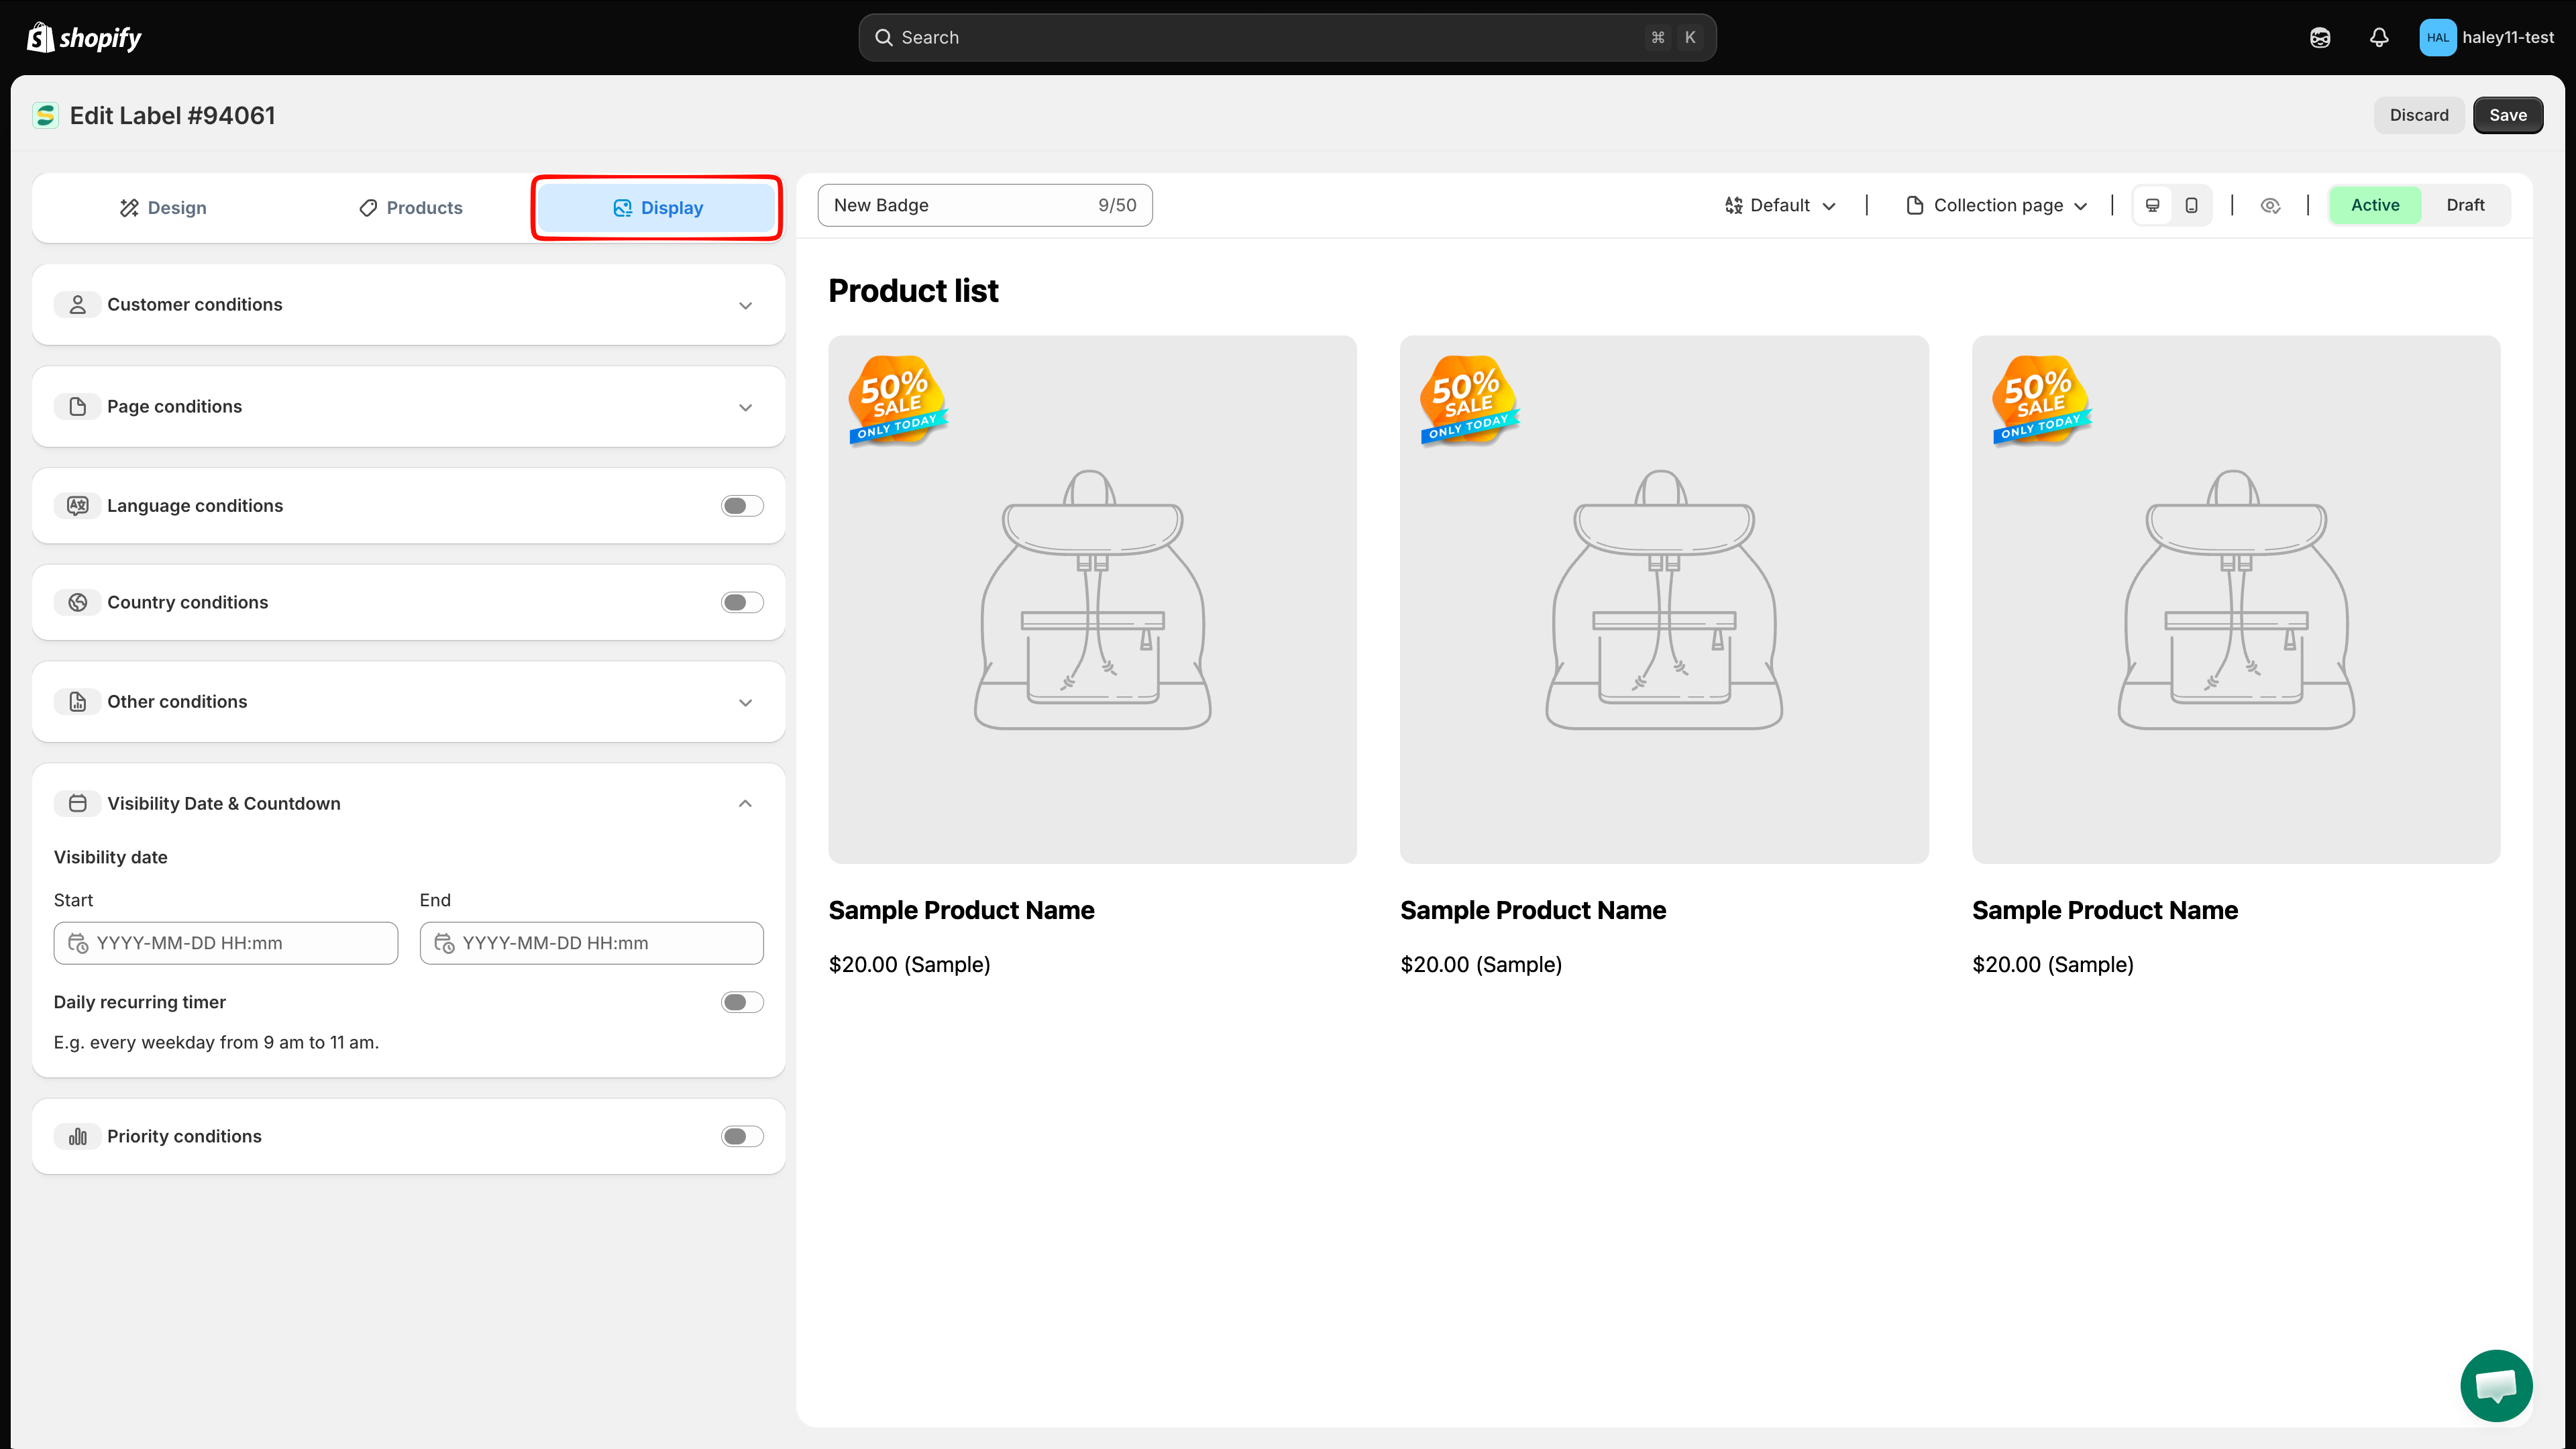
Open **Display** to control when and where the badge appears. Configure customer and page conditions, language or country restrictions, device and product-image settings under **Other conditions**, a visibility schedule, and priority when multiple badges target the same product.

Leave a section unchanged when you do not need that restriction.

<figure><img src="https://1598842017-files.gitbook.io/~/files/v0/b/gitbook-x-prod.appspot.com/o/spaces%2F1WRTlT5AcaLSAedbCJyZ%2Fuploads%2Fgit-blob-d10d47992d83eb33f1512c15de535e2ff13ff81c%2Fimage_17.png?alt=media" alt="Display tab with customer, page, language, country, visibility, and priority conditions"><figcaption><p>Use Display conditions only when the badge needs additional audience, page, device, schedule, or priority restrictions.</p></figcaption></figure>
{% endstep %}

{% step %}

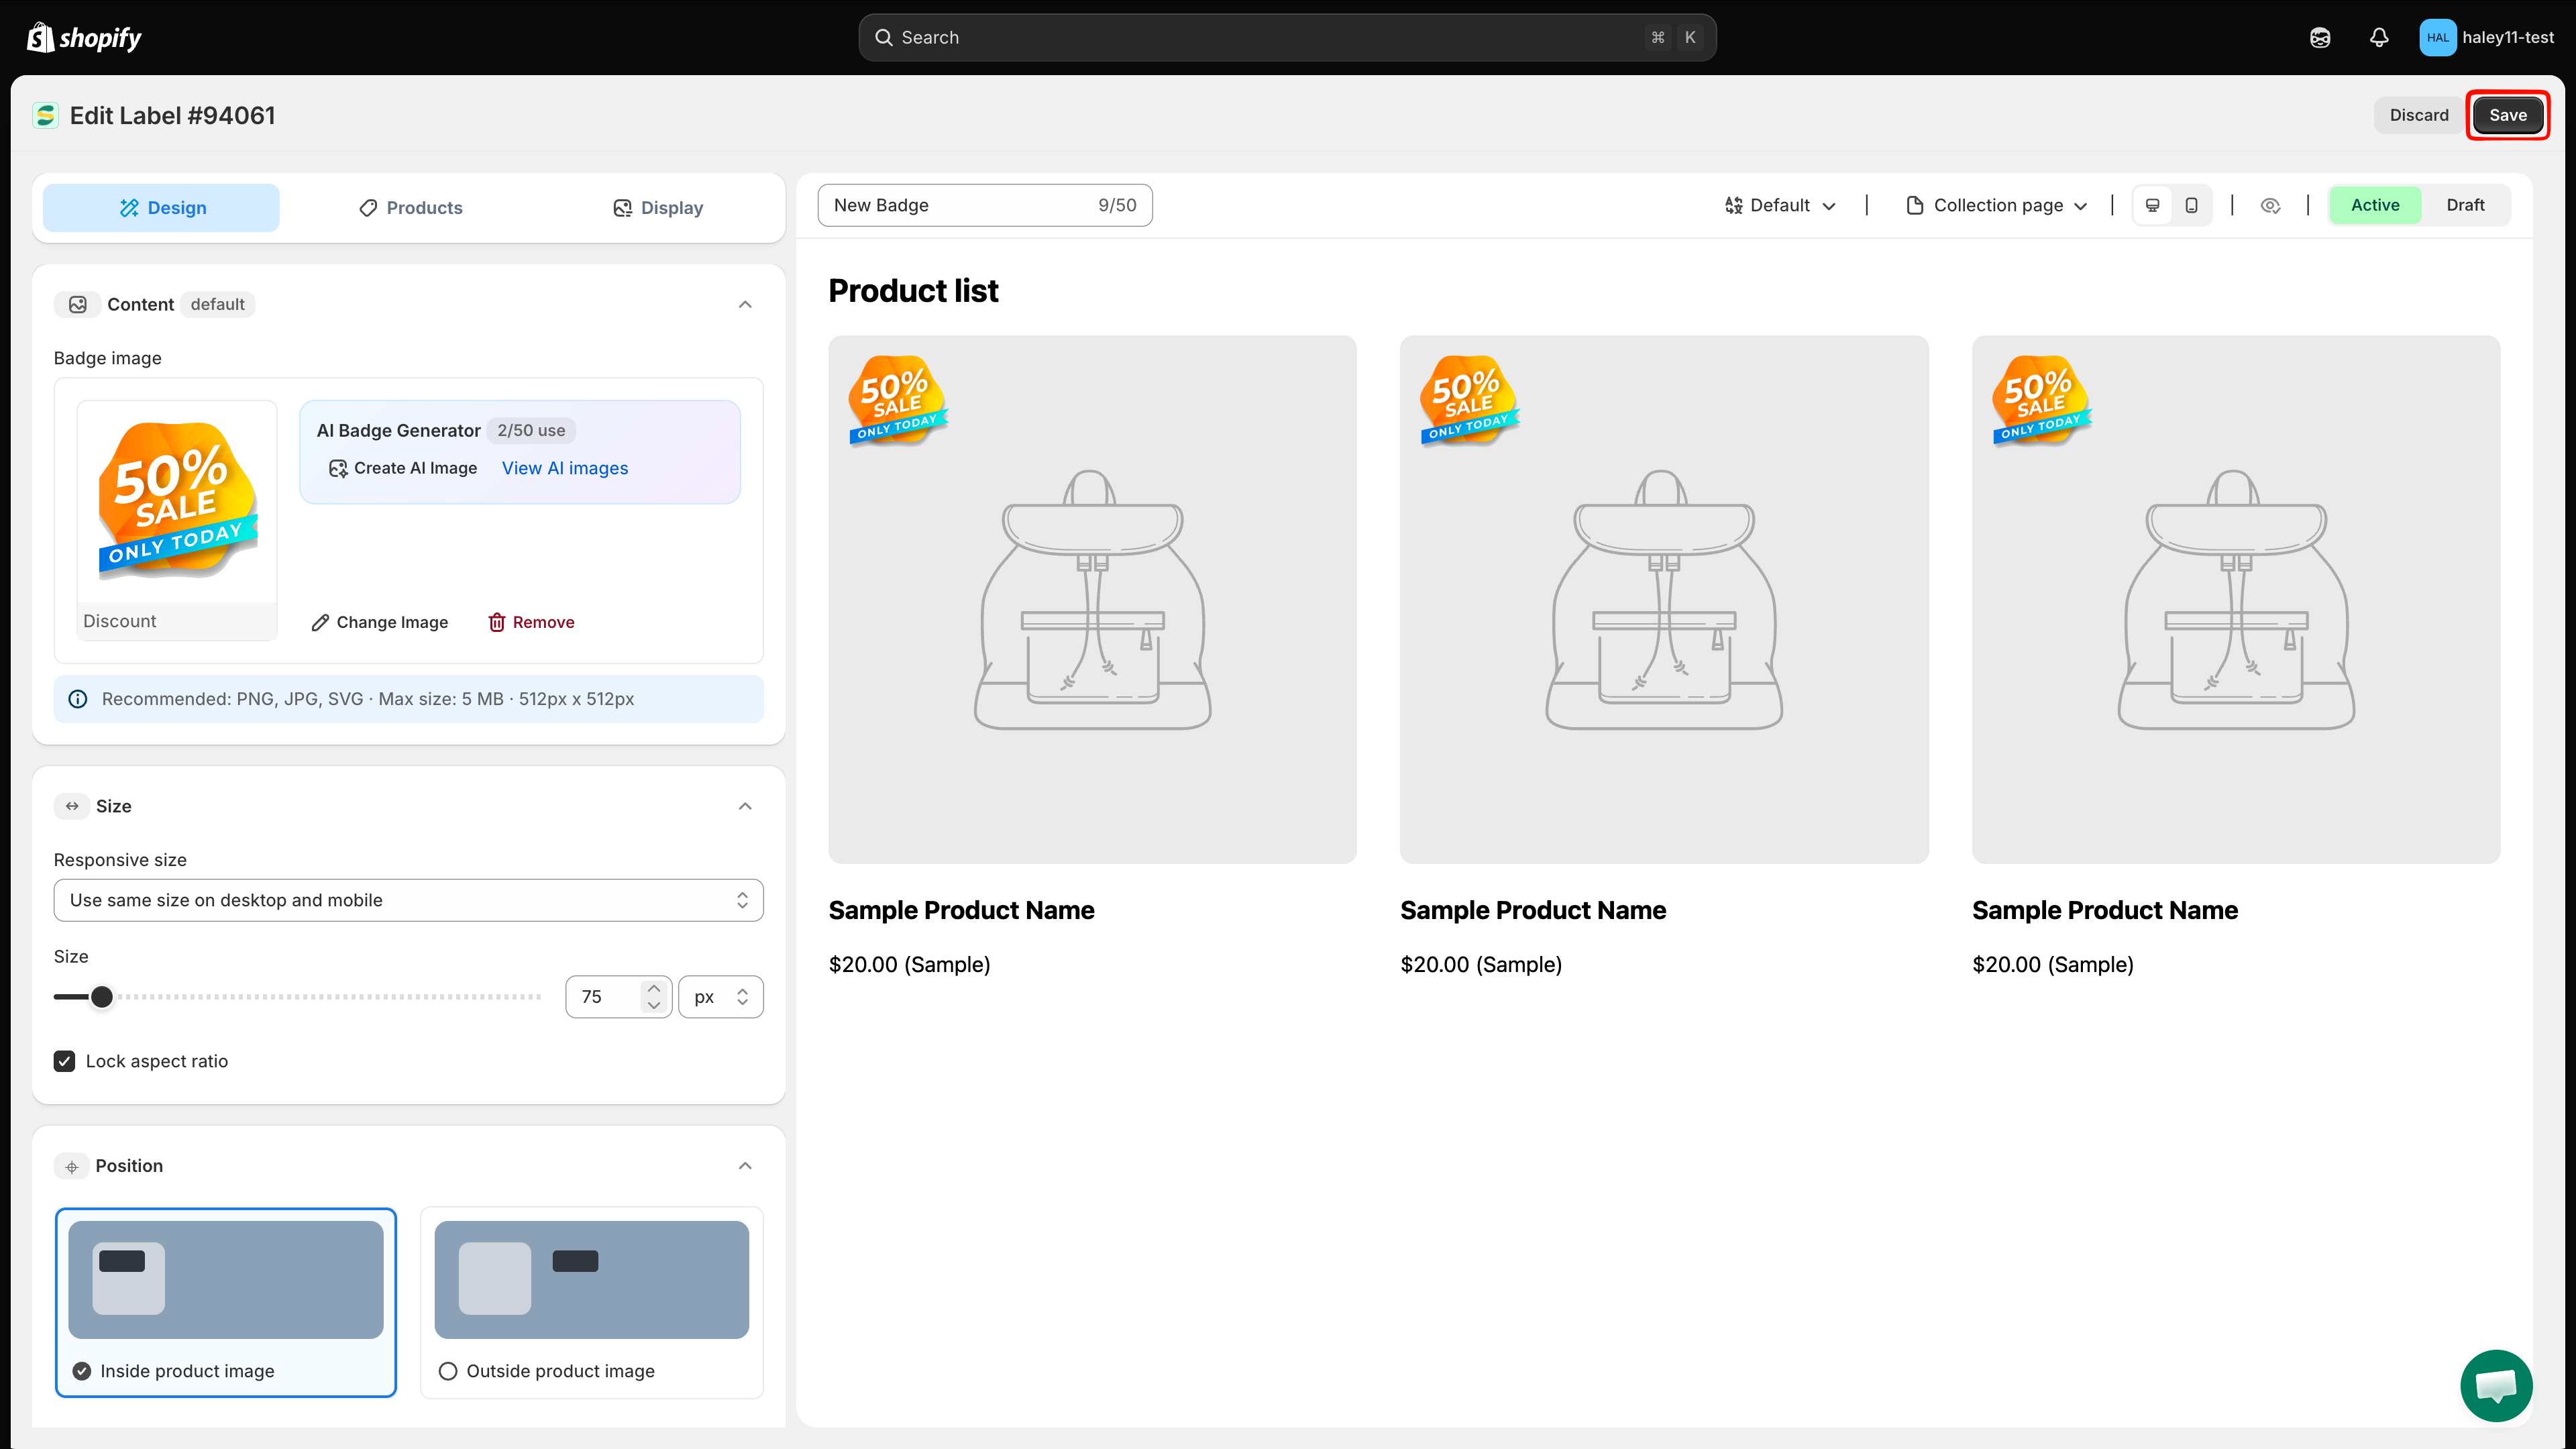
## Save your badge

Review the preview, then choose **Active** to publish the badge or **Draft** to keep it hidden from the storefront. Click **Save** to finish creating the badge.

<figure><img src="https://1598842017-files.gitbook.io/~/files/v0/b/gitbook-x-prod.appspot.com/o/spaces%2F1WRTlT5AcaLSAedbCJyZ%2Fuploads%2Fgit-blob-4e3e3630cfb20f29b7637a3391d74aa1a5f0b25f%2Fimage_19.png?alt=media" alt="Save button on badge editor"><figcaption><p>Click Save to finish creating your image badge.</p></figcaption></figure>
{% endstep %}
{% endstepper %}

## Next steps

* [Upload your own badge image](/badges-and-labels/upload-badge-image.md) — Use your own artwork from a file or a direct image link.
* [Change badge position](/badges-and-labels/change-position.md) — Move your badge to the exact location you want on the product image.
* [Change badge size](/badges-and-labels/change-size.md) — Fine-tune the width and height of your badge.
* [Target specific products](/badges-and-labels/target-products.md) — Learn more about manual product selection and condition-based targeting.
* [Control display by device and page](/badges-and-labels/display-device-page.md) — Add page, device, image, and priority conditions.
* [Generate an image with AI](/ai-features/generate-image.md) — Create unique badge graphics using AI prompts.

{% hint style="success" %}
**Need support?**

If you run into any difficulty while following these steps, contact us at <support@samita.io>.
{% endhint %}


---

# Agent Instructions
This documentation is published with GitBook. GitBook is the documentation platform designed so that both humans and AI agents can read, navigate, and reason over technical content effectively. Learn more at gitbook.com.

## Querying This Documentation
If you need additional information that is not directly available in this page, you can query the documentation dynamically by asking a question.

Perform an HTTP GET request on the current page URL with the `ask` query parameter, and the optional `goal` query parameter:

```
GET https://docs.samita.io/badges-and-labels/create-image-badge.md?ask=<question>&goal=<endgoal>
```

`ask` is the immediate question: it should be specific, self-contained, and written in natural language.
`goal` is optional and describes the broader end goal you are ultimately trying to accomplish on behalf of the user. GitBook uses it to tailor the answer towards what is most useful for that goal.

The response will contain a direct answer to the question and relevant excerpts and sources from the documentation.

Use this mechanism when the answer is not explicitly present in the current page, you need clarification or additional context, or you want to retrieve related documentation sections.