> For the complete documentation index, see [llms.txt](https://docs.samita.io/llms.txt). Markdown versions of documentation pages are available by appending `.md` to page URLs; this page is available as [Markdown](https://docs.samita.io/extra-features/configure-display-conditions.md).
# Configure banner display conditions
Control where each banner appears and who sees it, using the position picker and the condition panels on the Placement tab.
The **Placement** tab of the banner editor controls two things: **where** the bar sits on the page, and **who** sees it. Both banner types — basic and infinite scroll — use the same tab.
## Open the Placement tab
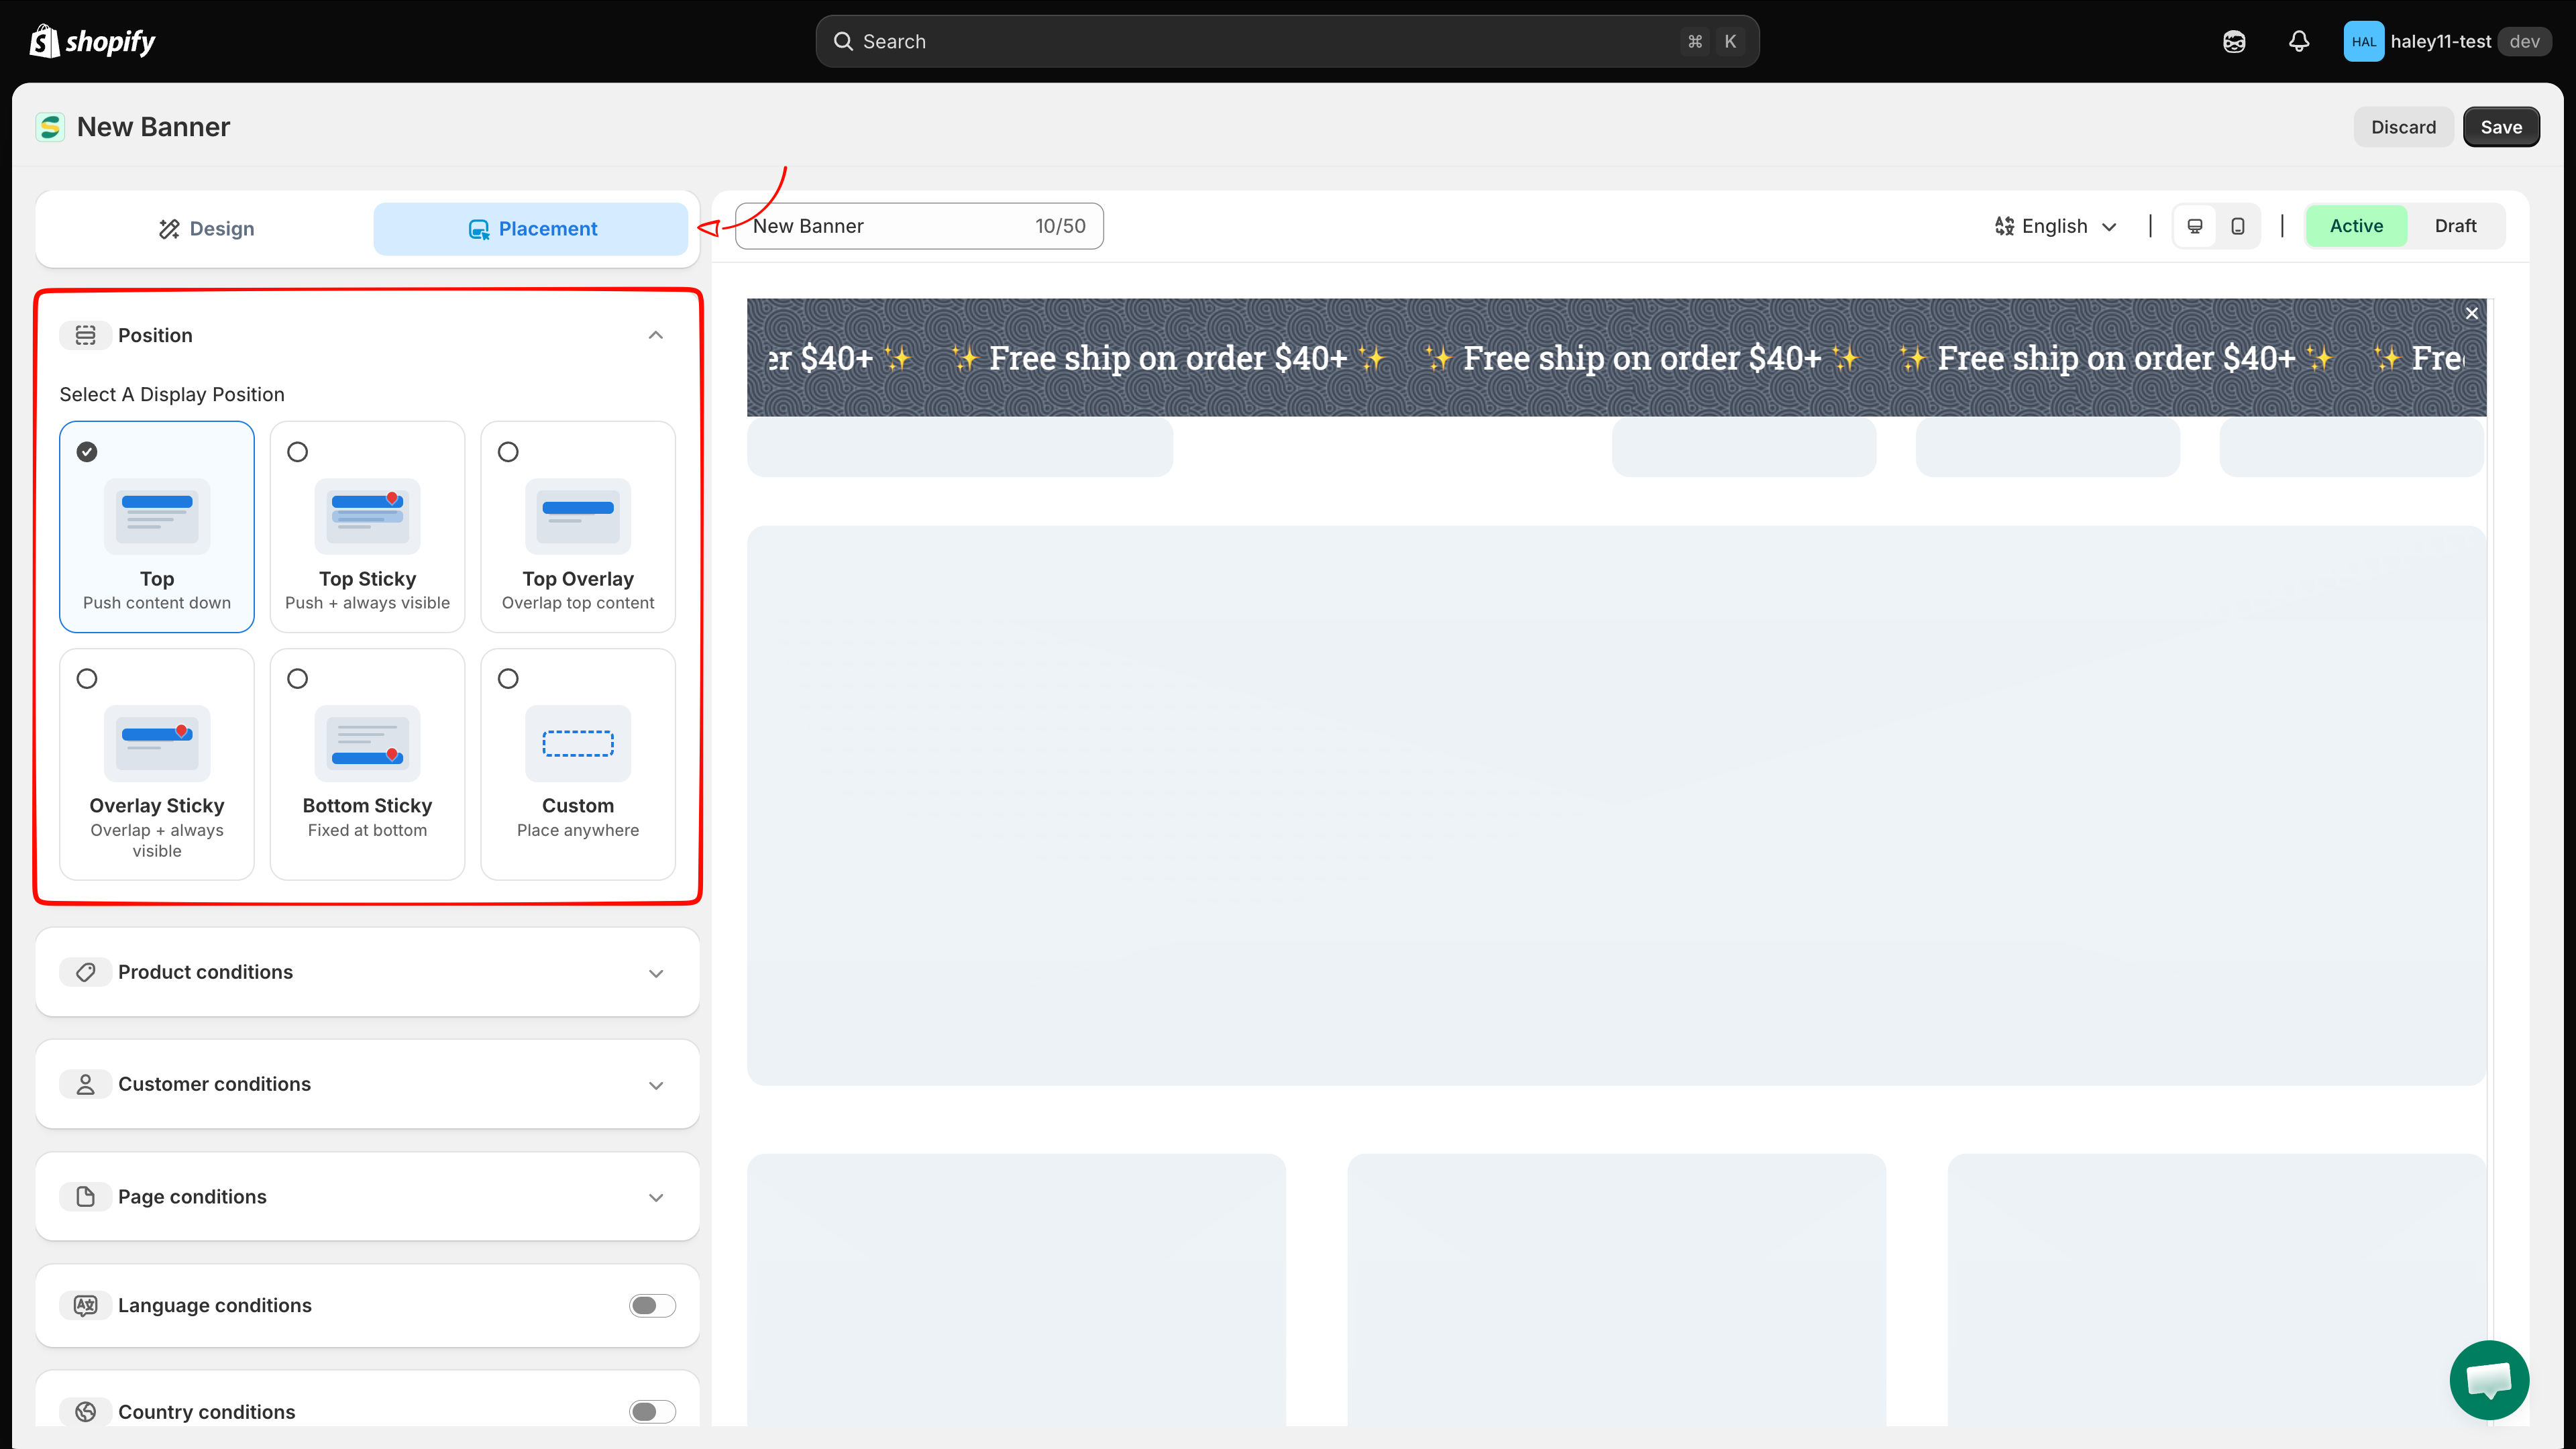
While creating or editing a banner in **Sami Product Labels**, click **Placement** at the top of the left panel.
The Placement tab: a position picker at the top, condition panels below.
## Choose a display position
**Position** is the first panel, and it is required — every banner has one.
| Position | Behaviour |
| ------------------ | ----------------------------------------------------------------------------------------------------------------------- |
| **Top** | Sits above your page content and pushes it down. |
| **Top Sticky** | Pushes content down and stays visible while the customer scrolls. |
| **Top Overlay** | Overlaps the top of your page content instead of pushing it. |
| **Overlay Sticky** | Overlaps content and stays visible while the customer scrolls. |
| **Bottom Sticky** | Fixed to the bottom of the viewport. |
| **Custom** | Renders nowhere by default — you place it yourself with the shortcode. See [Shortcode placement](#shortcode-placement). |
## Condition panels
Everything below the position picker is optional. Leave a panel empty and it places no restriction — the banner shows to everyone, everywhere the position allows.
### Product conditions
Restrict the banner to products that match a rule. Click **Add conditions**, then build a row from three parts: a field, an operator (**is equal to** / **is not equal to**), and a value.
| Field | Value you pick |
| ------------------------- | --------------------------------------------------- |
| **Select Products** | Individual products from your catalog. |
| **Product tag** | One or more product tags. |
| **Product compare price** | A compare-at price, for targeting discounted items. |
| **Collections** | One or more collections. |
Use the delete icon at the end of a row to remove it, and **Add conditions** again to stack more rows.
{% hint style="info" %}
**Product tag** conditions require the GOLD plan or above.
{% endhint %}
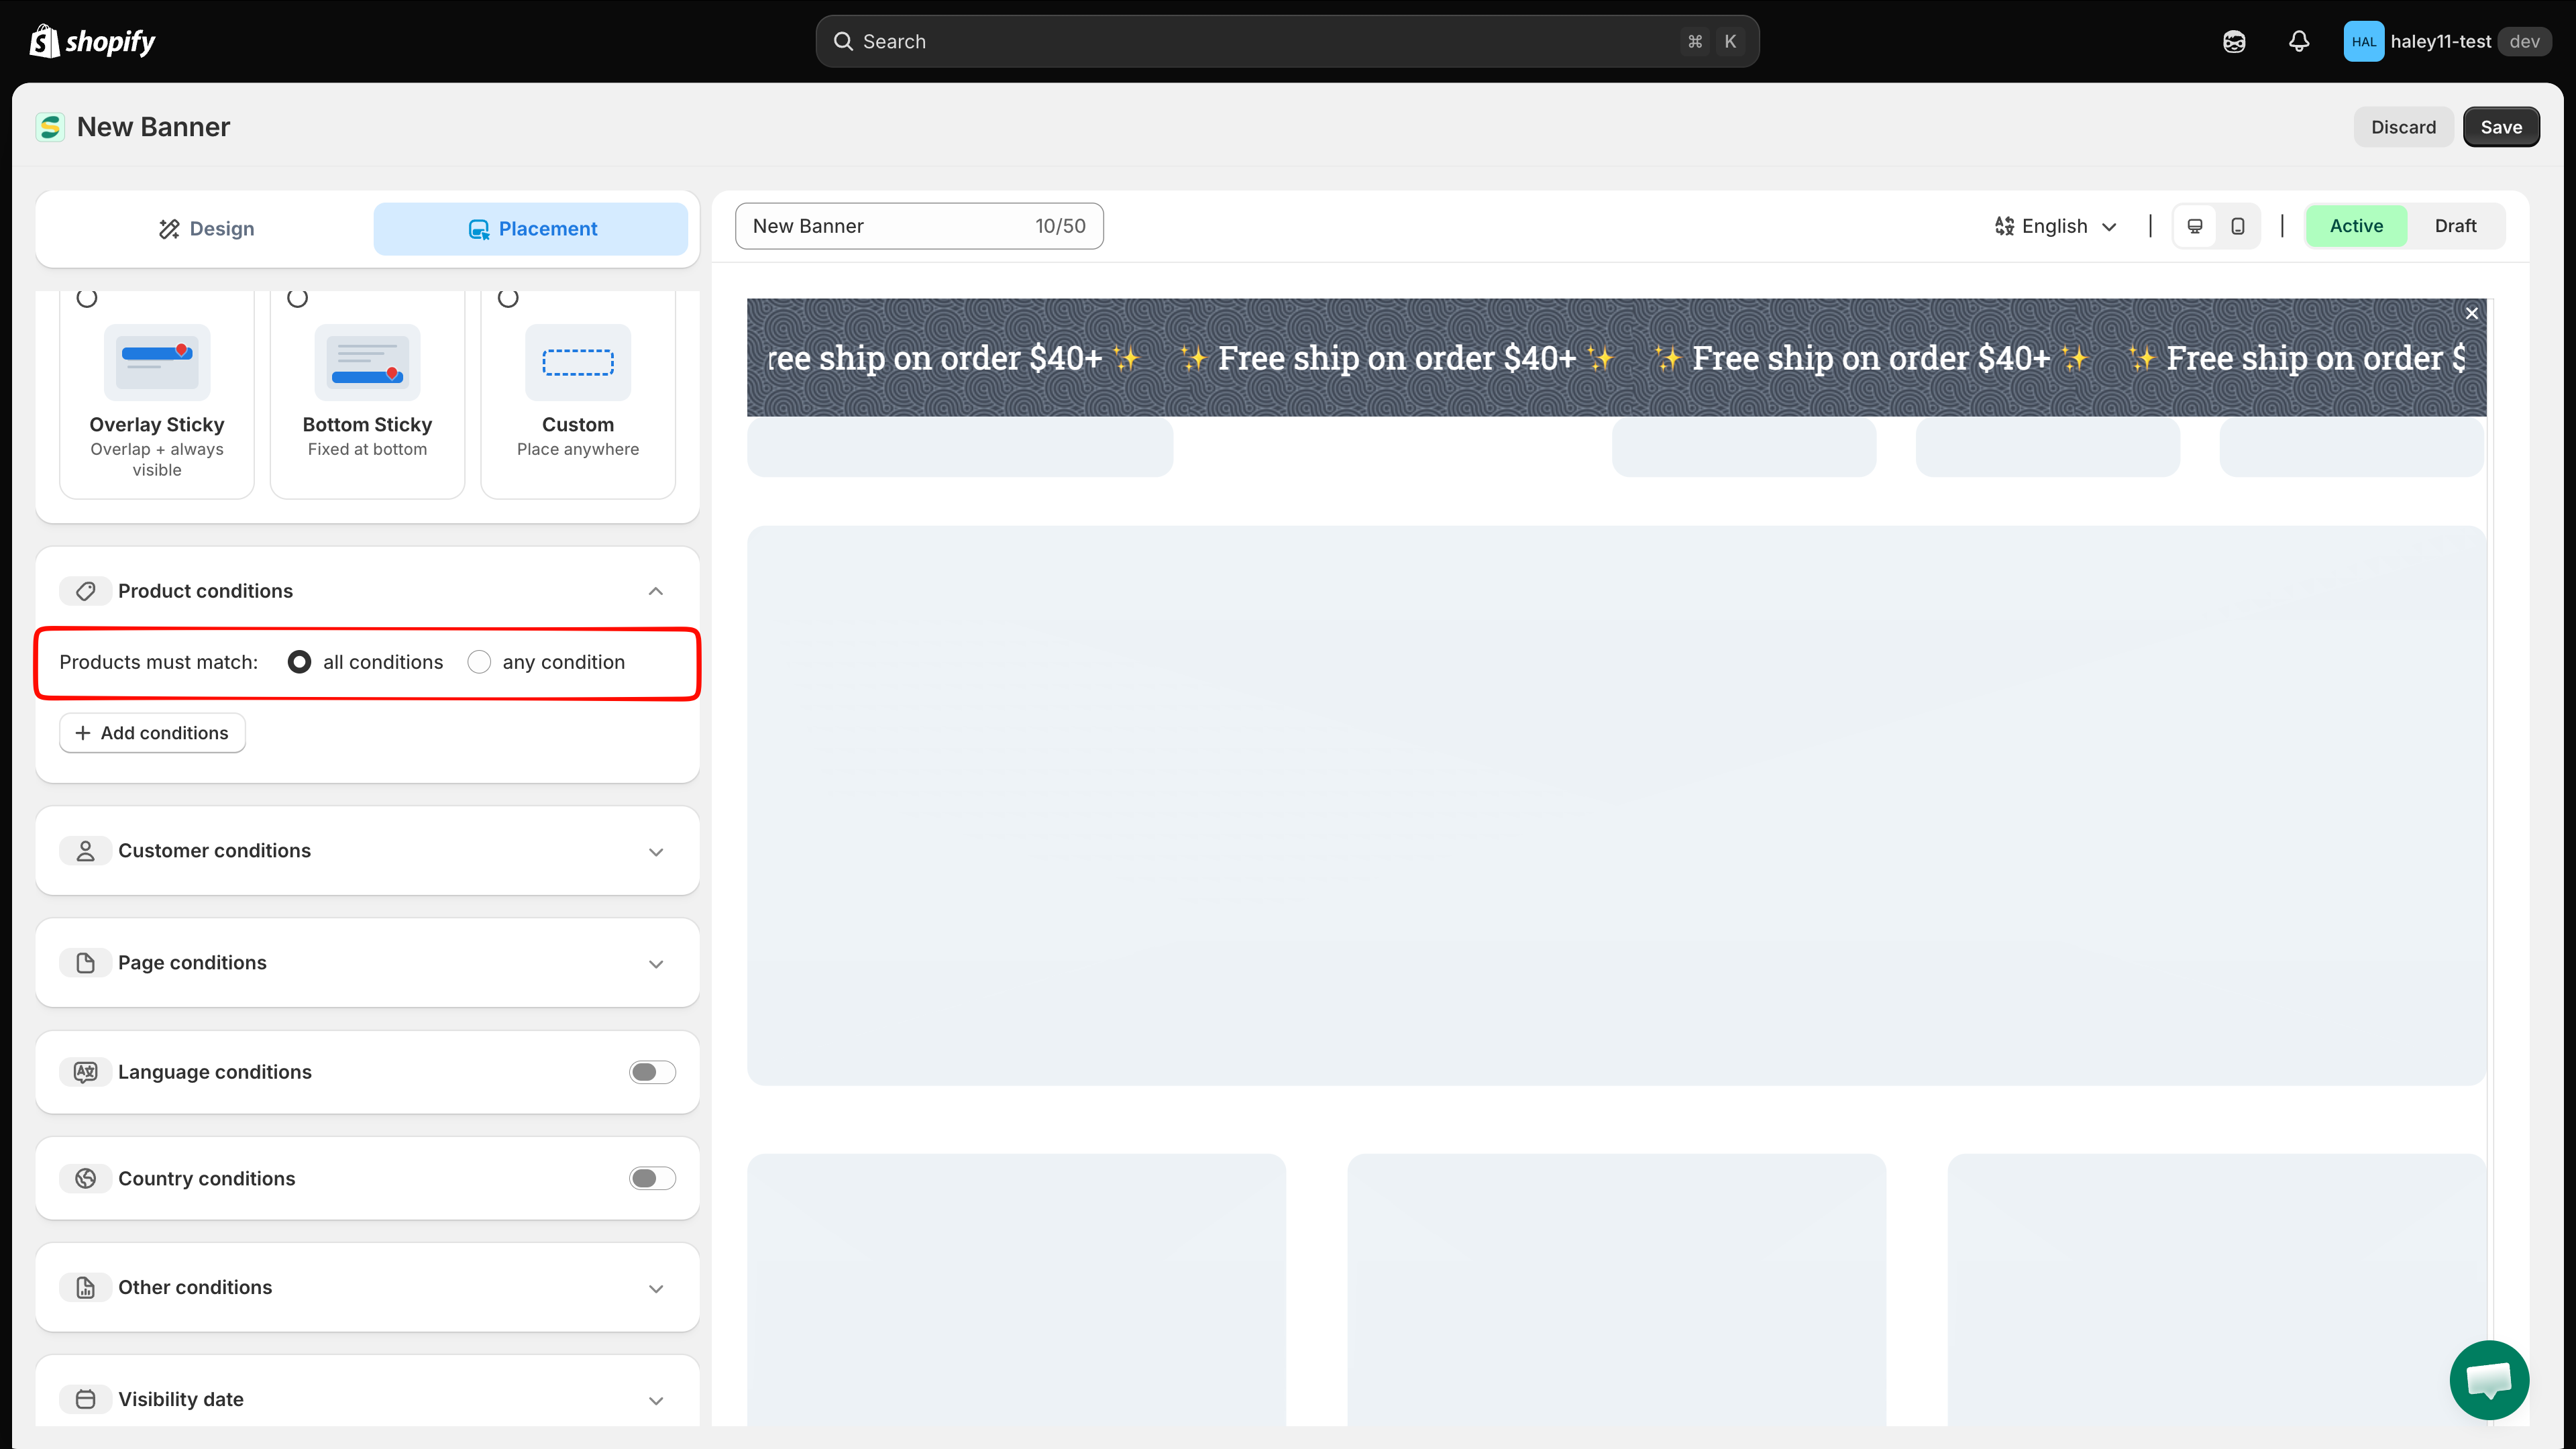
### Match all conditions or any condition
When a panel holds more than one row, the **Products must match** radio decides how they combine:
* **all conditions** — every row must be true (AND). For example, a product tagged `sale` **and** in the `Clearance` collection.
* **any condition** — one row is enough (OR). For example, a product tagged `sale` **or** in the `Clearance` collection.
Switch between AND and OR logic for the rows in a panel.
See [Condition operators reference](/reference/condition-operators-reference.md) for the full behaviour of each operator.
### Customer conditions
Restrict the banner by who is browsing. Click **Add conditions**, then choose a field:
| Field | Options |
| ---------------- | -------------------------------------- |
| **Customer** | **Is Logged In** or **Not Logged In**. |
| **Customer tag** | Match one or more customer tags. |
{% hint style="info" %}
Customer tag conditions require the GOLD plan or above.
{% endhint %}
### Page conditions
Restrict the banner to certain page types. Each row is **Page** + an operator + a page type:
| Page type | Where it applies |
| ------------------- | -------------------------------------------------- |
| **Index page** | Your store's home page. |
| **Collection page** | Pages listing the products in a collection. |
| **Product page** | Individual product detail pages. |
| **Article Page** | Blog article pages. |
| **Blog page** | Blog listing pages. |
| **Cart page** | The shopping cart page, including the cart drawer. |
| **Search page** | Search results. |
| **Specific pages** | Any other page, matched by the URL you enter. |
{% hint style="info" %}
There is no "all pages" option — leaving **Page conditions** empty is what shows the banner everywhere.
{% endhint %}
### Language conditions
Switch the panel on with its toggle, choose an **Operator** — **Equals** or **Not equals** — then search for and select your store's languages. The banner shows only when the customer's active language matches.
{% hint style="info" %}
Language targeting requires the DIAMOND plan. On other plans, banners display for all languages.
{% endhint %}
### Country conditions
Switch the panel on with its toggle, pick an **Operator** — **Equals** or **Not equals** — then search for and select countries. Useful for region-specific shipping or promotional messages.
### Other conditions
Holds a single **Device targeting** setting: **All devices**, **Desktop**, or **Mobile**.
### Visibility date
Schedule the banner with a **Start** and an **End** date and time, both in `YYYY-MM-DD HH:mm` format. Leave a field empty to leave that end of the window open — set only **End**, for example, to run a banner until a sale finishes.
## Shortcode placement
Choose the **Custom** position when you need the banner at an exact spot in your theme rather than pinned to the top or bottom of the page.
{% stepper %}
{% step %}
## Copy the shortcode
Open the **Shortcode** panel at the bottom of the Placement tab and click **Copy**. The snippet looks like this:
```html
```
You can also copy it from the **Shortcode** column on the banners list.
{% endstep %}
{% step %}
## Paste it into your theme
In Shopify admin, go to **Online Store > Themes > Edit code** and paste the snippet into the Liquid template — or into a Custom HTML section — at the position where the banner should appear.
{% endstep %}
{% endstepper %}
{% hint style="info" %}
Only use the shortcode when you need exact placement. For everything else, one of the five built-in positions is enough on its own.
{% endhint %}
## Tips for effective targeting
* **Start broad, then narrow.** Pick the position first, confirm the banner shows, and only then add conditions.
* **Remember that panels combine.** Conditions in different panels must all pass — a product condition plus a page condition means both have to match.
* **Check both devices.** Use the mobile preview toggle above the editor, and set **Device targeting** if a message only makes sense on one.
* **Test on your storefront.** Activate the banner and load the affected pages to confirm it appears where you expect.
## Next steps
* [Create a basic banner](/extra-features/create-basic-banner.md) — build a static or rotating announcement bar.
* [Create an infinite scroll banner](/extra-features/create-infinite-scroll-banner.md) — build a ticker-style bar.
* [Banners overview](/extra-features/overview.md) — return to the banners hub.
{% hint style="success" %}
**Need support?**
If you run into any difficulty while following these steps, contact us at .
{% endhint %}
---
# Agent Instructions
This documentation is published with GitBook. GitBook is the documentation platform designed so that both humans and AI agents can read, navigate, and reason over technical content effectively. Learn more at gitbook.com.
## Querying This Documentation
If you need additional information that is not directly available in this page, you can query the documentation dynamically by asking a question.
Perform an HTTP GET request on the current page URL with the `ask` query parameter, and the optional `goal` query parameter:
```
GET https://docs.samita.io/extra-features/configure-display-conditions.md?ask=&goal=
```
`ask` is the immediate question: it should be specific, self-contained, and written in natural language.
`goal` is optional and describes the broader end goal you are ultimately trying to accomplish on behalf of the user. GitBook uses it to tailor the answer towards what is most useful for that goal.
The response will contain a direct answer to the question and relevant excerpts and sources from the documentation.
Use this mechanism when the answer is not explicitly present in the current page, you need clarification or additional context, or you want to retrieve related documentation sections.