> For the complete documentation index, see [llms.txt](https://docs.samita.io/llms.txt). Markdown versions of documentation pages are available by appending `.md` to page URLs; this page is available as [Markdown](https://docs.samita.io/getting-started/quickstart.md).

# Quickstart

Install the app, build your first badge, and see it live on your storefront in a few minutes.

This walkthrough takes you from installing **Sami AI Product Labels & Badge** to a badge live on your product pages.

{% stepper %}
{% step %}

## Install the app

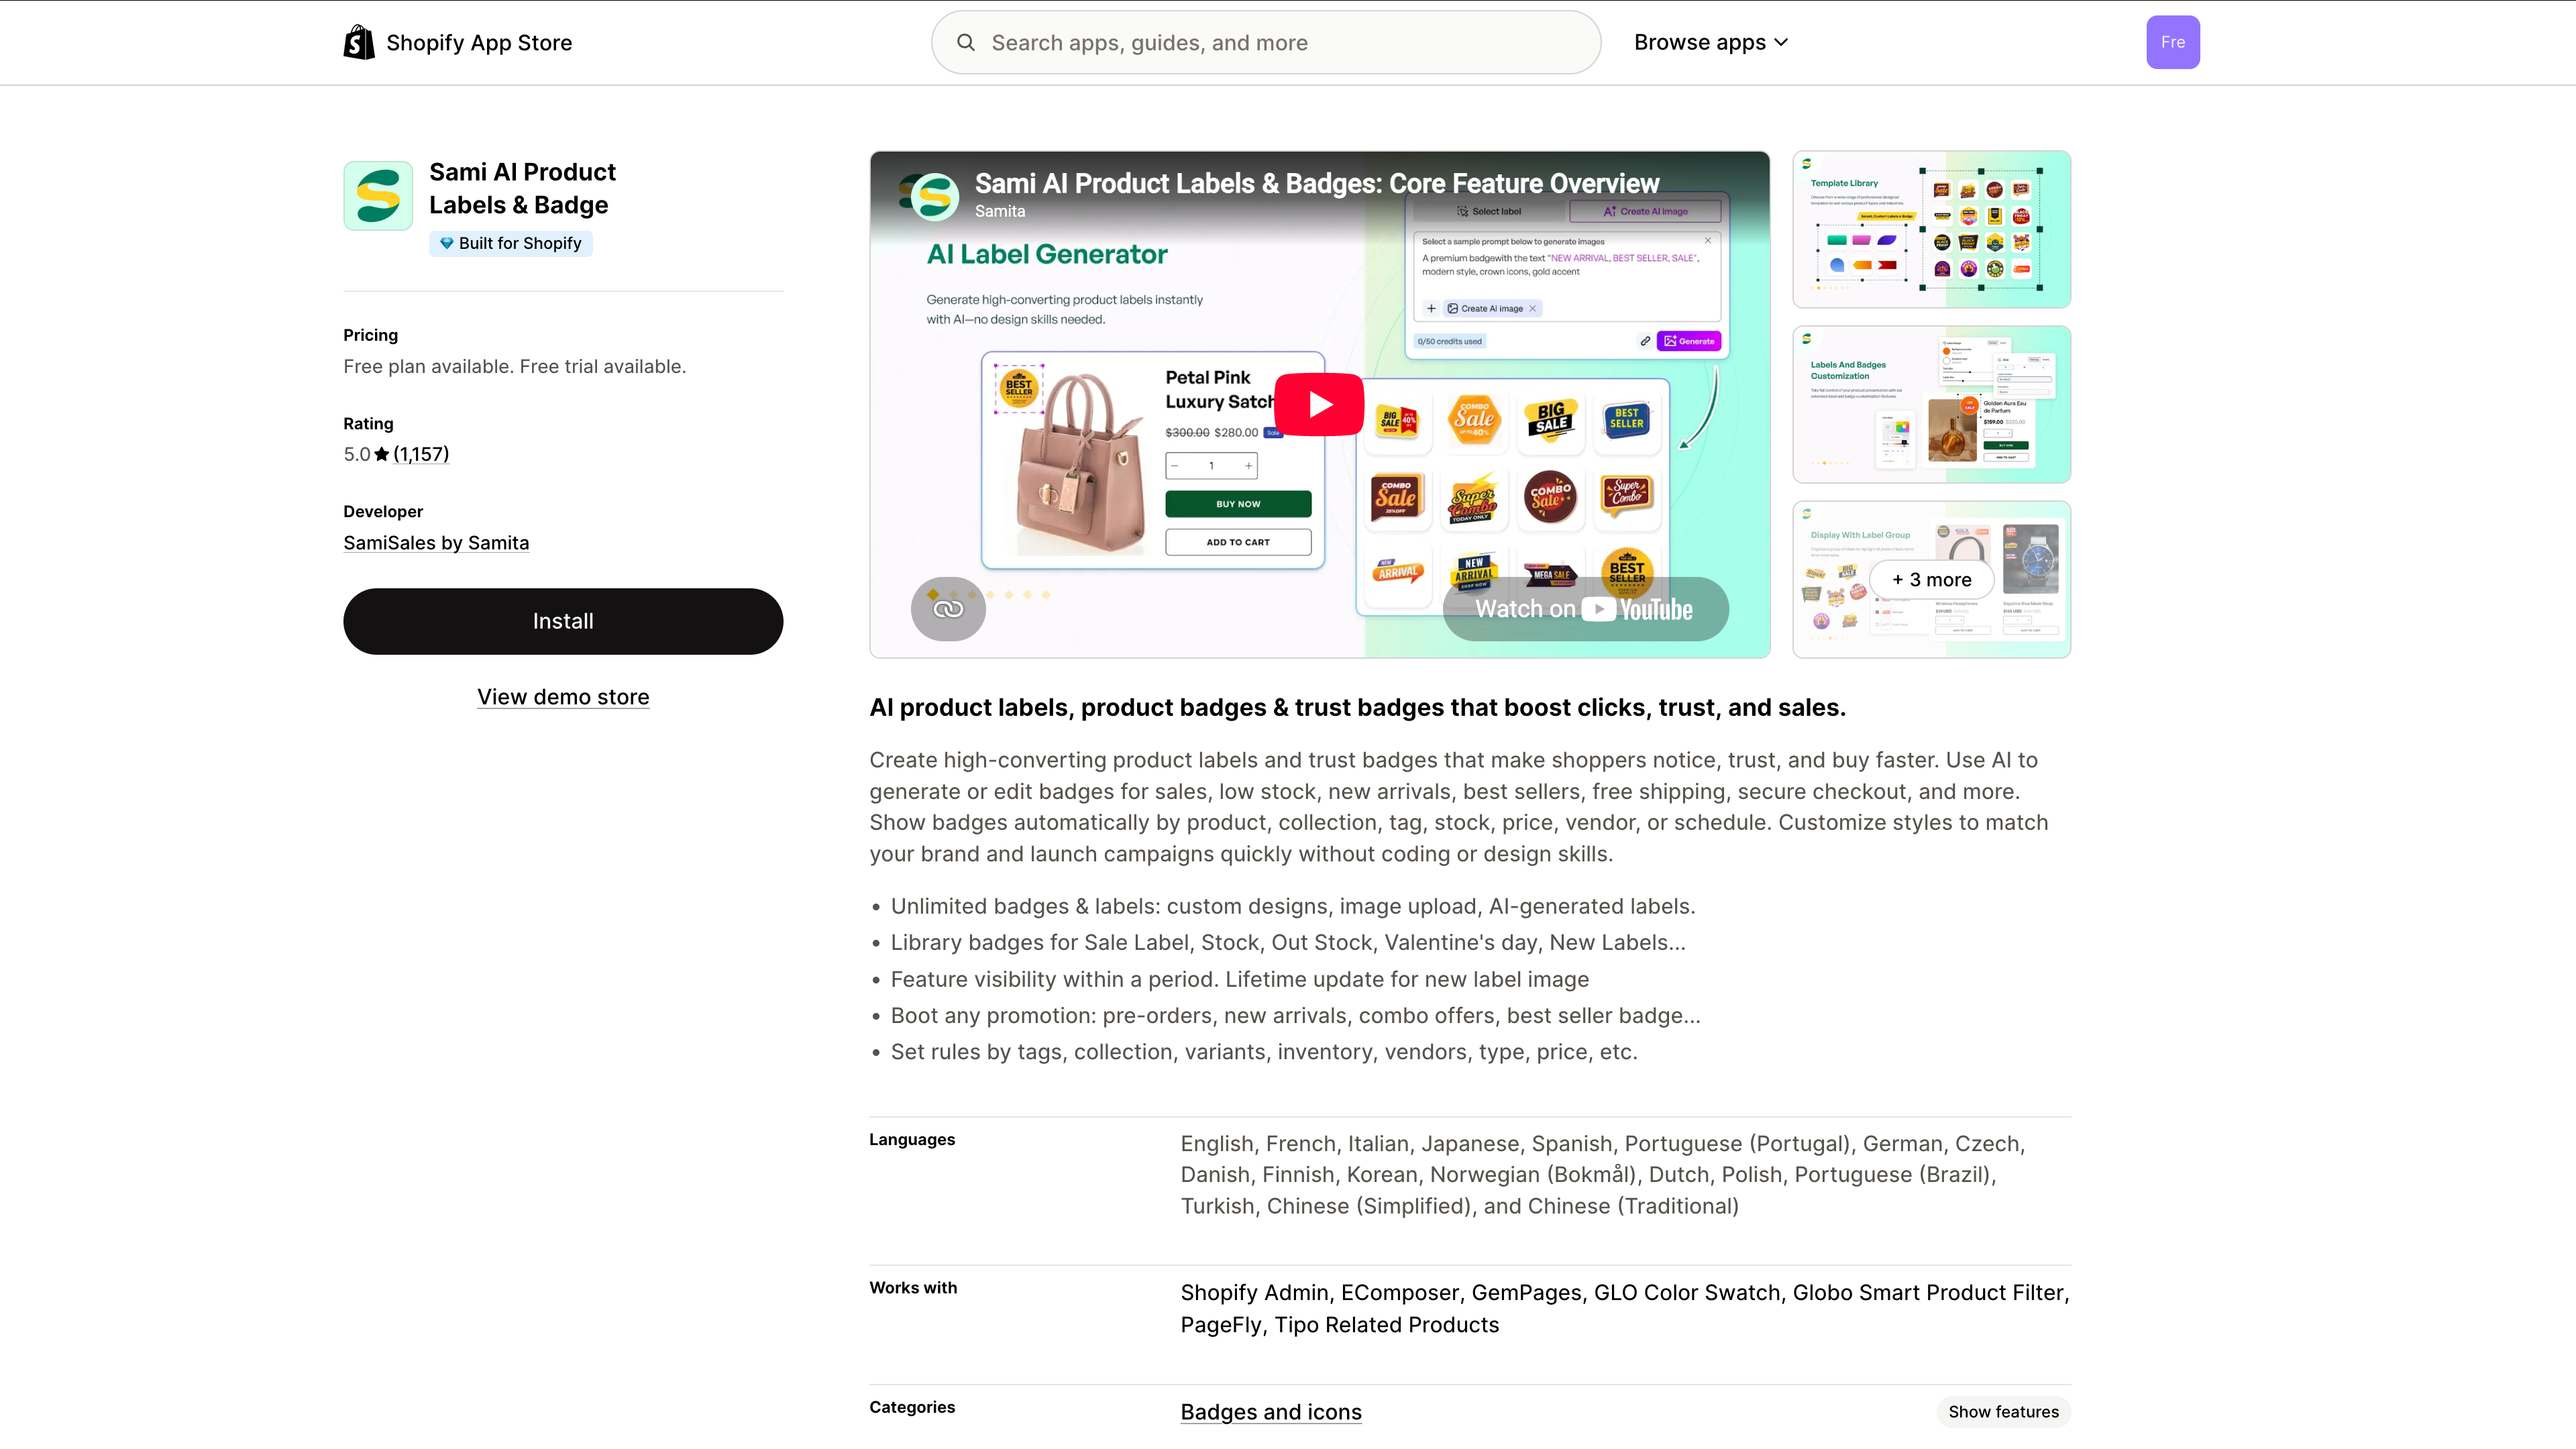
Open the [Shopify App Store listing](https://apps.shopify.com/product-labels-badges-samita) and click **Install**, then review and approve the requested permissions.

<figure><img src="https://1598842017-files.gitbook.io/~/files/v0/b/gitbook-x-prod.appspot.com/o/spaces%2F1WRTlT5AcaLSAedbCJyZ%2Fuploads%2Fgit-blob-224874ba3bc2b875914dbcf4d3a6c864746cae8c%2Fimage_194.png?alt=media" alt="Sami AI Product Labels listing in the Shopify App Store"><figcaption><p>Click Install on the app listing page.</p></figcaption></figure>
{% endstep %}

{% step %}

## Enable the app embed

{% hint style="warning" %}
Do this first. Badges never render on your storefront until the app embed is on — even a badge set to **Active** stays invisible without it.
{% endhint %}

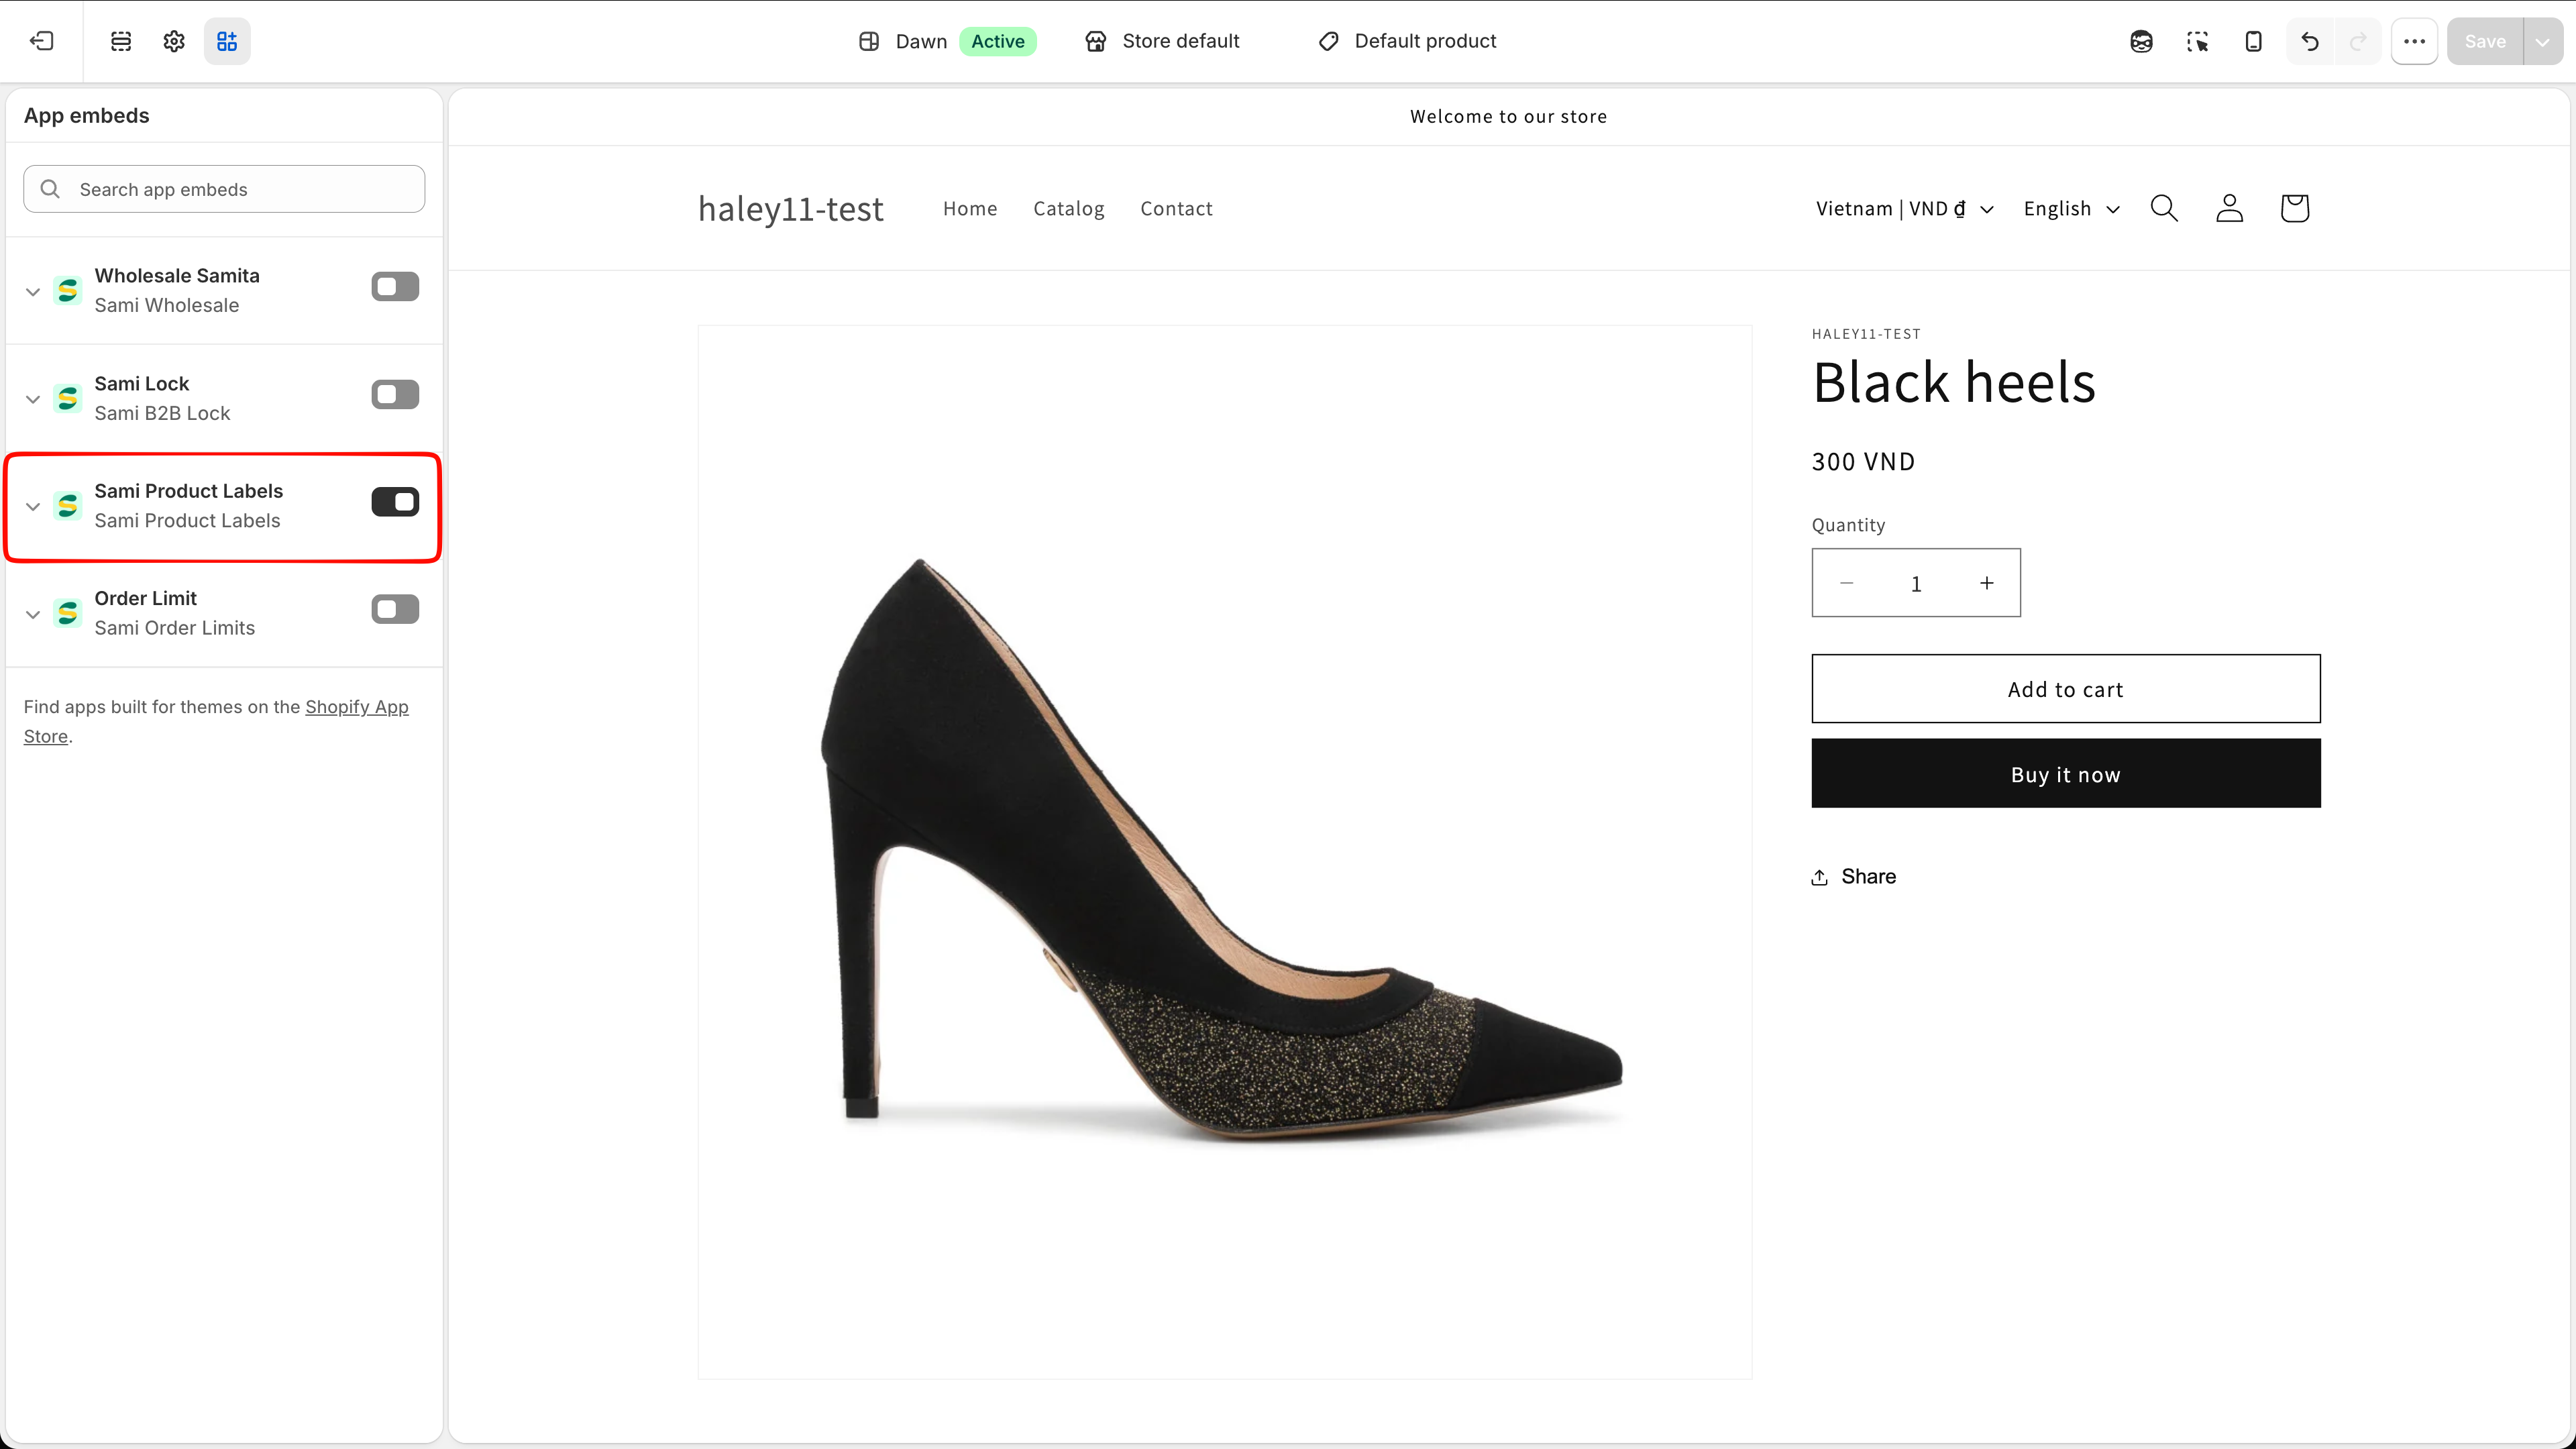
On the **Dashboard**, check the status chip beside **Explore outstanding features**. If it reads **App embed inactive**, turn the embed on in your theme editor.

<figure><img src="https://1598842017-files.gitbook.io/~/files/v0/b/gitbook-x-prod.appspot.com/o/spaces%2F1WRTlT5AcaLSAedbCJyZ%2Fuploads%2Fgit-blob-817e72718b6e3e8125eb00058b41171dce57c511%2Fimage_193.png?alt=media" alt="Shopify theme editor showing the App embeds panel with Sami Product Labels toggled on"><figcaption><p>Toggle on the app embed and click Save in the theme editor.</p></figcaption></figure>

Full instructions: [Enable app in theme](/getting-started/enable-app-in-theme.md).
{% endstep %}

{% step %}

## Create your first badge

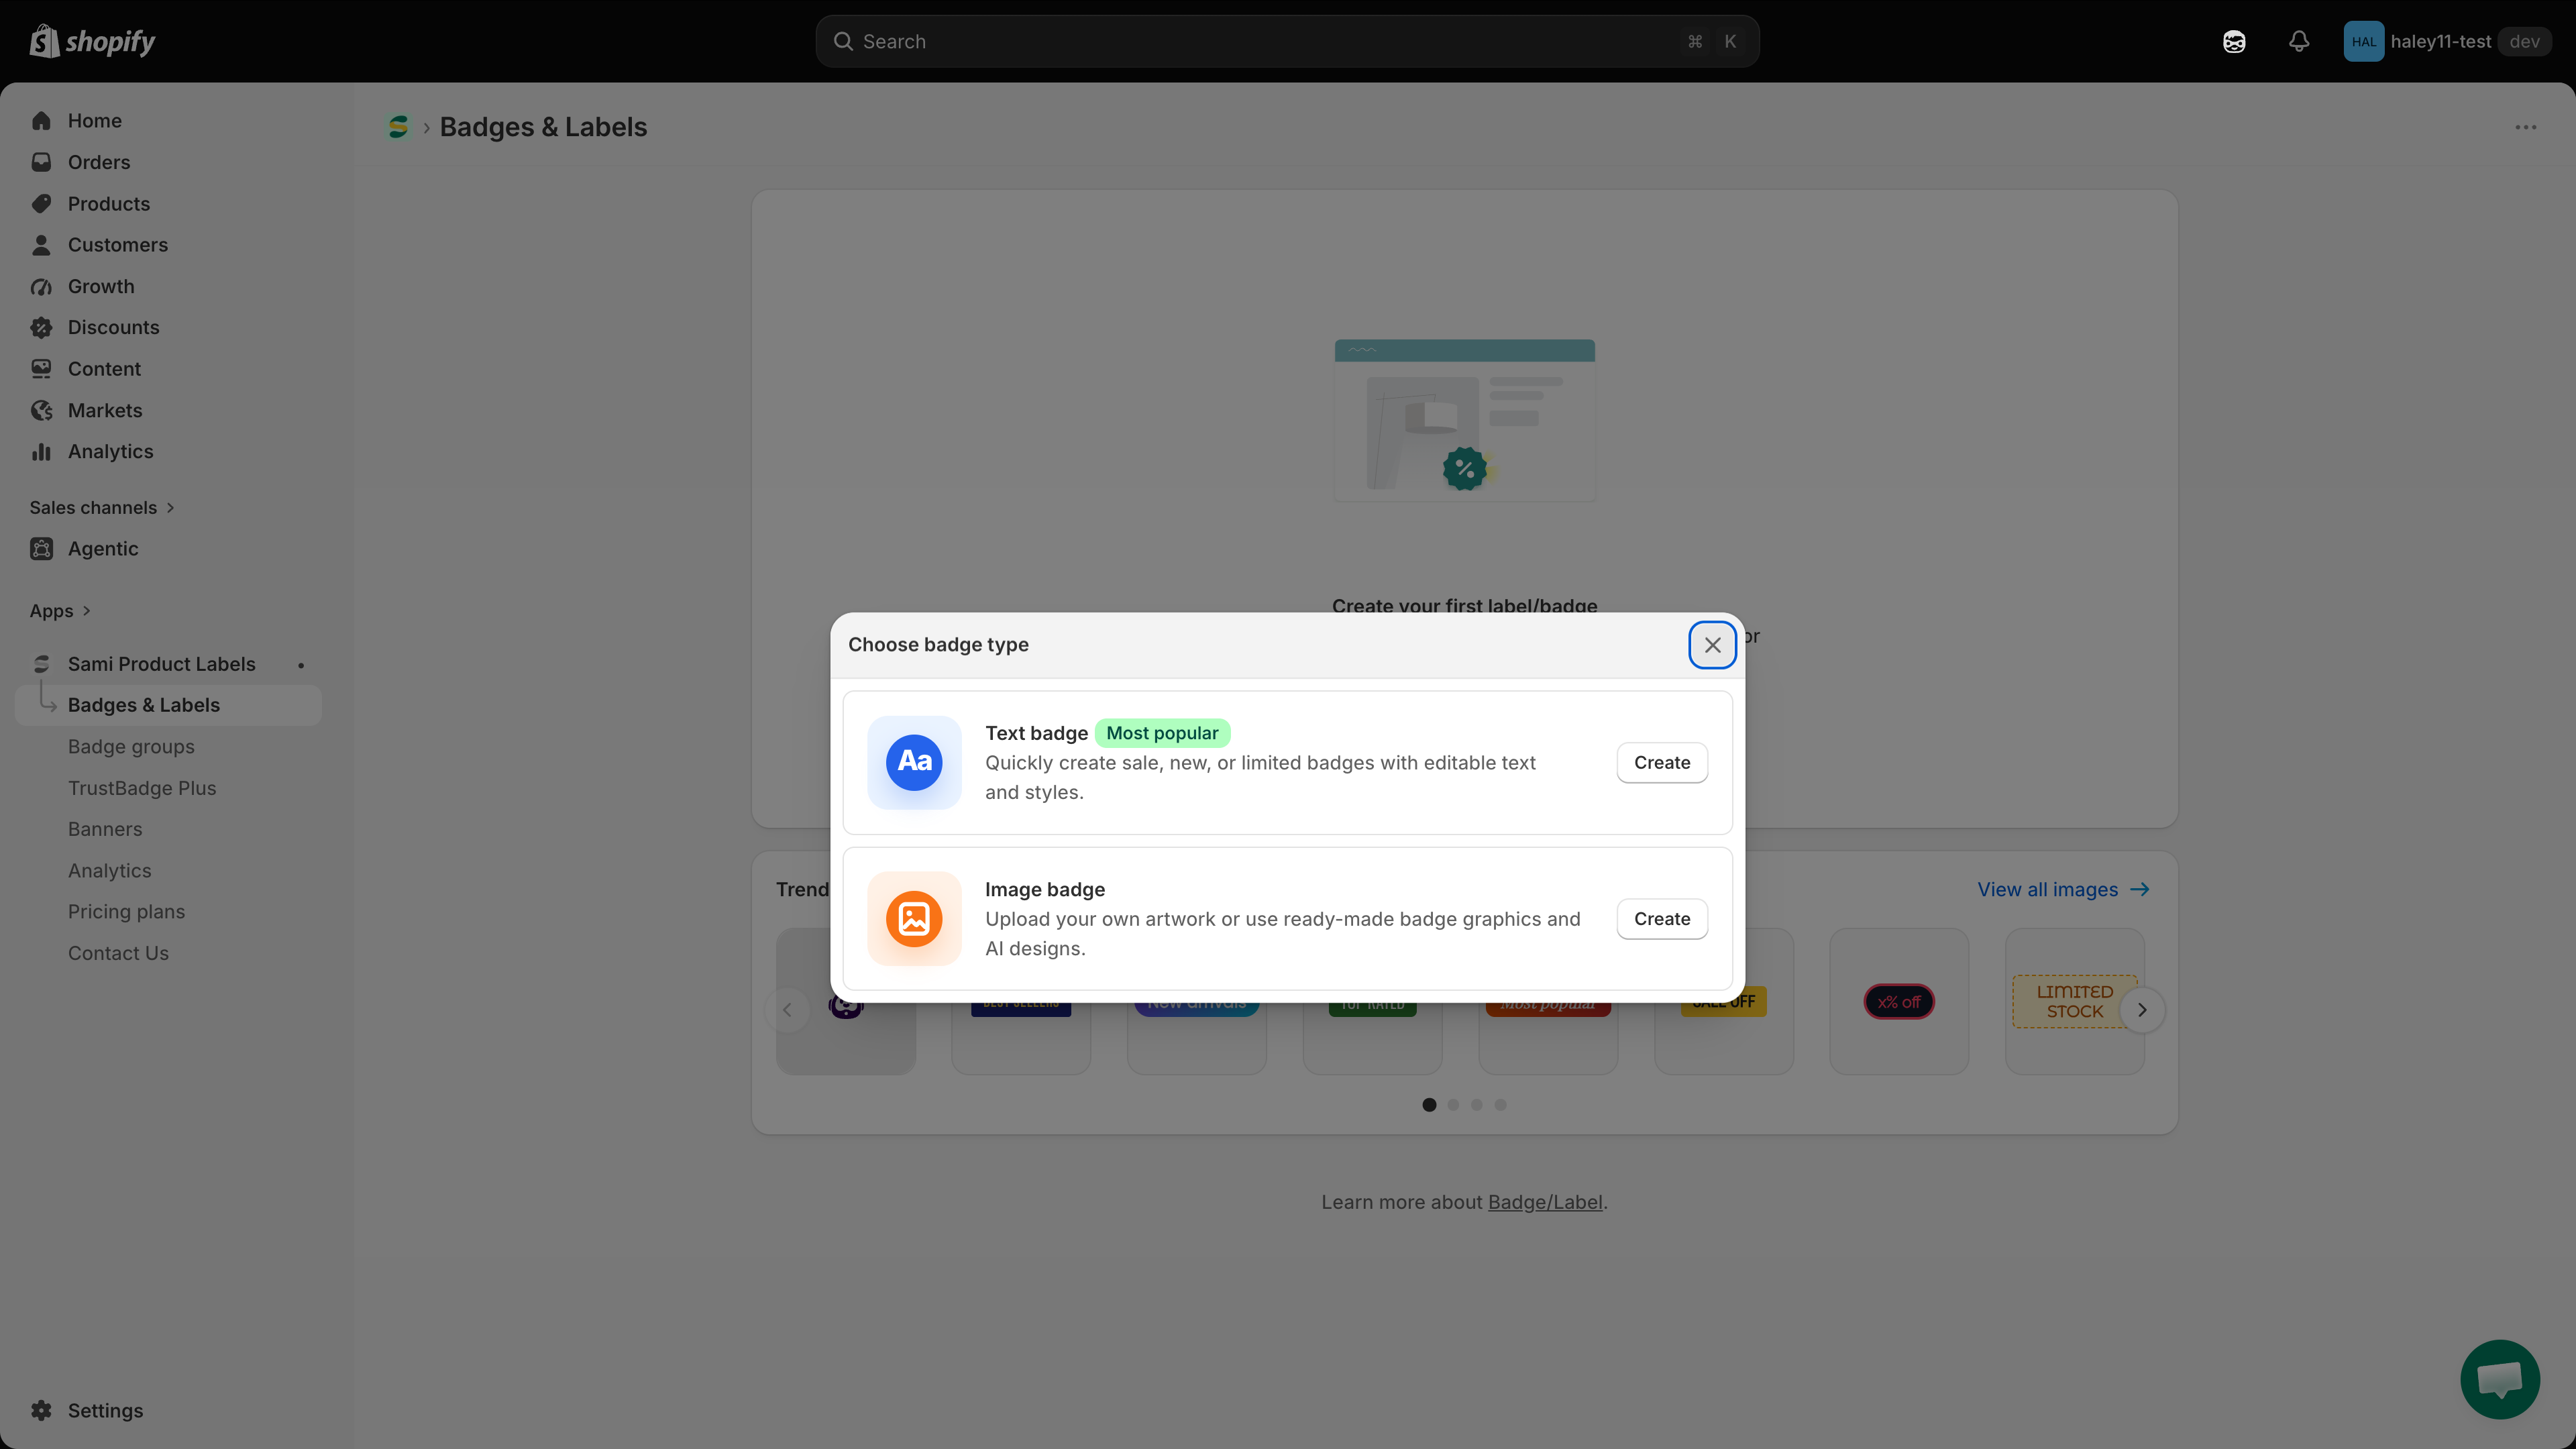
Go to **Badges & Labels** in the app sidebar and click **Create badge**. The **Choose badge type** dialog offers two options — click **Create** on the one you want.

| Type                          | Description                                                 |
| ----------------------------- | ----------------------------------------------------------- |
| **Text badge** (most popular) | Sale, new, or limited badges with editable text and styles. |
| **Image badge**               | Your own artwork, ready-made badge graphics, or AI designs. |

<figure><img src="https://1598842017-files.gitbook.io/~/files/v0/b/gitbook-x-prod.appspot.com/o/spaces%2F1WRTlT5AcaLSAedbCJyZ%2Fuploads%2Fgit-blob-0b282745efa40aafd6a03ec77e7033c91f45a795%2Fimage_195.png?alt=media" alt="Choose badge type dialog with Text badge and Image badge options"><figcaption><p>Pick a badge type, then click Create.</p></figcaption></figure>
{% endstep %}

{% step %}

## Design the badge

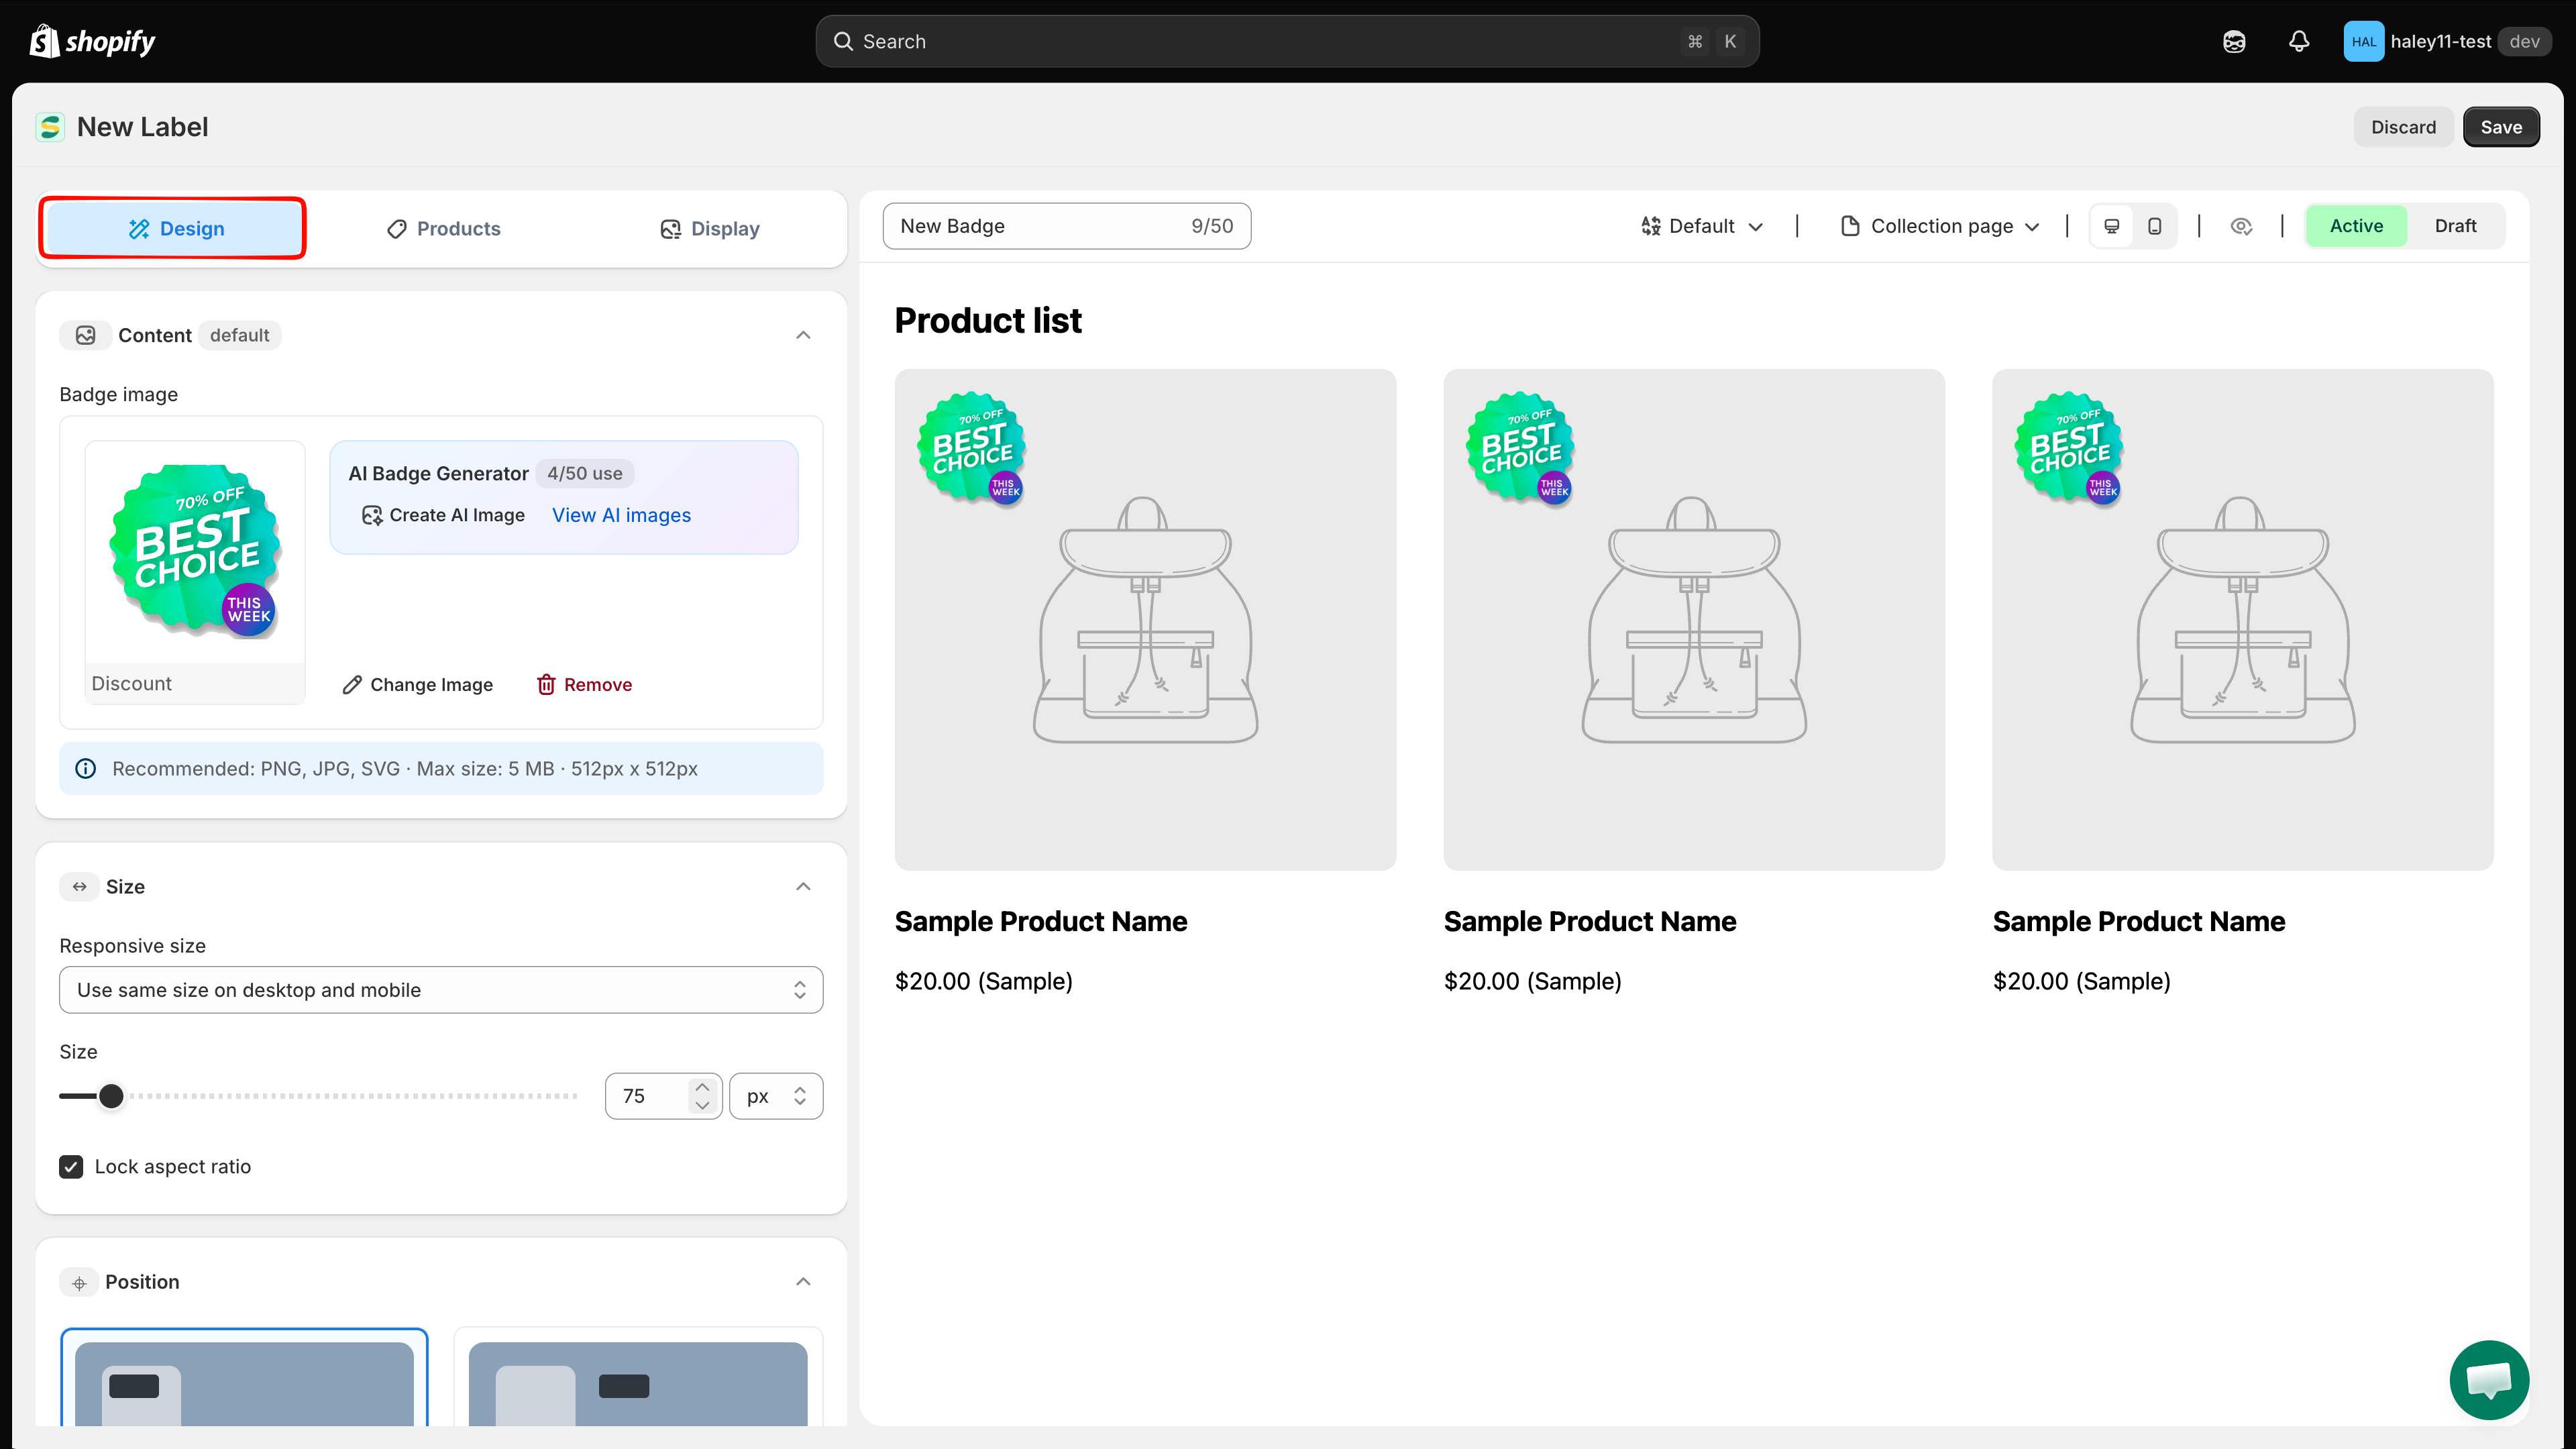
The editor opens on the **Design** tab, with a live preview on the right that updates as you type.

* **Text badges** — enter the **Badge text**, pick a font and text color, set the **Background color**, then choose a shape from **Choose template**.
* **Image badges** — upload your own image, pick one from the library, or generate one with AI.

Under **Position**, choose where the badge sits:

| Option                    | What you get                                                                                                        |
| ------------------------- | ------------------------------------------------------------------------------------------------------------------- |
| **Inside product image**  | A 3 × 3 grid of nine positions, from top-left to bottom-right. Tick **Use Custom Position** for exact coordinates.  |
| **Outside product image** | A **Predefined position** dropdown — for example *Below the product price* — plus left, center, or right alignment. |

<figure><img src="https://1598842017-files.gitbook.io/~/files/v0/b/gitbook-x-prod.appspot.com/o/spaces%2F1WRTlT5AcaLSAedbCJyZ%2Fuploads%2Fgit-blob-48ed913d2304dd5cdc4f7c3a241744f0cc2d5042%2Fimage_196.png?alt=media" alt="Badge editor Design tab with color, template, and position controls"><figcaption><p>Set the text, colors, shape, and position on the Design tab.</p></figcaption></figure>
{% endstep %}

{% step %}

## Choose which products show it

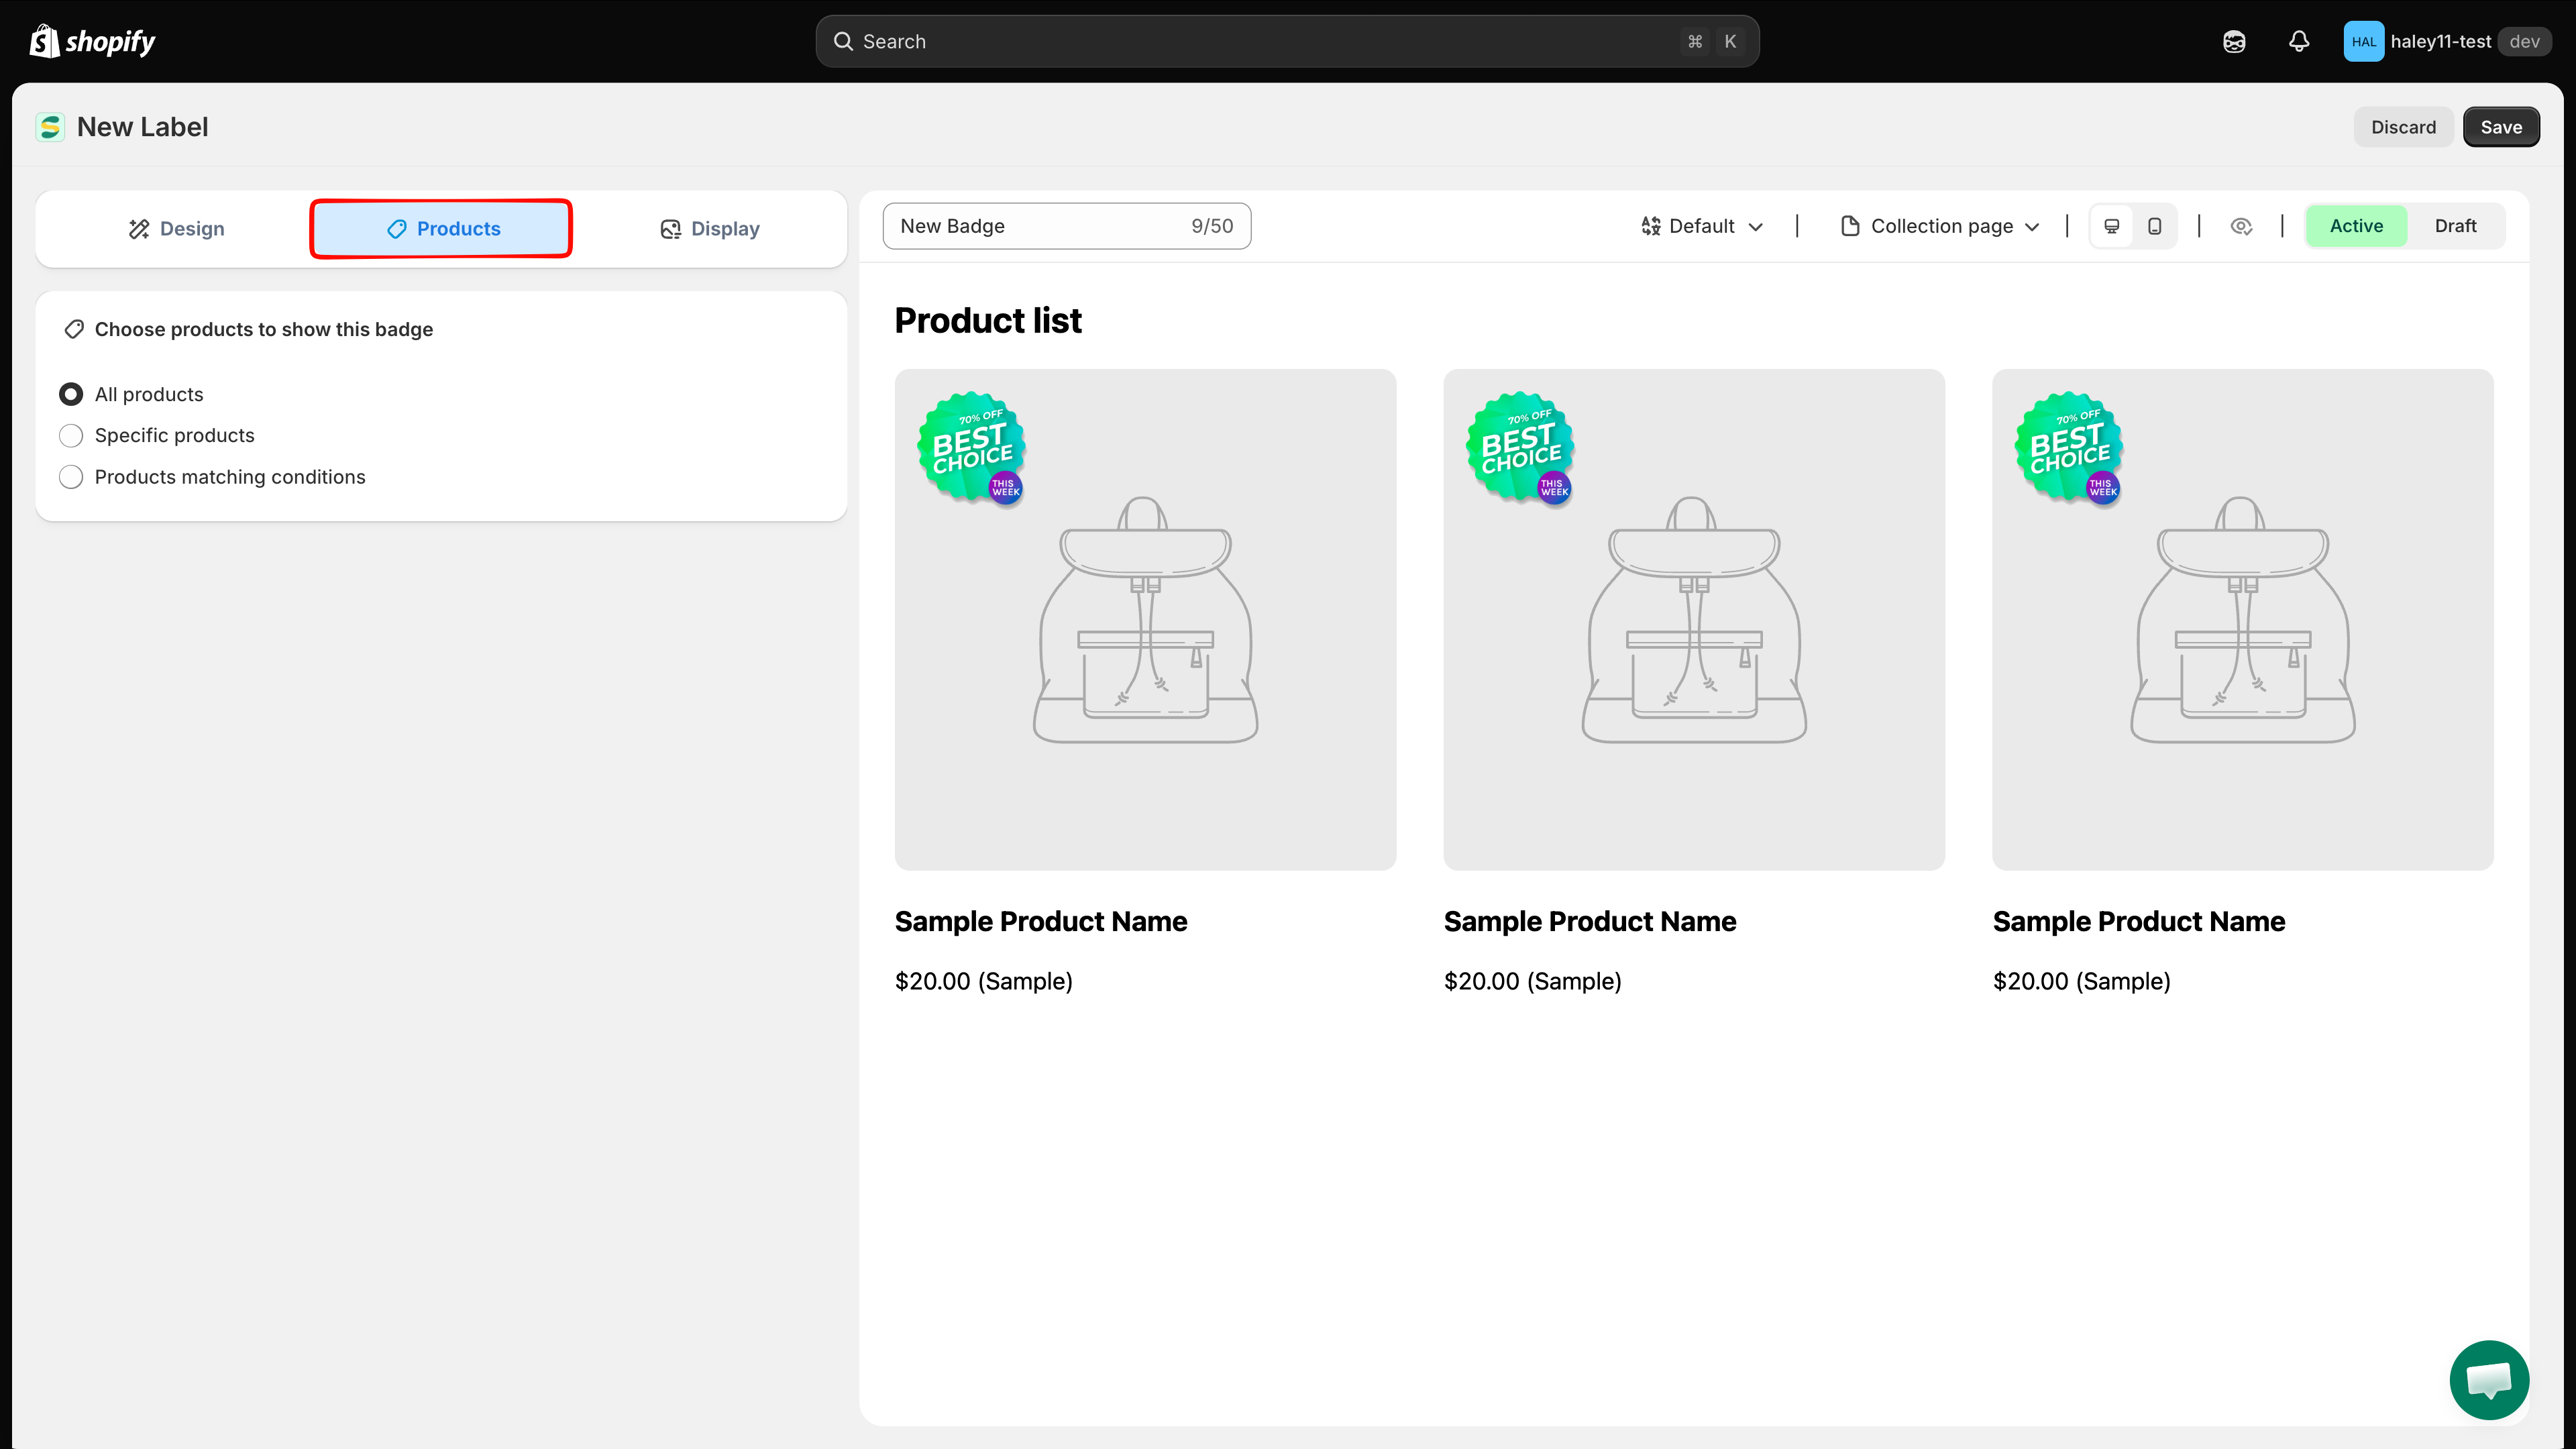
Switch to the **Products** tab and pick one of three options under **Choose products to show this badge**:

| Option                           | What it does                                                                                |
| -------------------------------- | ------------------------------------------------------------------------------------------- |
| **All products**                 | Shows the badge on every product in your store.                                             |
| **Specific products**            | Hand-pick individual products.                                                              |
| **Products matching conditions** | Build rules from product title, type, vendor, price, tag, inventory, collections, and more. |

<figure><img src="https://1598842017-files.gitbook.io/~/files/v0/b/gitbook-x-prod.appspot.com/o/spaces%2F1WRTlT5AcaLSAedbCJyZ%2Fuploads%2Fgit-blob-0216f042ca853afba4b25e2981fd49f6bd188e16%2Fimage_197.png?alt=media" alt="Products tab showing the three selection options"><figcaption><p>Target every product, a hand-picked list, or a rule.</p></figcaption></figure>

See [Condition operators reference](/reference/condition-operators-reference.md) for every field and operator.
{% endstep %}

{% step %}

## Activate and check your storefront

Set the status switch above the preview to **Active**, then click **Save** in the top-right corner.

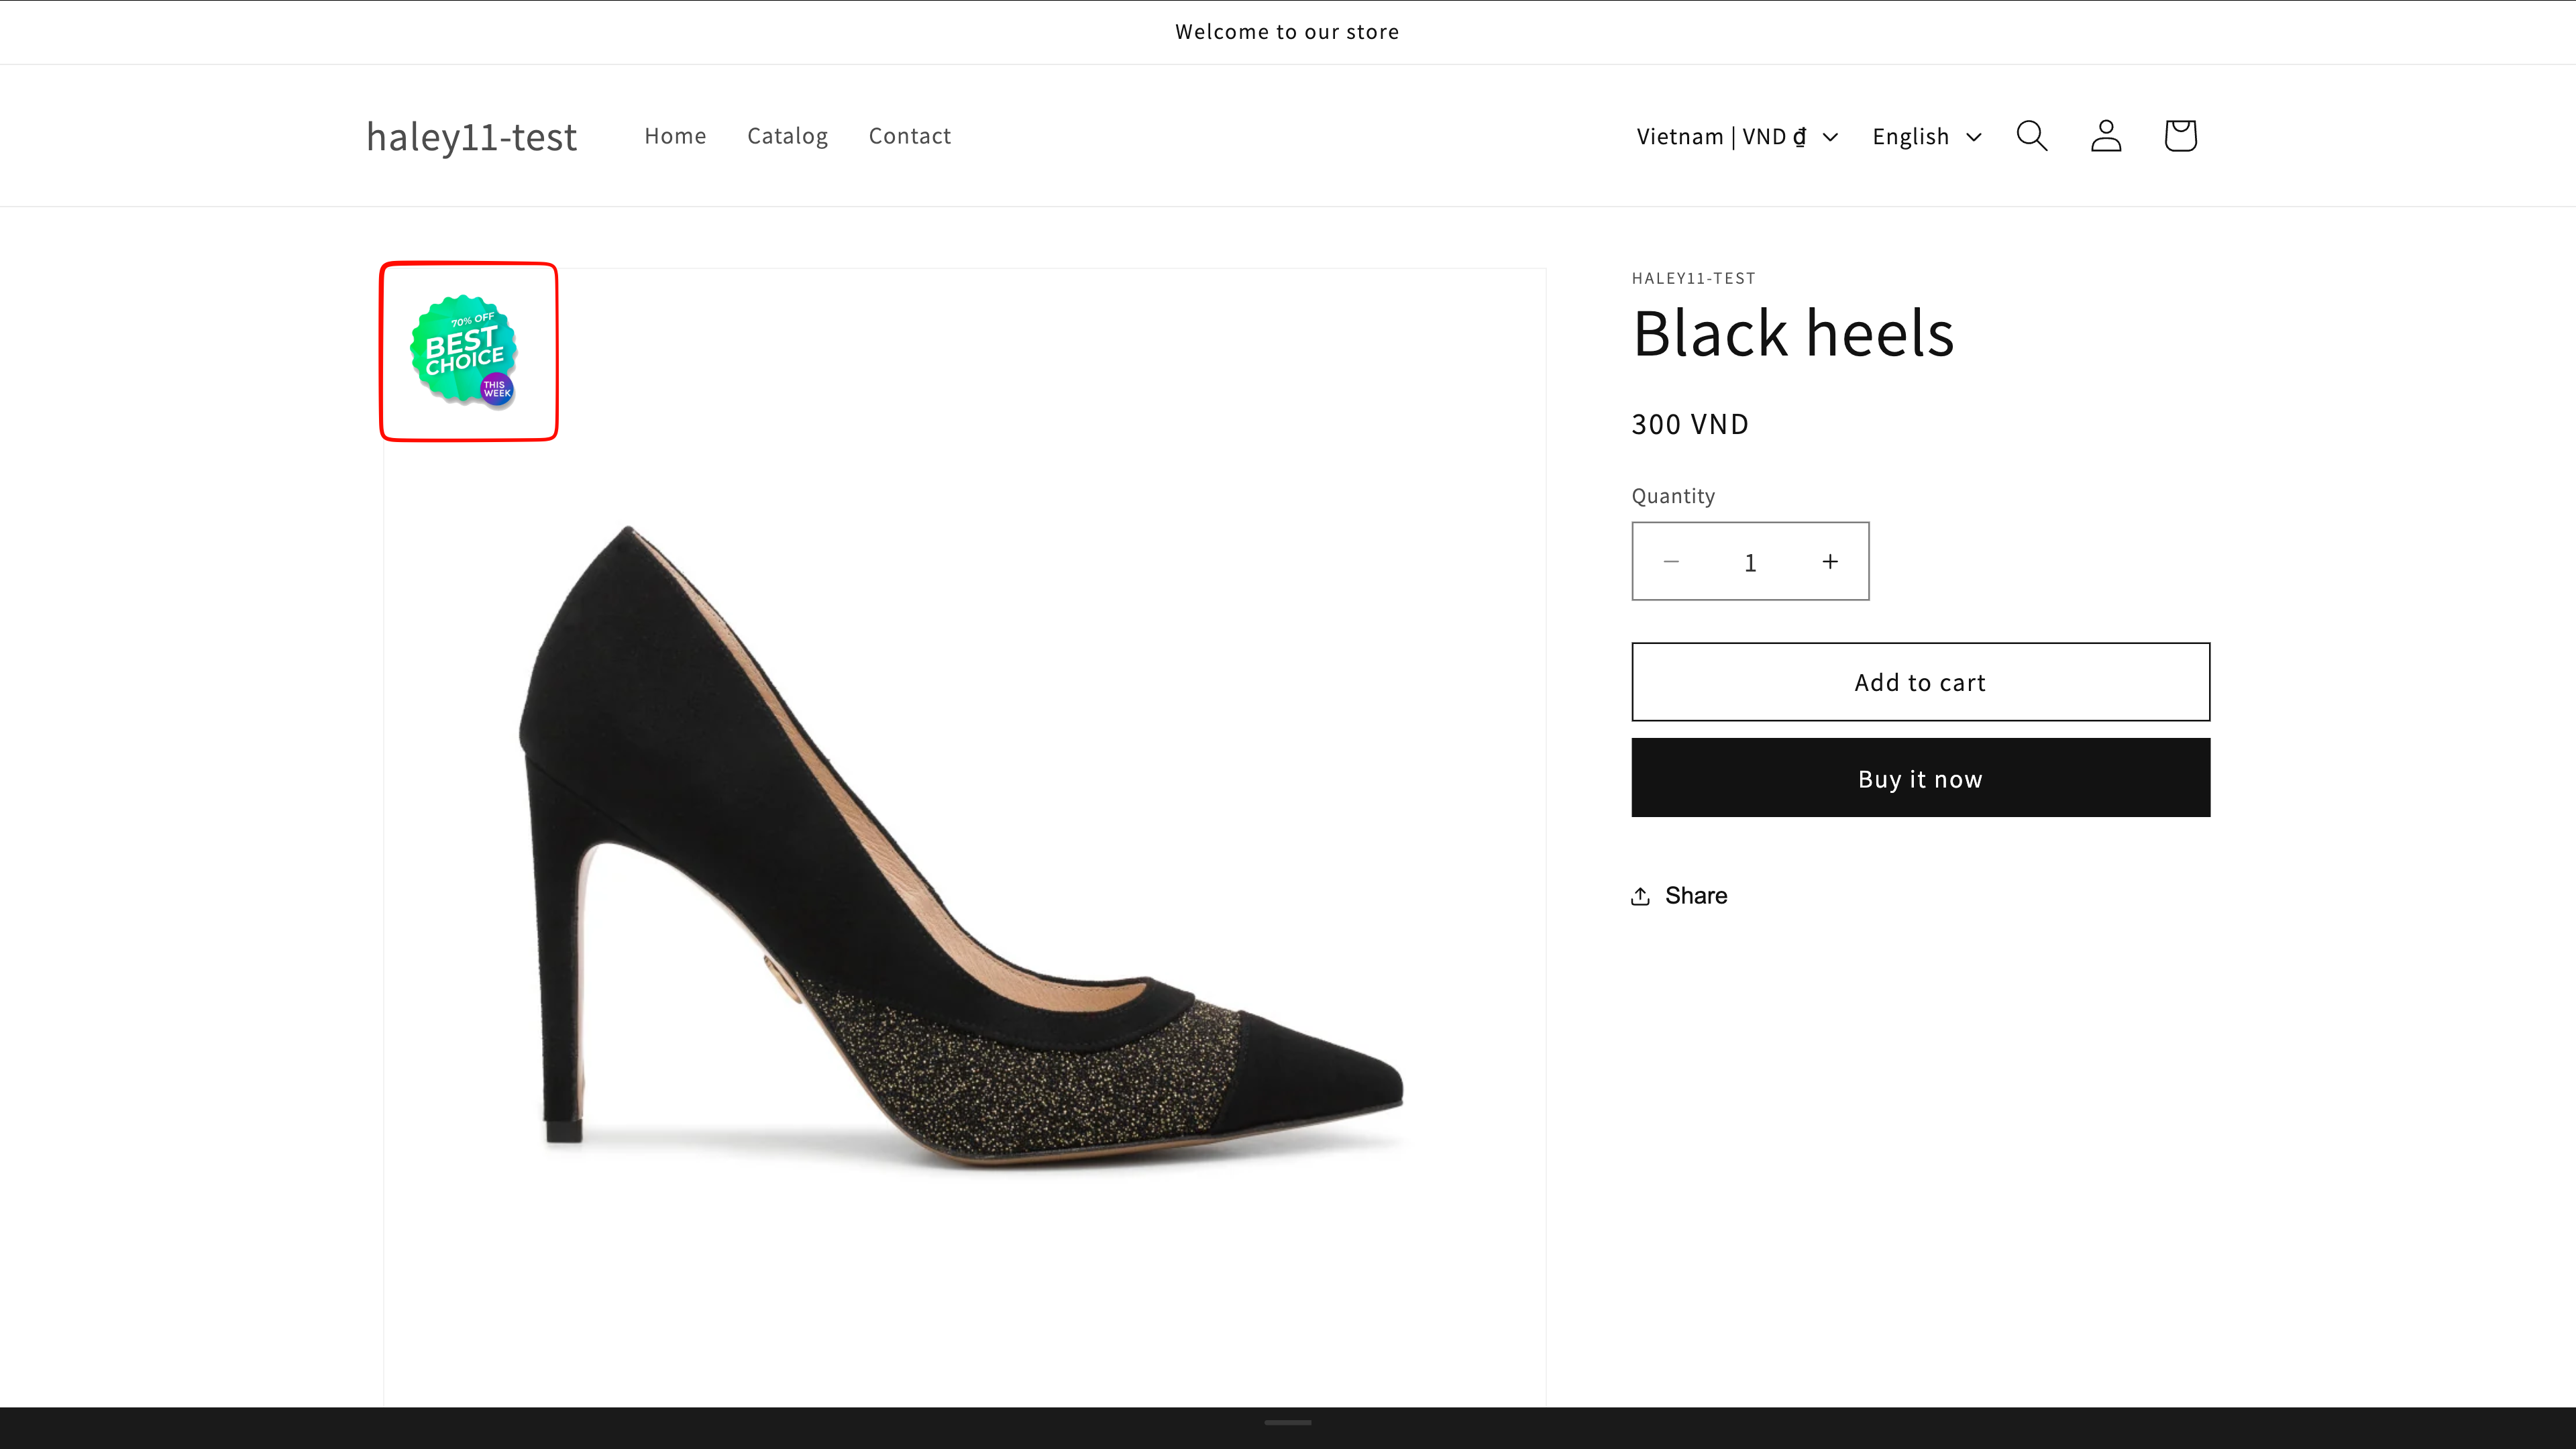
Open your storefront in a new tab — the badge appears on your product images within a few seconds.

<figure><img src="https://1598842017-files.gitbook.io/~/files/v0/b/gitbook-x-prod.appspot.com/o/spaces%2F1WRTlT5AcaLSAedbCJyZ%2Fuploads%2Fgit-blob-33d32f23a8acb3a86ee78a281933937537ca6d3a%2Fimage_198.png?alt=media" alt="Storefront product page showing a live badge on the product image"><figcaption><p>Your badge is now live on your storefront.</p></figcaption></figure>

{% hint style="success" %}
That's it — your first badge is live on your product and collection pages.
{% endhint %}
{% endstep %}
{% endstepper %}

## Next steps

* [Create a text badge](/badges-and-labels/create-text-badge.md) — all the text badge design options.
* [Create an image badge](/badges-and-labels/create-image-badge.md) — upload artwork or use the built-in library.
* [Badges & Labels overview](/badges-and-labels/overview.md) — the full feature set.

{% hint style="success" %}
**Need support?**

If you run into any difficulty while following these steps, contact us at <support@samita.io>.
{% endhint %}


---

# Agent Instructions
This documentation is published with GitBook. GitBook is the documentation platform designed so that both humans and AI agents can read, navigate, and reason over technical content effectively. Learn more at gitbook.com.

## Querying This Documentation
If you need additional information that is not directly available in this page, you can query the documentation dynamically by asking a question.

Perform an HTTP GET request on the current page URL with the `ask` query parameter, and the optional `goal` query parameter:

```
GET https://docs.samita.io/getting-started/quickstart.md?ask=<question>&goal=<endgoal>
```

`ask` is the immediate question: it should be specific, self-contained, and written in natural language.
`goal` is optional and describes the broader end goal you are ultimately trying to accomplish on behalf of the user. GitBook uses it to tailor the answer towards what is most useful for that goal.

The response will contain a direct answer to the question and relevant excerpts and sources from the documentation.

Use this mechanism when the answer is not explicitly present in the current page, you need clarification or additional context, or you want to retrieve related documentation sections.