> For the complete documentation index, see [llms.txt](https://docs.samita.io/llms.txt). Markdown versions of documentation pages are available by appending `.md` to page URLs; this page is available as [Markdown](https://docs.samita.io/sami-b2b-onboarding/application-forms/after-the-buyer-submits.md).

# After the buyer submits

Choose the thank-you screen or the page buyers see after they submit, and learn where each application goes.

When a buyer sends your form, Sami B2B Onboarding files the application for your team and shows the buyer either a thank-you screen or another page of your choice. This page covers both choices, the emails that go out and what signed-in customers see.

## What happens when a buyer submits

* **The application is filed.** It appears in **Companies › Applications** with the status **Pending**, under **Needs your action**. See [Review an application](/sami-b2b-onboarding/reviewing-applications/review-an-application.md).
* **Emails go out.** The buyer gets the **Application received** email and your team gets the **New application** email. Both are on by default. You can switch each one off for a form in the builder's **Email** section. See [Edit email templates](/sami-b2b-onboarding/settings/email-templates.md).
* **Rules run.** If you set up rules, one may approve or reject the application, ask for more information, assign it or flag it straight away. See [Rules that decide applications](/sami-b2b-onboarding/automation/rules.md).
* **The buyer sees what you chose** in **After submit**: a thank-you screen, or another page.

Nothing is created in Shopify yet. The customer and company are made when the application is approved.

## Show a thank-you message

The thank-you screen replaces the form on the same page. It's the default.

{% stepper %}
{% step %}

### Open After submit

Go to **Forms** and click **Edit** beside the form. In the rail on the left, click **After submit**.
{% endstep %}

{% step %}

### Choose the thank-you message

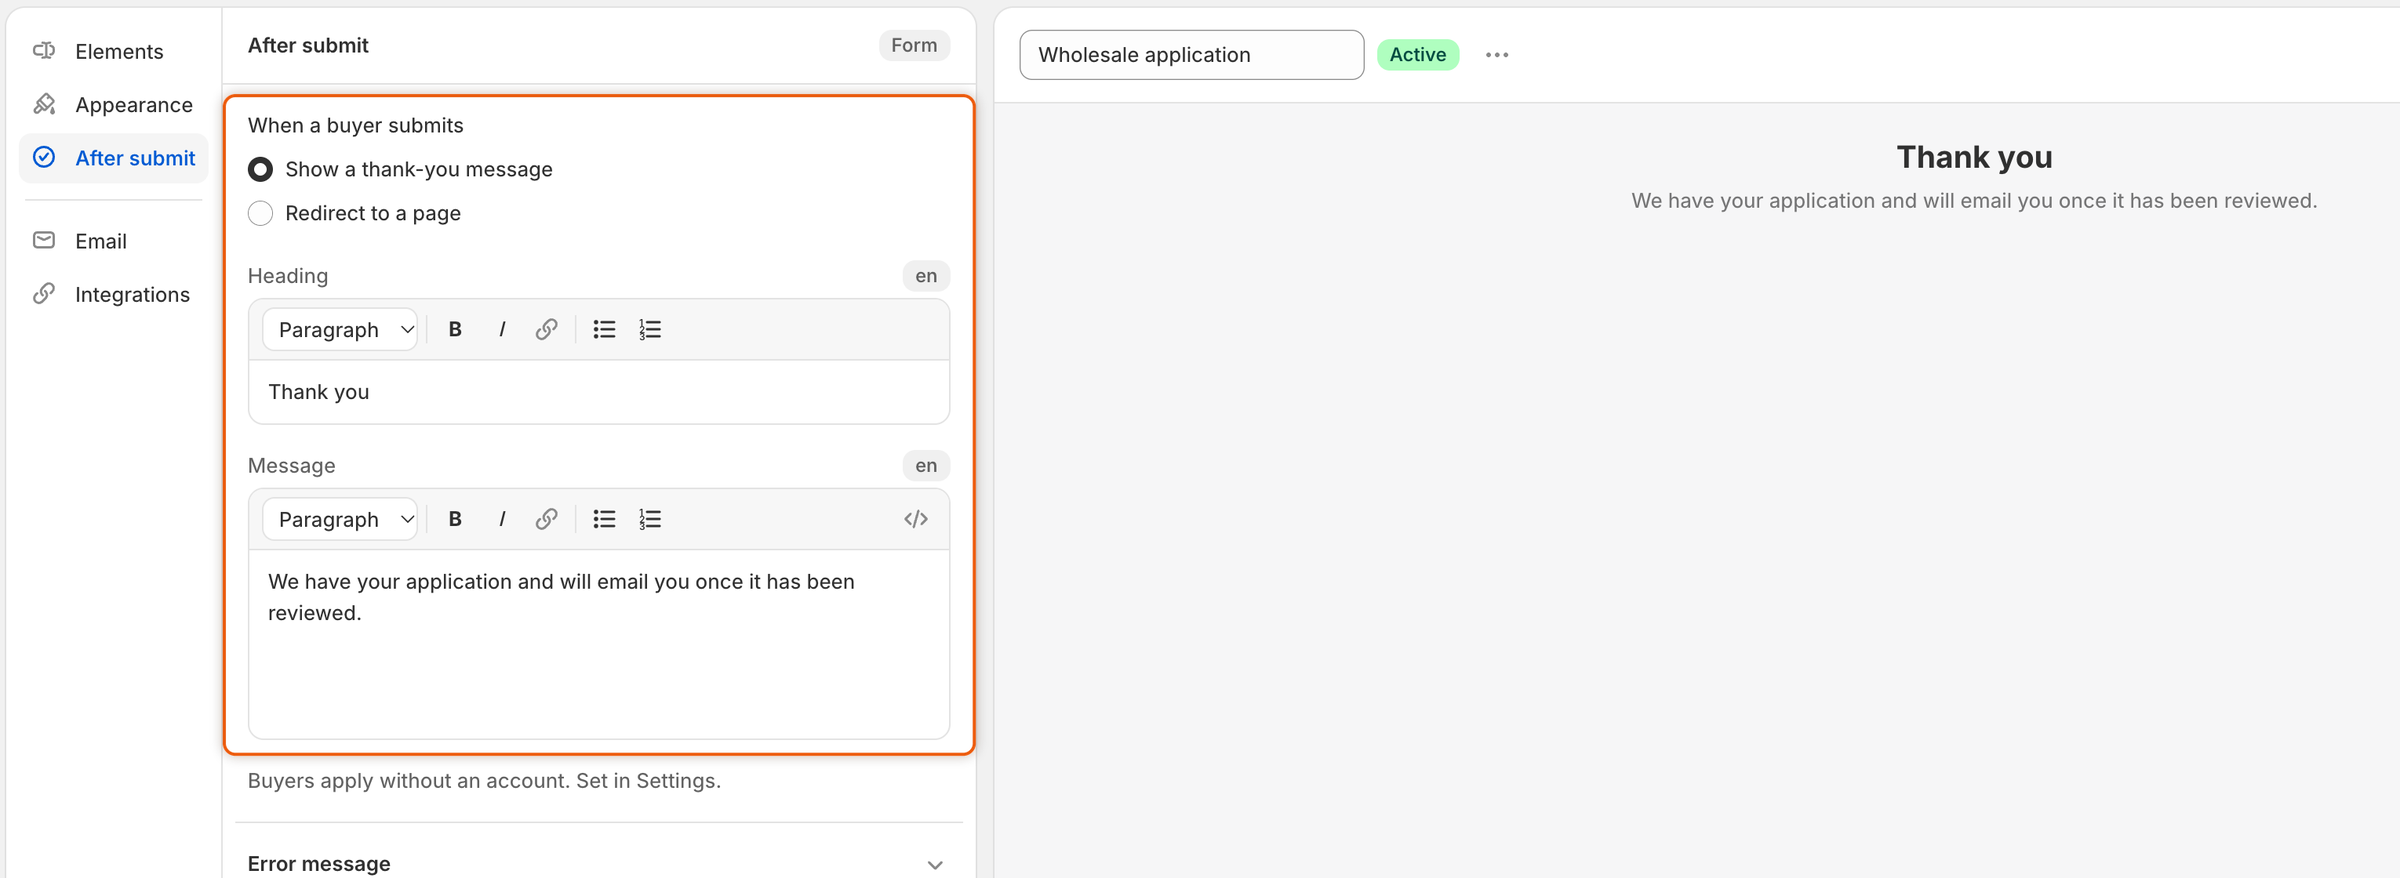
Under **When a buyer submits**, choose **Show a thank-you message**. While this panel is open, the preview shows the thank-you screen instead of the form.
{% endstep %}

{% step %}

### Write the heading and message

Type in **Heading** and **Message**. Use the toolbar above each box to format the text, for example to add bold text or a link.

The **Wholesale application** form starts with **Thank you** and "We have your application and will email you once it has been reviewed." A new form starts with **Thank you** and "We have received your application and will be in touch."

<figure><img src="https://3844812229-files.gitbook.io/~/files/v0/b/gitbook-x-prod.appspot.com/o/spaces%2FRrf4pQPgjvb3GW7IN3Ci%2Fuploads%2Fgit-blob-656631feedb0b0a6967dbe4ce8dbfbcd492b4e75%2Fscreenshot-builder-after-submit-thank-you.png?alt=media" alt="The After submit panel with Show a thank-you message selected and the heading and message boxes filled in, beside a preview of the thank-you screen."><figcaption><p>While After submit is open, the preview shows the thank-you screen your buyers will see.</p></figcaption></figure>
{% endstep %}

{% step %}

### Save and test

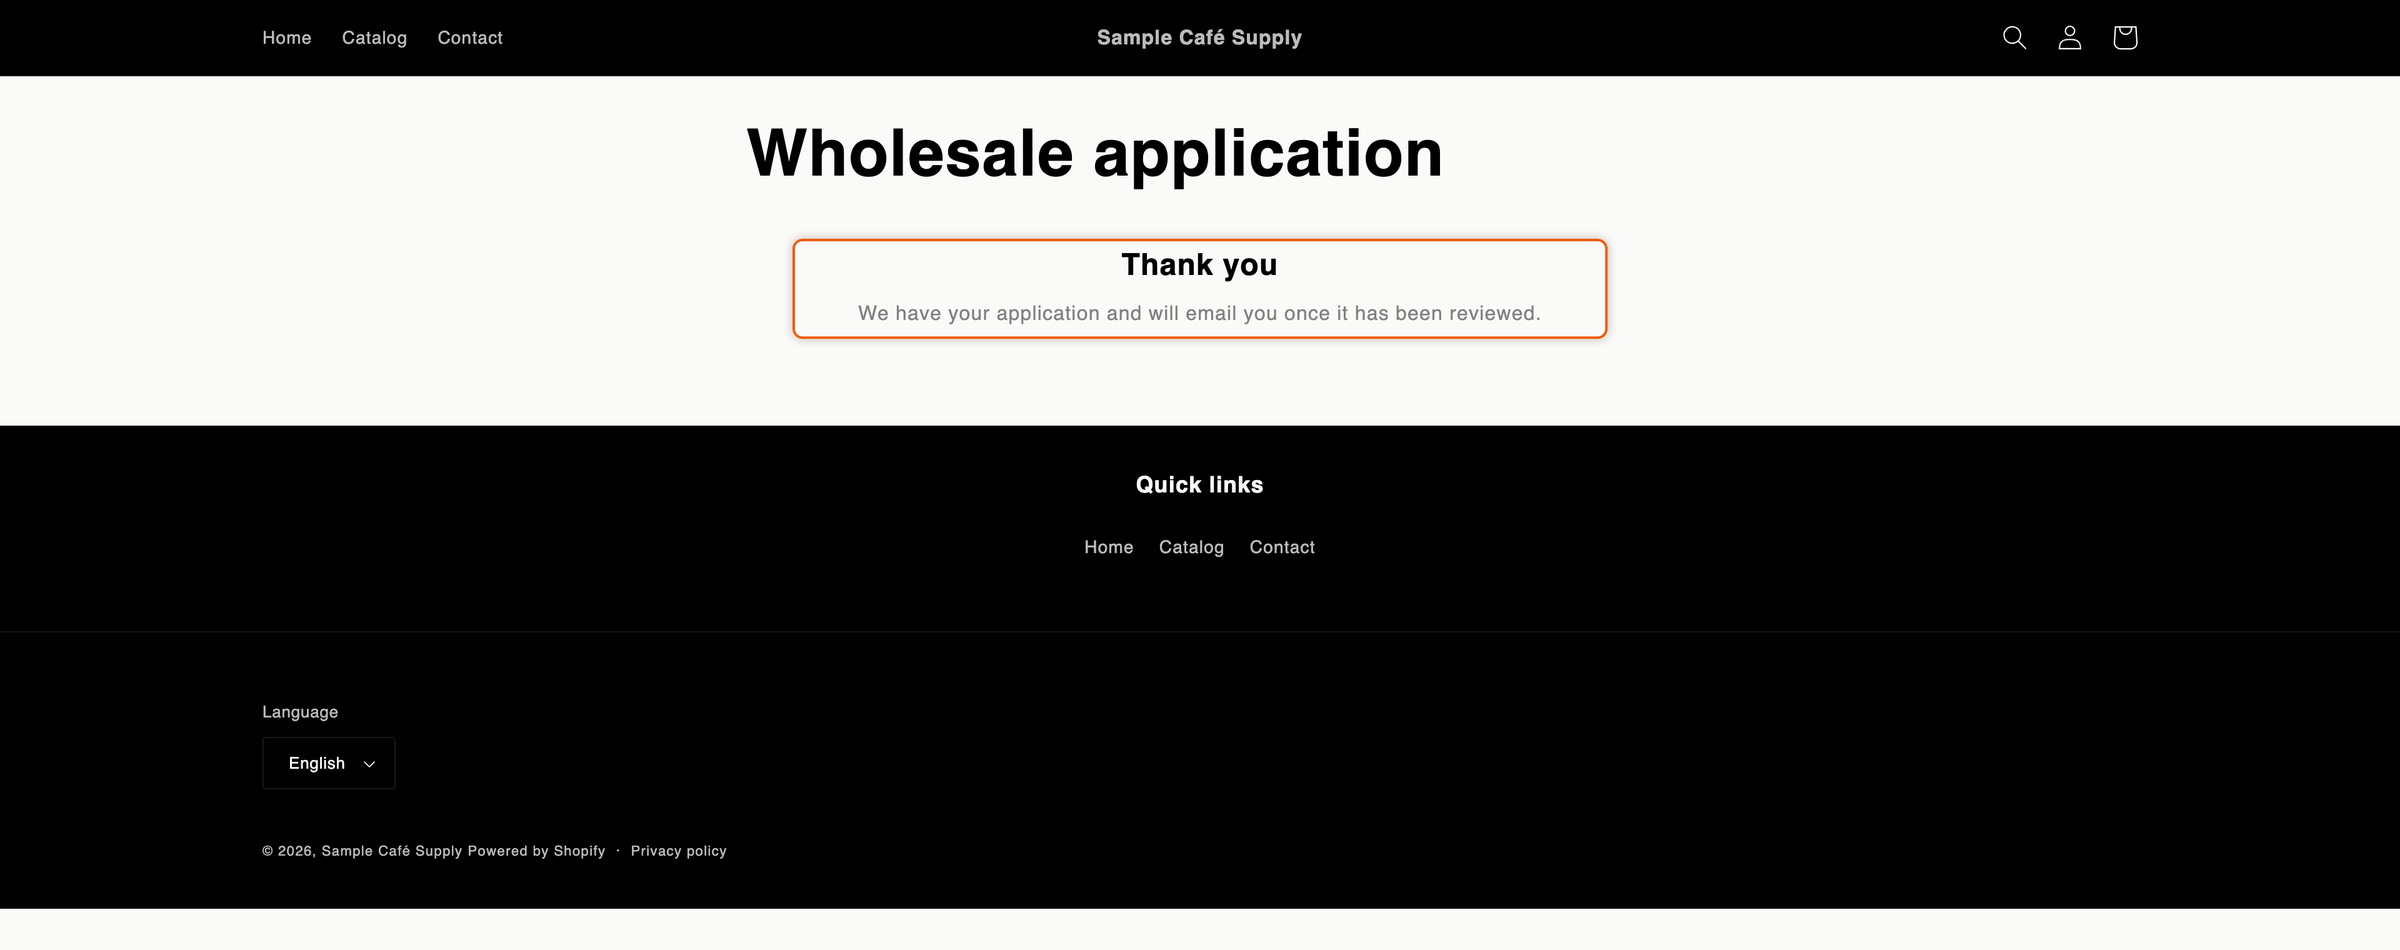
Click **Save** in the save bar. Open the form on your store, fill it in and submit it. The form is replaced by your heading and message.

<figure><img src="https://3844812229-files.gitbook.io/~/files/v0/b/gitbook-x-prod.appspot.com/o/spaces%2FRrf4pQPgjvb3GW7IN3Ci%2Fuploads%2Fgit-blob-2d70c73f0de13a274325b42246c630423aeb6565%2Fscreenshot-storefront-after-submit-thank-you.png?alt=media" alt="The store&#x27;s wholesale application page after submitting, showing the heading Thank you and the message below it."><figcaption><p>After a buyer submits, your thank-you message takes the form's place.</p></figcaption></figure>
{% endstep %}
{% endstepper %}

{% hint style="warning" %}
A blank box shows nothing. If you empty both **Heading** and **Message**, buyers see an empty space where the form was, with no sign that it worked. Keep at least a heading.
{% endhint %}

To show the heading and message in other languages, translate them in [Translate](/sami-b2b-onboarding/settings/translate.md).

## Send buyers to another page

Use a redirect when you have a page of your own to show next, such as a thank-you page with your wholesale catalog or contact details.

{% stepper %}
{% step %}

### Choose Redirect to a page

In **After submit**, under **When a buyer submits**, choose **Redirect to a page**.
{% endstep %}

{% step %}

### Enter the address

In **Redirect URL**, type either:

* a page on your store, starting with `/`, for example `/pages/thank-you`, or
* a full web address, for example `https://example.com/wholesale`.

Anything else, such as `example.com/wholesale` without `https://` in front, is refused when you save, with "Enter a web address that starts with https\:// or a page on your store that starts with /."
{% endstep %}

{% step %}

### Save and test

Click **Save** in the save bar. Submit the form on your store: once the application is sent, the browser opens the page you entered.
{% endstep %}
{% endstepper %}

If you choose **Redirect to a page** but leave **Redirect URL** empty, buyers stay on the form's page and see the thank-you screen.

## Change the error messages

The **After submit** panel also holds **Error message**, the wording buyers read when an answer is missing or doesn't fit. Click **Error message** to open it. There is one box per message, such as **Required**, **Invalid email**, **Min characters** and **Captcha**.

Leave a box empty to keep the wording shown in it. In your own wording, `{{ label }}` becomes the field's label, and `{{ min }}` and `{{ max }}` the limit the buyer missed. For example: `Please fill in {{ label }}.`

## What signed-in customers see

When a buyer is signed in to their customer account, the form knows who they are, and each customer can send one application.

| The customer                       | What they see instead of a blank form                                                                                                                                                                                                                                         |
| ---------------------------------- | ----------------------------------------------------------------------------------------------------------------------------------------------------------------------------------------------------------------------------------------------------------------------------- |
| Hasn't applied yet                 | The form, with "Signed in as … We'll link this application to your account." Their email is filled in from their account and can't be changed, and there is no captcha. After they submit, the thank-you screen adds a **Go to your account** button.                         |
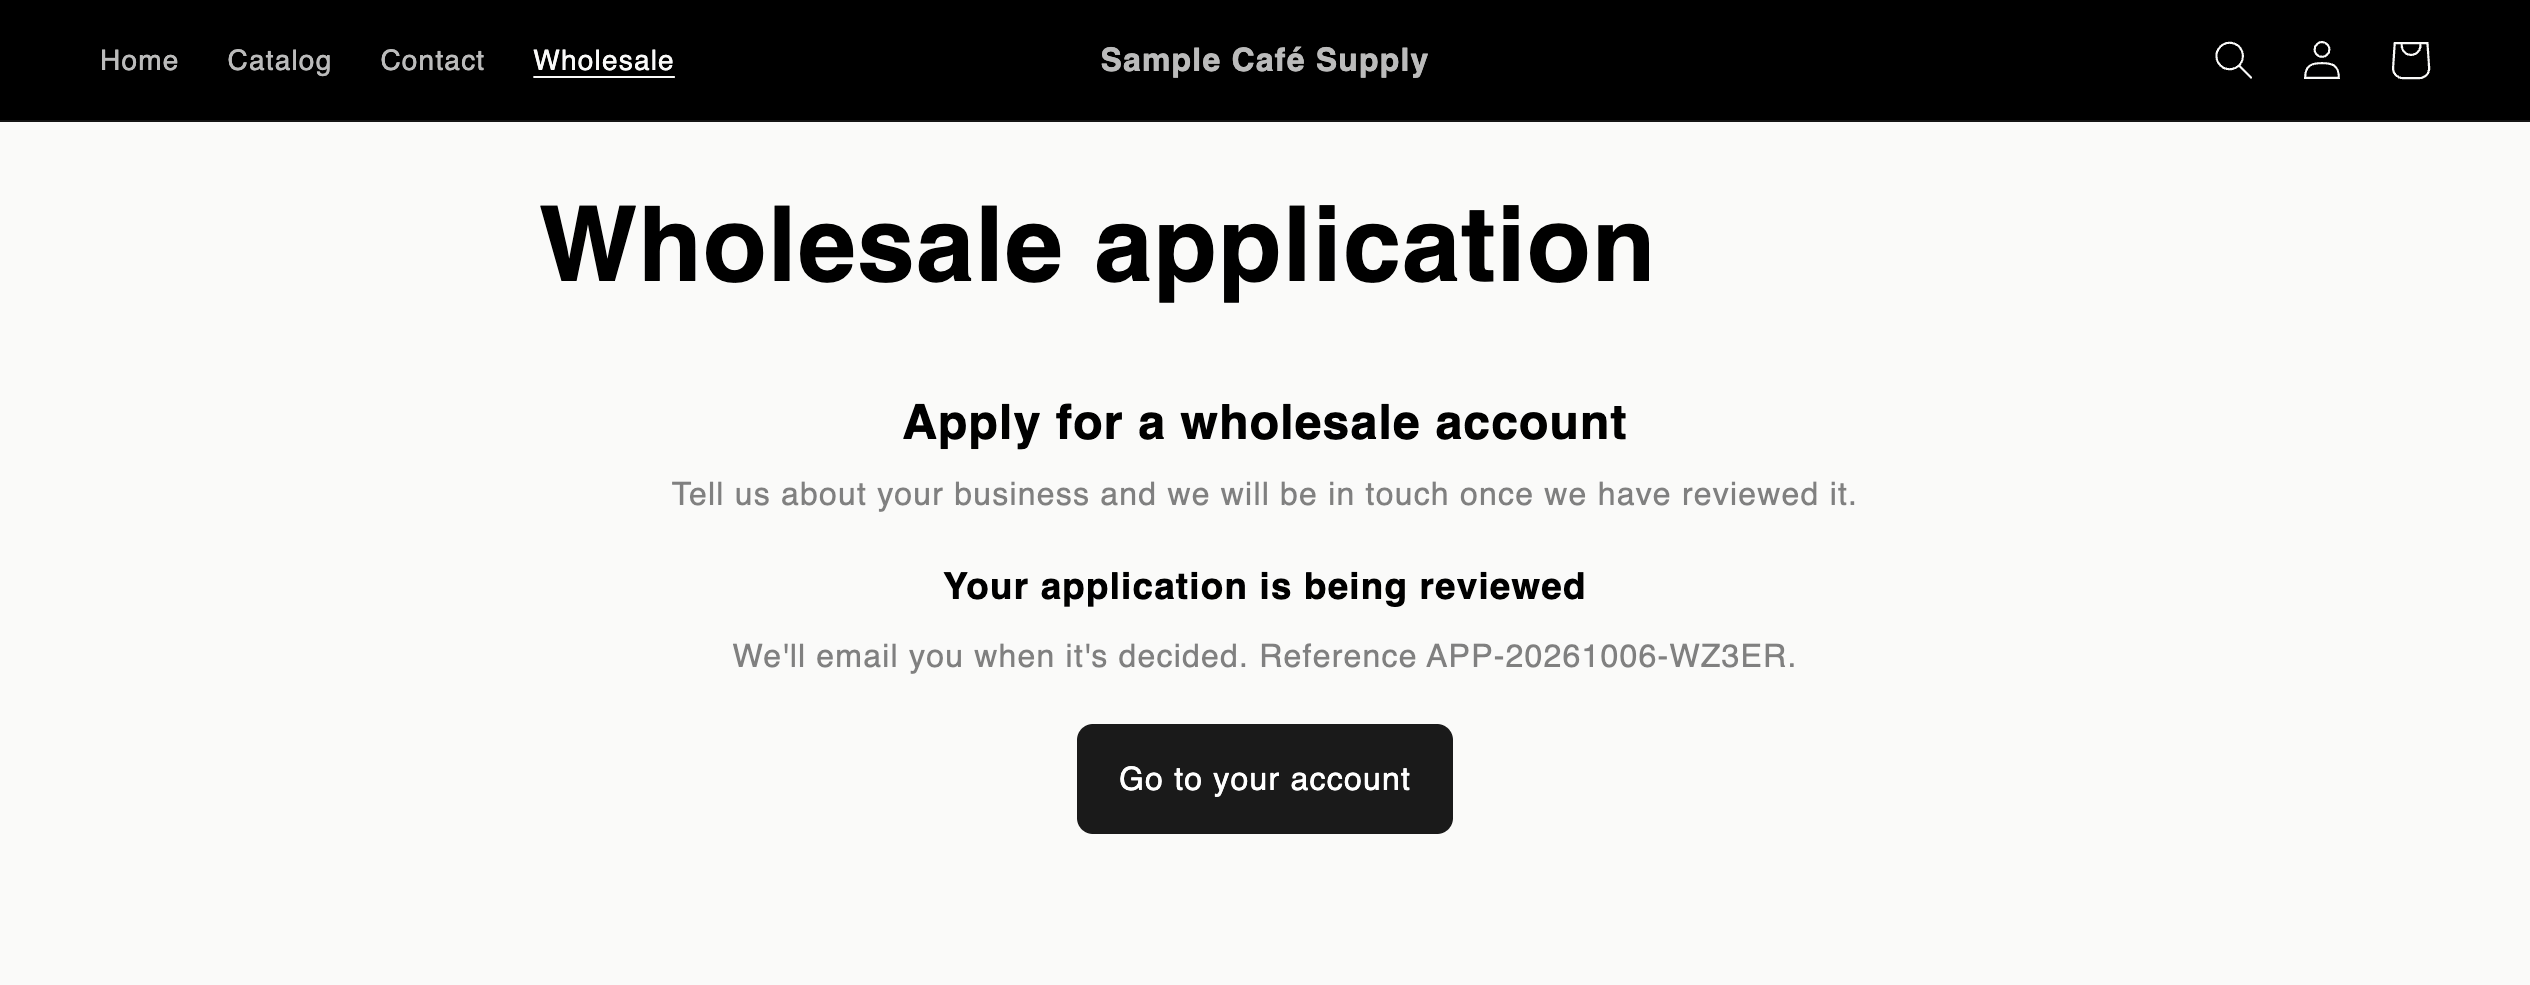
| Applied and waiting for a decision | **Your application is being reviewed**, with their application's reference, and **Go to your account**.                                                                                                                                                                       |
| Asked for more information         | **We need a little more from you**, with **Update your application**, which opens their answers to change and send again.                                                                                                                                                     |
| Rejected                           | **Your application wasn't approved**. If you rejected it with **Let them update it and send it again**, **Update your application** is added.                                                                                                                                 |
| Approved                           | **Your business account is open**, with **Go to your account**.                                                                                                                                                                                                               |
| Already buys for a company         | **You already have a business account**, with the company's name and **Go to your account**. This notice shows only where the form comes from the theme editor block. On the form page the app creates, or with the embed code, they see the form, but sending it is refused. |

If a signed-in customer who has already applied, or who buys for a company, submits anyway, for example from a page they left open, the application is refused. A guest who isn't signed in can't be told apart from anyone else, so the form stays open to them.

<figure><img src="https://3844812229-files.gitbook.io/~/files/v0/b/gitbook-x-prod.appspot.com/o/spaces%2FRrf4pQPgjvb3GW7IN3Ci%2Fuploads%2Fgit-blob-451a744848925ca31574f49973e4142ff1428cdc%2Fscreenshot-storefront-after-submit-signed-in-notice.png?alt=media" alt="The wholesale application page showing Your application is being reviewed, the application&#x27;s reference and a Go to your account button instead of the form."><figcaption><p>A signed-in customer who has already applied sees where their application stands instead of a new form.</p></figcaption></figure>

You can reword all of these messages in [Translate](/sami-b2b-onboarding/settings/translate.md). To ask every buyer to sign in before they see the form, see [Ask buyers to log in before applying](/sami-b2b-onboarding/store-access/log-in-before-applying.md).

{% hint style="info" %}
In the theme editor you always see the form itself, even when you're signed in. To see what a guest sees on the live store, open the page in a private browser window.
{% endhint %}

## Next steps

* [Review an application](/sami-b2b-onboarding/reviewing-applications/review-an-application.md) — open the applications buyers send.
* [Edit email templates](/sami-b2b-onboarding/settings/email-templates.md) — change the Application received email the buyer gets.
* [Choose who gets notified](/sami-b2b-onboarding/settings/notification-recipients.md) — pick who on your team gets the New application email.
* [Add a form to your store](/sami-b2b-onboarding/add-a-form-to-your-store/add-a-form-to-your-store.md) — put the form where buyers can find it.


---

# Agent Instructions
This documentation is published with GitBook. GitBook is the documentation platform designed so that both humans and AI agents can read, navigate, and reason over technical content effectively. Learn more at gitbook.com.

## Querying This Documentation
If you need additional information that is not directly available in this page, you can query the documentation dynamically by asking a question.

Perform an HTTP GET request on the current page URL with the `ask` query parameter, and the optional `goal` query parameter:

```
GET https://docs.samita.io/sami-b2b-onboarding/application-forms/after-the-buyer-submits.md?ask=<question>&goal=<endgoal>
```

`ask` is the immediate question: it should be specific, self-contained, and written in natural language.
`goal` is optional and describes the broader end goal you are ultimately trying to accomplish on behalf of the user. GitBook uses it to tailor the answer towards what is most useful for that goal.

The response will contain a direct answer to the question and relevant excerpts and sources from the documentation.

Use this mechanism when the answer is not explicitly present in the current page, you need clarification or additional context, or you want to retrieve related documentation sections.