> For the complete documentation index, see [llms.txt](https://docs.samita.io/llms.txt). Markdown versions of documentation pages are available by appending `.md` to page URLs; this page is available as [Markdown](https://docs.samita.io/sami-b2b-onboarding/integrations/webhooks.md).

# Webhooks (Zapier, Make, n8n)

Send an event to Zapier, Make or n8n each time an application is submitted, approved or rejected, and use it to start your own workflows.

A webhook sends an application to an automation tool when it's submitted, approved or rejected. Use it to add new applicants to a spreadsheet or CRM, post a message in your team chat, or start any workflow you build. Sami B2B Onboarding works with Zapier, Make, n8n and any other tool that gives you a webhook URL.

The store has one webhook URL, and every form that's connected sends to it. Each form chooses which events it sends.

## Get a webhook URL from your tool

The URL must start with `https://` and be on the public internet.

{% tabs %}
{% tab title="Zapier" %}

1. In Zapier, create a Zap.
2. For the trigger, choose **Webhooks by Zapier**, with the event **Catch Hook**. Click **Continue** until you reach the **Test** step.
3. Copy the webhook URL Zapier shows. It starts with `https://hooks.zapier.com/hooks/catch/`.

Keep the Zap open. You'll test it in a moment.
{% endtab %}

{% tab title="Make" %}

1. In Make, create a scenario.
2. Add the **Webhooks** module and choose **Custom webhook**.
3. Click **Add**, name the webhook and click **Save**.
4. Click **Copy address to clipboard**.

Make now waits for the first event, so it can learn the fields.
{% endtab %}

{% tab title="n8n" %}

1. In n8n, start a workflow with a **Webhook** node.
2. Set **HTTP Method** to **POST**. The app sends its events as POST requests, and the node starts on GET.
3. Copy the **Production URL**, and activate the workflow so that URL listens.

While you build the workflow, you can use the **Test URL** instead. It only listens after you click **Listen for test event**, so switch to the **Production URL** when you're done.
{% endtab %}
{% endtabs %}

## Connect the form

{% stepper %}
{% step %}

### Open the Webhook panel

Go to **Forms** and click **Edit** beside the form. In the rail on the left, click **Integrations**. Under **Connected apps**, click **Connect** on the **Webhook (Zapier, Make, n8n)** row.

The **Webhook** panel opens with three sections: **Account**, **This form** and **Payload**.
{% endstep %}

{% step %}

### Paste the URL

Under **Account**, click **Set up**. In the **Webhook** dialog, paste the URL into **Webhook URL** and click **Save**.

You see **Keys saved**. The **Account** row shows only the URL's domain and its last few characters. Anyone who has the URL can send data to your workflow, so the app keeps the rest hidden.

If the URL isn't saved, the box under it says why. Check that you copied the whole URL and that it starts with `https://`. A URL that points to a local or private address gets **Paste the webhook URL Zapier, Make or n8n gave you — a public address, not a local or private one.**
{% endstep %}

{% step %}

### Choose the events

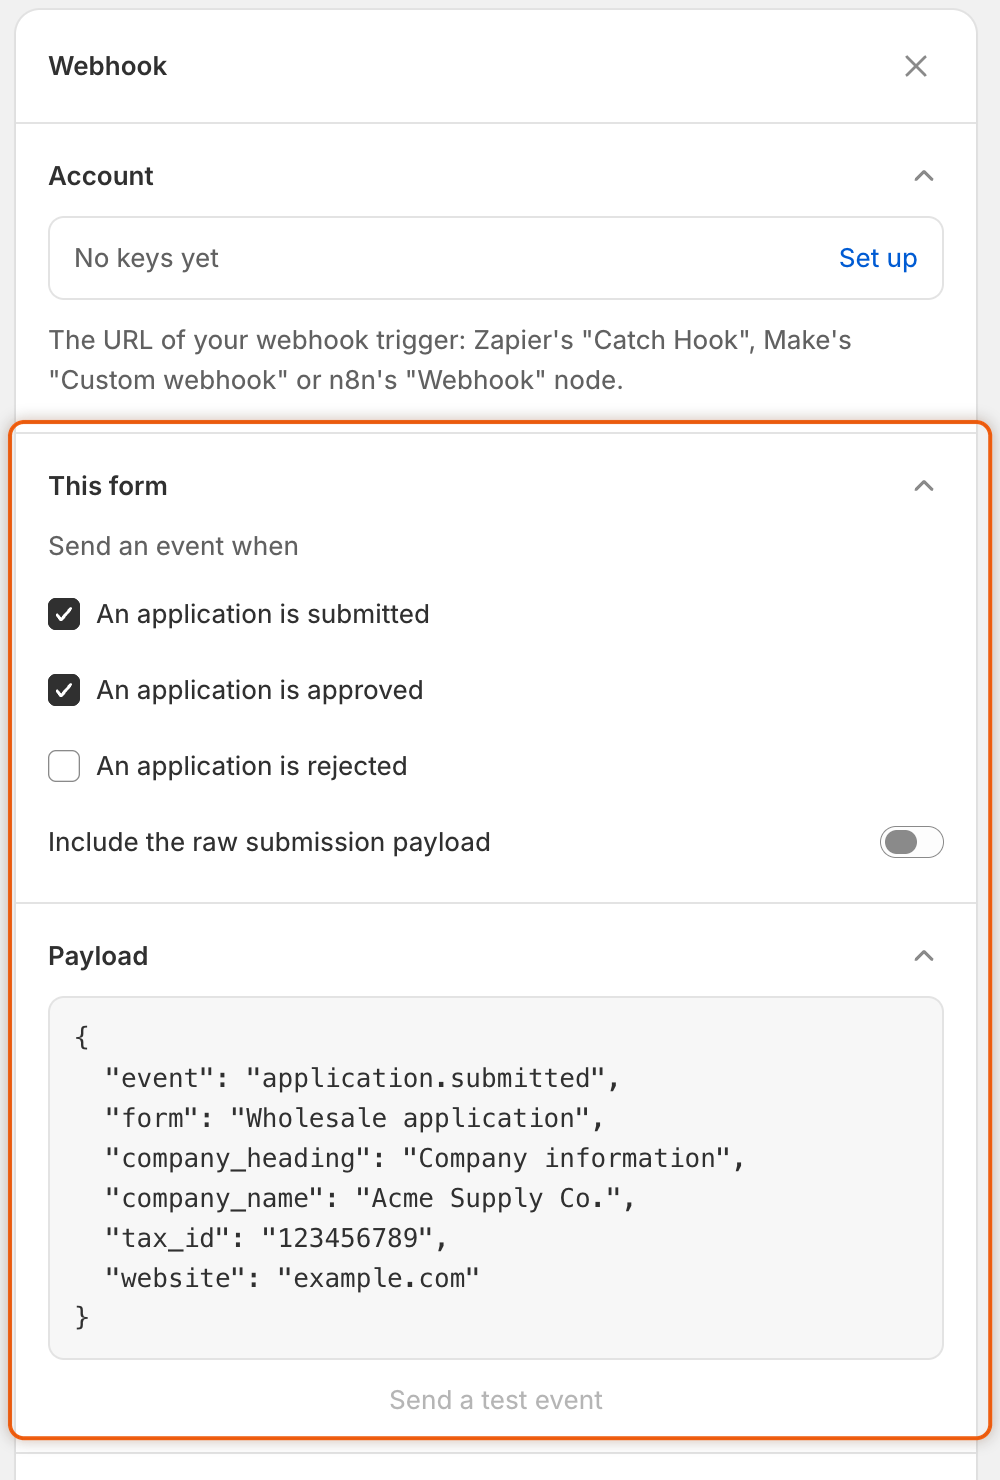
Under **This form**, below **Send an event when**, tick the events this form sends:

* **An application is submitted**: ticked to start with.
* **An application is approved**: ticked to start with.
* **An application is rejected**: cleared to start with.

Turn on **Include the raw submission payload** if your workflow needs every answer exactly as it was stored. See [What each event contains](#what-each-event-contains).

<figure><img src="https://3844812229-files.gitbook.io/~/files/v0/b/gitbook-x-prod.appspot.com/o/spaces%2FRrf4pQPgjvb3GW7IN3Ci%2Fuploads%2Fgit-blob-c59ec5556ef734e579948d8841b67c049777aaac%2Fscreenshot-integrations-webhook-panel.png?alt=media" alt="The Webhook panel with no URL saved (Account reads No keys yet), submitted and approved ticked, rejected cleared, the raw payload switch off, a sample payload and a greyed-out Send a test event button."><figcaption><p>Each form chooses which events it sends, and Send a test event stays greyed out until a webhook URL is saved.</p></figcaption></figure>
{% endstep %}

{% step %}

### Connect and save

At the bottom of the panel, click **Connect**. The button changes to **Disconnect**, and the row in **Connected apps** shows **Connected**. If no URL is saved yet, a banner reads **Add your webhook URL first.**

Click **Save** in the save bar. You see **Form saved**. No event is sent until you save.
{% endstep %}
{% endstepper %}

## Send a test event

The test event lets your tool learn the form's fields before a real buyer applies.

{% stepper %}
{% step %}

### Save the form first

The test event carries the questions of the form as it was last saved. Save after adding or removing questions.
{% endstep %}

{% step %}

### Send it

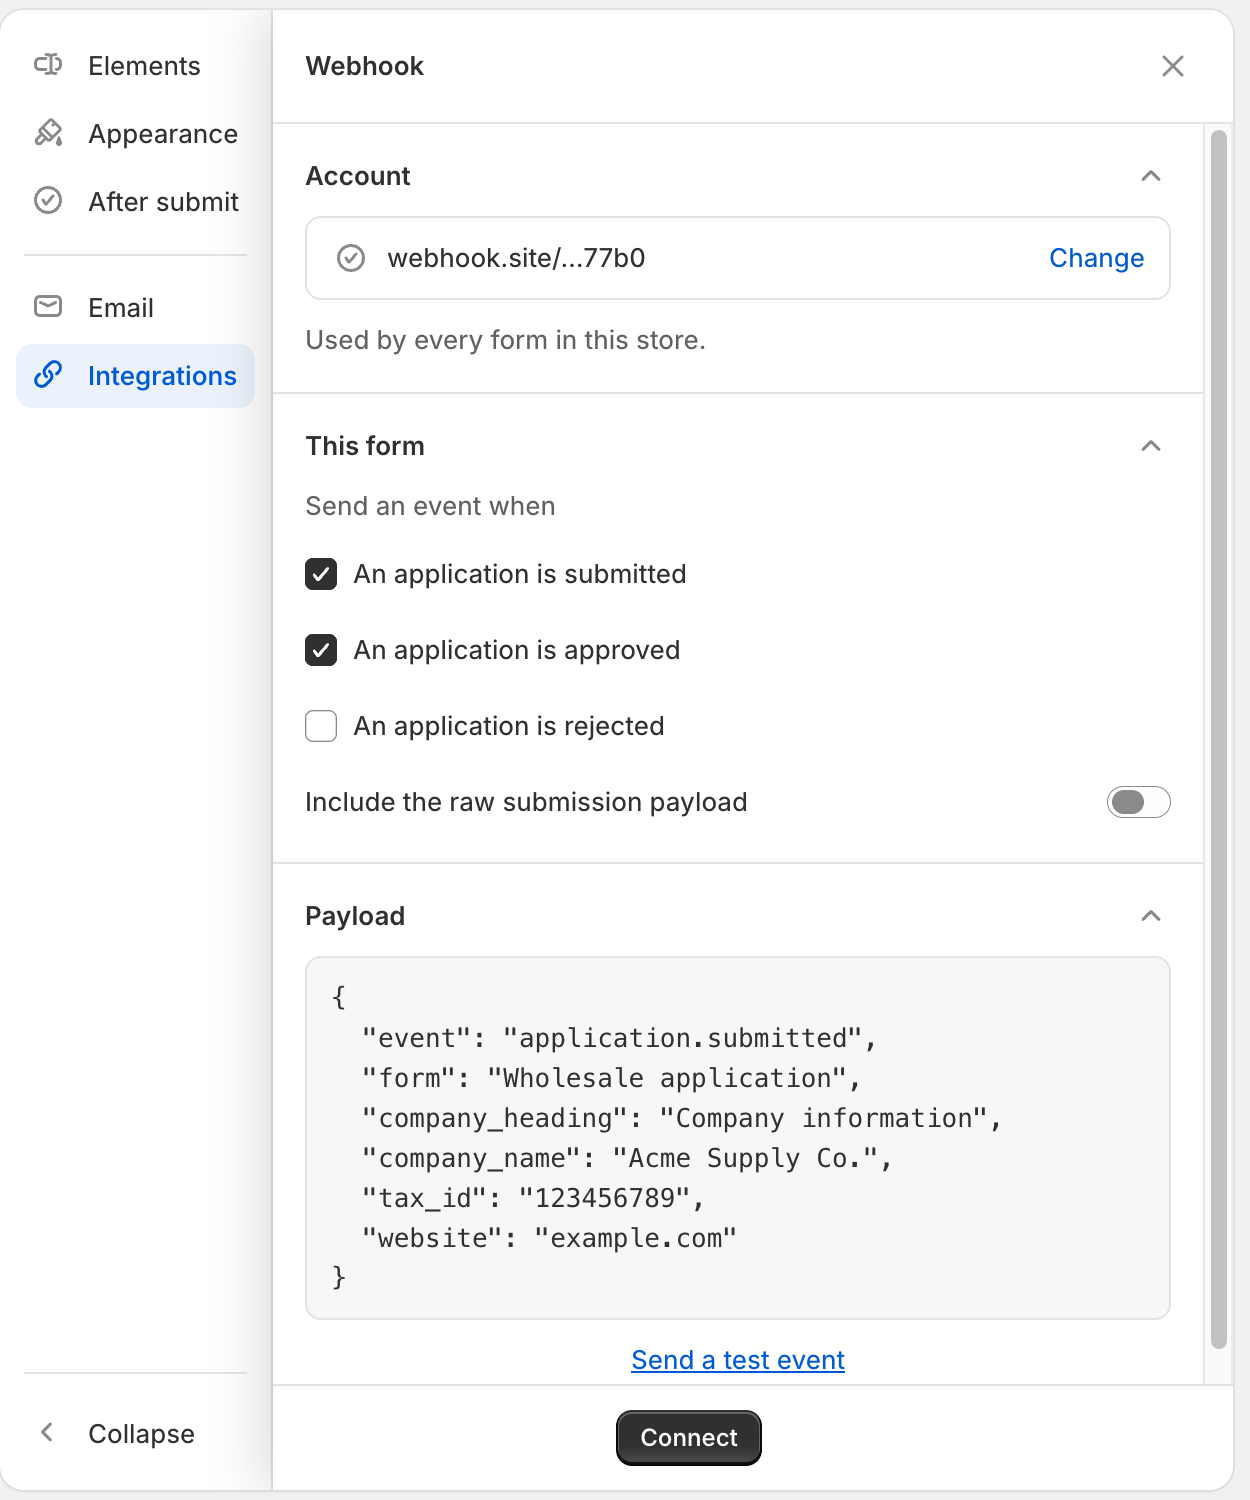
In the **Payload** section, click **Send a test event**. The button reads **Sending…**, then you see **Test event sent**. The button works as soon as a URL is saved, even before you click **Connect**.

<figure><img src="https://3844812229-files.gitbook.io/~/files/v0/b/gitbook-x-prod.appspot.com/o/spaces%2FRrf4pQPgjvb3GW7IN3Ci%2Fuploads%2Fgit-blob-a42f435e7c3eea11be08ca83645b40ef6529a01f%2Fscreenshot-integrations-webhook-url-saved.png?alt=media" alt="The Webhook panel with a saved webhook.site URL under Account, the events this form sends, the sample payload and the Send a test event link."><figcaption><p>Once a URL is saved, Send a test event works even before you connect the form.</p></figcaption></figure>
{% endstep %}

{% step %}

### See it in your tool

* **Zapier**: on the **Test** step, click **Test trigger** and pick the request that arrived.
* **Make**: the webhook module says the data structure was determined.
* **n8n**: the **Webhook** node shows the data it received. With the **Test URL**, click **Listen for test event** before you send.

Then map the fields in your tool's next steps.
{% endstep %}
{% endstepper %}

If your tool doesn't accept the test, a **Test event failed** banner appears with one of these messages:

| Message                                                                                                                               | What to do                                                                                                                                                                                                                                             |
| ------------------------------------------------------------------------------------------------------------------------------------- | ------------------------------------------------------------------------------------------------------------------------------------------------------------------------------------------------------------------------------------------------------ |
| Add your webhook URL first.                                                                                                           | Save a URL under **Account** first.                                                                                                                                                                                                                    |
| That webhook URL is not a public address. Change it, then try again.                                                                  | Use the public `https://` URL your tool gave you. Click **Change** under **Account** to replace it.                                                                                                                                                    |
| The webhook didn't answer. Check the URL, then try again.                                                                             | The address couldn't be reached. Copy the URL from your tool again and paste it with **Change**.                                                                                                                                                       |
| The webhook answered with HTTP 404. Check that the scenario or workflow is on and listening, then try again. (The number can differ.) | Your tool refused the event. In Make, check that the scenario and its webhook still exist. In n8n, activate the workflow, or click **Listen for test event** when you use the **Test URL**. In Zapier, check that the Zap and its trigger still exist. |
| The test event wasn't sent. Try again.                                                                                                | The app couldn't send it. Try again in a moment.                                                                                                                                                                                                       |

## The events

| Event                           | Sent when                                                                                                                                                                     |
| ------------------------------- | ----------------------------------------------------------------------------------------------------------------------------------------------------------------------------- |
| **An application is submitted** | A buyer sends a new application. It's sent even if a rule decides the application straight after. A buyer who answers a request for more information doesn't send it again.   |
| **An application is approved**  | Someone on your team approves the application, alone or with others selected, or adds the buyer to a company you already have. Also when a Shopify Flow workflow approves it. |
| **An application is rejected**  | Someone on your team rejects the application, or a Shopify Flow workflow does.                                                                                                |

Asking a buyer for more information sends no event.

{% hint style="info" %}
An application that a rule or the tax ID check approves or rejects on its own doesn't send the approved or rejected event.
{% endhint %}

## What each event contains

Each event arrives as one set of named fields. Your tool shows them under these names when you map them:

| Field                                           | What it holds                                                                                                                                                                                                                                                                             |
| ----------------------------------------------- | ----------------------------------------------------------------------------------------------------------------------------------------------------------------------------------------------------------------------------------------------------------------------------------------- |
| `event`                                         | `application.submitted`, `application.approved` or `application.rejected`. Use it to filter one workflow to one event.                                                                                                                                                                    |
| `form`                                          | The form's name, for example Wholesale application.                                                                                                                                                                                                                                       |
| `reference`                                     | The application's reference, as shown under **Reference** on the application in the app.                                                                                                                                                                                                  |
| `status`                                        | The application's status when the event was sent, for example `pending`, `approved` or `rejected`. A rule may already have decided a new application by then, so use `event`, not `status`, to tell events apart.                                                                         |
| `submitted_at`                                  | When the buyer submitted, as a date and time.                                                                                                                                                                                                                                             |
| `company_name`, `contact_name`, `contact_email` | The company name, the buyer's name and their email.                                                                                                                                                                                                                                       |
| `country`                                       | The buyer's country, as a two-letter code such as `US`.                                                                                                                                                                                                                                   |
| One field per answer                            | Each answer, under the field name the form gives its question, for example `contact_title` or `shipping_city` on the Wholesale application form. The **Payload** box and the test event show these names. Several choices are joined with commas, and an upload is sent as its file name. |
| `raw`                                           | Only when **Include the raw submission payload** is on: every answer as it was stored, with lists kept as lists.                                                                                                                                                                          |

The **Payload** box in the panel shows the start of an event for your form, so you can see the names before you test.

The test event has the same fields, filled with example values. `reference` reads `APP-TEST`, each question holds its placeholder or its label, and an extra field, `test`, is set to `true`, so your workflow can skip it. Upload questions and `raw` are left out of the test.

## See what was sent

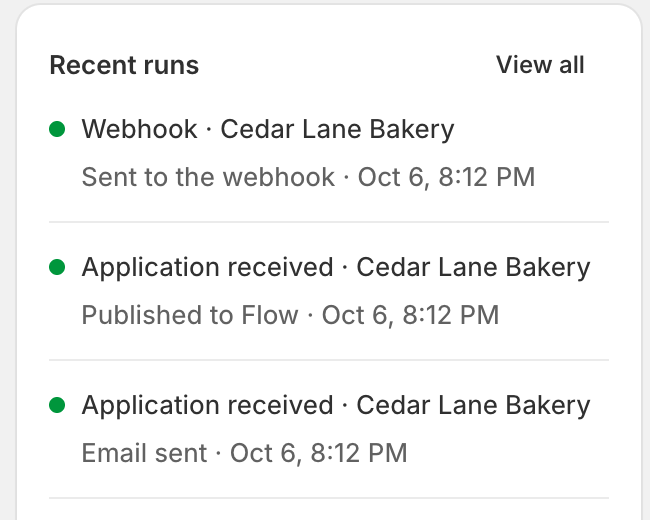
Every event the app sends leaves an entry on the application's **Timeline**, named **Webhook** and the company, for example **Webhook · Acme Supply Co.** Click it to see the result: **Sent to the webhook**, "The webhook answered with HTTP 410" or **The webhook didn't answer**. The same entries appear under **Recent runs** on the **Automations** tab of **Automation**, and in **Settings › Activity log** on its **Emails** view. A test event leaves no entry.

<figure><img src="https://3844812229-files.gitbook.io/~/files/v0/b/gitbook-x-prod.appspot.com/o/spaces%2FRrf4pQPgjvb3GW7IN3Ci%2Fuploads%2Fgit-blob-ba708ffa64314fe1214f80795c72c7cd3395f65c%2Fscreenshot-integrations-webhook-recent-runs.png?alt=media" alt="The Recent runs card on the Automations tab, with Webhook · Cedar Lane Bakery marked Sent to the webhook above the application&#x27;s other runs."><figcaption><p>Each delivery to your webhook shows under Recent runs, with its result and time.</p></figcaption></figure>

## Stop sending

* **Stop one form**: open its **Webhook** panel, click **Disconnect**, then **Save**. Its event choices stay.
* **Change the URL**: under **Account**, click **Change**, paste the new URL and click **Save**. Leave the box empty to keep the URL you already saved.
* **Remove the URL for every form**: under **Account**, click **Change**, then **Remove keys**. The dialog warns **Every form in this store stops using Webhook until you add keys again.** Click **Remove keys** to confirm. You see **Keys removed**. This takes effect at once.

## Next steps

* [Automations and Shopify Flow](/sami-b2b-onboarding/automation/automations-and-shopify-flow.md) — build workflows inside Shopify instead, with the app's Flow triggers.
* [Klaviyo](/sami-b2b-onboarding/integrations/klaviyo.md) — add applicants or approved buyers to a Klaviyo list.
* [Activity log](/sami-b2b-onboarding/settings/activity-log.md) — see every delivery the app made.


---

# Agent Instructions
This documentation is published with GitBook. GitBook is the documentation platform designed so that both humans and AI agents can read, navigate, and reason over technical content effectively. Learn more at gitbook.com.

## Querying This Documentation
If you need additional information that is not directly available in this page, you can query the documentation dynamically by asking a question.

Perform an HTTP GET request on the current page URL with the `ask` query parameter, and the optional `goal` query parameter:

```
GET https://docs.samita.io/sami-b2b-onboarding/integrations/webhooks.md?ask=<question>&goal=<endgoal>
```

`ask` is the immediate question: it should be specific, self-contained, and written in natural language.
`goal` is optional and describes the broader end goal you are ultimately trying to accomplish on behalf of the user. GitBook uses it to tailor the answer towards what is most useful for that goal.

The response will contain a direct answer to the question and relevant excerpts and sources from the documentation.

Use this mechanism when the answer is not explicitly present in the current page, you need clarification or additional context, or you want to retrieve related documentation sections.