For the complete documentation index, see llms.txt. This page is also available as Markdown.

Certain IP addresses

Match visitors whose public IP address exactly matches an address on a merchant-entered list.

Certain IP addresses matches a visitor based on their exact public IP address against a list you enter. It's a good fit for gating content to a known, fixed set of locations — for example, letting only your office or warehouse network see an internal catalog or a testing page.

Like most access rules (aside from the action-based ones such as Passcode, Secret link, Subscribe, and Confirmation prompt), Certain IP addresses can be set to match If the visitor's IP is on your list, or Unless it is — inverting it to match every other IP instead. See Combining rules.

Add the rule

  1. Open Locks and create a new lock, or open an existing one to edit it.

  2. Choose the content you want to protect. See Access rules overview for how rules fit into a lock.

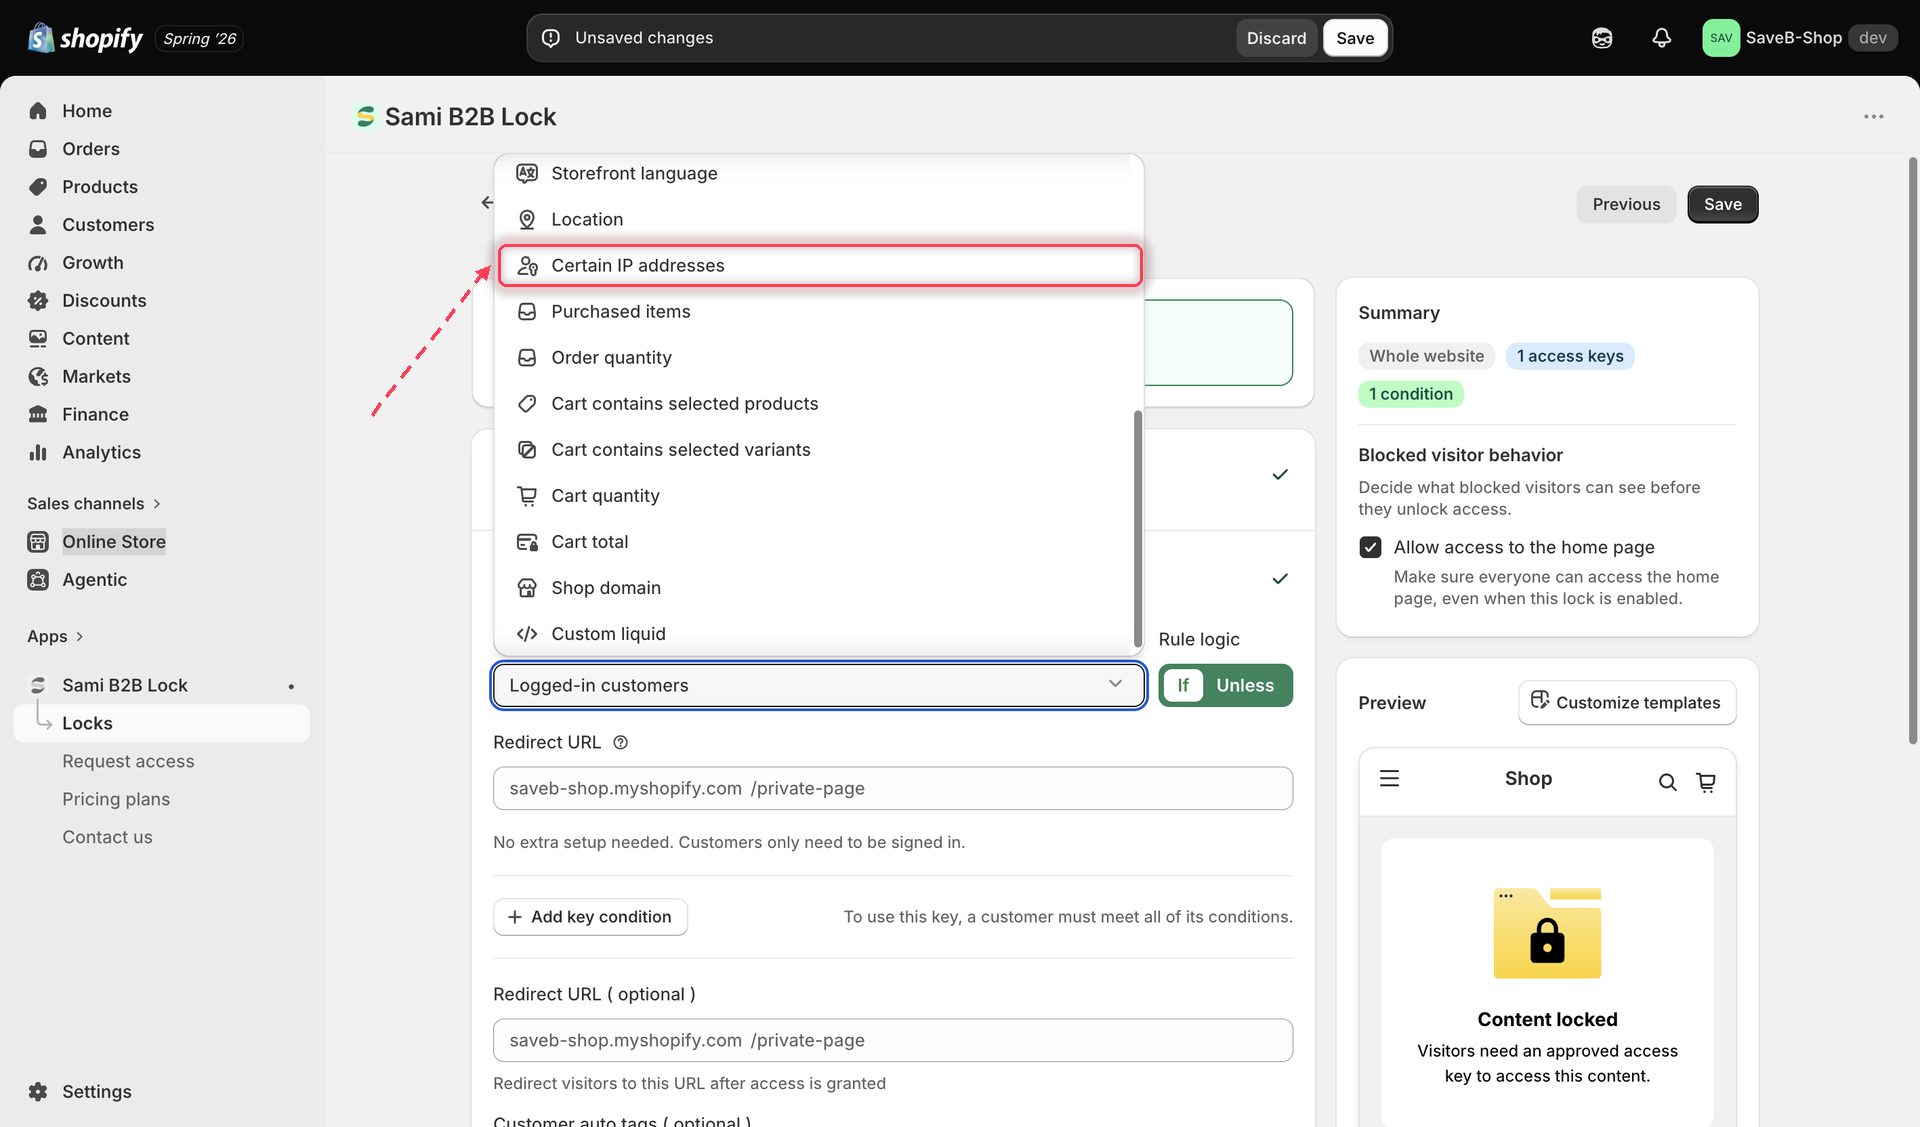
  3. Click the Unlock rules tab, then in the Condition type dropdown, select Certain IP addresses.

The Unlock rules tab with Certain IP addresses selected in the Condition type dropdown.
Select Certain IP addresses from the Condition type dropdown on the Unlock rules tab.
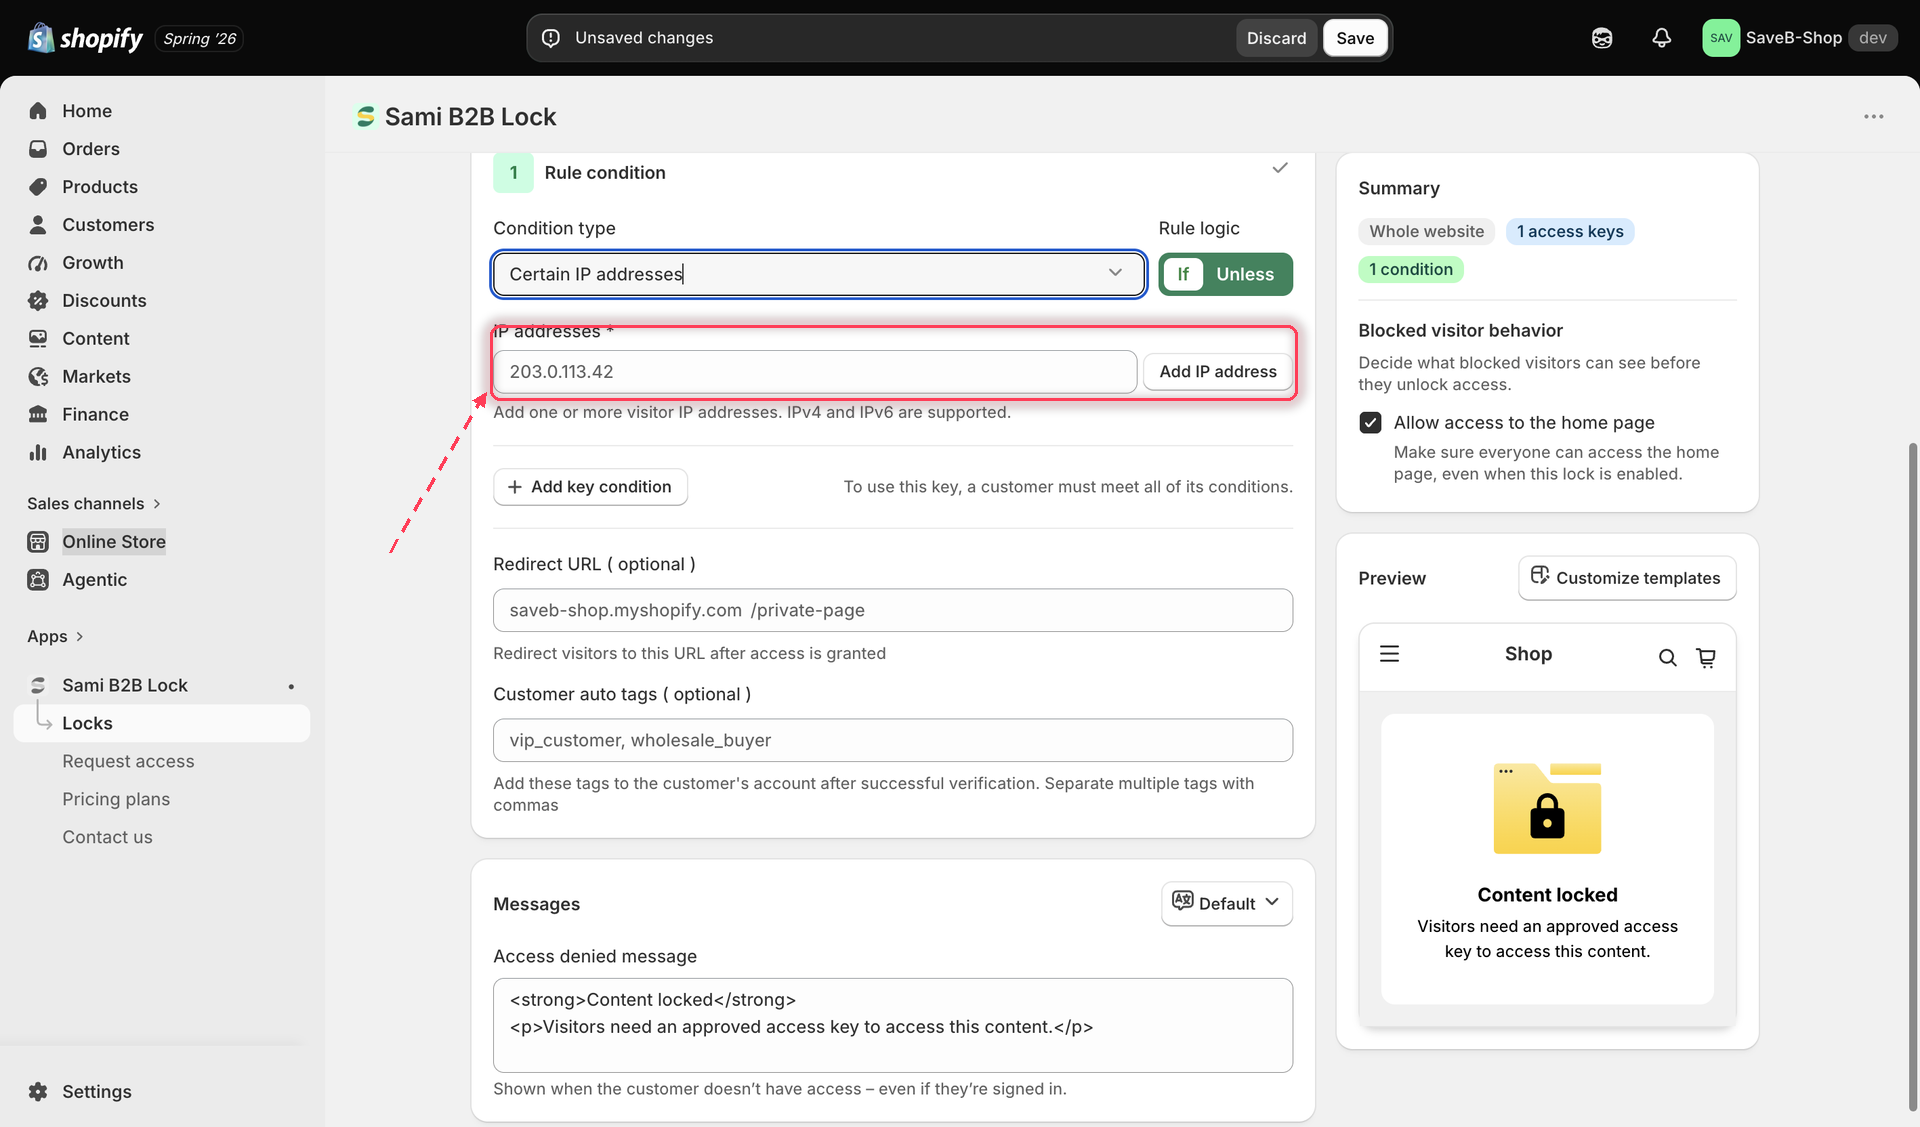
  1. Enter the exact public IP address(es) you want to match. You can add more than one.

The Certain IP addresses rule settings, showing a list input for entering exact IP addresses.
Add each exact public IP address this rule should match — no ranges or wildcards.
  1. Choose If or Unless.

  2. Click Save.

To find the public IP address to enter for a location like your office or warehouse, search "what is my IP" from a browser on that network, or check with whoever manages that network's internet connection.

Example: Limit an internal price list to the office network

Suppose the office's fixed public IP address is 203.0.113.10, and only visitors using that network should see an internal price list.

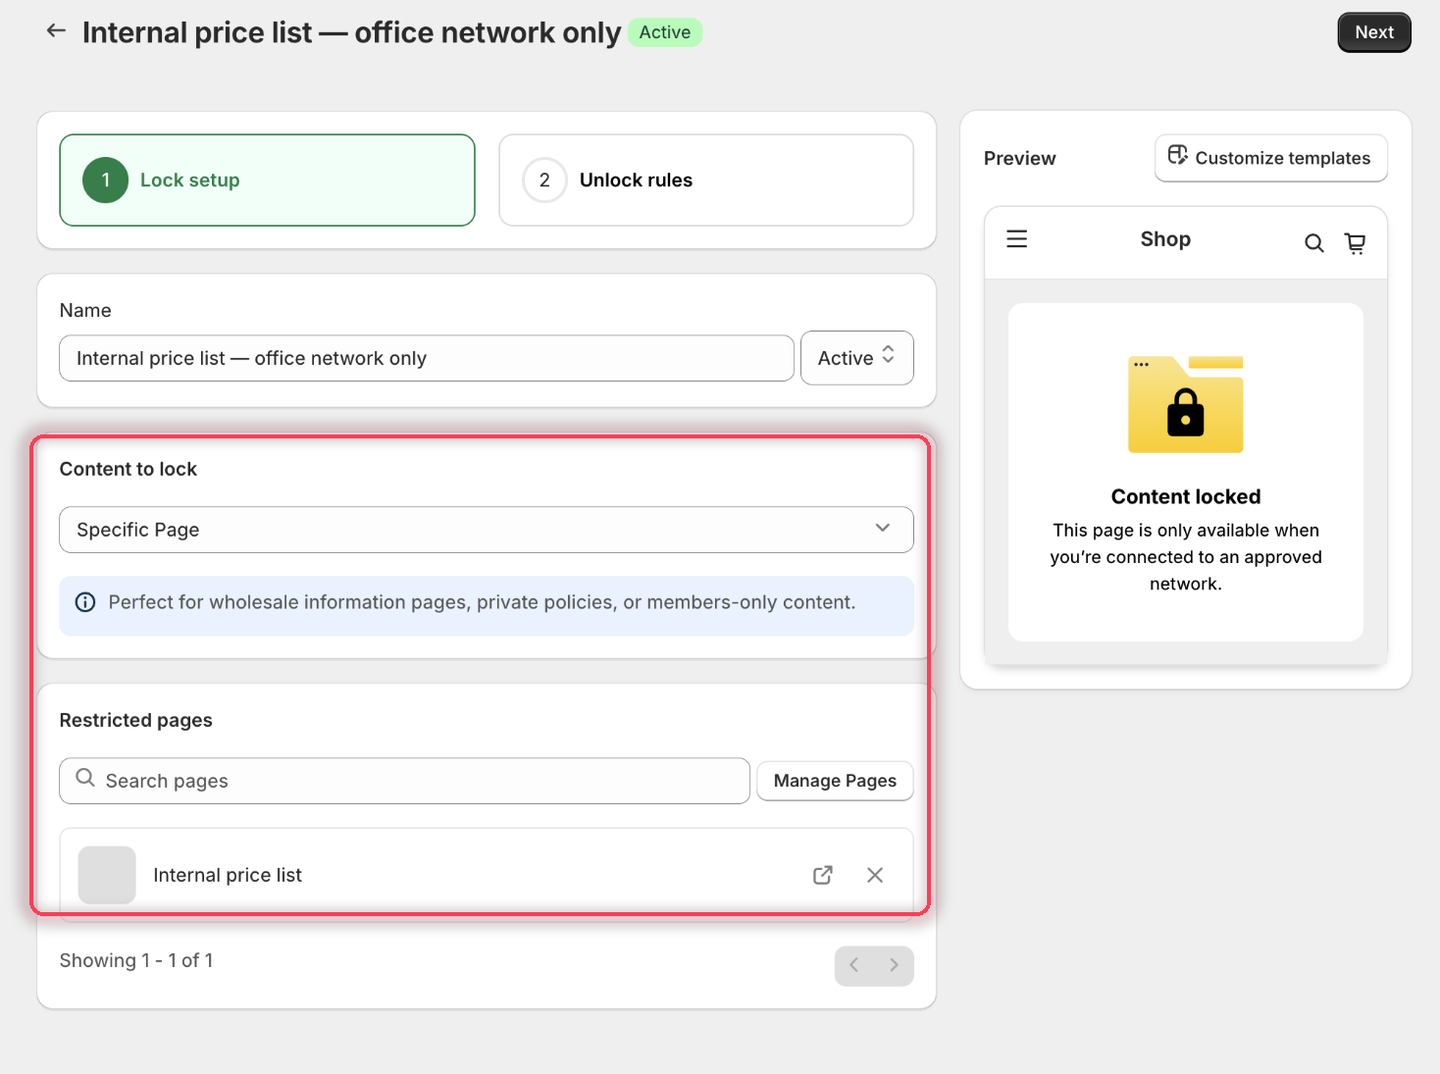
  1. Select the Internal price list page as the content to protect.

The Lock setup tab with Specific Page as the content type and the Internal price list page listed under Restricted pages.
Pick the page you want to keep on the office network.
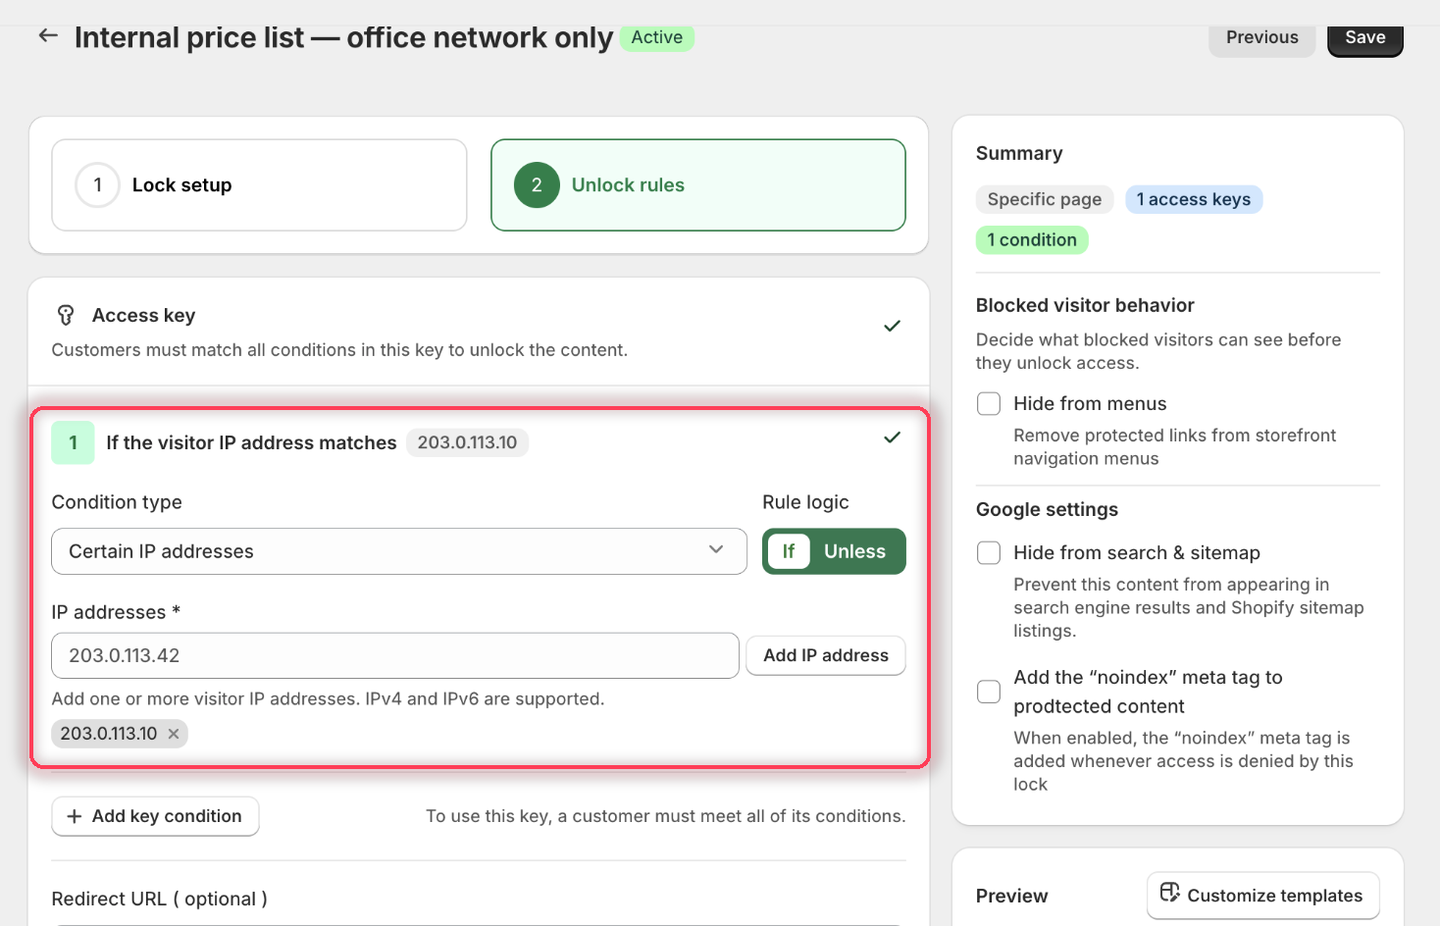
  1. Add Certain IP addresses, choose If, and enter 203.0.113.10. Click Add IP address to turn it into a chip — the value isn't saved until you do.

The Certain IP addresses condition with Rule logic set to If and 203.0.113.10 added as a chip below the IP addresses field.
The condition heading confirms the value: If the visitor IP address matches 203.0.113.10.
  1. Leave the rule's Redirect URL empty.

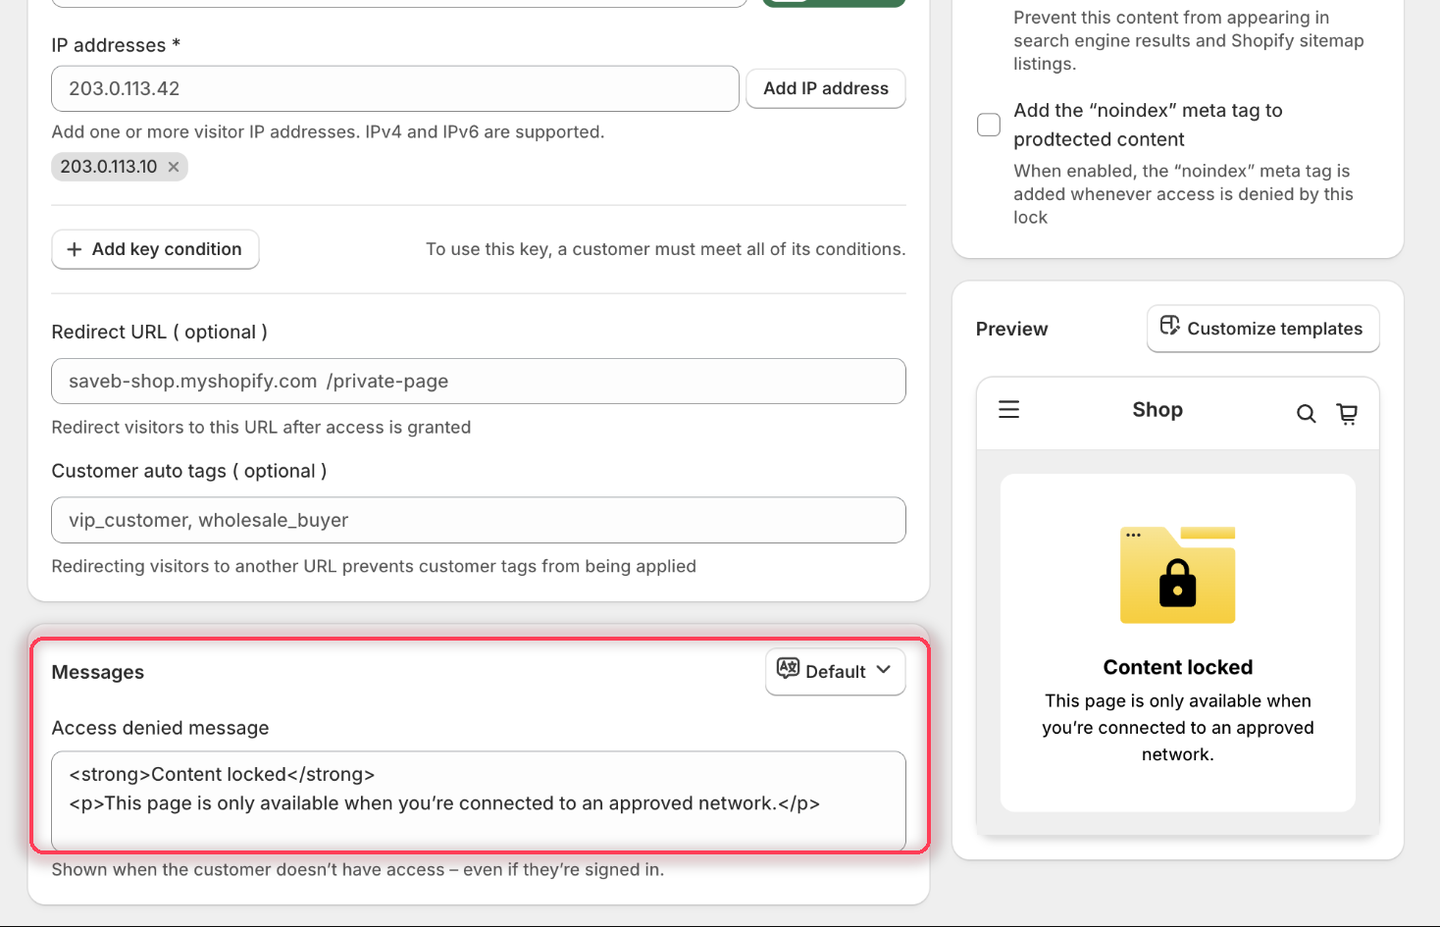
  2. Set the Access denied message to:

This page is only available when you’re connected to an approved network.

The Messages card showing the Access denied message set to the approved-network wording, with the Preview panel rendering it.
This rule has only one message field. The Preview panel shows the wording as shoppers will read it.
  1. Click Save.

Result on the storefront

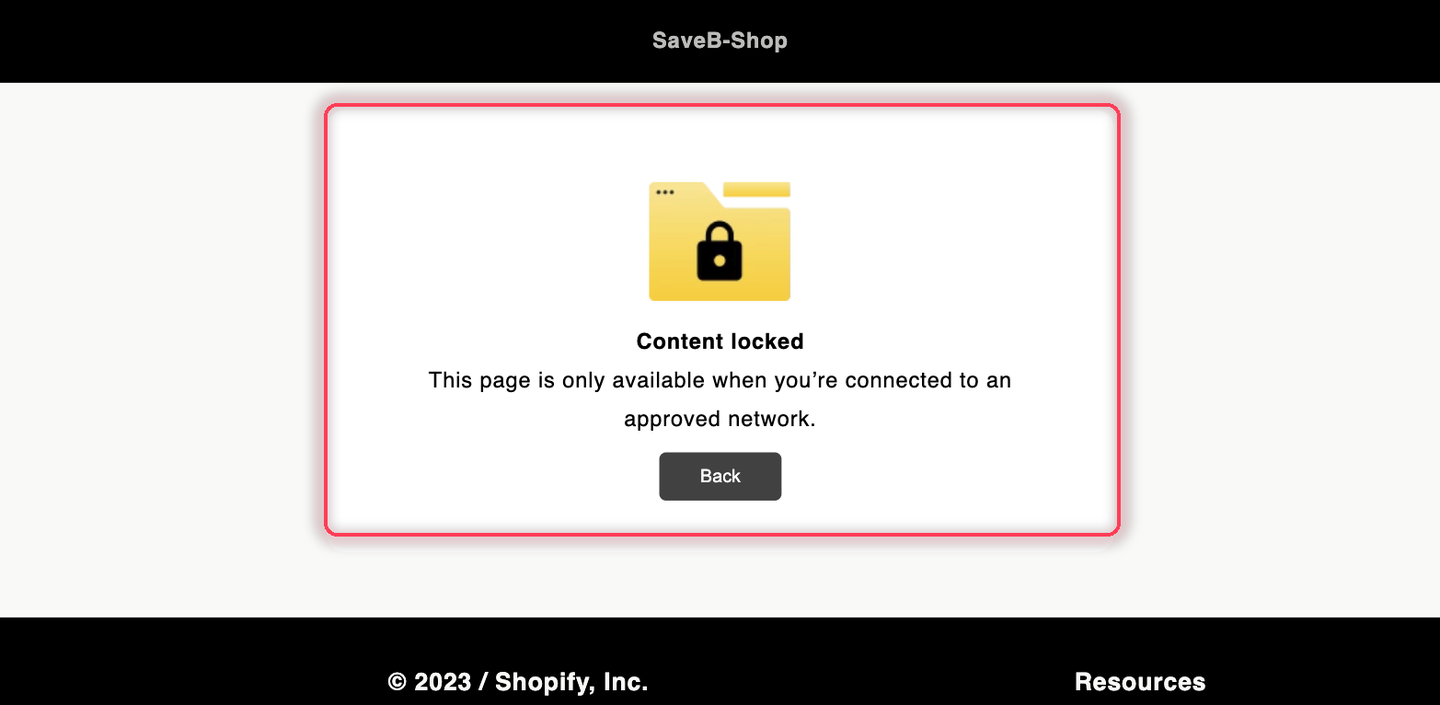
A visitor whose public IP is exactly 203.0.113.10 can open the page. Any other IP address fails the rule and sees the message above. If the office's public IP changes, update the value in the rule before access can work again.

The Internal price list page displaying the configured approved-network message.
A visitor outside the allowed IP address sees the Access denied message from this example.

Last updated

Was this helpful?