
Customize request and access emails
Edit the subject, content, and variables of the admin notification and customer access emails sent by Request access.
Request access sends two different emails: one that tells you a shopper submitted a request, and one that tells the shopper they’ve been granted access. Both are edited from the same Manage email page.
Getting to Manage email
Section titled “Getting to Manage email”From the Request access list, click Manage email at the top right of the page.
Two separate templates
Section titled “Two separate templates”At the top of the Manage email page, switch between:
- Admin email — sent to you every time a shopper submits a new request.
- Customer email — sent to the shopper when you click Send access on their request.
Each template is edited independently — changes to one don’t affect the other.
Editing a template
Section titled “Editing a template”For whichever template is selected:
- Email subject — a plain text field. For the Admin email, the subject also supports variables (for example, including
{{customer_name}}in the subject line). - Preview / Edit code — toggle between seeing the email rendered with sample data (Preview) and editing its raw HTML directly (Edit code). There’s no separate set of controls for colors, the logo, or the footer — the app’s default template already includes all of that, and if you want to change the colors, swap the logo image, or edit the footer text, do it by editing the HTML in Edit code mode.
- Reset default HTML — discards your edits to that template’s subject and HTML and restores the app’s original design.
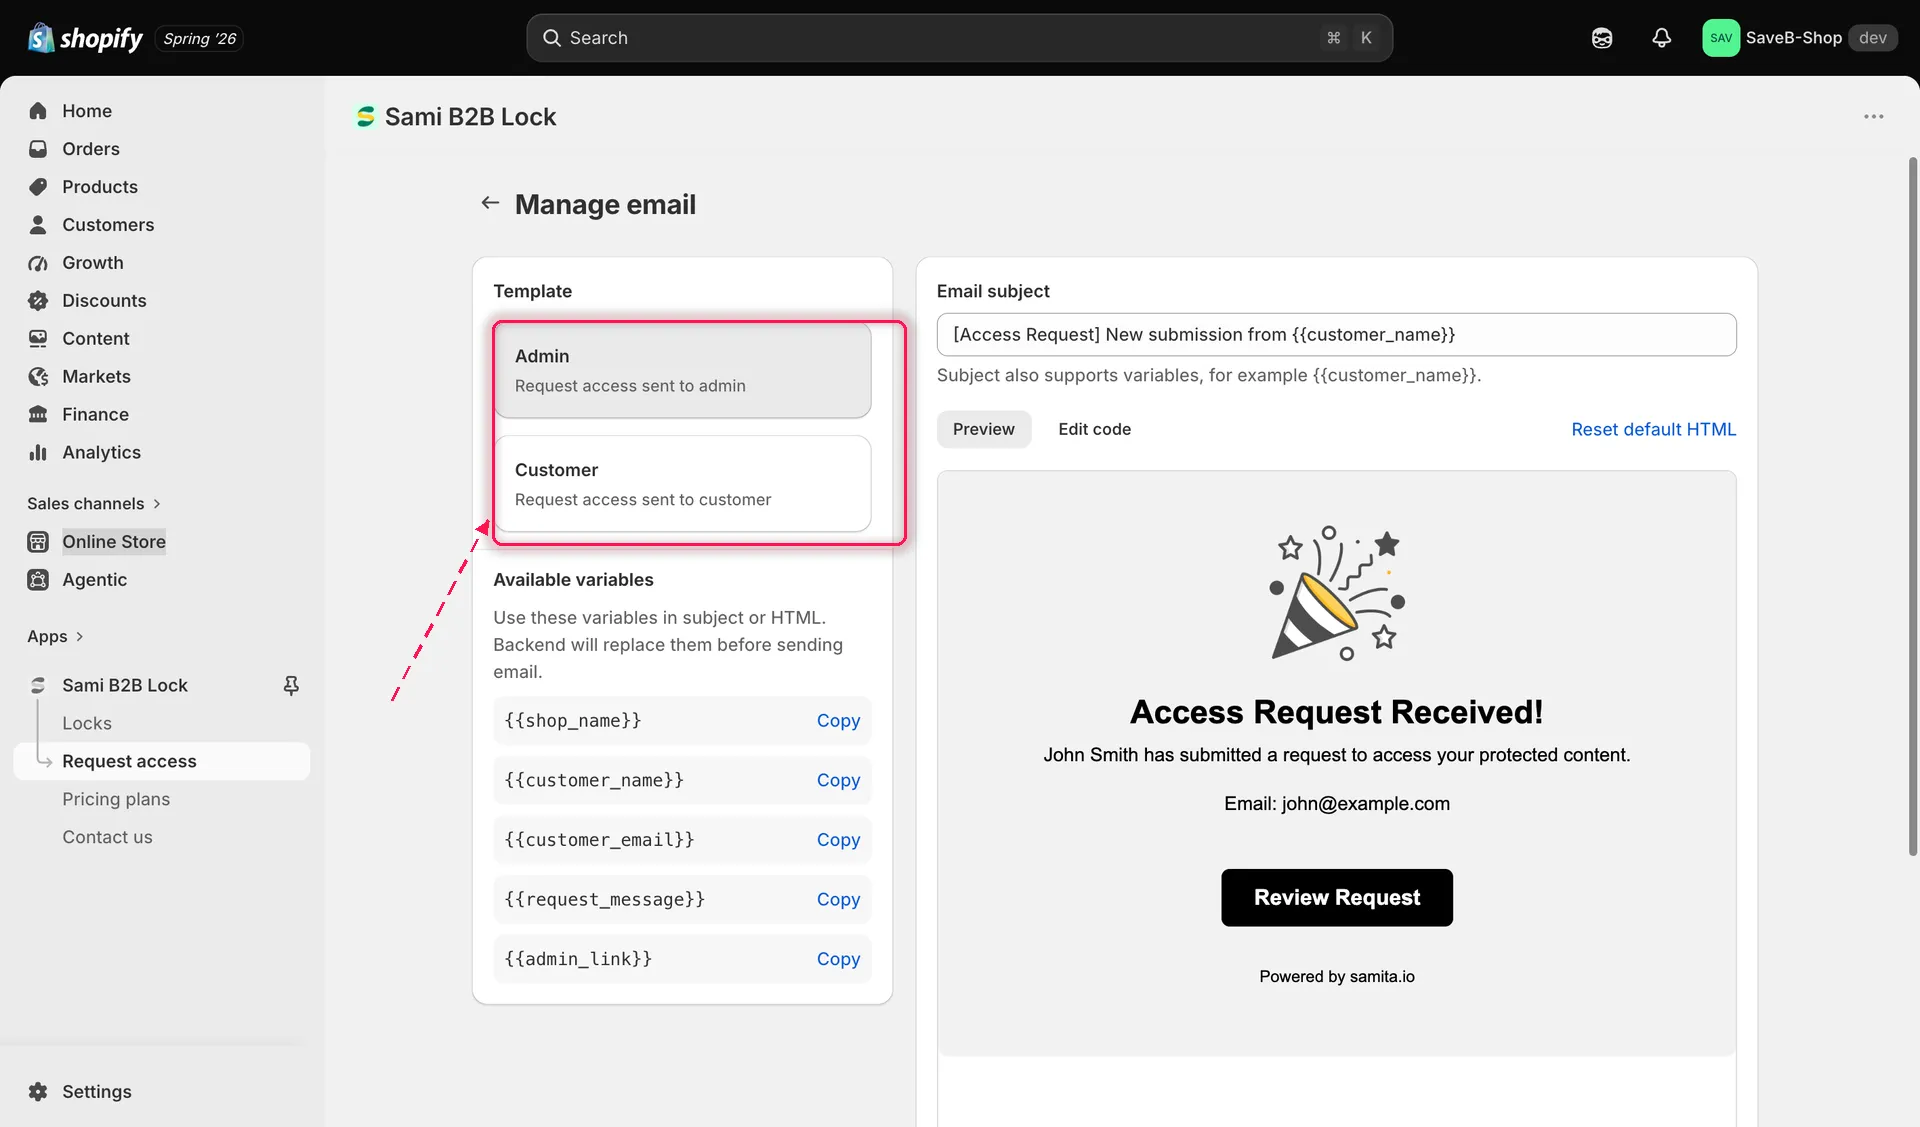
Previewing the Admin email template with sample data.
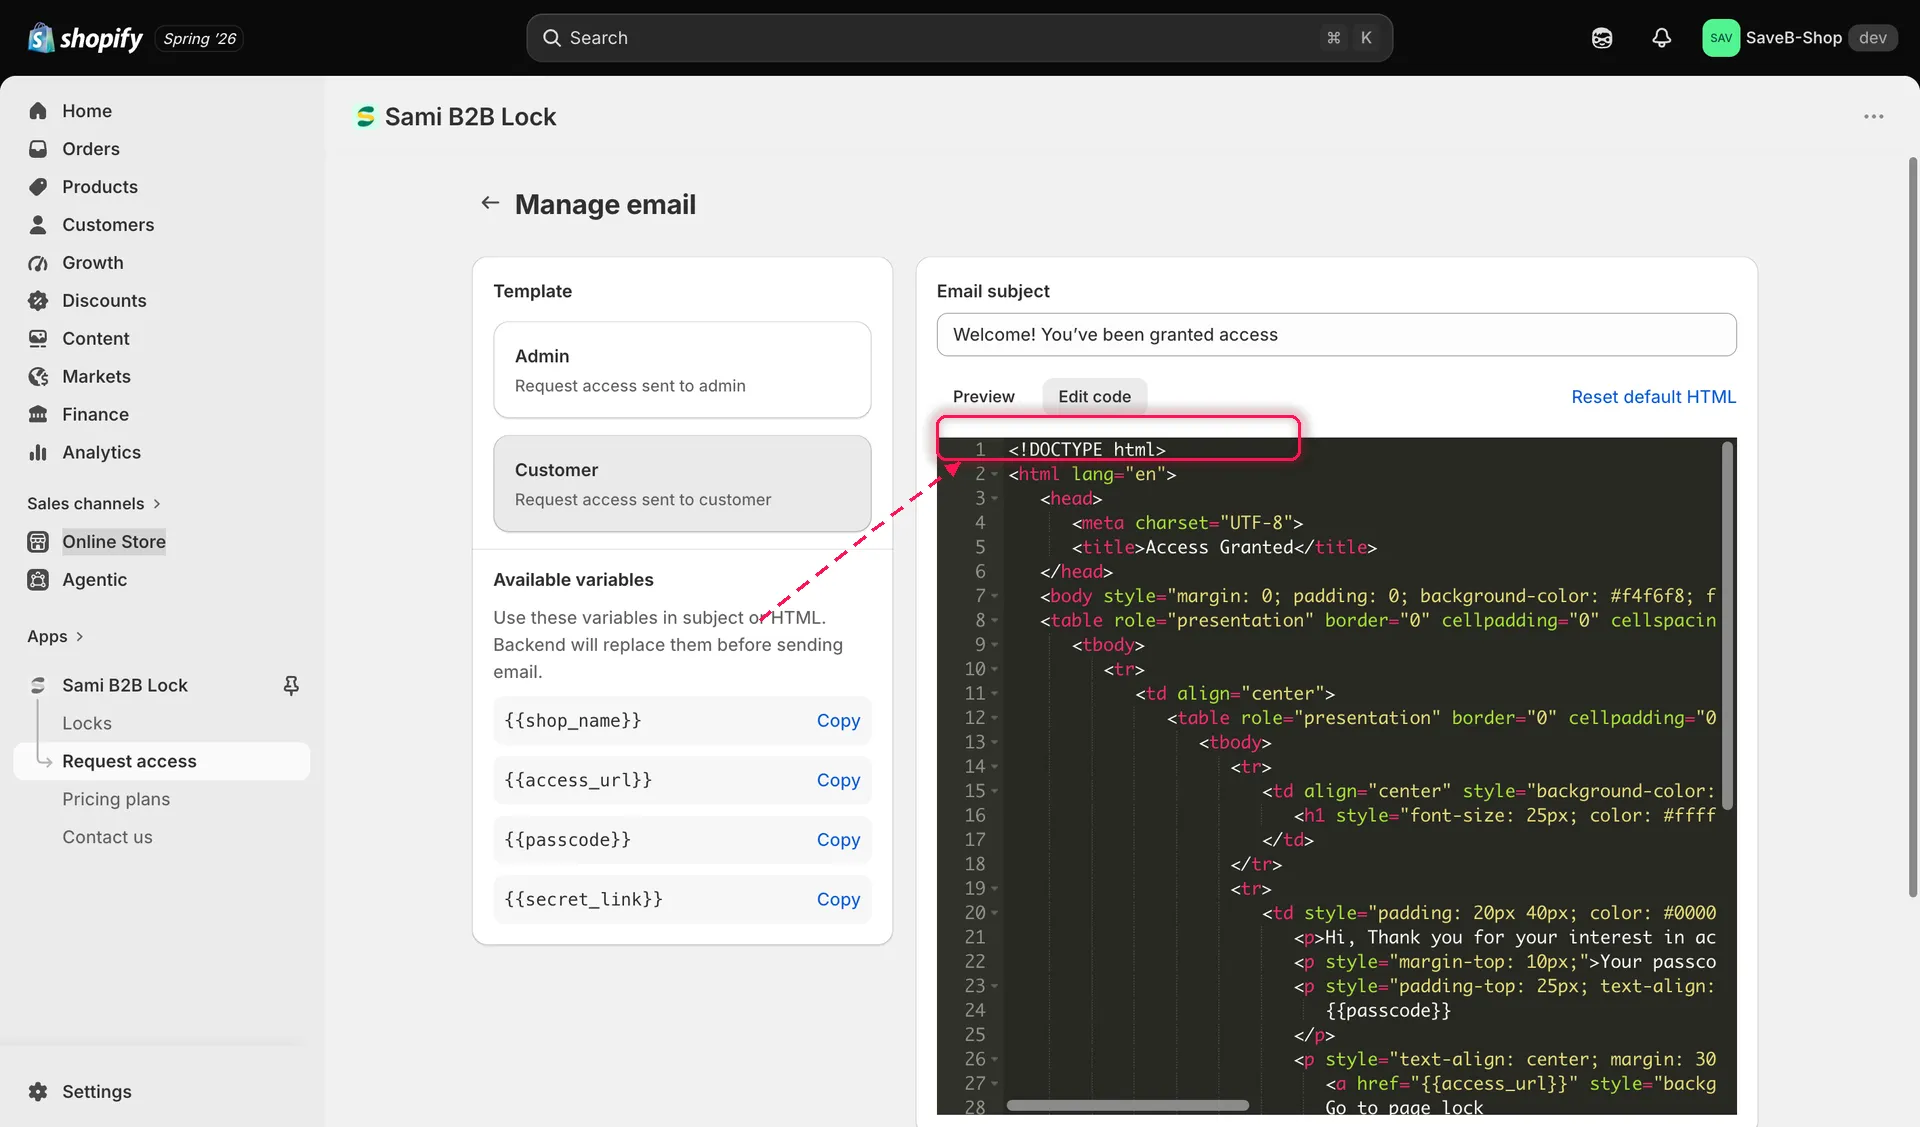
Editing a template’s raw HTML, with the available variables listed alongside it.
Available variables
Section titled “Available variables”Next to the editor, a panel lists the variables you can drop into that template’s subject or HTML — click Copy next to any variable to copy it to your clipboard. The app fills in the real value when the email is actually sent. The variables differ by template, since each email has access to different information:
| Variable | Available in | What it fills in |
|---|---|---|
{{shop_name}} |
Admin and Customer | Your store’s name. |
{{customer_name}} |
Admin | The name the shopper entered on the request form. |
{{customer_email}} |
Admin | The email address the shopper entered. |
{{request_message}} |
Admin | Any optional message the shopper included with their request. |
{{admin_link}} |
Admin | A link straight to that request in the app, so you can review it in one click. |
{{access_url}} |
Customer | The URL of the locked page they requested access to. |
{{passcode}} |
Customer | The passcode you selected to send, if the lock uses a Passcode rule. |
{{secret_link}} |
Customer | The secret link you selected to send, if the lock uses a Secret link rule. |