> For the complete documentation index, see [llms.txt](https://docs.samita.io/llms.txt). Markdown versions of documentation pages are available by appending `.md` to page URLs; this page is available as [Markdown](https://docs.samita.io/b2b-lock-password-protect/request-access/email-setup.md).
# Customize request and access emails
Edit the subject, content, and variables of the admin notification and customer access emails sent by Request access.
Request access sends two different emails: one that tells you a shopper submitted a request, and one that tells the shopper they've been granted access. Both are edited from the same **Manage email** page.
## Getting to Manage email
From the **Request access** list, click **Manage email** at the top right of the page.
{% hint style="info" %}
An open request's detail page also has a **Customize the style of your email access request** card, but its **Customize** button goes to the app's General settings (the storefront notification and Custom CSS options) — not to this page. To edit the emails themselves, always use **Manage email** on the Request access list.
{% endhint %}
## Two separate templates
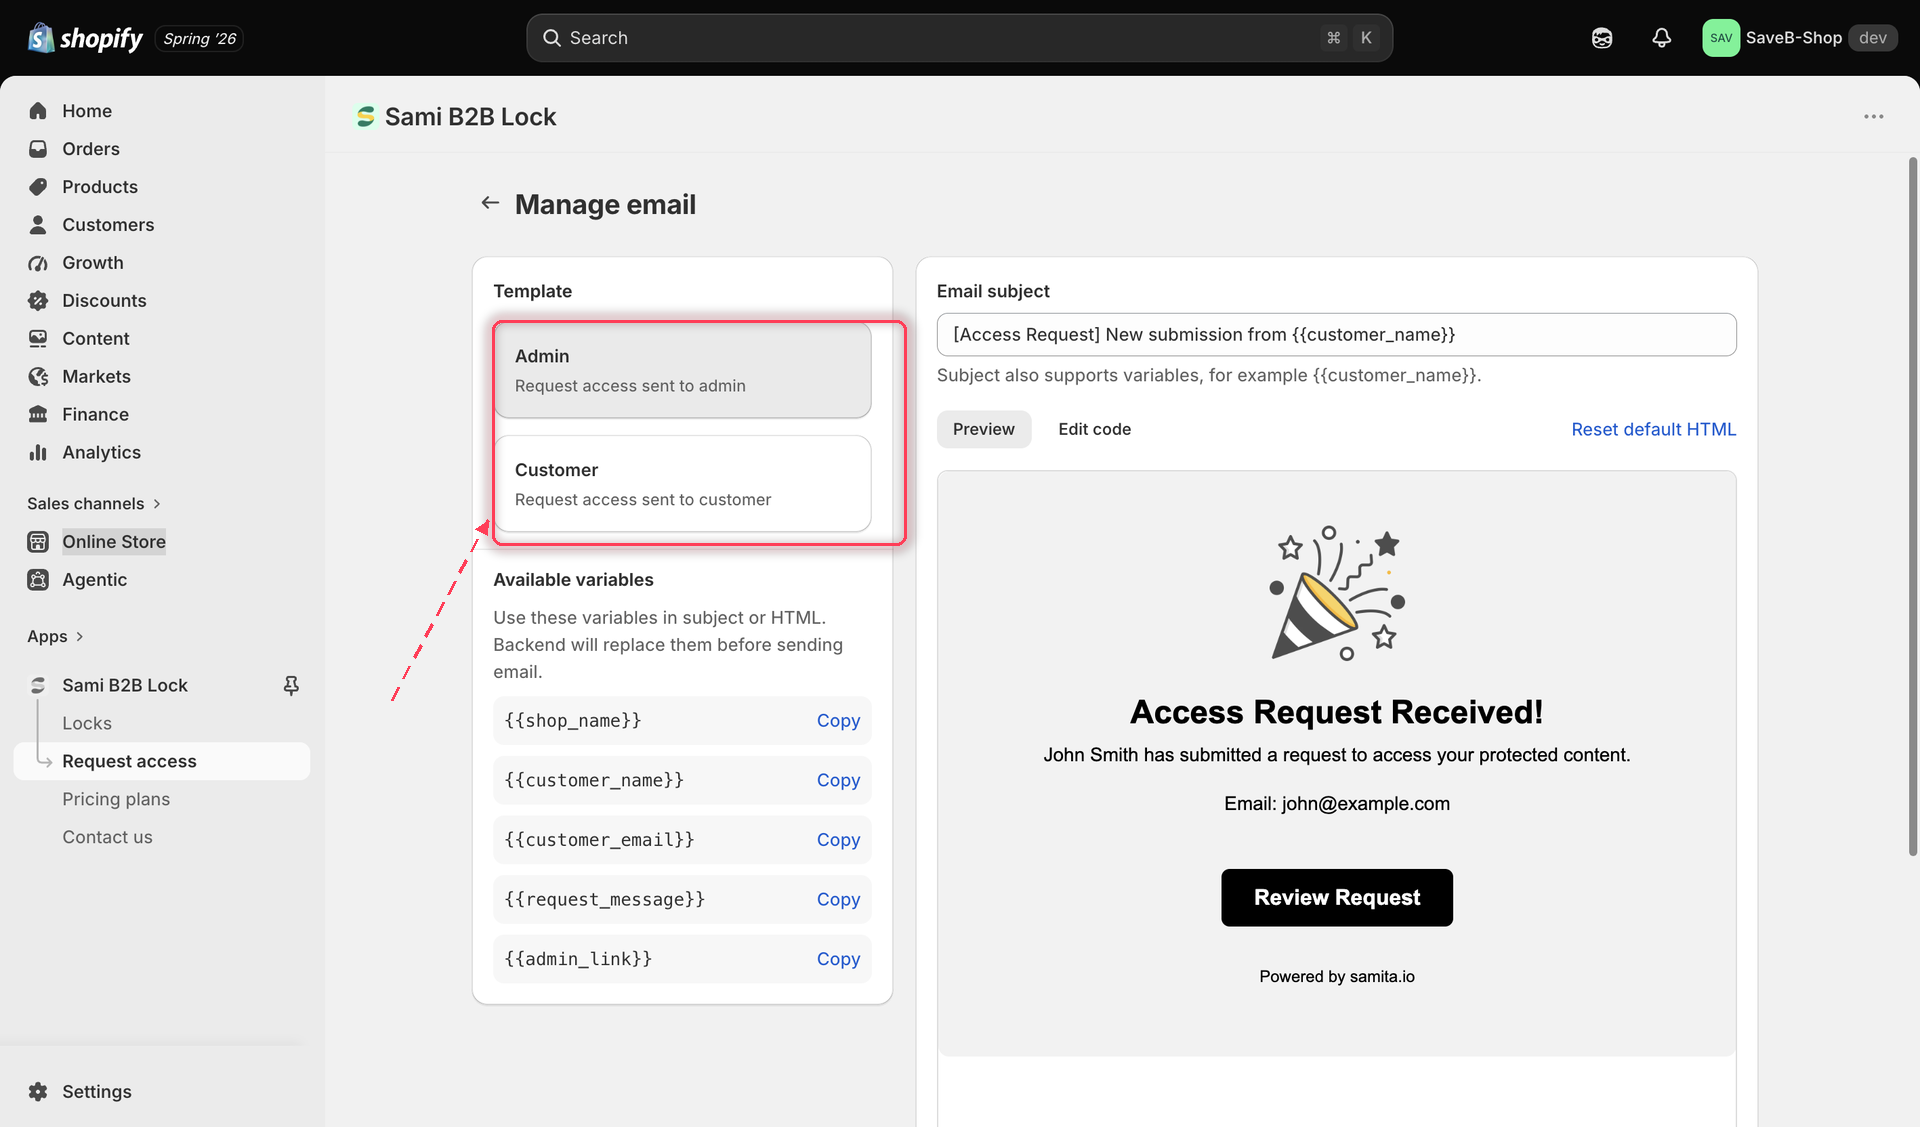
At the top of the Manage email page, switch between:
* **Admin email** — sent to you every time a shopper submits a new request.
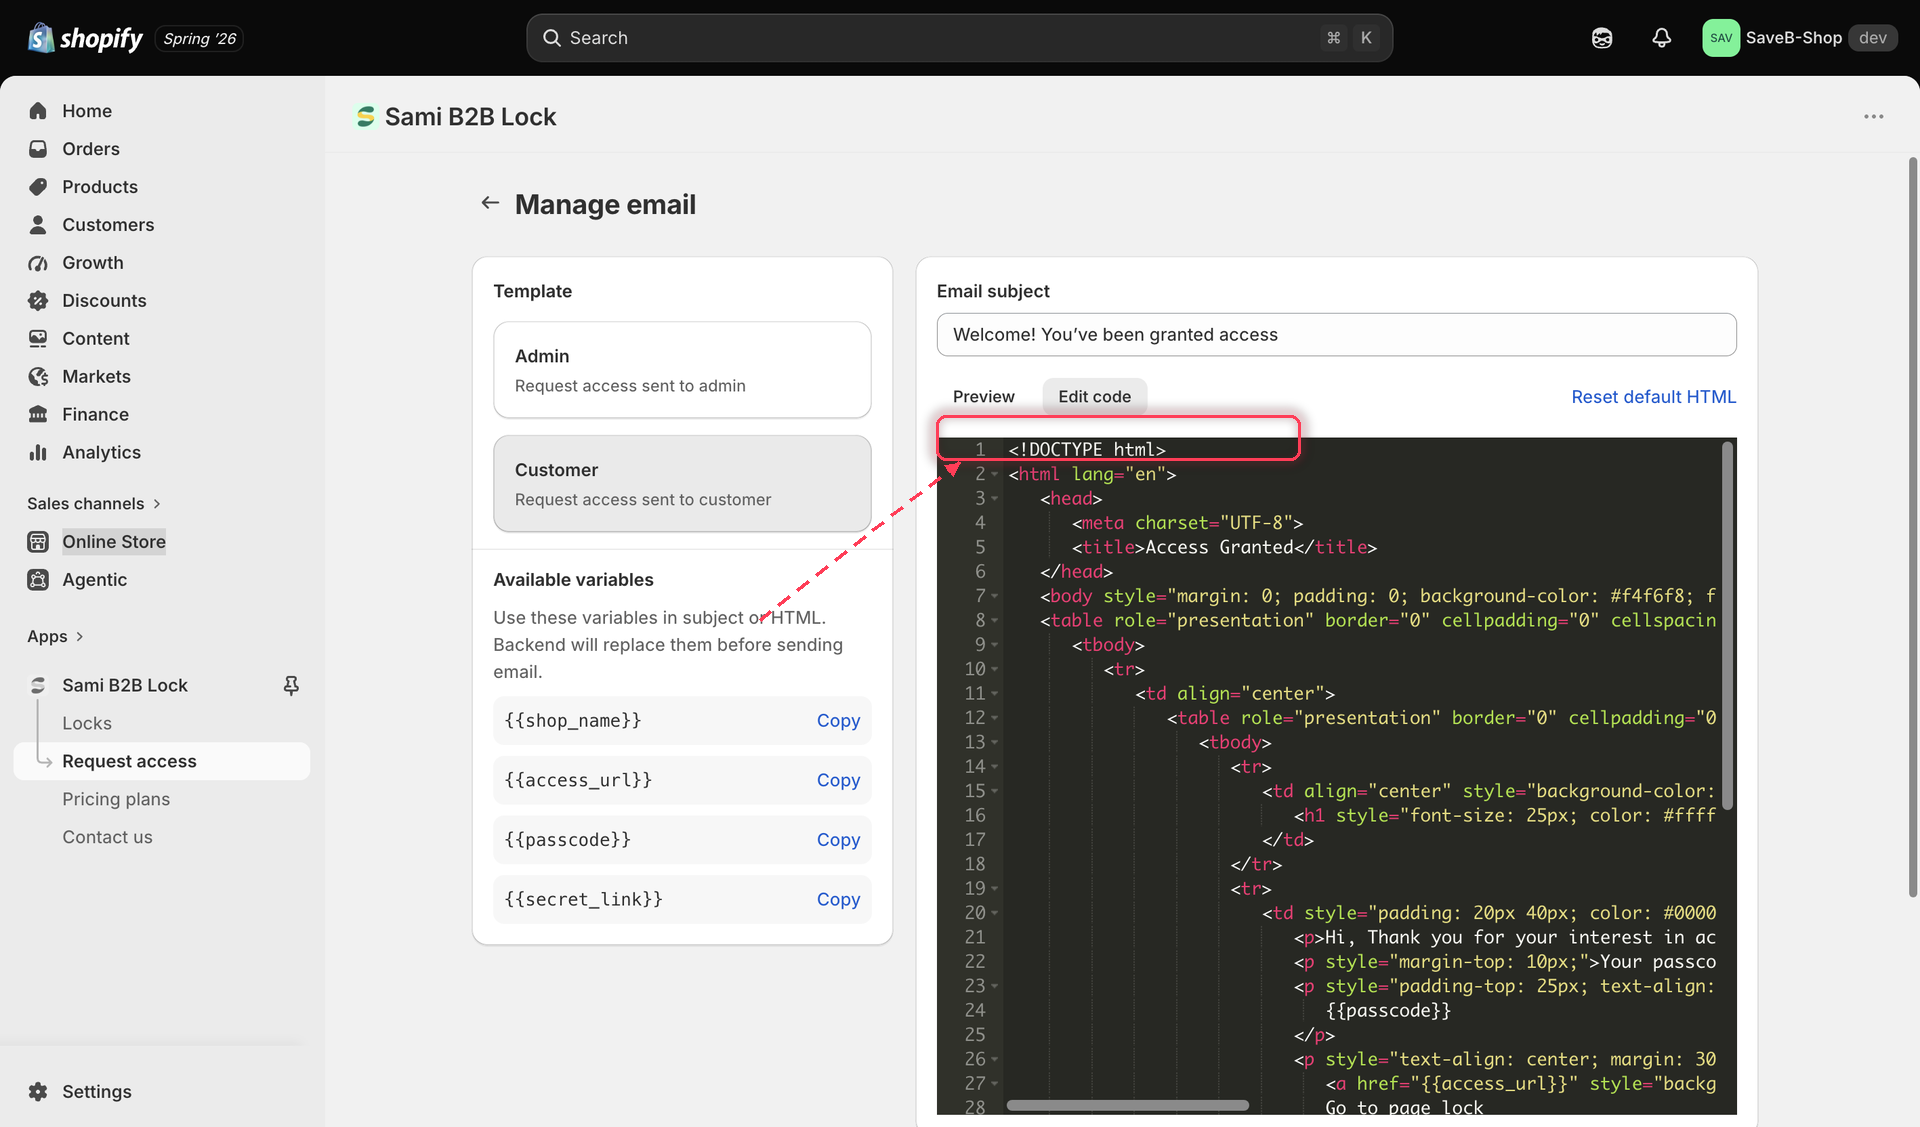
* **Customer email** — sent to the shopper when you click Send access on their request.
Each template is edited independently — changes to one don't affect the other.
## Editing a template
For whichever template is selected:
* **Email subject** — a plain text field. For the Admin email, the subject also supports variables (for example, including `{{customer_name}}` in the subject line).
* **Preview** / **Edit code** — toggle between seeing the email rendered with sample data (Preview) and editing its raw HTML directly (Edit code). There's no separate set of controls for colors, the logo, or the footer — the app's default template already includes all of that, and if you want to change the colors, swap the logo image, or edit the footer text, do it by editing the HTML in Edit code mode.
* **Reset default HTML** — discards your edits to that template's subject and HTML and restores the app's original design.
Previewing the Admin email template with sample data.
Editing a template's raw HTML, with the available variables listed alongside it.
## Available variables
Next to the editor, a panel lists the variables you can drop into that template's subject or HTML — click **Copy** next to any variable to copy it to your clipboard. The app fills in the real value when the email is actually sent. The variables differ by template, since each email has access to different information:
| Variable | Available in | What it fills in |
| --------------------- | ------------------ | ------------------------------------------------------------------------------ |
| `{{shop_name}}` | Admin and Customer | Your store's name. |
| `{{customer_name}}` | Admin | The name the shopper entered on the request form. |
| `{{customer_email}}` | Admin | The email address the shopper entered. |
| `{{request_message}}` | Admin | Any optional message the shopper included with their request. |
| `{{admin_link}}` | Admin | A link straight to that request in the app, so you can review it in one click. |
| `{{access_url}}` | Customer | The URL of the locked page they requested access to. |
| `{{passcode}}` | Customer | The passcode you selected to send, if the lock uses a Passcode rule. |
| `{{secret_link}}` | Customer | The secret link you selected to send, if the lock uses a Secret link rule. |
{% hint style="info" %}
The variables panel only lists the variables valid for the template you're currently editing, so the list changes when you switch between Admin and Customer.
{% endhint %}
{% hint style="info" %}
Very high-volume stores should note a daily email limit applies to request access emails on trial or free plans.
{% endhint %}
## Related docs
* [Request access overview](/b2b-lock-password-protect/request-access/overview.md)
* [Manage access requests](/b2b-lock-password-protect/request-access/manage-requests.md)
* [Passcode](/b2b-lock-password-protect/access-rules/passcode.md)
* [Secret link](/b2b-lock-password-protect/access-rules/secret-link.md)
---
# Agent Instructions
This documentation is published with GitBook. GitBook is the documentation platform designed so that both humans and AI agents can read, navigate, and reason over technical content effectively. Learn more at gitbook.com.
## Querying This Documentation
If you need additional information that is not directly available in this page, you can query the documentation dynamically by asking a question.
Perform an HTTP GET request on the current page URL with the `ask` query parameter, and the optional `goal` query parameter:
```
GET https://docs.samita.io/b2b-lock-password-protect/request-access/email-setup.md?ask=&goal=
```
`ask` is the immediate question: it should be specific, self-contained, and written in natural language.
`goal` is optional and describes the broader end goal you are ultimately trying to accomplish on behalf of the user. GitBook uses it to tailor the answer towards what is most useful for that goal.
The response will contain a direct answer to the question and relevant excerpts and sources from the documentation.
Use this mechanism when the answer is not explicitly present in the current page, you need clarification or additional context, or you want to retrieve related documentation sections.