> For the complete documentation index, see [llms.txt](https://docs.samita.io/llms.txt). Markdown versions of documentation pages are available by appending `.md` to page URLs; this page is available as [Markdown](https://docs.samita.io/b2b-lock-password-protect/request-access/manage-requests.md).
# Manage access requests
Review incoming access requests, see what each shopper asked for, and send them a passcode or secret link.
Every time a shopper submits the request form on a Passcode- or Secret-link-protected lock (see [Request access overview](/b2b-lock-password-protect/request-access/overview.md)), it shows up in the **Request access** list, ready for you to review and act on.
## The Request Access list
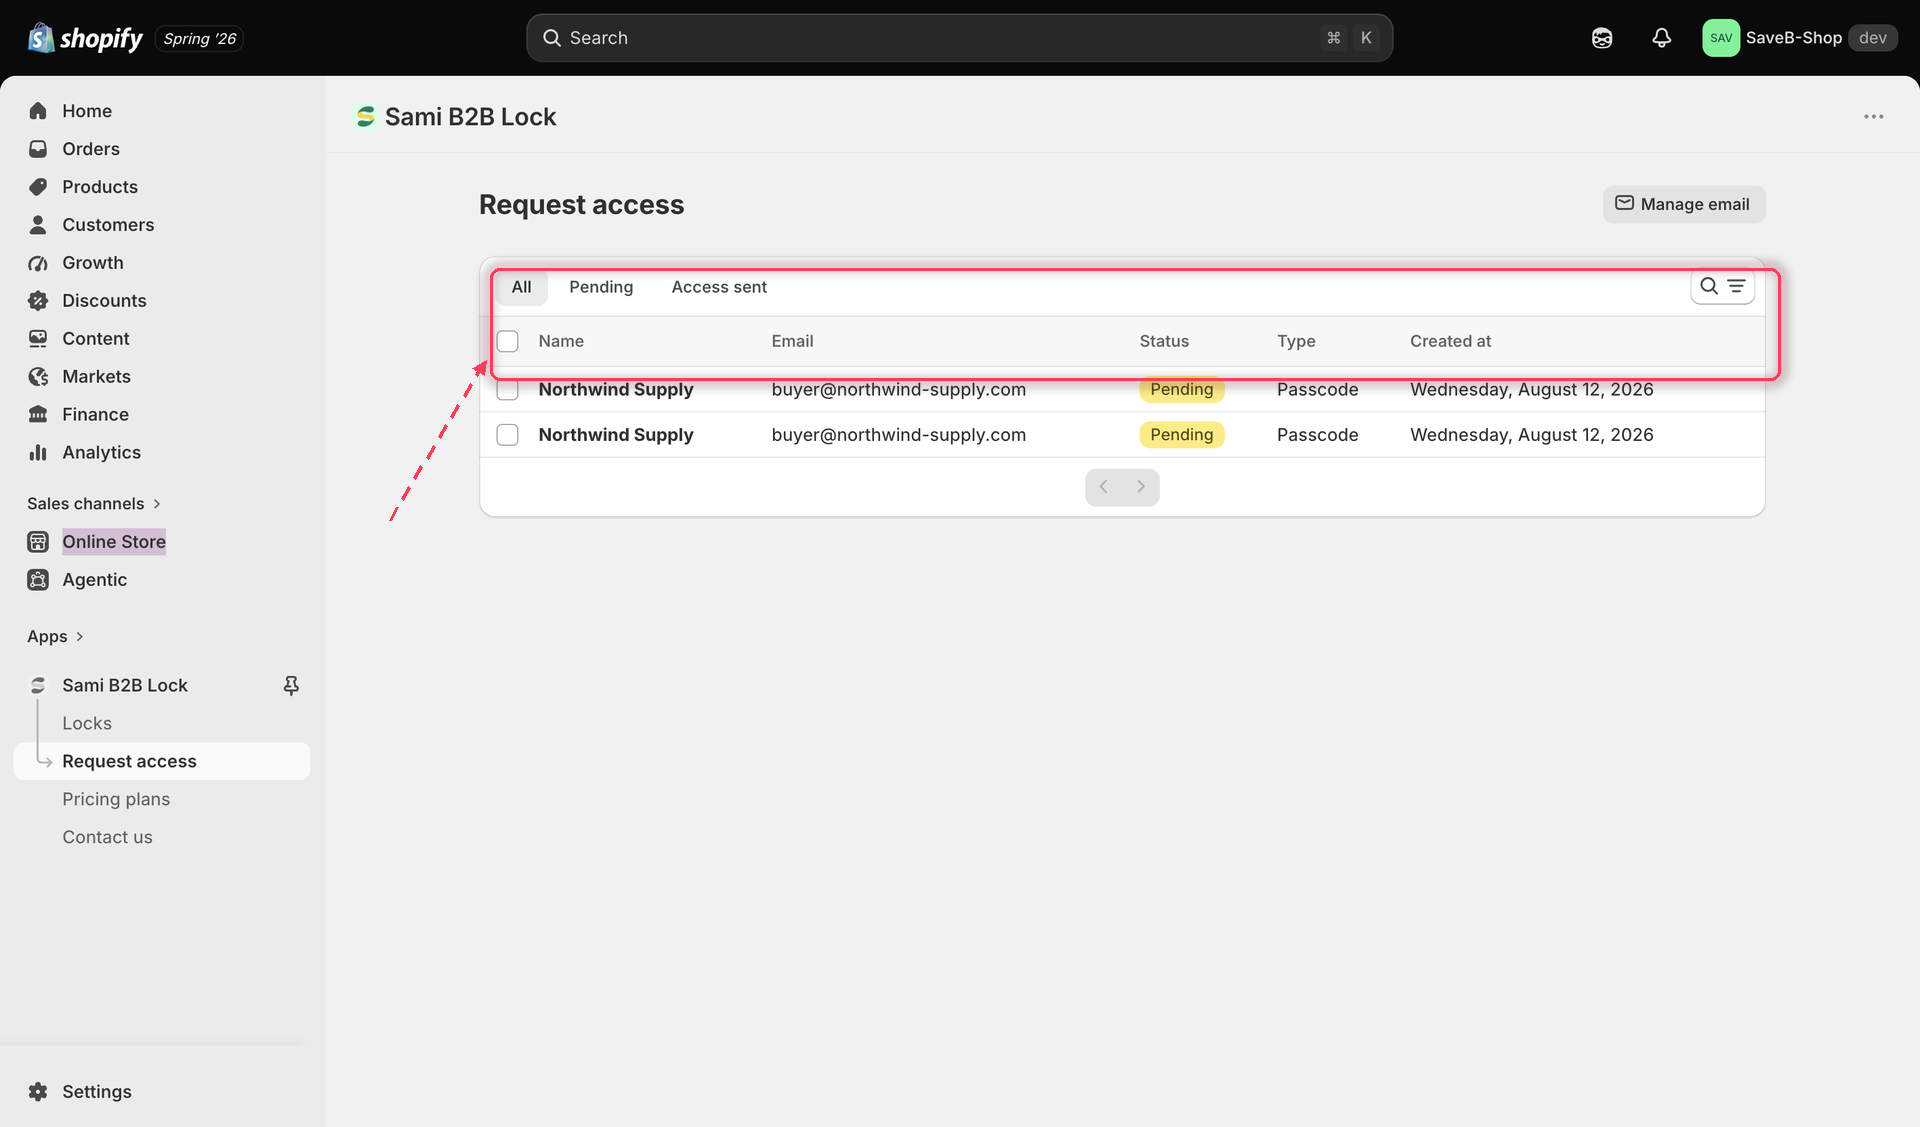
Open **Request access** from the app's main navigation. The list shows every submission with:
* **Name** and **Email** — who asked.
* **Status** — Pending (not yet actioned) or Access sent (you've already granted access).
* **Type** — which access rule the request applies to (Passcode or Secret link).
* **Created at** — when the request came in.
Use the tabs above the list to filter to **All**, **Pending**, or **Access sent**, and the search field to find a request by name or email. Select one or more rows to reveal a **Delete request** bulk action — deleting is permanent, so confirm you no longer need that request before removing it.
The Request access list with its status tabs and search.
## Opening a request
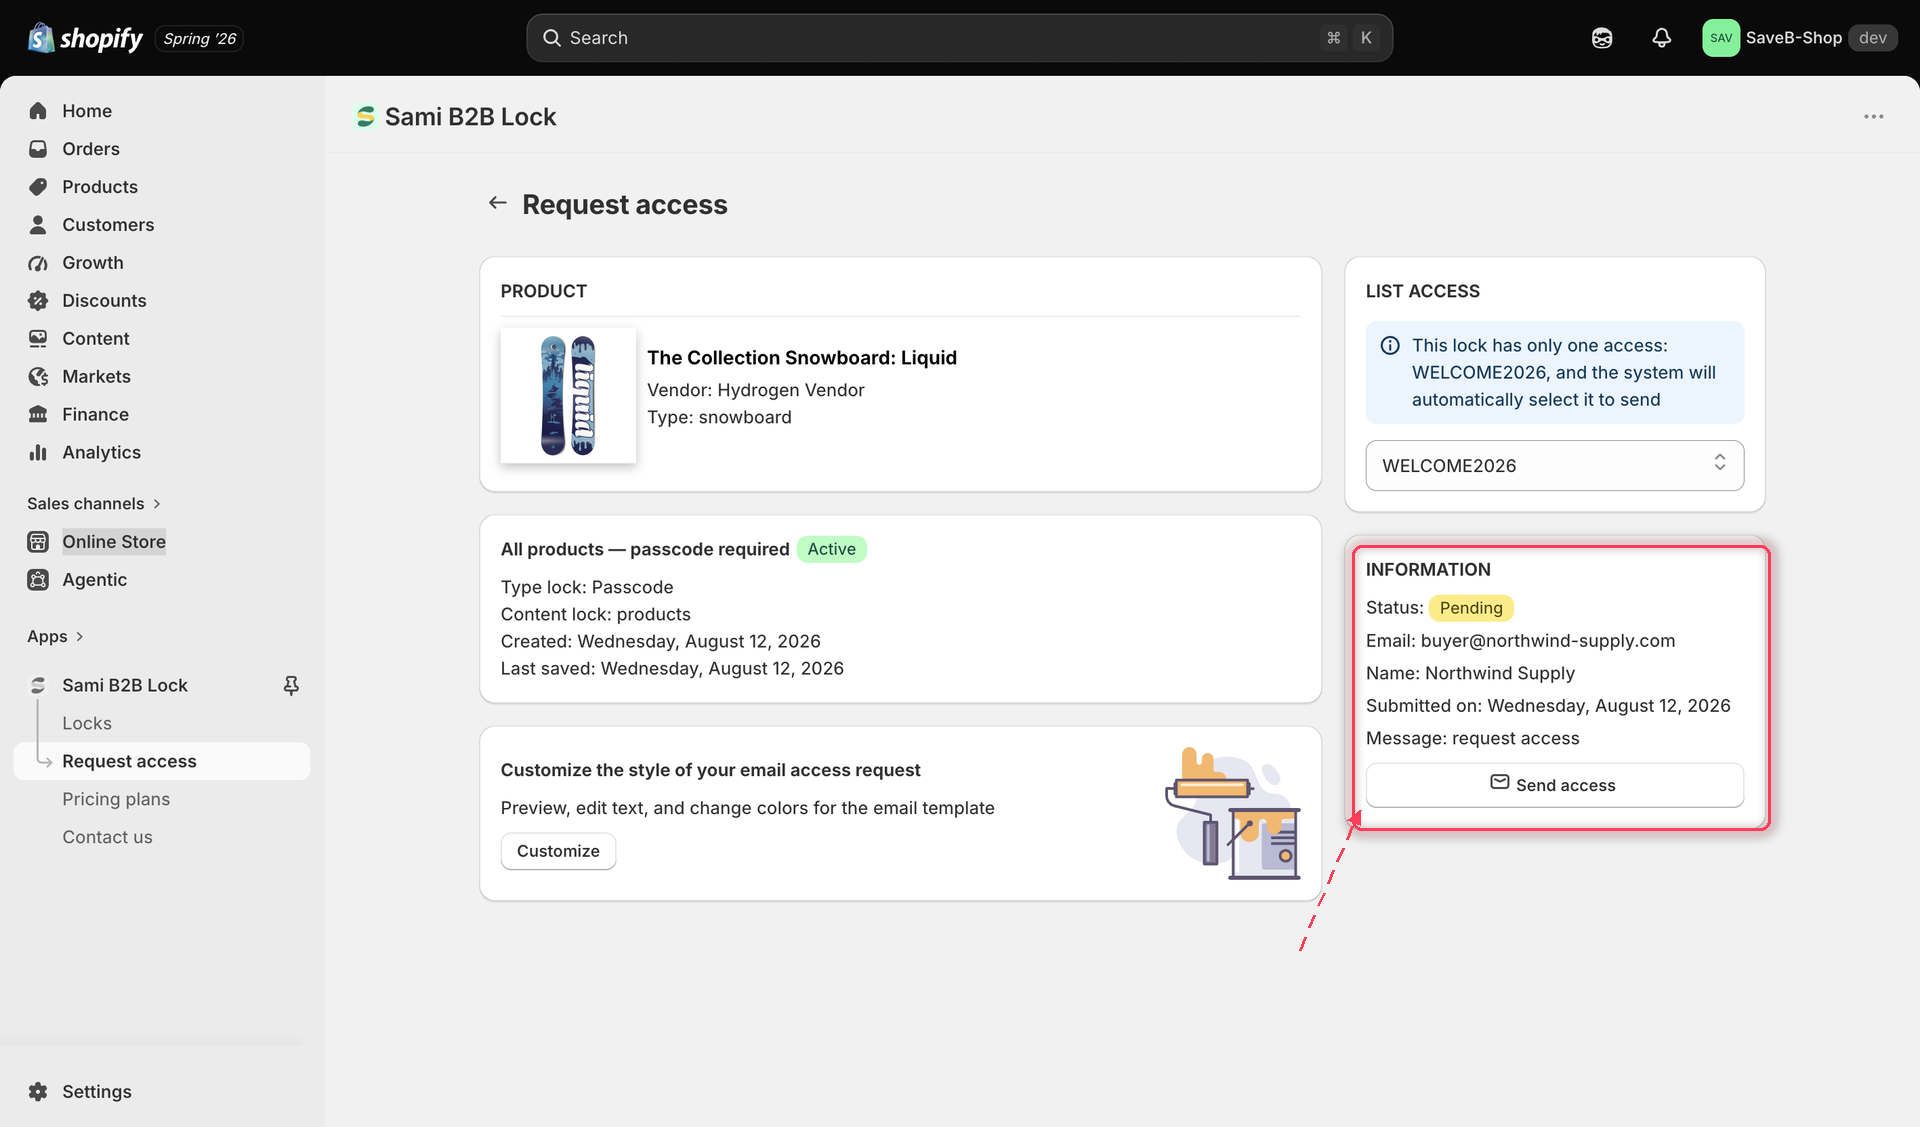
Click any row to open its detail page. At the top you'll see the locked resource the shopper was trying to reach — the product, collection, or page card (with its image, title, and other details), or a direct link to the locked URL if the lock doesn't target a single product, collection, or page. Below that, a card shows the lock's name, status, rule type, scope, and when it was created and last saved.
## Granting access
On the request's detail page, the **List access** card shows the passcode or secret link you can send:
* If the lock only has one active passcode or secret link, it's selected for you automatically, with a note confirming that.
* If the lock has more than one, pick which one to send from the dropdown.
The **information** card next to it repeats the request's status, the shopper's email, name, the date they submitted it, and any message they included. When you're ready, click **Send access**. This emails the shopper the Customer access email with the passcode or secret link you selected, and flips the request's status to Access sent. If sending fails for any reason, an error banner explains what went wrong so you can try again.
Reviewing a request and sending access with the selected passcode.
{% hint style="info" %}
Want to change what the notification and access emails look like before you start approving real requests? Open [Customize request and access emails](/b2b-lock-password-protect/request-access/email-setup.md) — there's a shortcut to it right from this page.
{% endhint %}
## Related docs
* [Request access overview](/b2b-lock-password-protect/request-access/overview.md)
* [Customize request and access emails](/b2b-lock-password-protect/request-access/email-setup.md)
* [Passcode](/b2b-lock-password-protect/access-rules/passcode.md)
* [Secret link](/b2b-lock-password-protect/access-rules/secret-link.md)
---
# Agent Instructions
This documentation is published with GitBook. GitBook is the documentation platform designed so that both humans and AI agents can read, navigate, and reason over technical content effectively. Learn more at gitbook.com.
## Querying This Documentation
If you need additional information that is not directly available in this page, you can query the documentation dynamically by asking a question.
Perform an HTTP GET request on the current page URL with the `ask` query parameter, and the optional `goal` query parameter:
```
GET https://docs.samita.io/b2b-lock-password-protect/request-access/manage-requests.md?ask=&goal=
```
`ask` is the immediate question: it should be specific, self-contained, and written in natural language.
`goal` is optional and describes the broader end goal you are ultimately trying to accomplish on behalf of the user. GitBook uses it to tailor the answer towards what is most useful for that goal.
The response will contain a direct answer to the question and relevant excerpts and sources from the documentation.
Use this mechanism when the answer is not explicitly present in the current page, you need clarification or additional context, or you want to retrieve related documentation sections.