
Getting started
Install Sami Bulk Price Editor and run your first bulk edit task.
Install the app
Section titled “Install the app”-
Add the app from the Shopify App Store
Section titled “Add the app from the Shopify App Store”Open https://apps.shopify.com/bulk-price-editor-sami and click Install. Log in to your store if Shopify asks you to.
-
Approve the permissions
Section titled “Approve the permissions”The app asks for access to products, inventory and publications (sales channels). These are needed to read your catalog, write the changes you request and publish or unpublish products.
-
Choose a plan
Section titled “Choose a plan”On first launch the app shows the Choose your plan page. Pick Continue as Free to start on the Free plan, or start a paid plan. Paid plans include a free trial. See Plans and pricing.
-
Open the app
Section titled “Open the app”In your Shopify admin go to Apps › Bulk Price Editor Sami. The app menu has six entries: Dashboard, New bulk edit, Tasks, Settings, Pricing and Contact us.
Run your first bulk edit
Section titled “Run your first bulk edit”The example below lowers the price of every product by 10% right now and puts the old price in Compare at price so the storefront shows a strike-through discount.
-
Click New bulk edit
Section titled “Click New bulk edit”From the dashboard click New bulk edit, or use New bulk edit in the app menu. The Choose a Field to Edit page opens.
-
Select the Price field
Section titled “Select the Price field”Open the Variant fields group (or Most popular) and click Select on Price.
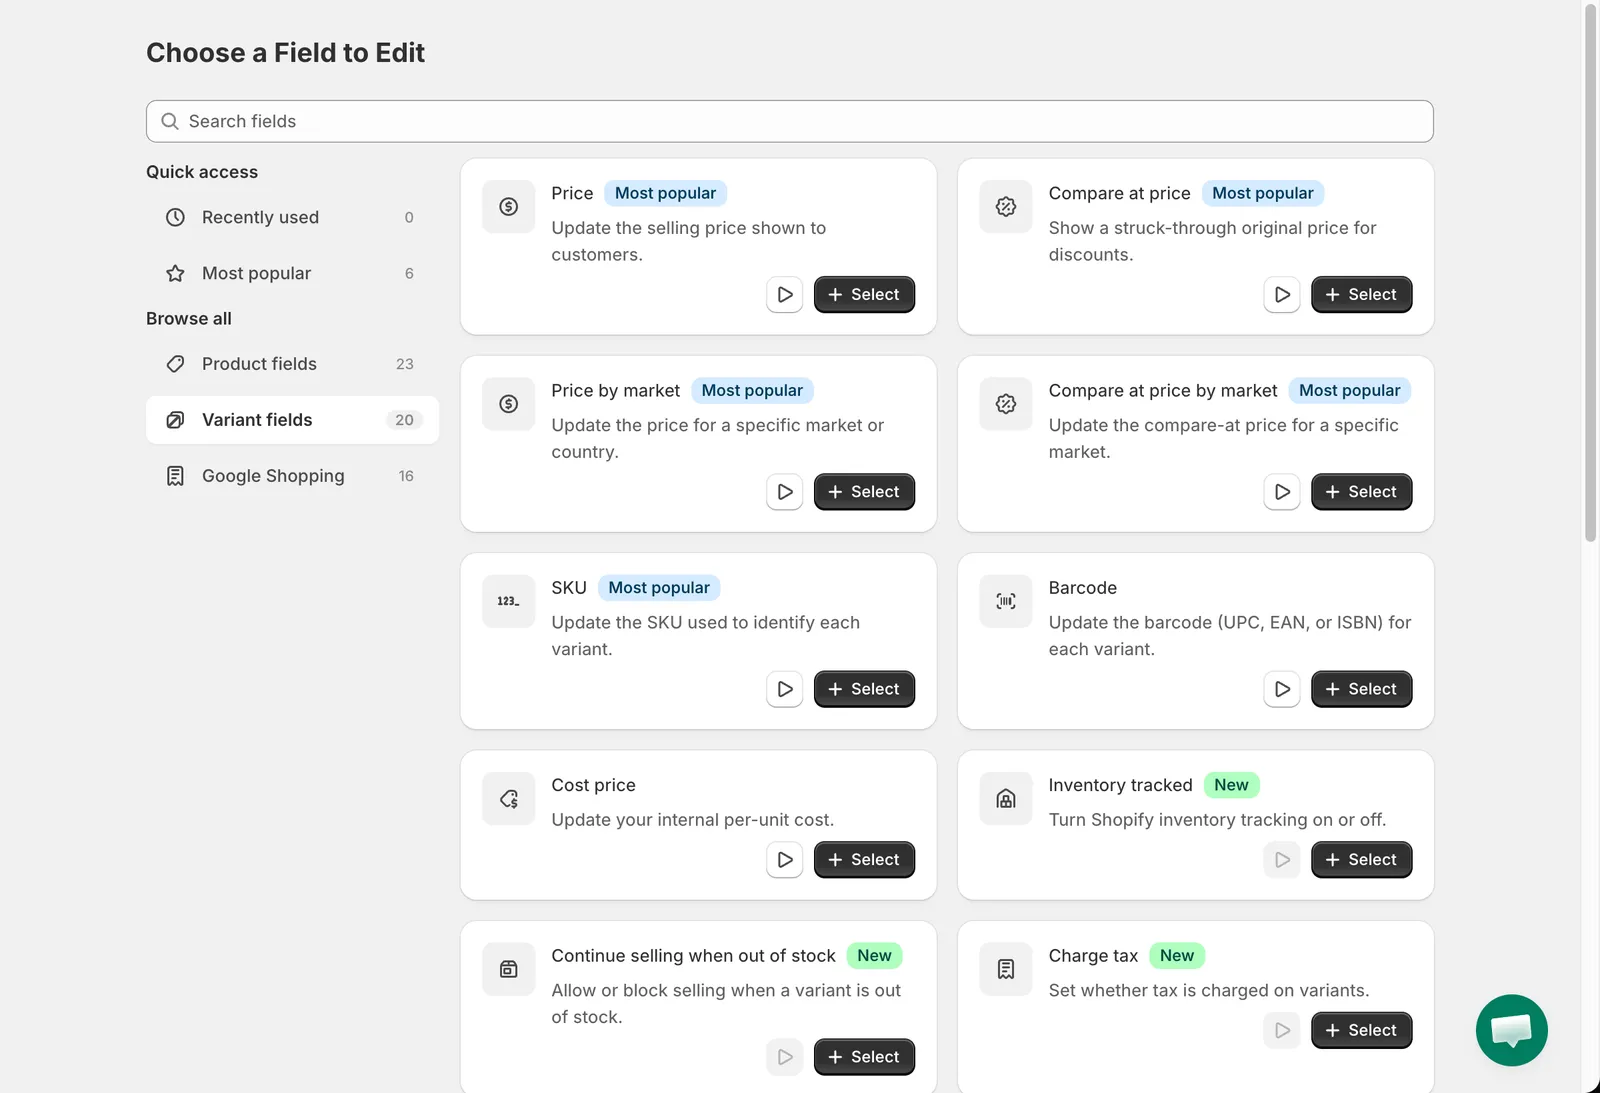
Choose a Field to Edit
-
Configure the edit
Section titled “Configure the edit”- Task name: type a name you will recognize later, for example
Summer Sale -10%. - Edit method: keep Decrease by percentage and enter
10in Value. - Rounding: keep Round to nearest .01.
- Under Compare at price choose Set the compare-at price and keep Set the compare-at price to the current price.
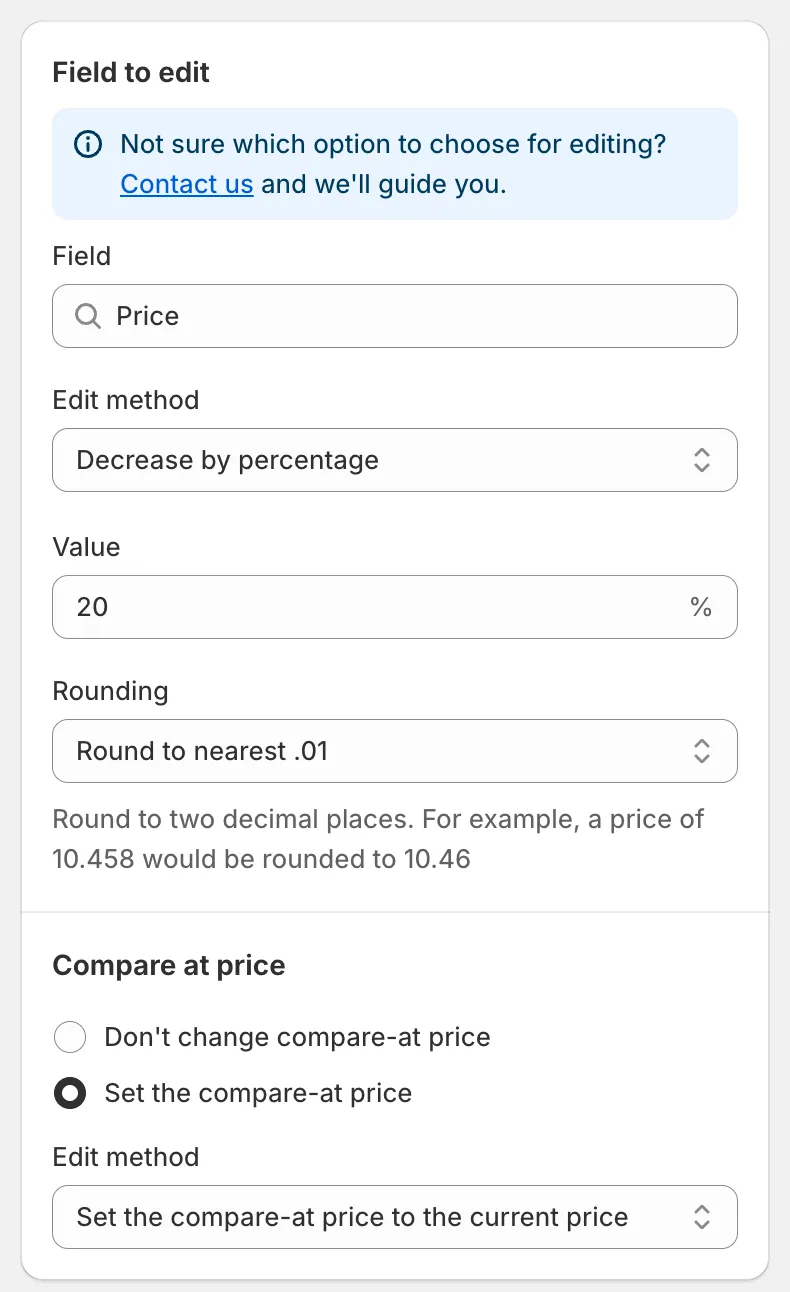
Field to edit
- Task name: type a name you will recognize later, for example
-
Choose the products
Section titled “Choose the products”Under Apply to products keep All products. The Preview on the right updates and shows the original and the new price for each variant.
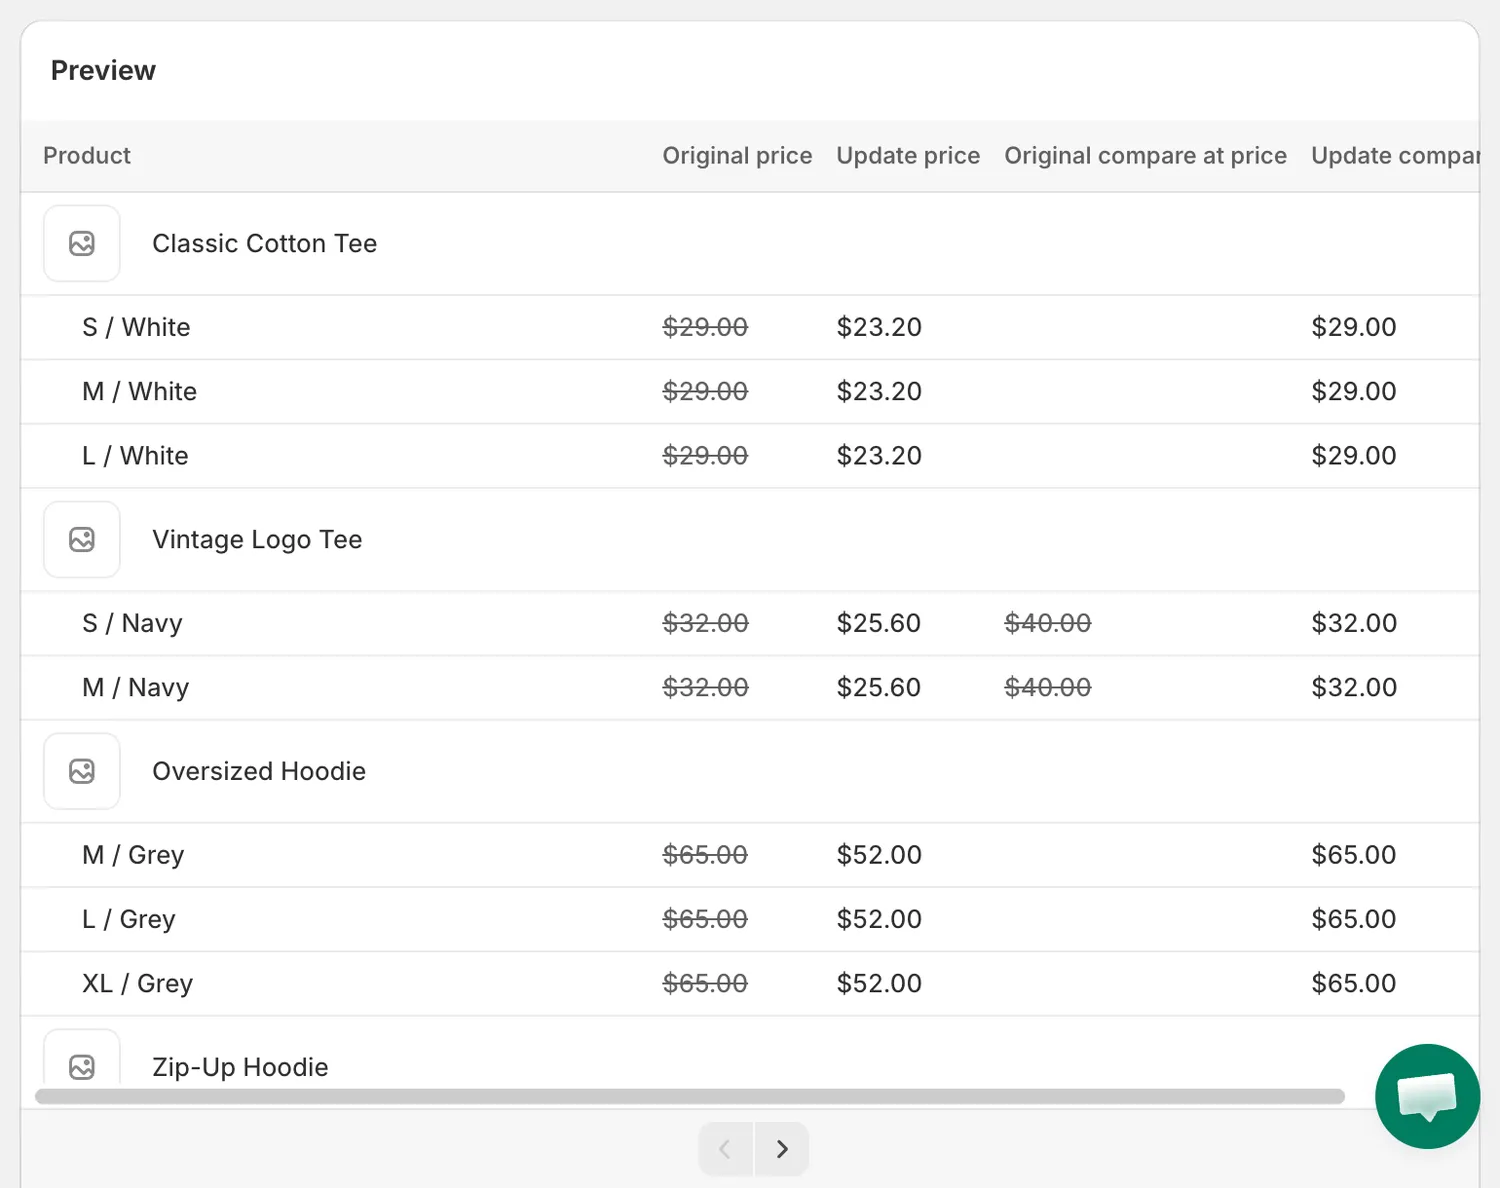
Preview
-
Choose when to run
Section titled “Choose when to run”Under Start time keep Now. If you want the prices to go back automatically, tick Schedule the revert and pick the date and time.
-
Save and confirm
Section titled “Save and confirm”Click Save in the top bar. Because the task starts now, a Task confirmation dialog summarises the change. Read it, then click Save. The task starts and the app opens the task details page.
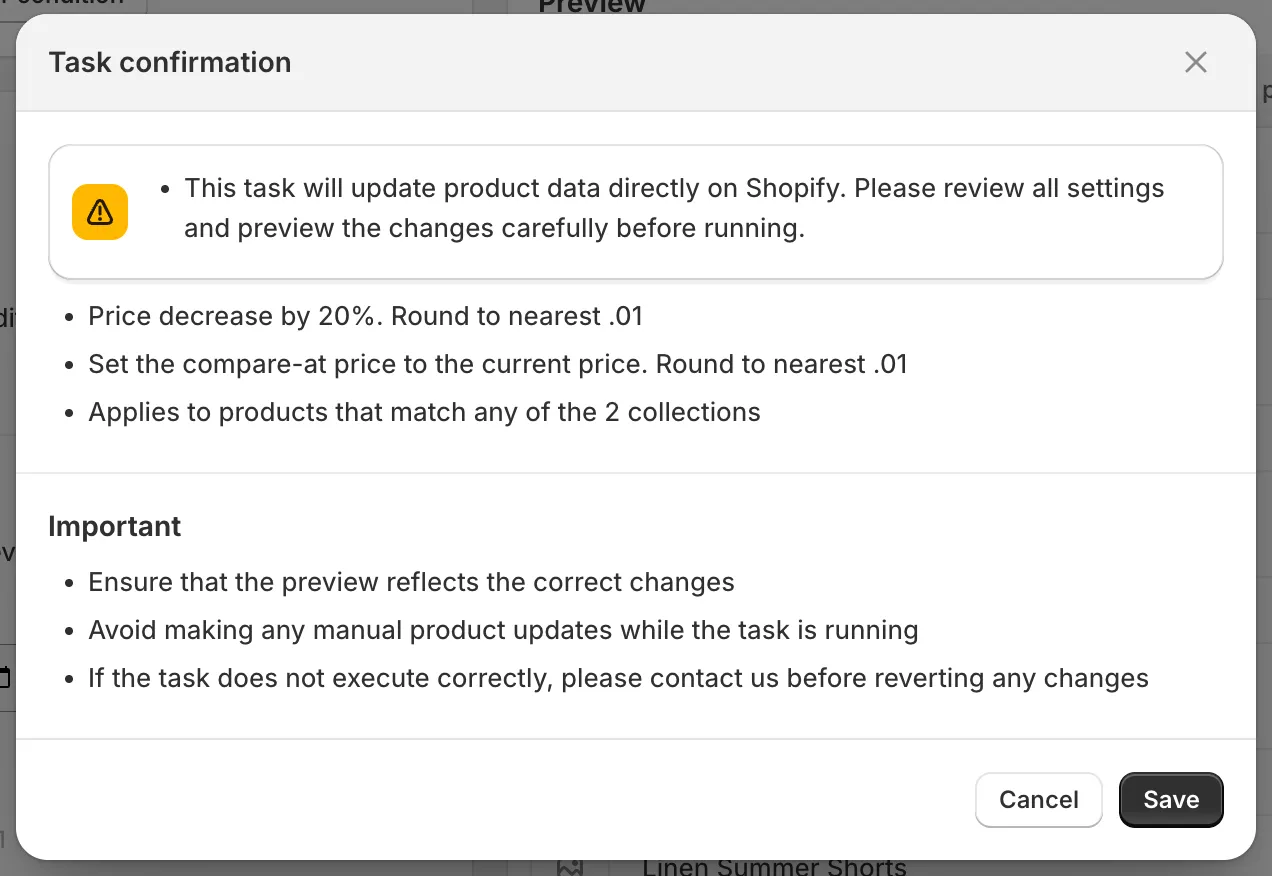
Task confirmation
What happens next
Section titled “What happens next”- The task details page refreshes while the task runs and shows Products changed as a progress bar.
- When the status becomes Completed, the Product changes table lists every product with its original and updated values.
- The change appears in your Shopify admin right away. Your storefront may take a few minutes to show it because of caching.
- You can undo the whole task with Revert now. See Revert changes.
Try it on a demo product first
Section titled “Try it on a demo product first”The task form shows a banner Try a demo run first. Click Create product and the app creates a demo product in your store and switches the task to Specific products with only that product selected. Run the task on the demo product, check the result, then change the selection to your real products.