
Change badge style
Customize fonts, colors, backgrounds, borders, opacity, and rotation for text and image badges.
Use the Design tab to change how a badge looks. Text badges provide font, color, background, border, opacity, and rotation controls. Image badges provide opacity and rotation controls for the selected artwork.
Open a badge in the editor
Section titled “Open a badge in the editor”-
Open Badges & Labels
Section titled “Open Badges & Labels”In Shopify admin, open Sami Product Labels > Badges & Labels.
-
Select a badge
Section titled “Select a badge”Find the badge you want to update, then click Edit badge/label in its row.
To style a new badge instead, click Create badge, then choose Text badge or Image badge.
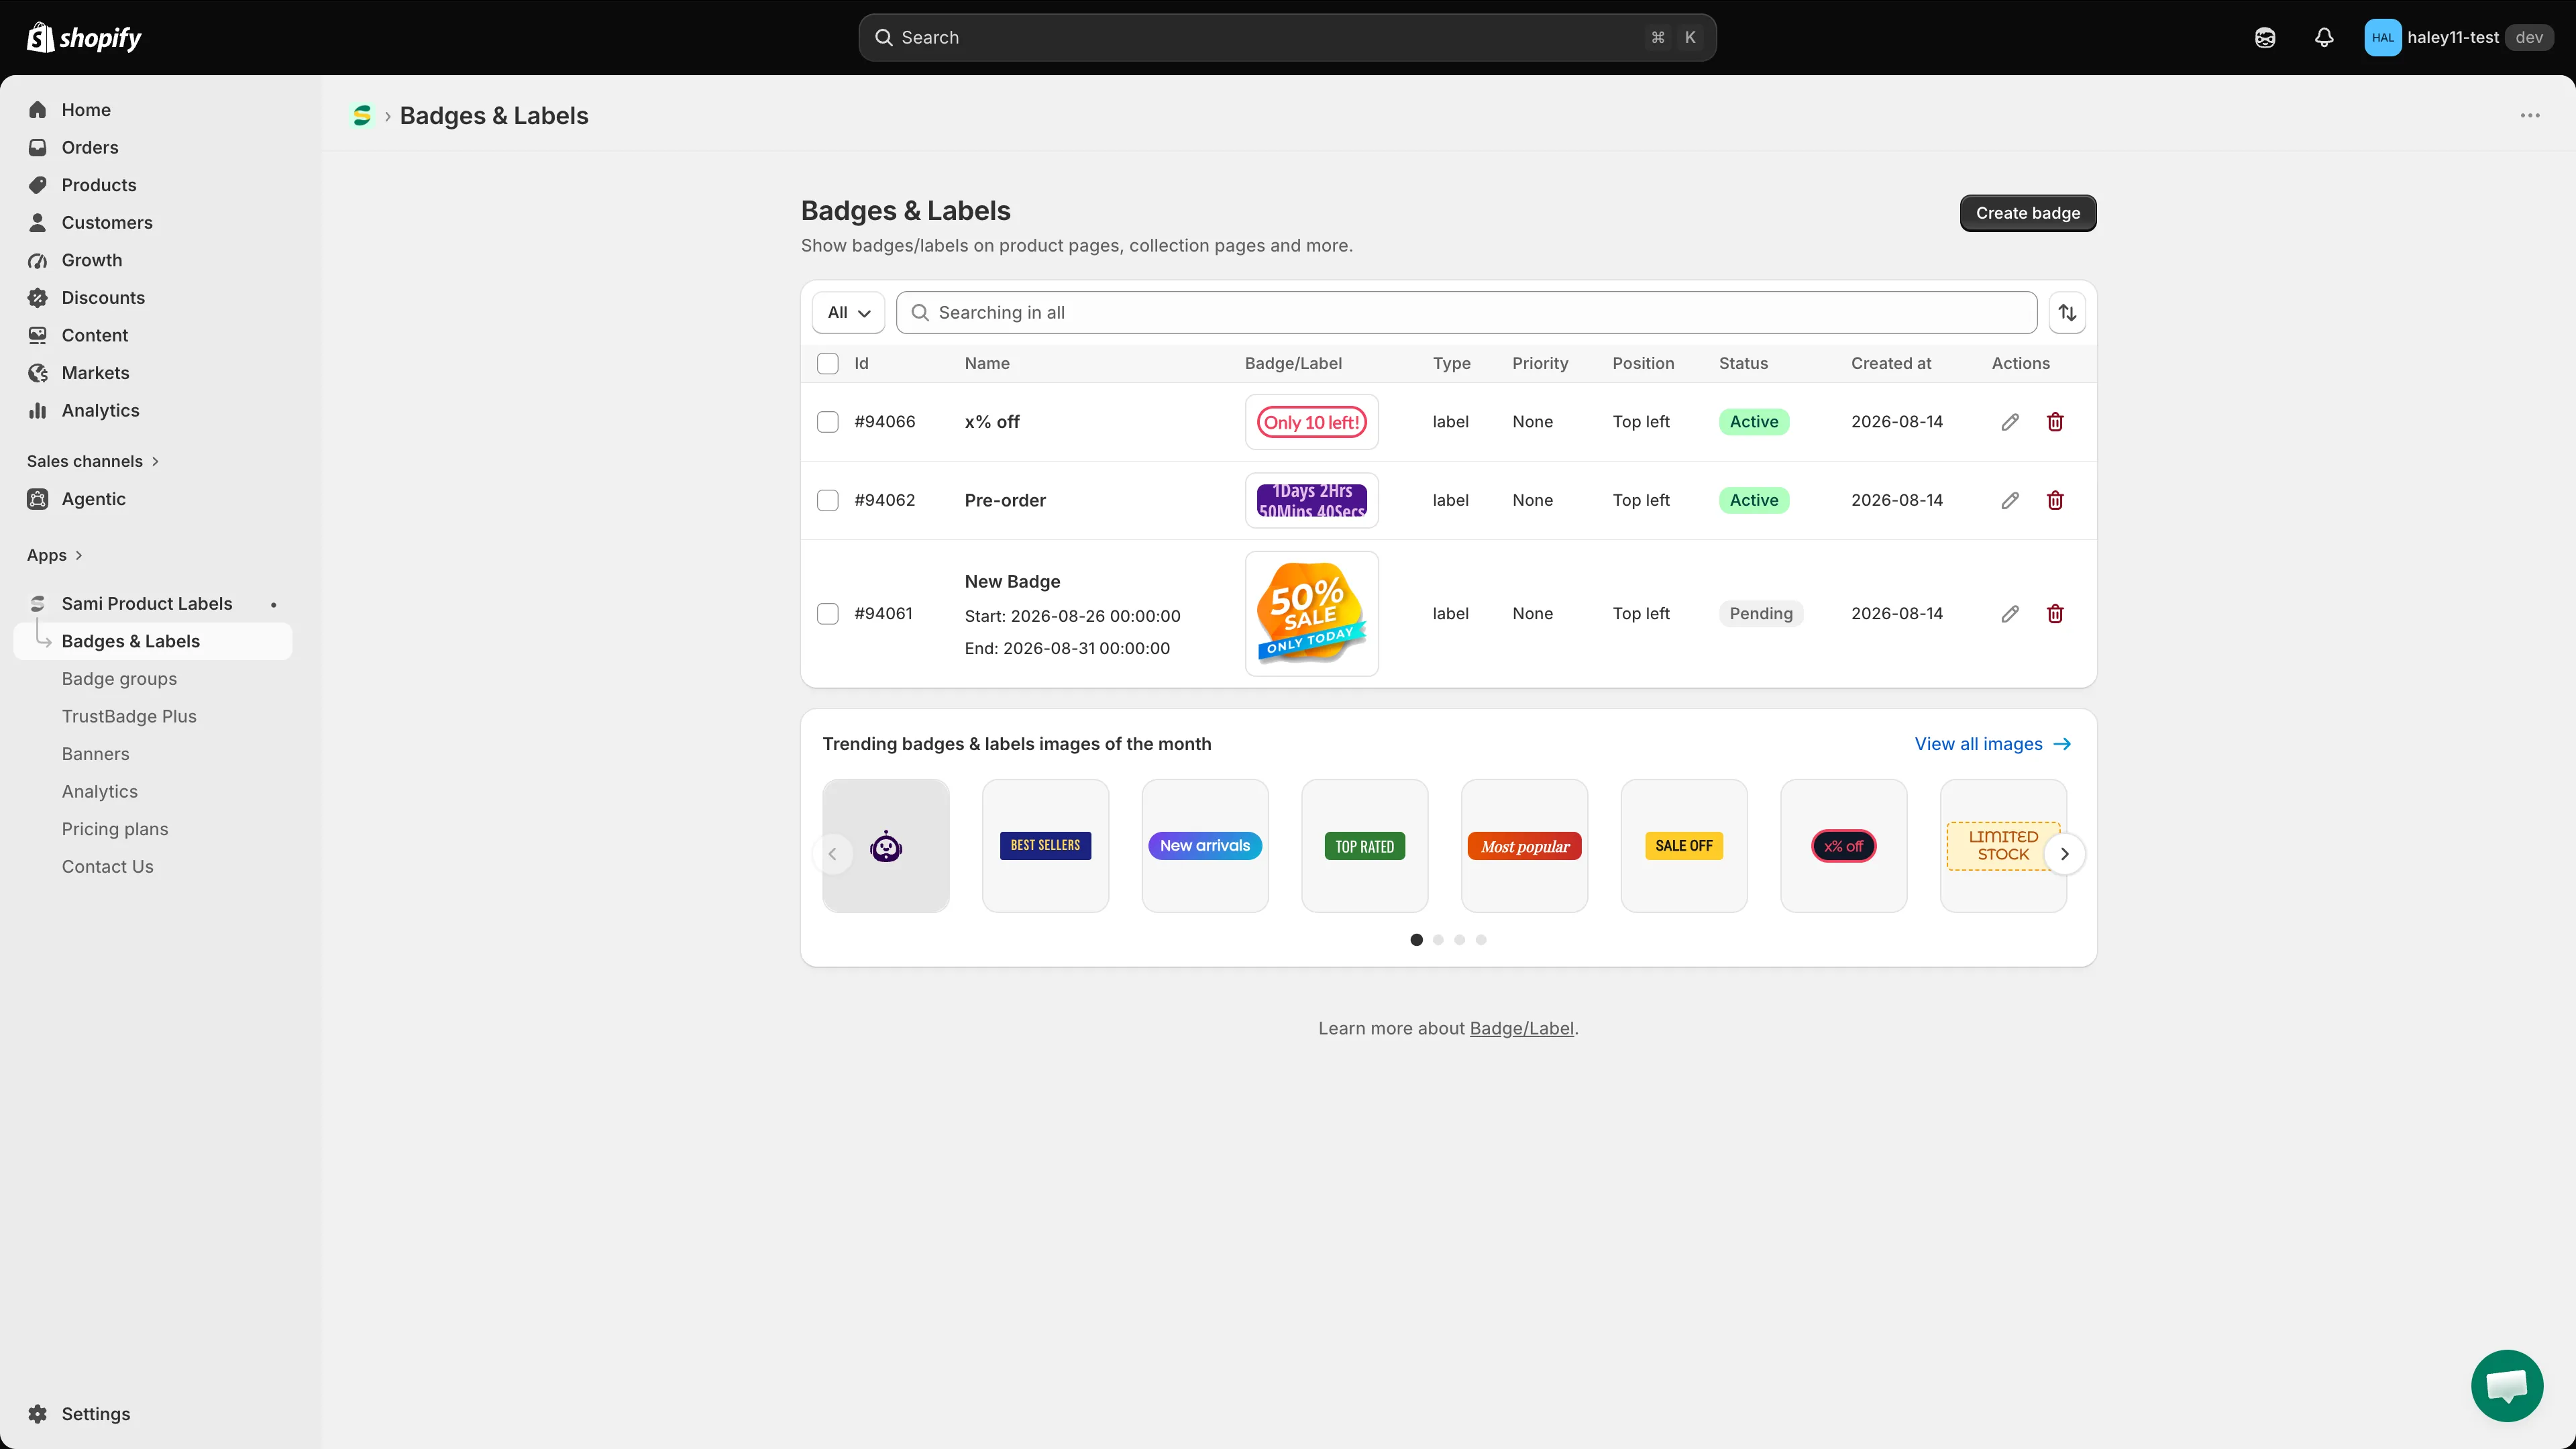
Click Edit badge/label for the badge you want to customize.
-
Stay on the Design tab
Section titled “Stay on the Design tab”The editor opens on Design. The available sections depend on whether you selected a text badge or an image badge.
Customize a text badge
Section titled “Customize a text badge”Choose a font and text color
Section titled “Choose a font and text color”Use the controls below Badge text to customize the text:
- Font picker — Choose a font from the built-in list.
- Use Custom Font Style — Enable this option to enter a font family in Font, then choose an available font style or weight, such as Regular or Bold.
- Text color — Open the color picker and choose a color that remains readable against the badge background.
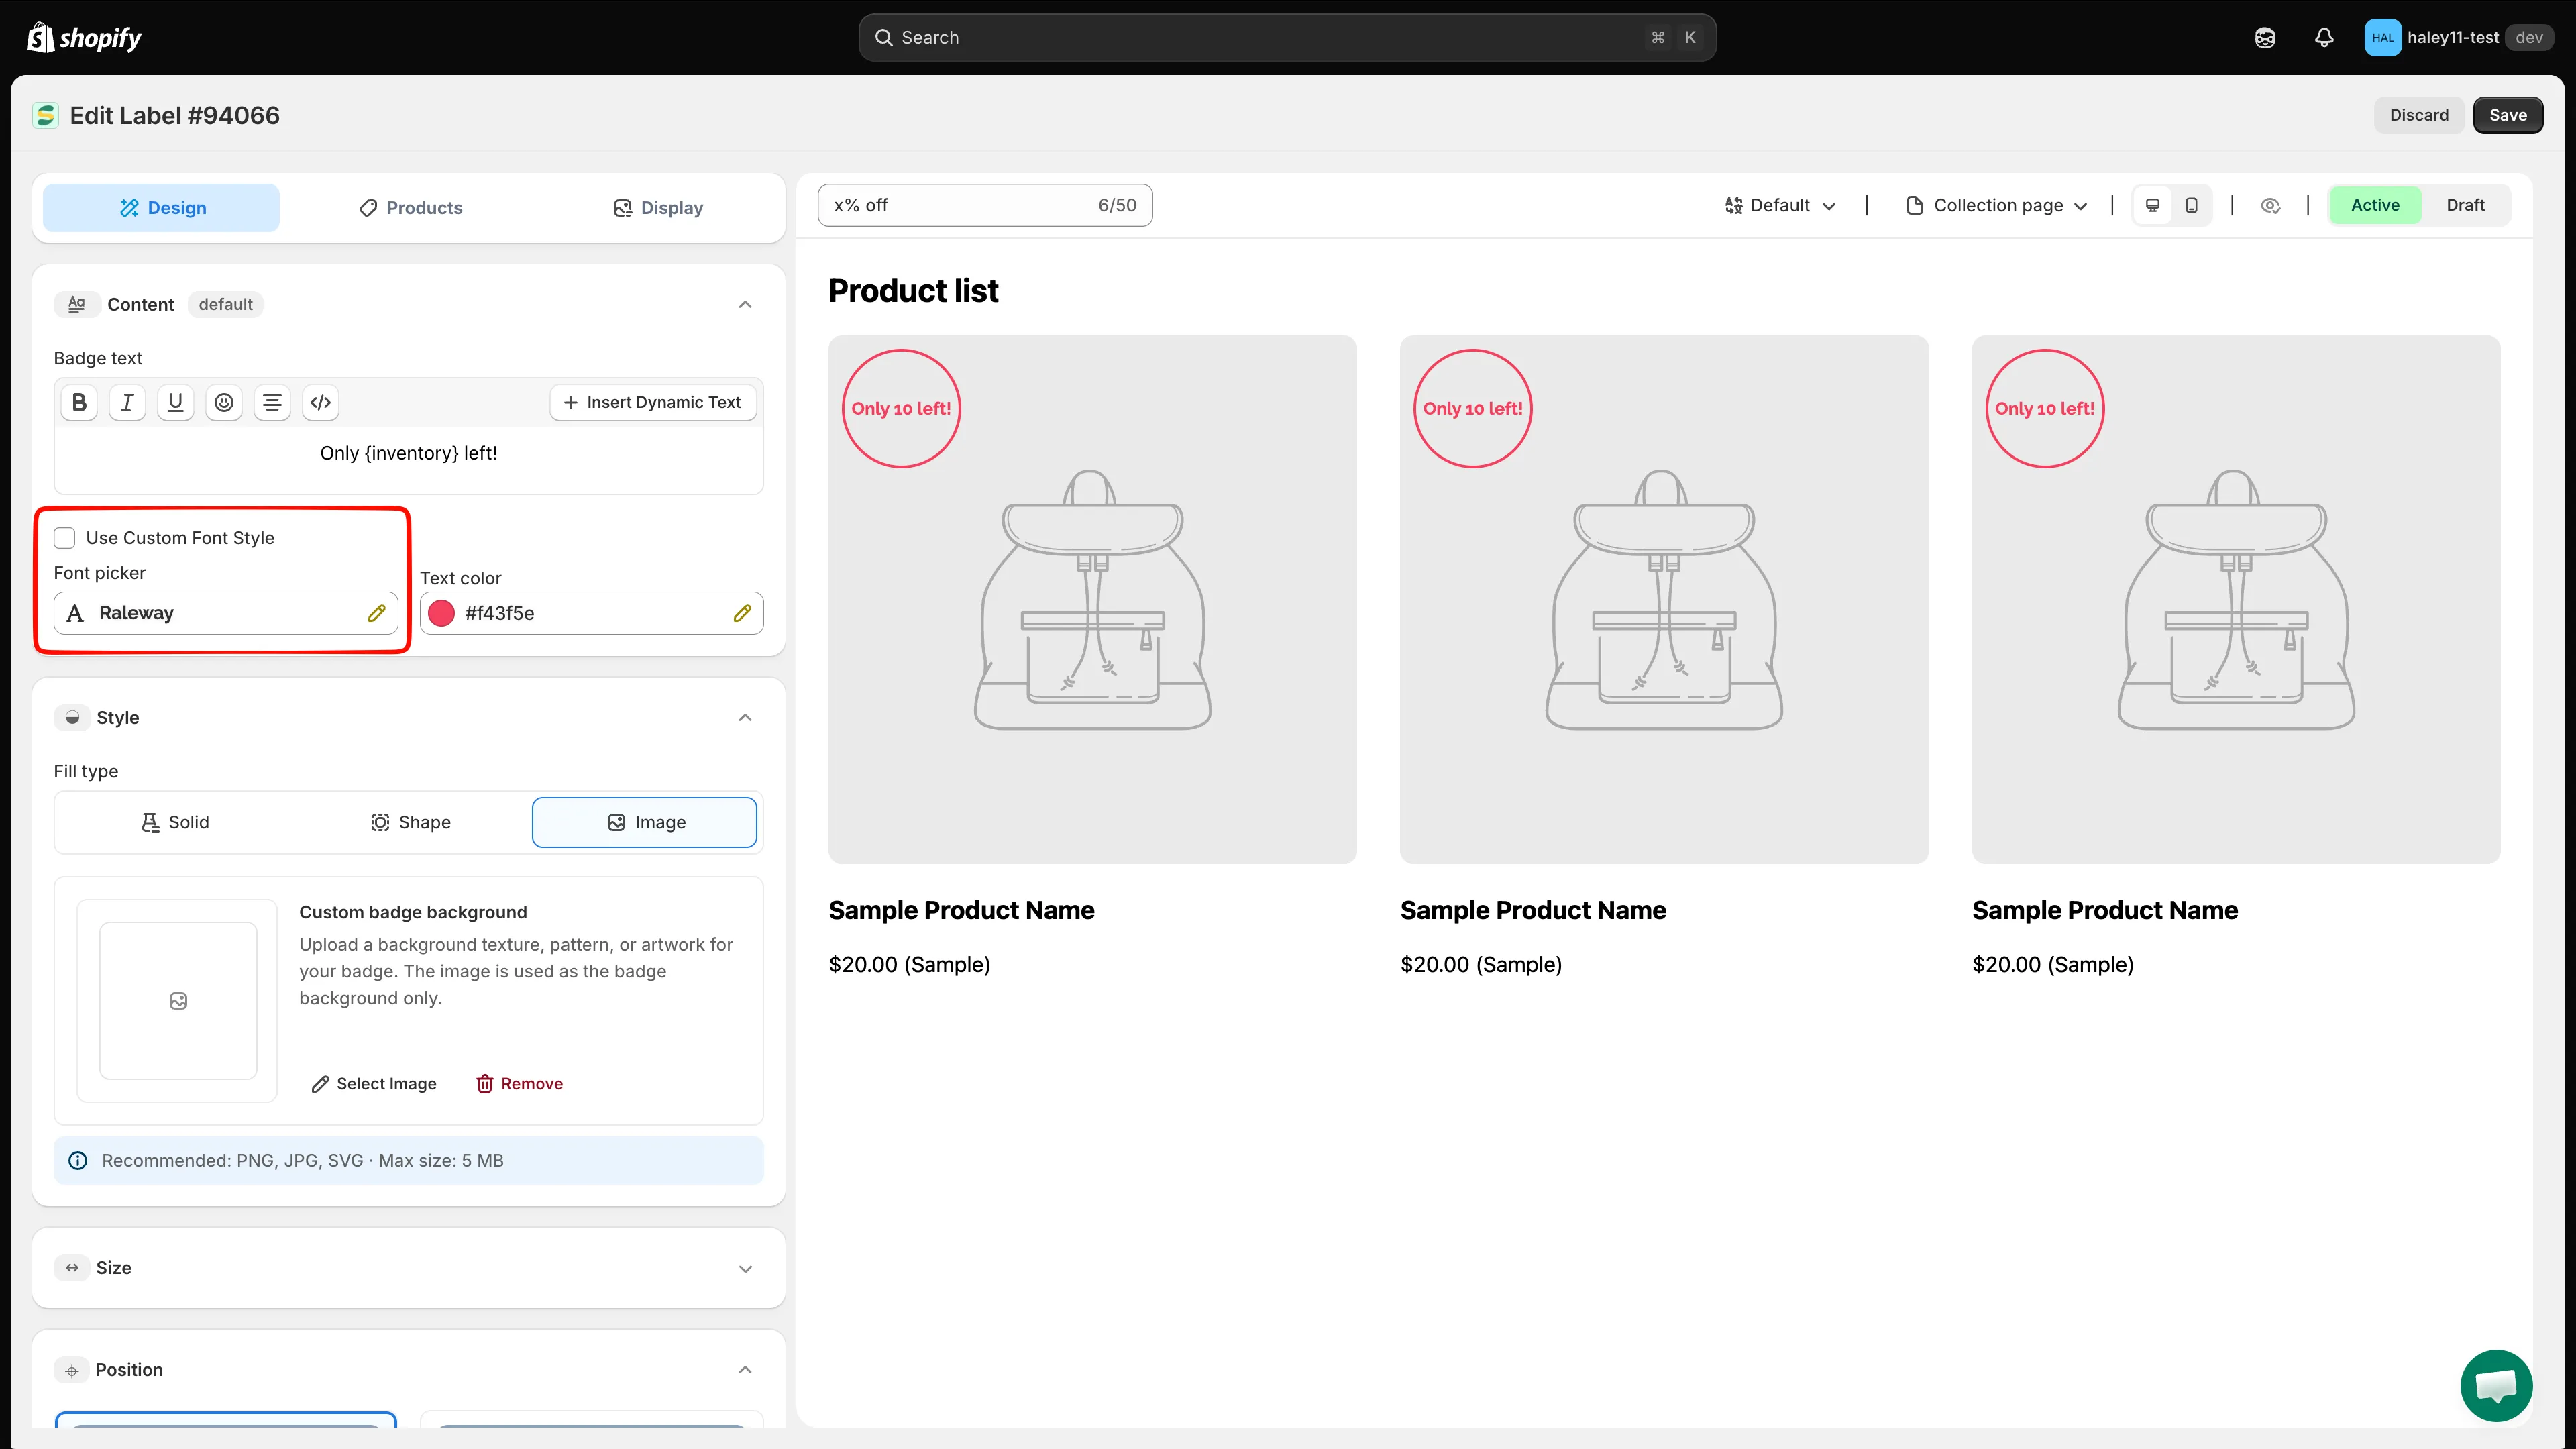
Choose a built-in font or enable Use Custom Font Style, then set the text color.
Text size and letter spacing are configured in Size. See Change badge size for those controls.
Choose a background
Section titled “Choose a background”Expand Style, then select a Fill type:
| Fill type | Use it for |
|---|---|
| Solid | A single background color or a color preset. |
| Shape | A template shape with a solid or gradient color treatment. |
| Image | A texture, pattern, or artwork used as the text badge’s background. |
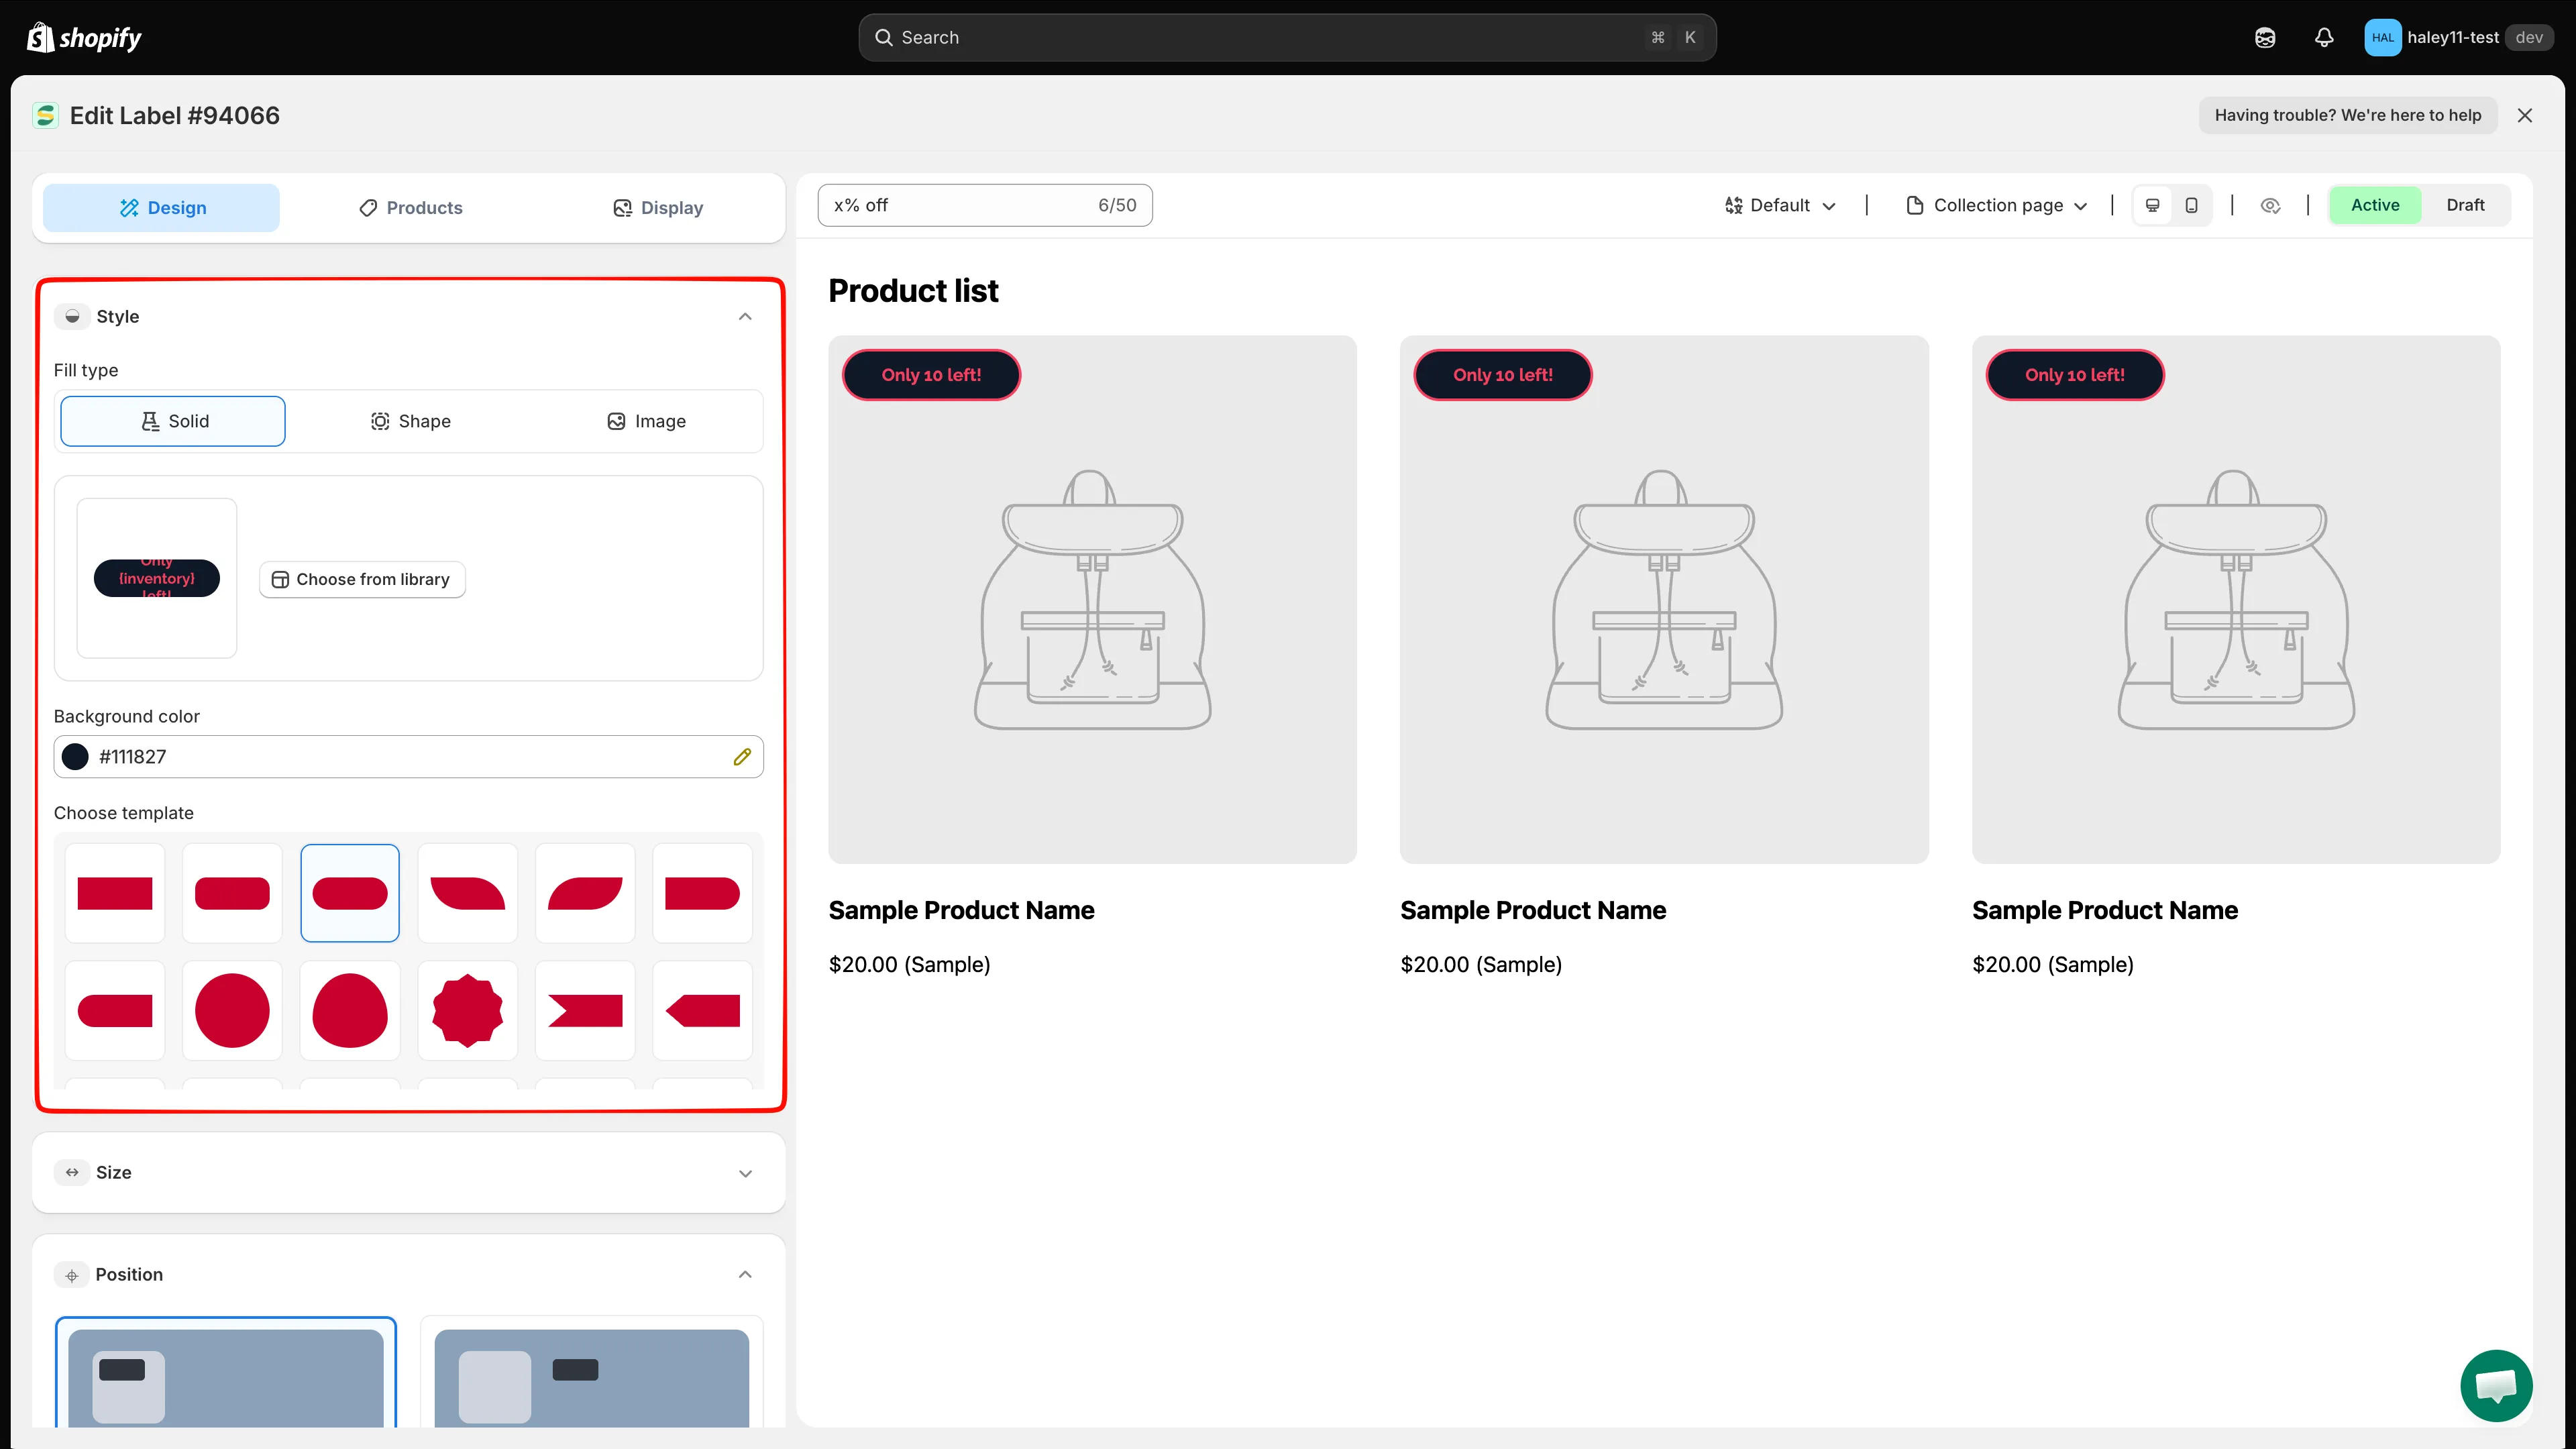
Expand Style and select the background type for the text badge.
Use a solid background
Section titled “Use a solid background”Select Solid, then choose a Background color. You can also select one of the presets under Choose template.
Use a shape or gradient background
Section titled “Use a shape or gradient background”Select Shape, then configure the following:
- Choose from library — Open the template gallery and filter designs by categories such as Sales, Autotext, Stock, Free shipping, Pre-order, and more.
- Start color and End color — Use the same color for a flat treatment or two different colors for a gradient.
- Gradient direction — Choose Left to right, Top to bottom, Diagonal, or Radial.
- Choose template — Apply a shape preset directly from the editor.
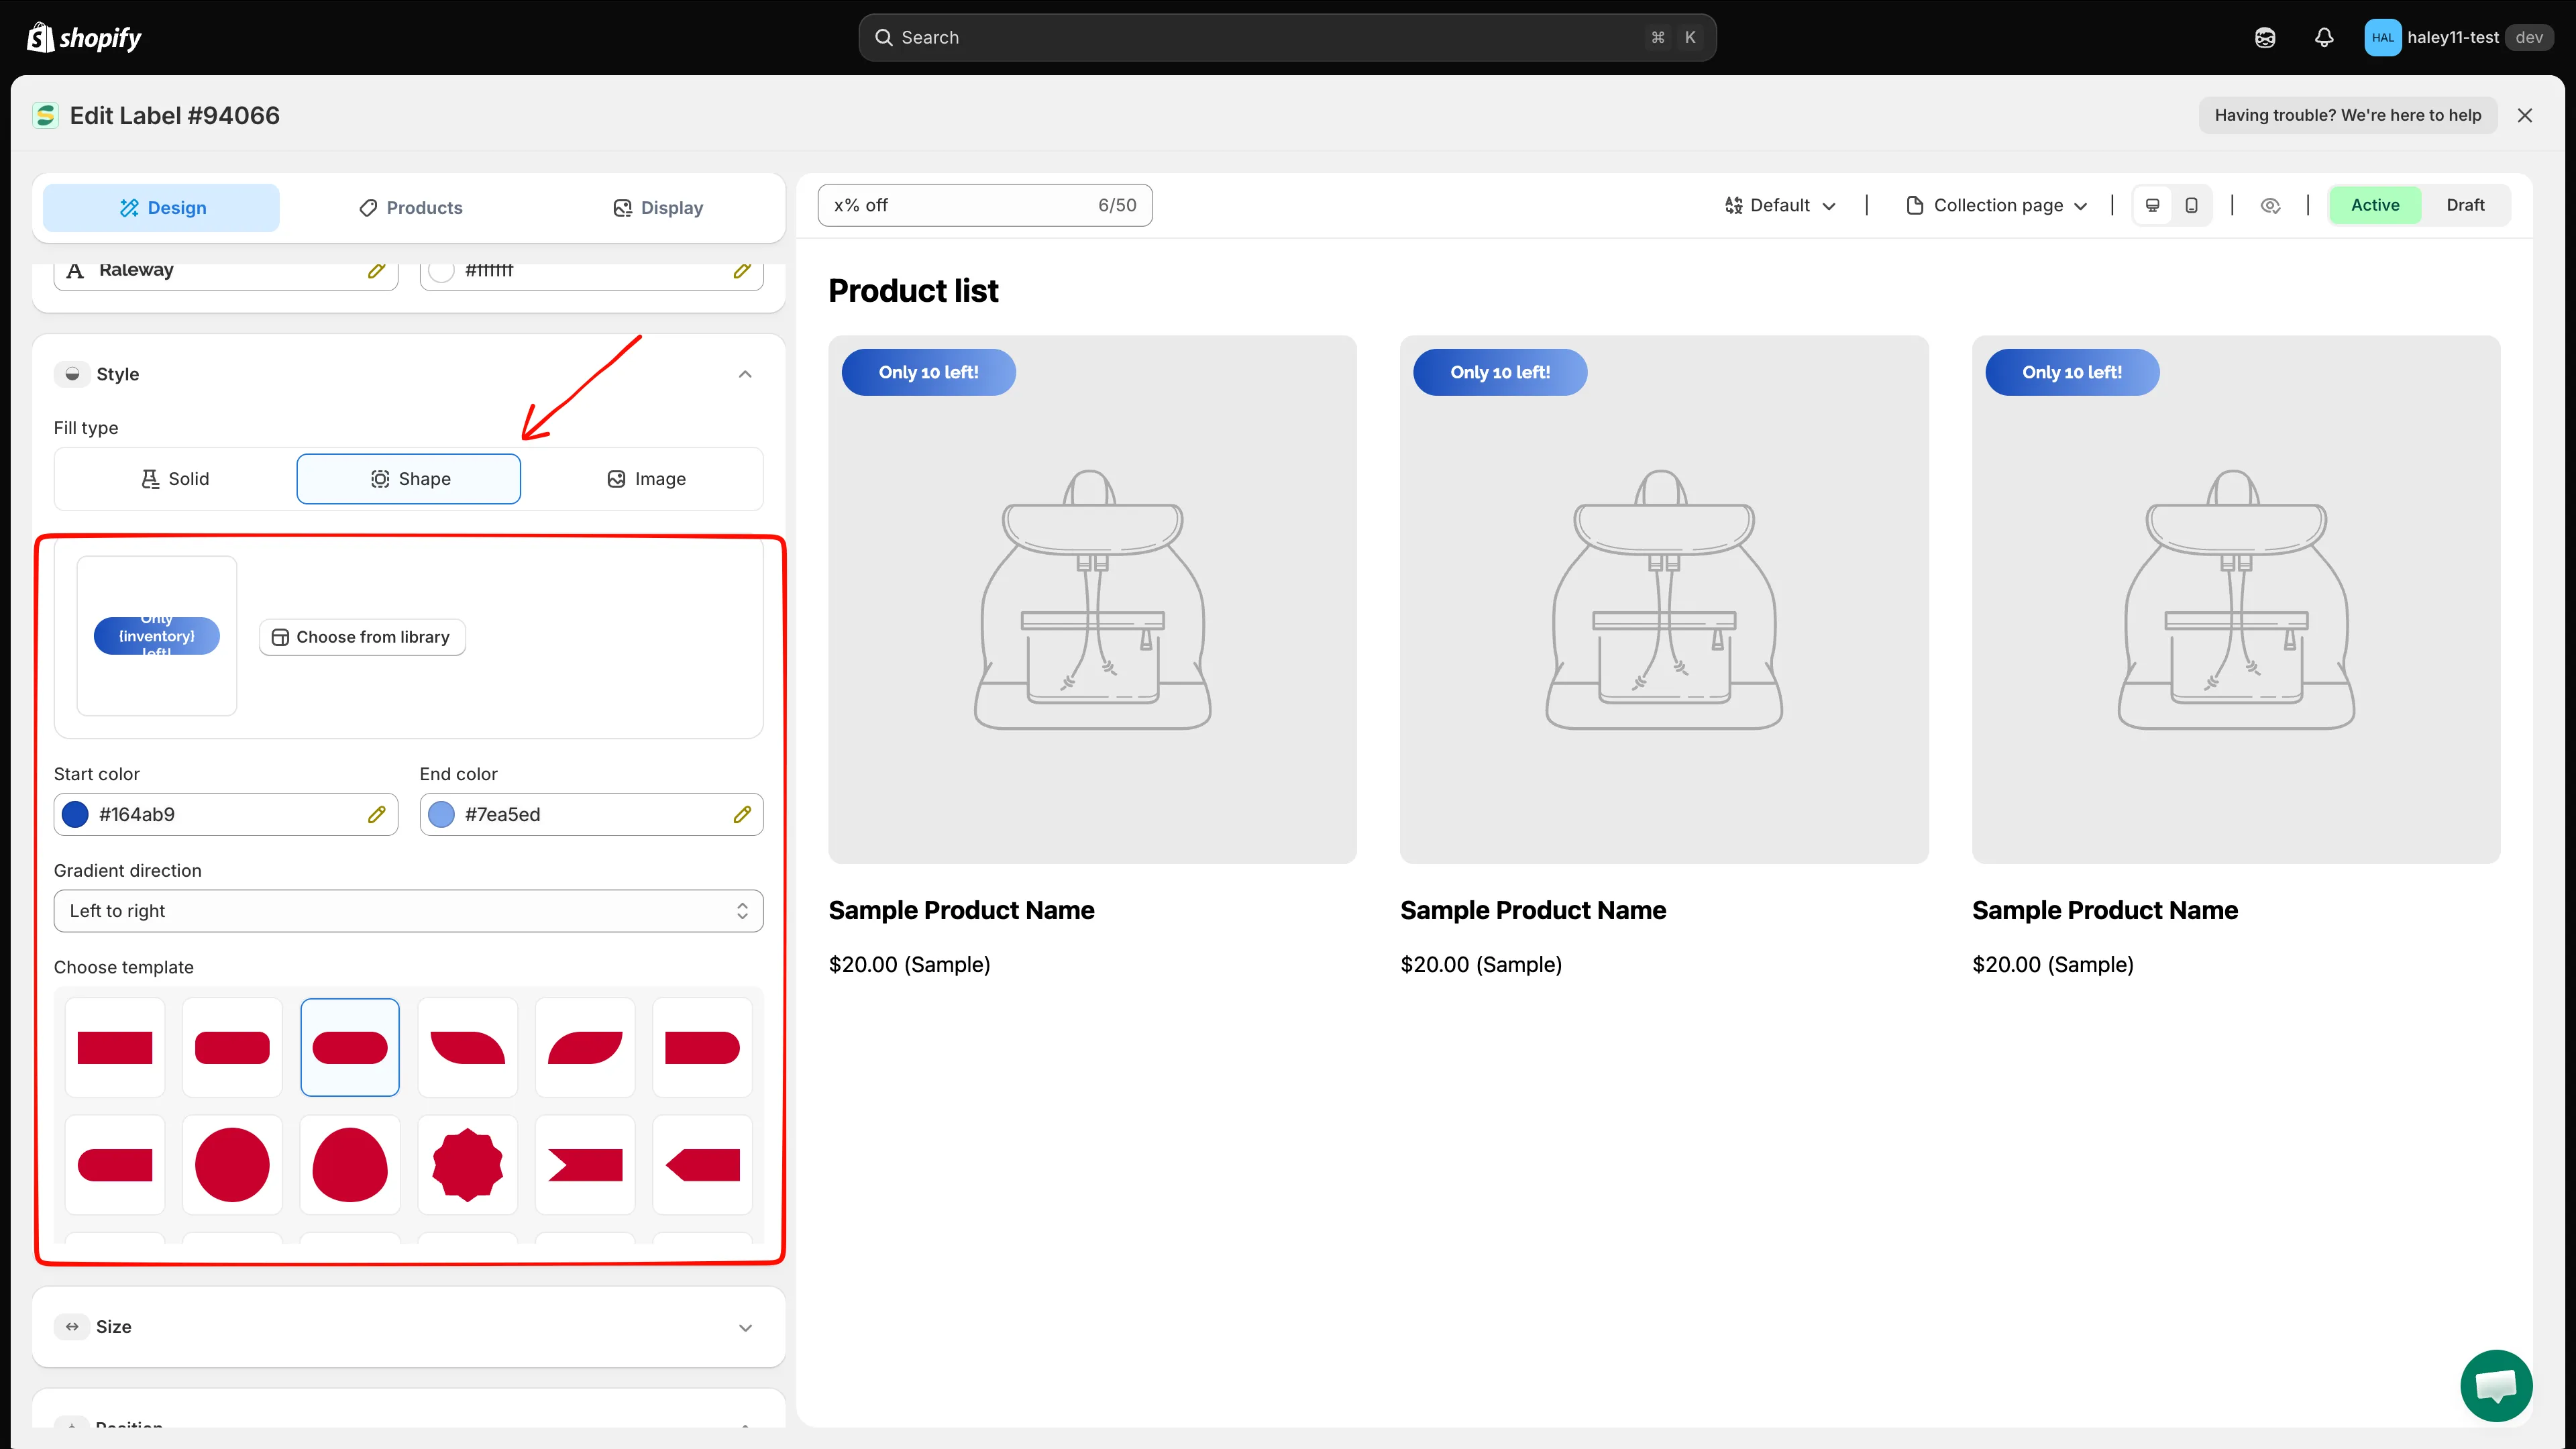
Choose a shape, set its colors, and select the gradient direction.
Use an image background
Section titled “Use an image background”Select Image, then click Select Image to choose a custom background. The editor accepts PNG, JPG, or SVG files up to 5 MB. Click Remove to clear the selected background.
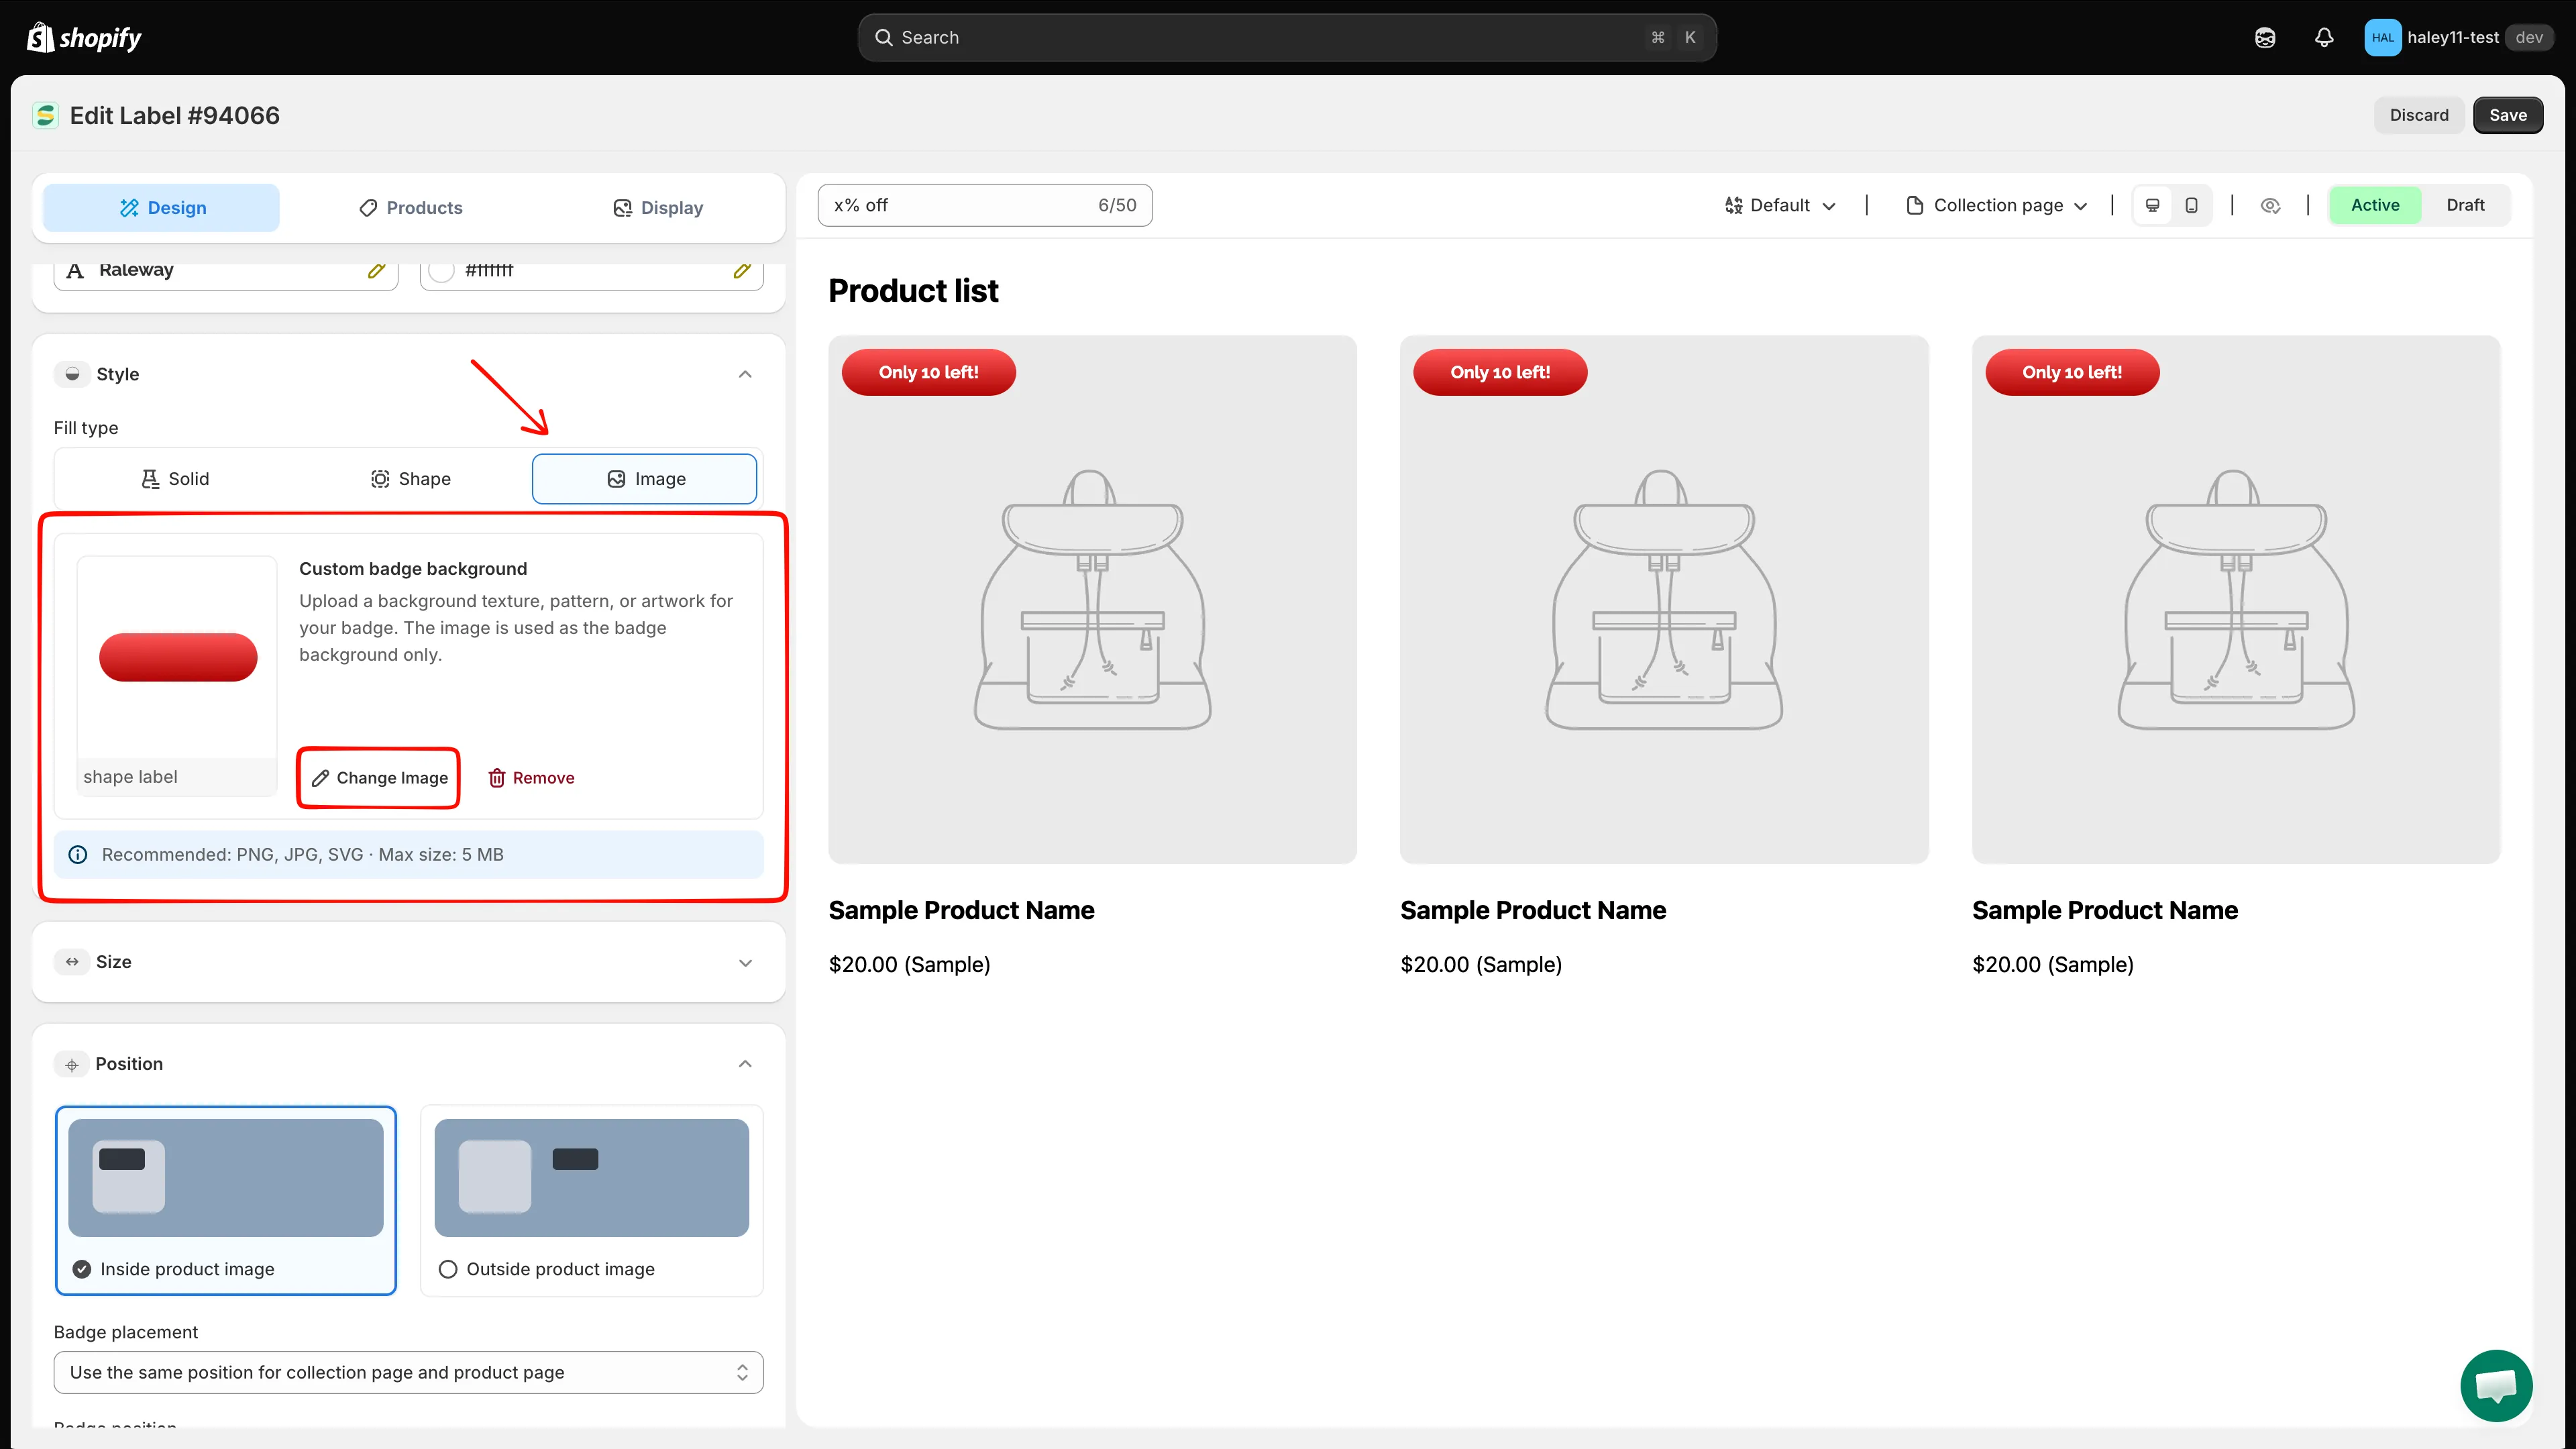
Select artwork to use as the background of a text badge.
Add a border or round the corners
Section titled “Add a border or round the corners”Expand Border & corners. Both options can be enabled independently:
| Option | Available controls |
|---|---|
| Add border | Set Border width from 0 to 8 px, choose a Border color, and select Solid, Dotted, or Dashed. |
| Round corners | Set Corner radius from 0 to 100 px. |
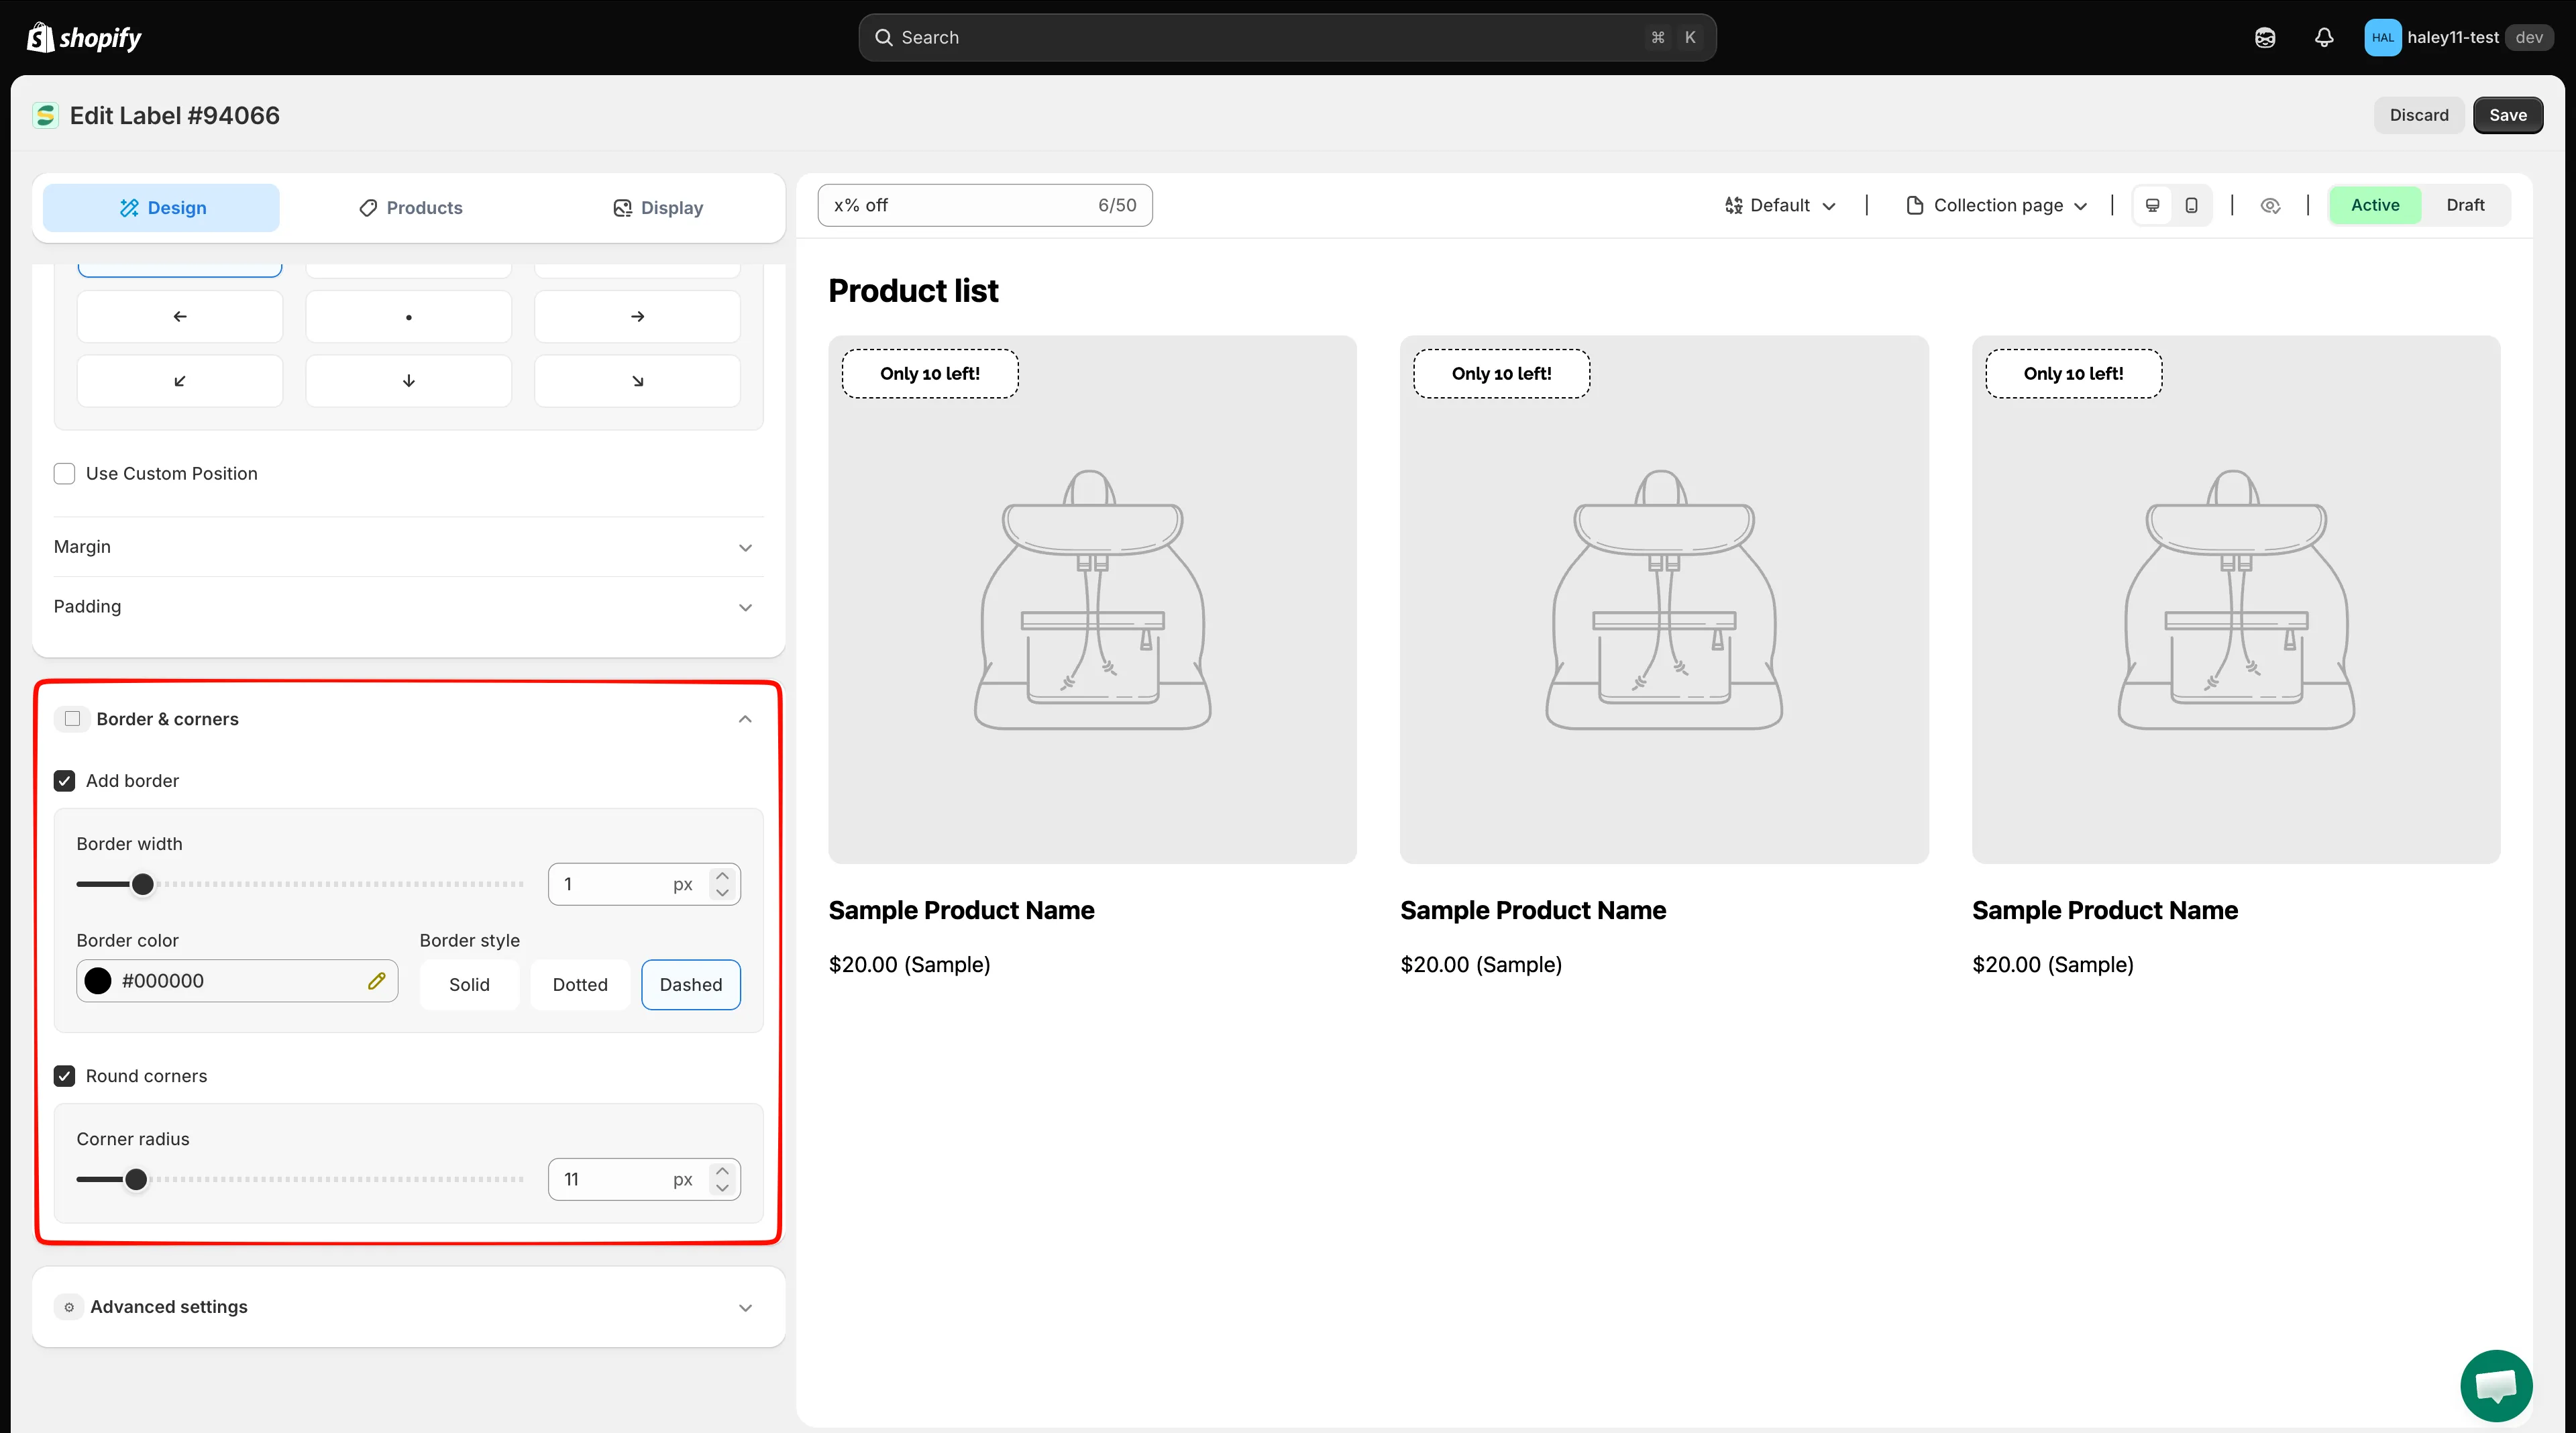
Add a border, round the corners, or use both settings together.
Style an image badge
Section titled “Style an image badge”Image badges do not show the text badge’s font, background, or Border & corners controls. Use Content at the top of the Design tab to change the badge artwork, then use Advanced settings to adjust its opacity or rotation.
For image dimensions and placement, see Change badge size and Change badge position.
Adjust opacity or rotation
Section titled “Adjust opacity or rotation”These effects are available for both text badges and image badges:
- Expand Advanced settings.
- Under Effects, enable the option you need.
- Adjust the value while checking the live preview.
| Effect | Range |
|---|---|
| Adjust opacity | 0% to 100% |
| Rotate badge | 0° to 360° |
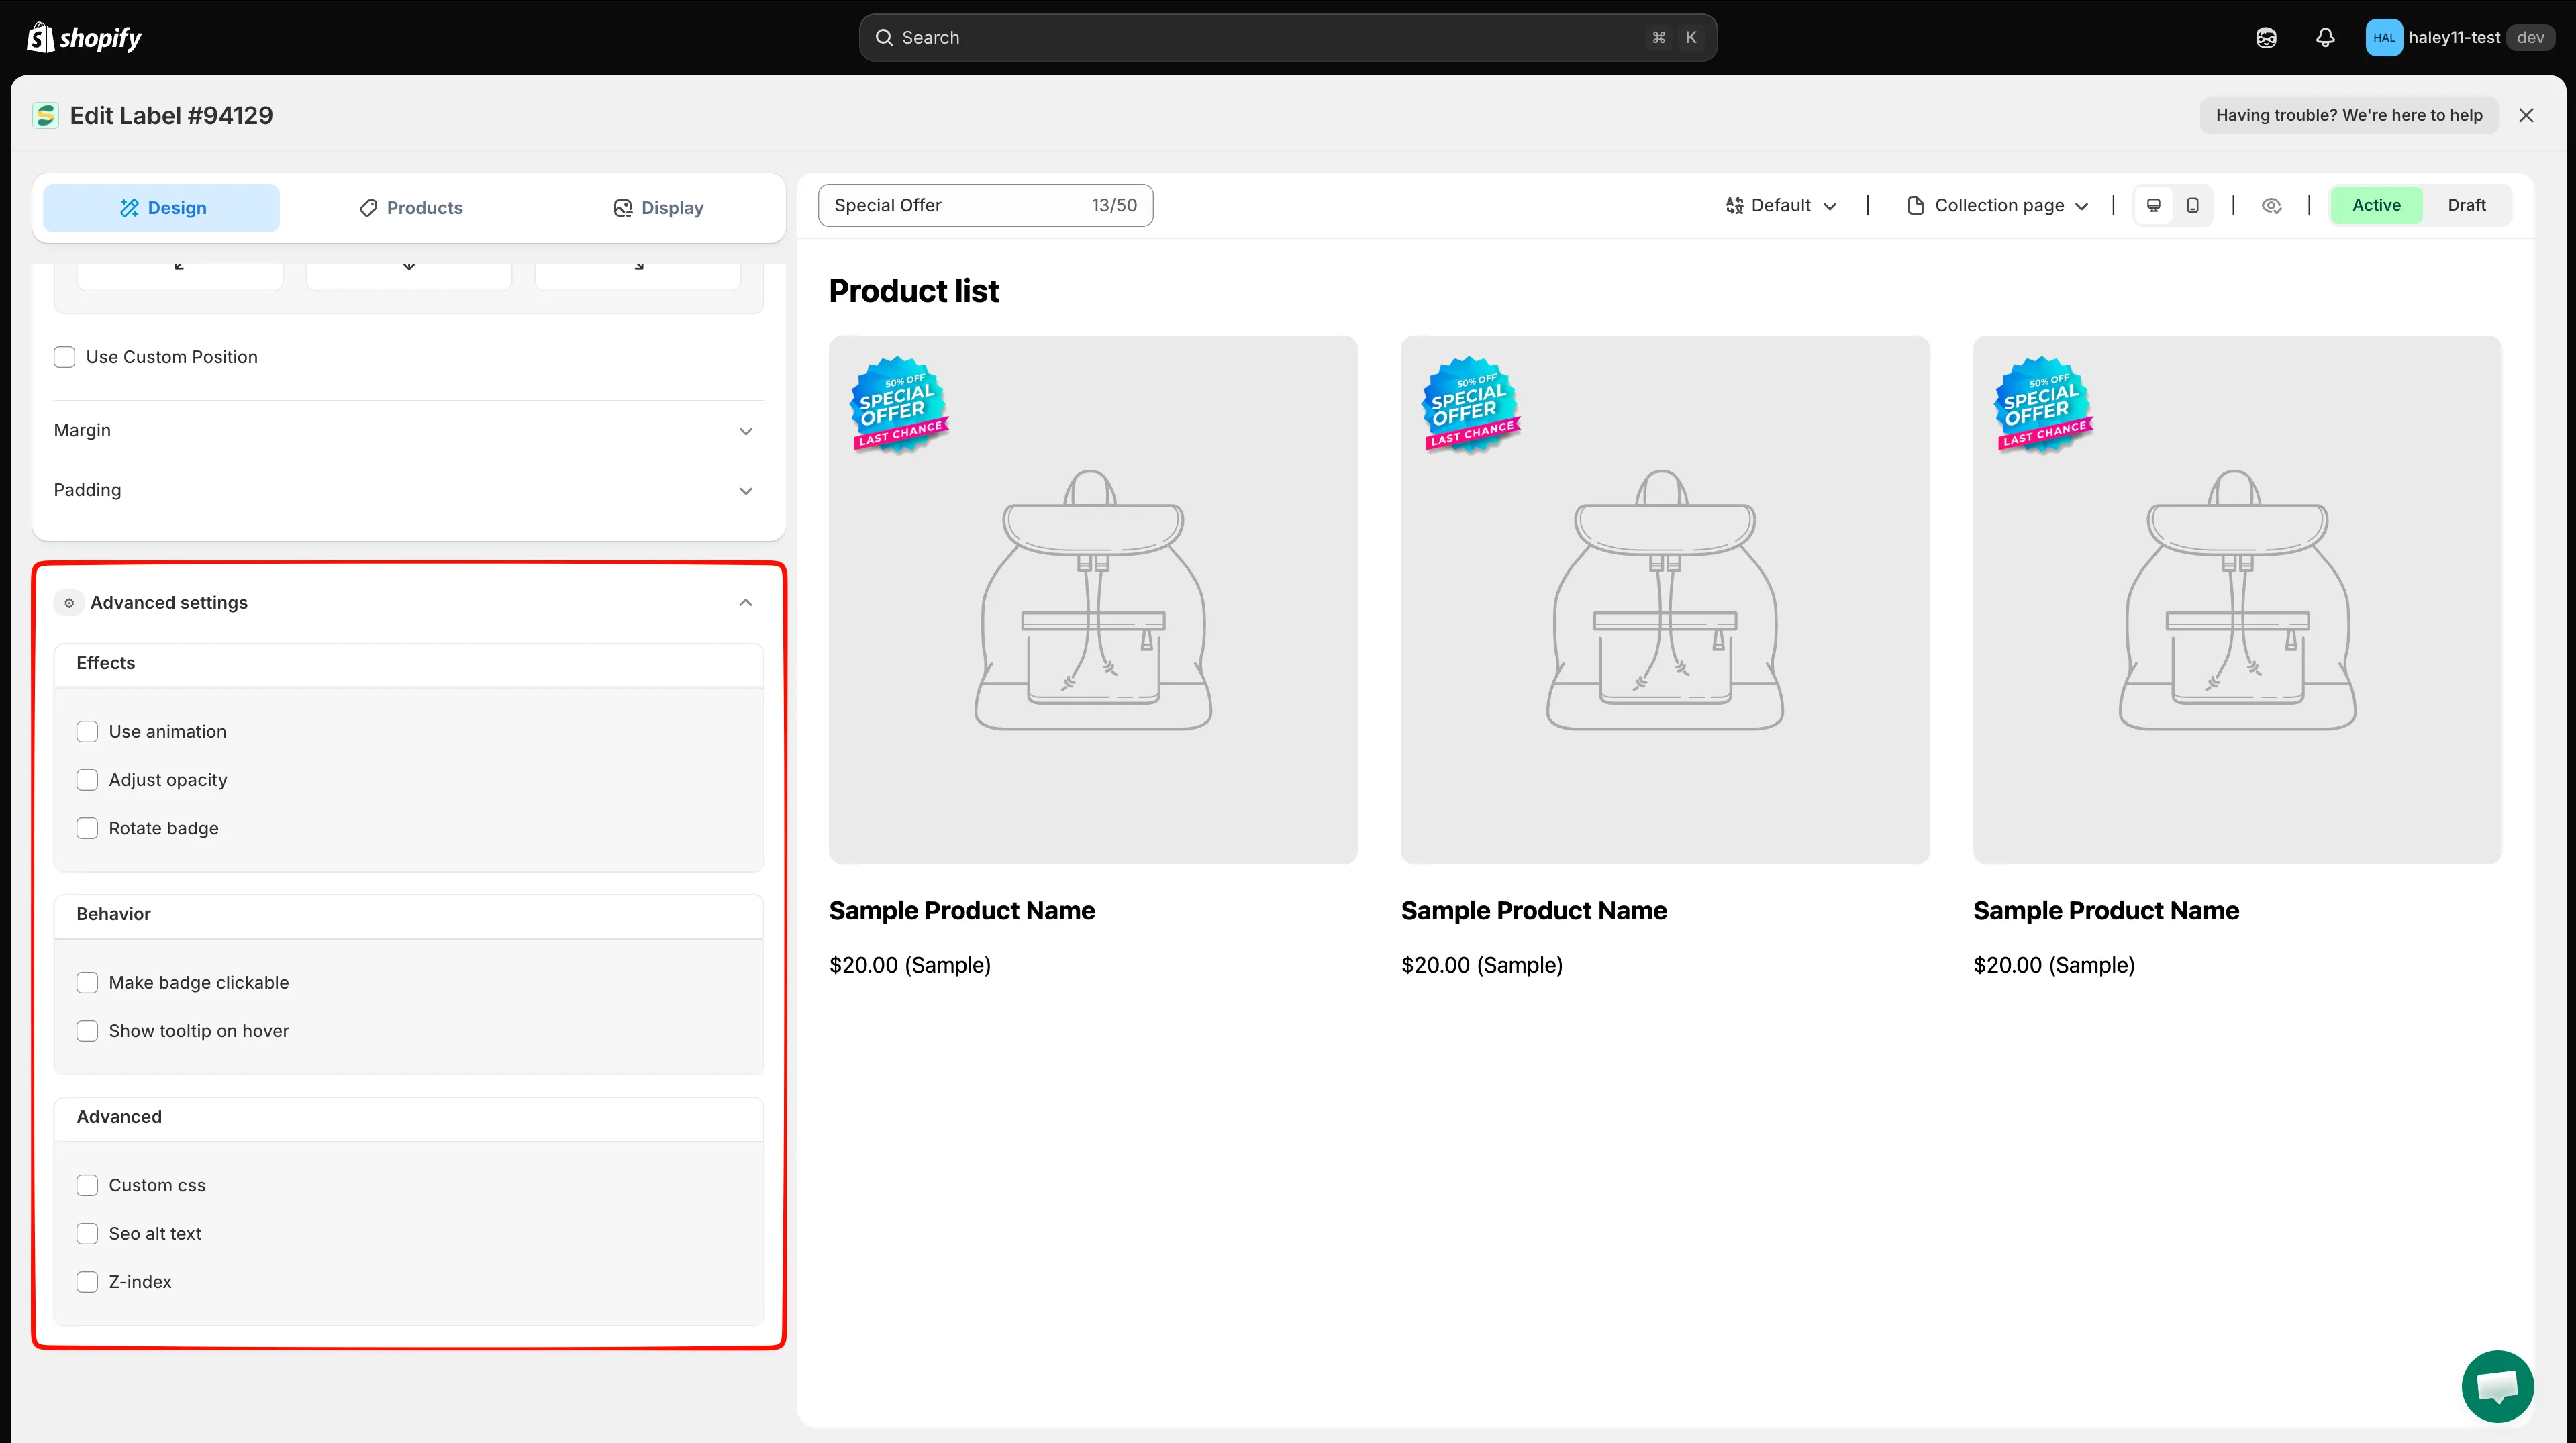
Enable Adjust opacity or Rotate badge, then set the effect value.
Preview and save
Section titled “Preview and save”Use the preview toolbar to check the badge on Collection page and Product page, then switch between Desktop view and Mobile view. When the badge looks correct in every required preview, click Save.
Next steps
Section titled “Next steps”- Change badge size — Resize the badge and adjust text size or letter spacing.
- Change badge position — Move the badge and adjust its margin or padding.
- Add animation to a badge — Apply an animation effect and configure its speed and repeat count.
- Use custom CSS — Fine-tune the badge with custom CSS.