
Create an infinite scroll banner
Build an infinite scroll banner that loops its content seamlessly for ticker-style announcements and promotions.
An infinite scroll banner is a bar whose content loops continuously from right to left, like a news ticker. Use it for repeating promotions, free-shipping notices, or short announcements you want customers to notice.
-
Open the Banners page
Section titled “Open the Banners page”In your Shopify admin, open the Sami Product Labels app, click Extra Features in the app sidebar, then switch to the Banners tab.
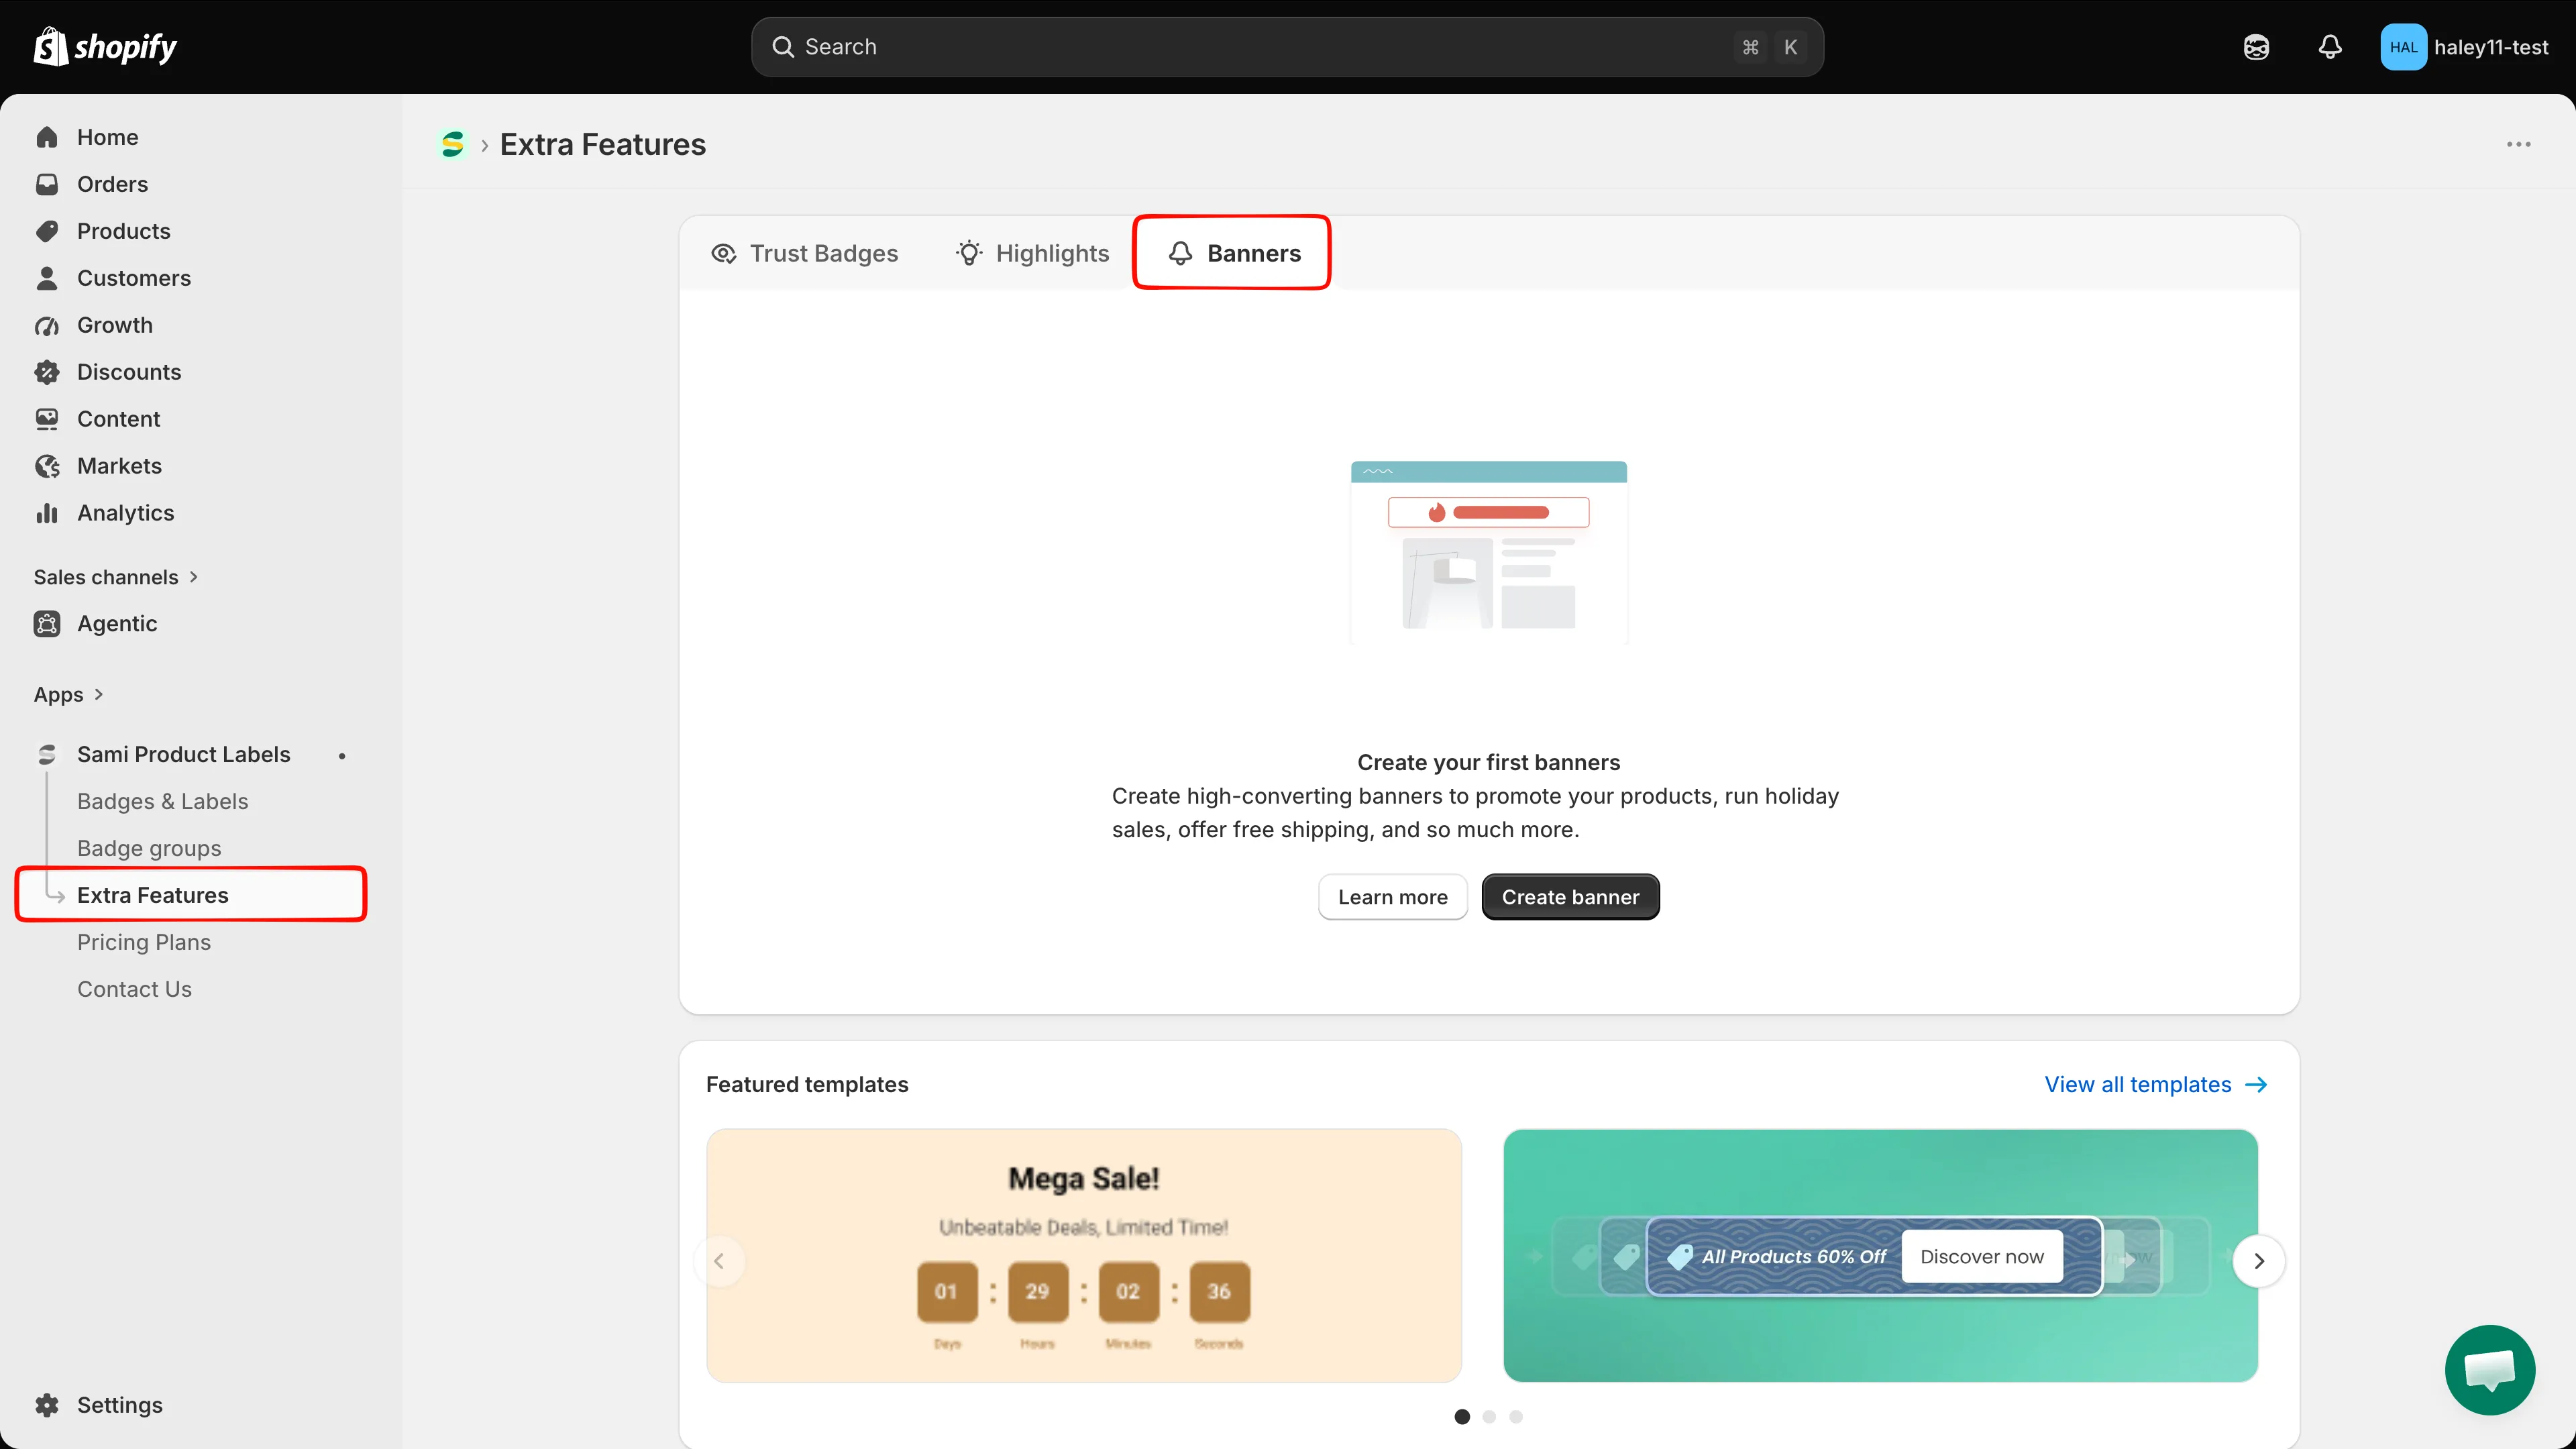
Open Banners from the Sami Product Labels sidebar.
-
Click Create banners, then choose Infinite Scroll
Section titled “Click Create banners, then choose Infinite Scroll”Click Create banners. In the Select Type dialog, click Select next to Infinite Scroll — the type that loops banner content infinitely for a seamless scrolling effect.
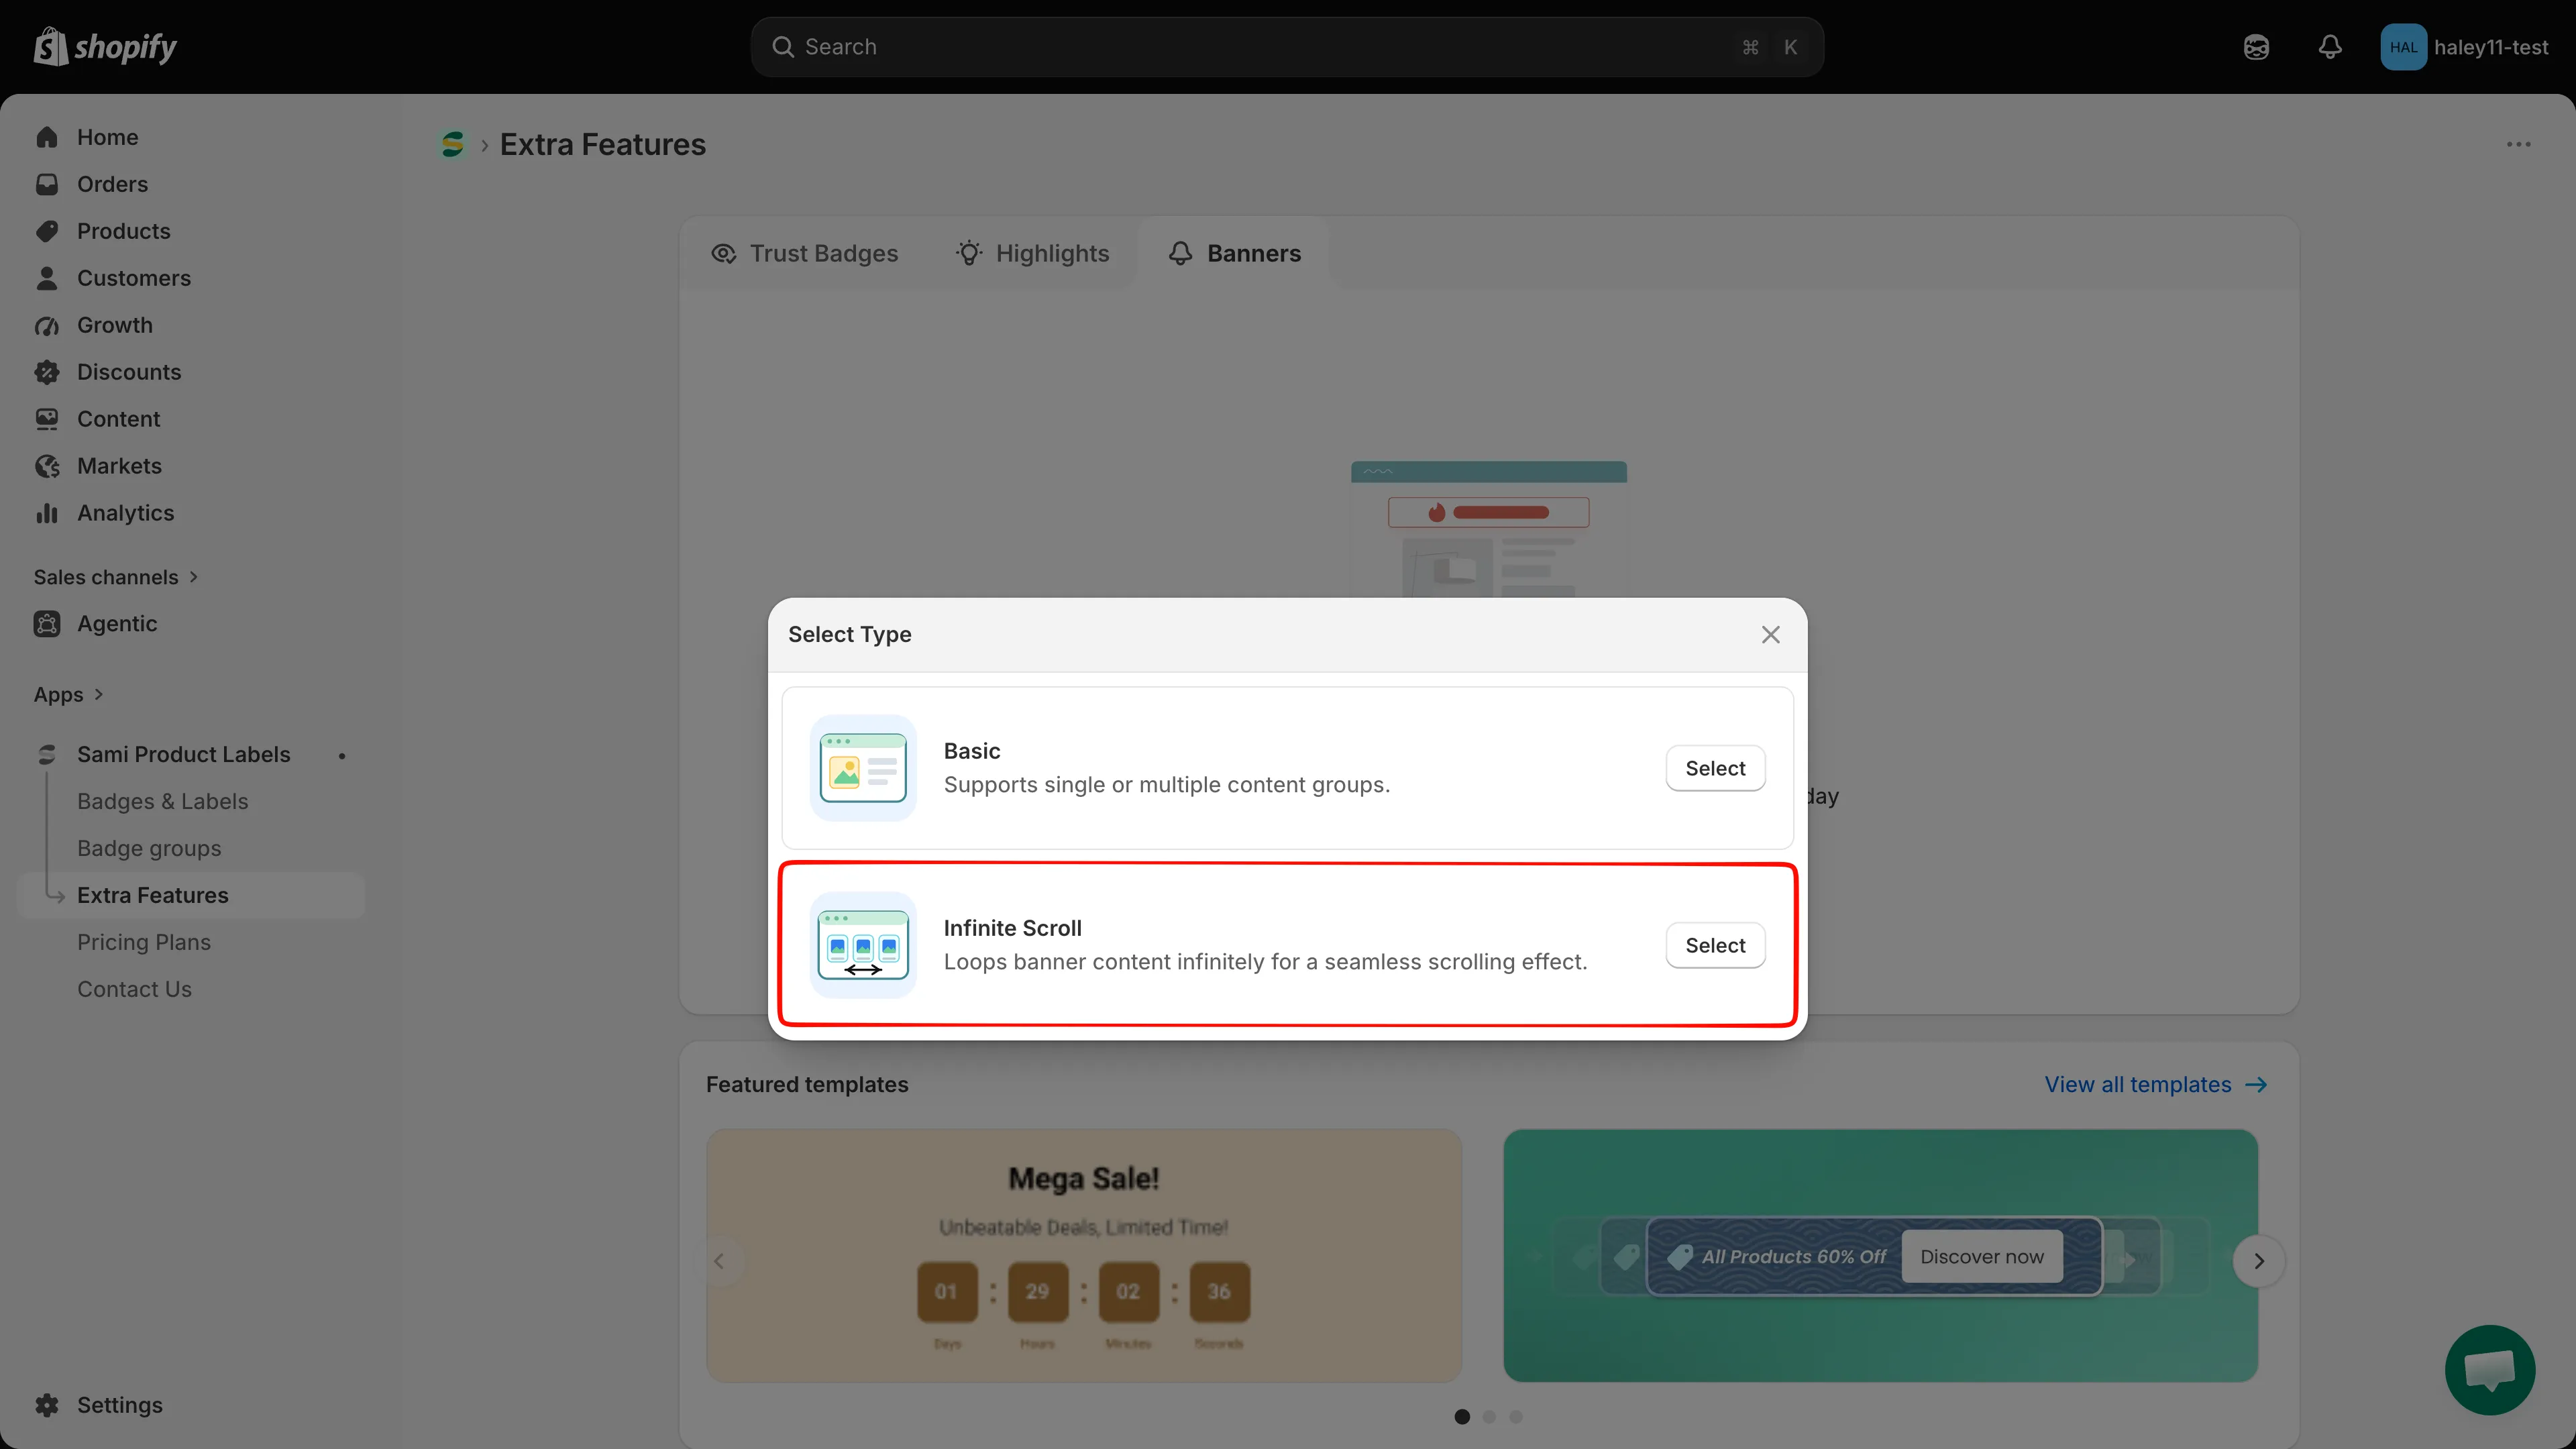
Choose Infinite Scroll to build a ticker-style bar.
-
Name the banner
Section titled “Name the banner”The full-screen editor opens on the Design tab. Replace New Banner in the name field above the preview with a name of up to 50 characters. This name is internal and is never shown to customers.
Next to the name you also get a language selector, desktop and mobile preview toggles, and the Active / Draft status switch.
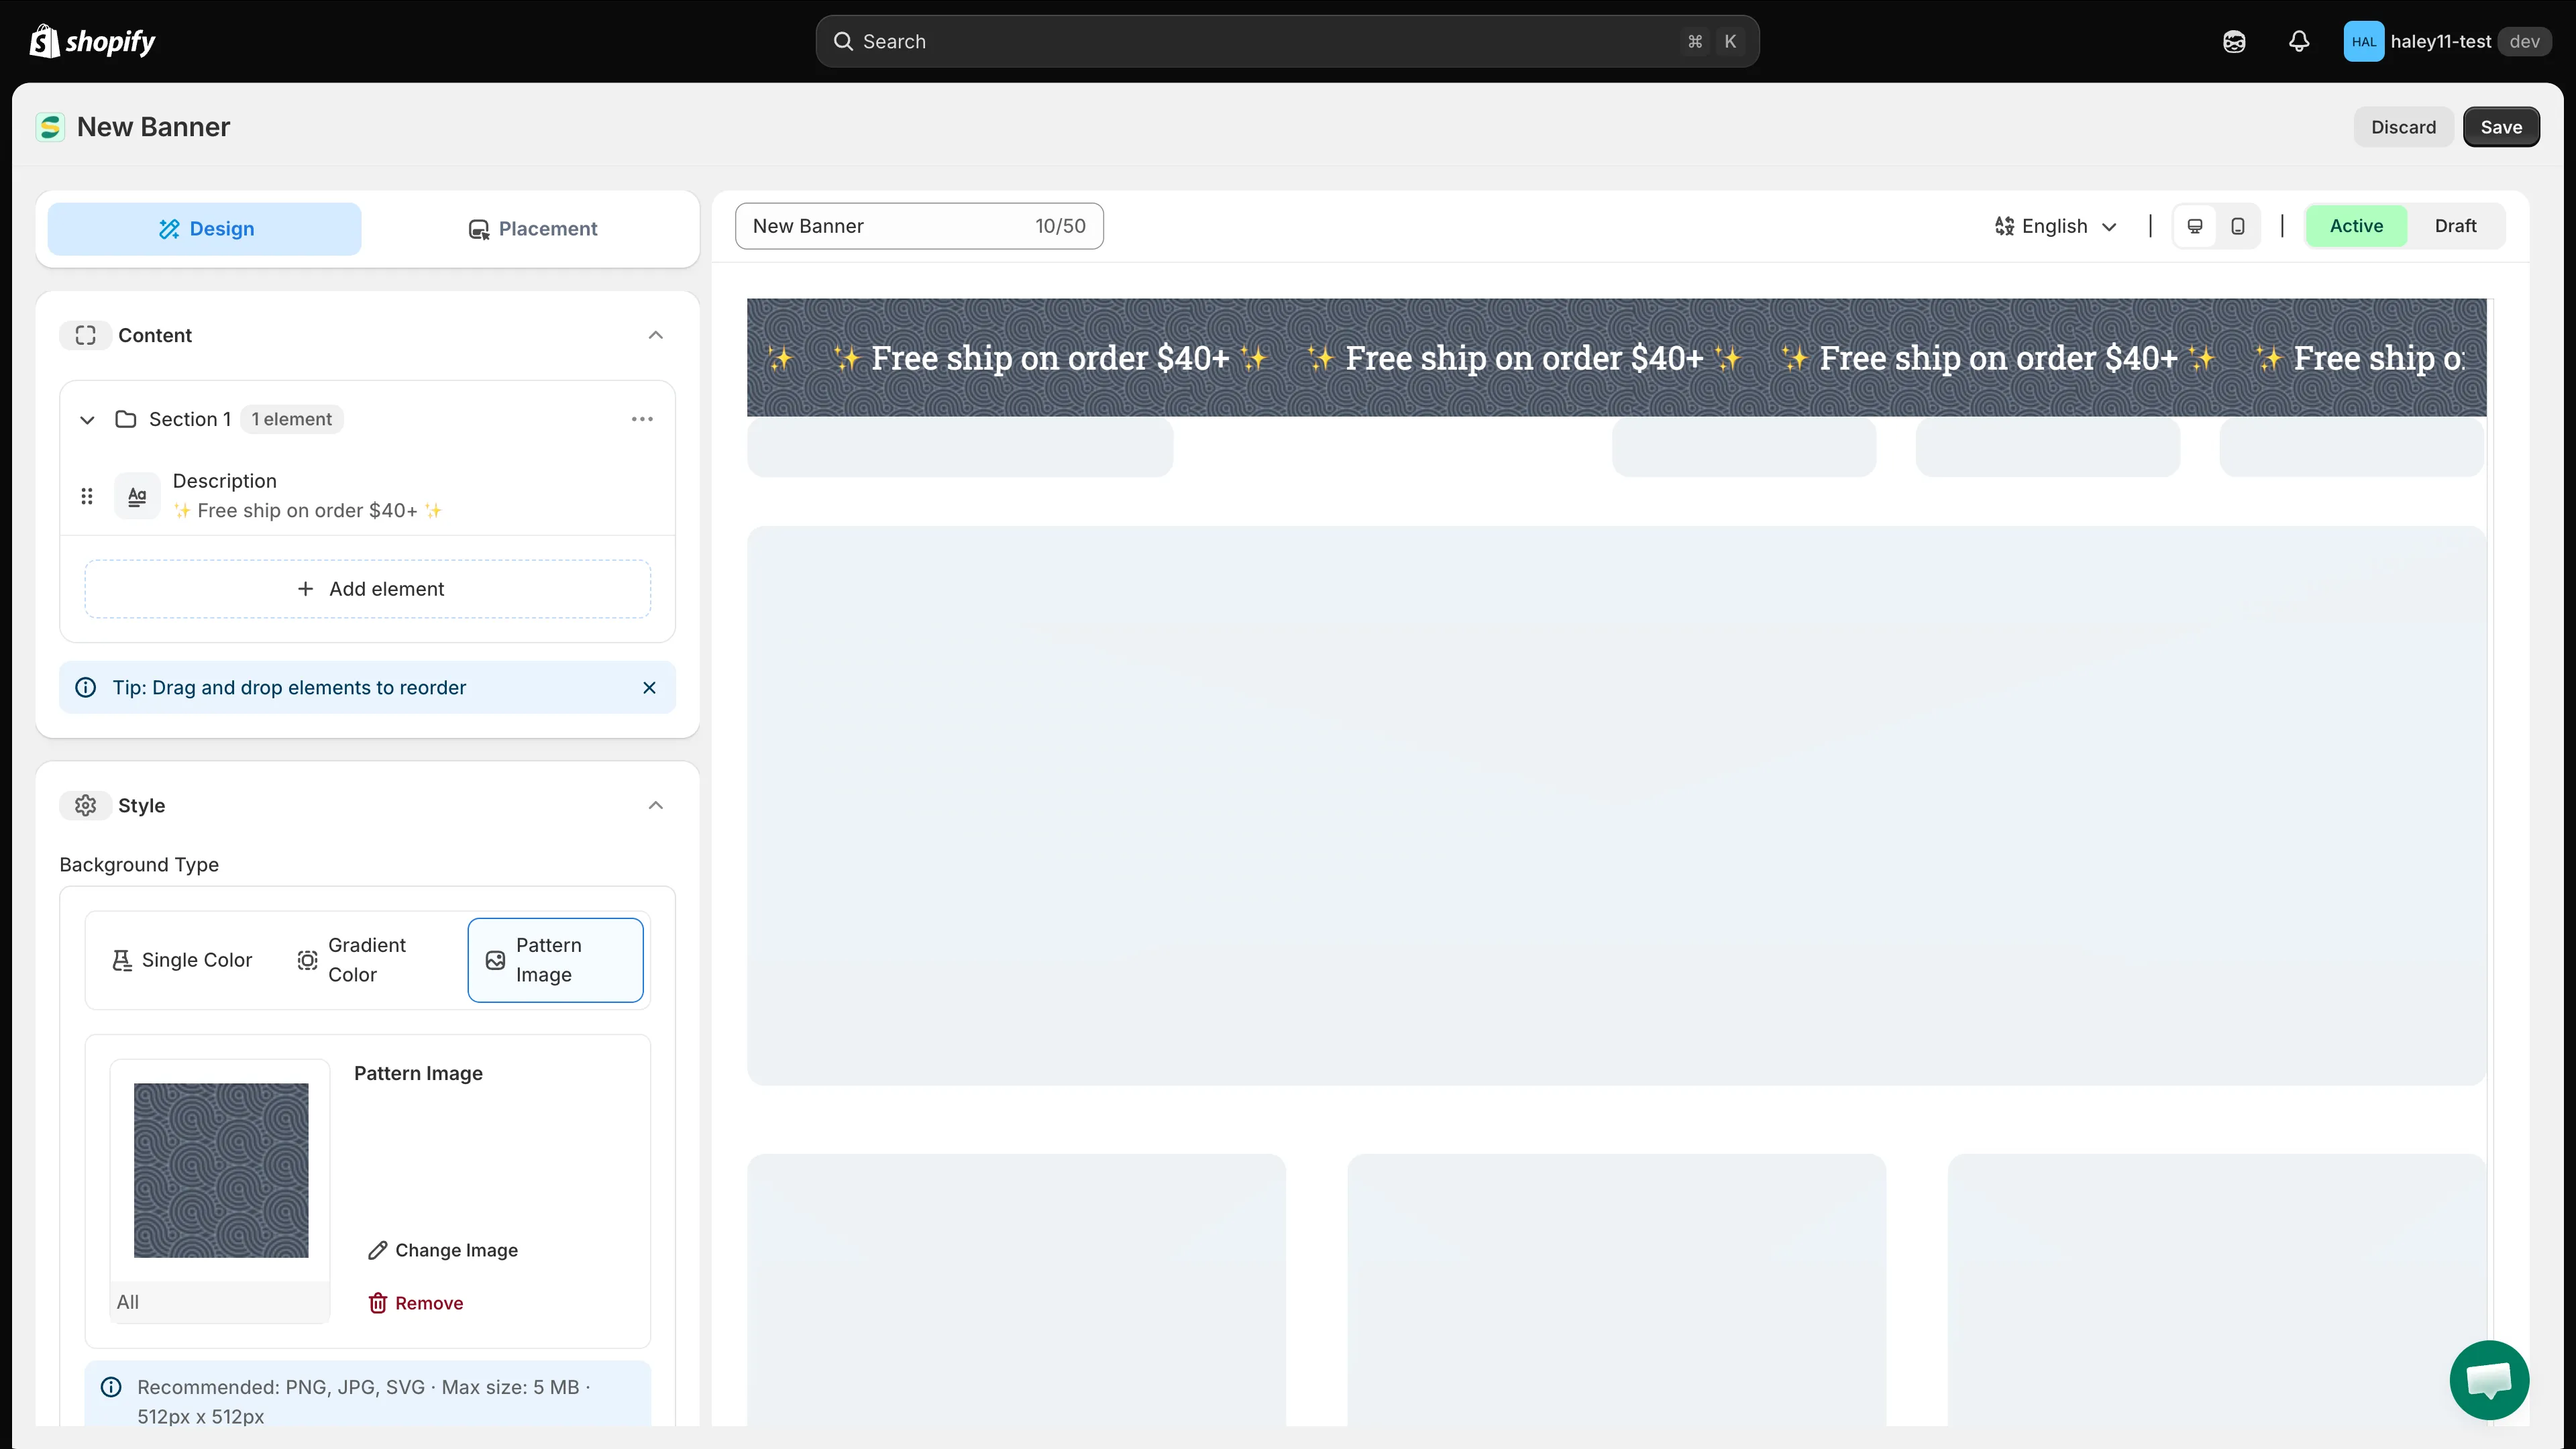
The toolbar above the preview holds the banner name, language, preview device, and status.
-
Edit the scrolling content
Section titled “Edit the scrolling content”Section 1 starts with a single Description element containing sample text such as
✨ Free ship on order $40+ ✨. Click it to open its settings on the right:- Content — a rich-text editor with bold, italic, underline, emoji, alignment, and an HTML view (
</>). The language chip shows which language you are editing. - Text — font Size and Color.
- Padding and Margin — spacing around the element, in pixels.
Click Add element to add more items to the loop — Message, Heading, Line break, Button, Countdown, or Image — and drag the handle on the left of a row to reorder them.
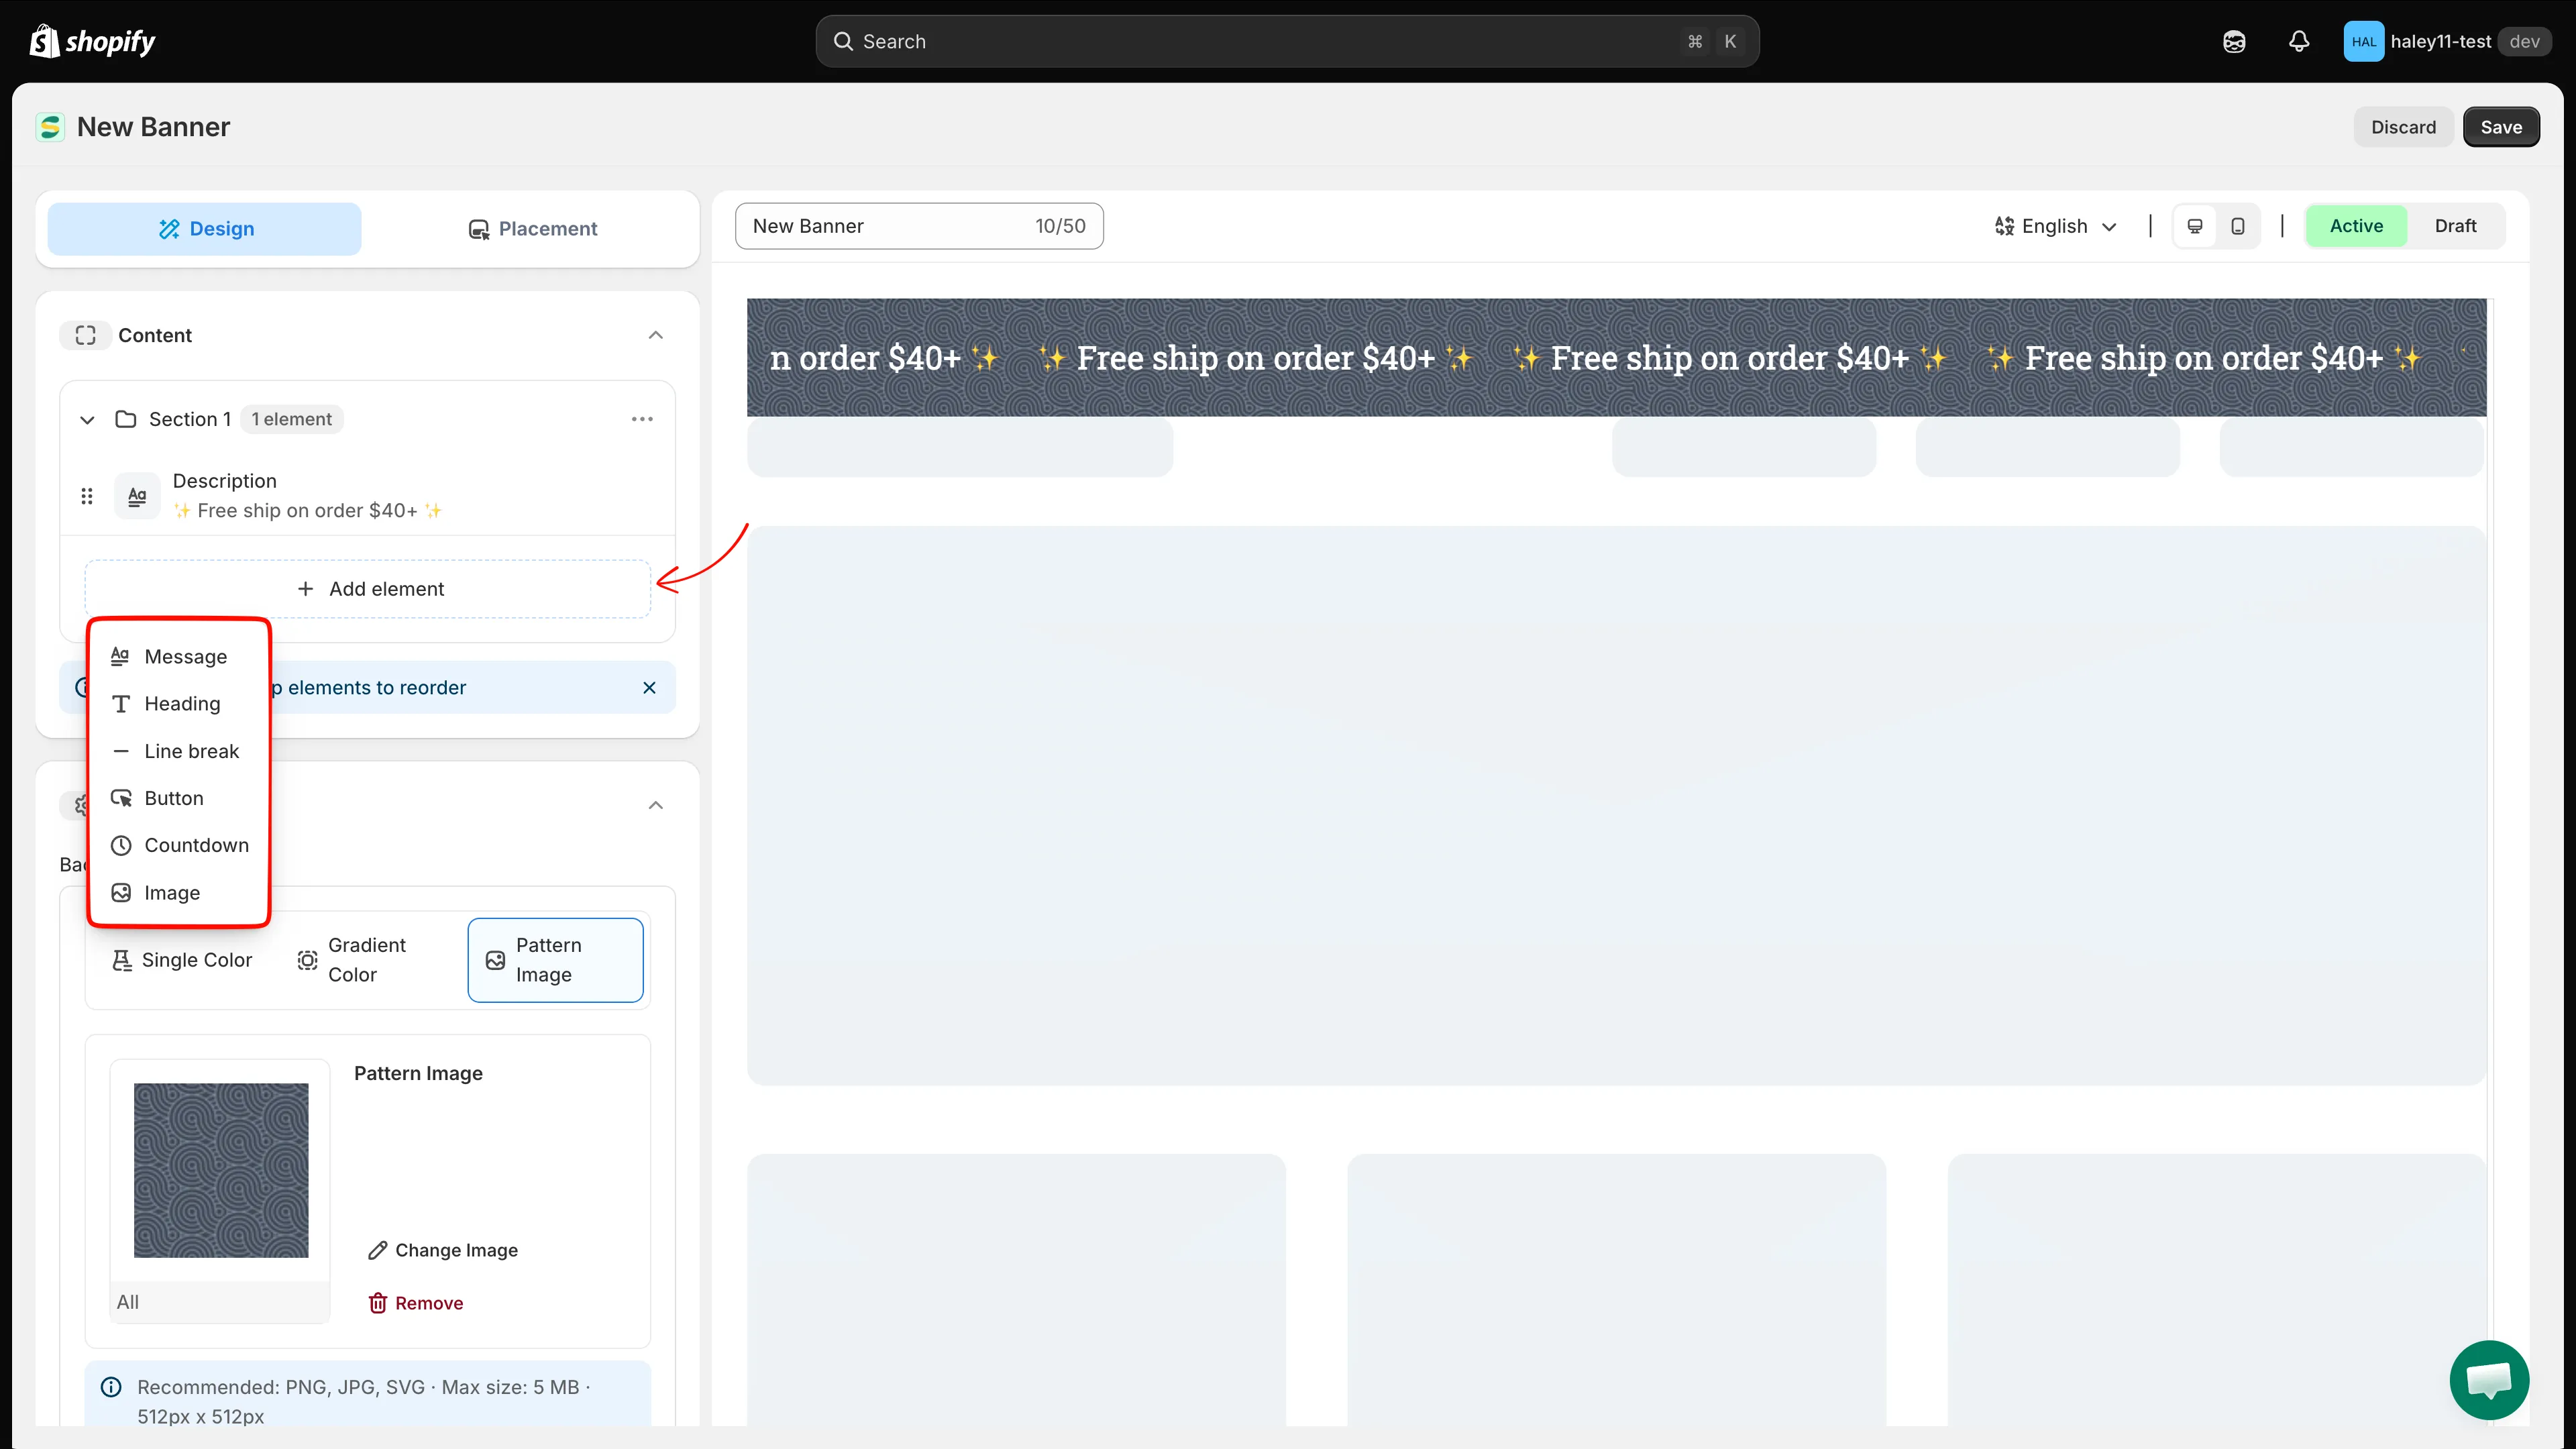
Edit the element that loops across the bar, or add more to the sequence.
- Content — a rich-text editor with bold, italic, underline, emoji, alignment, and an HTML view (
-
Style the bar
Section titled “Style the bar”In the Style panel:
- Background Type — choose Single Color, Gradient Color, or Pattern Image. Infinite scroll banners default to Pattern Image; use Change Image to swap the tile or Remove to clear it.
- Font Style — set the typeface, weight, and default text color.
- Padding — control the spacing inside the bar.
-
Add a close button or make the bar clickable
Section titled “Add a close button or make the bar clickable”Both options live in the Button panel and are off by default:
- Tick Include Close Button to place an “x” on the bar so customers can dismiss it. Two fields appear: Color and Hover Color.
- Tick Bar Clickable to make the whole bar a link. A Link URL field appears — enter the destination, and use the toggle beside it to open the link in a new tab.
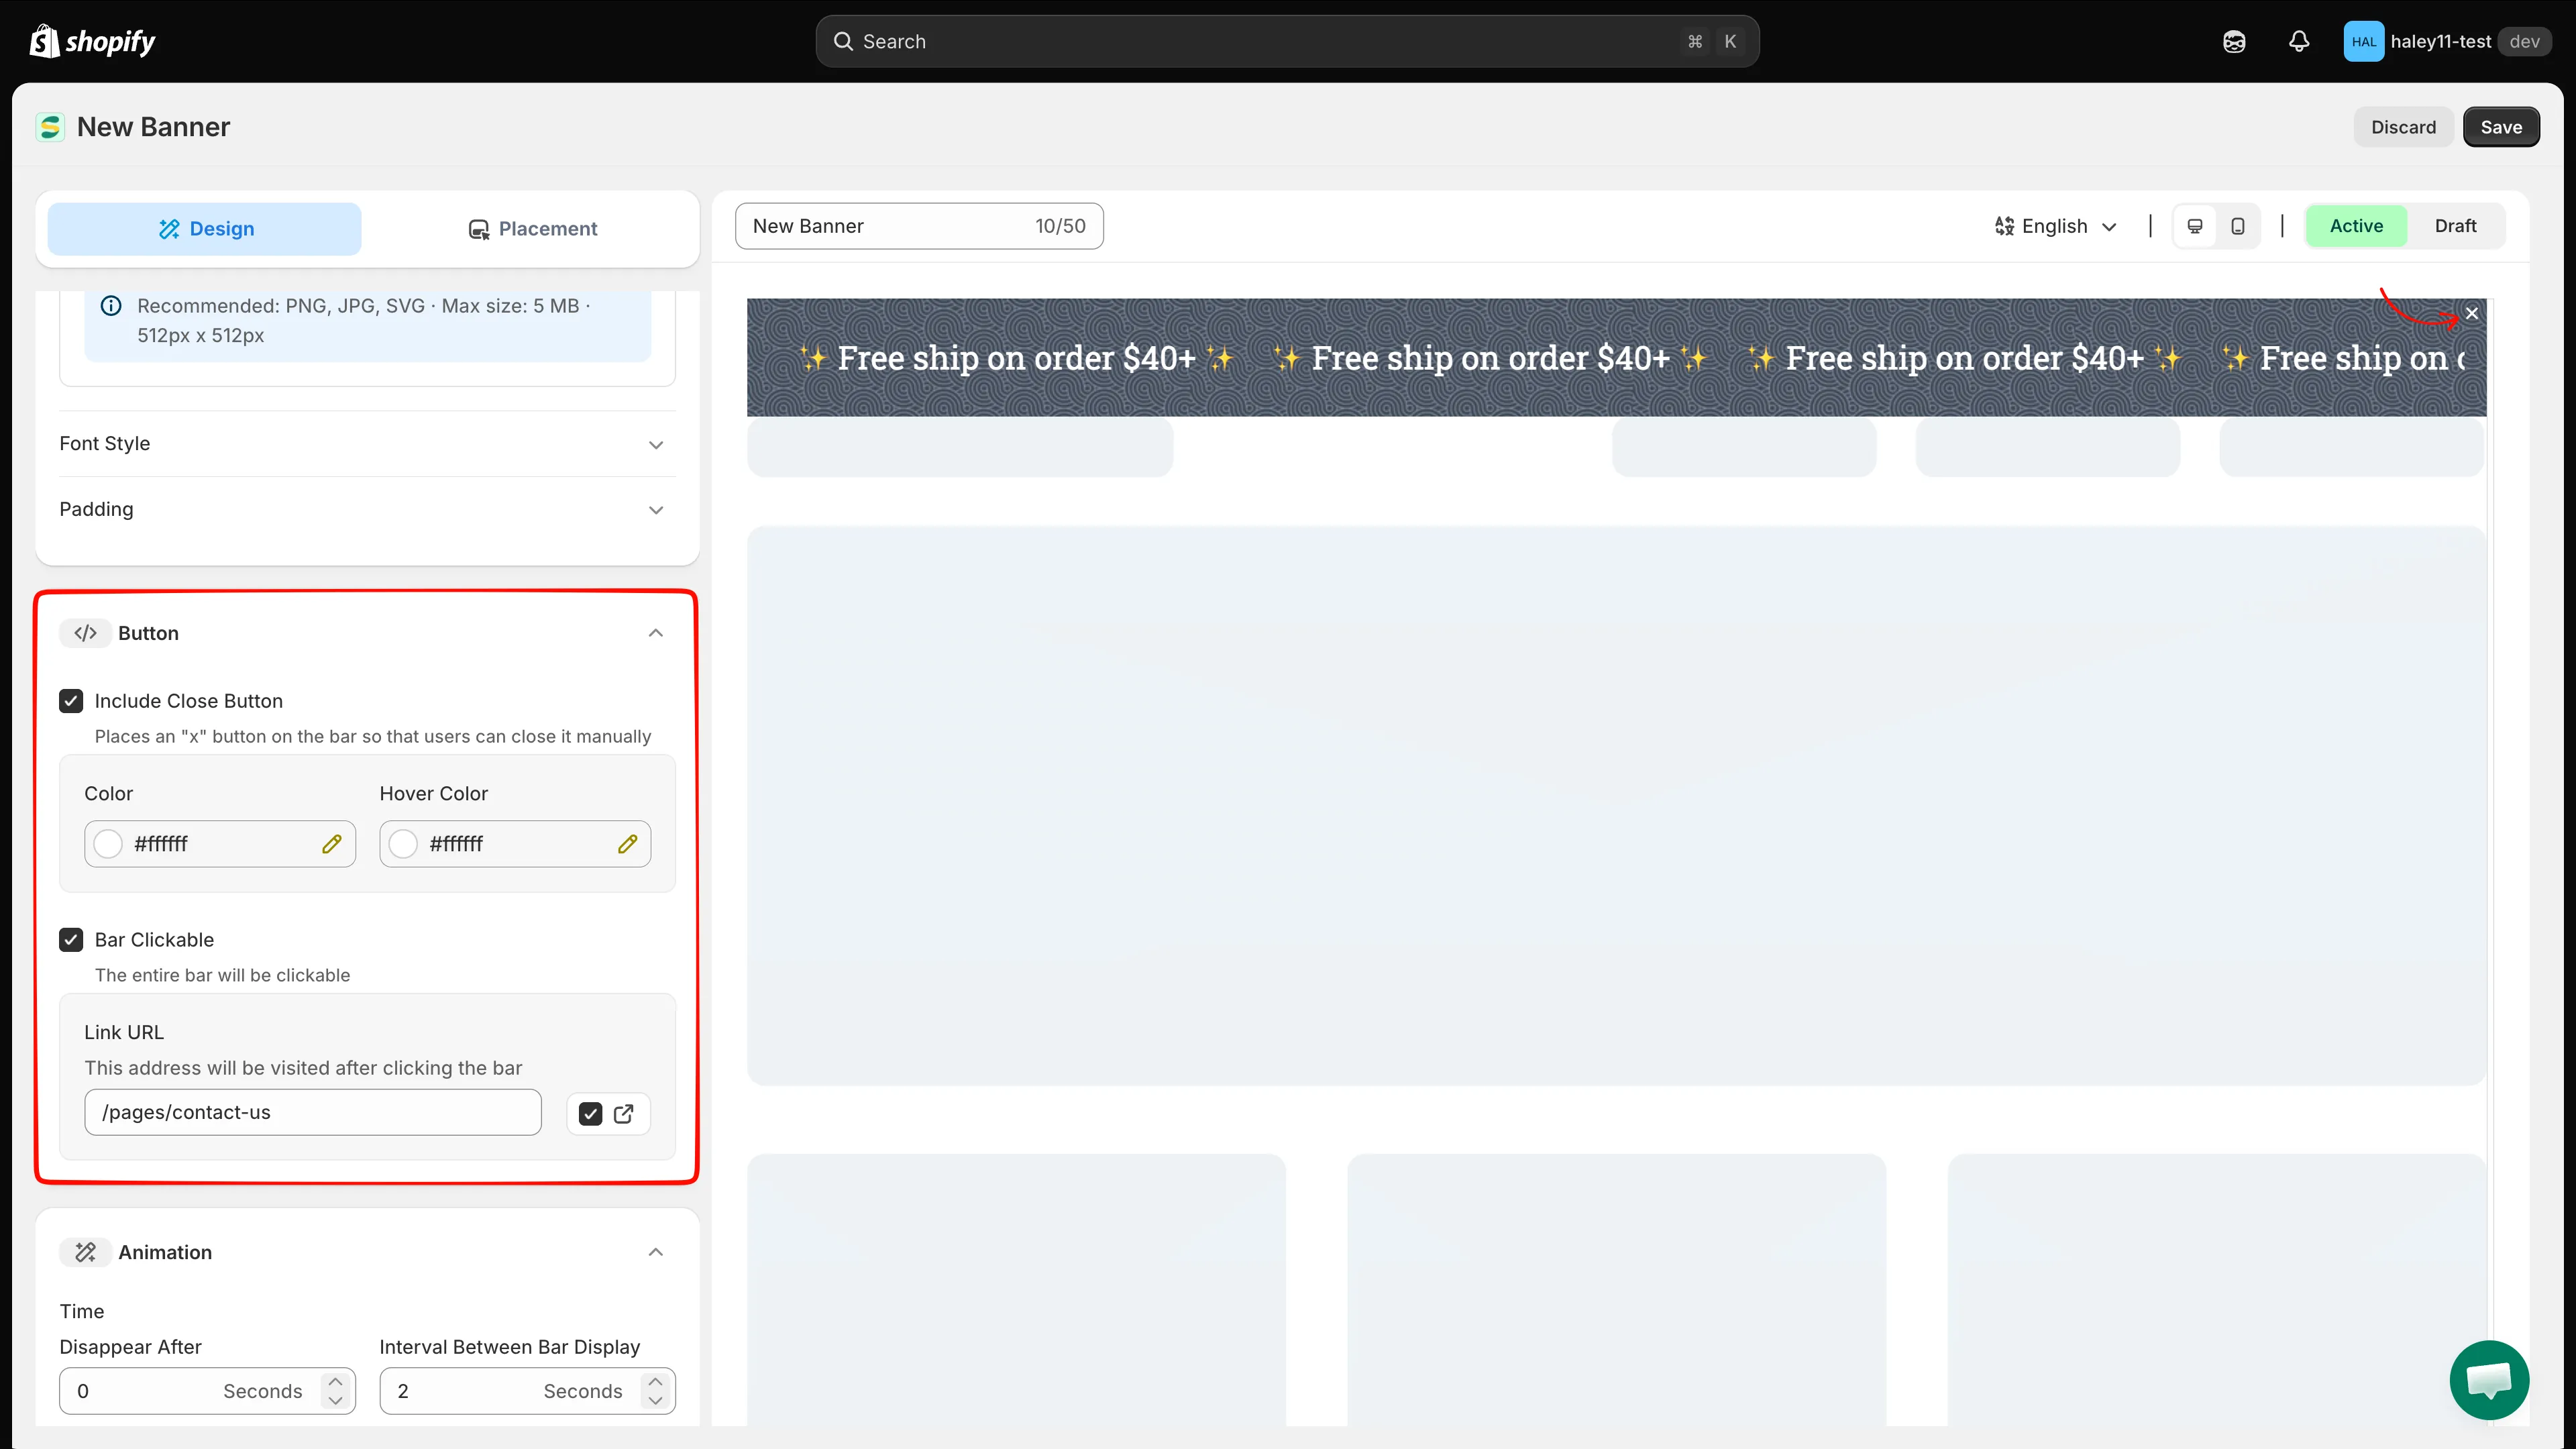
Enabling each checkbox reveals its settings — close button colors, or the link URL.
-
Set the scroll speed and timing
Section titled “Set the scroll speed and timing”All four fields in the Animation panel are in seconds:
Field What it controls Scroll speed How long one full loop takes. A higher number scrolls slower. Disappear After How long the bar stays on screen before hiding. Interval Between Bar Display The gap before the bar reappears. Time For The Bar To Fade In The length of the fade-in animation. 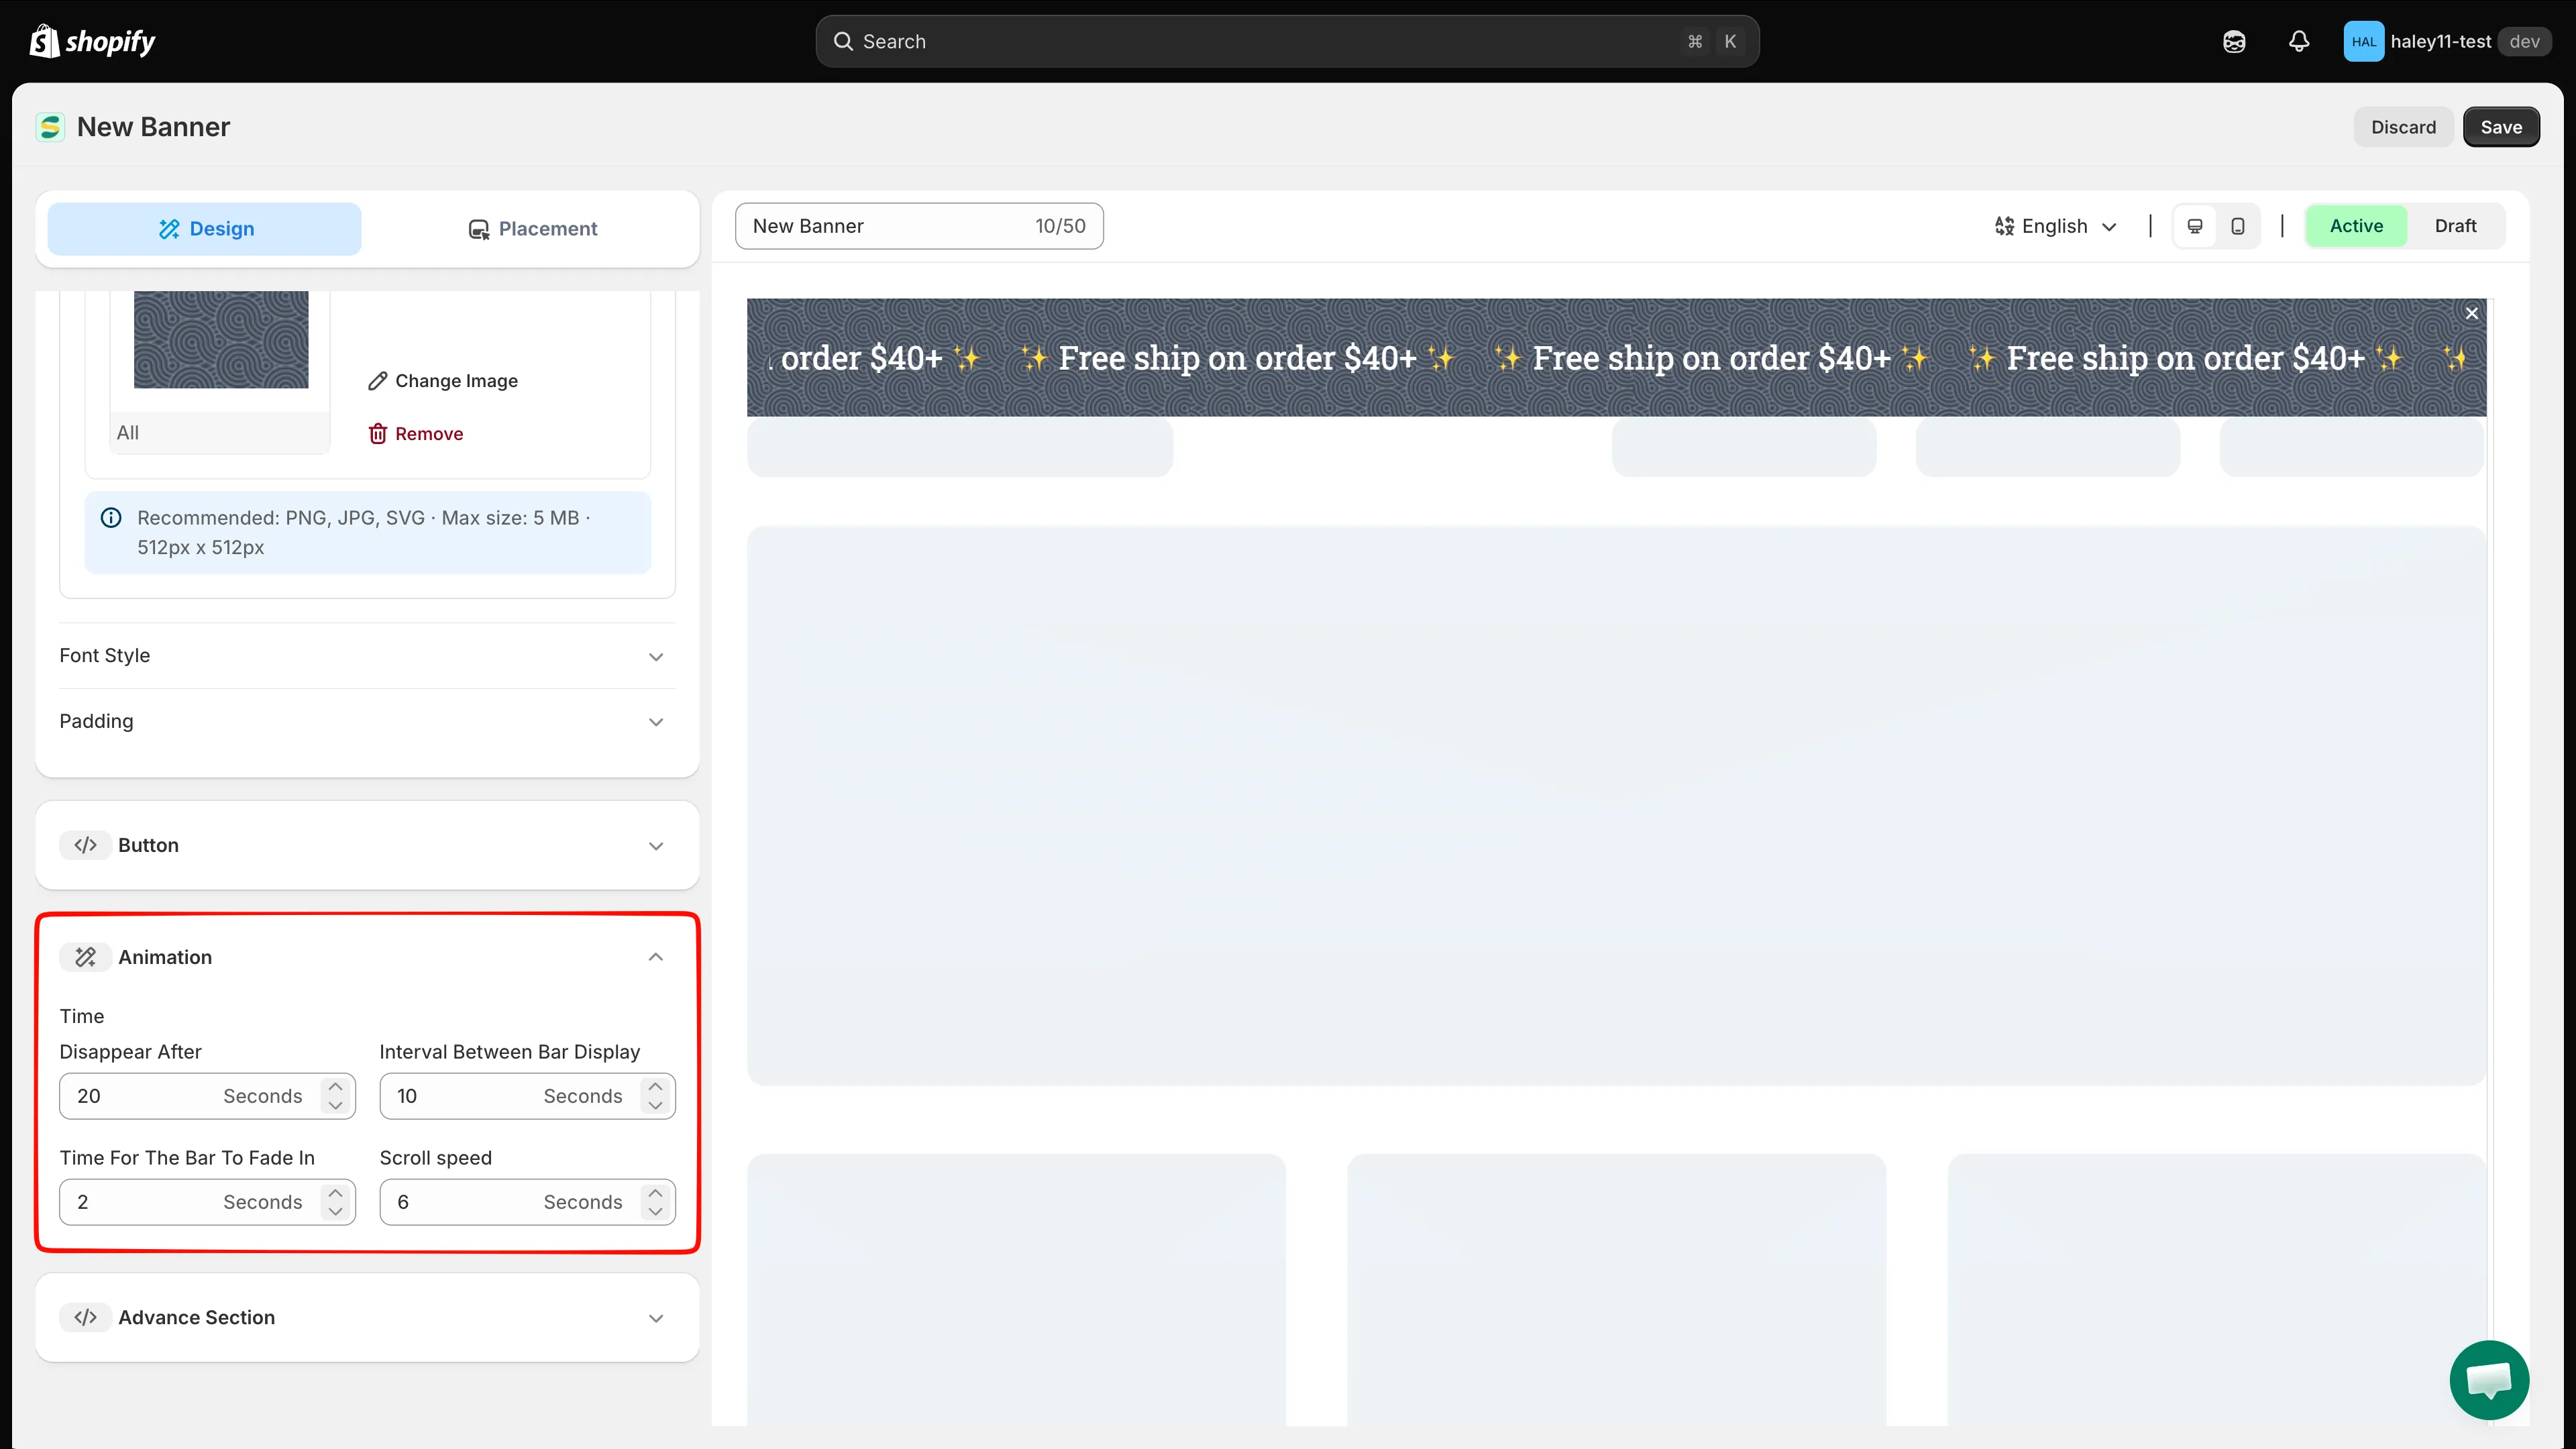
Scroll speed sets the duration of one loop — increase it to slow the ticker down.
-
(Optional) Add custom CSS
Section titled “(Optional) Add custom CSS”Open Advance Section to write your own CSS in the Custom CSS (Developer Zone) box. The CSS reference list below it shows the available selectors — including
.samita_banner_groups.infinityScroll, the wrapper used when infinite scrolling is enabled. Click a selector to insert it. -
Choose where the banner appears
Section titled “Choose where the banner appears”Switch to the Placement tab and pick a display position:
Position Behaviour Top Pushes page content down. Top Sticky Pushes content down and stays visible while scrolling. Top Overlay Overlaps the top of the page content. Overlay Sticky Overlaps content and stays visible while scrolling. Bottom Sticky Fixed at the bottom of the page. Custom Place the bar anywhere using a shortcode. Below the position picker, narrow the audience with Product conditions, Customer conditions, Page conditions, Language conditions, Country conditions, Other conditions, and Visibility date. The Shortcode panel gives you the snippet to paste into your theme when you choose Custom.
See Configure display conditions for the full breakdown of each condition type.
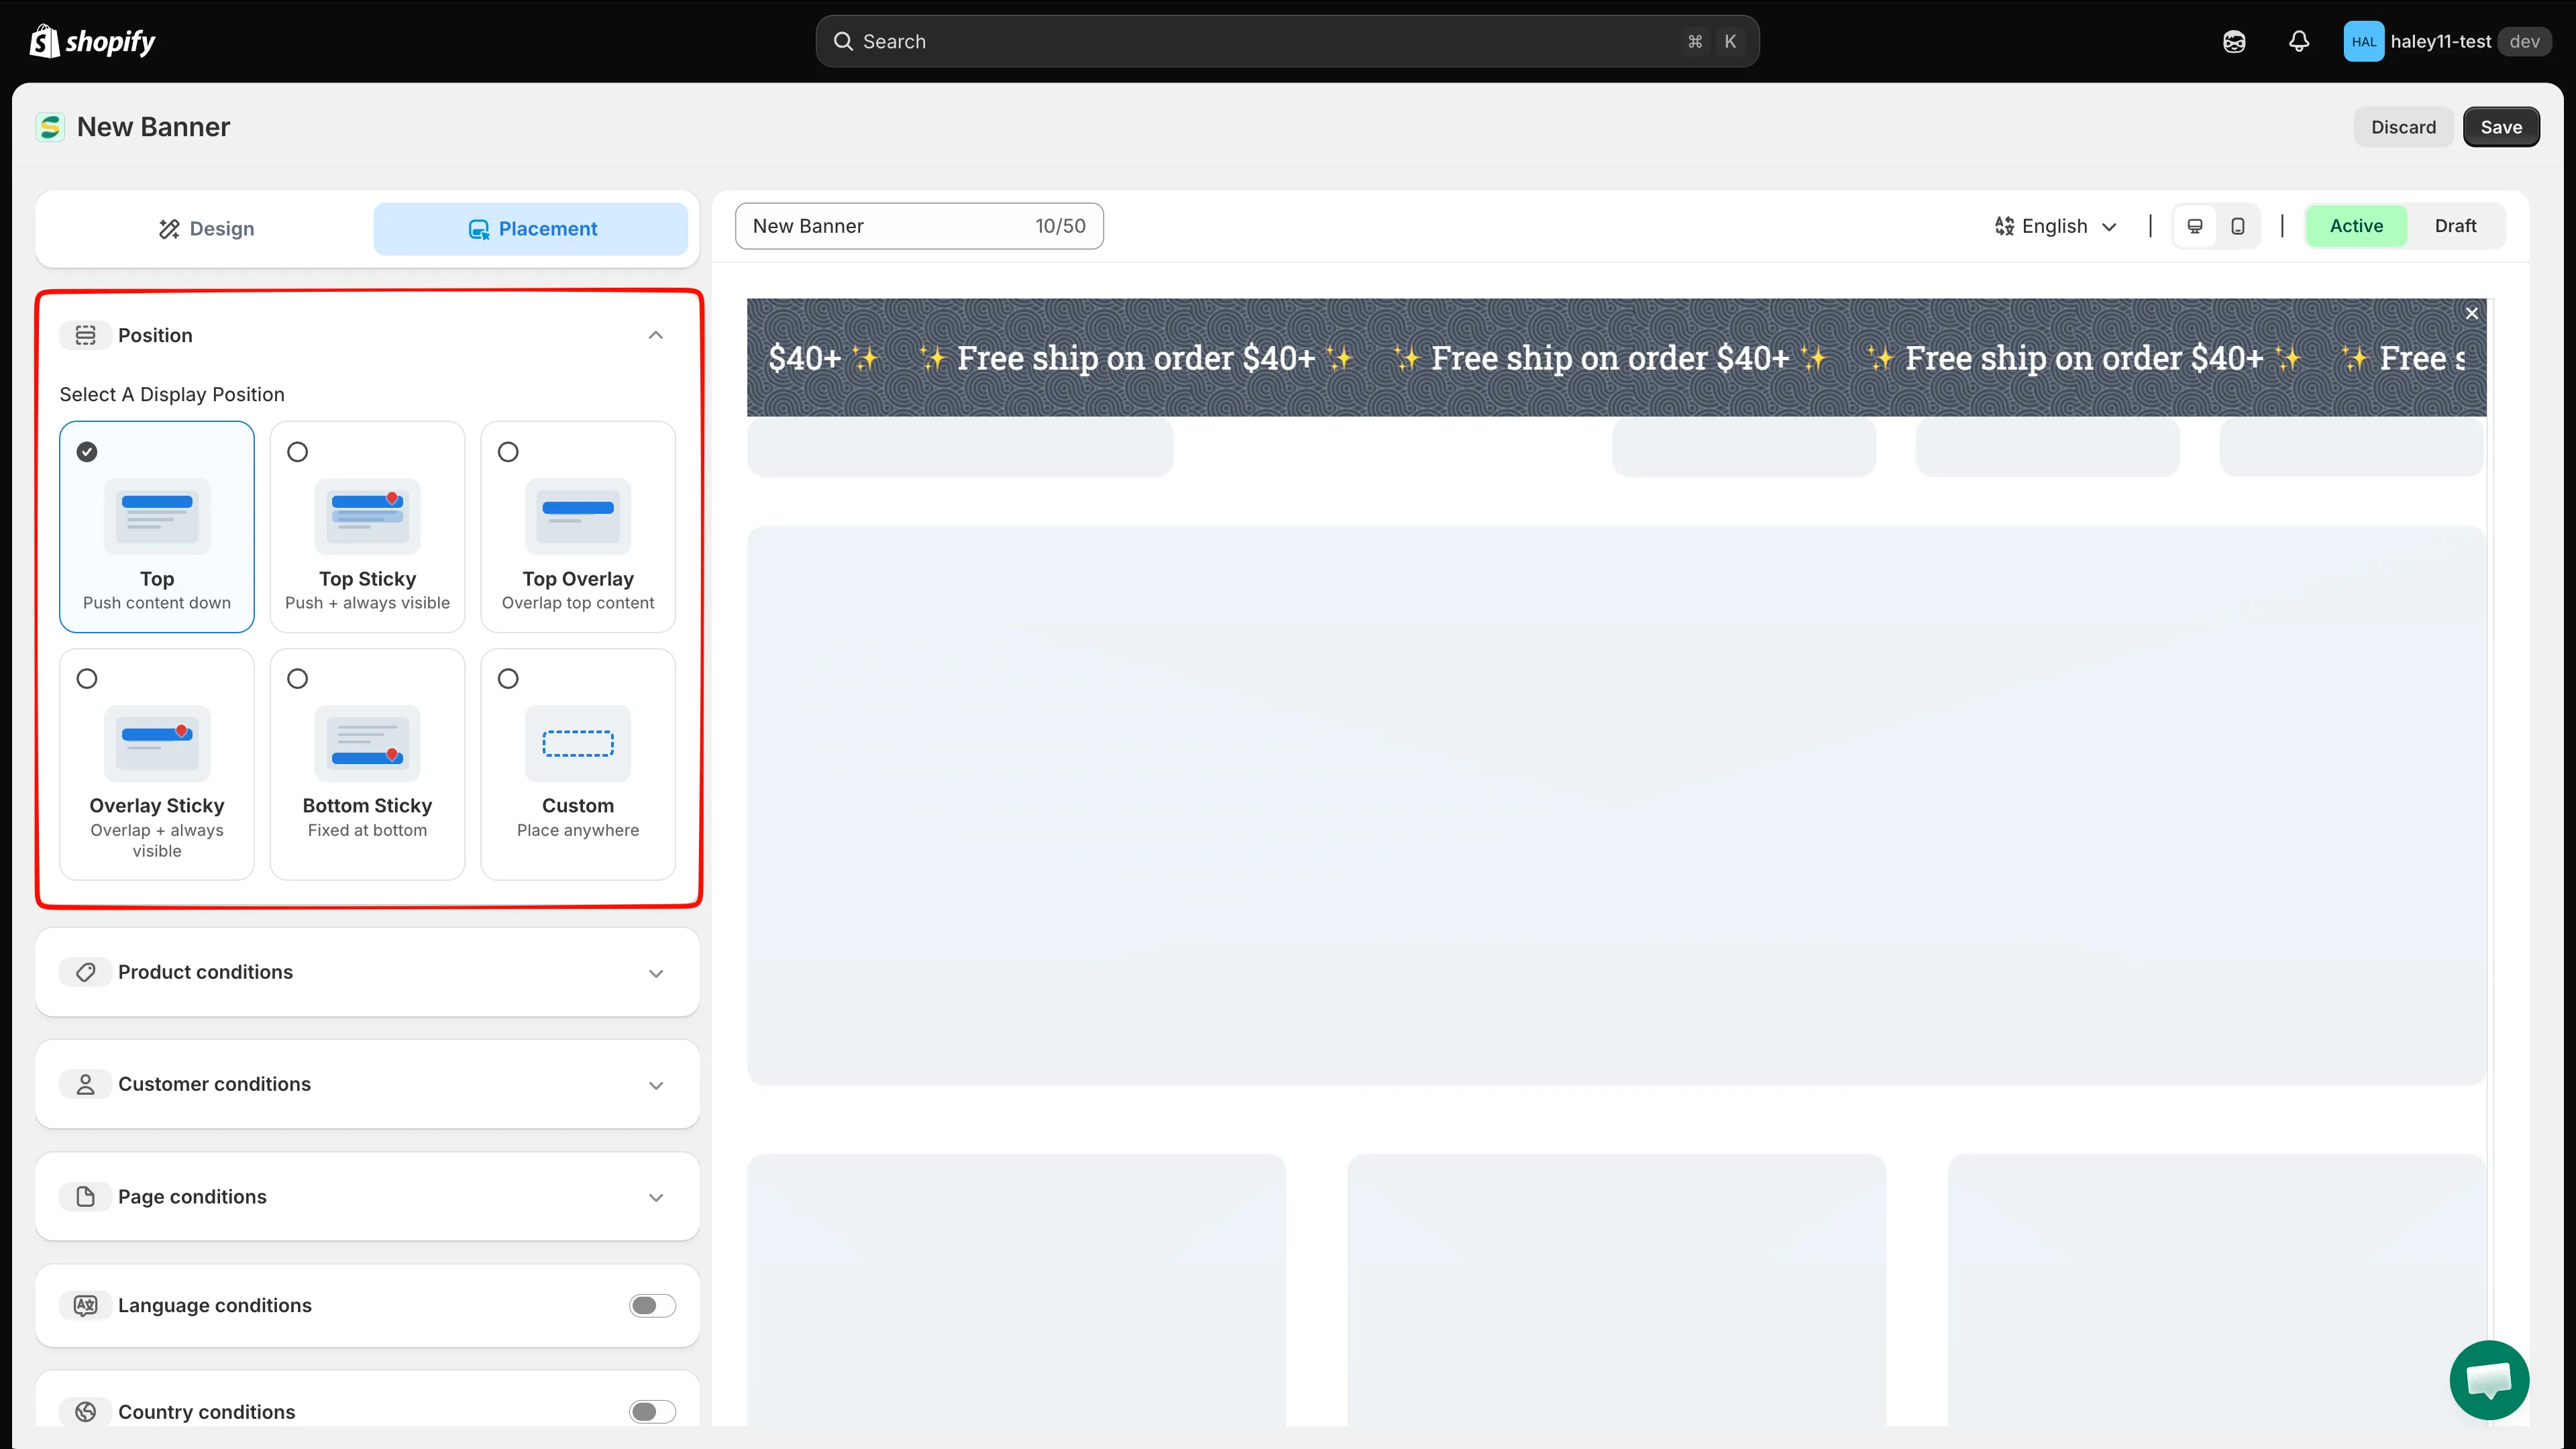
Pick a display position, then add conditions to control who sees the banner.
-
Save and activate
Section titled “Save and activate”Set the status switch above the preview to Active, then click Save in the top-right corner. Leave it on Draft to keep working without publishing.
Next steps
Section titled “Next steps”- Configure display conditions — control where and to whom your banner appears.
- Create a basic banner — build a static or rotating announcement bar instead.