
Create an automatic discount
Build a discount that applies itself at checkout — set the value, the schedule, the products it covers, and show the new price on your storefront.
An automatic discount needs no code: Shopify applies it at checkout as soon as the cart contains a product that matches your conditions. It is also the only type that can show its discounted price on your storefront.
-
Open the Discounts page
Section titled “Open the Discounts page”In your Shopify admin, open the Sami Product Labels app and click Discounts in the app sidebar.
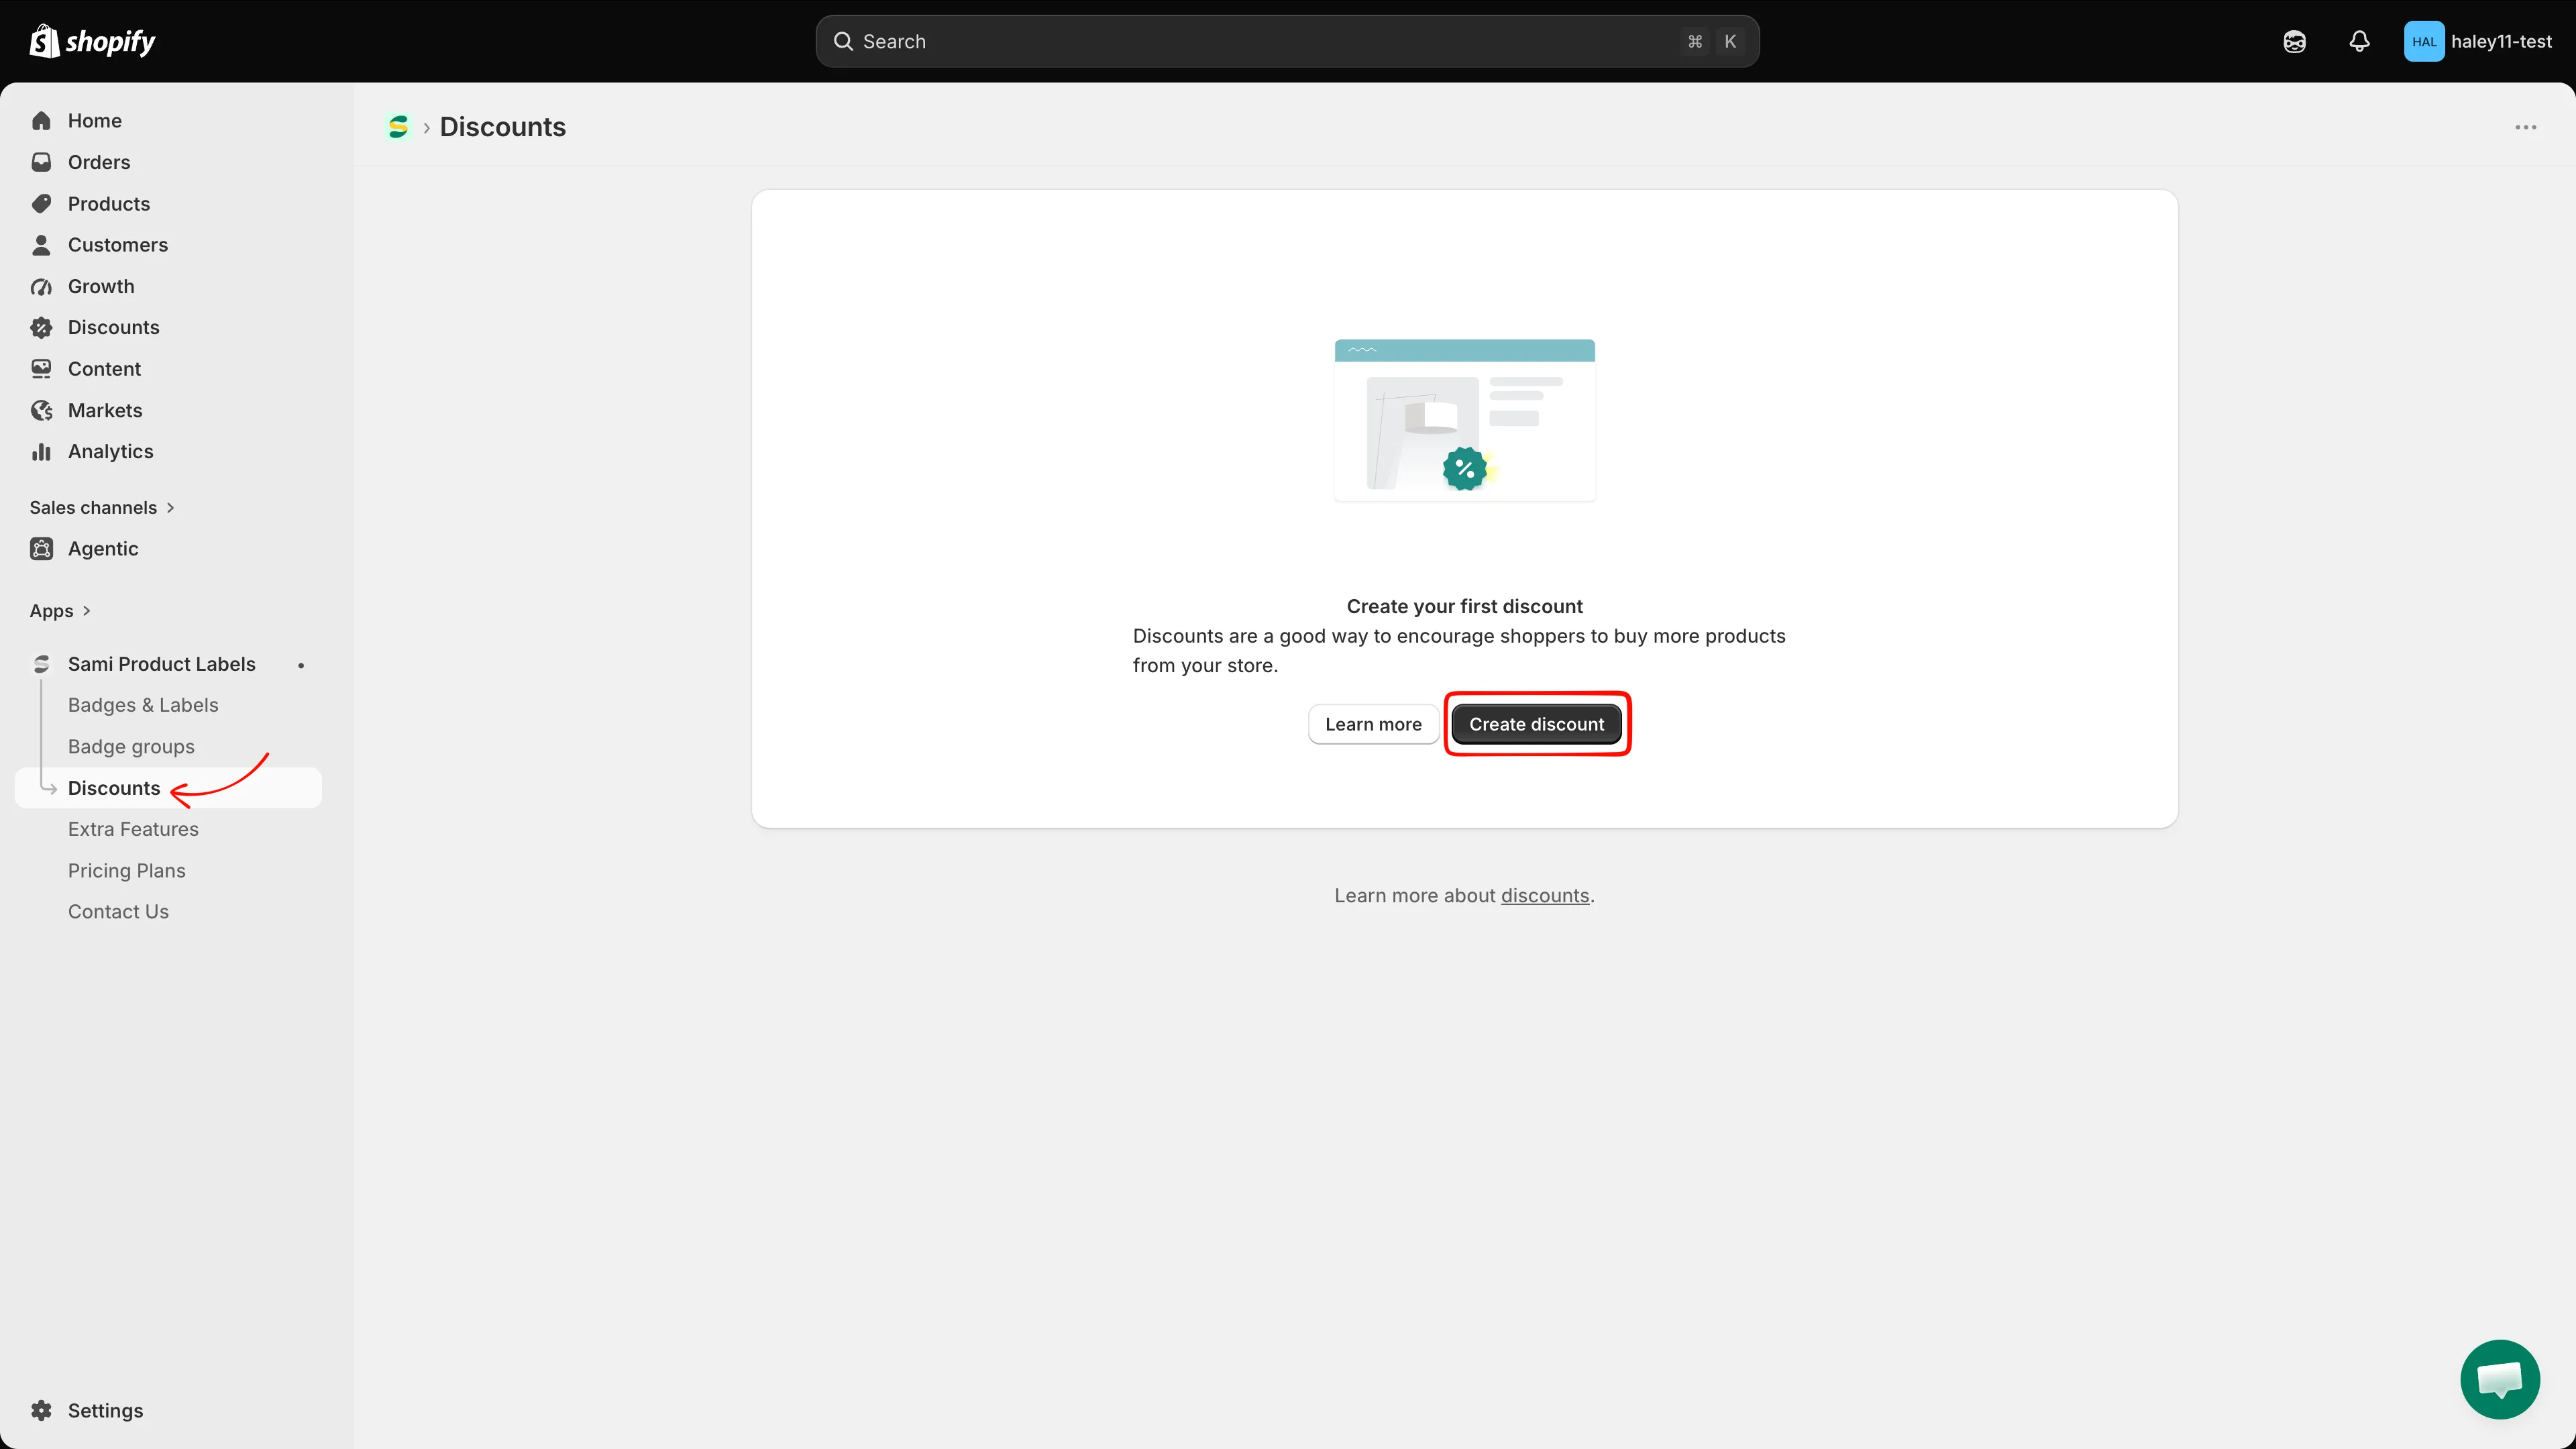
Discounts sits between Badge groups and Extra Features in the sidebar.
-
Click Create discount, then choose Automatic discount
Section titled “Click Create discount, then choose Automatic discount”Click Create discount. In the Choose discount type dialog, click Select next to Automatic discount.
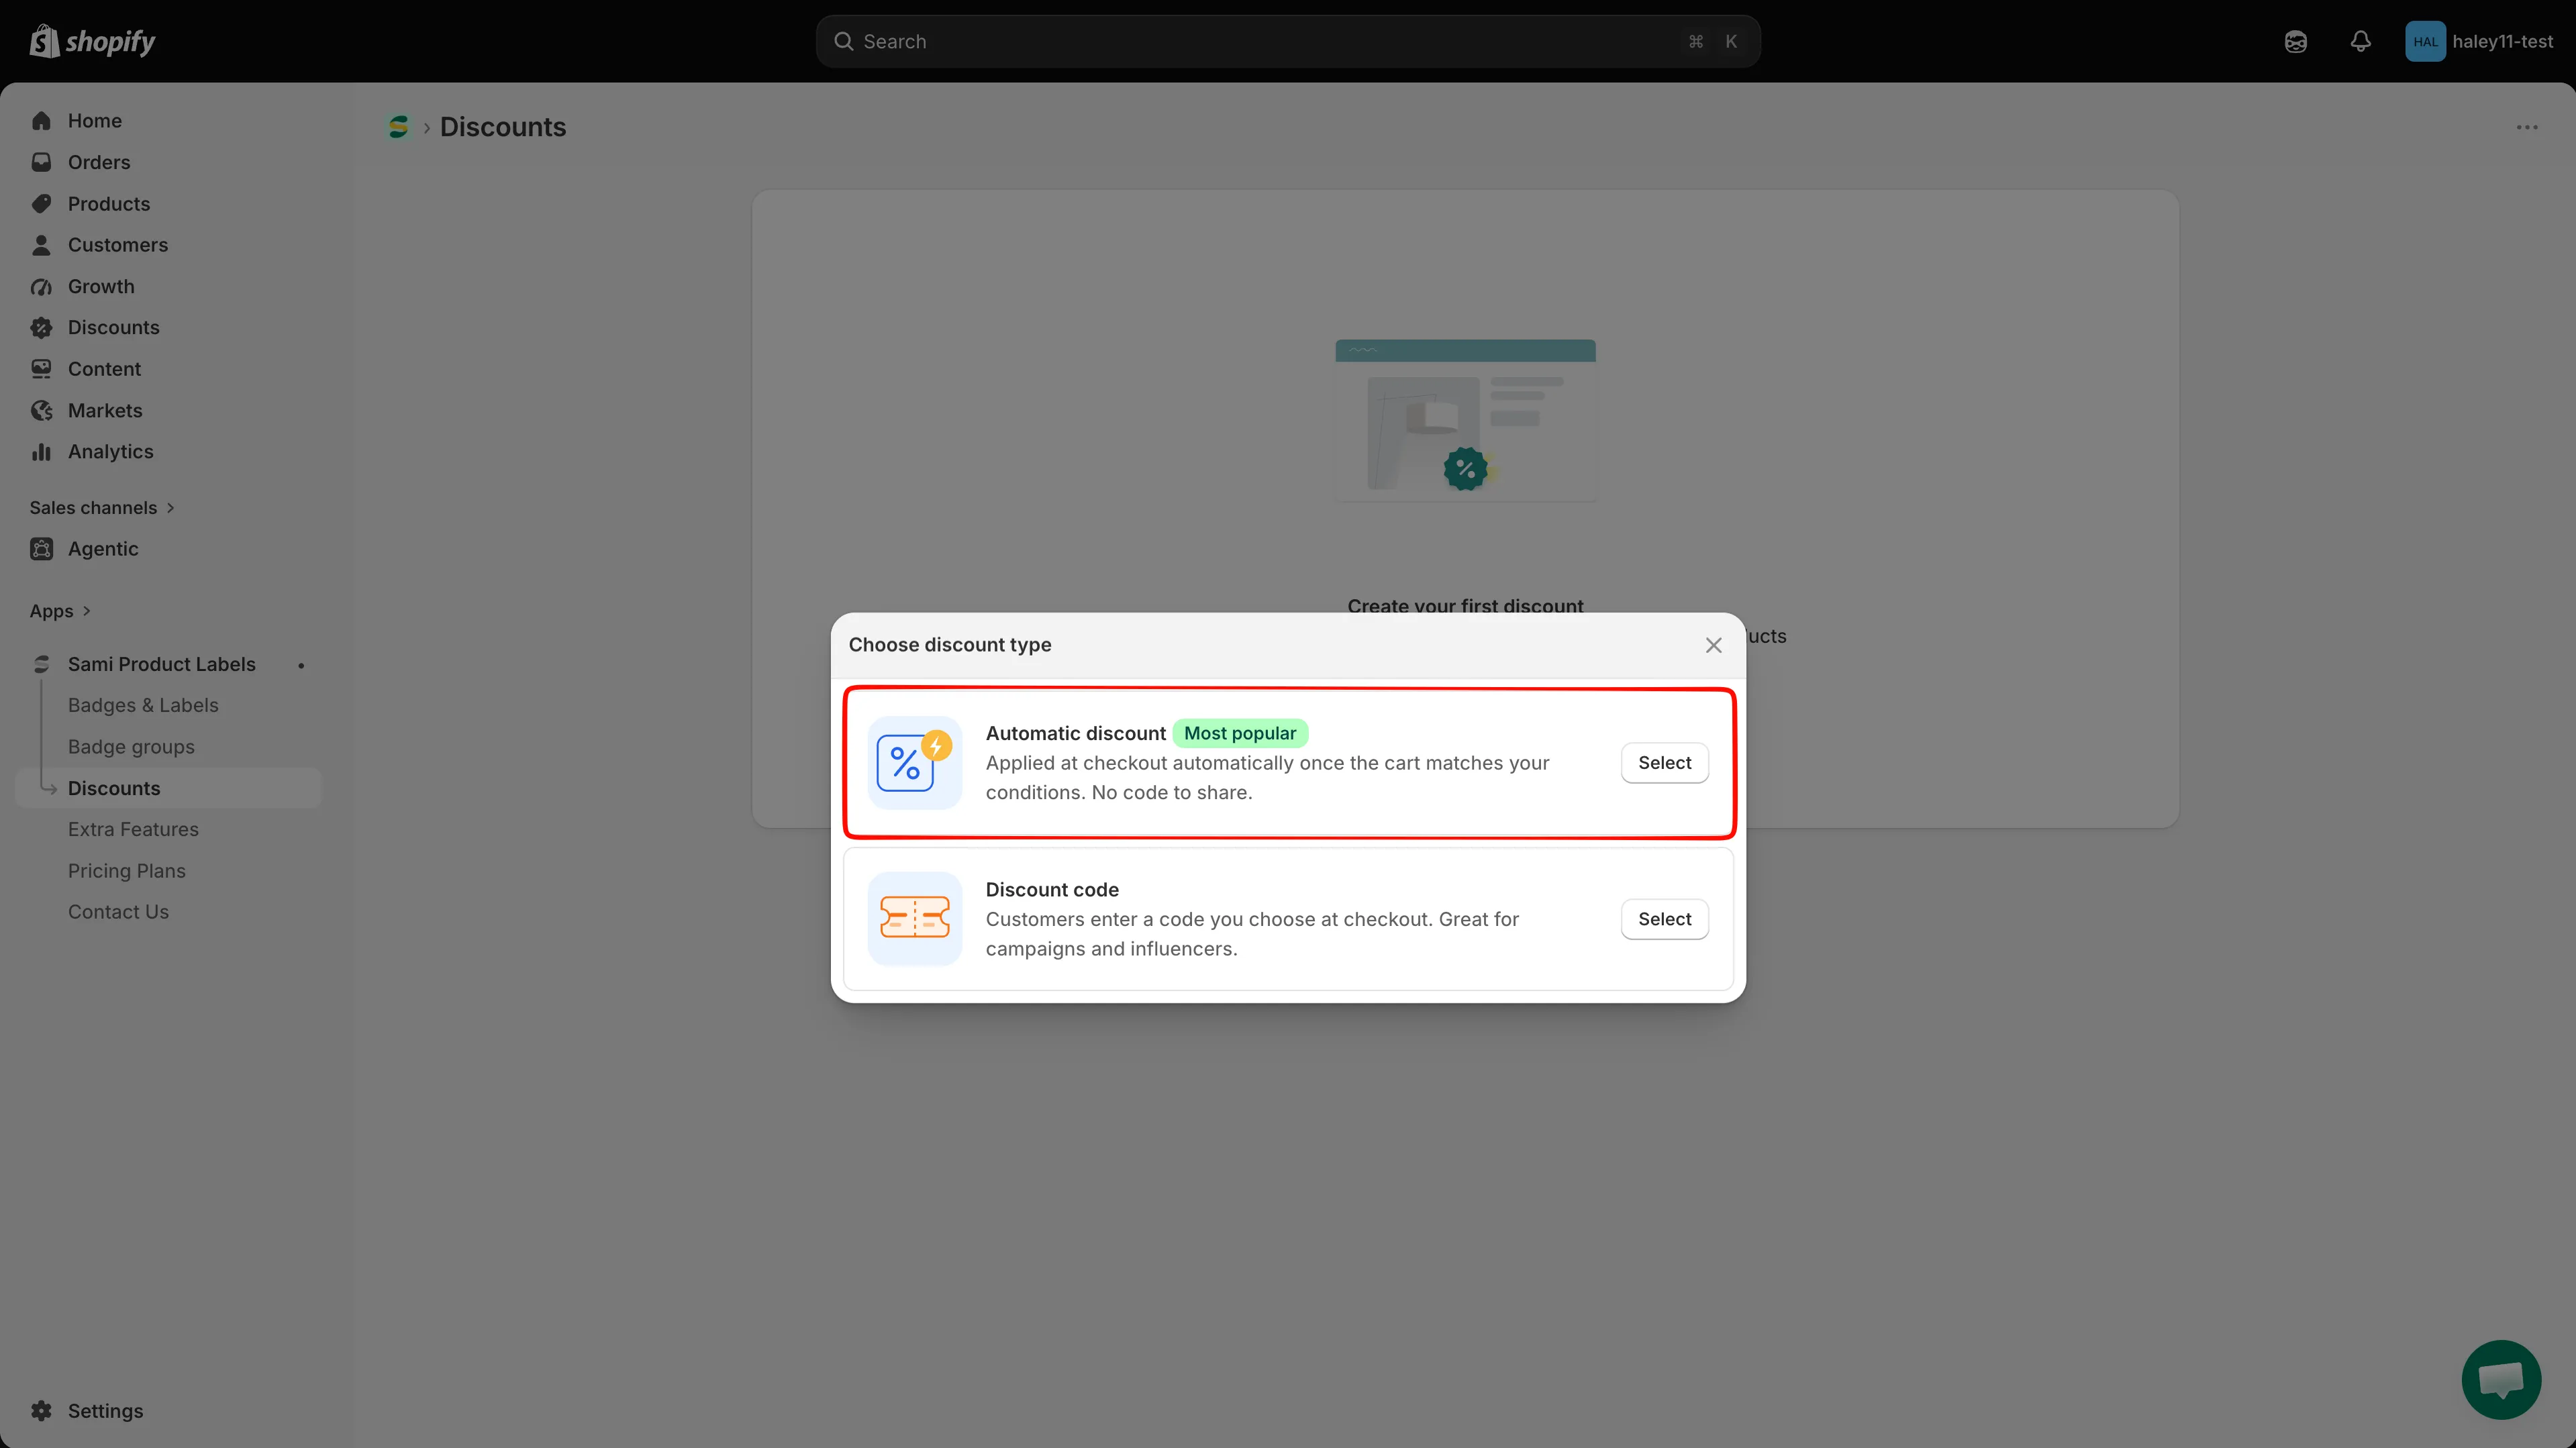
Automatic discount applies at checkout on its own — there is no code to share.
-
Name the discount and set its status
Section titled “Name the discount and set its status”The editor opens on the Discount configurations tab. In General information:
- Type a Discount name. It is internal — shoppers never see it — and must be unique in your store.
- Use the selector beside the name to set the status to Active or Draft. The badge next to the section heading follows your choice.
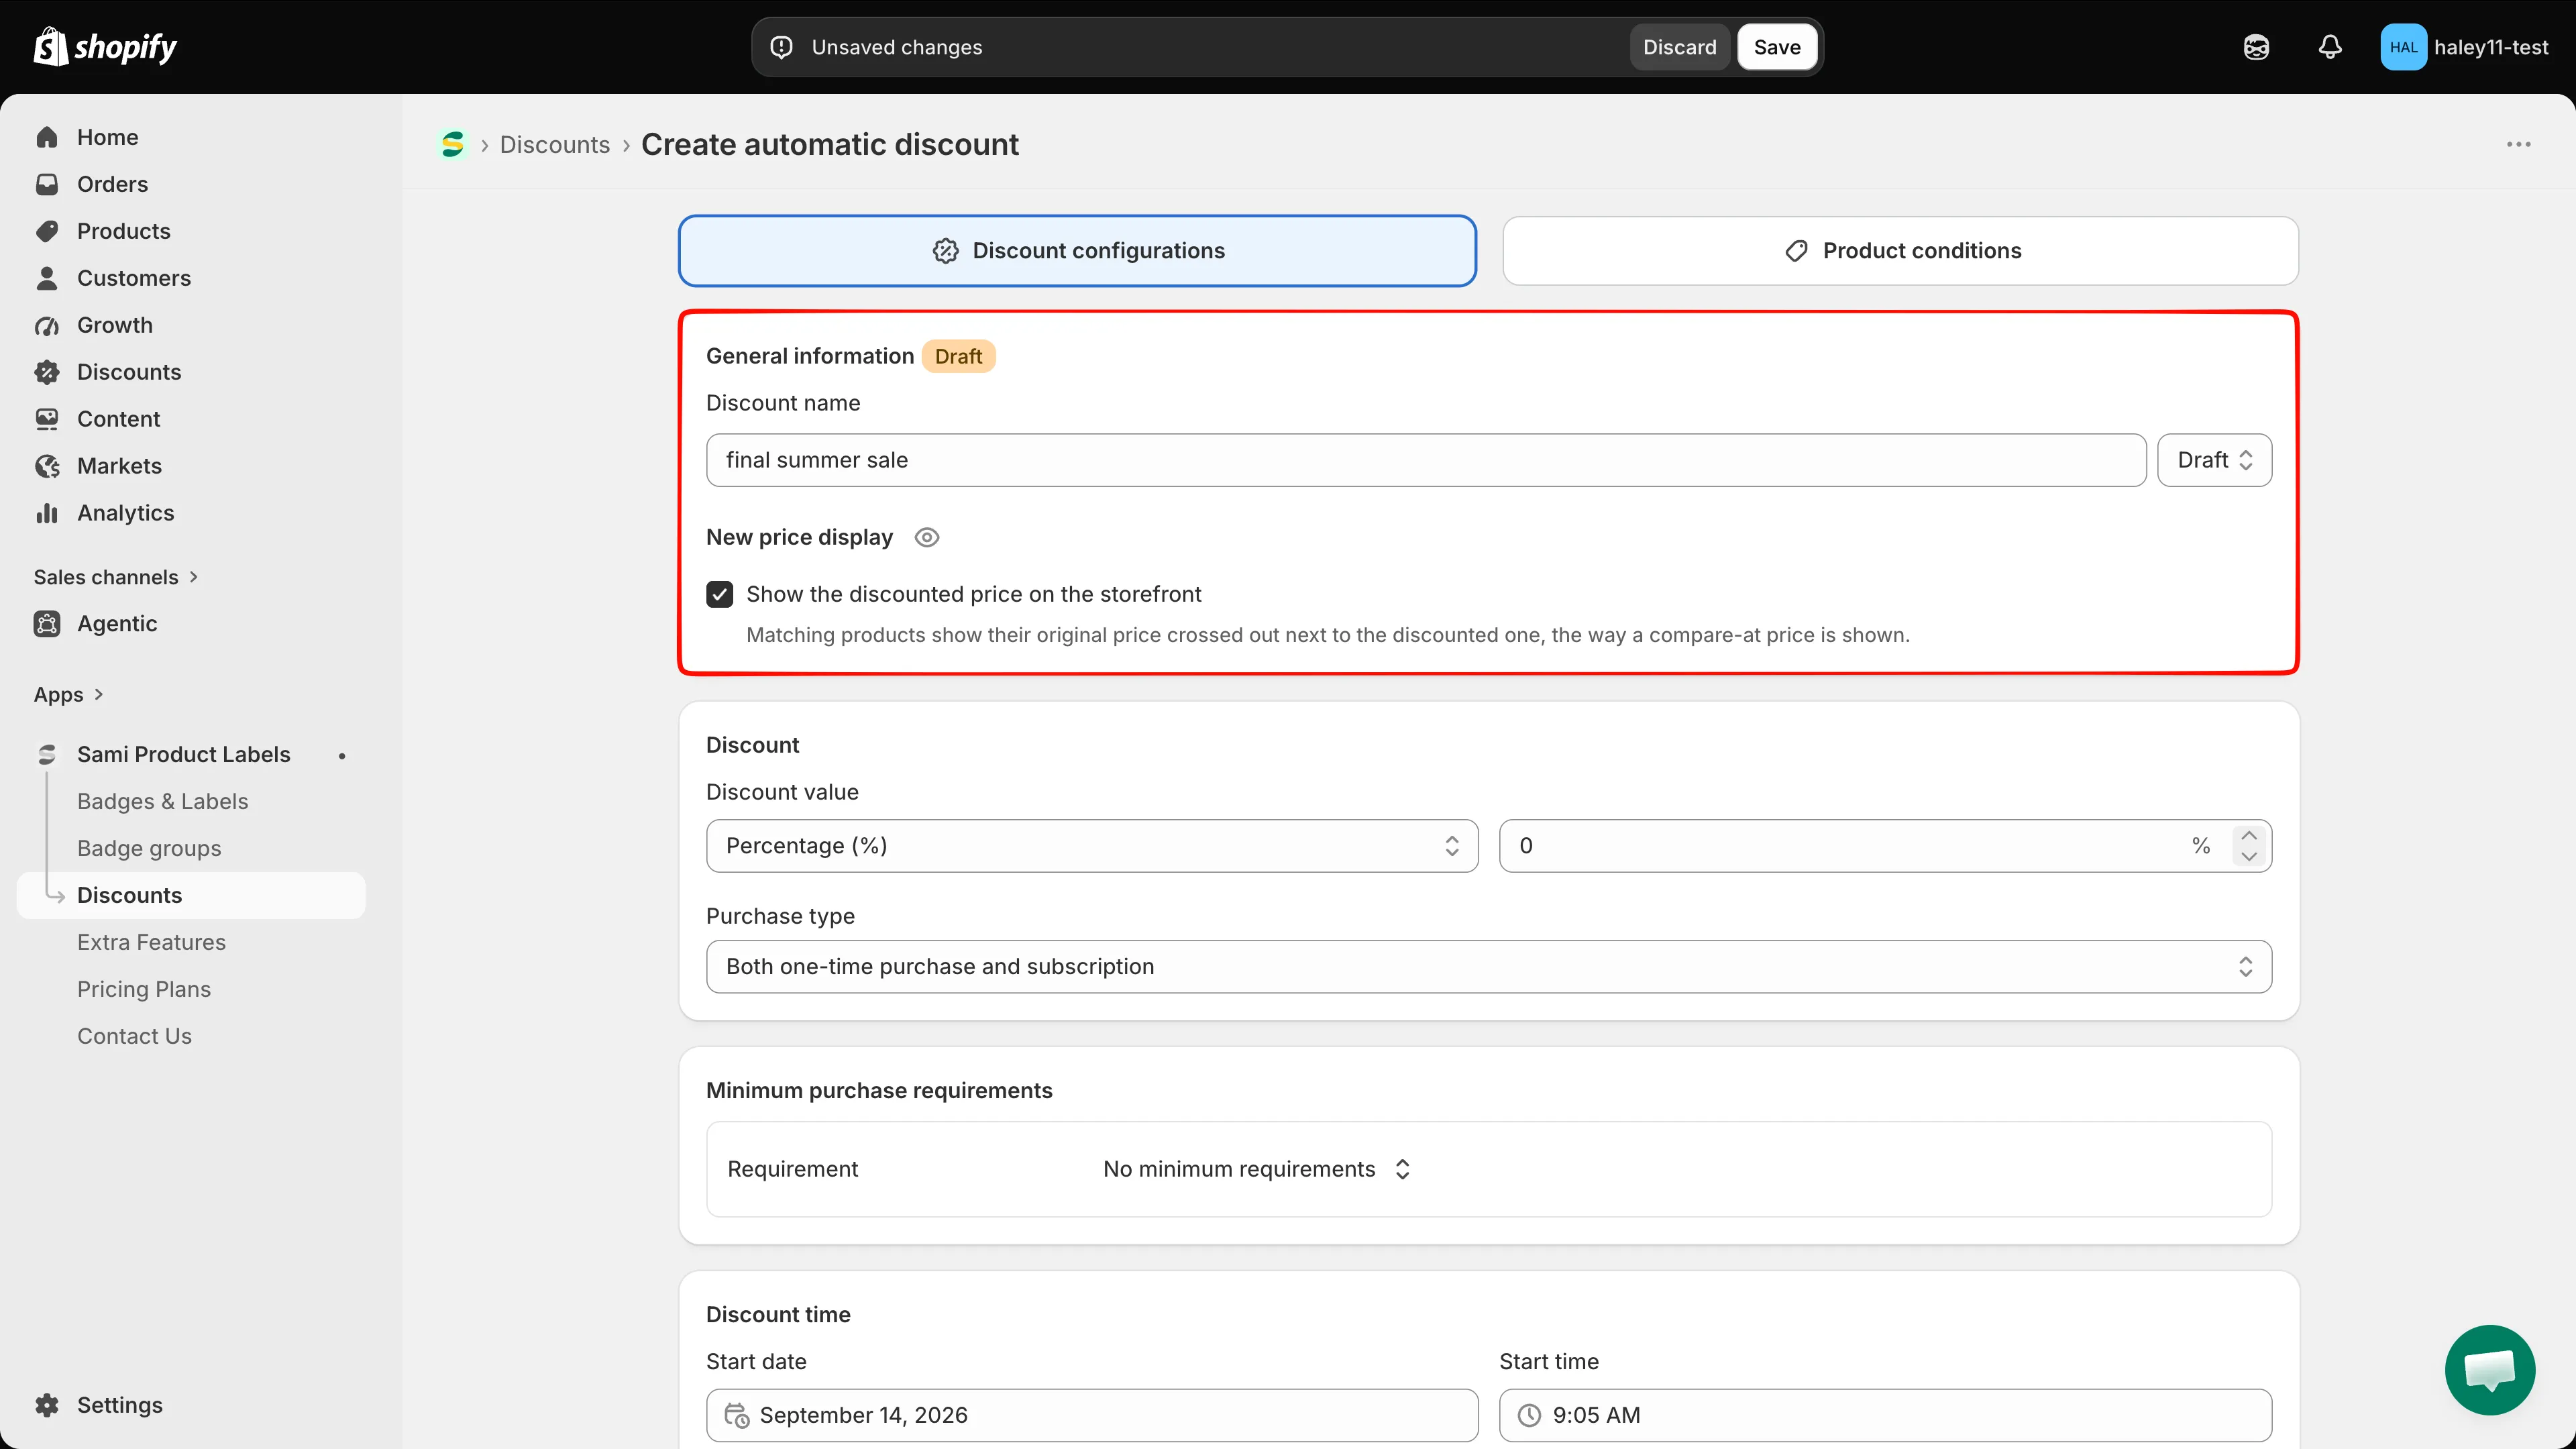
The name identifies the discount in your list and in the Shopify admin.
-
(Optional) Show the discounted price on the storefront
Section titled “(Optional) Show the discounted price on the storefront”Still in General information, tick Show the discounted price on the storefront. Matching products then show their original price crossed out next to the discounted one, the way a compare-at price is shown.
Click the eye icon next to New price display to open Discount preview and check the result on the Product page and the Checkout page.
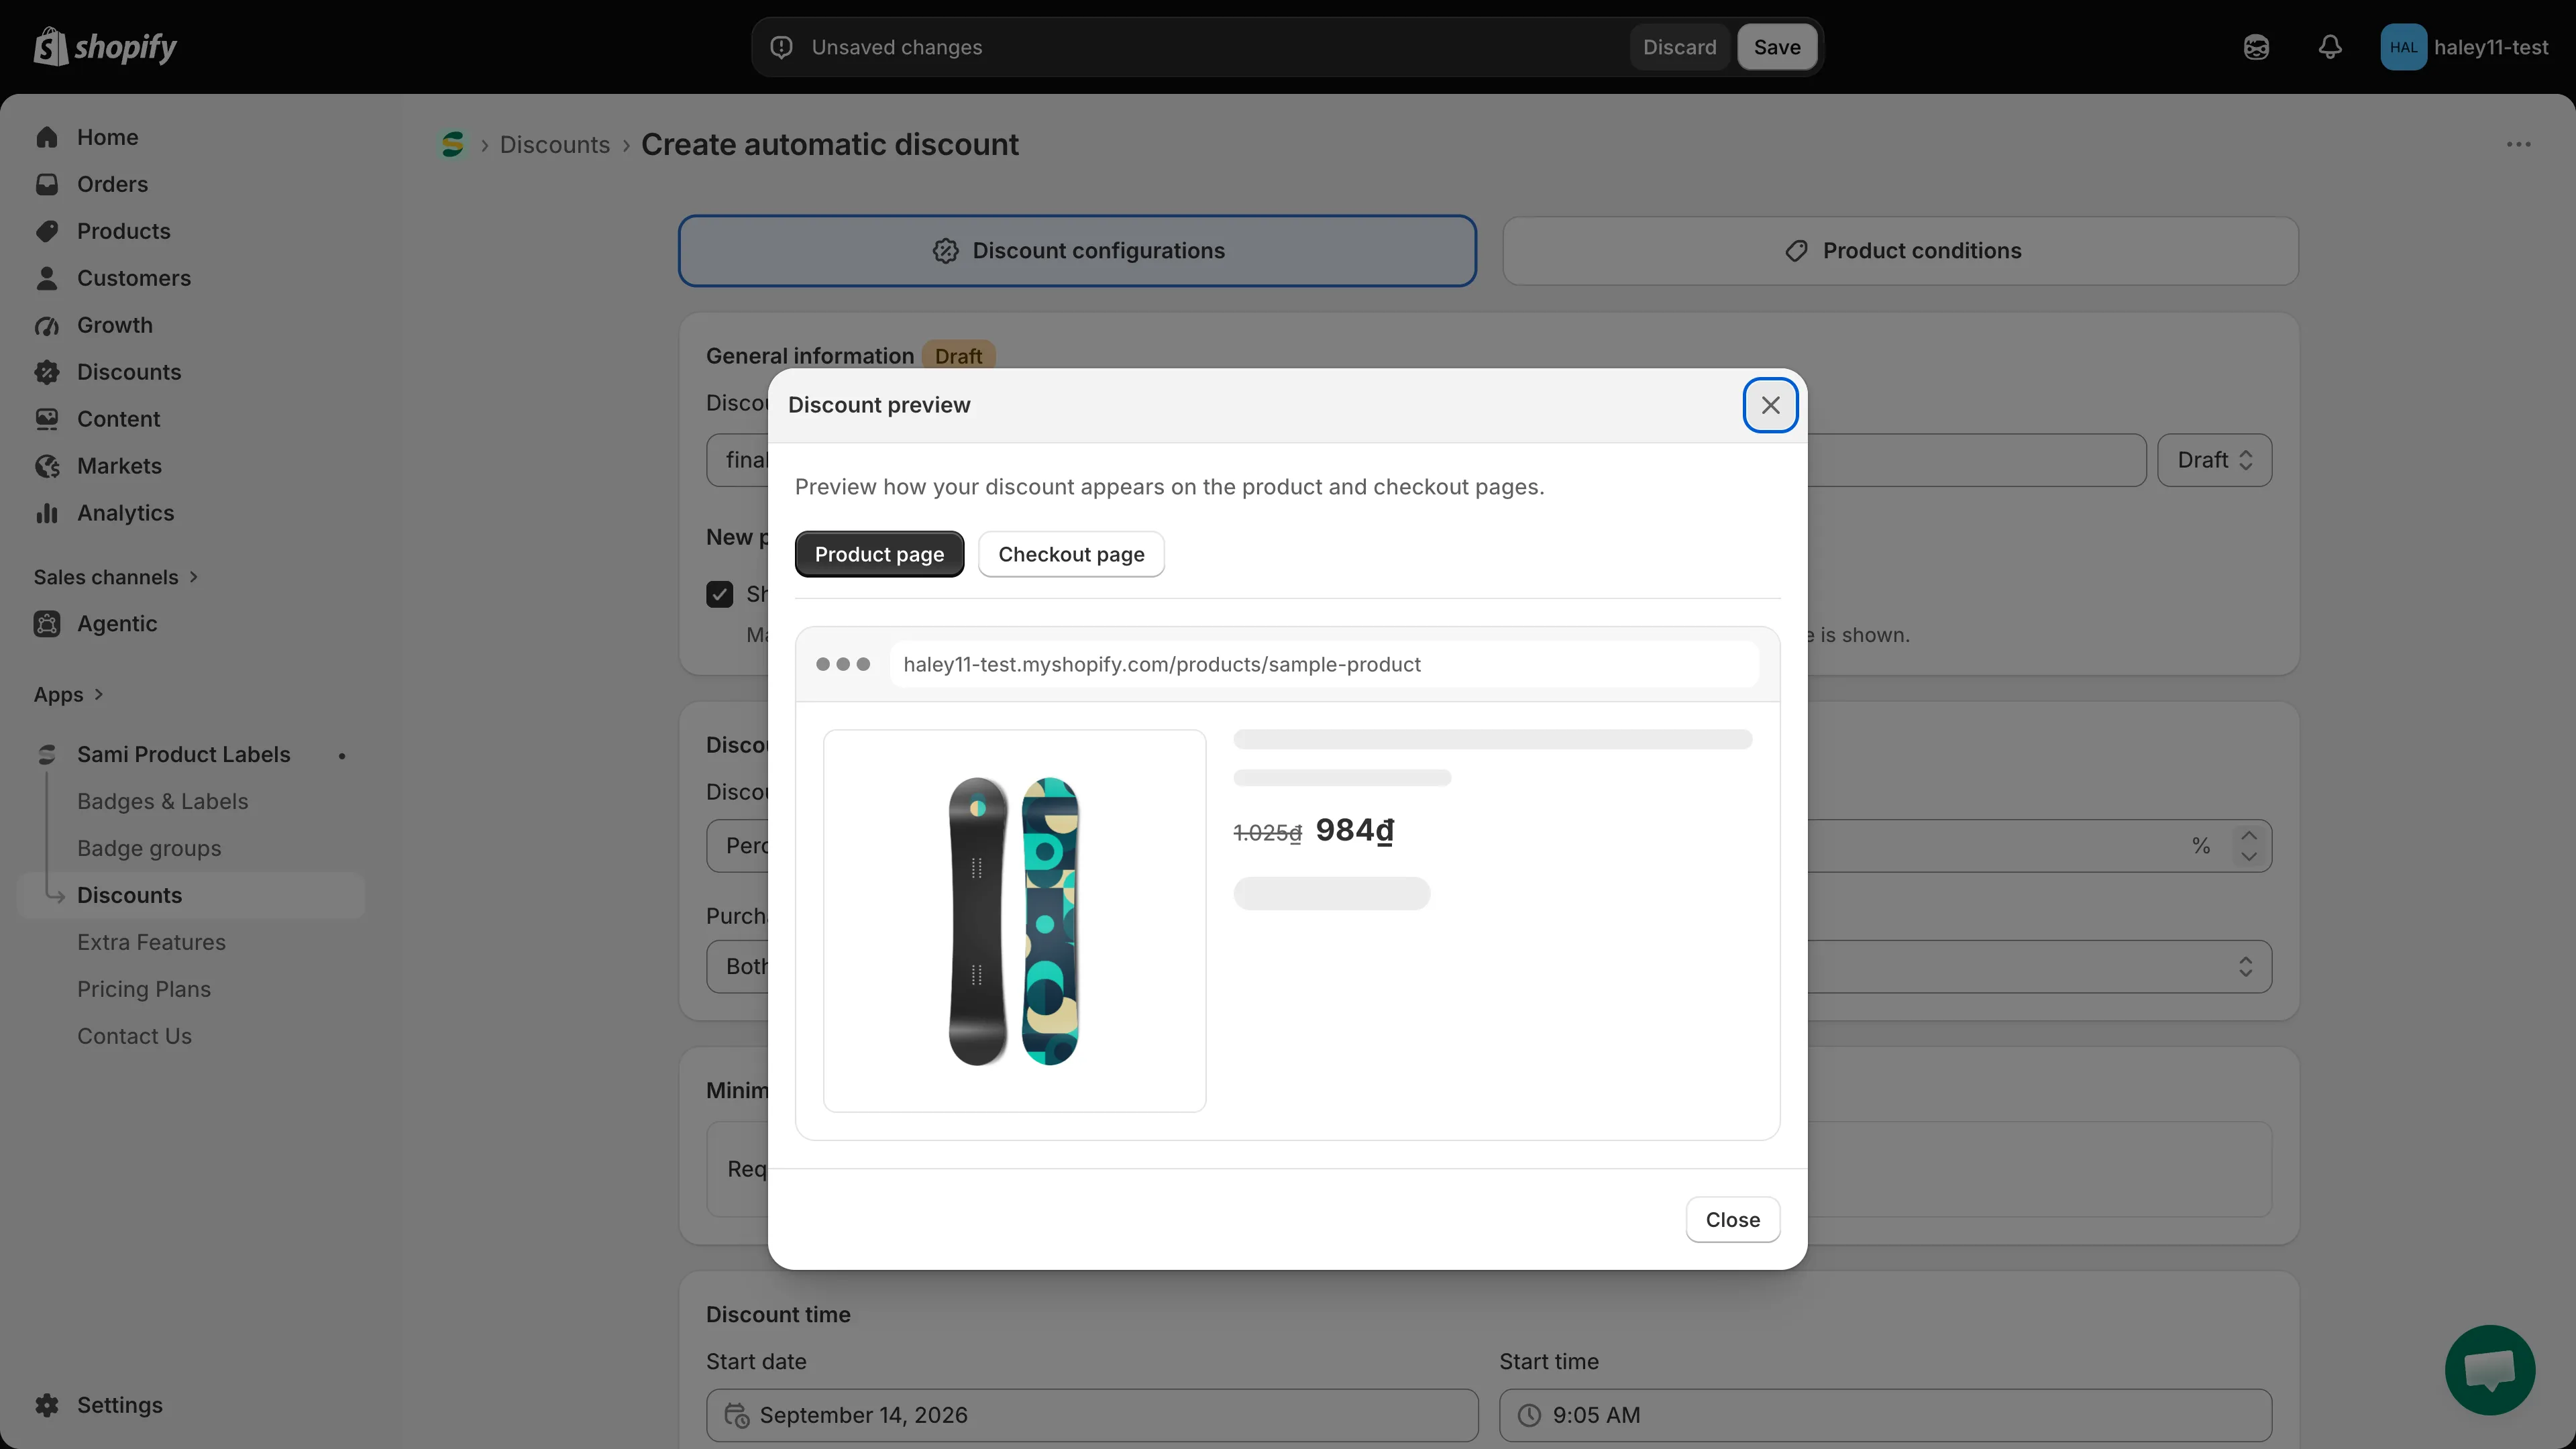
Preview how the discount reads before you publish it.
-
Set the discount value
Section titled “Set the discount value”In the Discount section, pick a Discount value type and enter the number:
Type What it does Percentage (%) Takes that percentage off each matching item. Maximum 100%. Fixed amount Takes that amount off each matching item, in your store currency. New price Sells each matching item at the price you type, instead of its own price. Then choose a Purchase type: One-time purchase, Subscription, or Both one-time purchase and subscription.
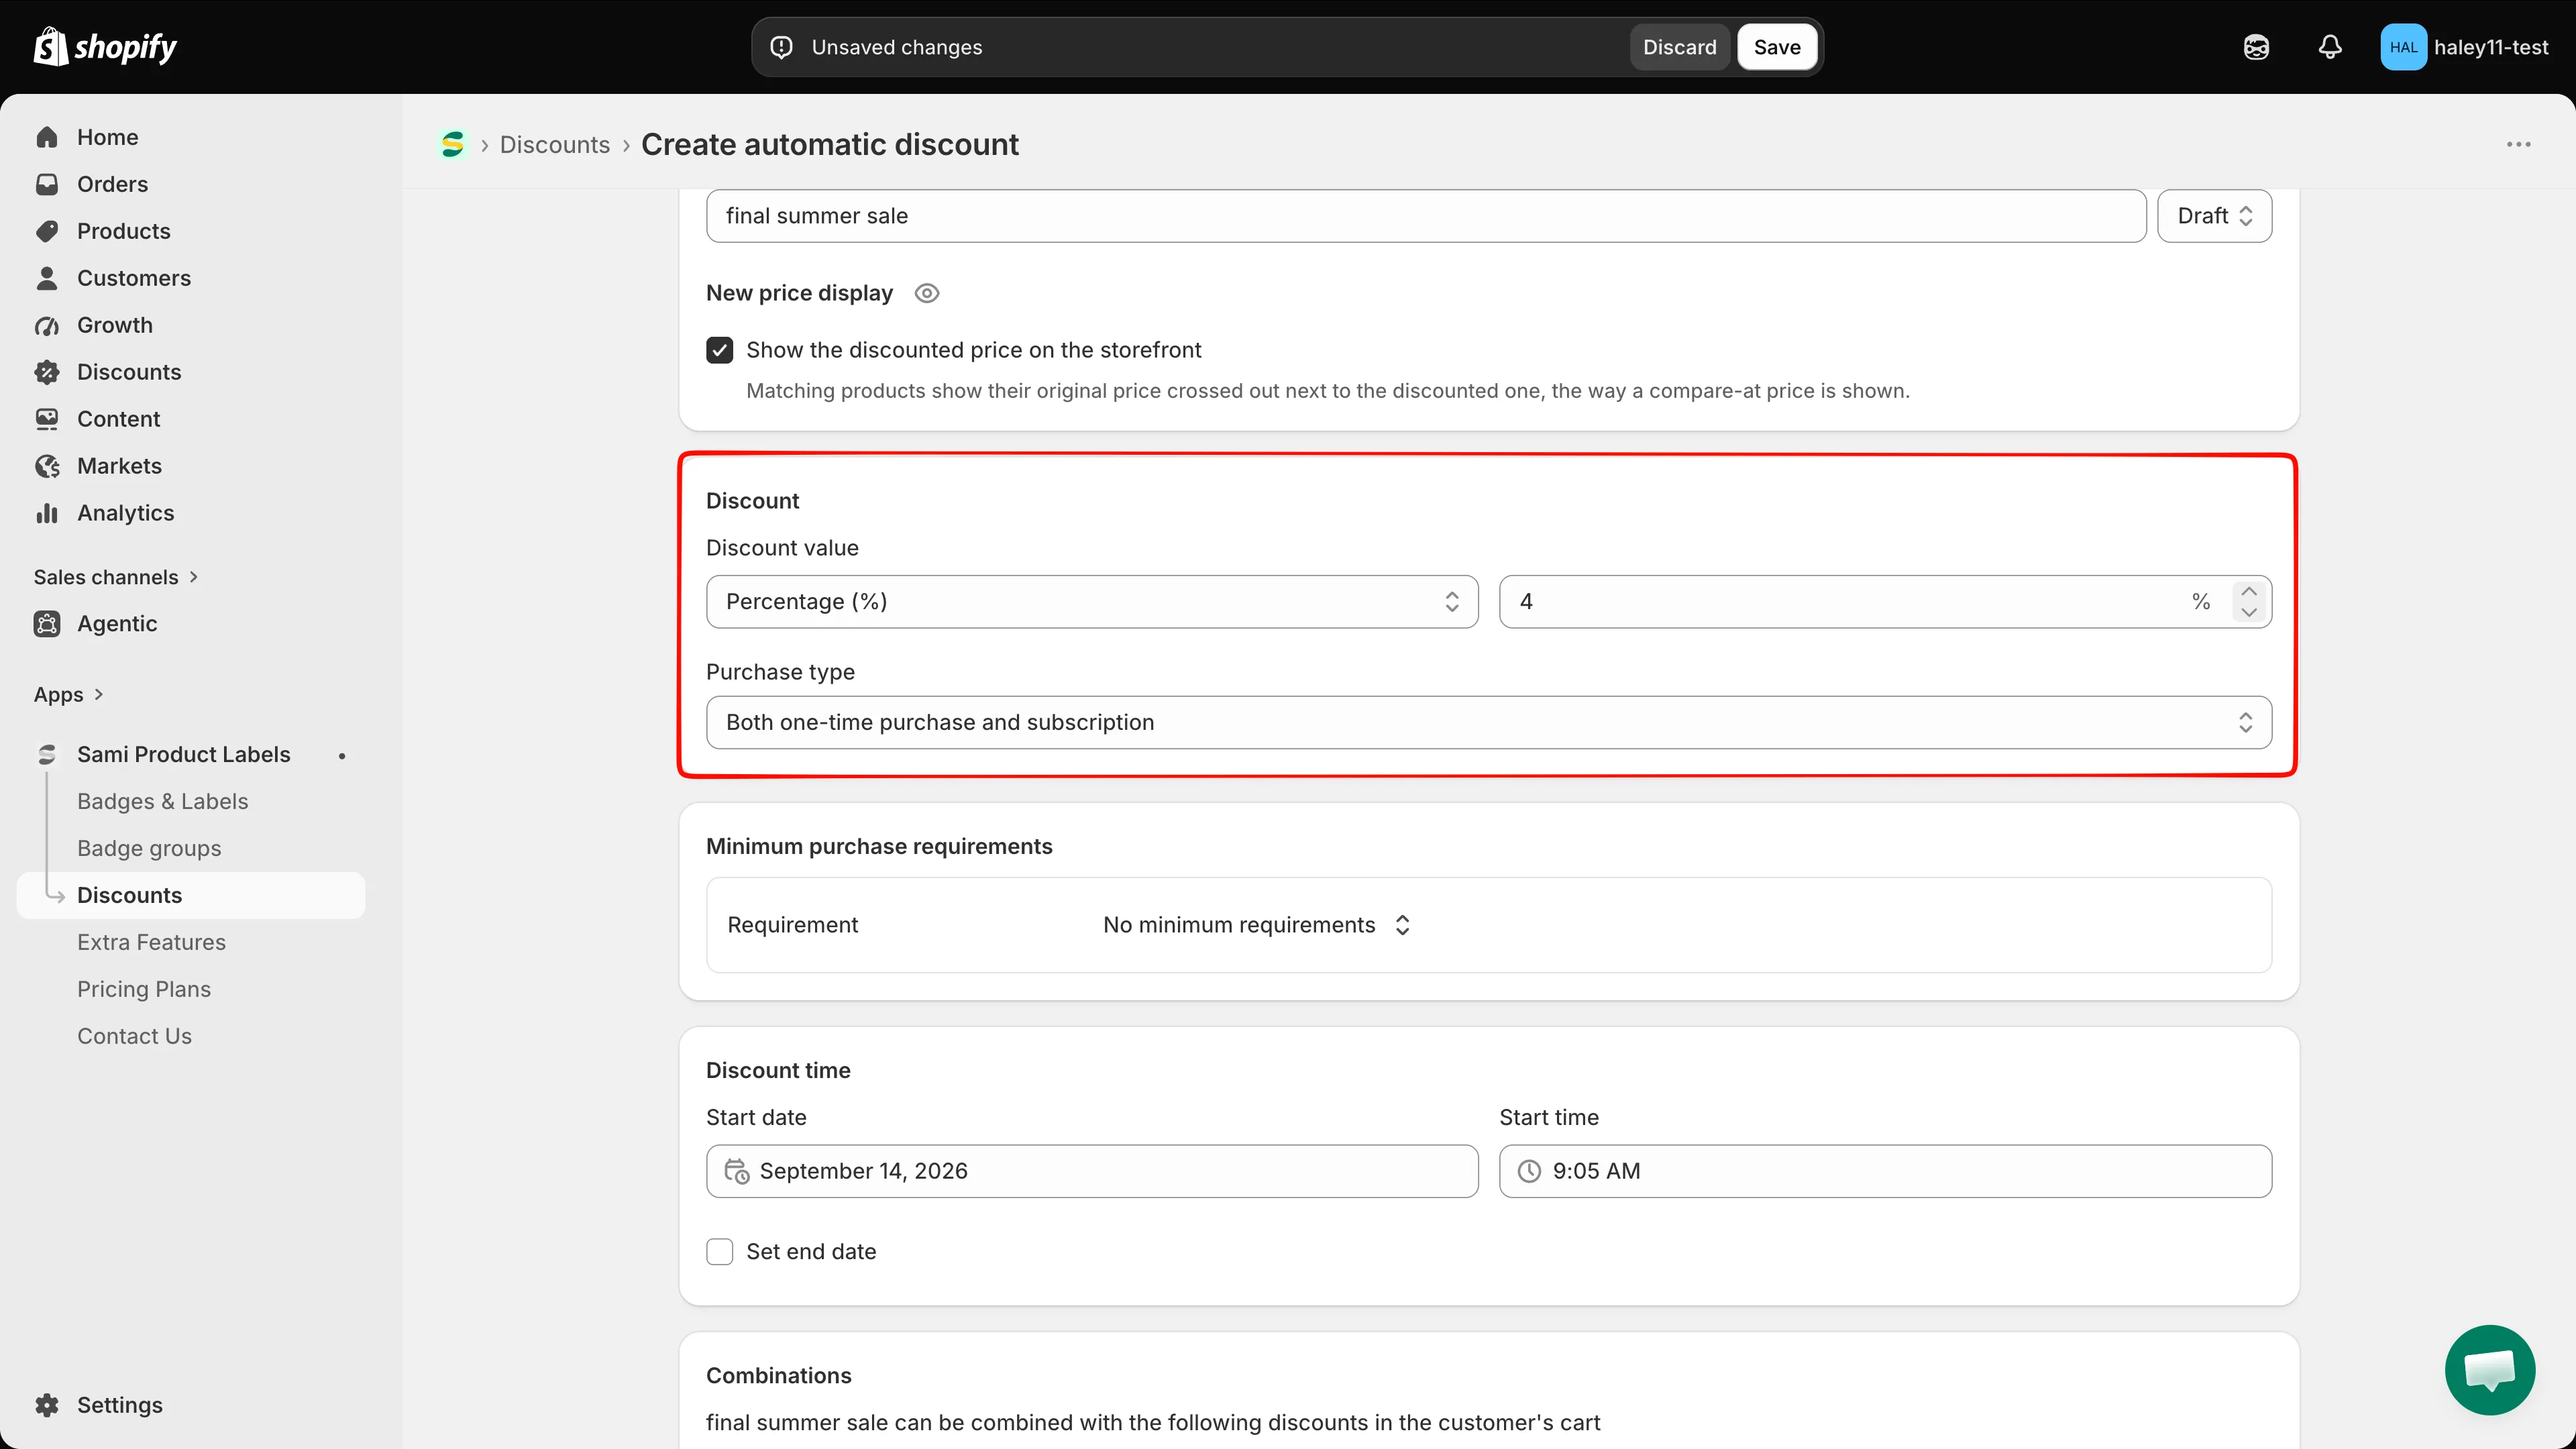
The value field switches between a % suffix and your currency prefix.
-
(Optional) Add a minimum purchase requirement
Section titled “(Optional) Add a minimum purchase requirement”Open the Requirement selector in Minimum purchase requirements and choose one of:
Option What the cart must reach No minimum requirements Nothing — the discount always applies. Minimum purchase amount A subtotal you set, in your store currency. Minimum quantity of items A number of items you set. Picking either of the last two adds a Requirement value field below. The requirement counts only the products this discount applies to.
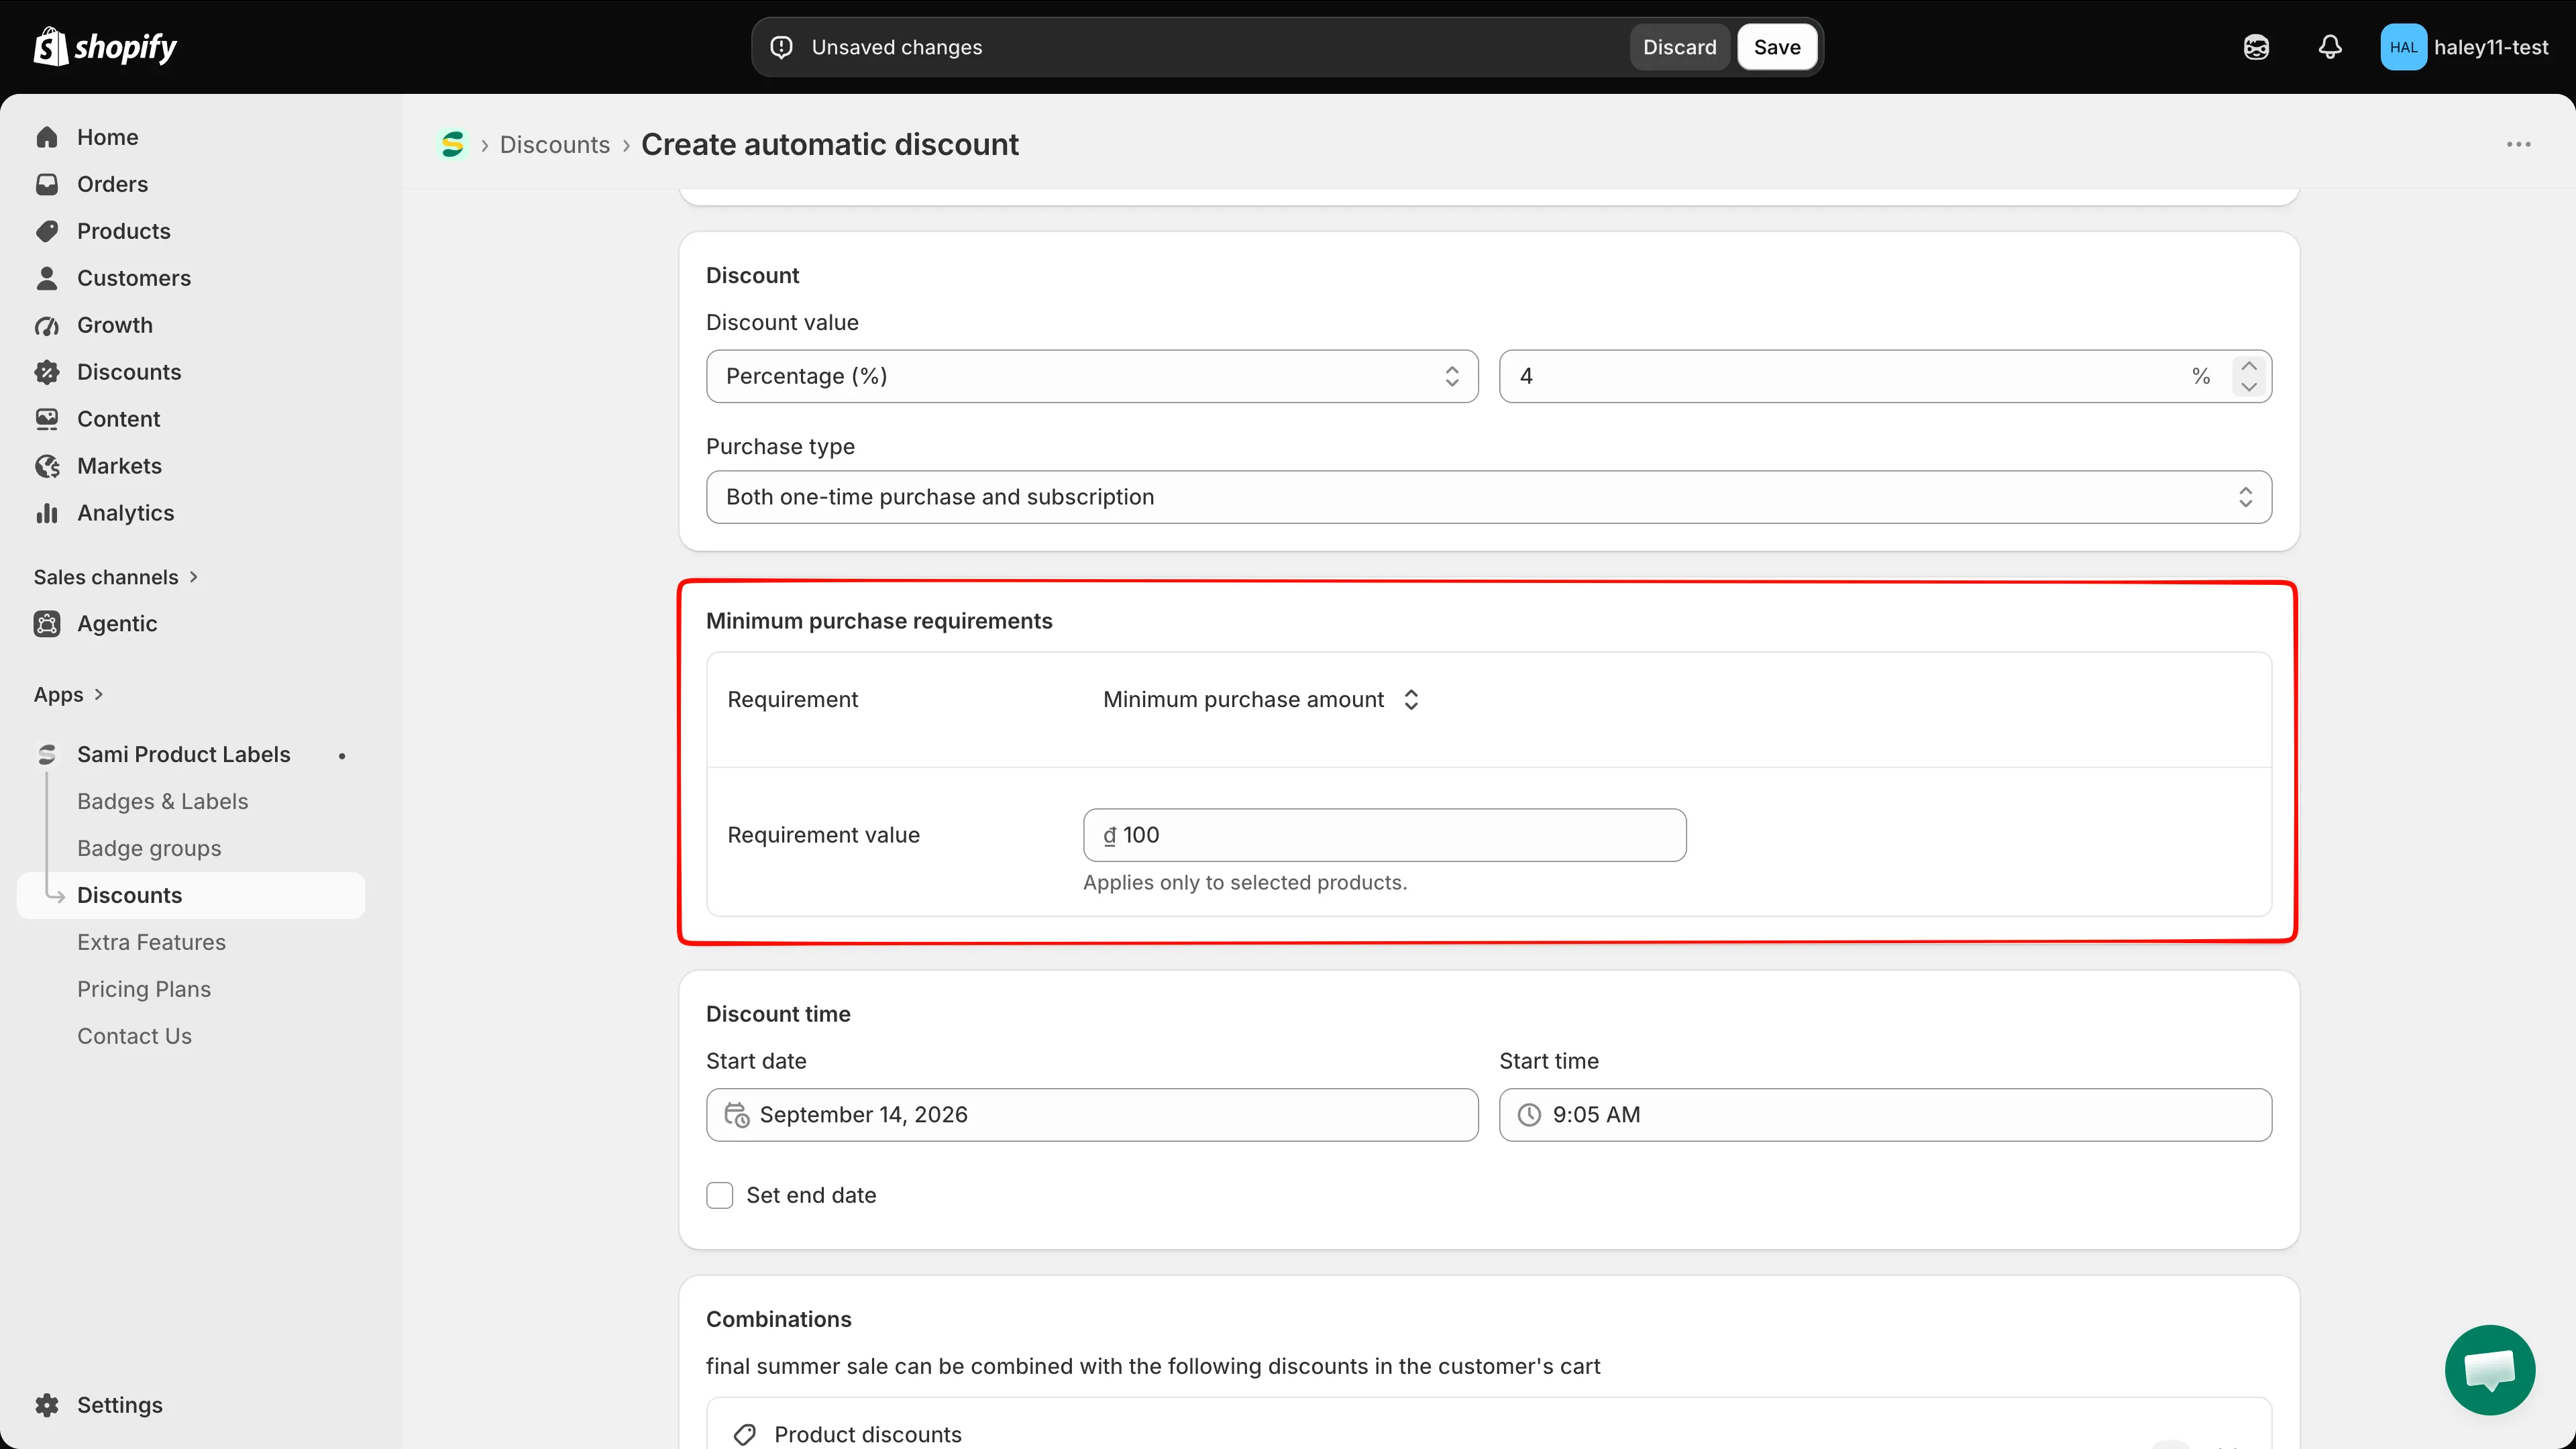
The value counts only the products the discount applies to.
-
Schedule the discount
Section titled “Schedule the discount”In Discount time, set the Start date and Start time. The fields are pre-filled with the current date and time.
Tick Set end date to add End date and End time fields. Leave it unticked to run the discount until you deactivate it.
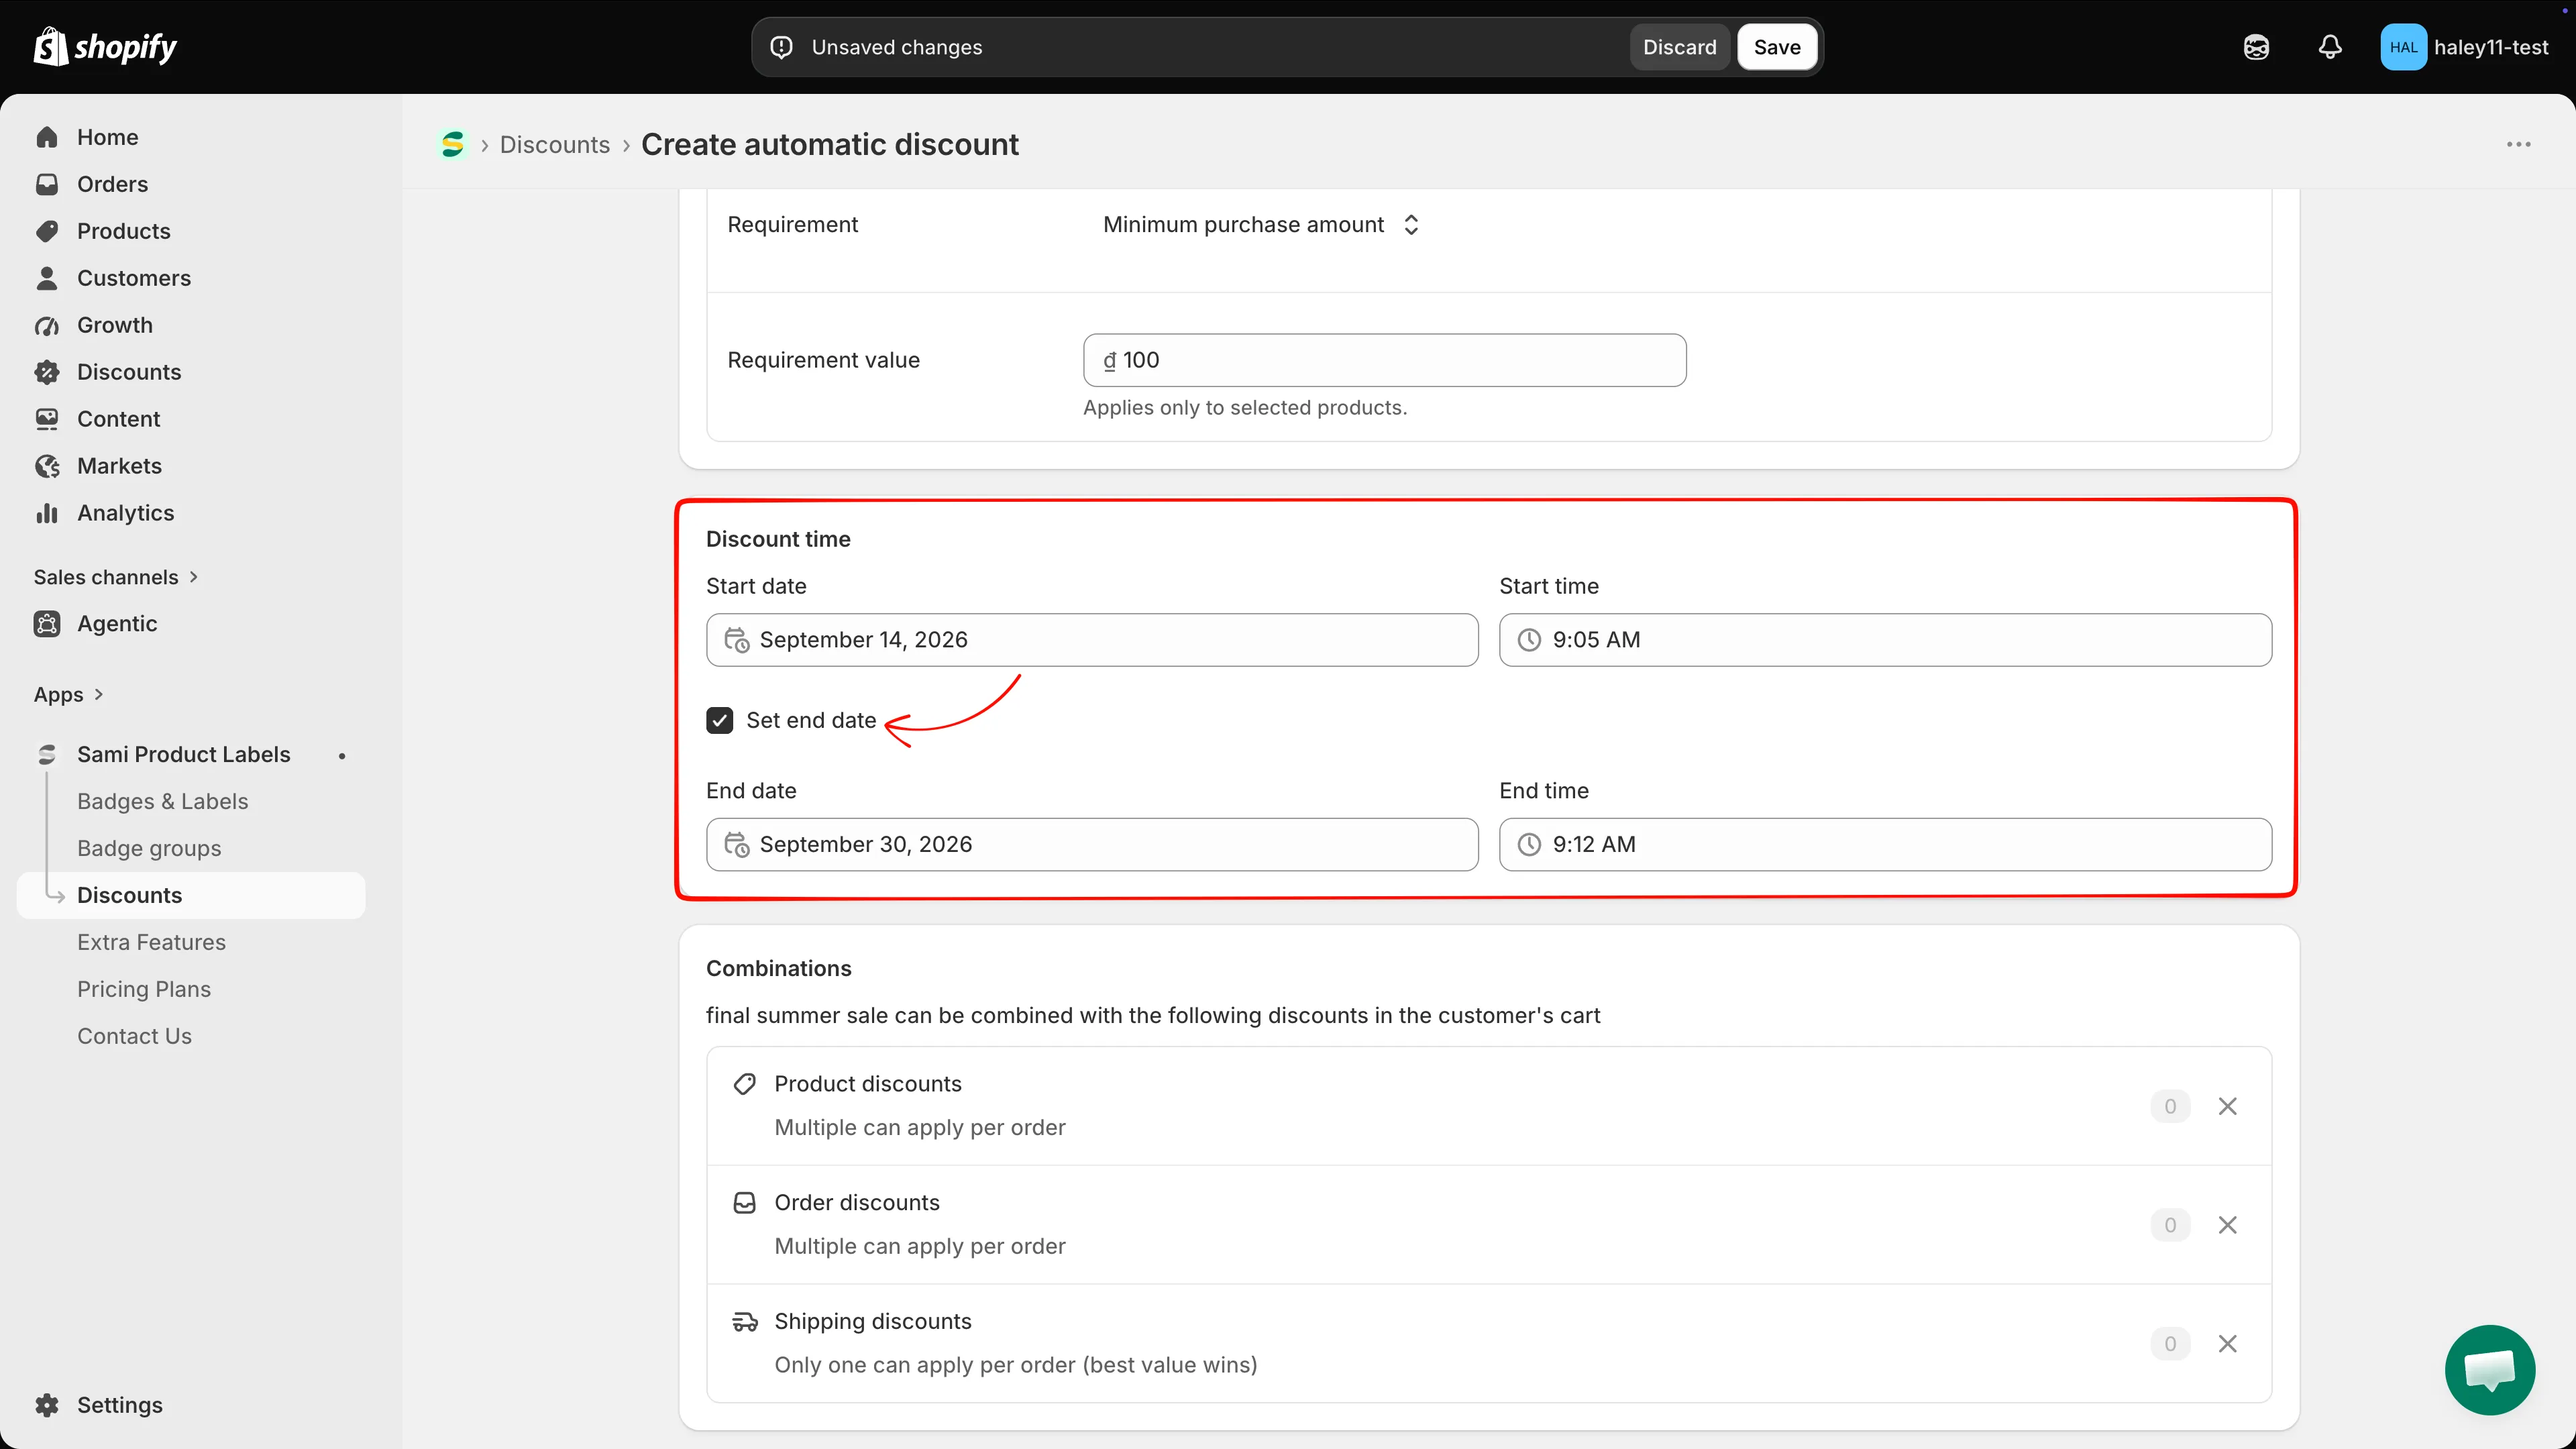
A discount with a start date in the future is listed as Scheduled.
-
Choose which discounts it can combine with
Section titled “Choose which discounts it can combine with”Combinations starts with all three types allowed. Each row shows how many active discounts of that type your store has — click the counter to list them.
Row Behaviour Product discounts Multiple can apply per order. Order discounts Multiple can apply per order. Shipping discounts Only one can apply per order (best value wins). Click the x on a row to stop this discount from combining with that type. Once a row is removed, a pencil icon appears in the section header — use it to tick the types back on.
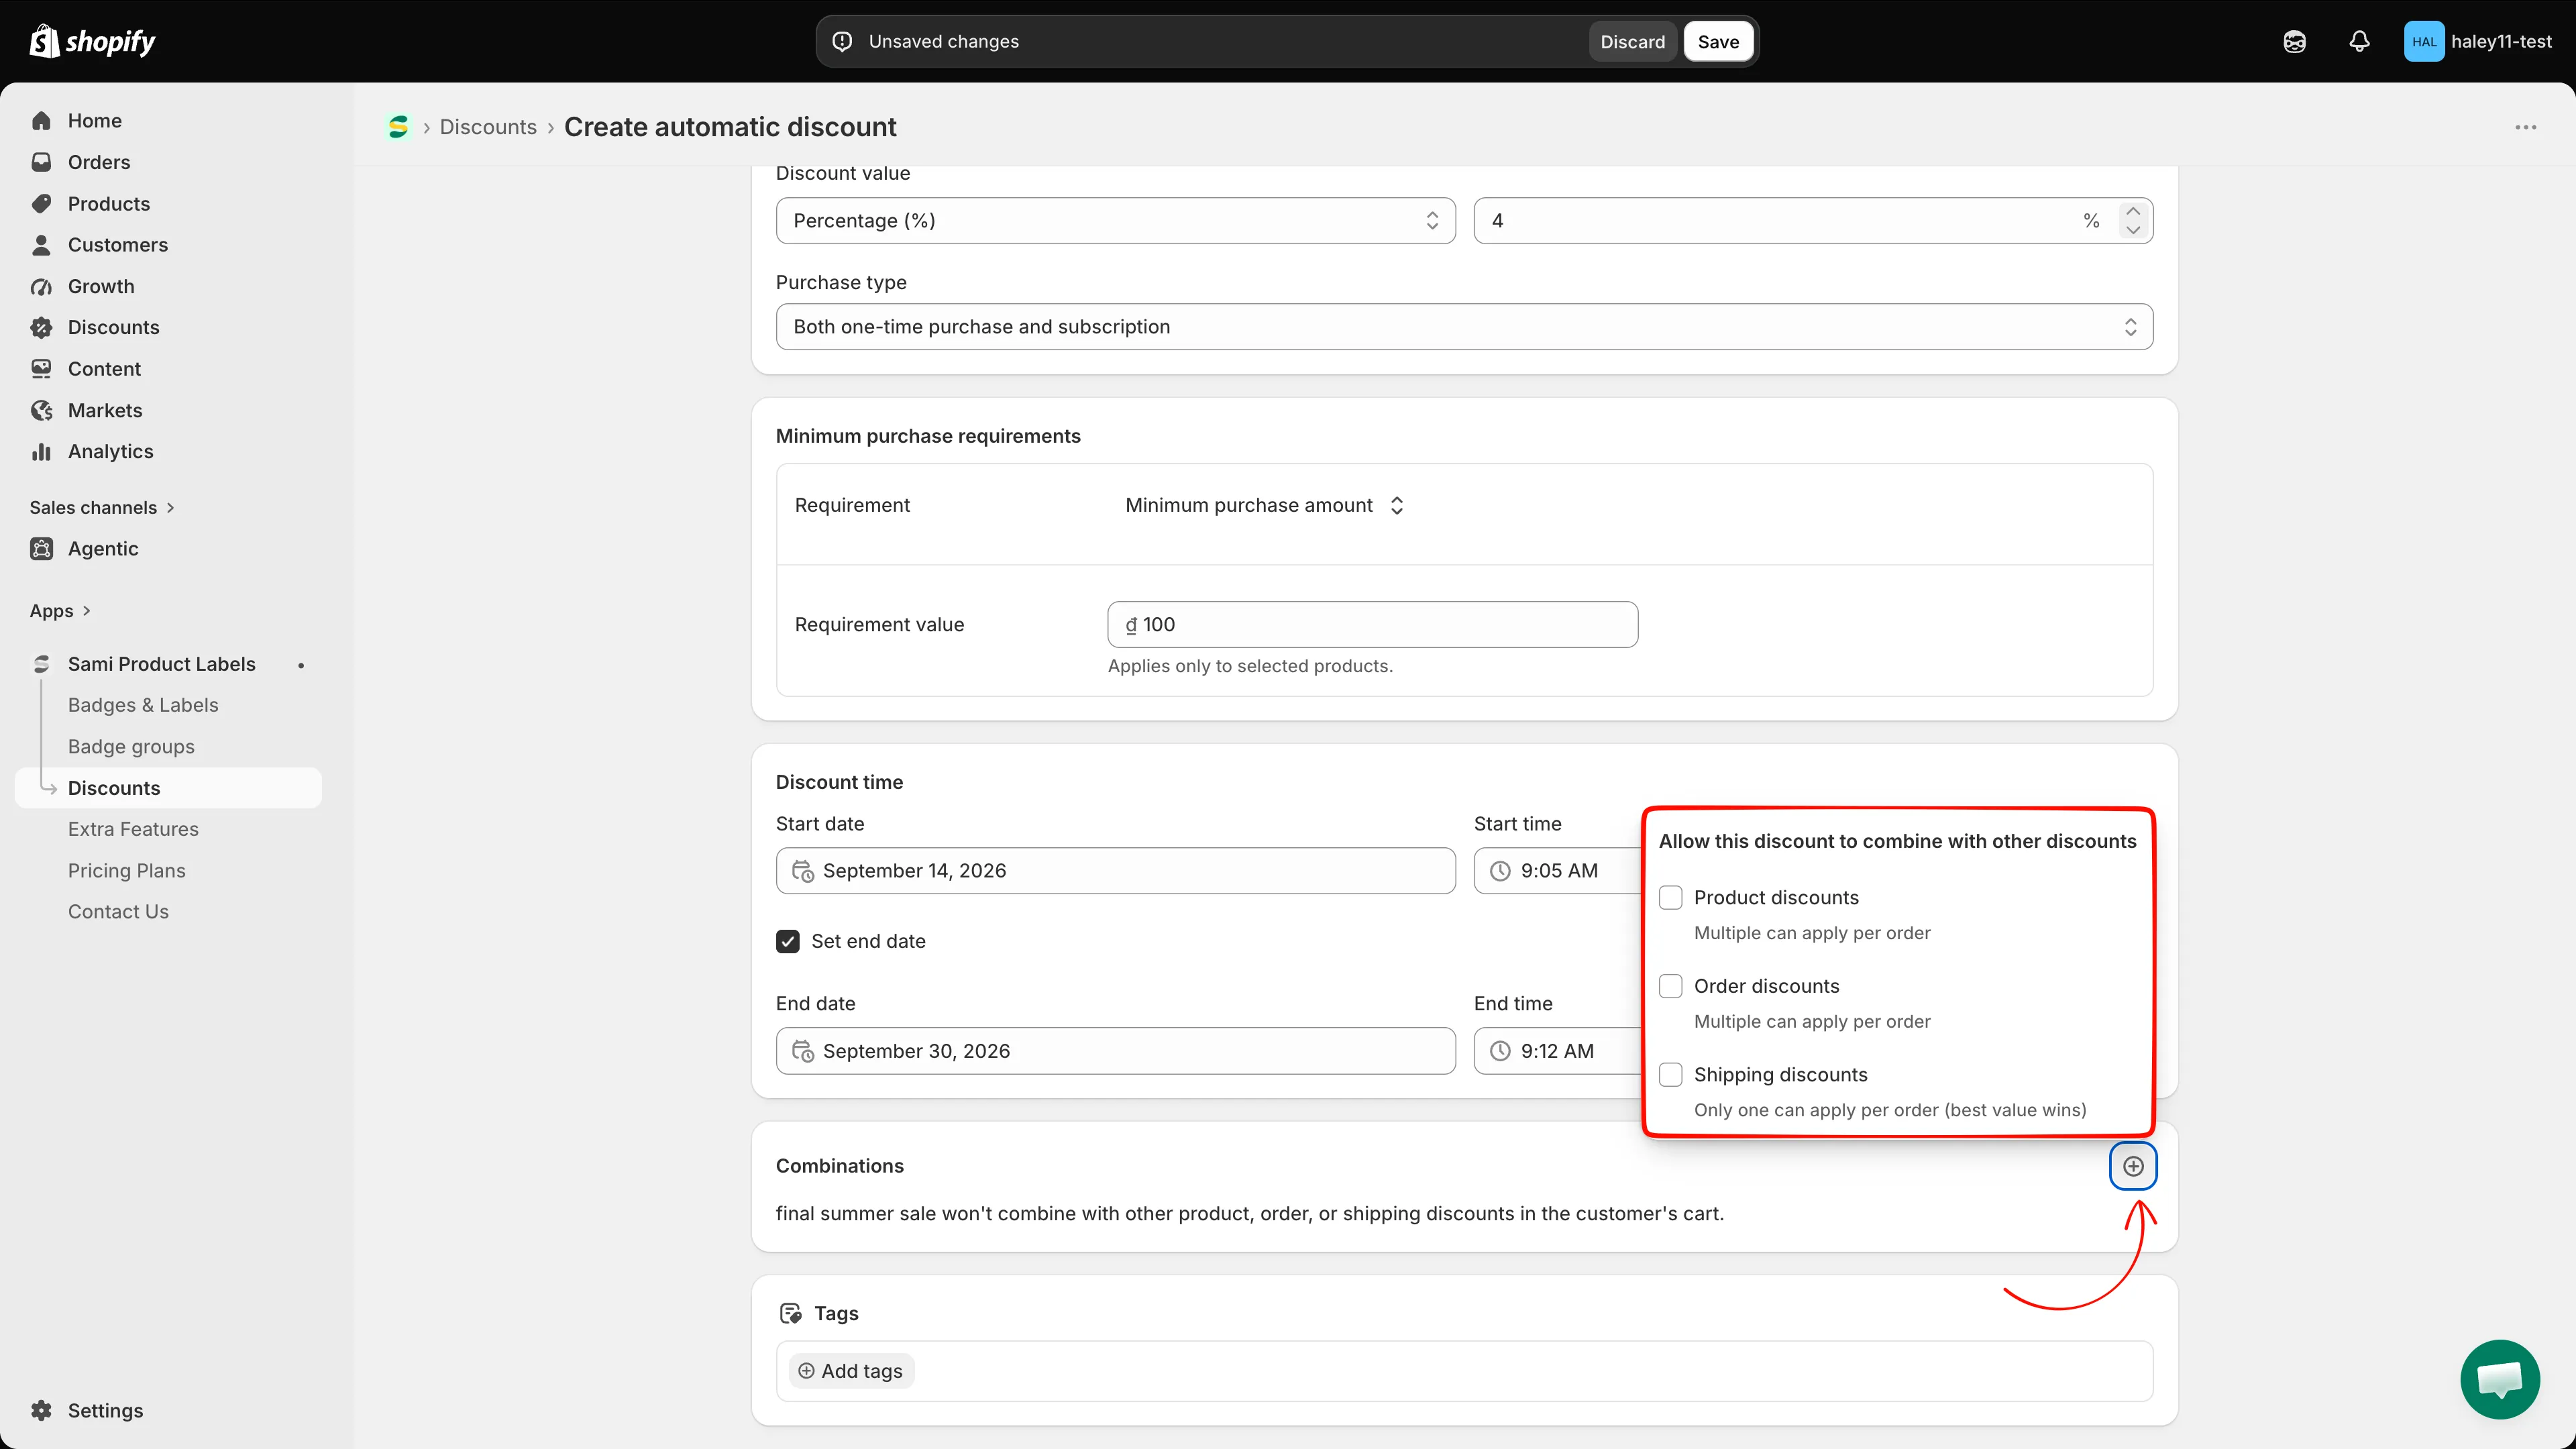
The pencil icon reopens the full list of combination types.
-
(Optional) Add tags
Section titled “(Optional) Add tags”In the Tags section, click Add tags to open the Discount tags popover. Tick an existing tag, or type a new one and click Add tag “…”.
Tags are internal. They are shared across the discounts in your store and are used to filter the combination list.
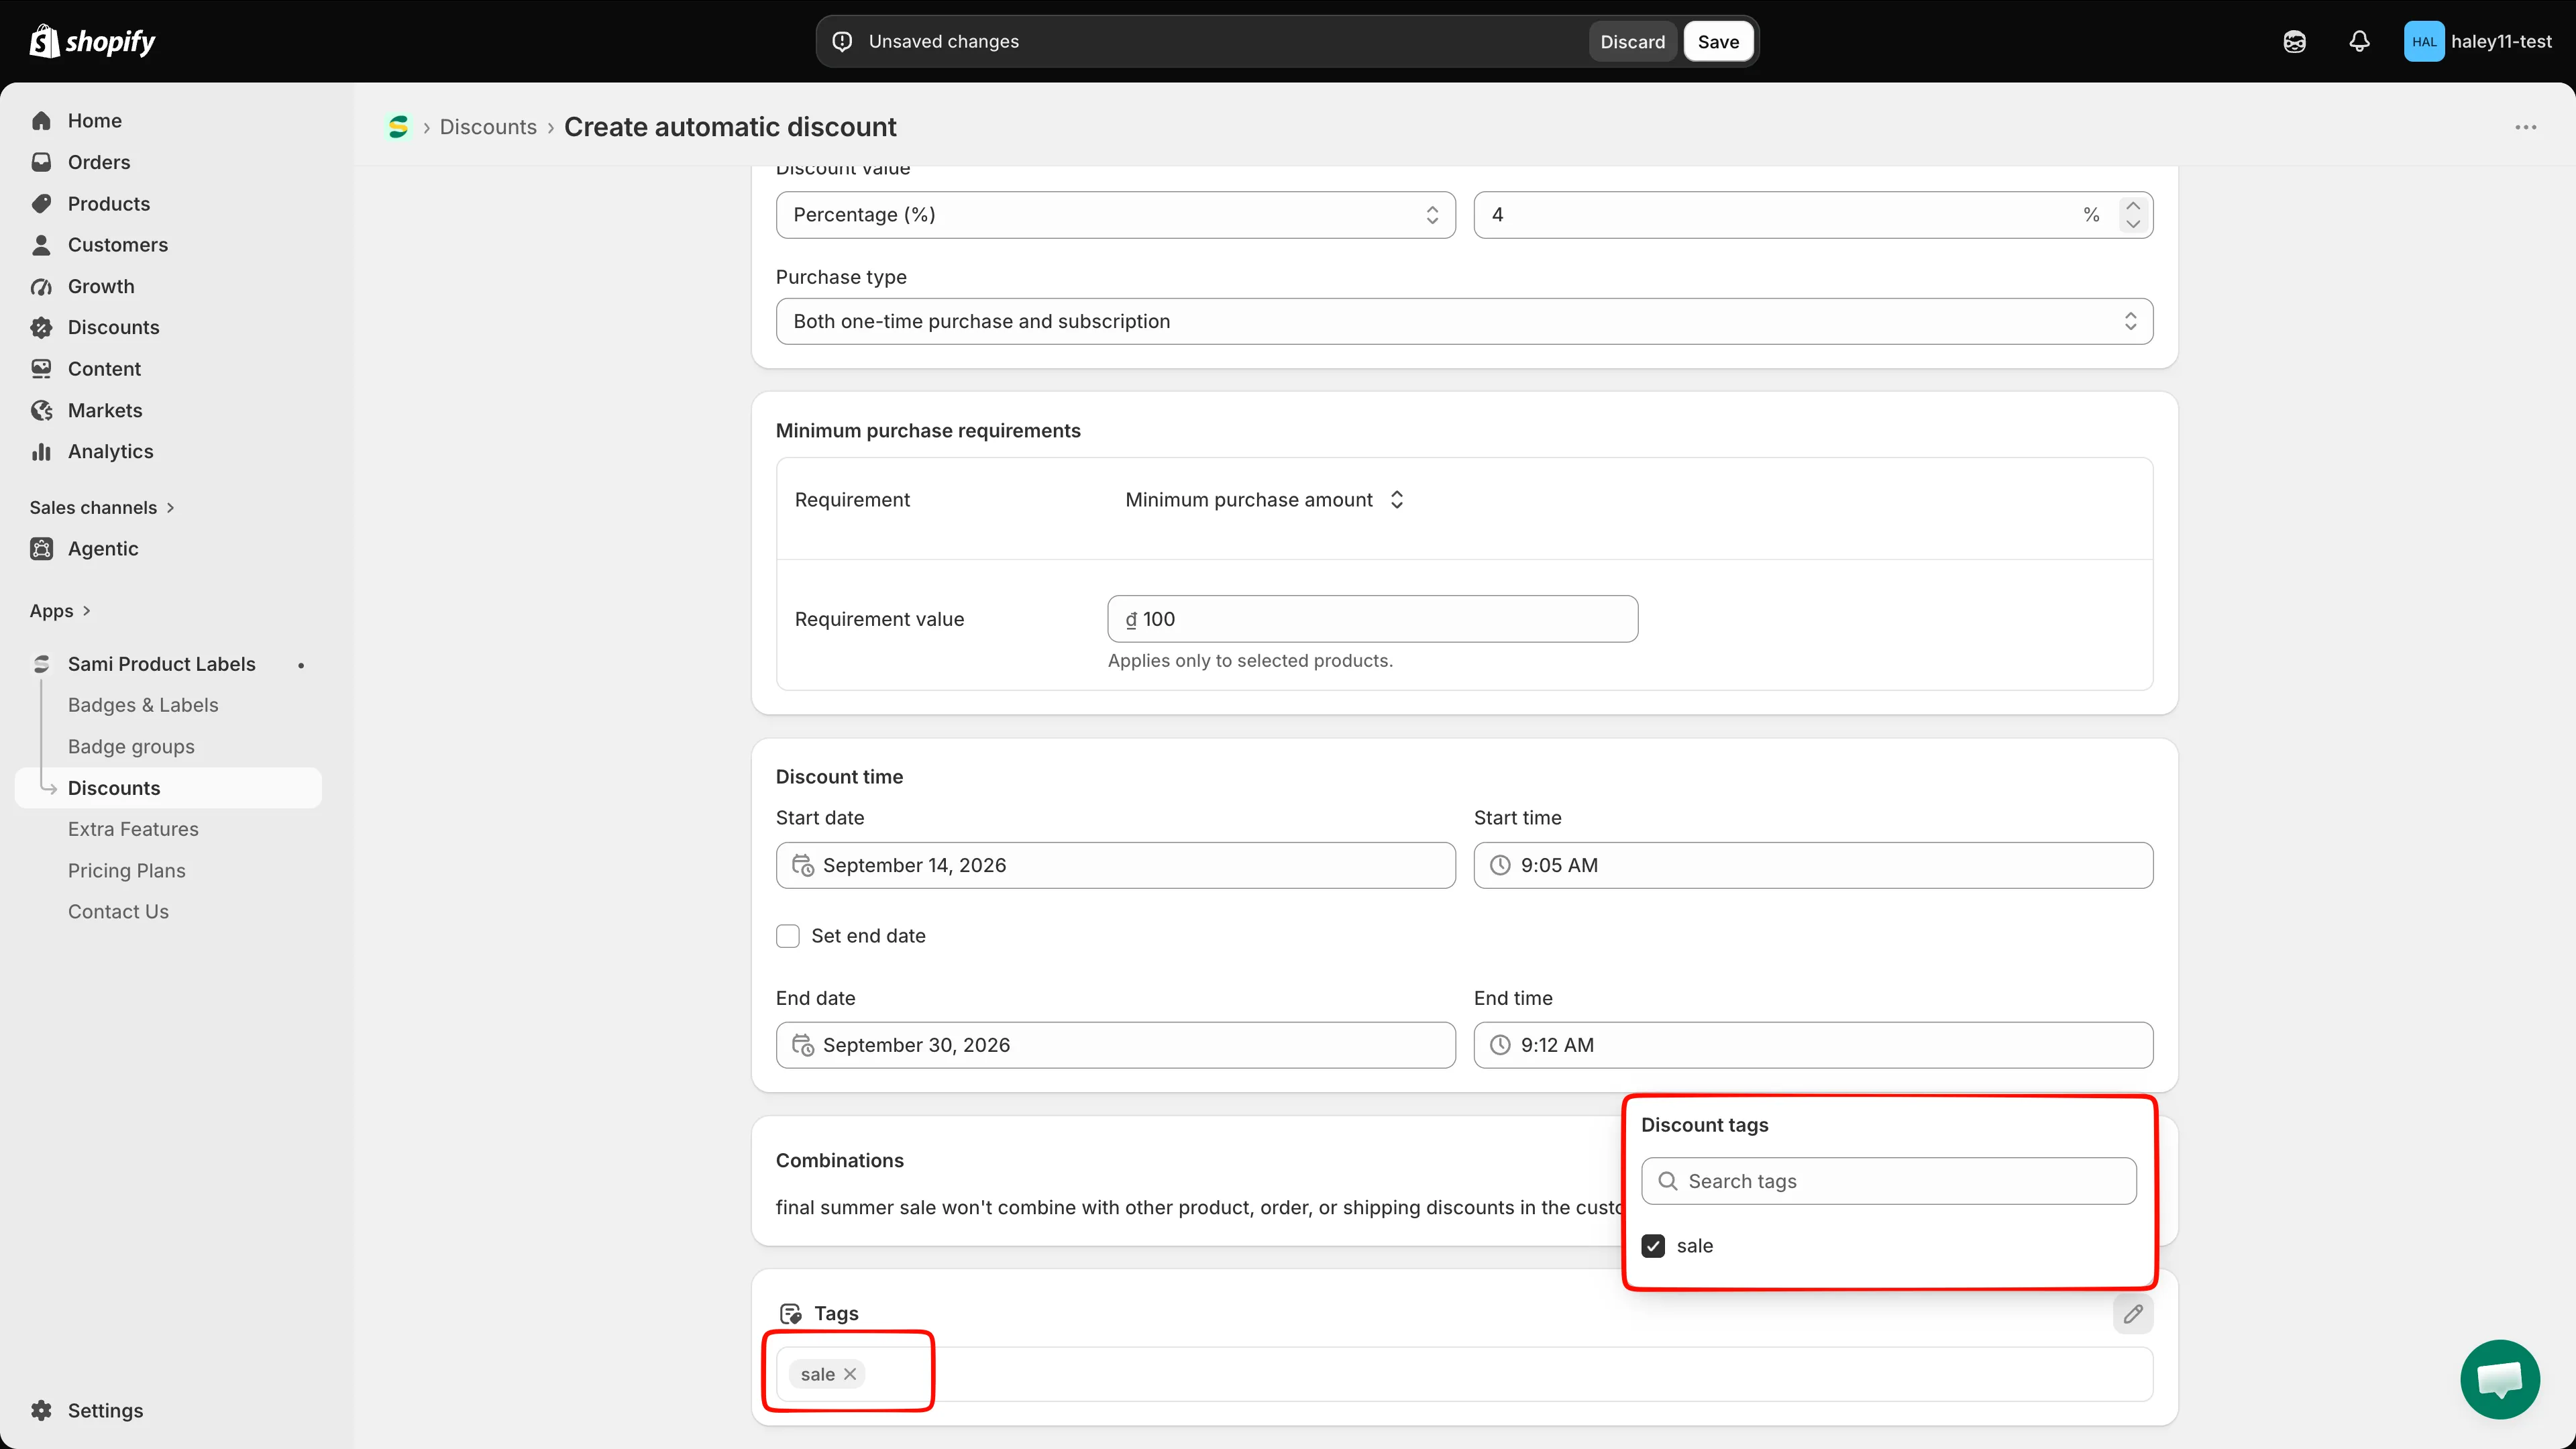
Tags group related campaigns without affecting what shoppers see.
-
Choose which products the discount applies to
Section titled “Choose which products the discount applies to”Switch to the Product conditions tab and pick a mode:
Mode What it covers All products Every product in the cart gets this discount. Specific products Only the products or variants you pick. Matching conditions Every product that matches the collections, titles, or tags you set. For Specific products, type in the Search products field or click Browse to open the Shopify product picker. Selected products are listed with a thumbnail; a product with several variants shows how many are selected and an Edit link to change them. The x removes a product from the list.
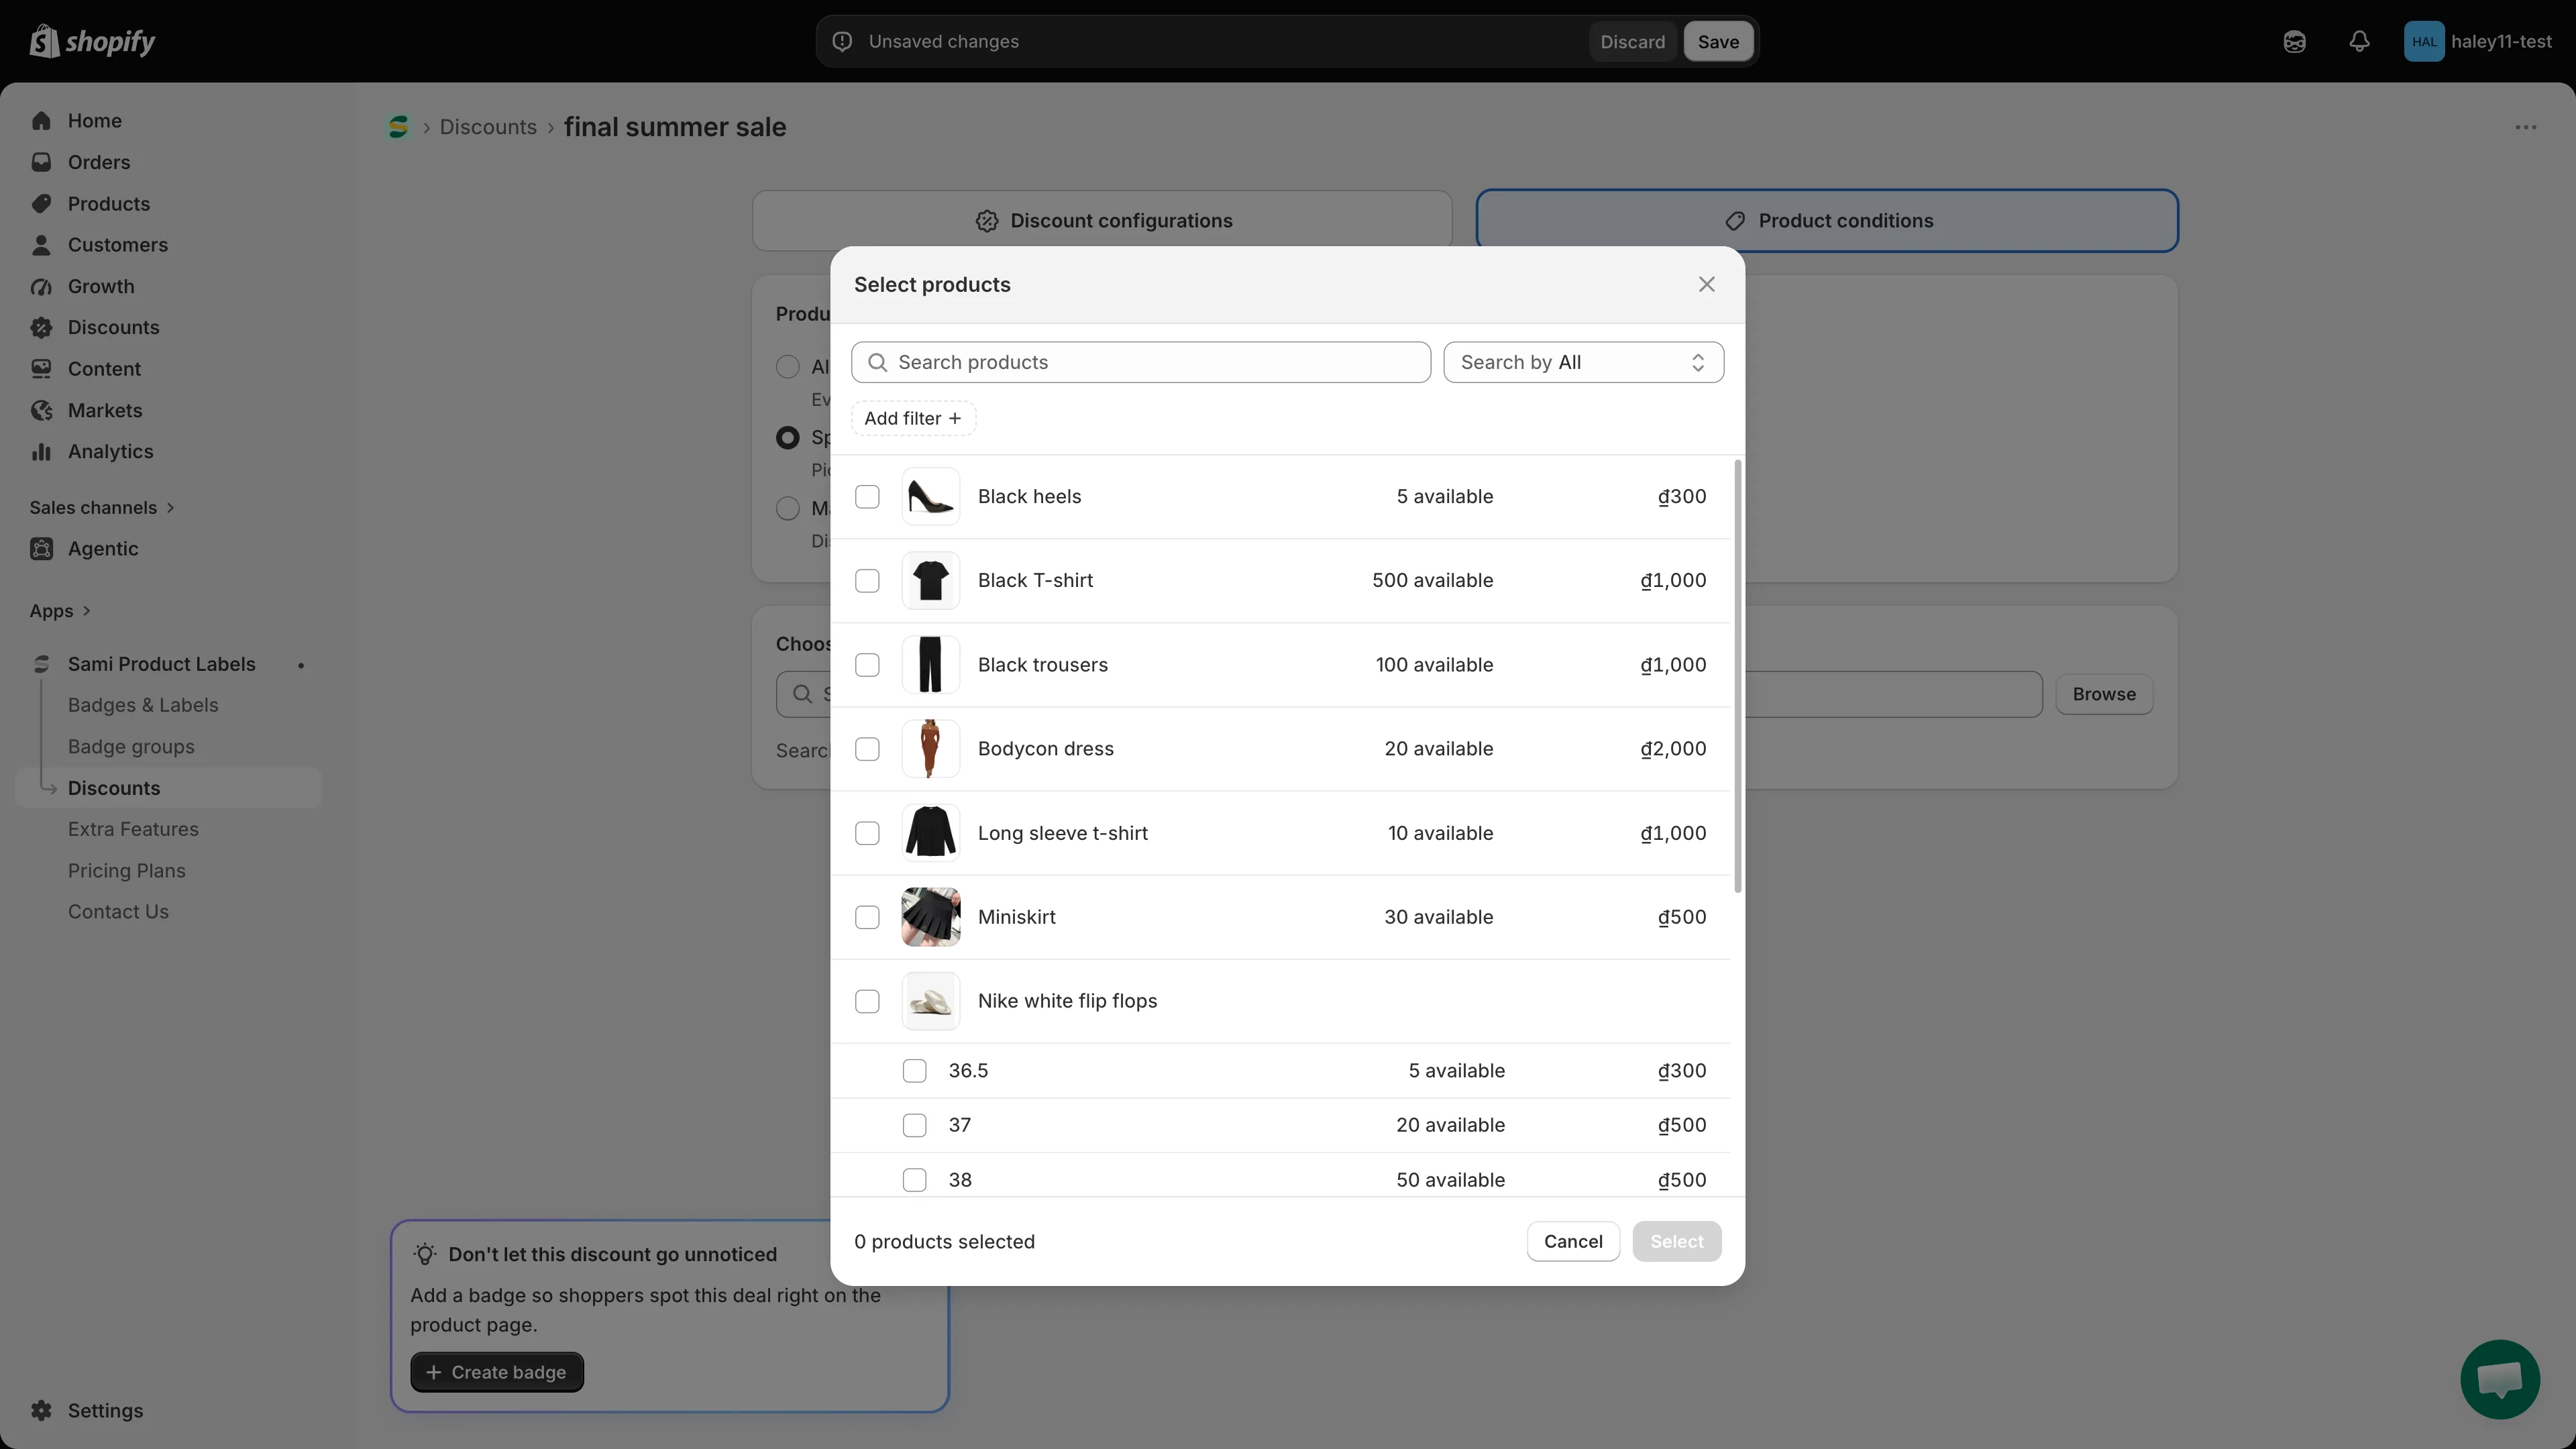
Specific products opens the Shopify picker, down to individual variants.
-
Click Save in the bar at the top of the screen. Discard throws away your changes after a confirmation.
If anything is missing, a red banner lists every problem and the editor switches to the tab that owns the first one.
Once saved, the page heading changes to your discount name and the Don’t let this discount go unnoticed card appears — click Create badge to build a badge for this discount, or dismiss it with the x.
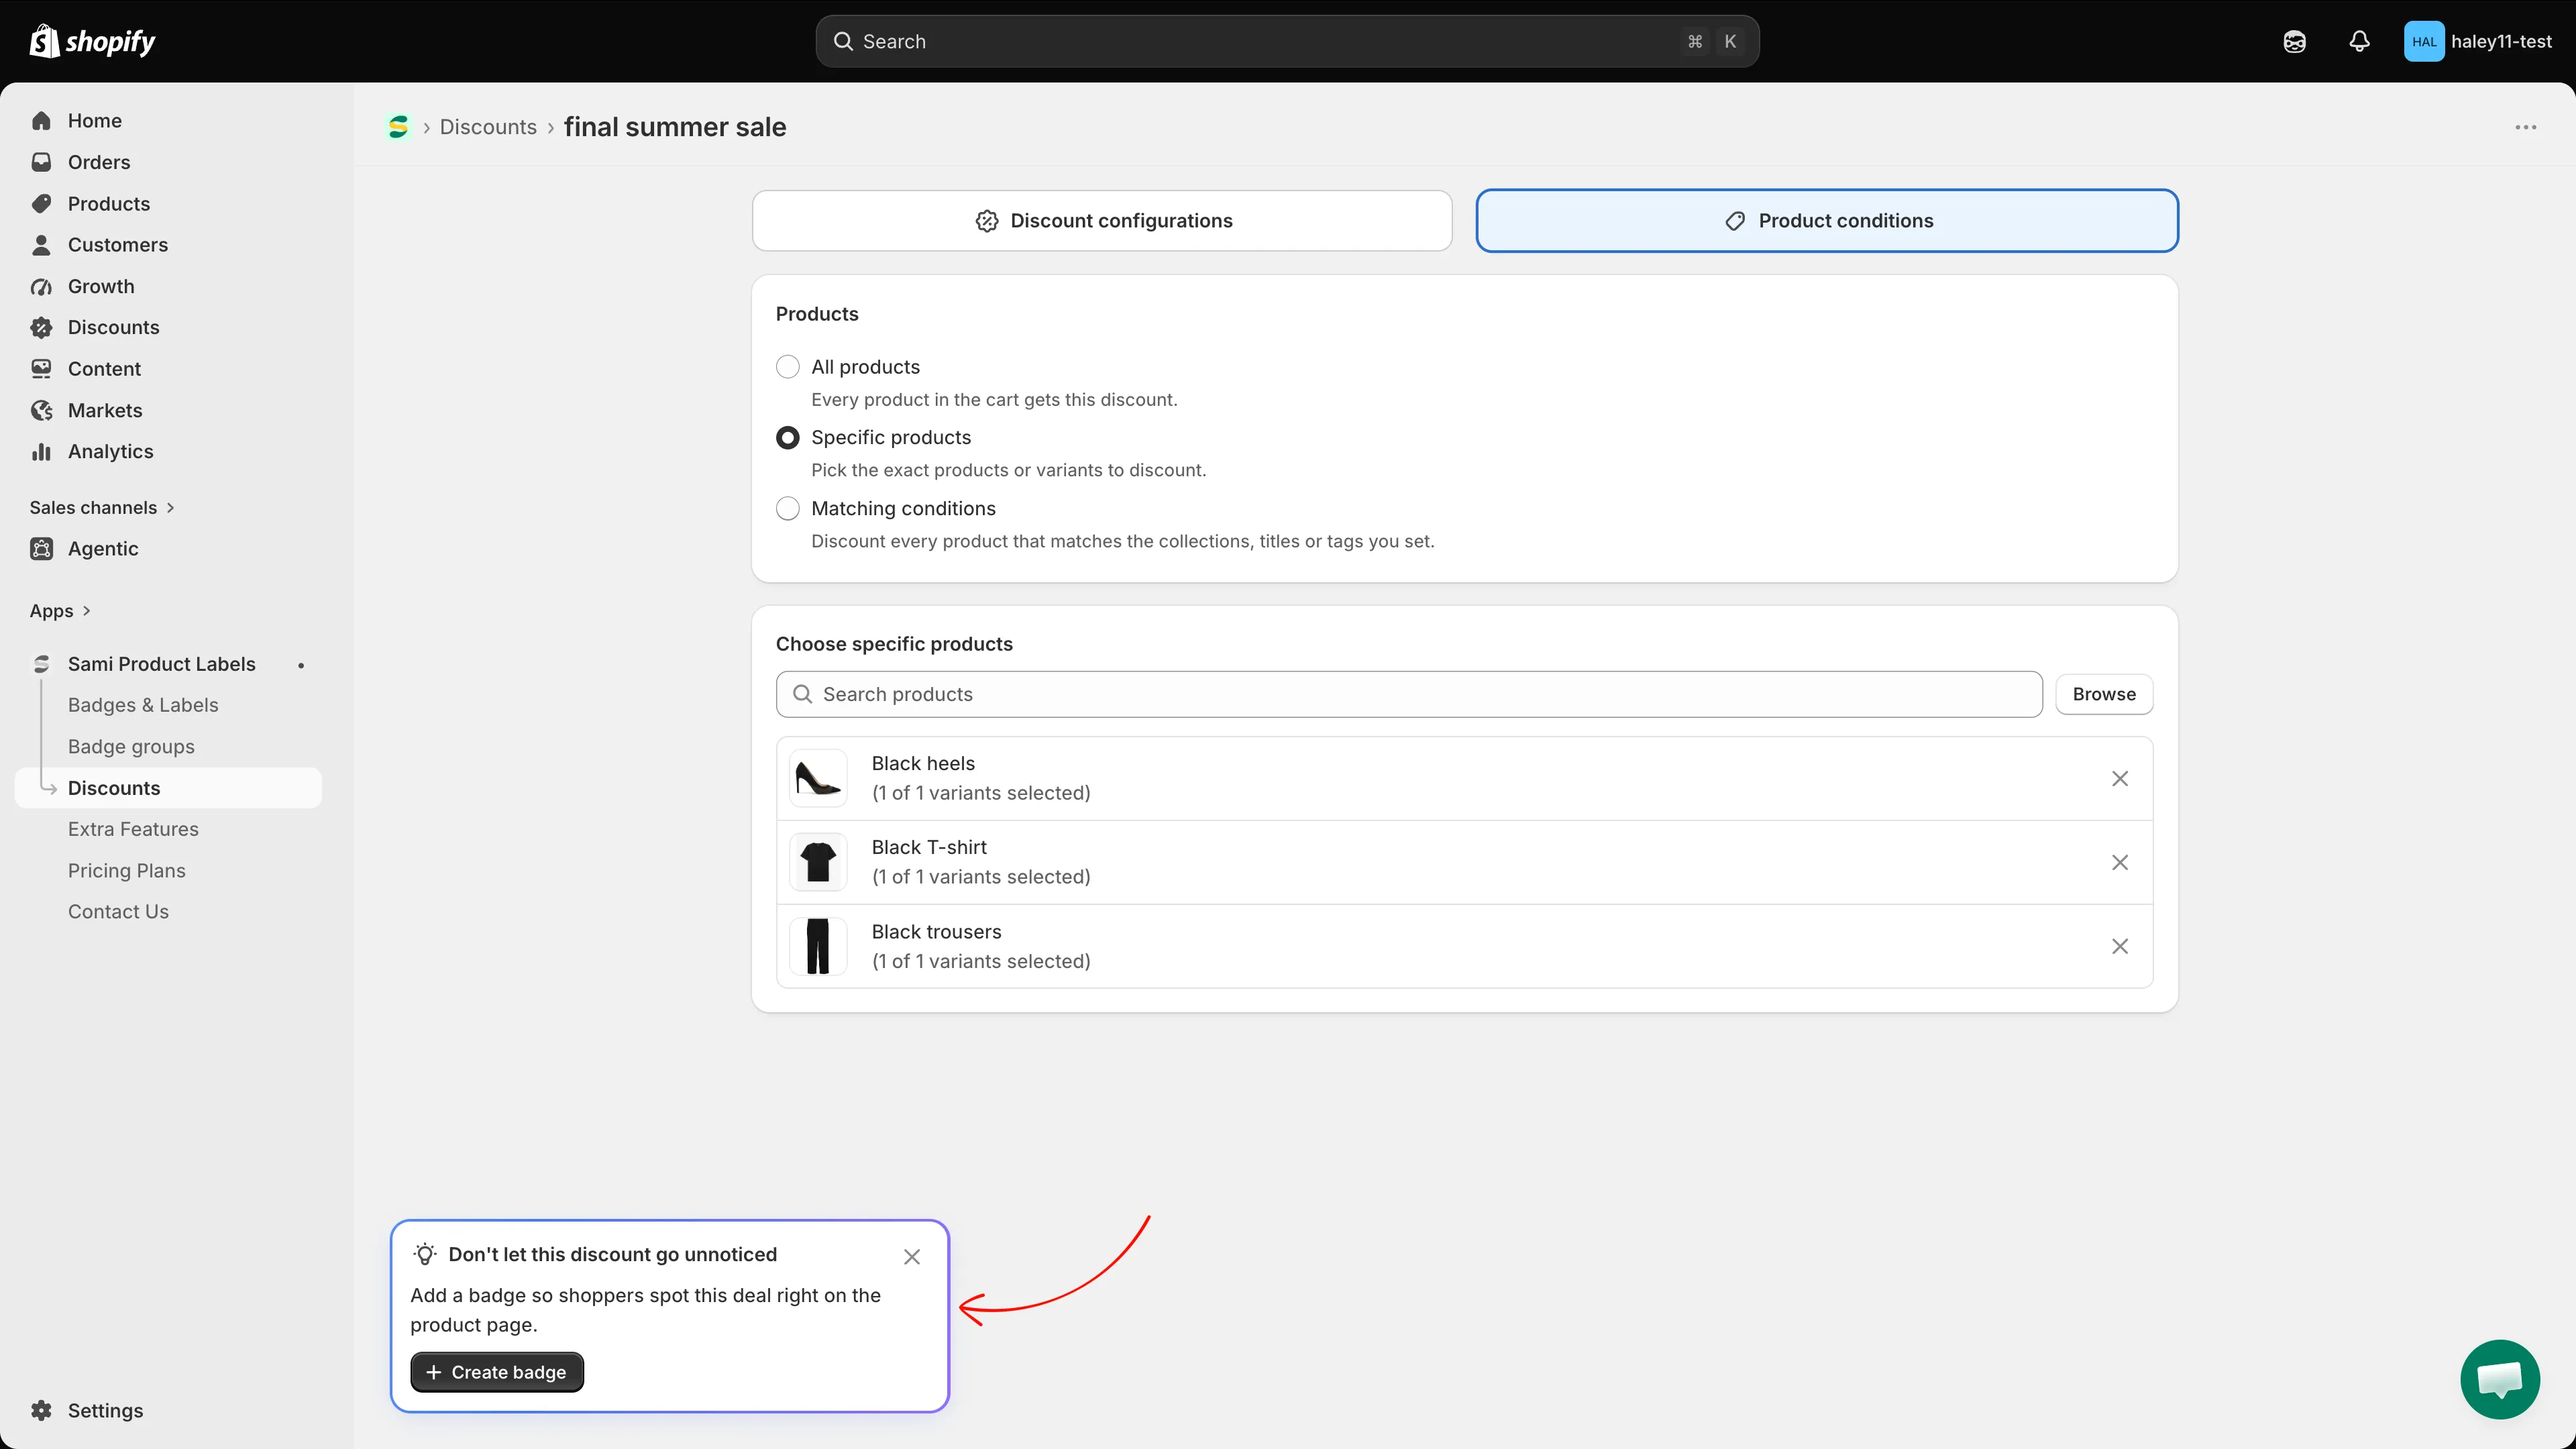
The badge editor opens pre-filled with this discount’s value.
Next steps
Section titled “Next steps”- Use matching conditions — match products by collection, title, or tag instead of picking them one by one.
- Create a discount code — the same setup, with a code the shopper types at checkout.
- Discounts overview — statuses, plan limits, and how discounts connect to badges.