
Translate your content
Open a store language on the Translation page, pick a badge, trust badge, highlight, or banner, and type its translation next to the original.
Each store language has its own translation page. On it, you pick an item from the list on the left, then type the translation next to the original text on the right. A live preview shows how the item will look in that language before you save.
Translate an item
Section titled “Translate an item”-
Open Translation
Section titled “Open Translation”In Sami Product Labels, click Translation in the app menu. The page lists every language under Store languages, with your default language first.
Label Meaning Default Your store’s main language. Its text is the original, so it can’t be opened. Published Visitors can switch your store to this language. Unpublished Added in Shopify but not live yet. You can still translate it ahead of time. To add or publish a language, click Manage languages — it opens Settings › Languages in your Shopify admin.
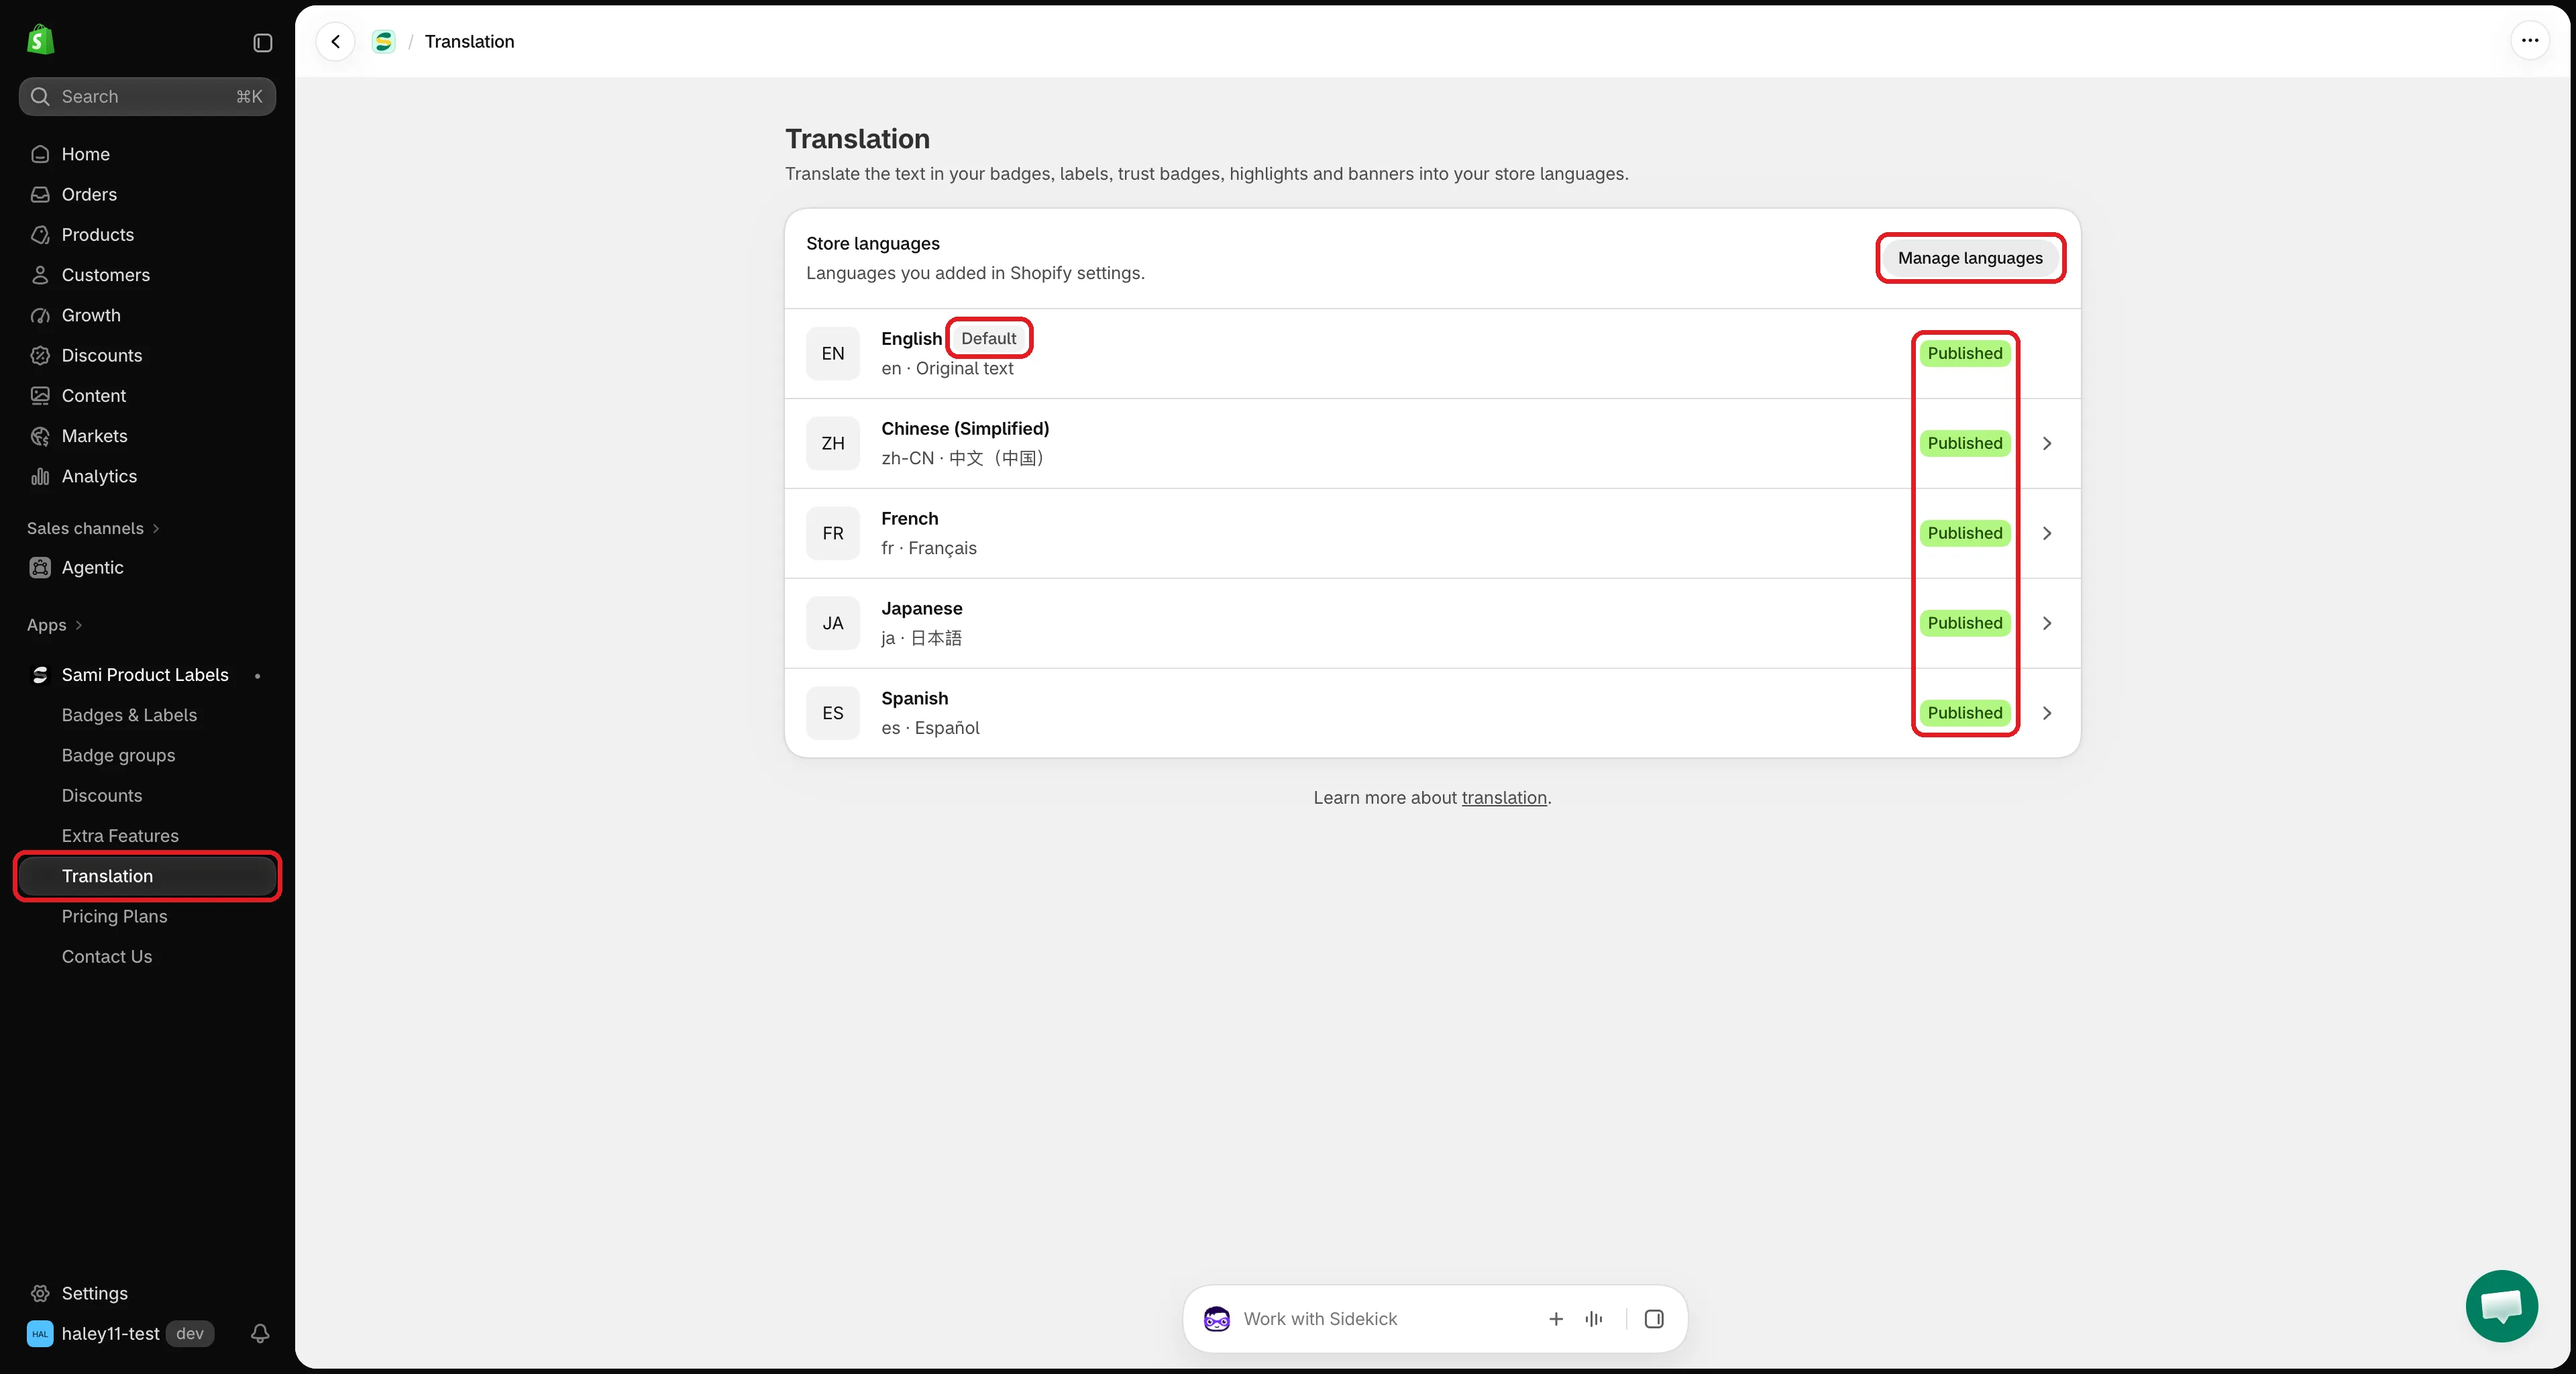
Every language you added in Shopify appears here.
-
Pick a language
Section titled “Pick a language”Click the language you want to translate into. Its translation page opens with three areas:
- The progress bar at the top — how many texts are translated in this language, and your AI usage.
- The tabs — Badges & Labels, Trust Badges, Highlights, and Banners. Each tab shows how many items are fully translated, for example Badges & Labels 3/8.
- The workspace — your items on the left, the translation fields on the right.
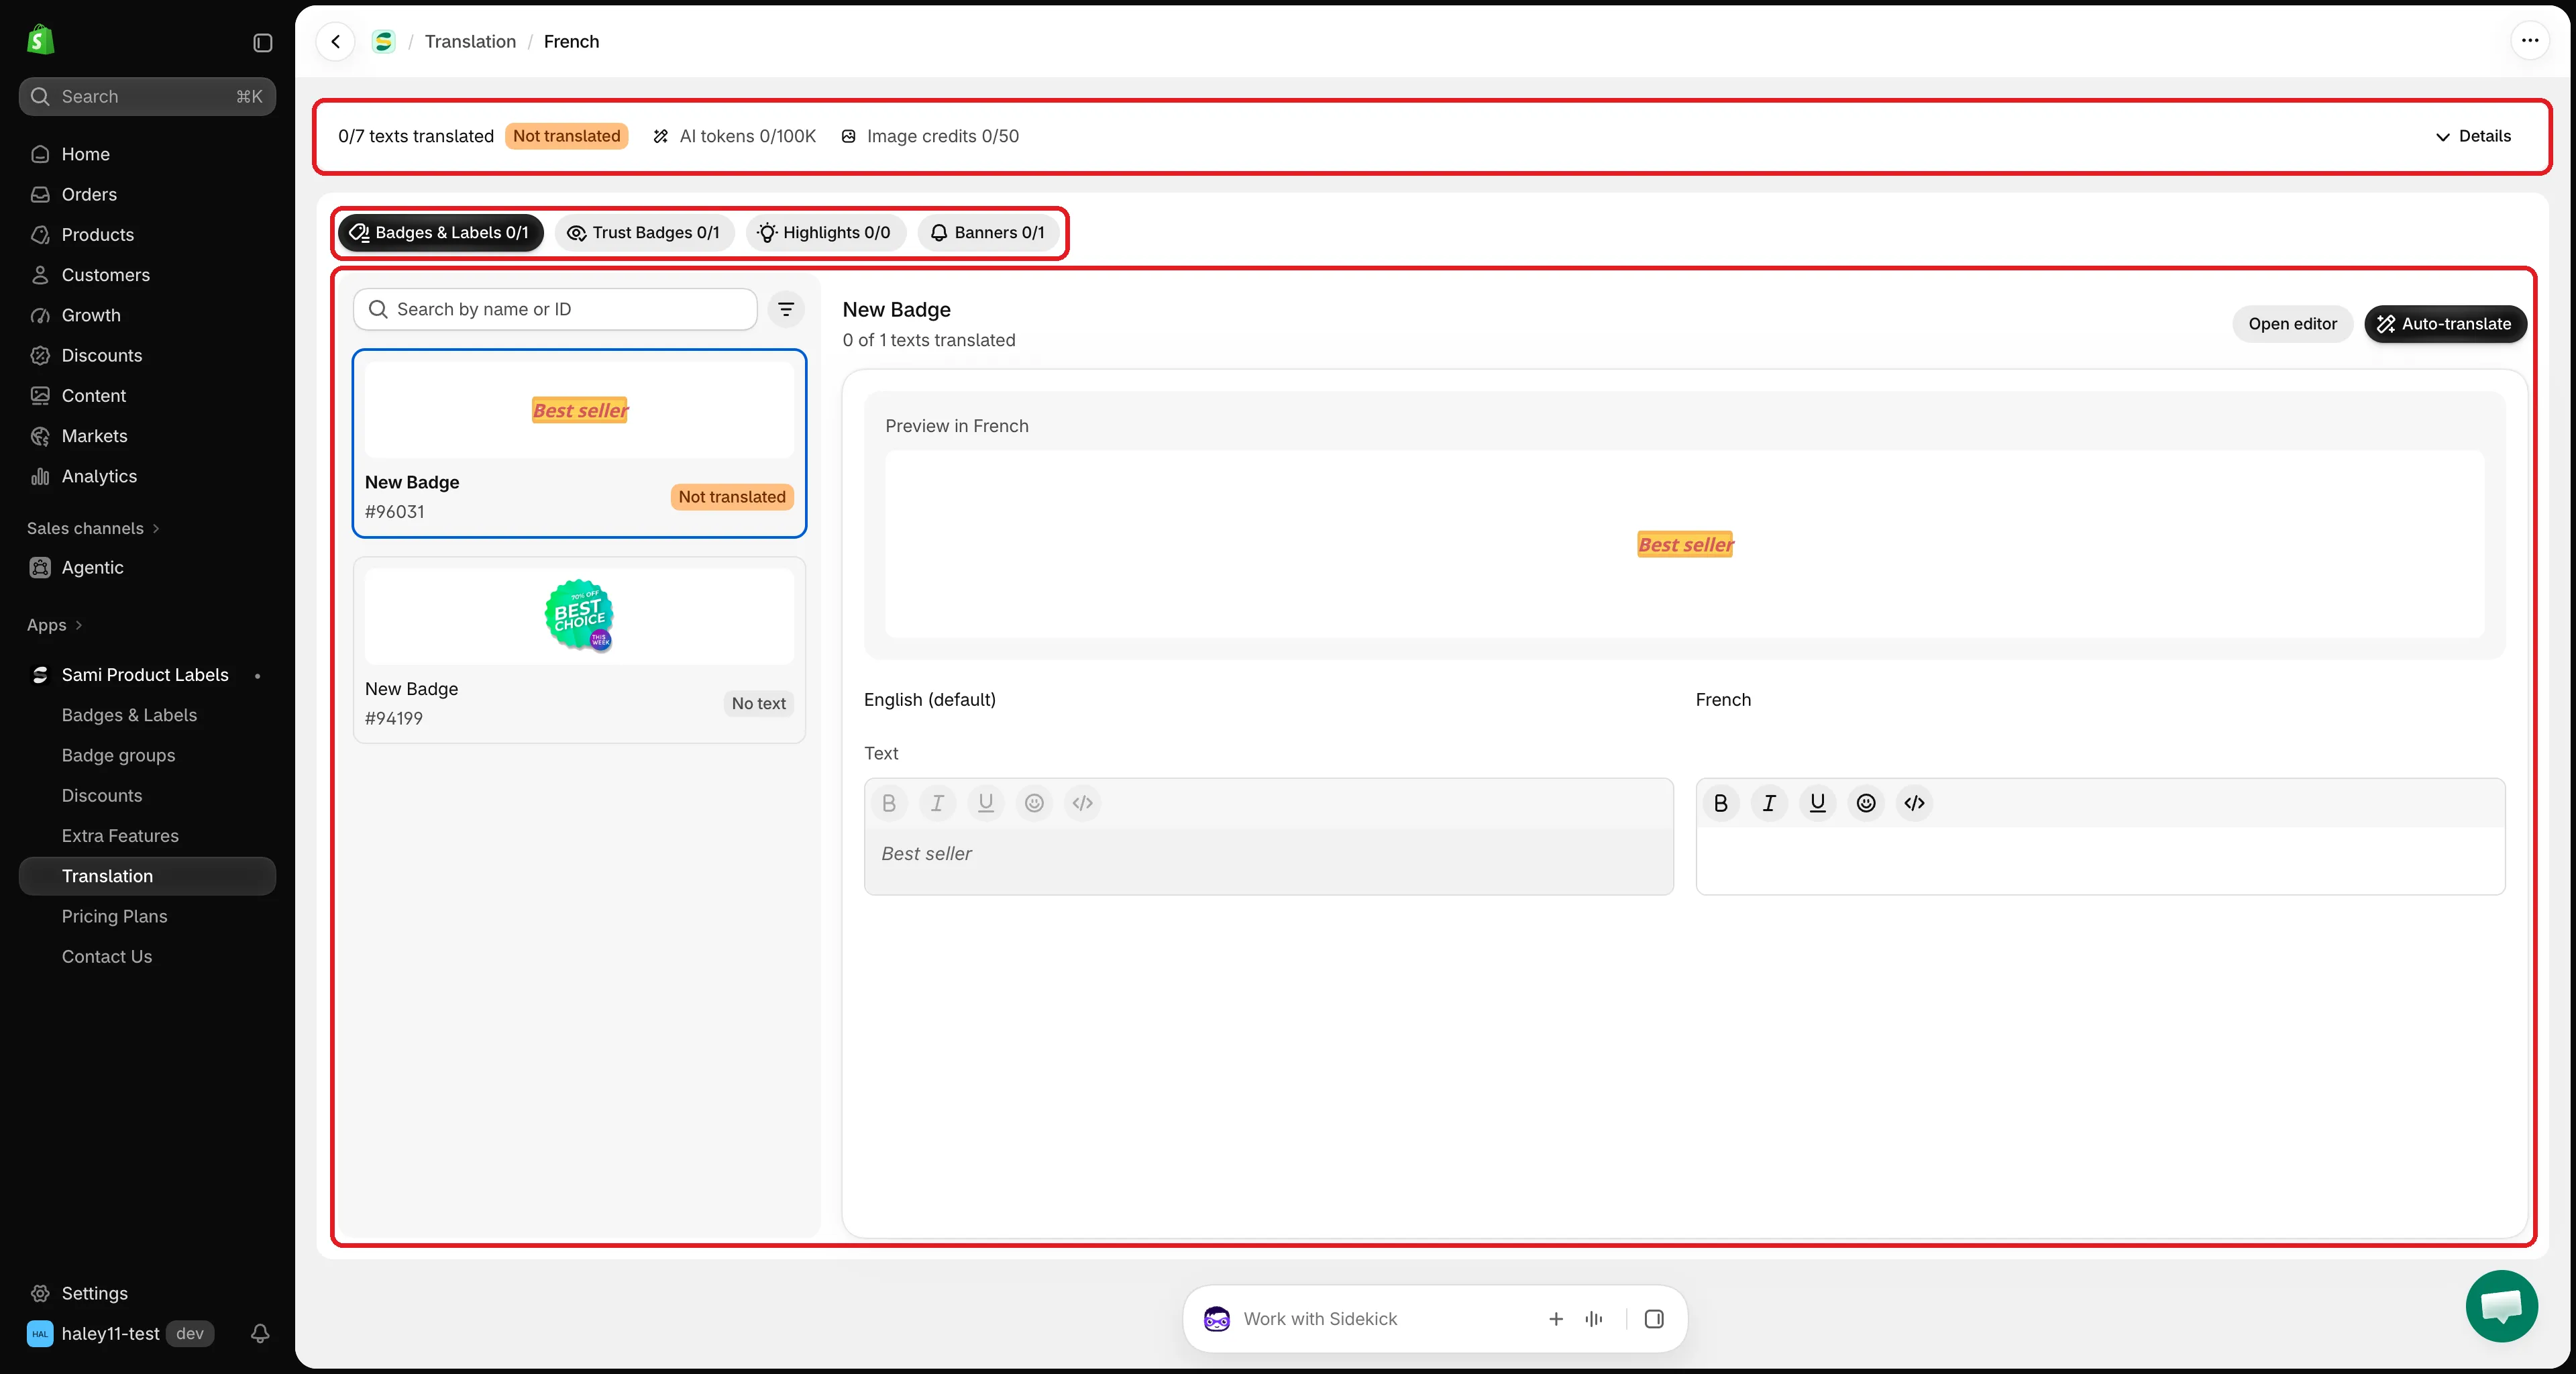
A language’s translation page: progress at the top, tabs, item list, and fields.
-
Choose an item
Section titled “Choose an item”Click a tab, then click an item in the list on the left. Each item shows a small preview, its name, its ID, and its status:
Status Meaning Translated Every text has a translation. 2/5 translated Some texts are translated, some aren’t. Not translated No text is translated yet. No text The item has no text to translate. To find an item quickly, type its name or ID in Search by name or ID, or click the filter icon and pick Not translated, Partially translated, or Translated.
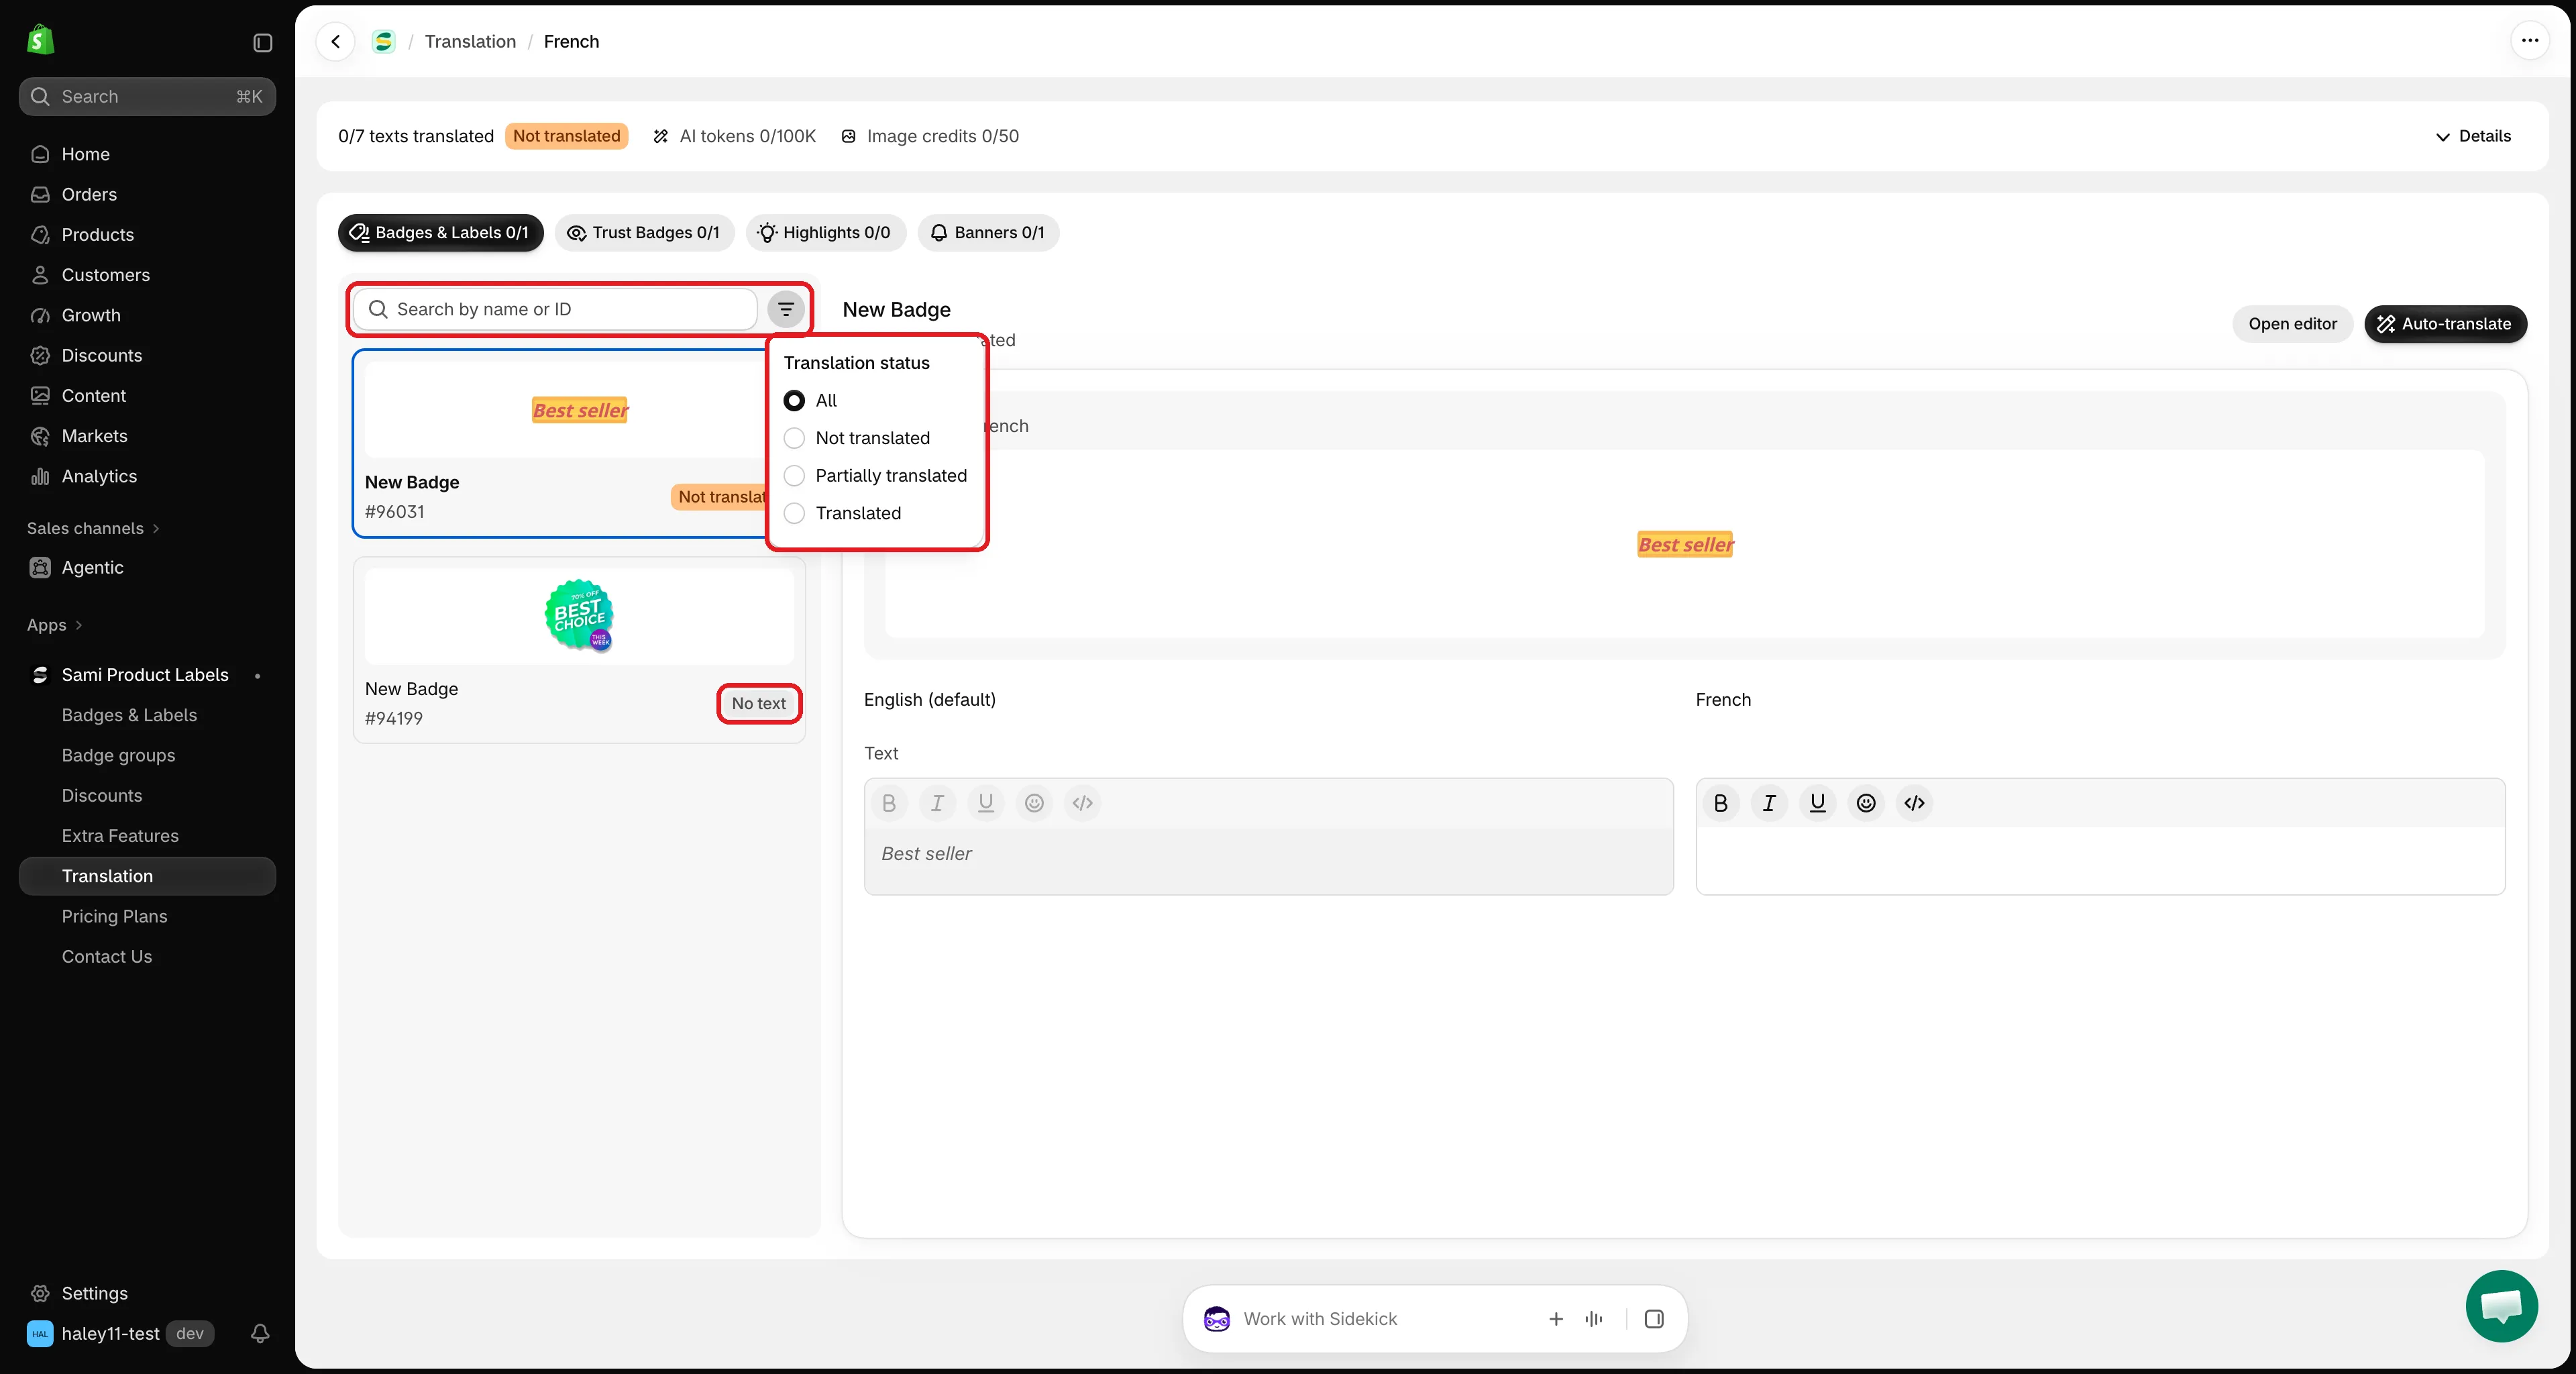
Filter the list to the items that still need work.
-
Type the translations
Section titled “Type the translations”The right side shows each text in two columns: the original on the left (read only), the translation on the right. Type your translation in the right column.
Text, titles, descriptions, and banner messages use a rich-text editor with bold, italic, underline, emoji, and HTML source. Keep placeholders like
{sale}or{countdown}exactly as they are.Leave a field empty to keep showing the original text in that language.
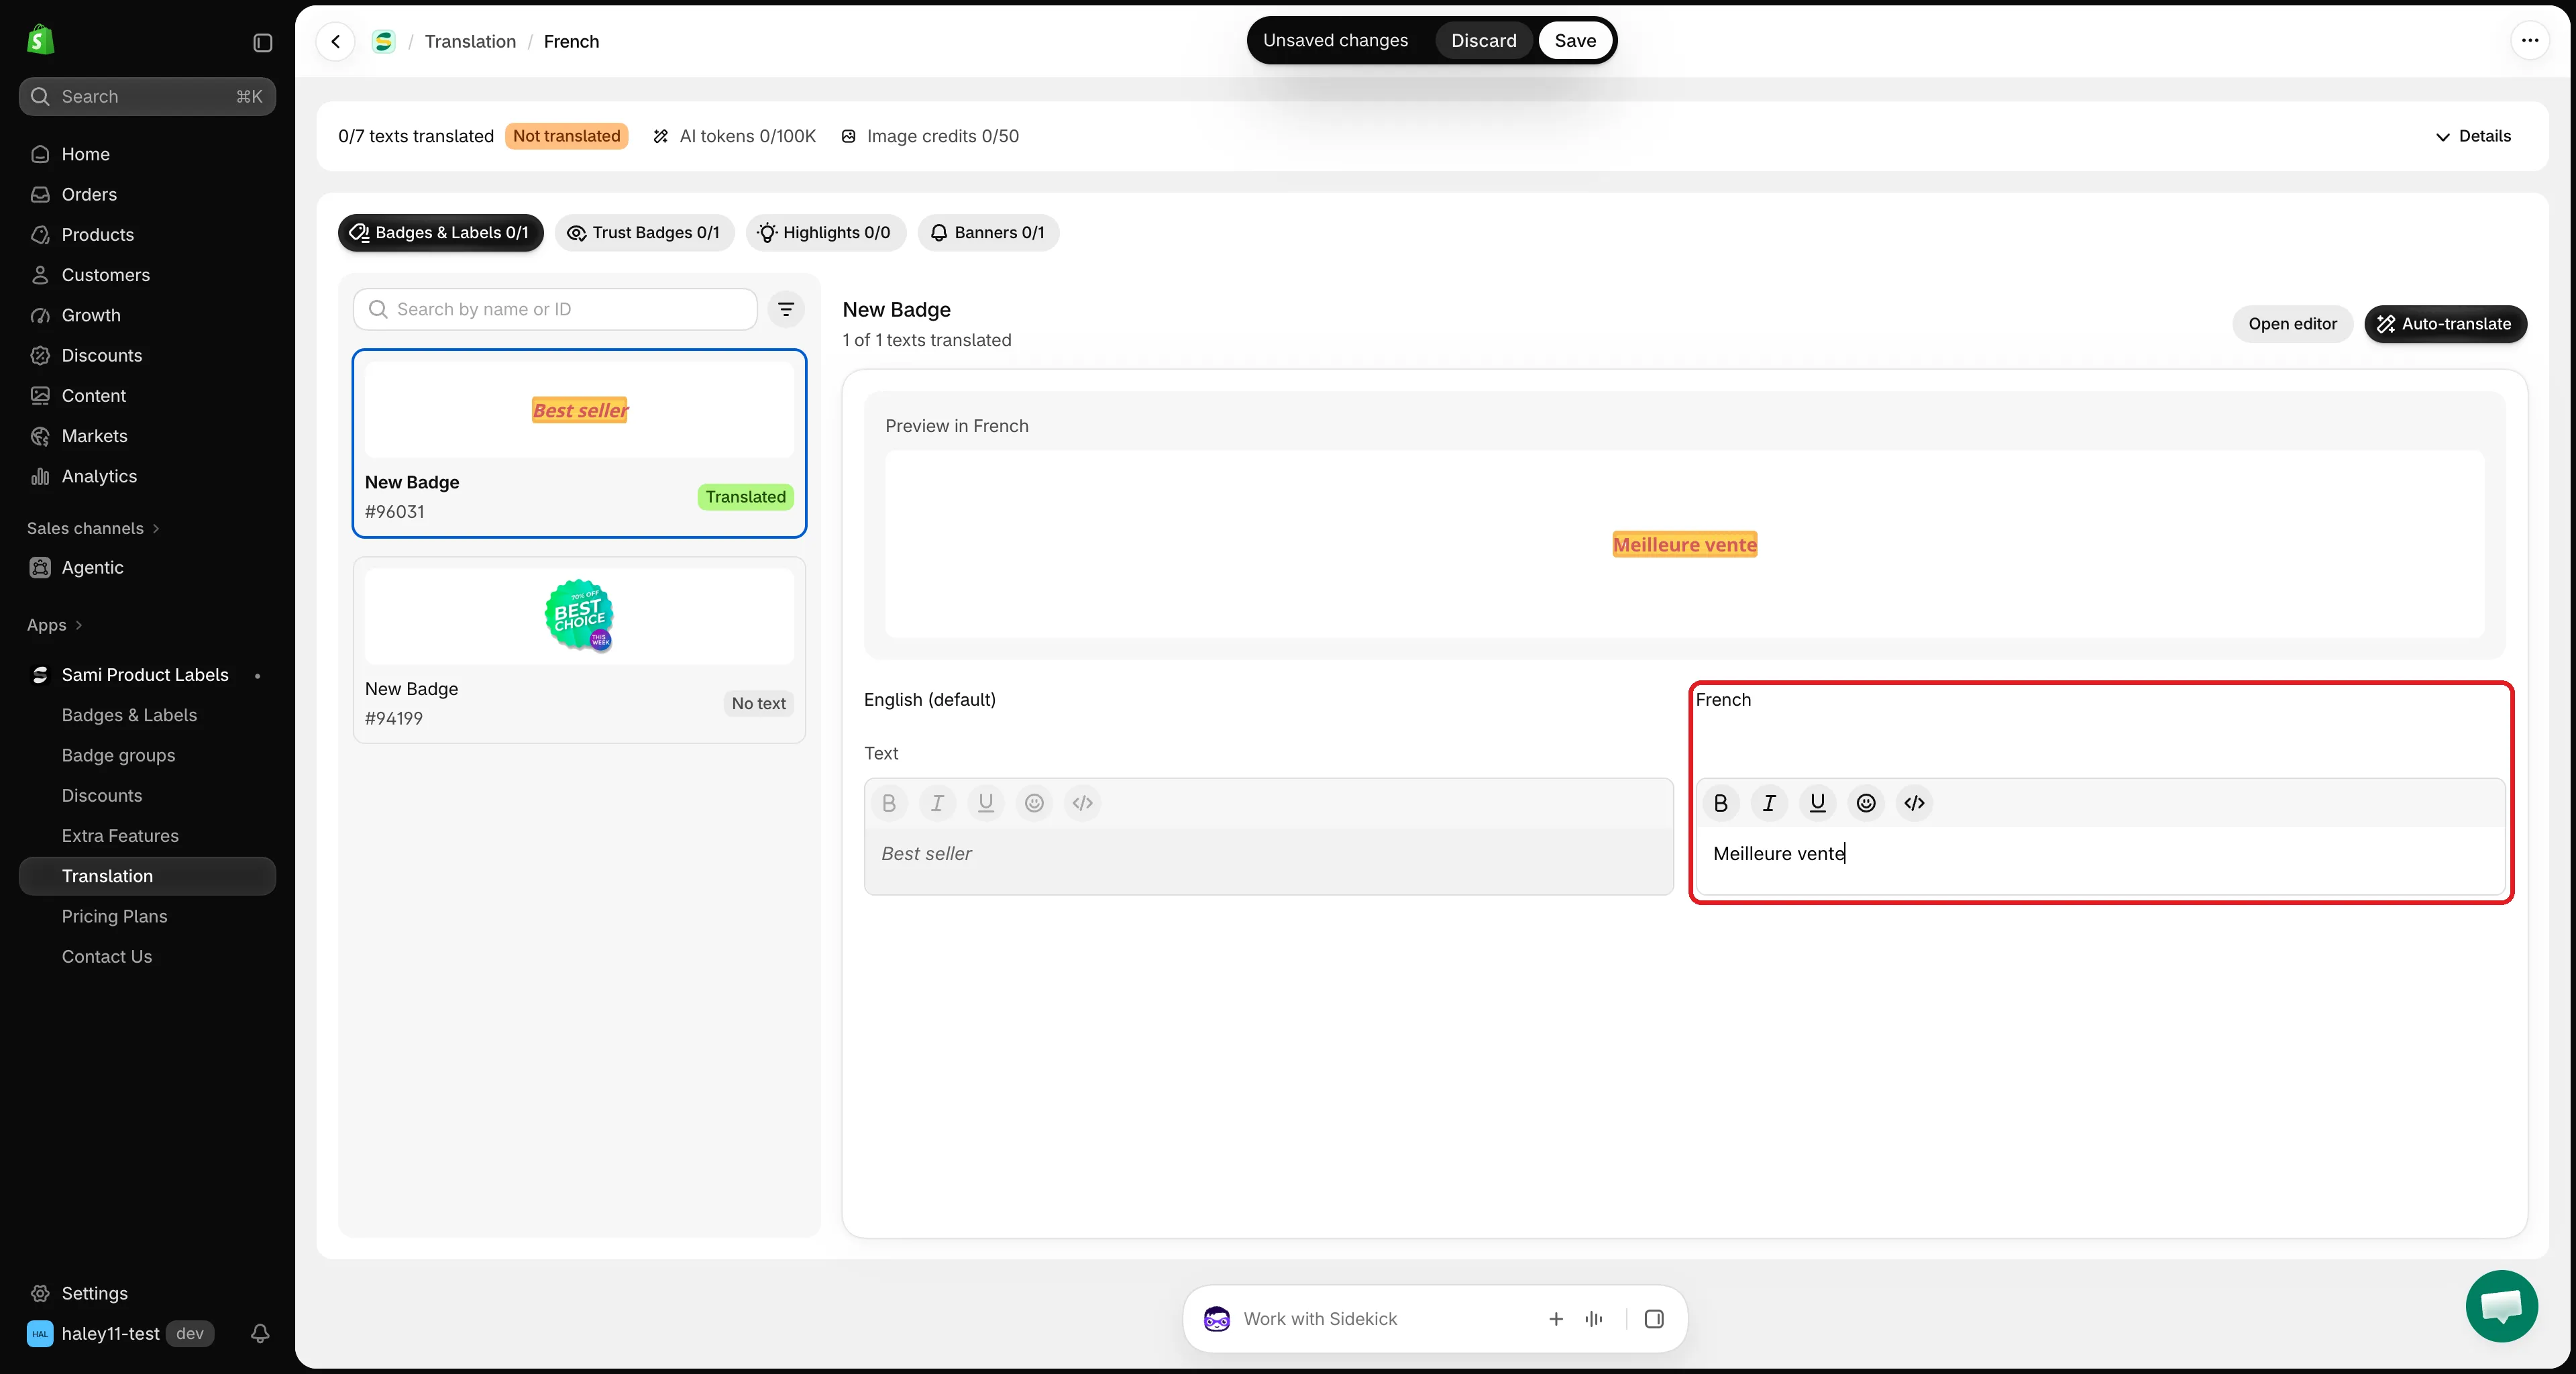
Type the translation next to the original. Empty fields fall back to the default language.
-
Check the preview
Section titled “Check the preview”Preview in [language], above the fields, renders the item the way your storefront will show it in that language. It updates a moment after you stop typing.
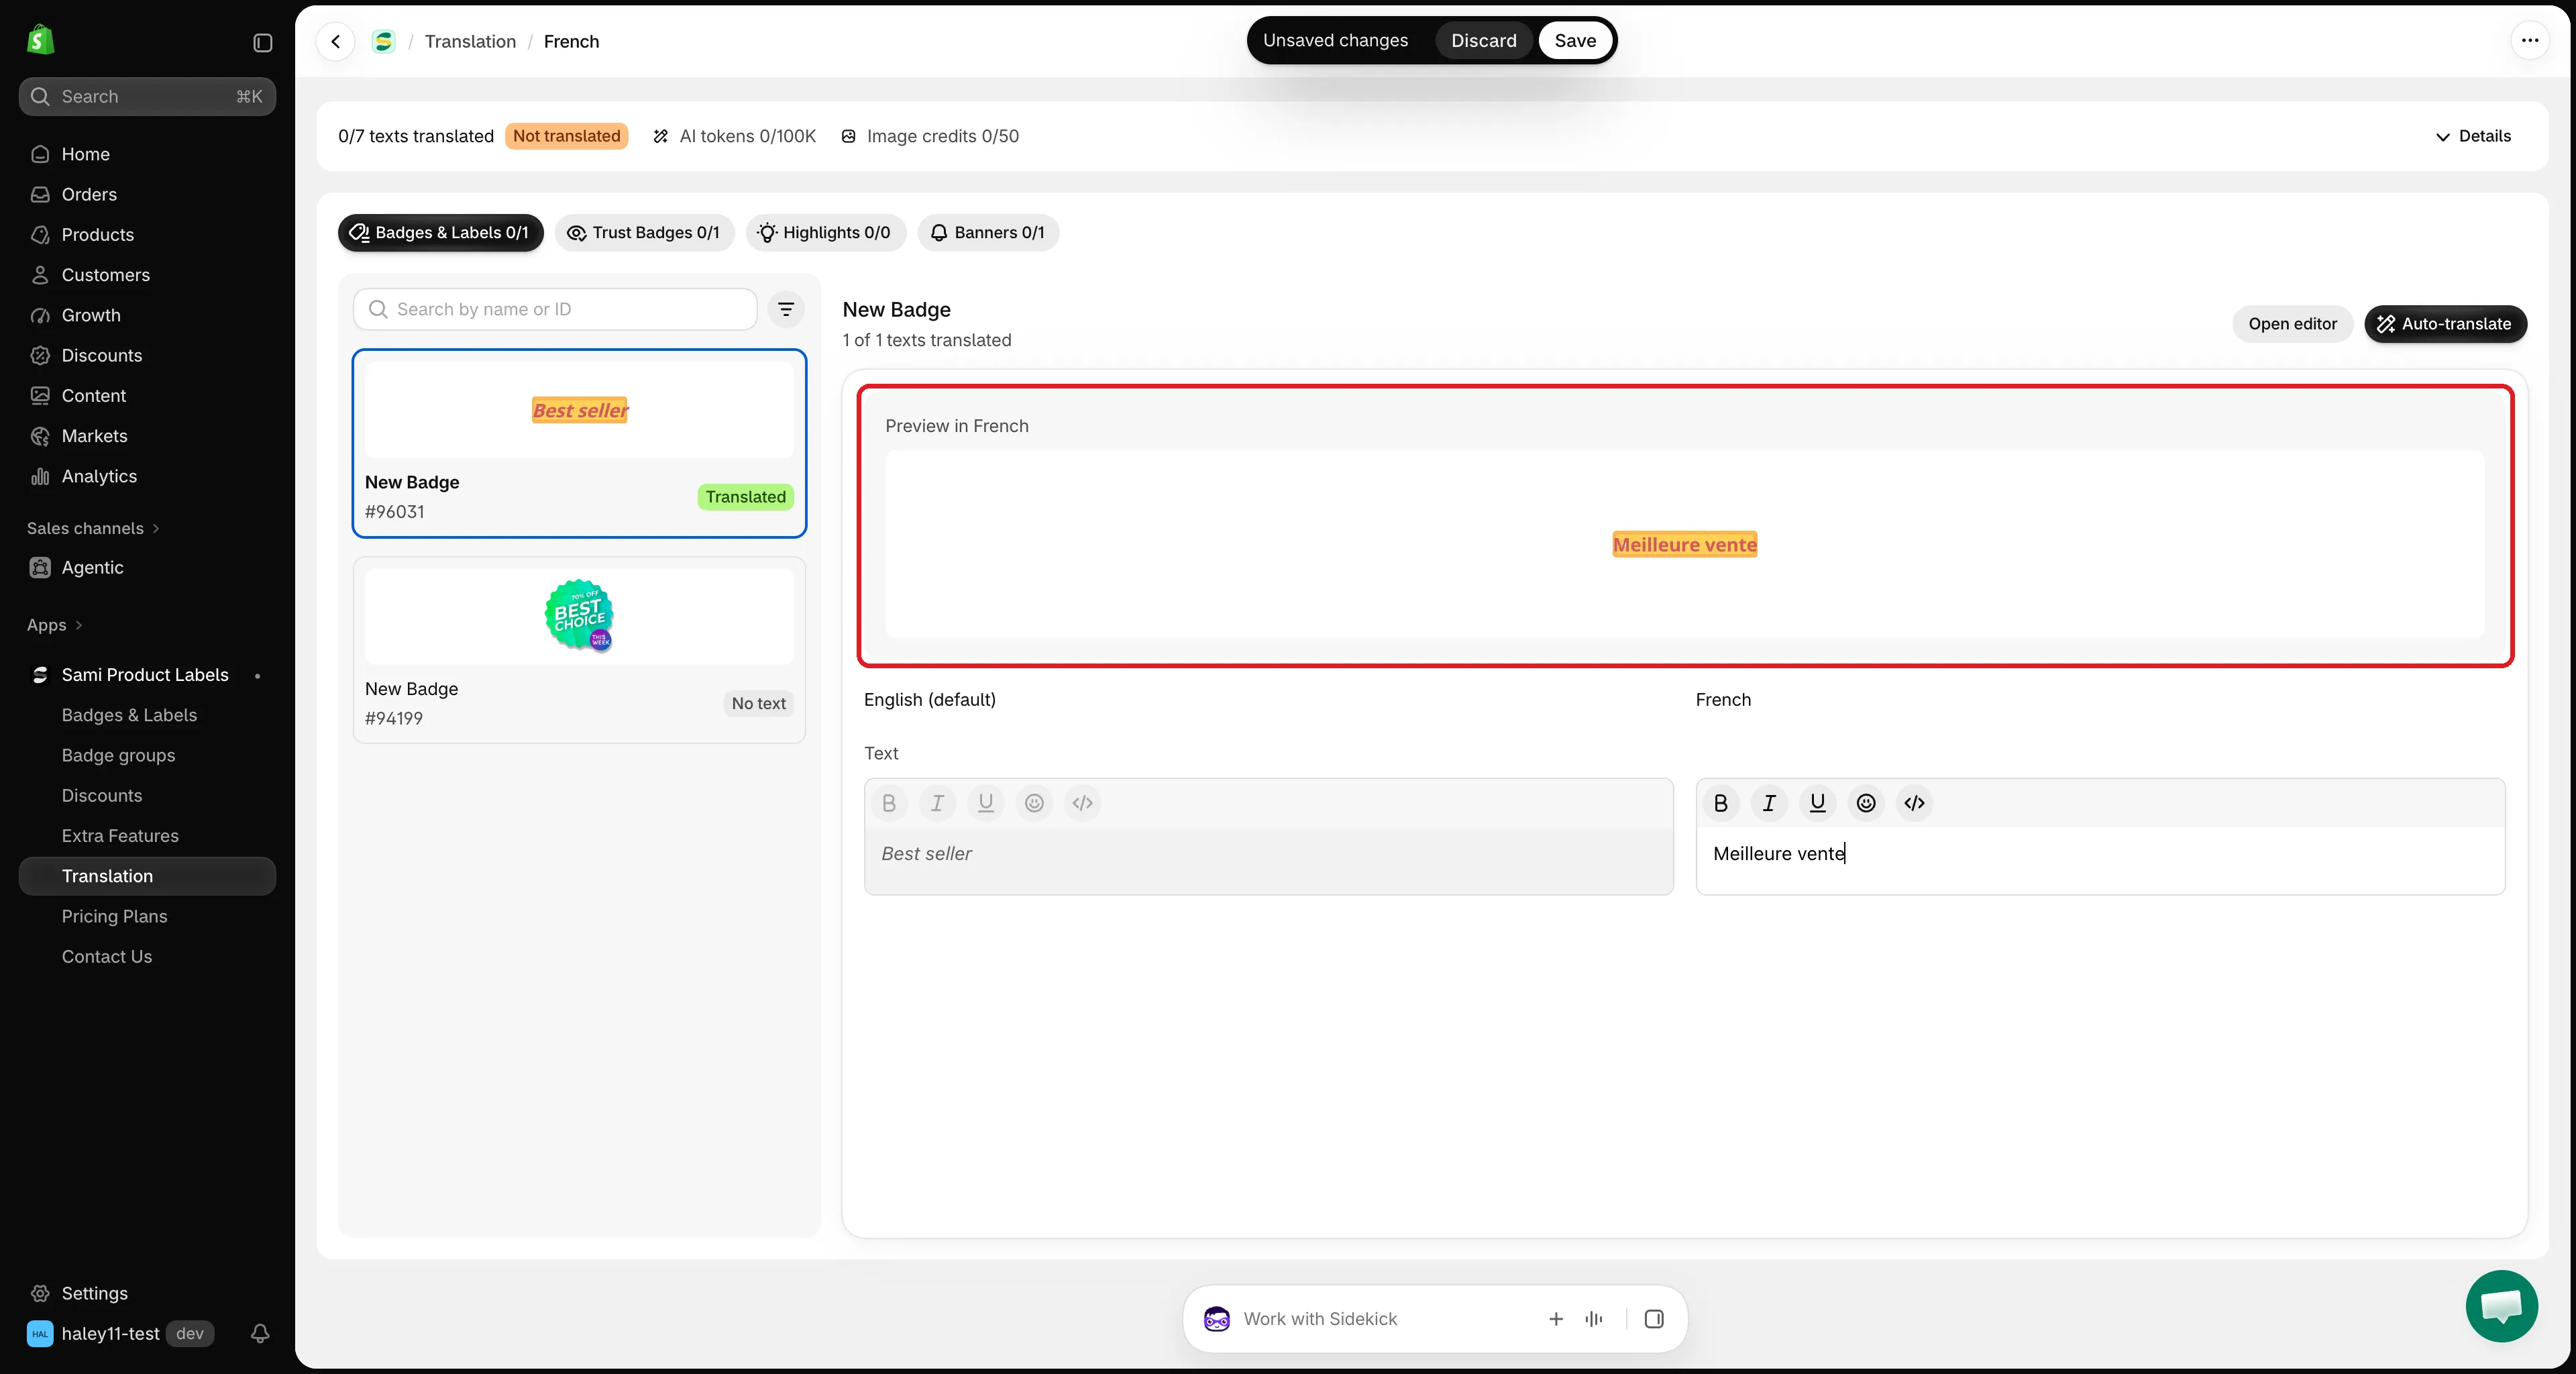
The preview shows the item in the language you are translating.
-
When you change a field, Shopify’s save bar appears at the top of the screen. Click Save to publish the translations of this item, or Discard to undo them. A Translations saved message confirms the save.
Translate from the editor
Section titled “Translate from the editor”Each editor has a Translate button, so you can jump to the translation of the item you’re working on.
| Editor | Where the button is |
|---|---|
| Badges & Labels | Next to the Content heading in the Design tab |
| Trust Badges | Next to the Content & Badges heading |
| Highlights | Next to the Content & Badges heading |
| Banners | Next to the Content heading |
When the editor shows a language other than the default, Translate opens that language’s page with the item already selected. Otherwise, it opens the list of store languages — pick one, and the item stays selected.
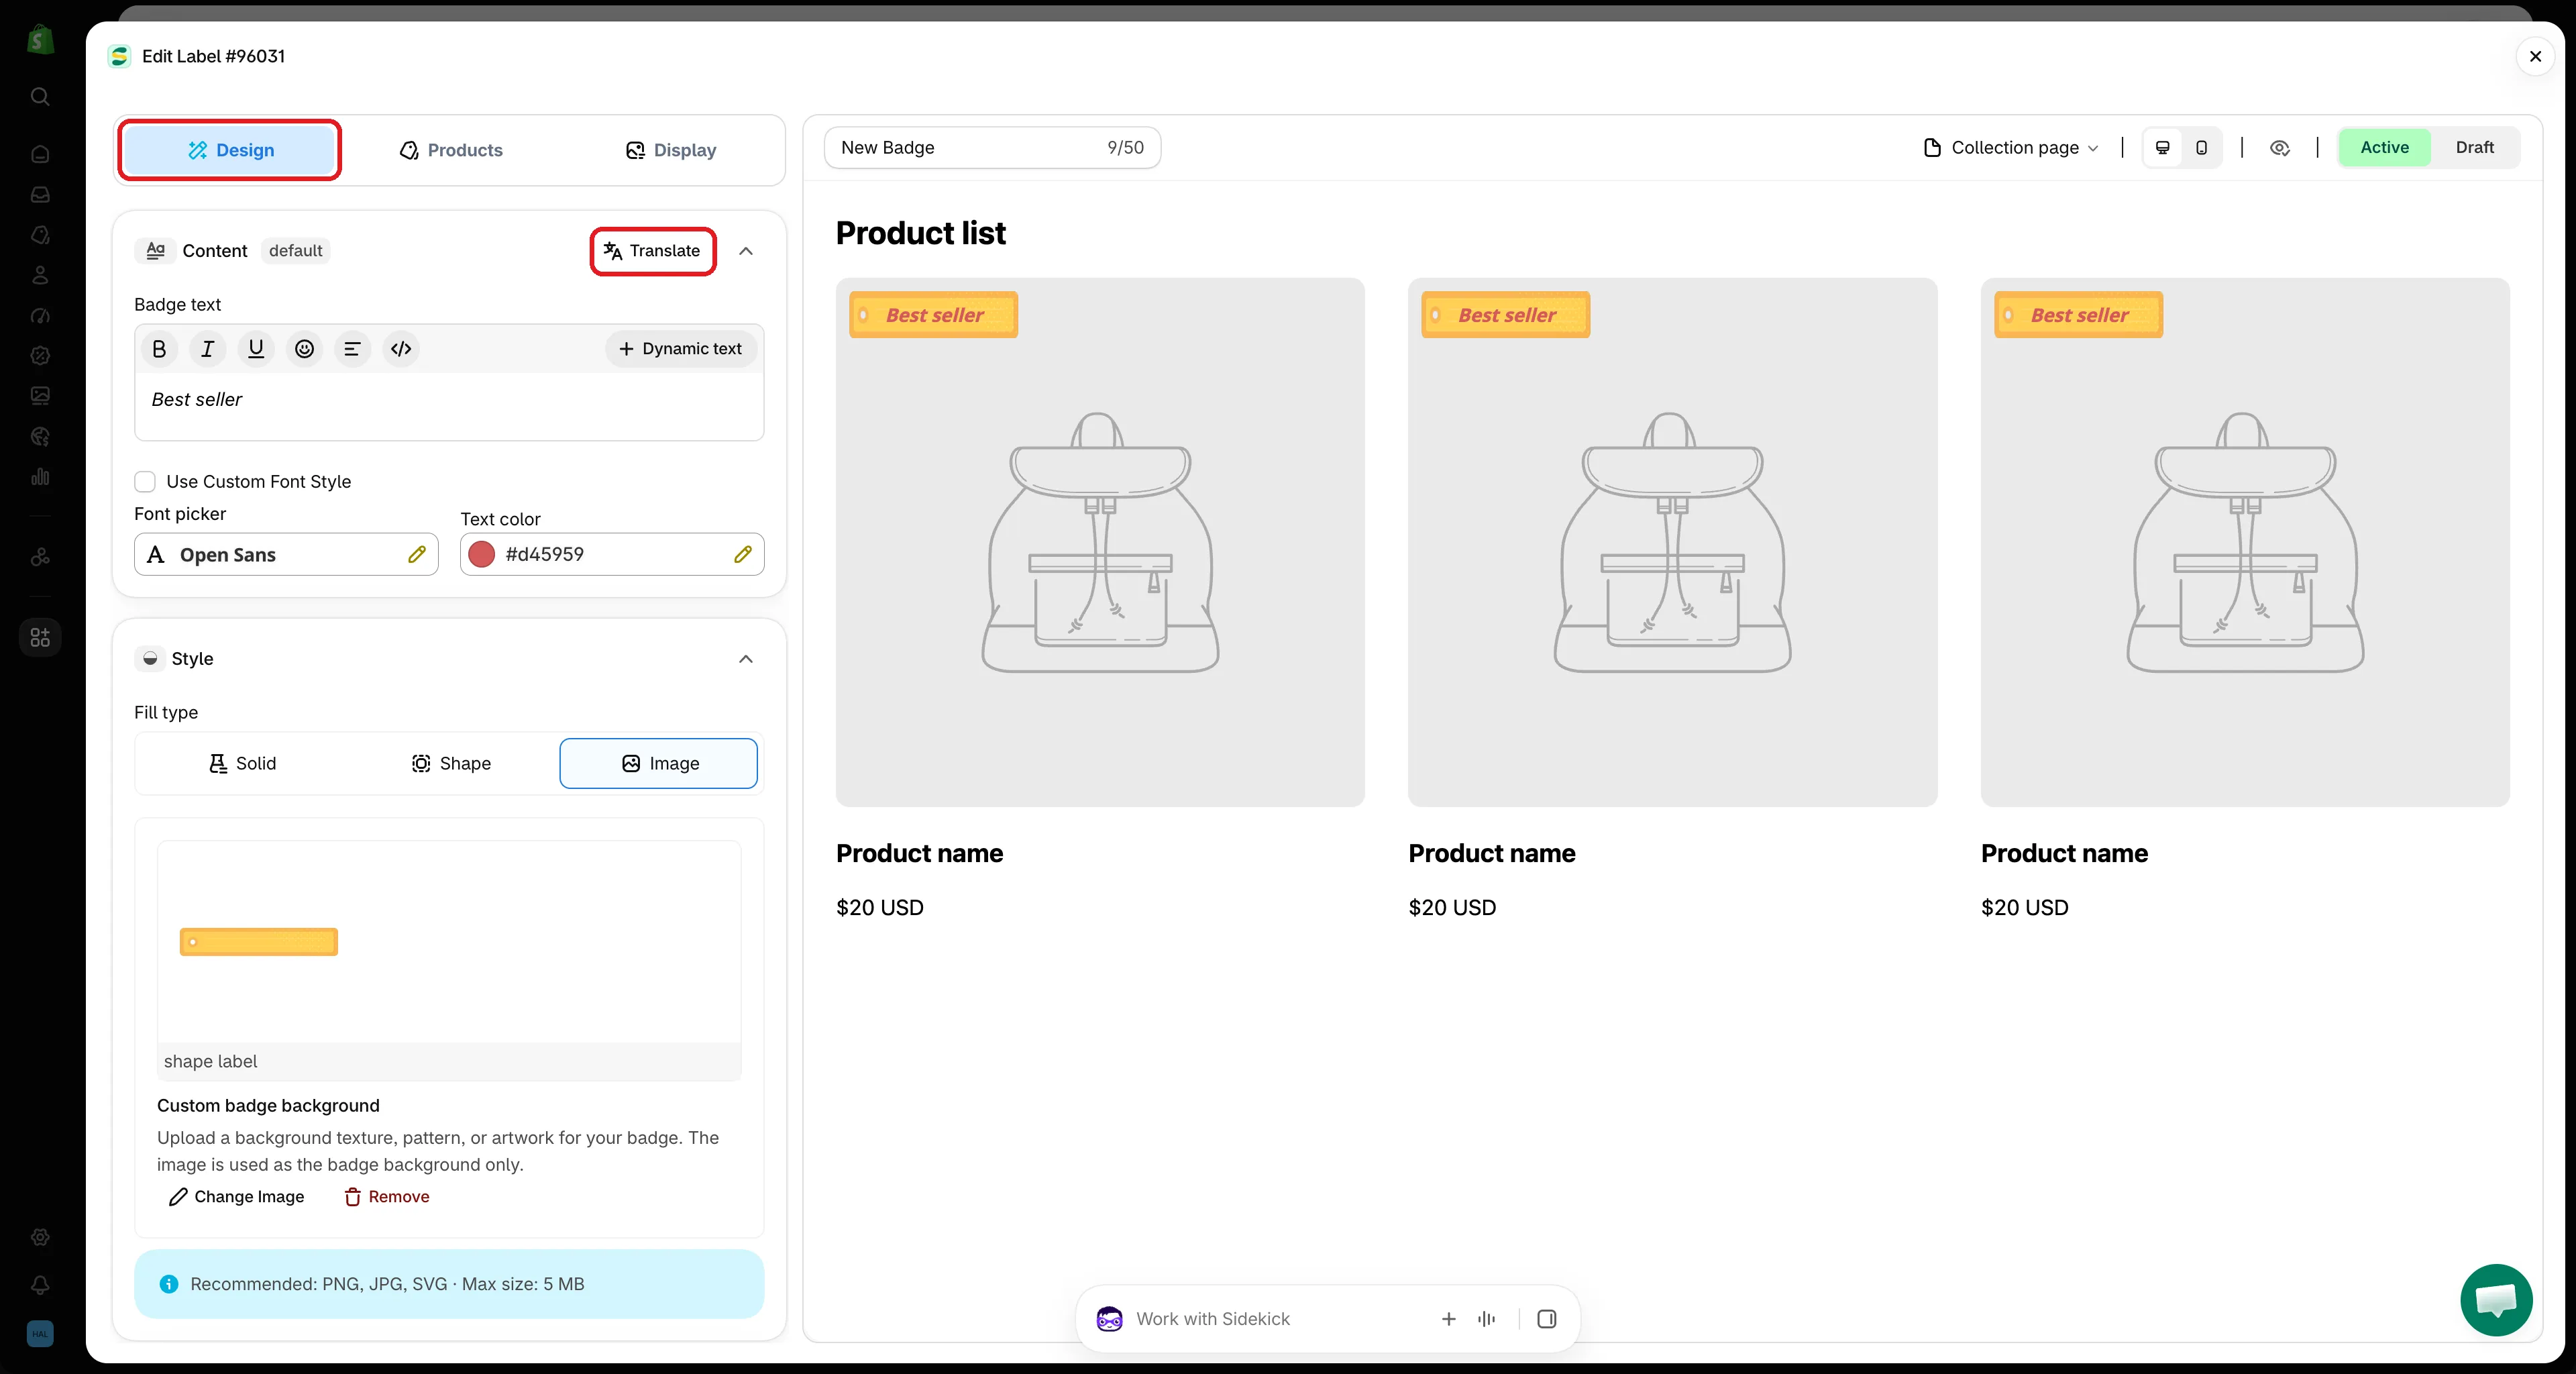
Click Translate in the editor to open the item on the Translation page.
Open or create an item from the Translation page
Section titled “Open or create an item from the Translation page”- Open editor — at the top of the selected item, opens it in its editor so you can change the original text or design. When you close the editor, the list reloads with your changes.
- Create — when a tab has no items yet, it shows Nothing to translate yet with a Create button that starts a new item of that type.
Track your progress
Section titled “Track your progress”The bar at the top of each translation page shows, for this language:
- How many texts are translated, for example 12/30 texts translated, with a Translated, Partially translated, or Not translated badge.
- Your AI tokens and Image credits used this month.
Click Details to see one tile per tab — for example 3 of 8 translated with 2 partially · 3 not started — and your monthly AI usage with the date it resets. Click a tile to jump to that tab.
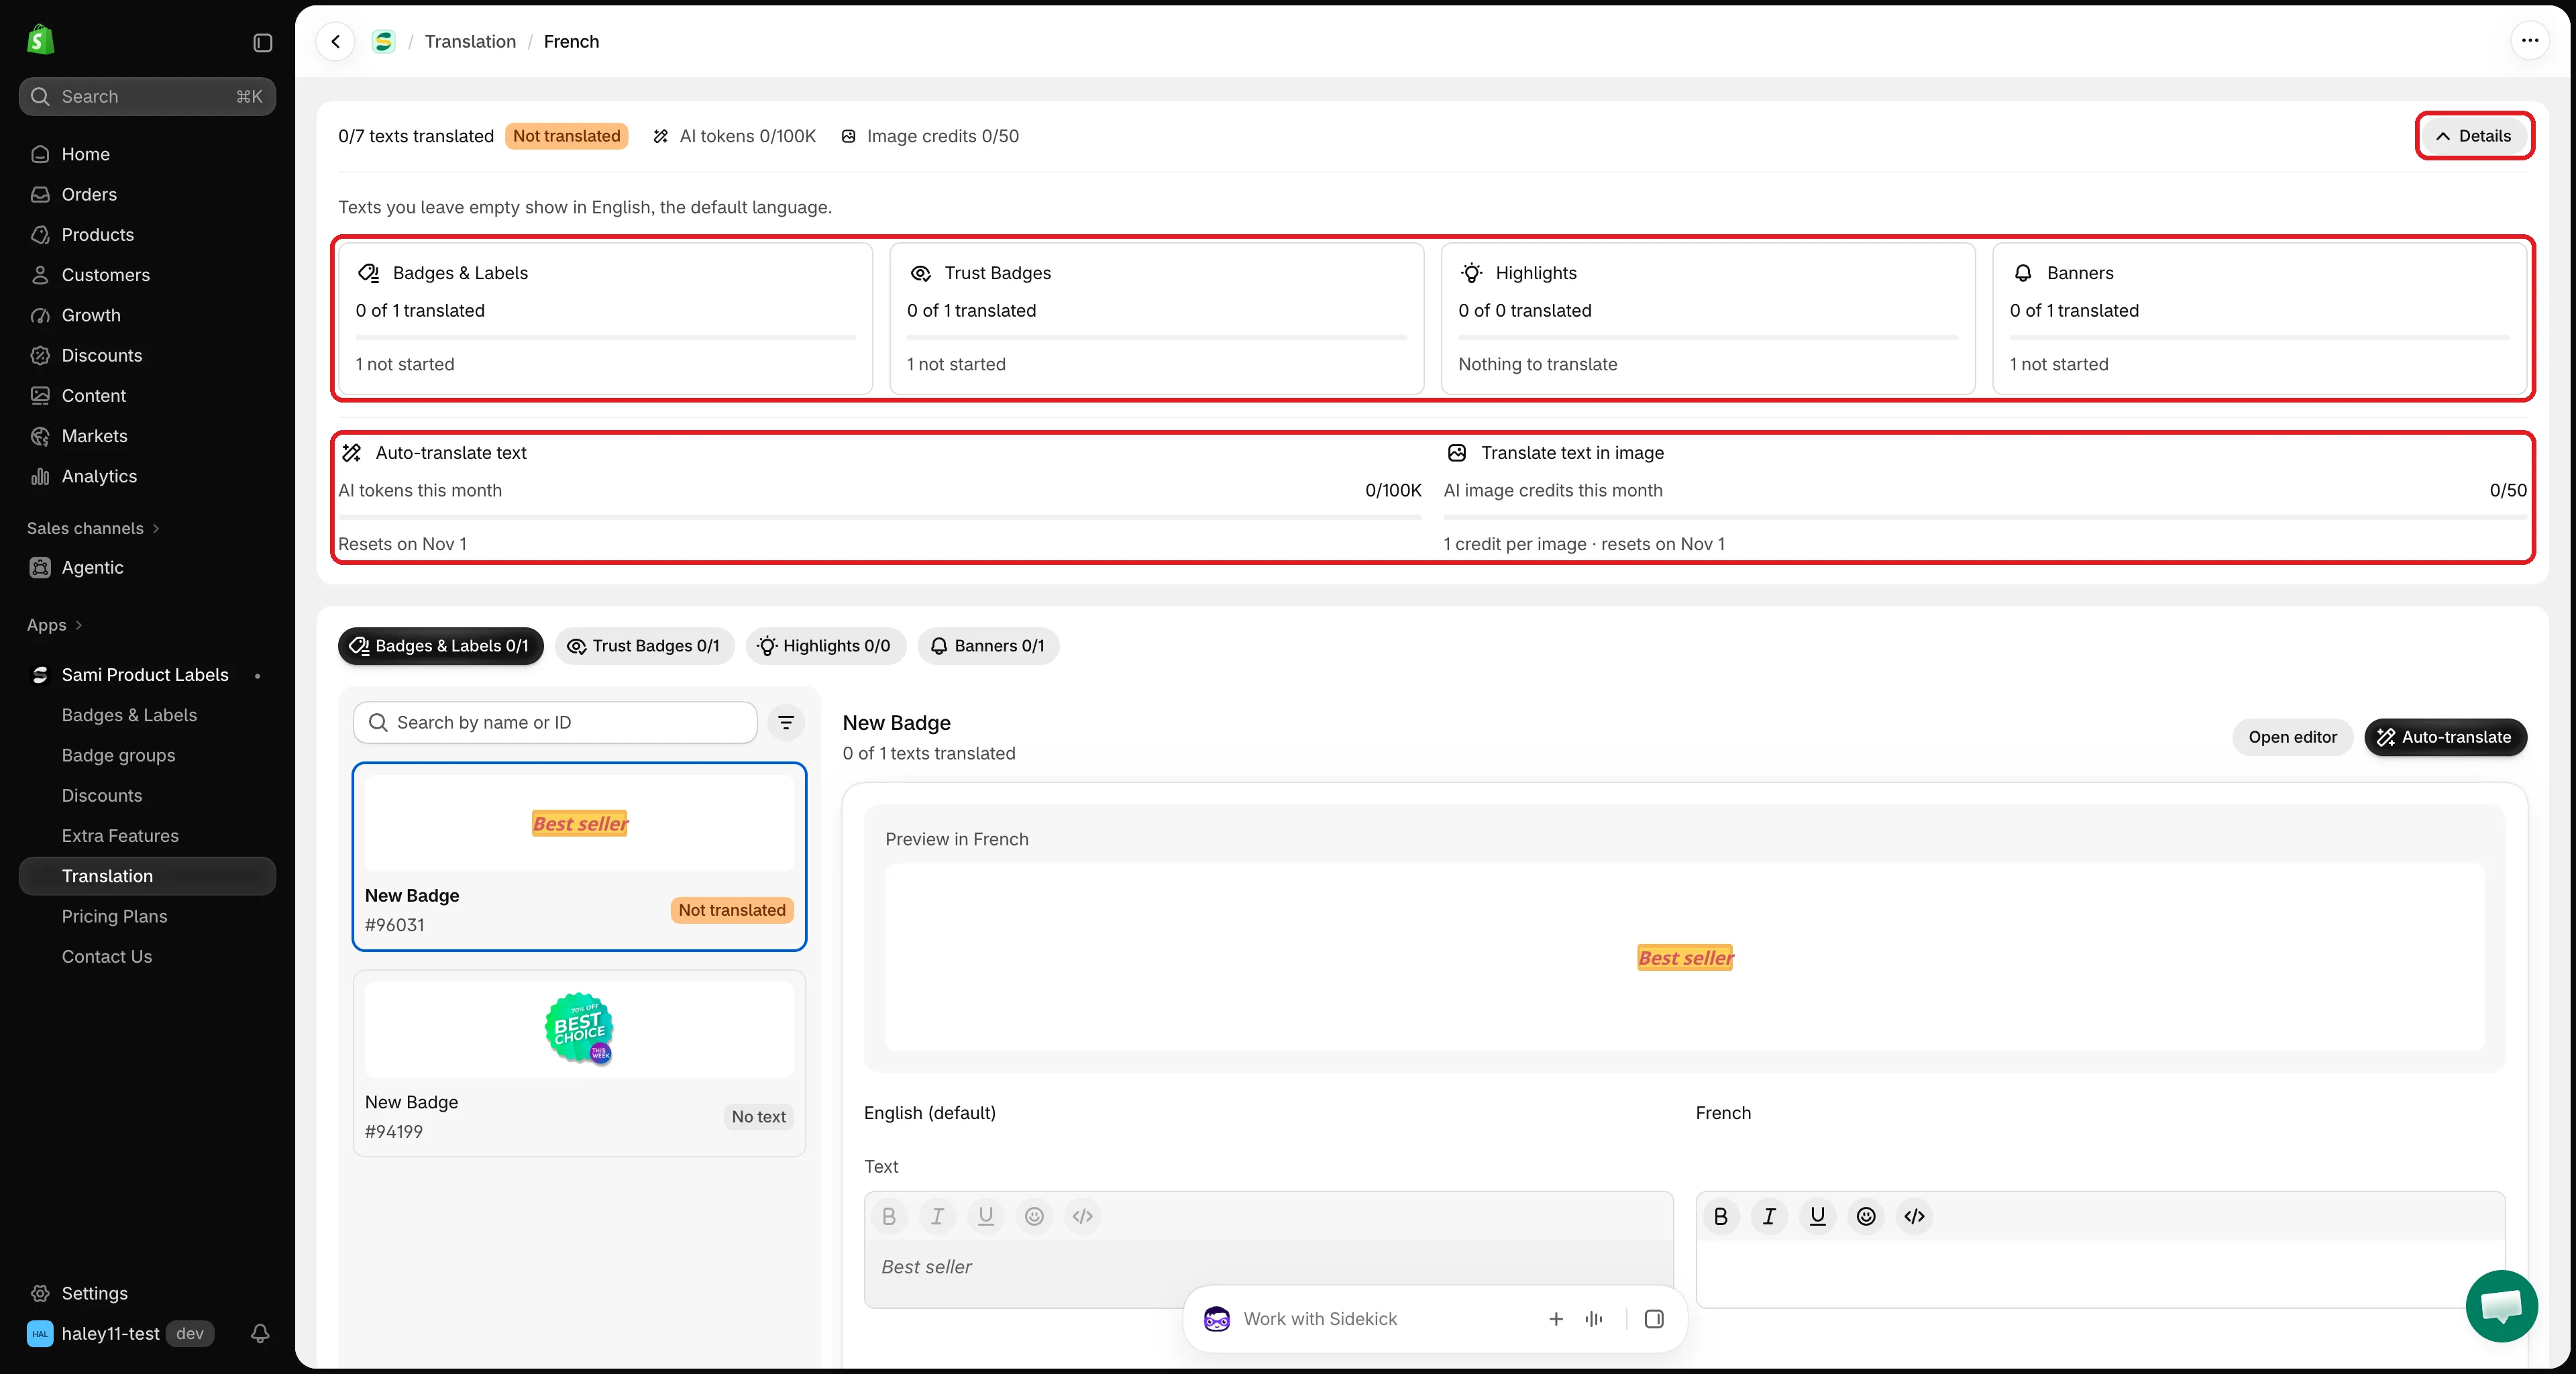
Details shows the progress of each tab and your AI usage this month.
Next steps
Section titled “Next steps”- Auto-translate with AI — translate every text of an item in one click.
- Translate image badges — translate the words inside an image badge.