
Fixed minutes per visitor
Give each visitor their own short timer that starts the moment they arrive.
Fixed minutes gives every shopper their own personal countdown. Instead of one shared deadline, the timer starts at the number of minutes you set the first time that shopper sees it, and runs down from there — the app describes it as “Individual fixed minutes countdown for each purchase session.”
Use it when you want urgency without a real end date: a “reserved for you” offer, a first-visit discount window, or a nudge on a high-consideration product.
Steps to set it up
Section titled “Steps to set it up”-
Create the countdown
Section titled “Create the countdown”Click Create countdown from the dashboard or the Countdowns page.
-
Pick a Countdown timer template
Section titled “Pick a Countdown timer template”Leave the type tab on Countdown timer, pick a design, and click Select.
-
Name it
Section titled “Name it”Name it something that tells you the mode later, like “15-minute offer timer”.
-
Write the text
Section titled “Write the text”On the Settings tab, open Content and set the Title, Subtitle, and timer labels. Wording that fits this mode talks about the shopper, not the shop — “Your offer expires in:” rather than “Sale ends in:”. See Timer text and button.
-
Choose Fixed minutes
Section titled “Choose Fixed minutes”In Setting timer, set Time type to Fixed minutes.
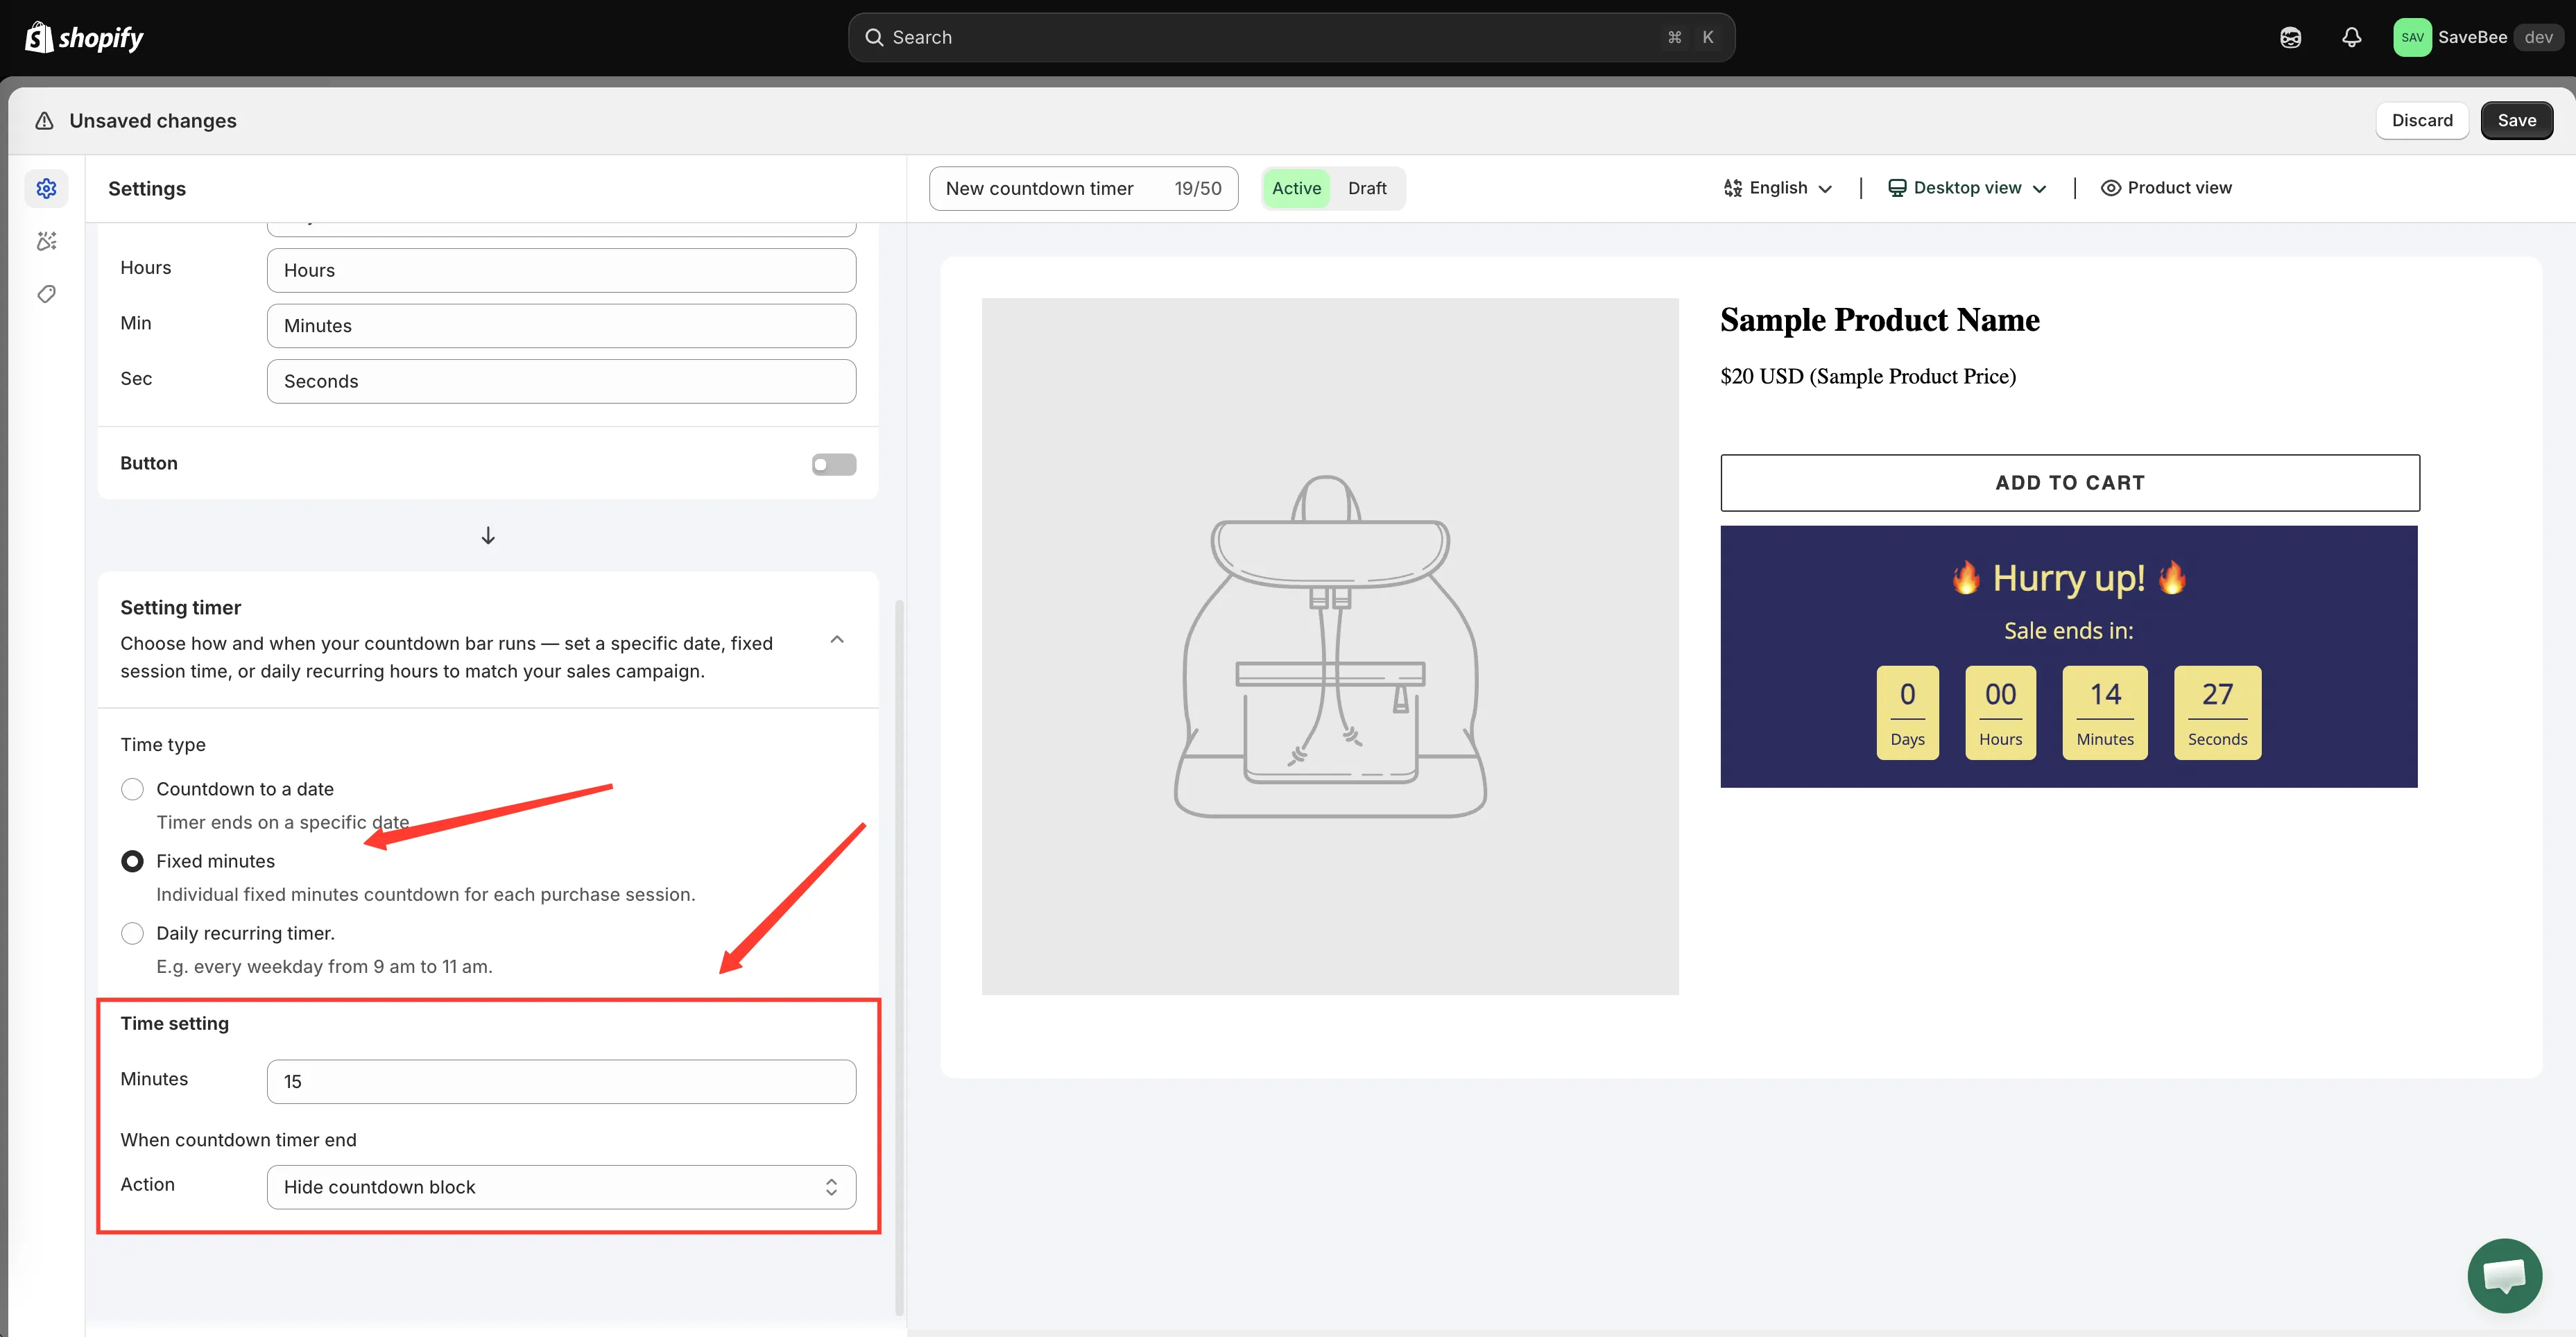
Fixed minutes replaces the date fields with a single Minutes value.
-
Set the number of minutes
Section titled “Set the number of minutes”Enter the length of the window in the Minutes field. The default is 15.
Keep it short enough to feel urgent and long enough to be plausible — most stores land between 10 and 30 minutes.
-
Choose what happens at zero
Section titled “Choose what happens at zero”Set When countdown timer end:
- Hide countdown block — the timer disappears once their window closes.
- Repeat the timer — it immediately restarts for another full window, so the shopper always sees a running clock.
- Do nothing — it sits at zero.
See When the timer ends.
-
Style it on the Design tab
Section titled “Style it on the Design tab”Adjust colors, fonts, and spacing on the Design tab, or keep the template’s look. See Design a countdown.
-
Choose where it shows
Section titled “Choose where it shows”On the Display tab, tick Product page, or copy the Shortcode for a custom position. Narrow it with Conditions if it should only apply to some products — see Display conditions.
-
Save it as Active and check your storefront
Section titled “Save it as Active and check your storefront”Save with the status set to Active, then open a matching page on your live storefront. The timer starts at the full number of minutes.
To see what a returning shopper sees, reload the page — the timer picks up where it left off rather than restarting. To see a brand-new visitor’s view again, open the page in a private or incognito window.
How each visitor’s timer is remembered
Section titled “How each visitor’s timer is remembered”The first time a shopper sees the timer, the app records their personal end time in a cookie in their browser. On every later page view it reads that cookie back, so the countdown continues instead of starting over.
What follows from that:
- Per browser, per device. The same person on their phone and their laptop gets two separate timers.
- Clearing cookies resets it. So does a private window, or a browser set to block site data.
- Changing the Minutes value resets everyone. If you edit the number and save, every visitor’s timer restarts at the new length the next time they load a page. Decide on a length before a campaign rather than tuning it mid-flight.