
Klaviyo
Connect Klaviyo so buyers who apply through a form, or the ones you approve, join a Klaviyo list with their answers on their profile.
Sami B2B Onboarding can add each buyer who applies, or each buyer you approve, to a Klaviyo list. The app creates or updates the buyer’s Klaviyo profile with the answers you choose, then subscribes them to the list. You add your Klaviyo key once for the store, and each form picks its own list.
The app sends Klaviyo a profile and a list subscription. It doesn’t send Klaviyo events.
Create a private API key in Klaviyo
Section titled “Create a private API key in Klaviyo”-
Open your API keys
Section titled “Open your API keys”In Klaviyo, open Settings › API keys.
-
Create a private key
Section titled “Create a private key”Click Create Private API Key and give it a name you’ll recognize, such as “Sami B2B Onboarding”.
The app reads your lists, creates and updates profiles, and subscribes them to a list. Choose Full Access Key, or a Custom Key with full access to Lists, Profiles and Subscriptions.
-
Copy the key
Section titled “Copy the key”Create the key and copy it. A private key starts with
pk_.
Add the key to the app
Section titled “Add the key to the app”-
Open the Klaviyo panel
Section titled “Open the Klaviyo panel”Go to Forms and click Edit beside the form. In the rail on the left, click Integrations. Under Connected apps, click Connect on the Klaviyo row.
The Klaviyo panel opens with three sections: Account, This form and Field mapping.
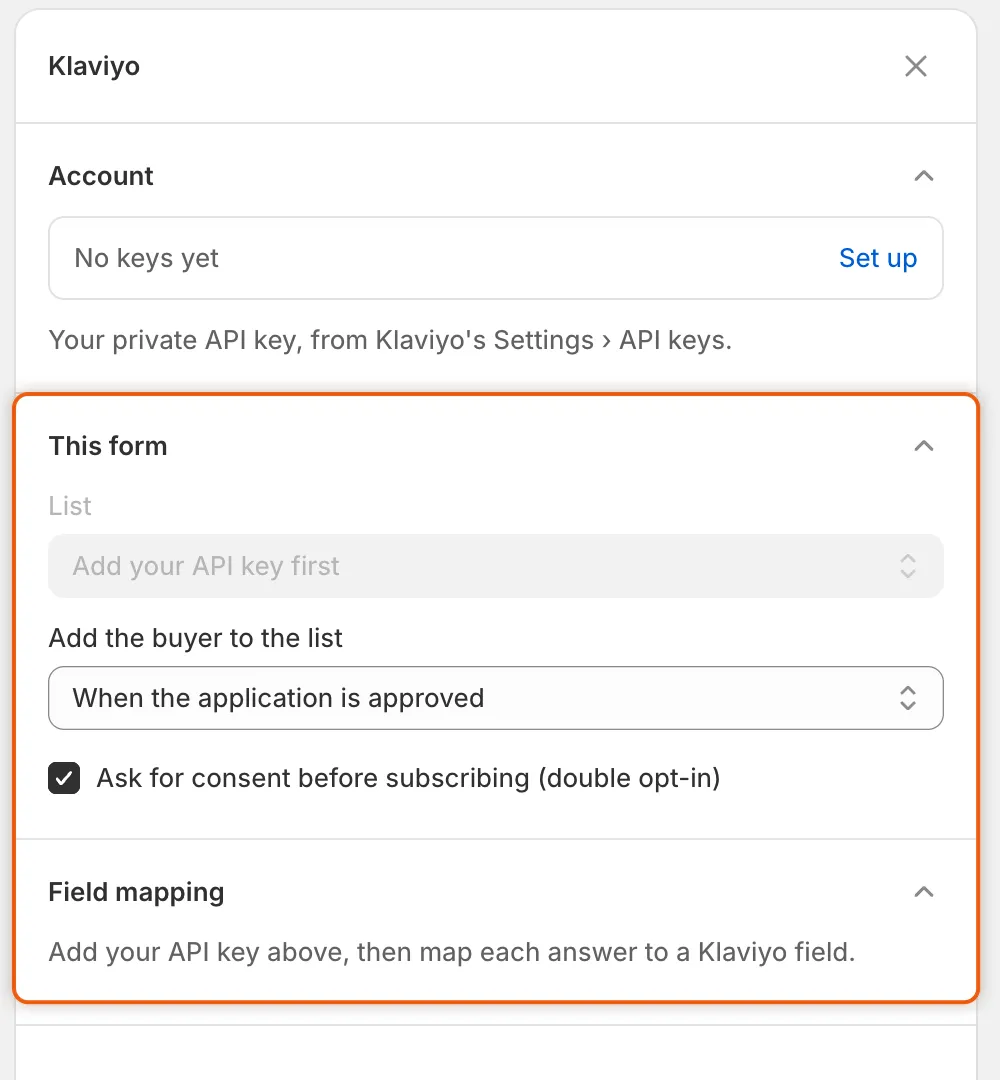
Until you add your API key under Account, you can’t pick a list or map answers, but you can already choose when buyers join and the double opt-in setting.
-
Paste the key
Section titled “Paste the key”Under Account, click Set up. In the Klaviyo dialog, paste the key into Private API key and click Save.
You see Keys saved. The Account row now shows the start and end of the key, and the line under it reads Used by every form in this store.
Choose the list and when buyers join
Section titled “Choose the list and when buyers join”All of these are under This form.
- In List, pick the Klaviyo list. While the app reads your lists, the box says Checking your keys….
- In Add the buyer to the list, choose When the application is submitted (the default) or When the application is approved. Choose approval if you only want buyers you accepted on the list.
- Leave Ask for consent before subscribing (double opt-in) ticked, or clear it. See the table below.
| Ask for consent before subscribing (double opt-in) | What the app does |
|---|---|
| Ticked (default) | Asks Klaviyo to subscribe the buyer to the list. If the list uses double opt-in in Klaviyo, Klaviyo first emails the buyer to confirm. |
| Cleared | Adds the buyer’s profile to the list straight away, without a consent request. |
If List can’t be filled, the panel says why:
| Message | What to do |
|---|---|
| Klaviyo would not accept that API key. Change it above and try again. | The key is wrong, was deleted in Klaviyo, or can’t read lists. Create a new key and paste it with Change. |
| Klaviyo didn’t answer. Close this panel and open it again to retry. | Klaviyo couldn’t be reached. Close the panel and open it again. |
| This Klaviyo account has no lists yet. Create one in Klaviyo, then reopen this panel. | Create a list in Klaviyo, then open the panel again. |
Map answers to Klaviyo fields
Section titled “Map answers to Klaviyo fields”Once a list is chosen, Field mapping lists your form’s questions. Each one has a dropdown that starts at Don’t send. Pick the Klaviyo field it fills: Email, Phone, First name, Last name, Title, Organization, Address line 1, Address line 2, City, Region, Postal code or Country.
For the Wholesale application form, a good start is:
| Question on the form | Klaviyo field |
|---|---|
| Company name | Organization |
| First name | First name |
| Last name | Last name |
| Job title | Title |
| Address line 1, City, State or province, ZIP or postal code, Country | Address line 1, City, Region, Postal code, Country |
The form has a shipping and a billing address with the same question names. Map one of them, not both. The list also shows the form’s headings, such as Company information. They hold no answer, so leave them at Don’t send.
As the panel says, An answer with no Klaviyo field is not sent. Email is what Klaviyo keys a profile by. If no question is mapped to Email, the app uses the email on the application. A buyer who applies twice updates the same profile.
Connect and save
Section titled “Connect and save”-
Connect the form
Section titled “Connect the form”At the bottom of the panel, click Connect. The button changes to Disconnect, and the Klaviyo row in Connected apps shows Connected.
If the key isn’t saved yet, a banner reads Add your Klaviyo private API key first.
-
Save the form
Section titled “Save the form”Click Save in the save bar. You see Form saved. Nothing is sent to Klaviyo until you save.
Check it works
Section titled “Check it works”-
Send a test application
Section titled “Send a test application”Go to Forms and click Copy link beside the form. Open the link in a private browser window and submit an application with an email address you can open, for example as Acme Supply Co. If you chose When the application is approved, approve it in Companies › Applications.
-
Read the result in the app
Section titled “Read the result in the app”Open the application. On its Timeline, click the Klaviyo · Acme Supply Co. entry. It opens to show Added to the Klaviyo list. The same entry appears under Recent runs on the Automations tab of Automation, and in Settings › Activity log on its Emails view.
-
Check the list in Klaviyo
Section titled “Check the list in Klaviyo”In Klaviyo, open the list. The buyer’s profile is on it. With double opt-in on the list, the buyer joins after they confirm the email Klaviyo sends.
If the entry says something else:
| Result | What it means |
|---|---|
| Skipped — the answers have no email to subscribe | No answer mapped to Email had a value, and the application had no email address either. Check that the form still has its email field. |
| Klaviyo refused the profile, with a number such as (400) | With 401 or 403, Klaviyo refused the key: paste a working one with Change under Account. With another number, Klaviyo didn’t accept one of the mapped answers. Check what you map, such as Phone. |
| Klaviyo didn’t answer | Klaviyo couldn’t be reached, or refused the subscription. Check the key and the list in the panel. |
Disconnect a form or remove the key
Section titled “Disconnect a form or remove the key”- Stop one form: open its Klaviyo panel, click Disconnect, then Save. The list and mapping stay, so you can connect again later.
- Change the key: under Account, click Change, paste the new key and click Save. Leave the box empty to keep the key you already saved.
- Remove the key for every form: under Account, click Change, then Remove keys. The dialog warns Every form in this store stops using Klaviyo until you add keys again. Click Remove keys to confirm, or Keep keys. You see Keys removed. This takes effect at once, with no save needed.
Next steps
Section titled “Next steps”- Webhooks (Zapier, Make, n8n) — send application events to other tools.
- Map answers to Shopify — choose which answers fill the Shopify customer and company.
- Activity log — see every delivery the app made.