
Documents
Find, download and export the business licenses, tax certificates and other files buyers upload with their applications.
The Documents tab in Sami B2B Onboarding lists every file buyers upload through a document field on your application form, from every application, whatever its status. Use it to find a reseller certificate quickly, download it, or export the list for your records.
How documents get there
Section titled “How documents get there”A file becomes a document when the buyer uploads it through one of the four ready-made document fields. In the form builder, add them from the Document fields group:
- Business license
- Tax certificate
- Tax registration
- Reseller certificate
Each upload is listed under the field’s document type. A plain File upload field doesn’t add anything to Documents. Its file stays with the application’s answers. To add document fields to your form, see Build your form.
When a buyer uploads a file with a different name after you request more information, it’s added as another document. The earlier one stays.
Open the Documents tab
Section titled “Open the Documents tab”In the Shopify admin, open Sami B2B Onboarding, click Companies in the app menu, then click the Documents tab.
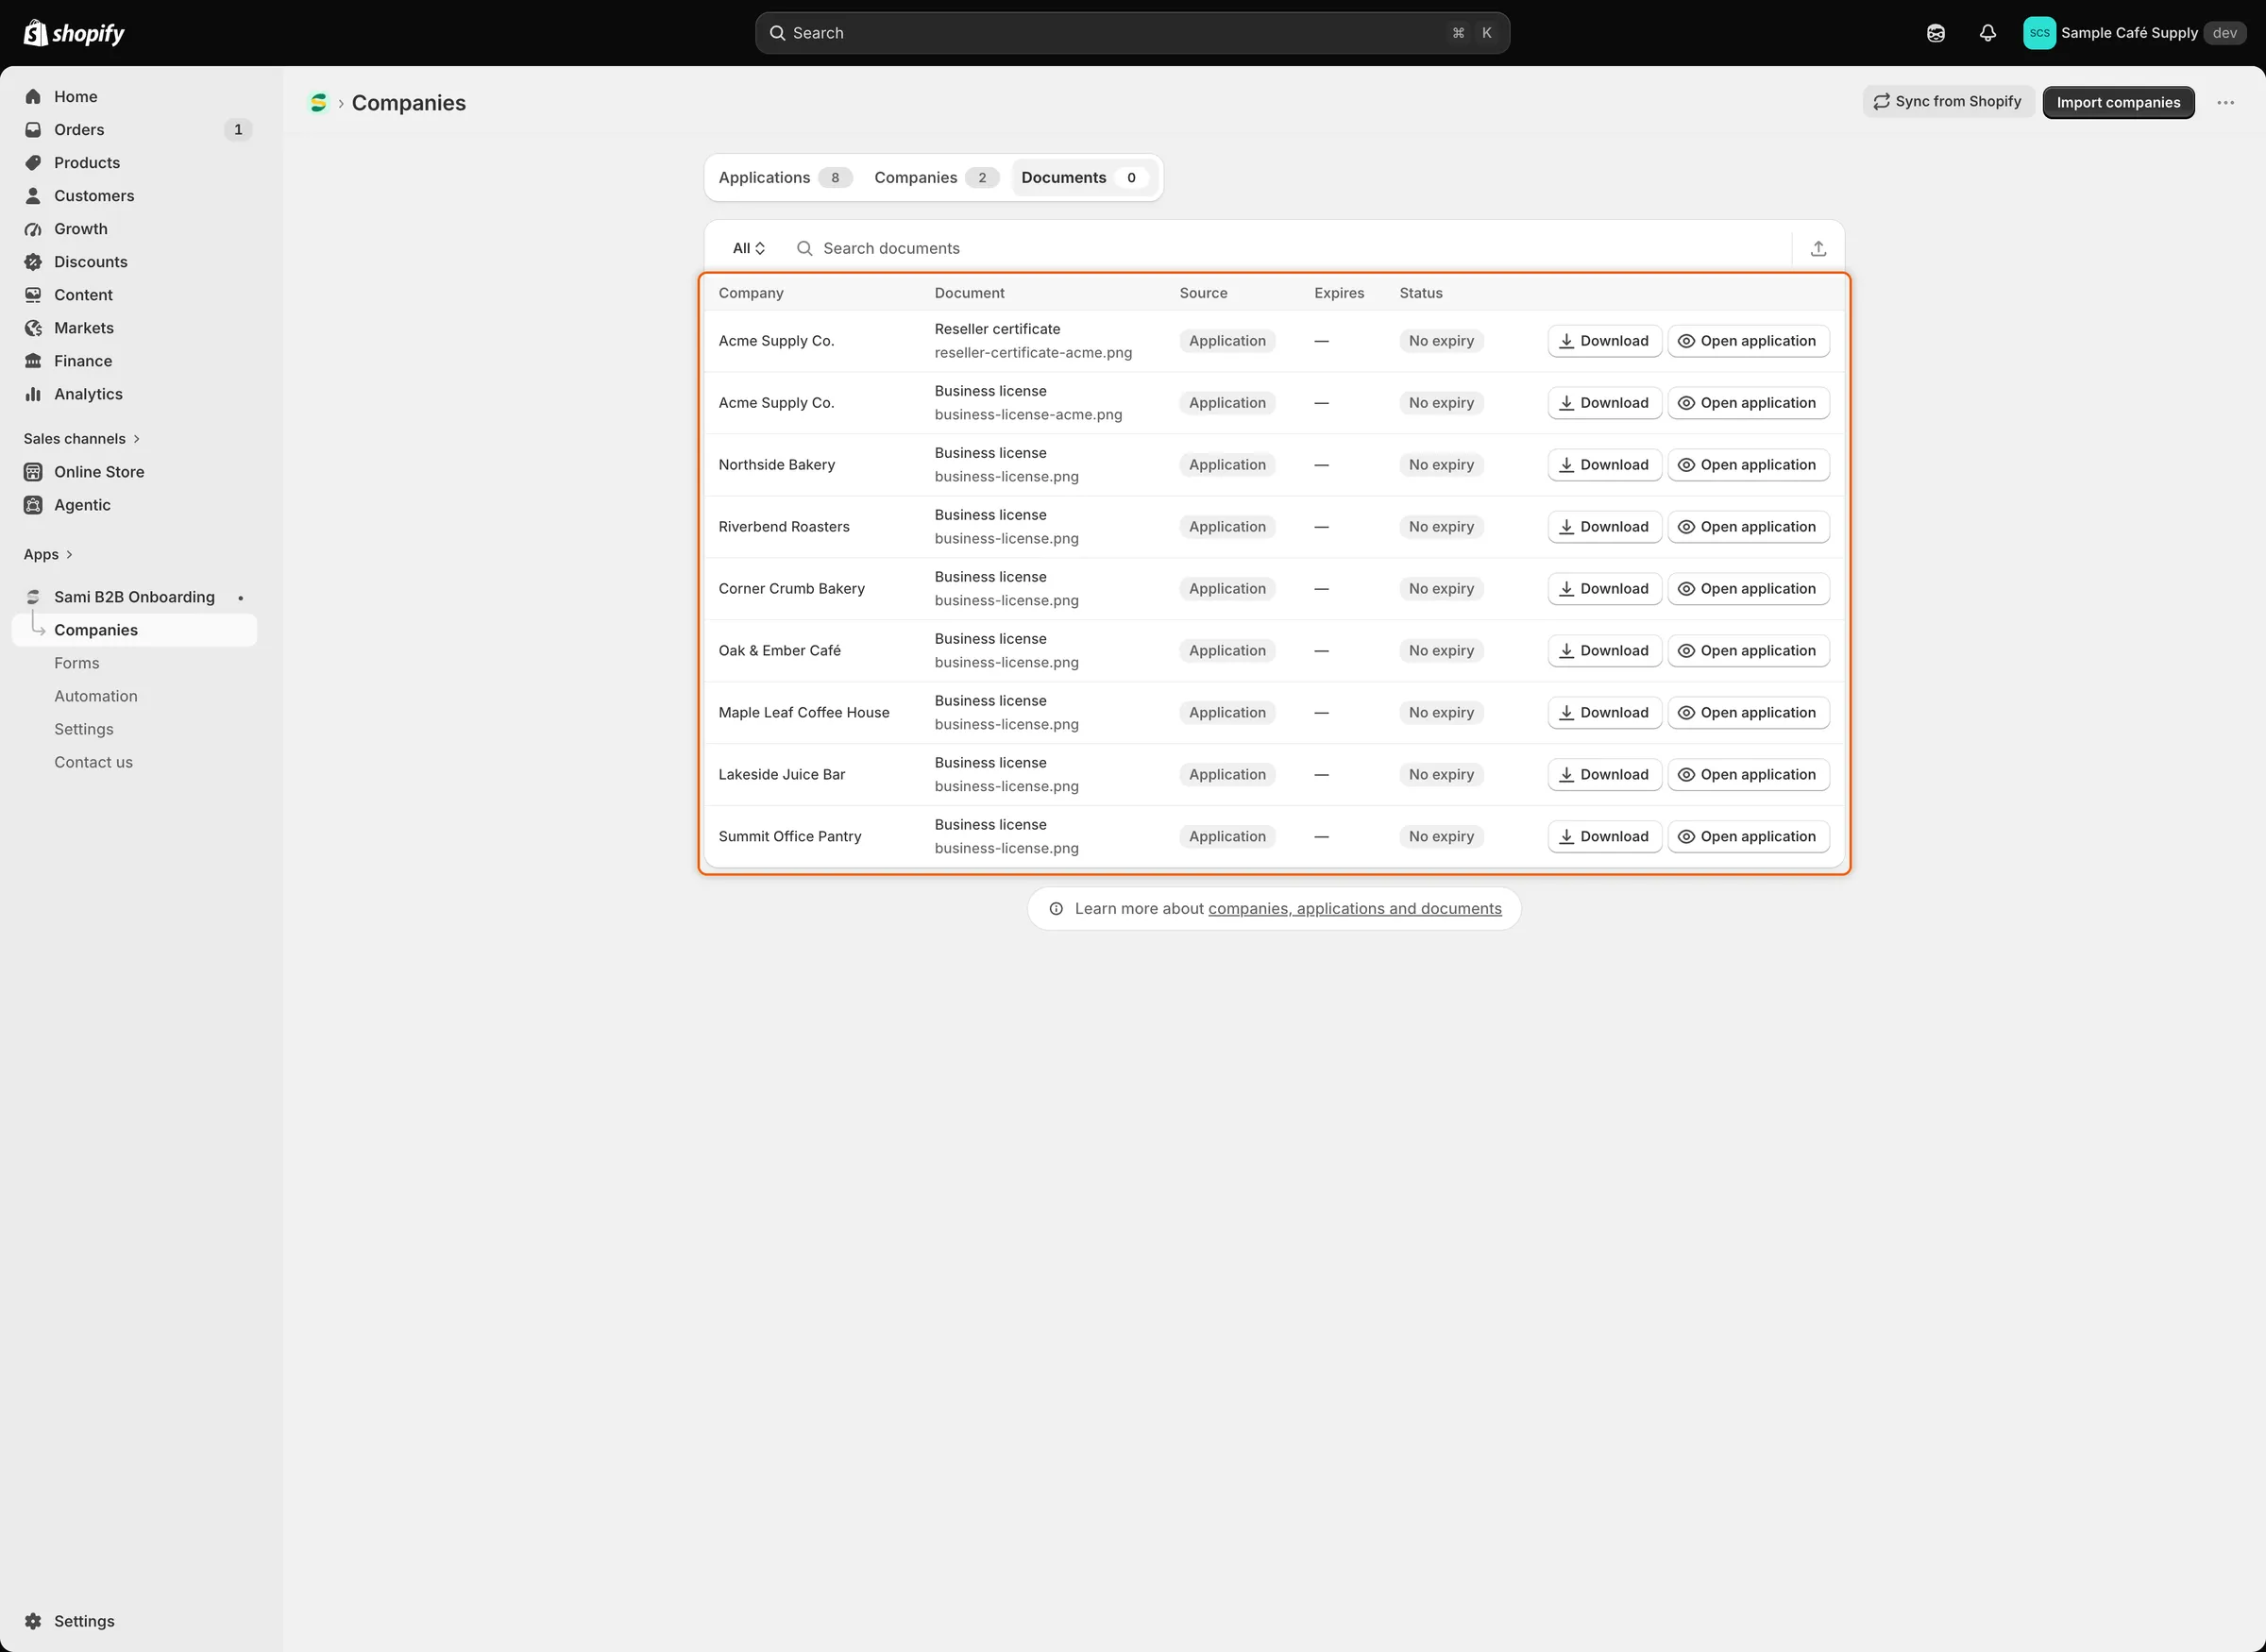
Each row shows the company, the document type with its file name, and buttons to download the file or open the application.
| Column | What it shows |
|---|---|
| Company | The company the document belongs to. |
| Document | The document type, with the file name under it. |
| Source | Application for files uploaded with an application. |
| Expires | The expiry date, or a dash when there is none. |
| Status | No expiry when the document has no expiry date. |
The application form doesn’t ask buyers for issue or expiry dates, so documents uploaded through it show a dash under Expires and No expiry under Status.
Find a document
Section titled “Find a document”Type in Search documents to search by document type, file name or company name.
The view button at the start of the search field (All to start with) also offers Needs attention, for documents that expire within 30 days or have expired. Files uploaded through the form have no expiry date, so that list stays empty.
Download a file
Section titled “Download a file”-
Find the document
Section titled “Find the document”Search for the company or the document type.
-
Click Download
Section titled “Click Download”Click Download on the document’s row. The app makes a private download link and opens it in a new browser tab, where the file downloads. The link works for five minutes. To download the file again later, click Download again.
When a document holds several files, Download on this tab gets the first one. To download each file, open the application and use its Attachments card.
If a banner says “That file couldn’t be opened.”, try again. If it keeps happening, the file may no longer be stored: ask the buyer for a new copy.
Open the application
Section titled “Open the application”Click Open application on a row to see the application the file came with, including the buyer’s answers and the decision.
A company’s own page also lists its files in an Attachments card, with a button to download each file. See Manage a company.
Export the list
Section titled “Export the list”-
Open the Export dialog
Section titled “Open the Export dialog”On the Documents tab, click the Export icon beside the search field.
-
Choose the rows and the format
Section titled “Choose the rows and the format”Choose Current page, All documents or Matching your search. Then choose CSV for Excel, Numbers, or other spreadsheet programs or Plain CSV file.
-
Export
Section titled “Export”Click Export documents. The CSV file downloads with the company, document type, source, issue date and expiry date of each document.
Next steps
Section titled “Next steps”- Build your form — add document fields to your application form.
- Review an application — check a buyer’s documents before you decide.
- Manage a company — see a company’s files beside its orders and terms.