
Create and publish a form
Make a new application form, publish it, put it on your store and check it works.
Create a new application form when the Wholesale application that Sami B2B Onboarding made at install doesn’t fit, or when you need a second form, for example one for café owners and one for resellers. This page takes you from an empty form to a form buyers can fill in on your store.
Create the form
Section titled “Create the form”-
Open the builder
Section titled “Open the builder”In the app, go to Forms and click Create form.
The builder opens in a full-screen window titled New form, with a Draft badge. The form already holds one page, Page 1, with two required fields: Email and Company name. The header reads Apply for a business account and Tell us about your company.
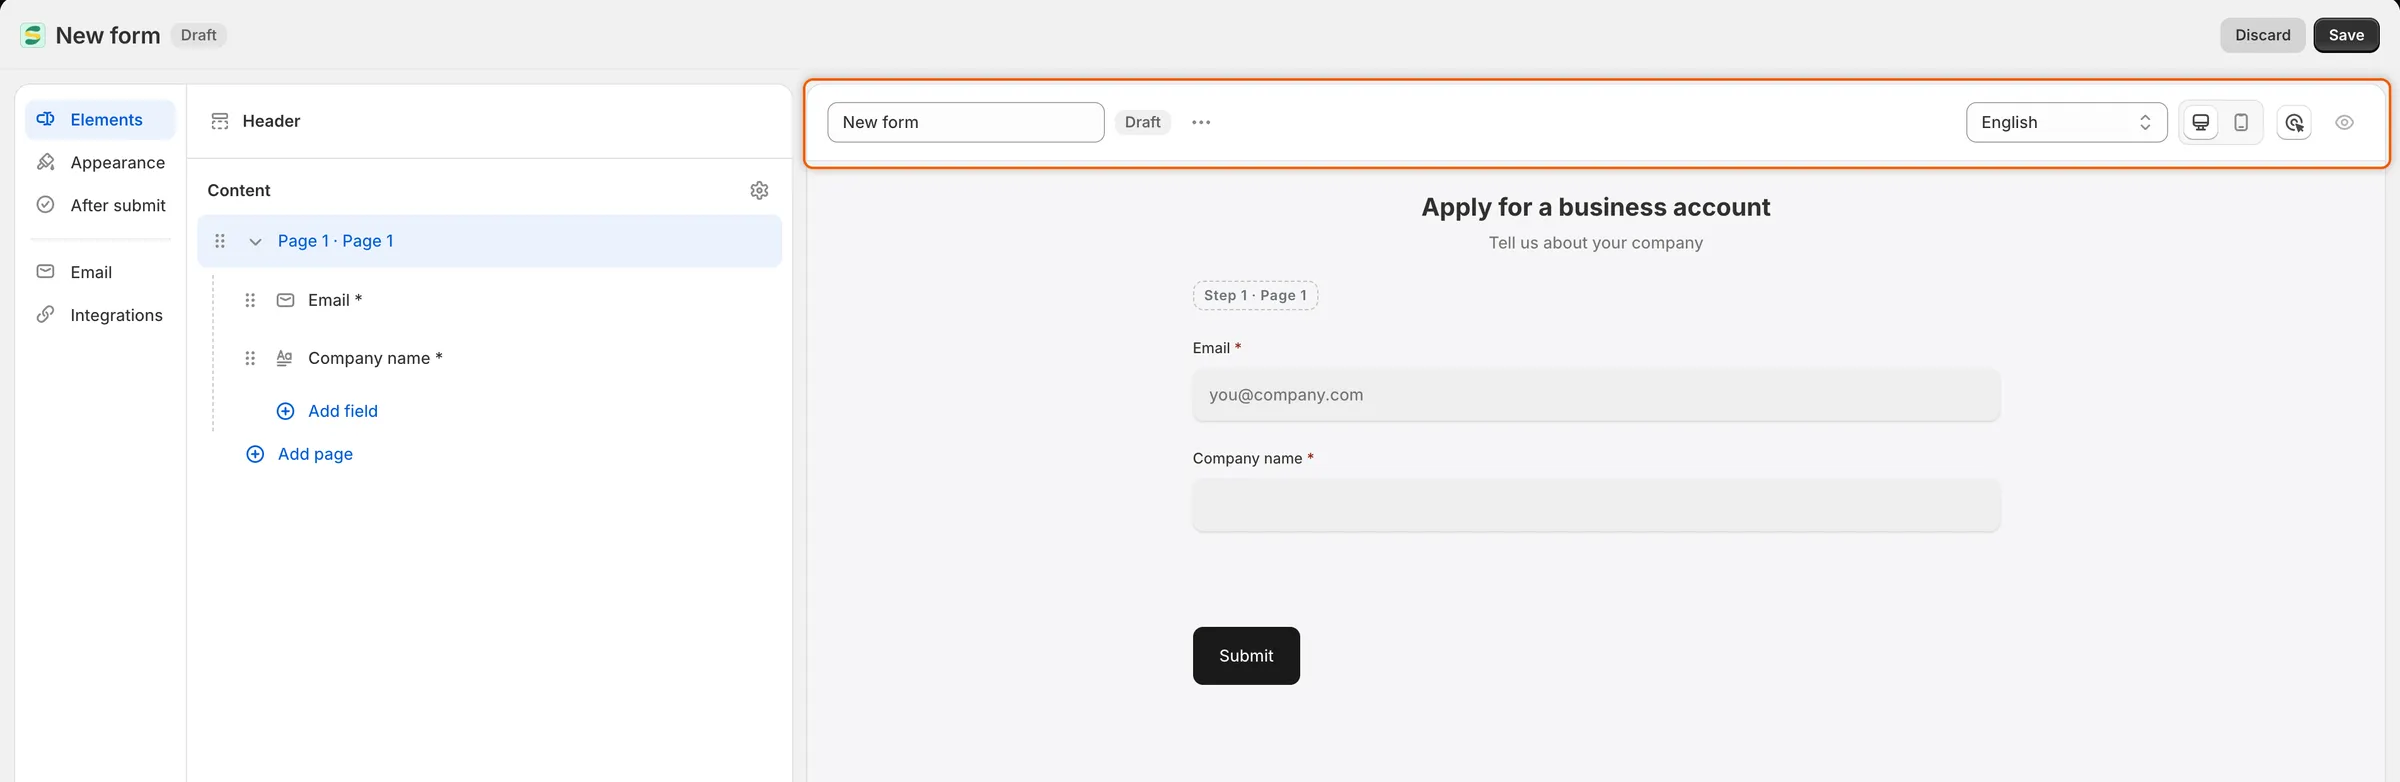
A new form opens as a Draft called New form, with Email and Company name already on Page 1.
-
Name the form
Section titled “Name the form”Click the Form name box at the top of the preview, delete New form and type a name, for example
Café wholesale application.The name is what you see on the Forms page. It is also the title of the form’s page on your store.
-
Add your questions
Section titled “Add your questions”Click Add field under Page 1 in the Elements panel on the left, or Add a field at the end of the page in the preview. Pick a field from the list, for example Phone or Tax ID. The field is added to the page and its settings open on the right, where you can change its label and turn on Required.
Repeat for every question you want to ask. For every field type and setting, see Build your form.
-
Click Save in the save bar.
The app saves the form and publishes it. The badge changes to Active, a Form saved message appears, and the Your form is ready dialog opens with two things you can copy:
- Public link: the address of the page the app created for this form on your Online Store. Click Copy beside it to copy it.
- Embed code: a snippet that shows the form inside another page. Click Copy beside it to copy it.
Click Done to close the dialog.
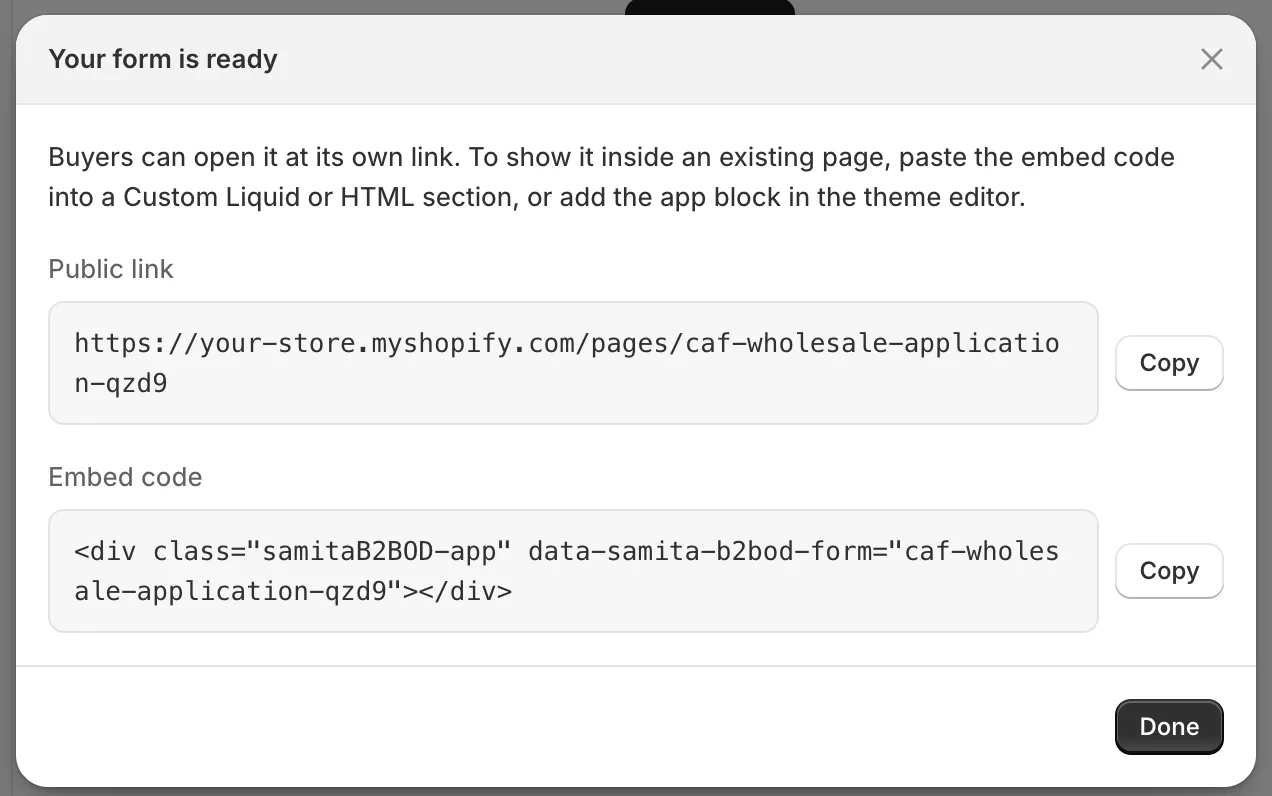
After the first save, the dialog gives you the form’s own link and an embed code.
-
Make it the default (optional)
Section titled “Make it the default (optional)”Close the builder window to go back to the Forms page. On the form’s row, click … (More actions) and choose Set as default.
A Default form set message appears and the form gets a Default badge. The badge moves off the form that had it. Only an Active form can be made the default.
The default form is the one the app uses wherever you haven’t picked a specific form, such as the theme editor’s form block with its Form setting left empty, and the Apply for an account button on a locked store.
-
Put the form on your store
Section titled “Put the form on your store”The quickest way is the page the app already created. On the Forms page, the page’s address, starting with
/pages/, is shown under the form’s name. Click Copy link beside it, then add that link to your store’s menu or send it to buyers.To show the form inside a page of your own instead, use the theme editor block or the embed code. See Add a form to your store.
-
Check it on your store
Section titled “Check it on your store”Open the copied link in a private browser window, so you see the form the way a new buyer does.
- Click Submit without filling anything in. Each required field shows an error under it, for example Company name is required.
- Fill in the form and click Submit. The thank-you message replaces the form.
- In the app, go to Forms. The form’s row now shows 1 submission. Click it to see the application in Companies › Applications.
If the page shows no form, check that the app embed is on and that the form’s badge says Active. If it shows Log in to apply instead, your store asks buyers to log in first. See Ask buyers to log in before applying.
Duplicate a form
Section titled “Duplicate a form”Copy a form when you want a second one with most of the same questions.
-
Make the copy
Section titled “Make the copy”On the Forms page, click … (More actions) on the form you want to copy and choose Duplicate form.
-
Edit the copy
Section titled “Edit the copy”The app makes a copy named after the original with copy at the end, for example Wholesale application copy, and opens it in the builder. The copy is a Draft, so buyers can’t see it yet. Rename it, change what you need and click Save.
-
Publish the copy
Section titled “Publish the copy”Close the builder. On the copy’s row, click … (More actions) and choose Publish. A Form published message appears and the badge changes to Active.
Unpublish or publish a form
Section titled “Unpublish or publish a form”Unpublish a form to stop new applications through it without losing anything.
- From the Forms page: click … (More actions) on the form and choose Unpublish or Publish. The change takes effect at once, and a Form unpublished or Form published message appears.
- From the builder: click … (More actions) in the toolbar, choose Unpublish or Publish, then click Save.
When a form is unpublished, its badge says Draft and its page is taken off your store. If the form is embedded in another page, buyers see This form is not available right now. Applications you already received stay where they are.
If you unpublish the default form, the app uses your oldest published form in its place until you publish the default again or choose another one.
Delete a form
Section titled “Delete a form”-
Choose Delete form
Section titled “Choose Delete form”On the Forms page, click … (More actions) on the form and choose Delete form. You can also choose Delete form from … (More actions) in the builder’s toolbar.
-
Confirm
Section titled “Confirm”A dialog asks you to confirm and reminds you that buyers who open the form’s link will no longer be able to apply. Click Delete form. A Form deleted message appears and the form leaves the list.
What happens next:
- Applications already submitted through the form are kept in Companies › Applications.
- The form’s page is unpublished, not deleted, so any text you added to it is safe. You can delete the page yourself in Shopify under Online Store › Pages.
- If you deleted the default form, your oldest remaining form becomes the default.
- You can’t delete your only application form. Create another one first.
Next steps
Section titled “Next steps”- Build your form — add fields, rows and pages, and set up each field.
- Show, require or disable fields with rules — ask some questions only when they apply.
- Map answers to Shopify — decide where each answer goes when you approve.
- Add a form to your store — show the form inside your own pages.