
Activity log
See everything that happened in the app, narrow it down by type, person and date, find out why an email didn't arrive and export the log.
Settings › Activity log is the full history of Sami B2B Onboarding in your store: each application decision, each email and automation run, each import, and the changes your team and your buyers made. Admins and reviewers can both open it.
Read the log
Section titled “Read the log”Go to Settings and click Activity log. The newest activity is at the top, 10 rows per page. Use the arrows under the table to go back further.
| Column | What it shows |
|---|---|
| When | The date and time, such as “Oct 5, 14:30”. |
| Who | The team member’s name, Rule: and the rule’s name, Buyer, or System for what the app did on its own. |
| What changed | What happened, such as “Approved Acme Supply Co.” or “Application received · Acme Supply Co.”. Rejections and failures are in red. |
| Detail | More about it, such as the reason given, the result of an email or what a status changed from and to. |
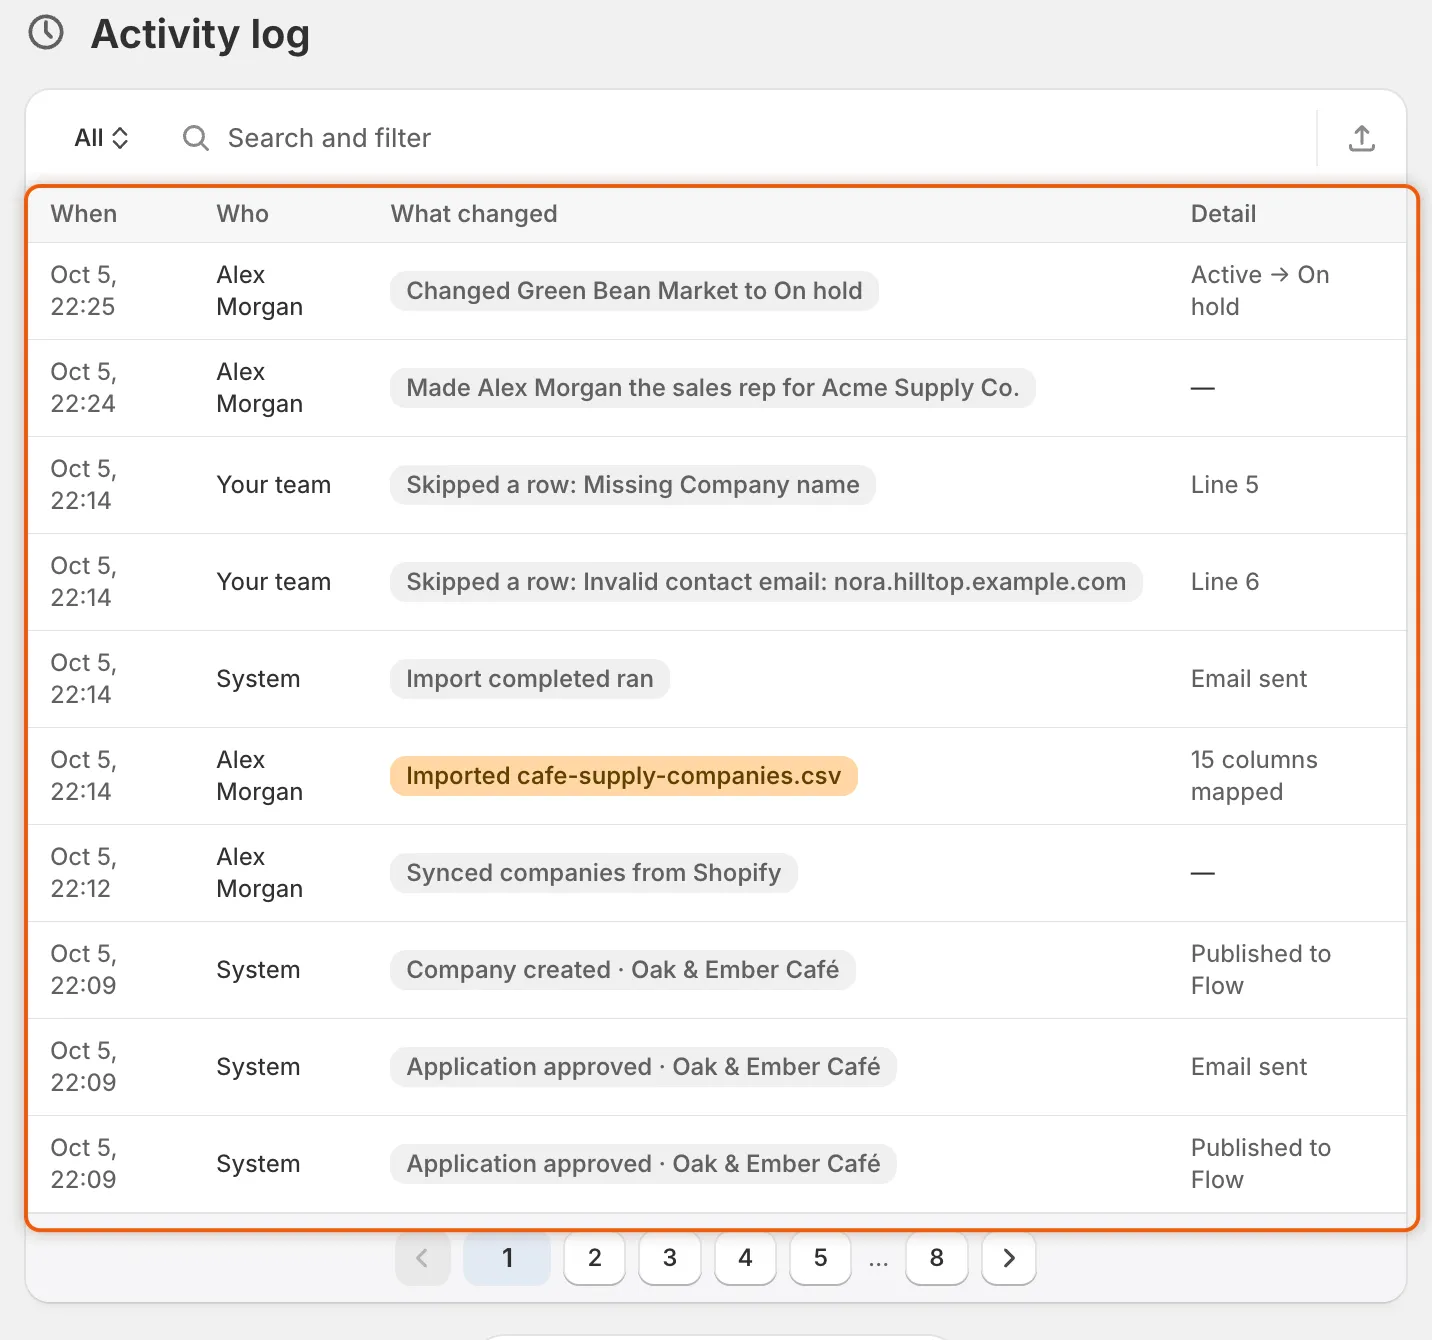
Each row says when it happened, who did it, what changed and the detail.
Narrow the log
Section titled “Narrow the log”The bar above the table has four tools. Use them together.
-
View. Click the name at the left of the bar, All to start with, and pick a view:
View What it lists All Everything. Applications New applications, approvals, rejections, requests for more information, resubmissions, closed applications and what your rules did. Emails Every email and automation run with its result, including the app’s writes to Shopify and test emails, plus changes such as edited answers, approval terms, a company’s status or a possible duplicate. Imports Company imports from CSV files, syncs from Shopify, and each row an import skipped. -
Search. Type in the Search and filter box. It finds company names, team members’ names, rule names, file names and reasons.
-
Who. Click in the search box and choose Who, then pick Your team, Automation rules, Buyers or System.
-
When. Choose When, then pick Last 7 days, Last 30 days, Last 90 days or Last 12 months.
A filter you’ve added shows in the bar, for example “Who is Your team”. Click it to change it, or click its × to remove it. If nothing matches, the table says No activity matches. Click Show all activity to clear everything.
What gets recorded
Section titled “What gets recorded”| Kind | Examples |
|---|---|
| Applications | “New application from Acme Supply Co.”, “Approved Acme Supply Co.”, “Requested information from Acme Supply Co.”, “Closed Acme Supply Co.: the buyer didn’t answer” |
| Rules | “Rule “US with valid tax ID” approved it”, “Rule “US with valid tax ID” matched” |
| Emails and automations | One row per email or automation an event sends, with its result |
| Test emails | “Sent a test email”, “Test email failed” with the reason |
| Your team’s changes | Edited answers, saved approval terms, a company’s status, the sales rep, who an application is assigned to |
| Checks | Possible duplicate companies, tax ID checks |
| Buyers’ changes | Contacts a buyer added, changed or removed from their company page in the customer account |
| Imports | Each CSV import and Shopify sync, and each skipped row with its reason |
| Data retention | “Applied data retention”, with how many applications expired and how many were deleted |
Find out why an email didn’t arrive
Section titled “Find out why an email didn’t arrive”-
Open the Emails view
Section titled “Open the Emails view”In Settings › Activity log, click All at the left of the bar and choose Emails.
-
Search for the company
Section titled “Search for the company”Type the company’s name in the Search and filter box, for example
Acme Supply Co.. -
Find the row for the event
Section titled “Find the row for the event”Rows are named after the event that sends the email, such as “Application approved · Acme Supply Co.” for the Account approved email. An event that sends two emails, one to the buyer and one to your team, has a row for each.
-
Read the Detail column
Section titled “Read the Detail column”Detail says What it means What to do Email sent The app sent the email. Ask the buyer to check their spam or junk folder, and check the email address on the application. Not sent — this email is turned off. Turn it on in the form’s Email tab or in Settings › Email. The reviewer asked to email the buyer about their decision, but that email is switched off. Turn it on. See Edit email templates. Reviewer chose not to email the buyer The person who made the decision chose not to email the buyer. Nothing is wrong. No recipient address There was no address to send to. Check the application’s email, or your team’s recipients. Email not sent: the mail server didn’t accept it Your mail server refused it. Check Settings › Email. See Send from your own address (SMTP). Email not sent Something else stopped it. Contact support with the company name and the time on the row. 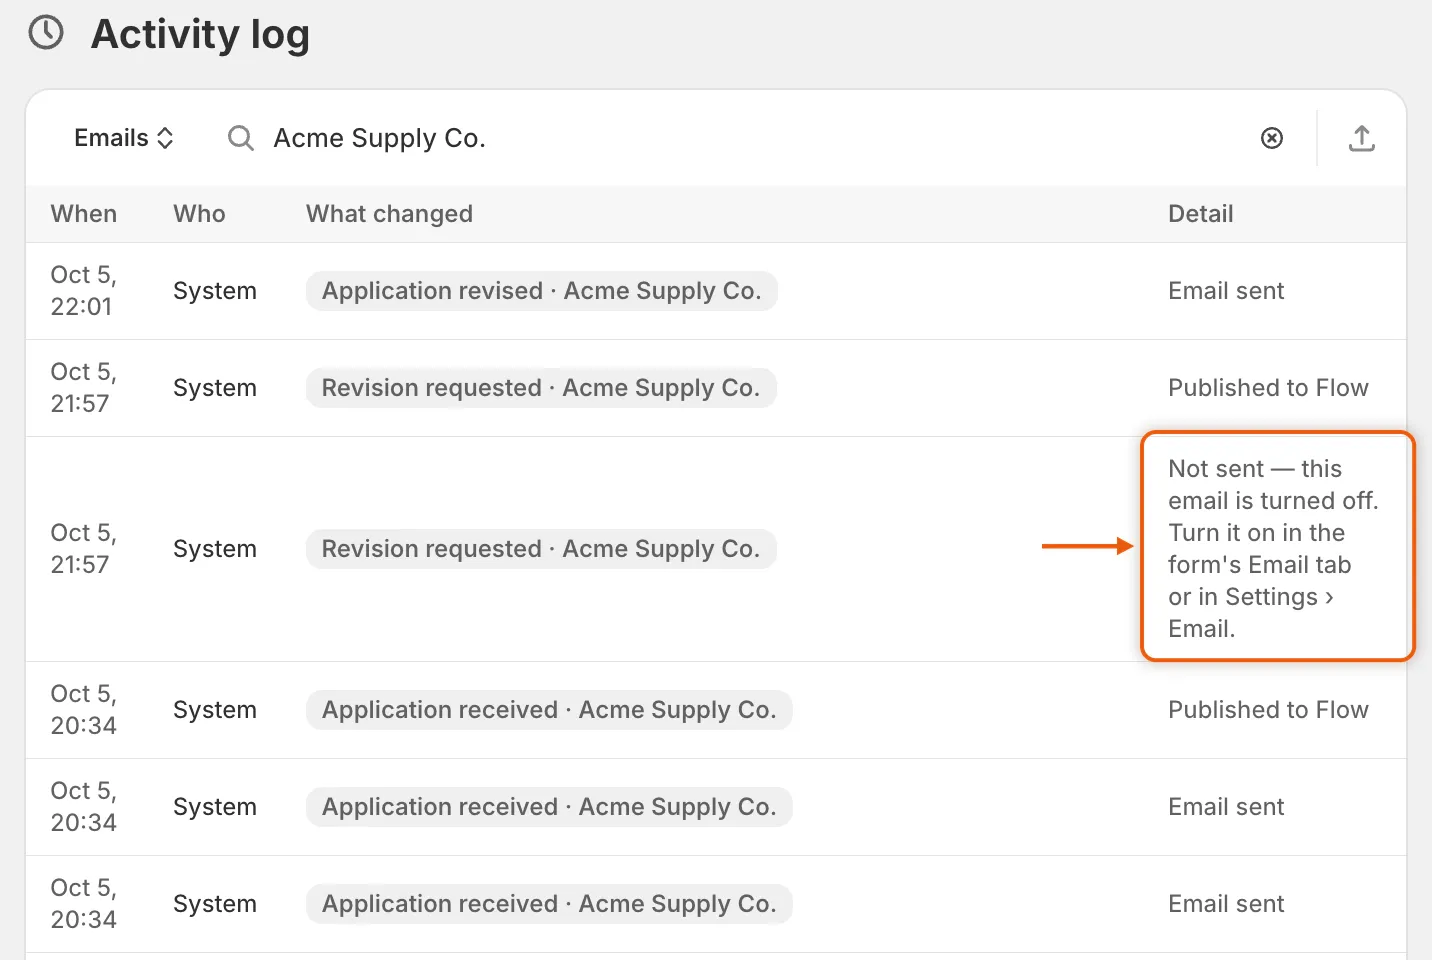
The Detail column says whether each email went out, and why not when it didn’t.
If there is no row at all for the email, check two switches:
- The event’s switch under Automation › Automations. A switched-off event sends nothing and leaves no row. See Automations and Shopify Flow.
- The email’s own switch, in the form builder’s Email section or in Settings › Email › Store emails. An email that is turned off usually leaves no row either. The only row you see is the “Not sent” one above, when a reviewer asked to email the buyer.
Export the log
Section titled “Export the log”-
Narrow the log first
Section titled “Narrow the log first”Set the view, search and filters to the rows you want.
-
Open Export
Section titled “Open Export”Click the export button (Export) at the right of the bar. The Export activity dialog opens.
-
Choose the rows and format
Section titled “Choose the rows and format”Under Export, choose Current page, All activity or Matching your search. Matching your search exports the rows you narrowed the log to. All activity exports the whole log, whatever the filters say. Under File format, choose CSV for Excel, Numbers, or other spreadsheet programs or Plain CSV file.
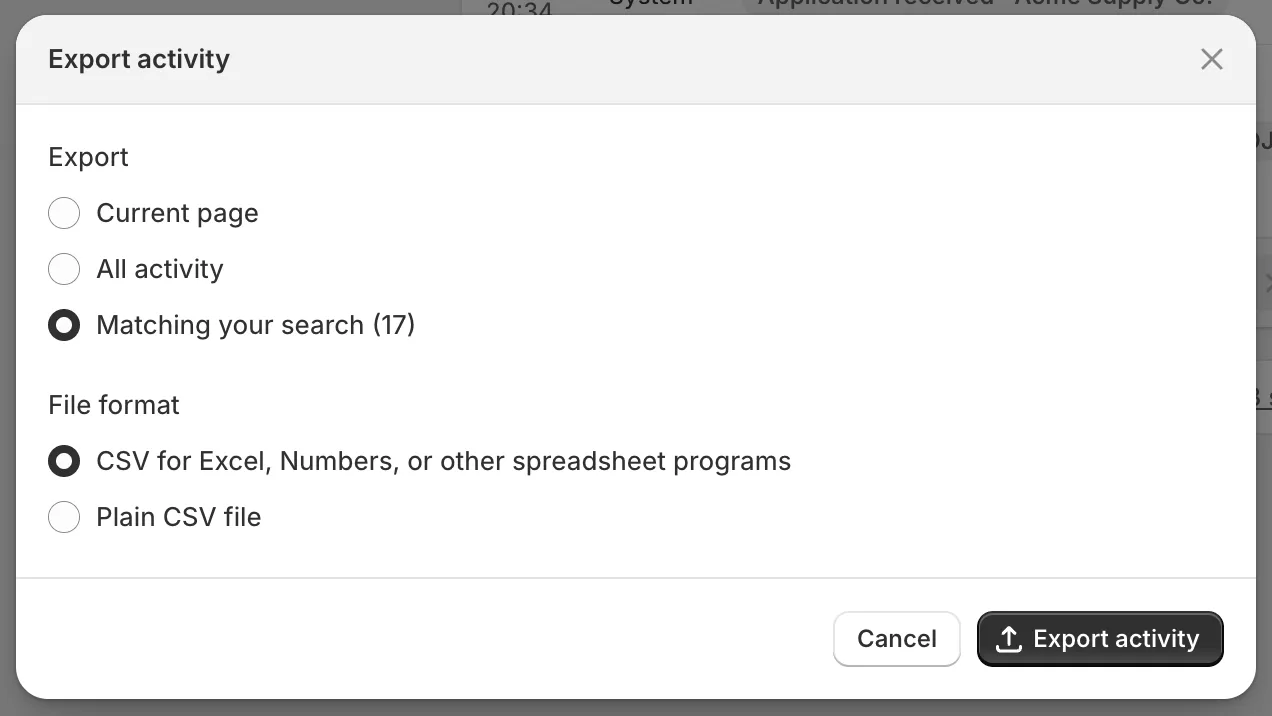
Export the rows you narrowed the log to, as a CSV file for your spreadsheet program.
-
Download
Section titled “Download”Click Export activity. The file downloads with the columns When, Who, Type, Status, Company and Detail. For an email, Detail also names the email and the address it went to.
Next steps
Section titled “Next steps”- Edit email templates — turn on an email that was switched off.
- Send from your own address (SMTP) — fix emails your mail server refused.
- Team and roles — see who on your team made a change.
- Troubleshooting — more fixes when something doesn’t work.