> For the complete documentation index, see [llms.txt](https://docs.samita.io/llms.txt). Markdown versions of documentation pages are available by appending `.md` to page URLs; this page is available as [Markdown](https://docs.samita.io/samita-wholesale-b2b/volume-pricing/import-multiple-products-for-volume-pricing-setup.md).
# Import multiple products for Volume pricing setup
Create many volume pricing rules at once by uploading a CSV or XLSX file instead of building each rule by hand.
If you need to set up a large number of volume pricing rules, uploading a file is much faster than creating them one by one in the app. This import creates brand-new volume pricing rules — if you only need to add products, quantity tiers, and prices to a rule that already exists, use [Import products into a volume pricing rule](/samita-wholesale-b2b/volume-pricing/import-products-into-a-volume-pricing-rule.md) instead.
## Step 1: Prepare your file
Create a CSV or XLSX file with one row per quantity tier / product / variant, using the columns described below. The file is read by column **name**, not by position — you can reorder columns, and you can leave out any column you don't need. Every row that shares the same **Rule Id** value belongs to the same volume pricing rule.
The download sample only includes the minimum columns needed to get started (`Rule Id, Status, Type, Apply Customer, Apply Product, Apply Product ID, Apply Variant ID, From Quantity, To Quantity, Discount Type, Discount Value`, plus example tag columns). The reference below covers every column the importer understands, including the optional ones the sample leaves out.
Full column reference
| Column | Required? | Notes |
| ------------------------- | ----------- | ------------------------------------------------------------------------------------------------------------------------------------------------------------------------------------------------------------------------------------------- |
| **Rule Id** | Yes | Any value that groups rows together — rows sharing the same Rule Id become one volume pricing rule. It does not need to match a real rule ID. |
| **Name** | No | Name of the volume pricing rule. Defaults to "New Volume Pricing" if left blank. |
| **Status** | No | `active` or `draft`. Anything else is treated as draft. |
| **Type** | No | `quantity` (break by units bought) or `amount` (break by order amount). Defaults to `quantity`. |
| **Start Date** | No | When the rule starts working. |
| **End Date** | No | When the rule stops working. |
| **Apply Customer** | Yes | The customer condition. One of: `all`, `logged`, `non-logged`, `tags:tag1,tag2`, or `customers:id1,id2`. |
| **Exclude Customer Tags** | No | Comma-separated customer tags to exclude. |
| **Exclude Customer IDs** | No | Comma-separated customer IDs to exclude. |
| **Apply Product** | Yes | The product condition. One of: `all`, `products`, `products:id1,id2`, `collections:id1,id2`, or `tags:tag1,tag2` (product tags). |
| **Apply Product ID** | Conditional | The product this row sets a tier/price for. Required on any row that carries a per-product tier. Leave blank on the rule's first/summary row. See below for how to find a product's ID. |
| **Apply Variant ID** | No | Fill in when the row sets a tier for one specific variant rather than the whole product. See below for how to find it. |
| **Exclude Products** | No | Comma-separated product IDs to exclude from the rule. |
| **Exclude Collections** | No | Comma-separated collection IDs to exclude from the rule. |
| **Exclude Gift Cards** | No | `TRUE` to exclude gift card products. |
| **Apply Market** | No | `all`, or `markets:handle1,handle2` to restrict the rule to specific markets. |
| **Discount Methods** | No | `variant` (Same Variant), `across_group` (Mix Variants), or `across_product` (Mix Products). Defaults to `variant`. See [Discount Methods for Volume Pricing](/samita-wholesale-b2b/volume-pricing/discount-methods-for-volume-pricing.md). |
| **Pricing Source** | No | `PRICE` (Selling price) or `COMPARE_AT_PRICE` (Compare-at price). Defaults to `PRICE`. |
| **From Quantity** | Yes | The lower threshold of the price break, e.g. `10` for "buy 10 to 20 units, get 10% off". Holds an order-amount threshold instead when Type is `amount`. |
| **To Quantity** | No | The upper threshold of the price break, e.g. `20` for the same example. Leave blank for an open-ended top tier. |
| **Discount Type** | Yes | `percent`, `fixed` (fixed amount off), or `amount`. |
| **Discount Value** | Yes | The discount value for this tier. |
| *(any other column name)* | No | Extra trailing columns become **segment columns** — see below. |
**Segment columns:** when **Apply Customer** is `tags:...` or `customers:...`, you can give each tag or customer a different price by adding one column per tag name or customer ID (matching the values used in Apply Customer), then filling in that segment's Discount Value on the tier's row. A cell can hold a bare number (uses the row's Discount Type) or a value with its own type, e.g. `10 percent`, `10 fixed`, `10 amount`.
**Building a rule across several rows:** give the rule's general settings (Name, Status, Type, Apply Customer, Apply Product, etc.) on its first row, then add one row per quantity tier — and, if pricing specific products/variants, one row per tier per product/variant — repeating the same Rule Id and leaving the rule-level columns blank on those rows.
**Finding a product ID:** go to the Products folder in Shopify, open the product, and check the page URL — the product ID is the number at the end of the link.
**Finding a variant ID:** open the product, go to the variant you need, and click into it. The variant ID is the number at the end of that page's URL.
**Sample file:** download [volume\_example.csv](https://github.com/samita-baoan/Samita-Wholesale-B2B/tree/docs-restructure/.gitbook/assets/volume_example.csv) or [volume\_example.xlsx](https://github.com/samita-baoan/Samita-Wholesale-B2B/tree/docs-restructure/.gitbook/assets/volume_example.xlsx) to see the format in action.
Once your file is ready, save it.
## Step 2: Upload the file to the app
{% stepper %}
{% step %}
### Open Volume Pricing
From the app **Dashboard**, click **Volume Pricing**.
{% endstep %}
{% step %}
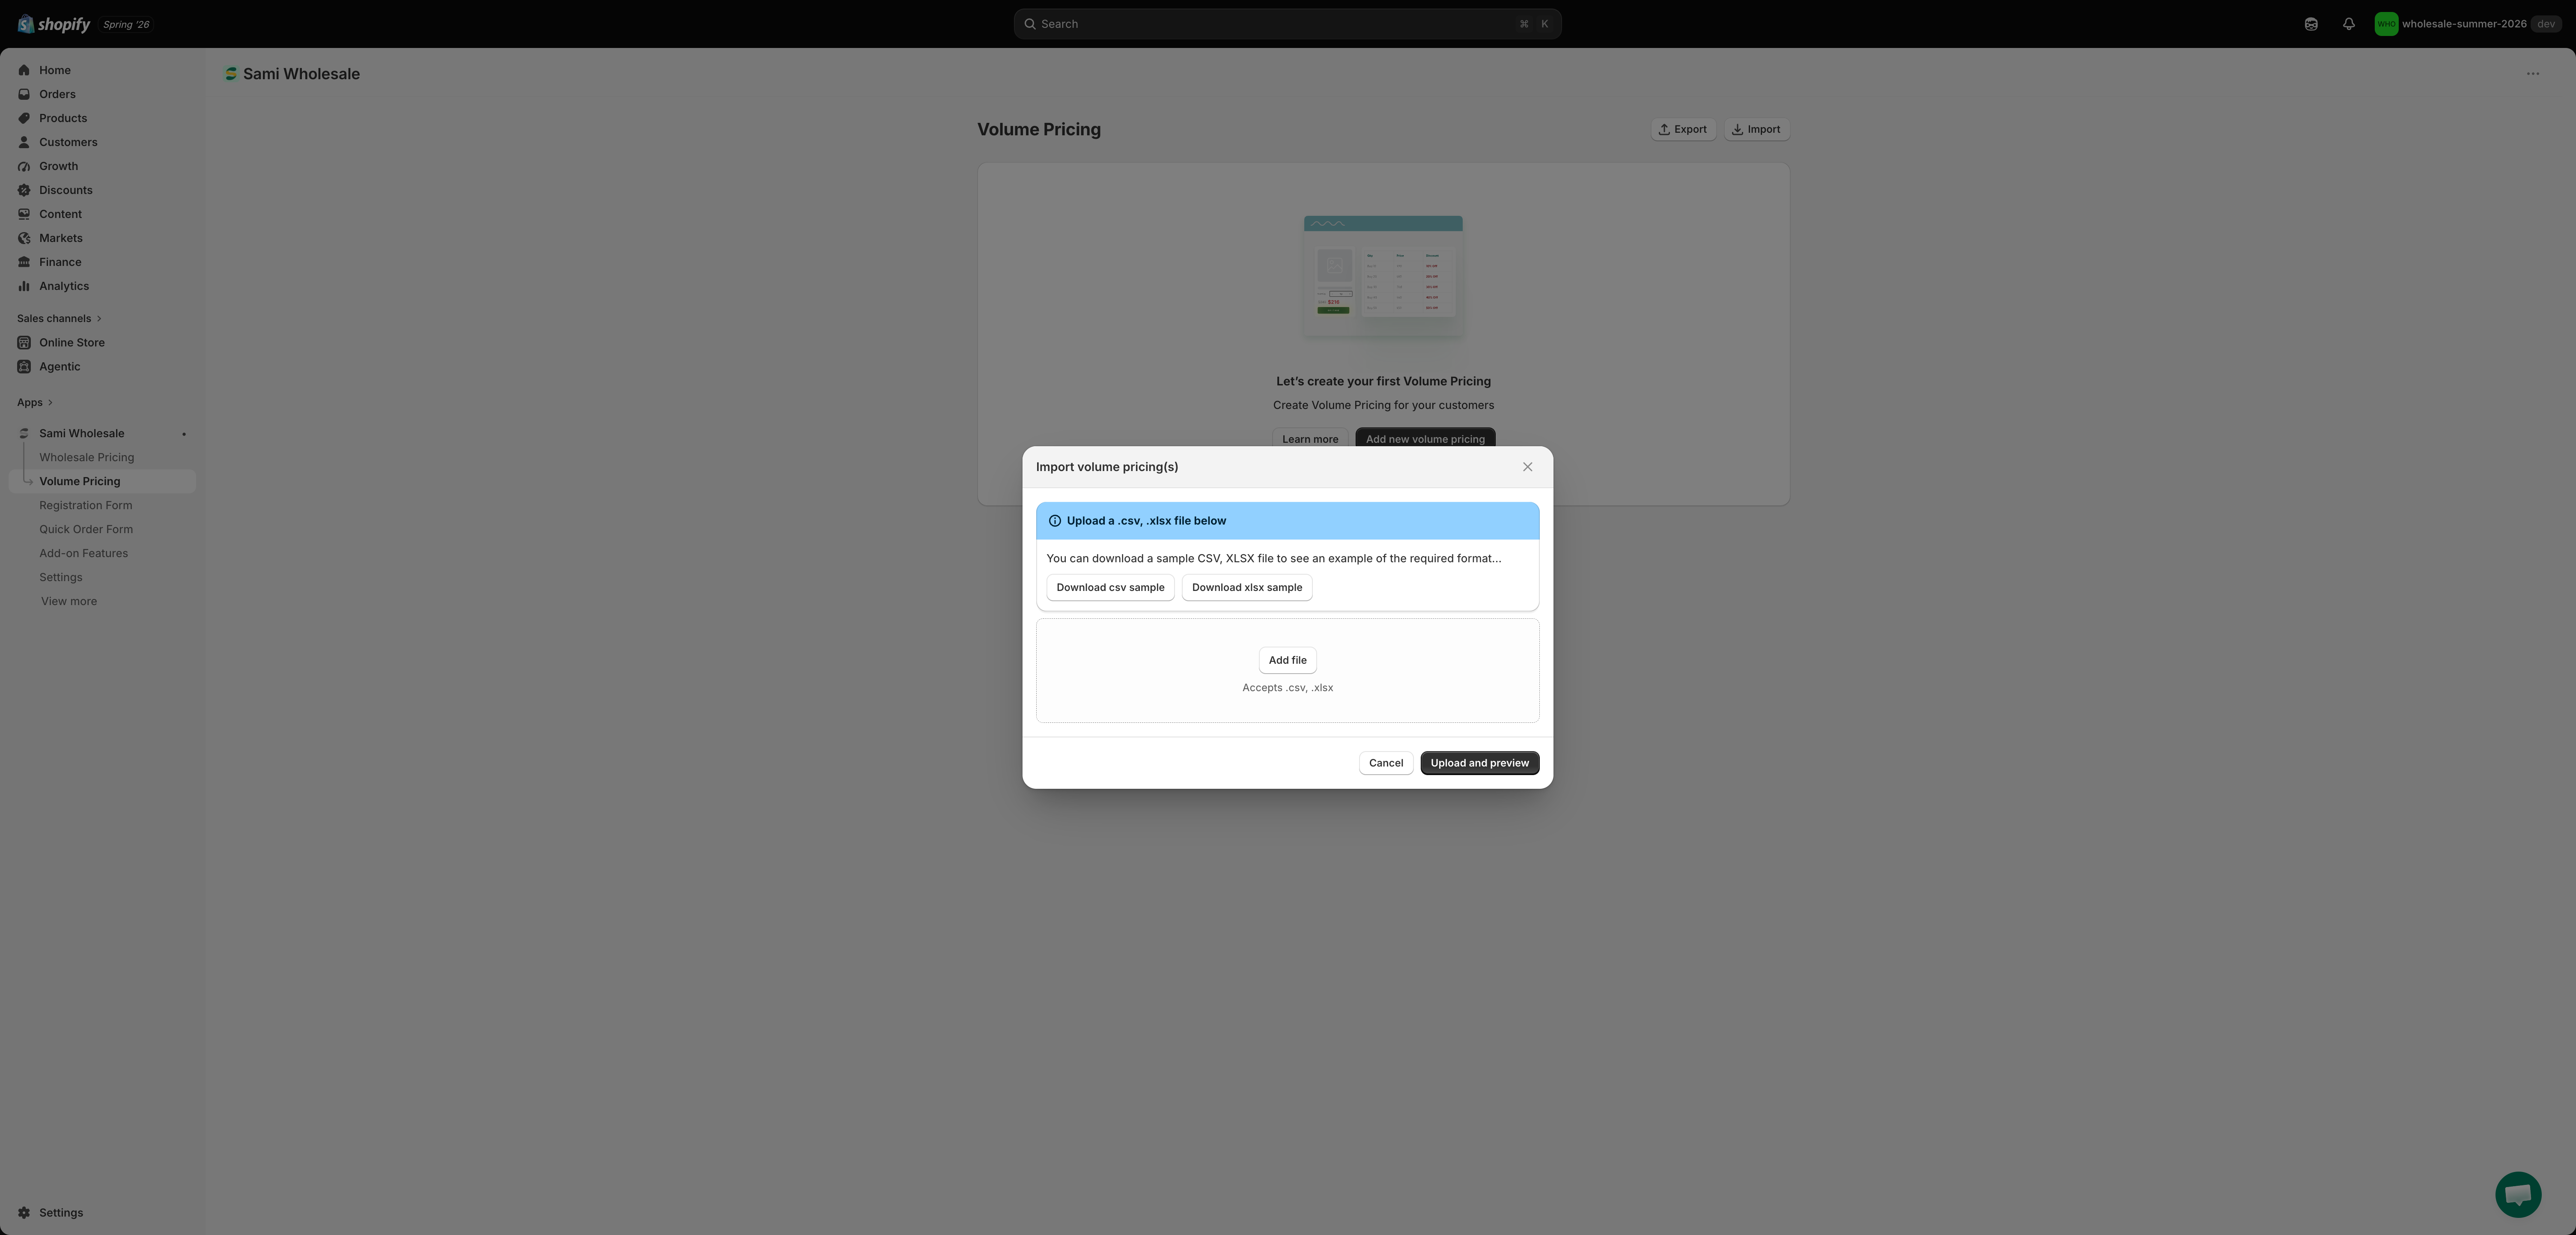
### Click Import
{% endstep %}
{% step %}
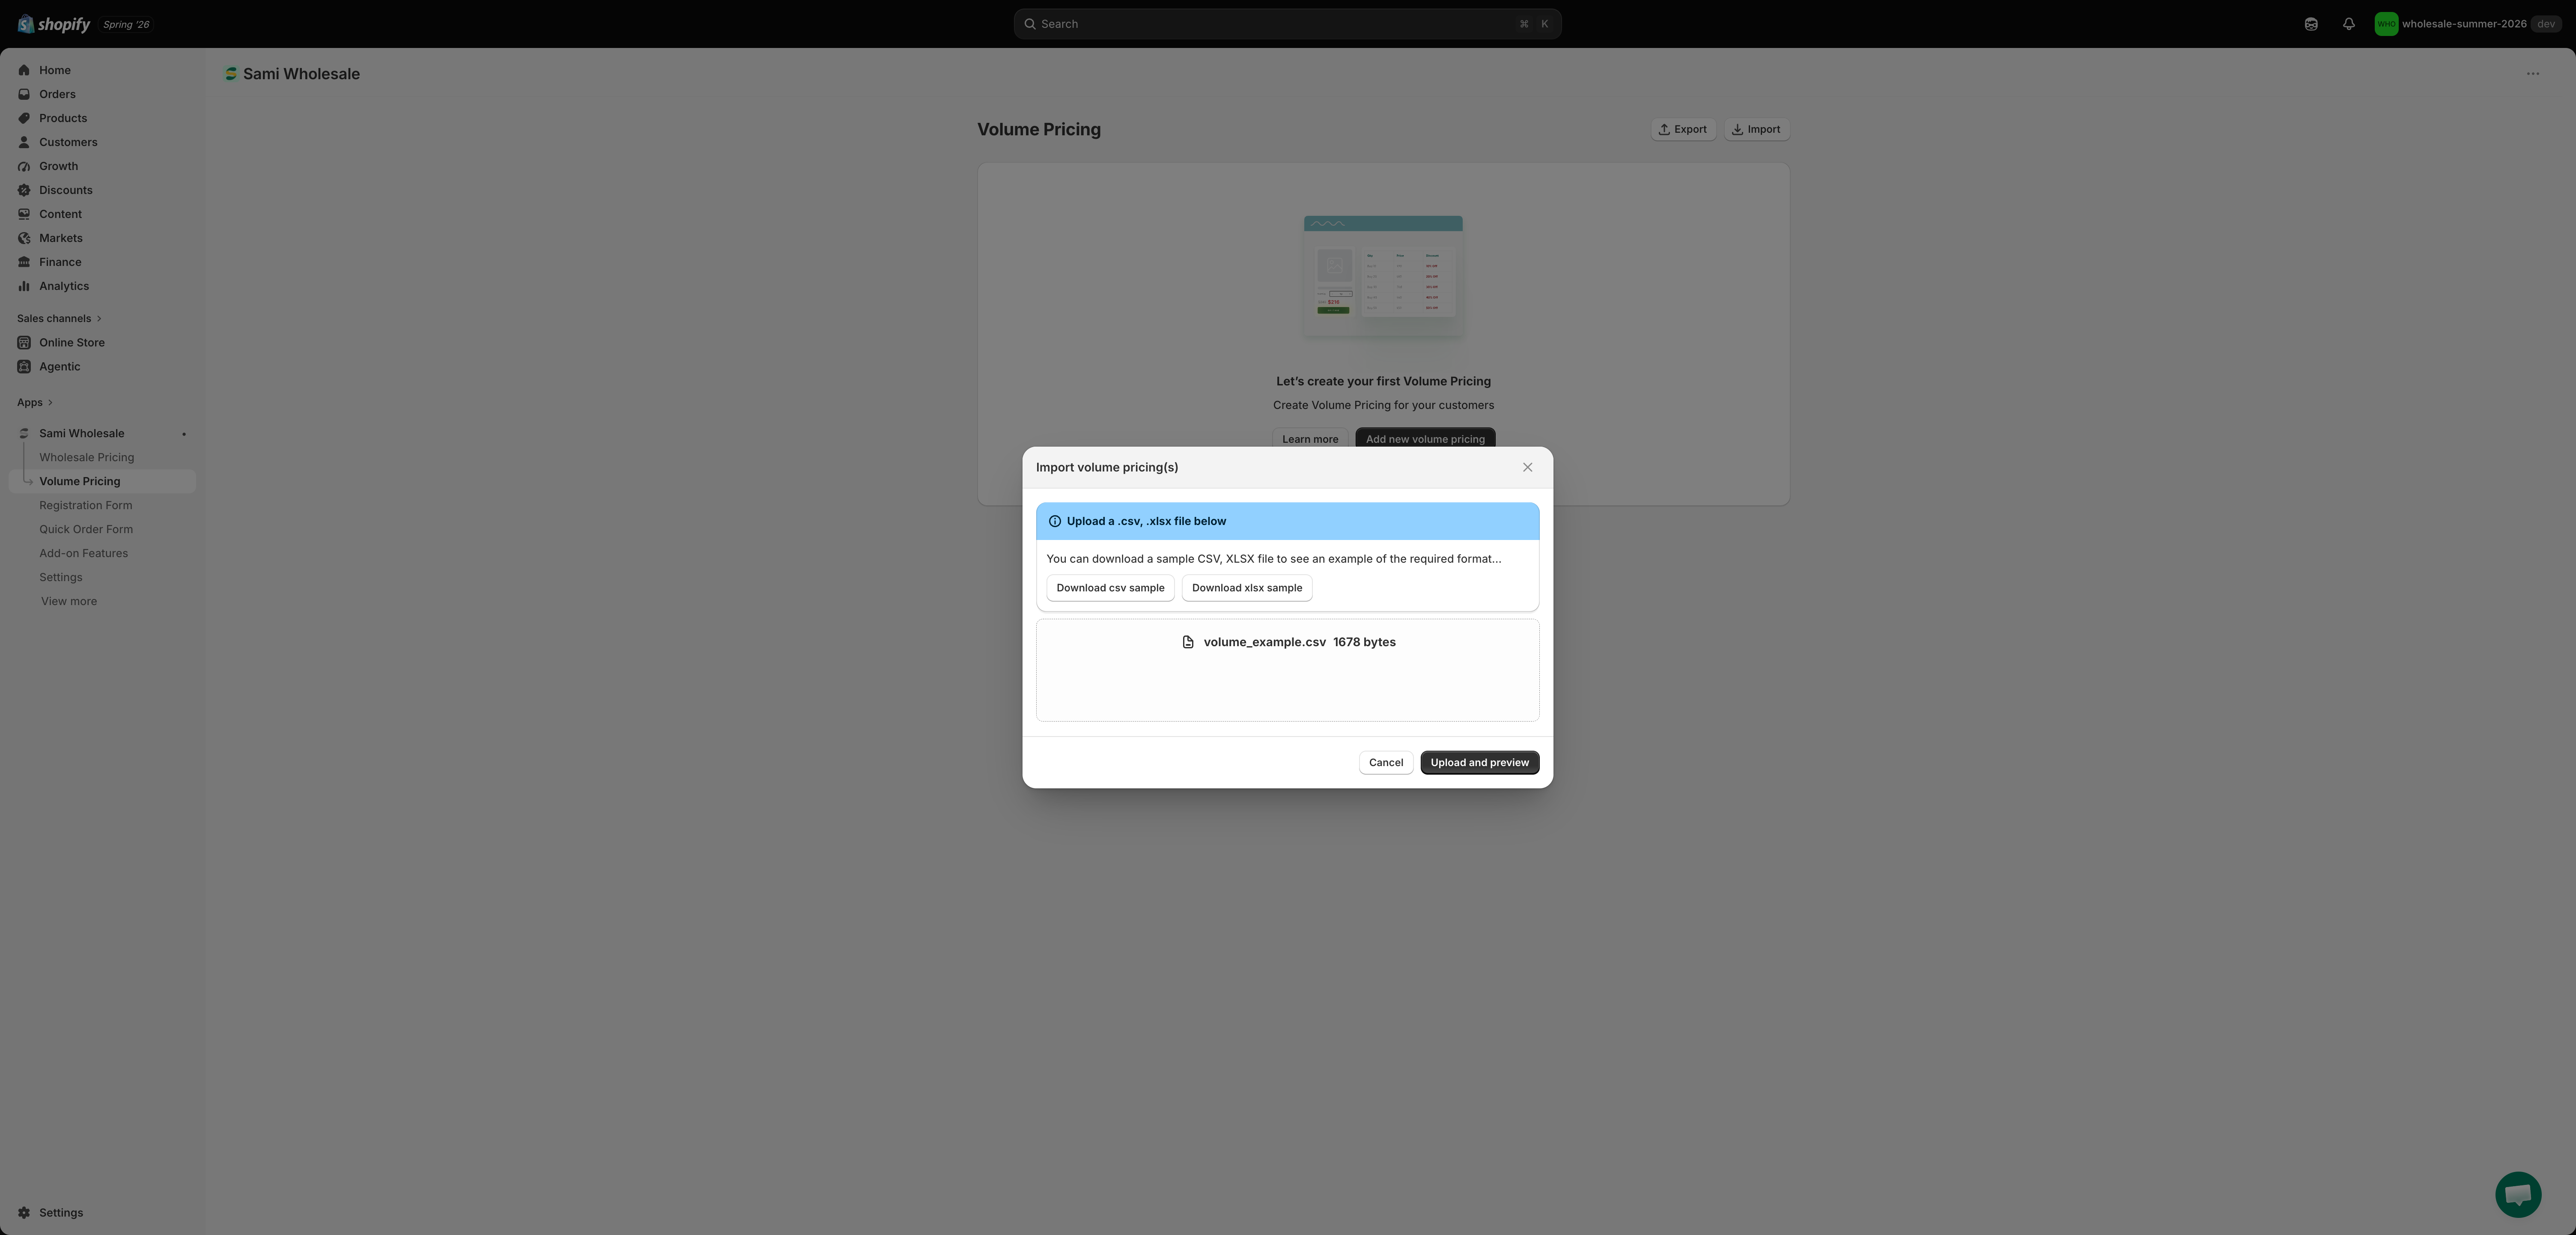
### Upload your file
You can also download a sample CSV or XLSX file here to see exactly what data each column needs.
{% endstep %}
{% step %}
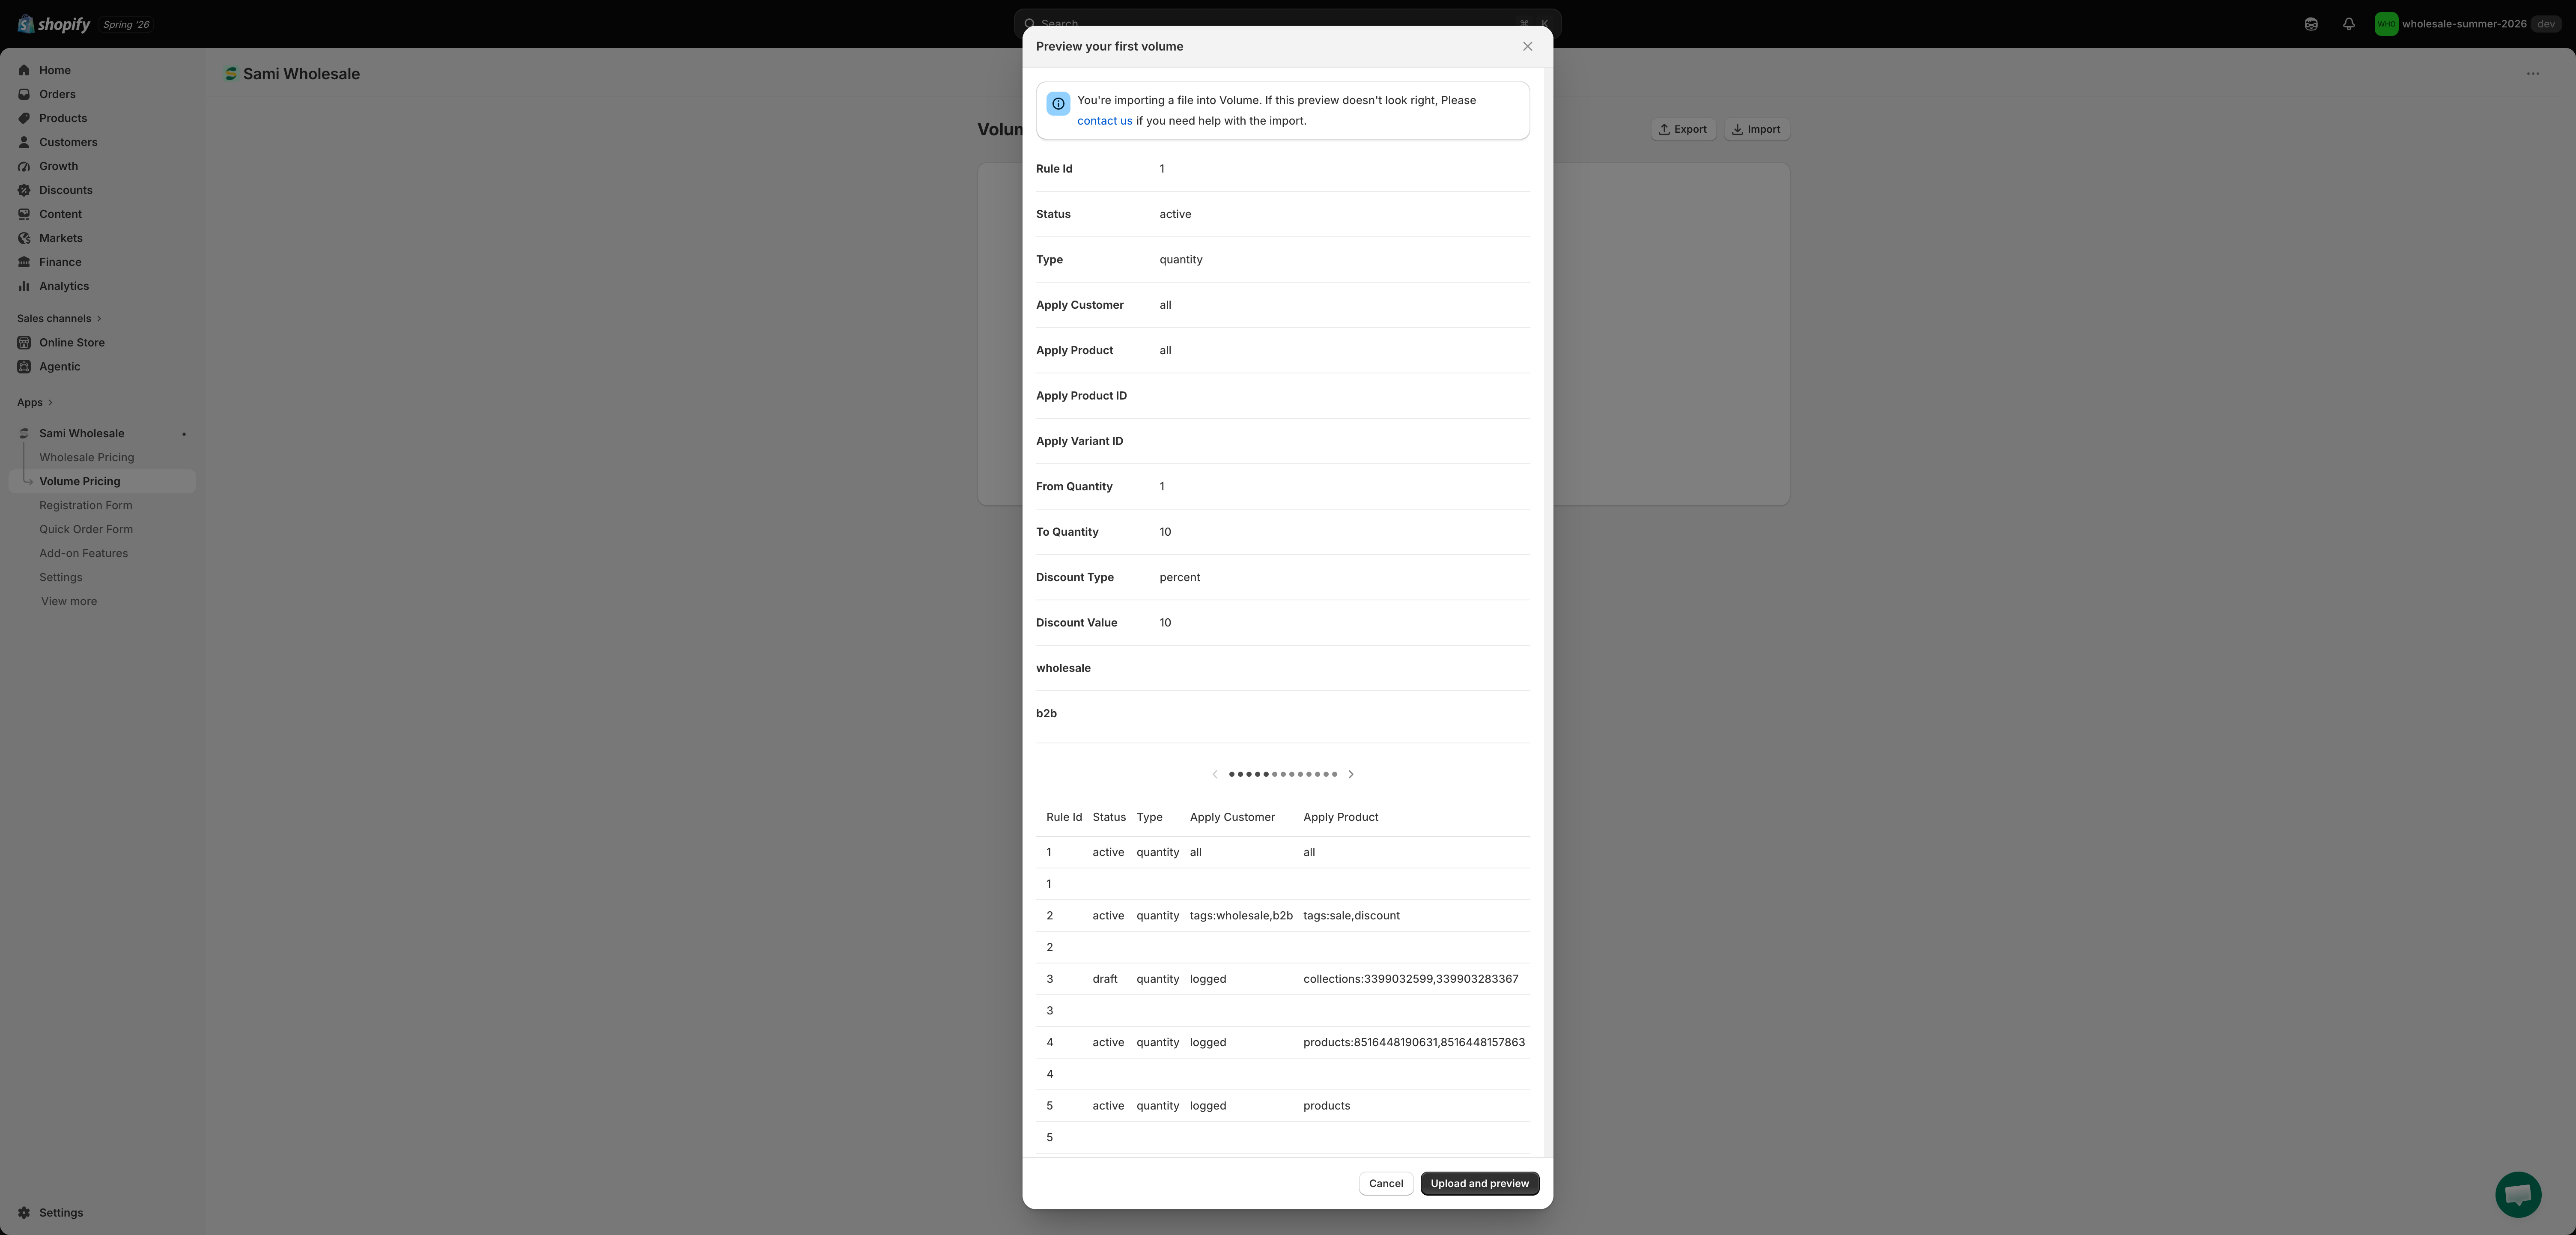
### Preview and confirm
Review the file information, then click **Upload and preview**.
{% endstep %}
{% endstepper %}
{% hint style="info" %}
If you run into any trouble during these steps, contact us any time at ****.
{% endhint %}
---
# Agent Instructions
This documentation is published with GitBook. GitBook is the documentation platform designed so that both humans and AI agents can read, navigate, and reason over technical content effectively. Learn more at gitbook.com.
## Querying This Documentation
If you need additional information that is not directly available in this page, you can query the documentation dynamically by asking a question.
Perform an HTTP GET request on the current page URL with the `ask` query parameter, and the optional `goal` query parameter:
```
GET https://docs.samita.io/samita-wholesale-b2b/volume-pricing/import-multiple-products-for-volume-pricing-setup.md?ask=&goal=
```
`ask` is the immediate question: it should be specific, self-contained, and written in natural language.
`goal` is optional and describes the broader end goal you are ultimately trying to accomplish on behalf of the user. GitBook uses it to tailor the answer towards what is most useful for that goal.
The response will contain a direct answer to the question and relevant excerpts and sources from the documentation.
Use this mechanism when the answer is not explicitly present in the current page, you need clarification or additional context, or you want to retrieve related documentation sections.
.png?alt=media)
.png?alt=media)