
Send from your own address (SMTP)
Send quote emails from your own mail server instead of the app's default sender, using any of the nine supported providers.
By default, quote emails come from the app’s own mail service at [email protected]. Setting up SMTP sends them from your own address instead — better for deliverability, and better for how your business looks.
The setting is on the Email notifications tab of Advanced settings, in the SMTP section. The app describes it as: “You can use either our default email service or your own by adjusting this setting. The sender email address will be used to send quote notifications to you and your customers.”
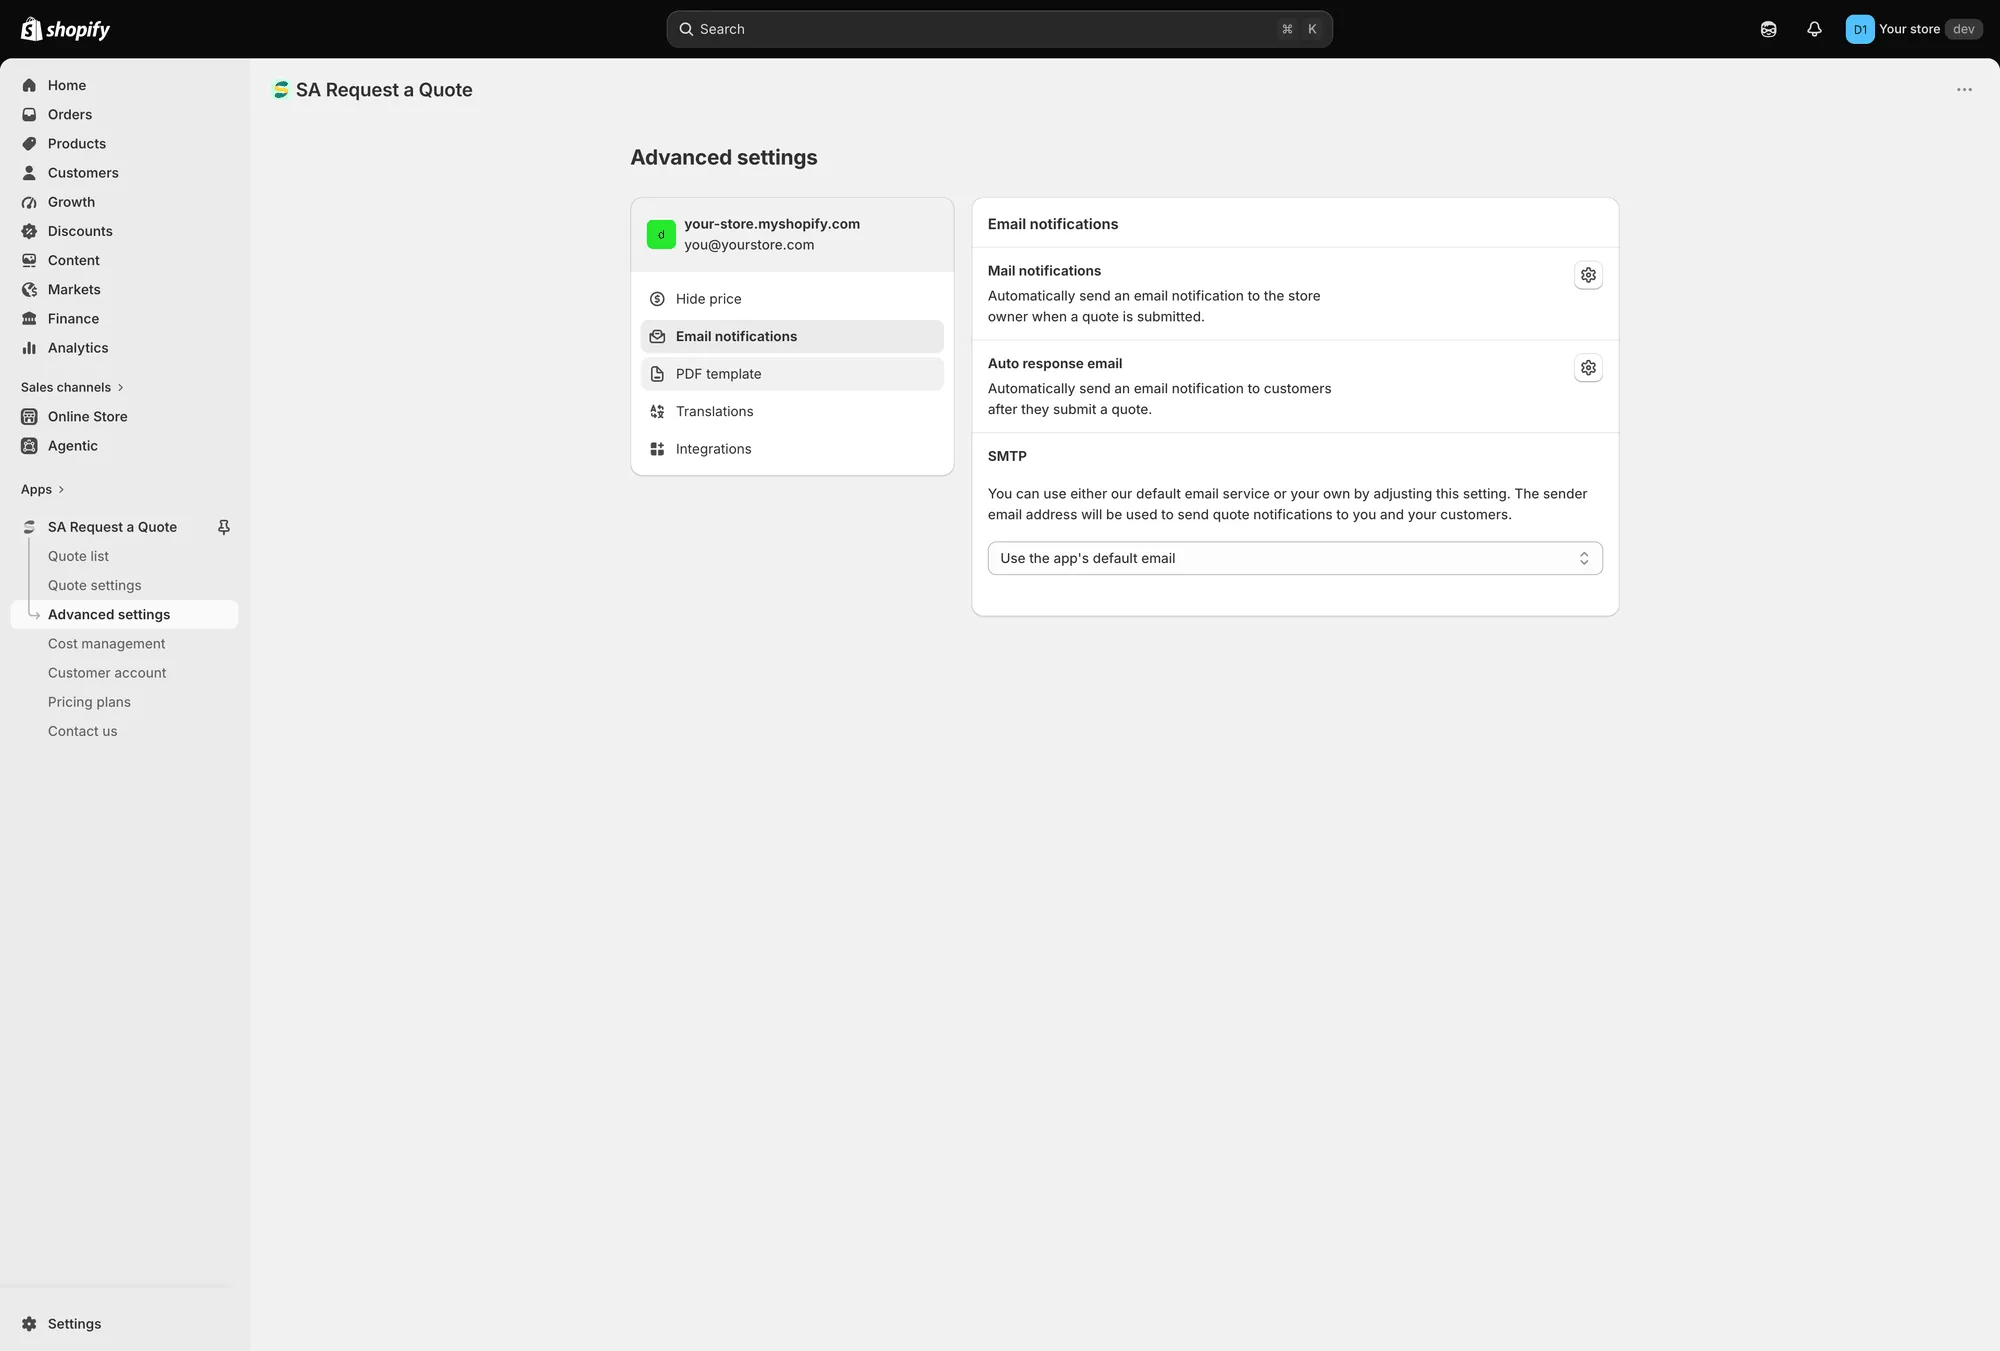
The SMTP dropdown, showing the default setting Use the app’s default email.
One setting covers both emails. Whatever you choose here is used for the notification you receive and for the confirmation your customer receives.
Supported providers
Section titled “Supported providers”Choose one from the SMTP dropdown:
| Option | When to use it |
|---|---|
| Use the app's default email | The app sends the emails itself, from [email protected]. |
| You run your business mail on Google Workspace or Gmail. | |
| Sendinblue | You already send marketing mail through Sendinblue. |
| SendGrid | A common choice for transactional email at volume. |
| Outlook | Your business mail is on Microsoft 365 or Outlook. |
| Pepipost | Transactional email provider. |
| Amazon SES | You already have AWS set up. |
| Elastic Email | Transactional email provider. |
| Mailgun | Transactional email provider. |
| Zoho | Your business mail is on Zoho. |
Set it up
Section titled “Set it up”-
Collect the details from your provider
Section titled “Collect the details from your provider”Every provider publishes the connection details for sending mail through it — typically a server address, a port, a username and a password, plus the address you want quote emails to come from. Find them in your provider’s own documentation and have them to hand before you start.
Gather them first, so you are not hunting for a missing detail halfway through.
Using Google? Google, field by field below gives the host and port to type, says which field each value goes in, and walks through creating the app password you will need.
-
Open the SMTP section
Section titled “Open the SMTP section”In the app, go to Advanced settings > Email notifications and find SMTP.
-
Choose your provider
Section titled “Choose your provider”Pick your provider from the dropdown, replacing Use the app’s default email.
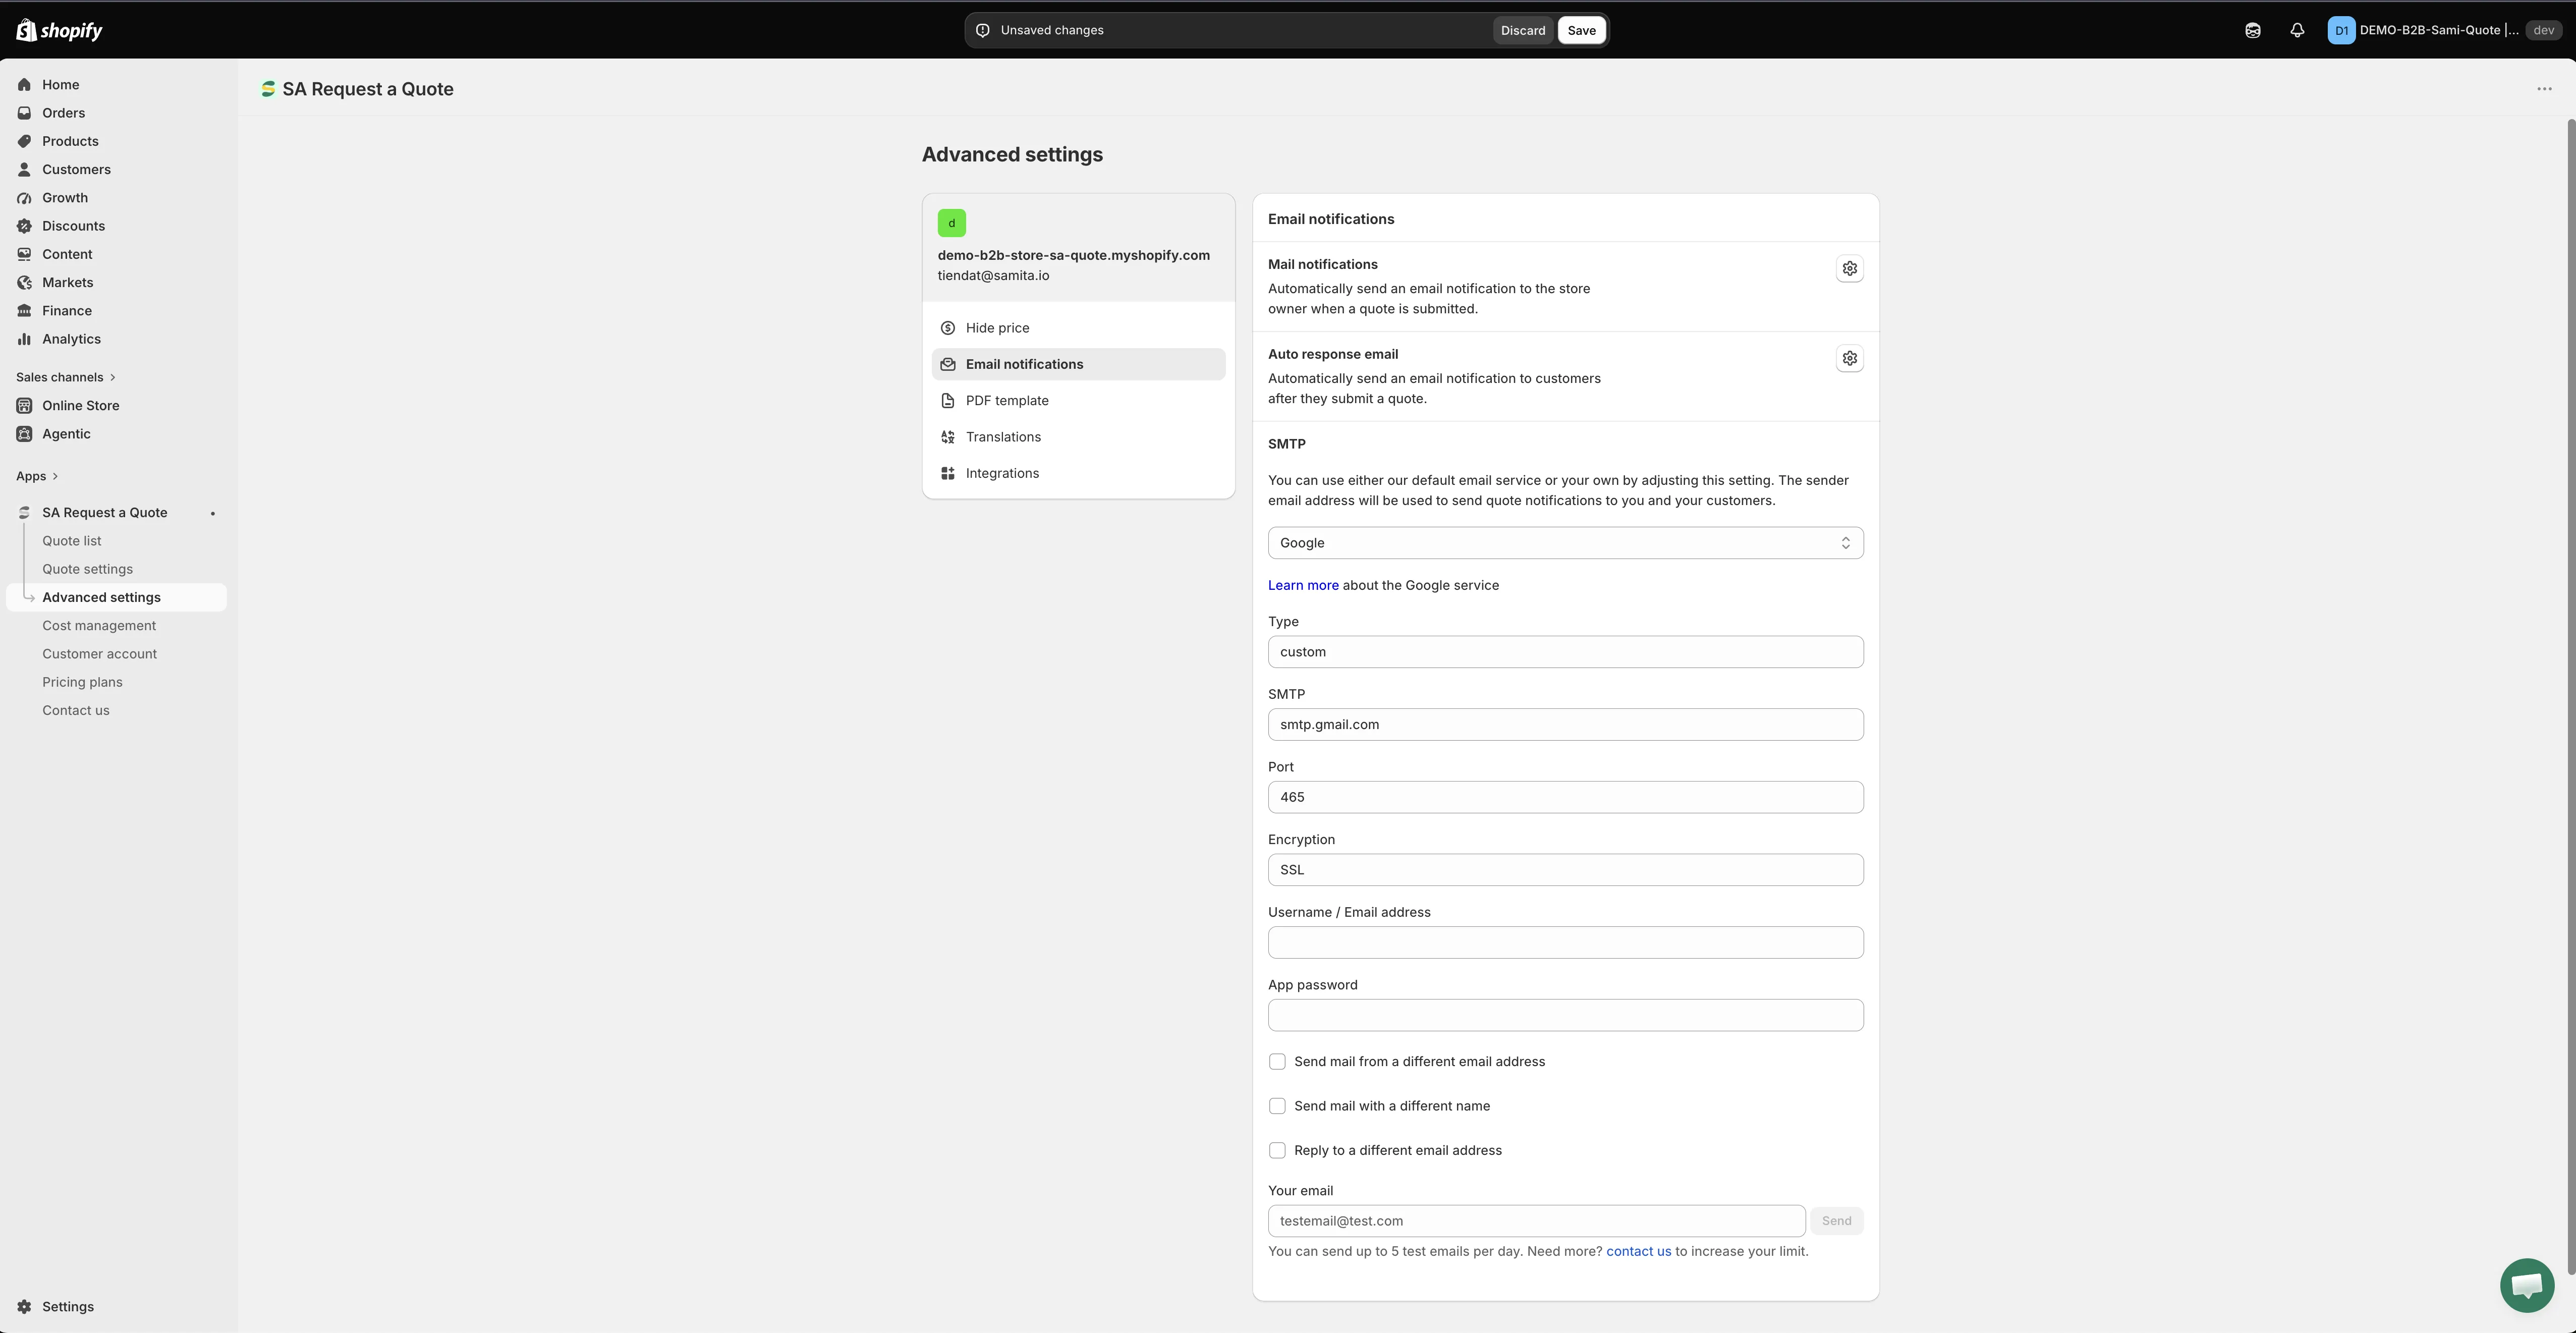
Your own SMTP server is optional — leave it blank and the app sends for you.
-
Enter the connection details
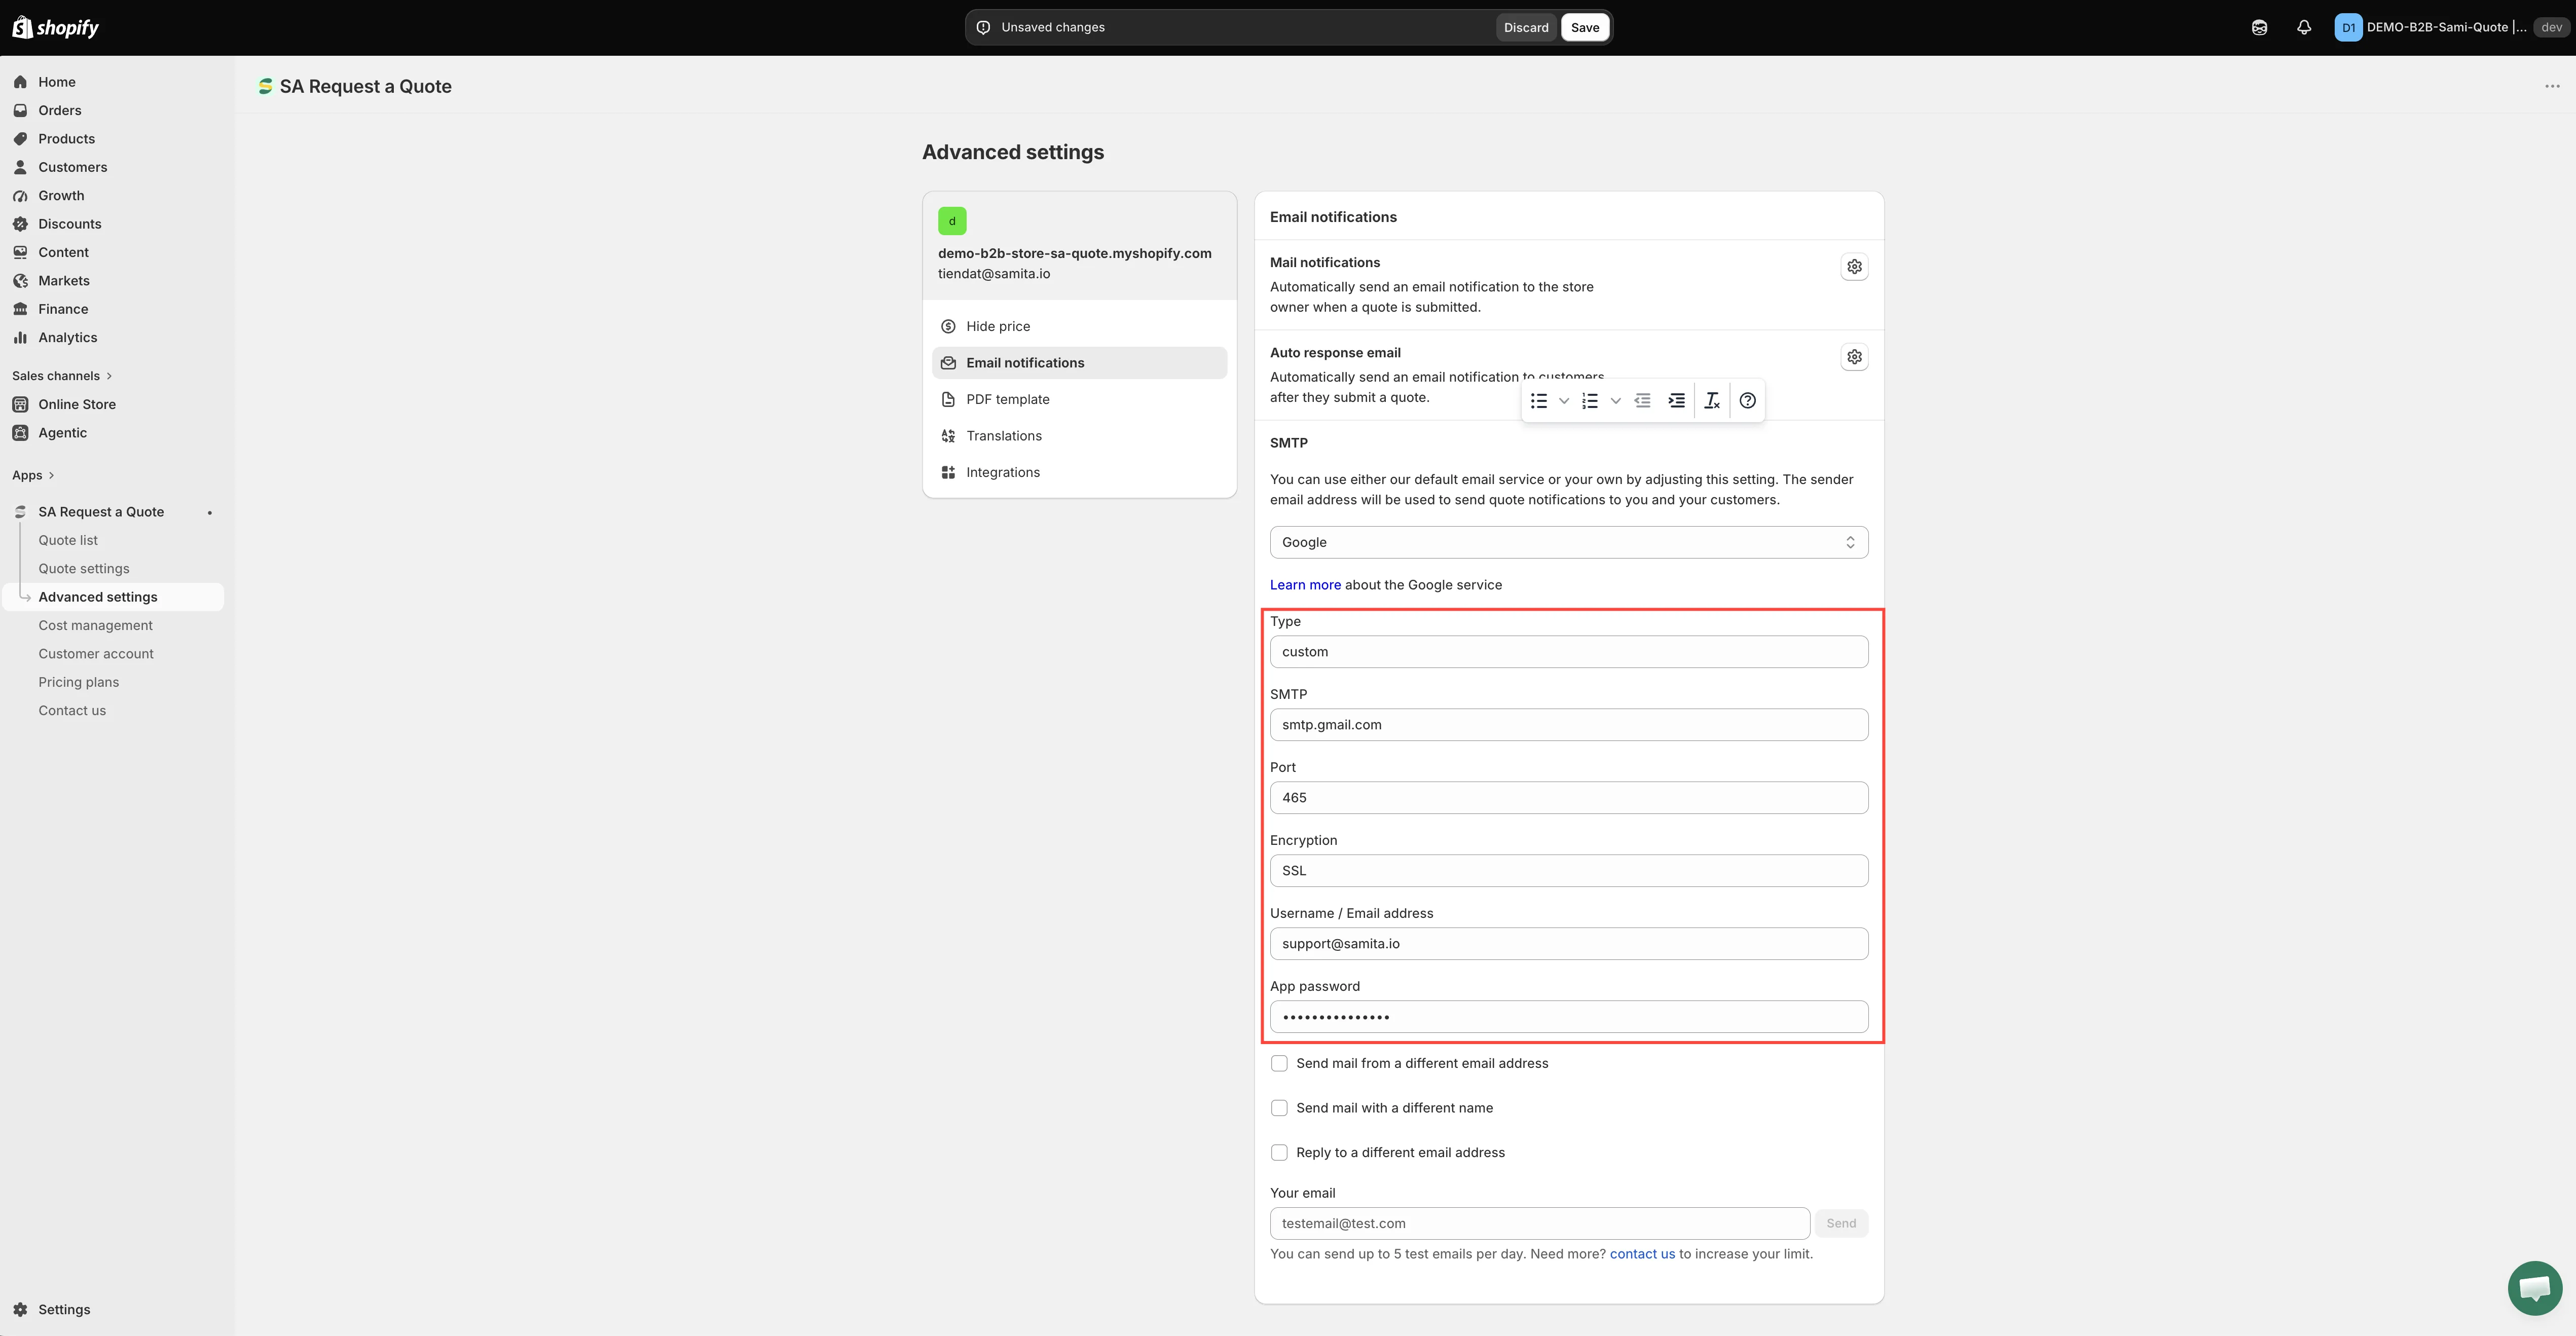
Section titled “Enter the connection details”Enter the information for your own SMTP in the fields, exactly as your provider gives it — copy and paste rather than retype, because a single wrong character stops everything.
-
Click Save to update the changes, before you go on to test.
-
Send a test
Section titled “Send a test”The SMTP section has its own Send a test email control. Use it first — it checks the connection without involving your storefront at all. The app allows up to 5 test emails a day, so treat them as a check rather than a way to preview wording.
Then submit a test quote request from your storefront and confirm the email arrives from your own address, not the app’s.
Check both emails while you are there: the one that reaches you, and the confirmation that reaches the customer. This single setting sends both.
Google, field by field
Section titled “Google, field by field”Google is the provider most merchants pick, so here is the whole thing end to end. Google will not accept your ordinary Gmail password from another app, so the account work comes first.
-
Log into your Google account
Section titled “Log into your Google account”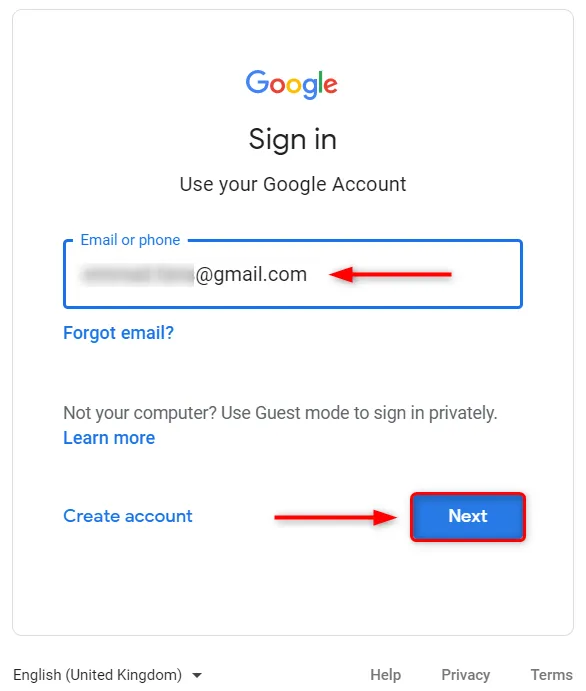
Start signed in to the account that will send your mail.
Sign in at myaccount.google.com.
-
Turn on 2-Step Verification
Section titled “Turn on 2-Step Verification”So that your Google account stays protected while it is used for SMTP, enable the 2-step verification Google offers. Google’s own guide: Enabling 2-Step Verification.
If you have already enabled 2-step verification, jump to the next step.
-
Generate an App password
Section titled “Generate an App password”Open Google App passwords.
Select Other/Custom name from Select App, give it a name such as “DO – Production Server”, and then click Generate.
Note down the application password. You need it in the next step.
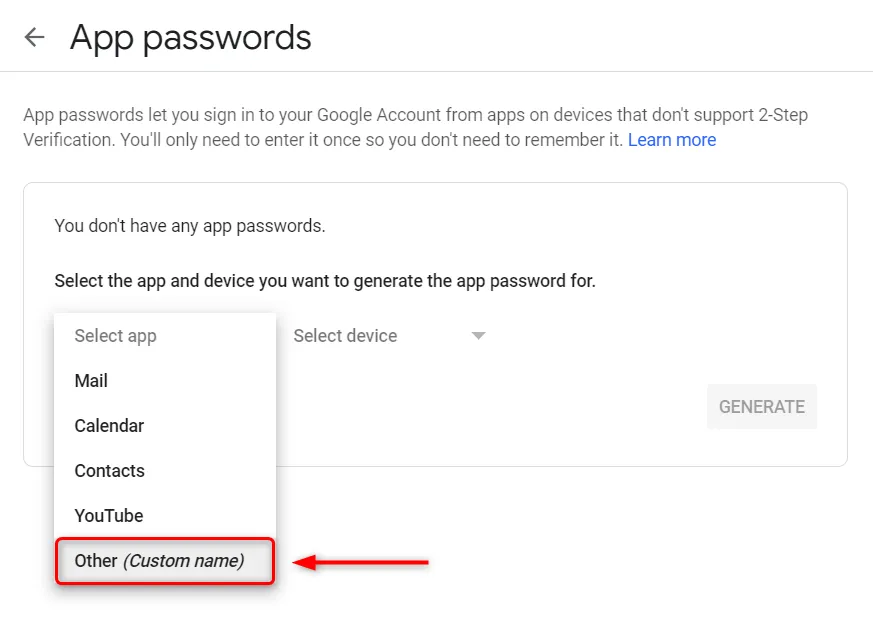
Pick Other (Custom name) so the password is labelled for this app.
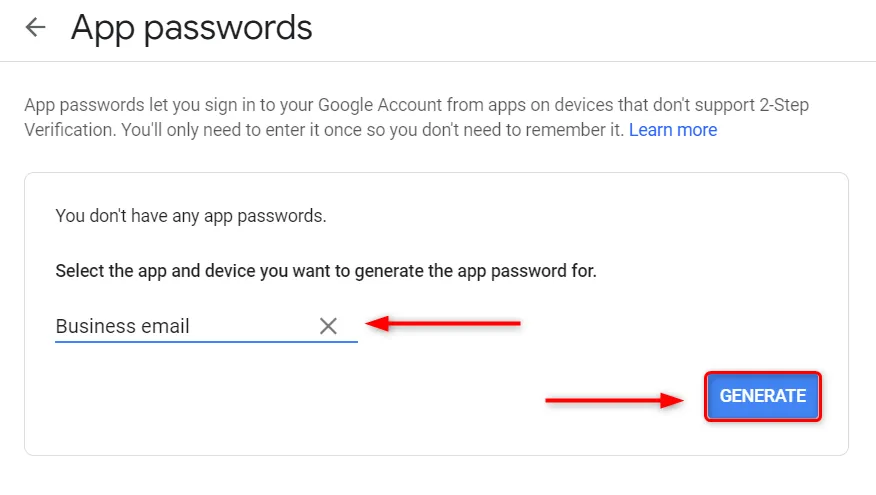
Name it, then Generate.
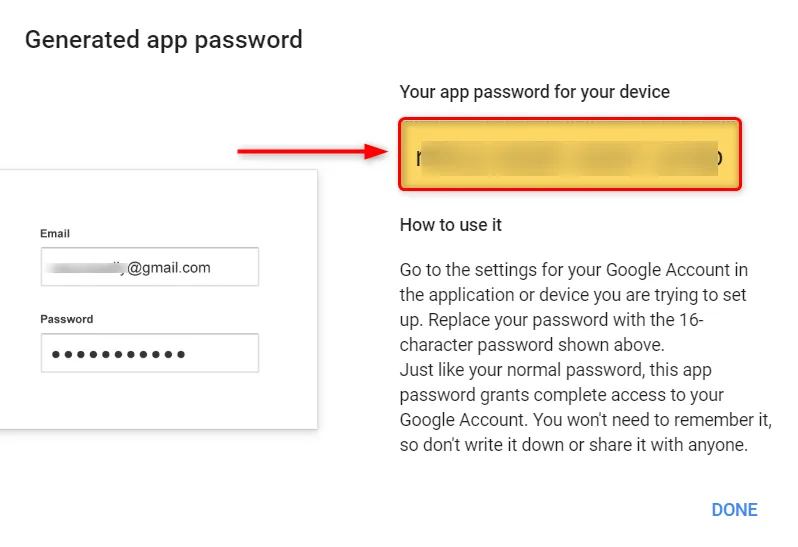
This sixteen-character string — not your Gmail password — is what the app needs.
-
Fill in the SMTP section in the app
Section titled “Fill in the SMTP section in the app”With Google chosen in the SMTP dropdown, the Google configuration takes the following:
# What the field is for What to enter 1 SMTP email Your SMTP email. 2 Host and port smtp.gmail.comas your host, and port465.3 Username Your Gmail login username — [email protected].4 Password Your App password, the one you generated above. 5 Send mail as a different email Optional. Use it when the address you want quote emails to come from is not the mailbox you authenticated with — a sales@address, for example.
Why bother
Section titled “Why bother”| Benefit | What it means |
|---|---|
| Better deliverability | Mail from your own authenticated domain is filtered as spam less often. |
| Customers can reply | Replies reach you directly instead of a no-reply address. |
| Looks like you | Your quote arrives from your business, not from a shared app sender. |
If the test fails
Section titled “If the test fails”- Check the password — most providers need an app-specific password, not your account password. On Google, that also means 2-Step Verification has to be on before an app password can exist at all.
- Check the sending address is one your provider is allowed to send as.
- Re-check every connection detail against your provider’s own documentation; a single wrong character stops everything. On Google that is
smtp.gmail.comand port465. - Check you saved — the dropdown and the fields only take effect once you click Save.
- Switch back to Use the app’s default email while you sort it out, so quote notifications keep flowing in the meantime.
- Check the quote arrived anyway in Quote list. A failed send never loses the request itself.
Still stuck? Email [email protected] with the provider you chose and the error the app shows.
Next steps
Section titled “Next steps”- Emails sent to customers — customise what your customers receive
- Change notification recipients — choose who gets notified
- Troubleshooting — wider email delivery problems