
Add quote links to your menu
Add the quote cart page and the quote history page to your store navigation so customers can always find them.
The app’s two storefront pages are Request for quote and Quote history. They are ordinary Shopify pages that the app created for you — you’ll find them under Online Store > Pages like any other — which is why they turn up in Shopify’s page picker with no extra work. Adding either of them to your store navigation is a Shopify setting, not an app one.
| Page to link | Its path on your storefront |
|---|---|
| "Request for quote" | /pages/request-for-quote |
| "Quote history" | /pages/quotes-history |
Add a menu item
Section titled “Add a menu item”-
Open the menu in your Shopify admin
Section titled “Open the menu in your Shopify admin”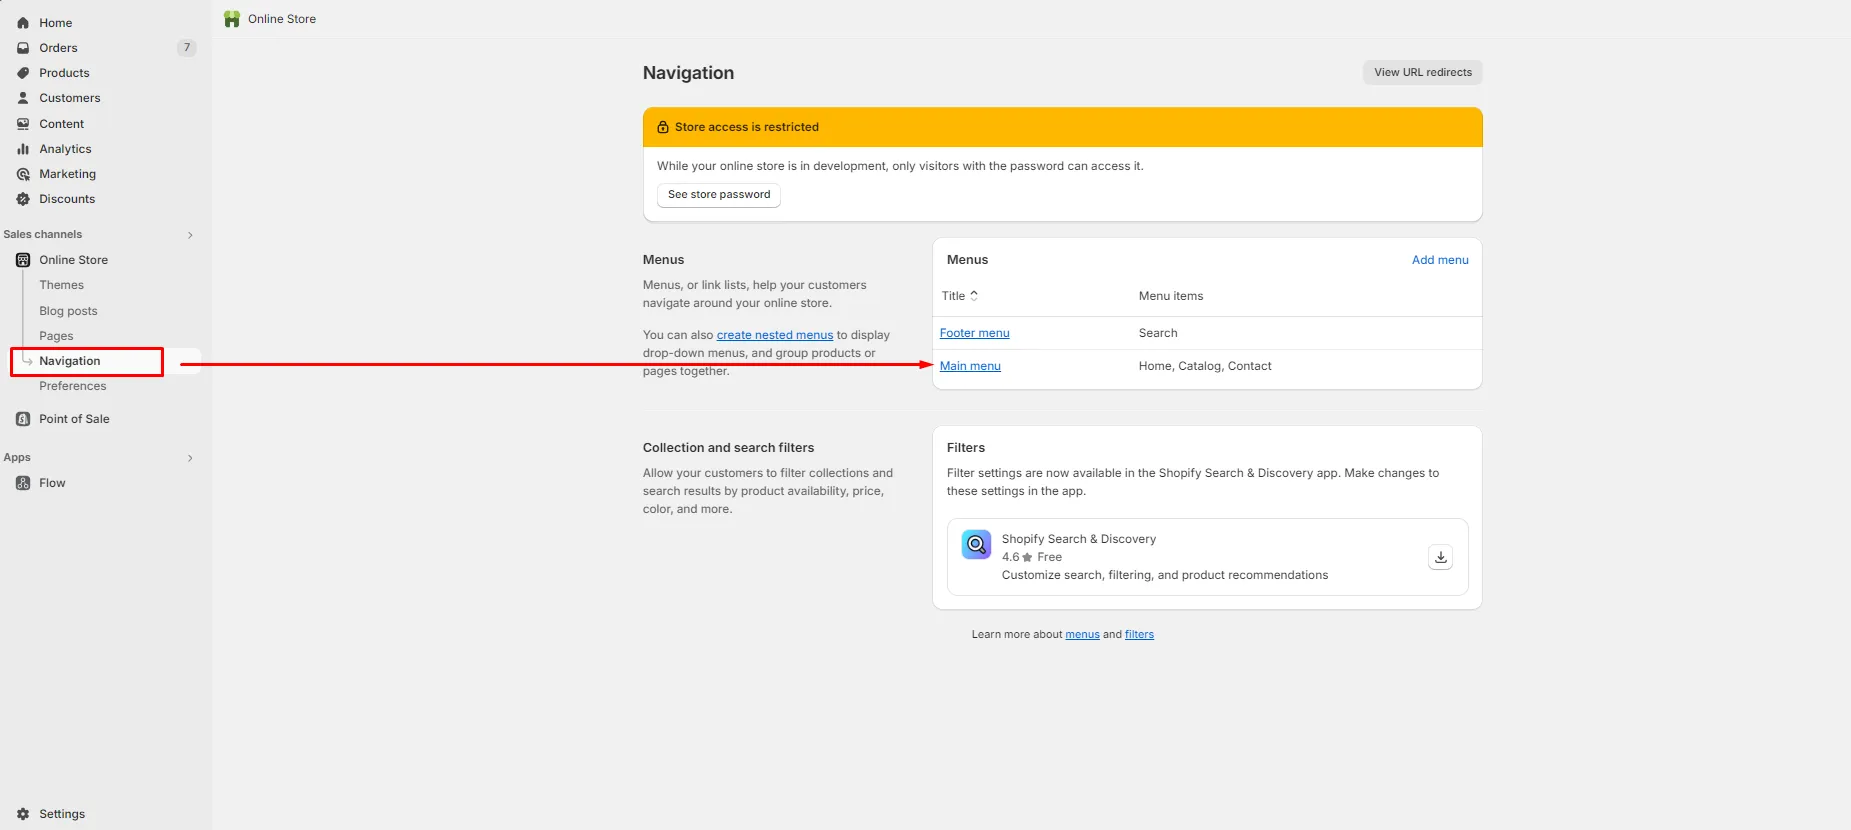
Menus live in Shopify, not in the app.
Go to Content > Menus in your Shopify admin, then open the menu the link belongs in. Main menu is the one most themes use for the header; footer links usually sit in a separate footer menu.
Older guides send you to Online Store > Navigation for this. In the current Shopify admin the menus live under Content > Menus.
-
Click Add menu item
Section titled “Click Add menu item”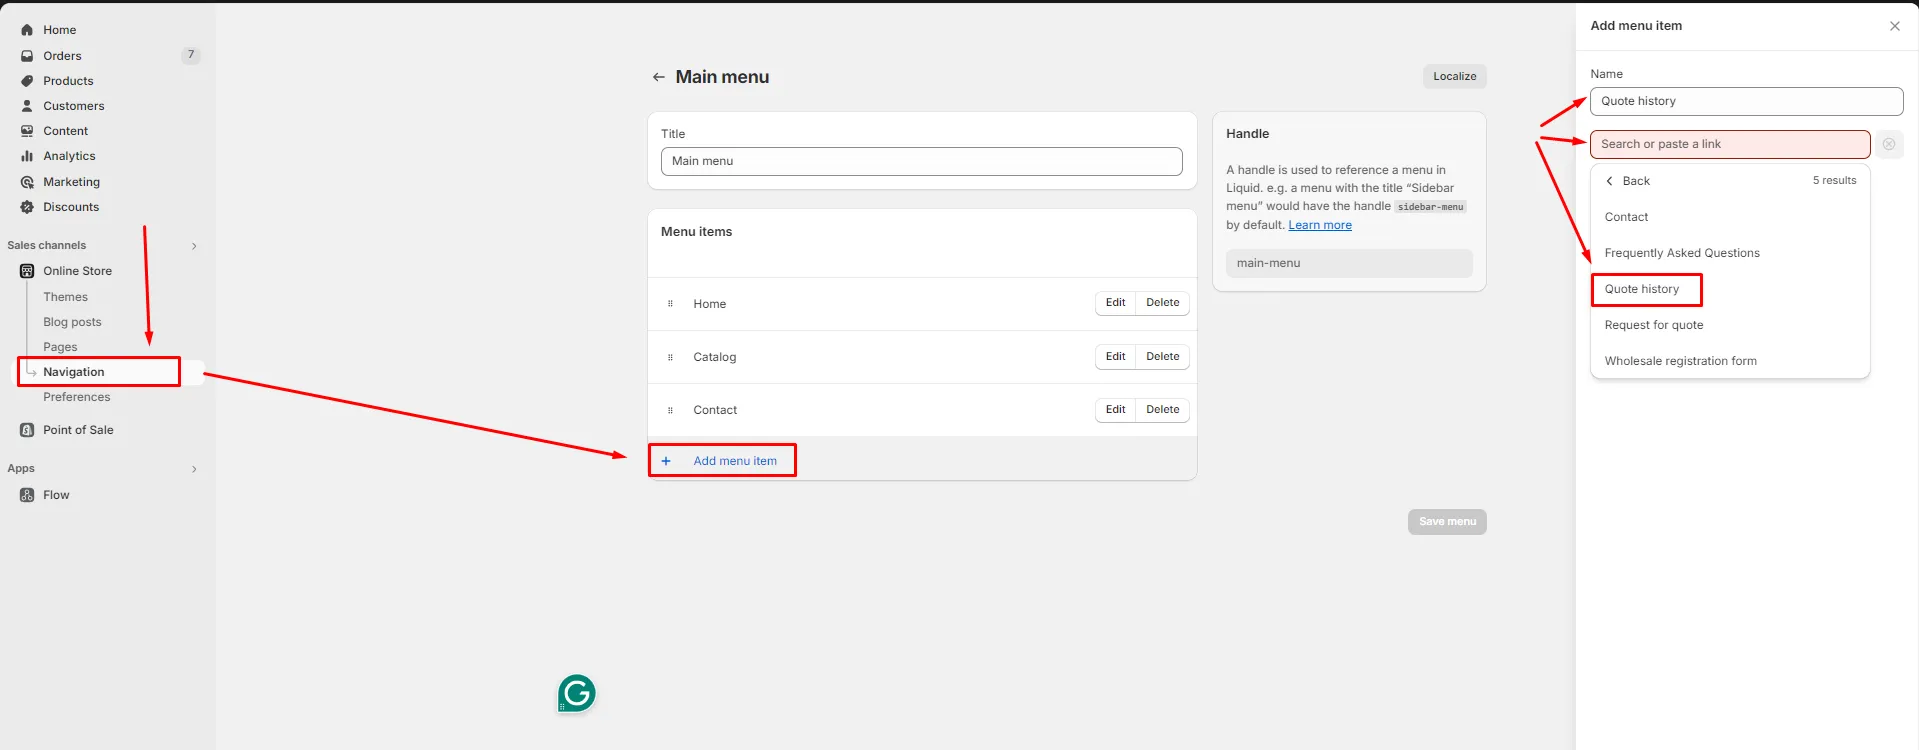
One panel: a label customers read, a link that does the work.
At the bottom of the Menu items card, click Add menu item. A new row appears with two fields, Label and Link.
-
Type the Label
Section titled “Type the Label”Label is the wording customers see in your menu. Write something they would recognise — “Request a quote” or “My quotes”.
-
Choose the page in the Link field
Section titled “Choose the page in the Link field”Click the Link field and pick the page from the list that drops down. The two you want are named exactly:
- Request for quote — the quote cart page
- Quote history — a customer’s past quotes
Watch the wording here. The pages are Request for quote and Quote history, not “Request a quote” or “Quote List” — if you type the wrong phrase into the picker’s search, nothing comes back and it looks as though the page doesn’t exist.
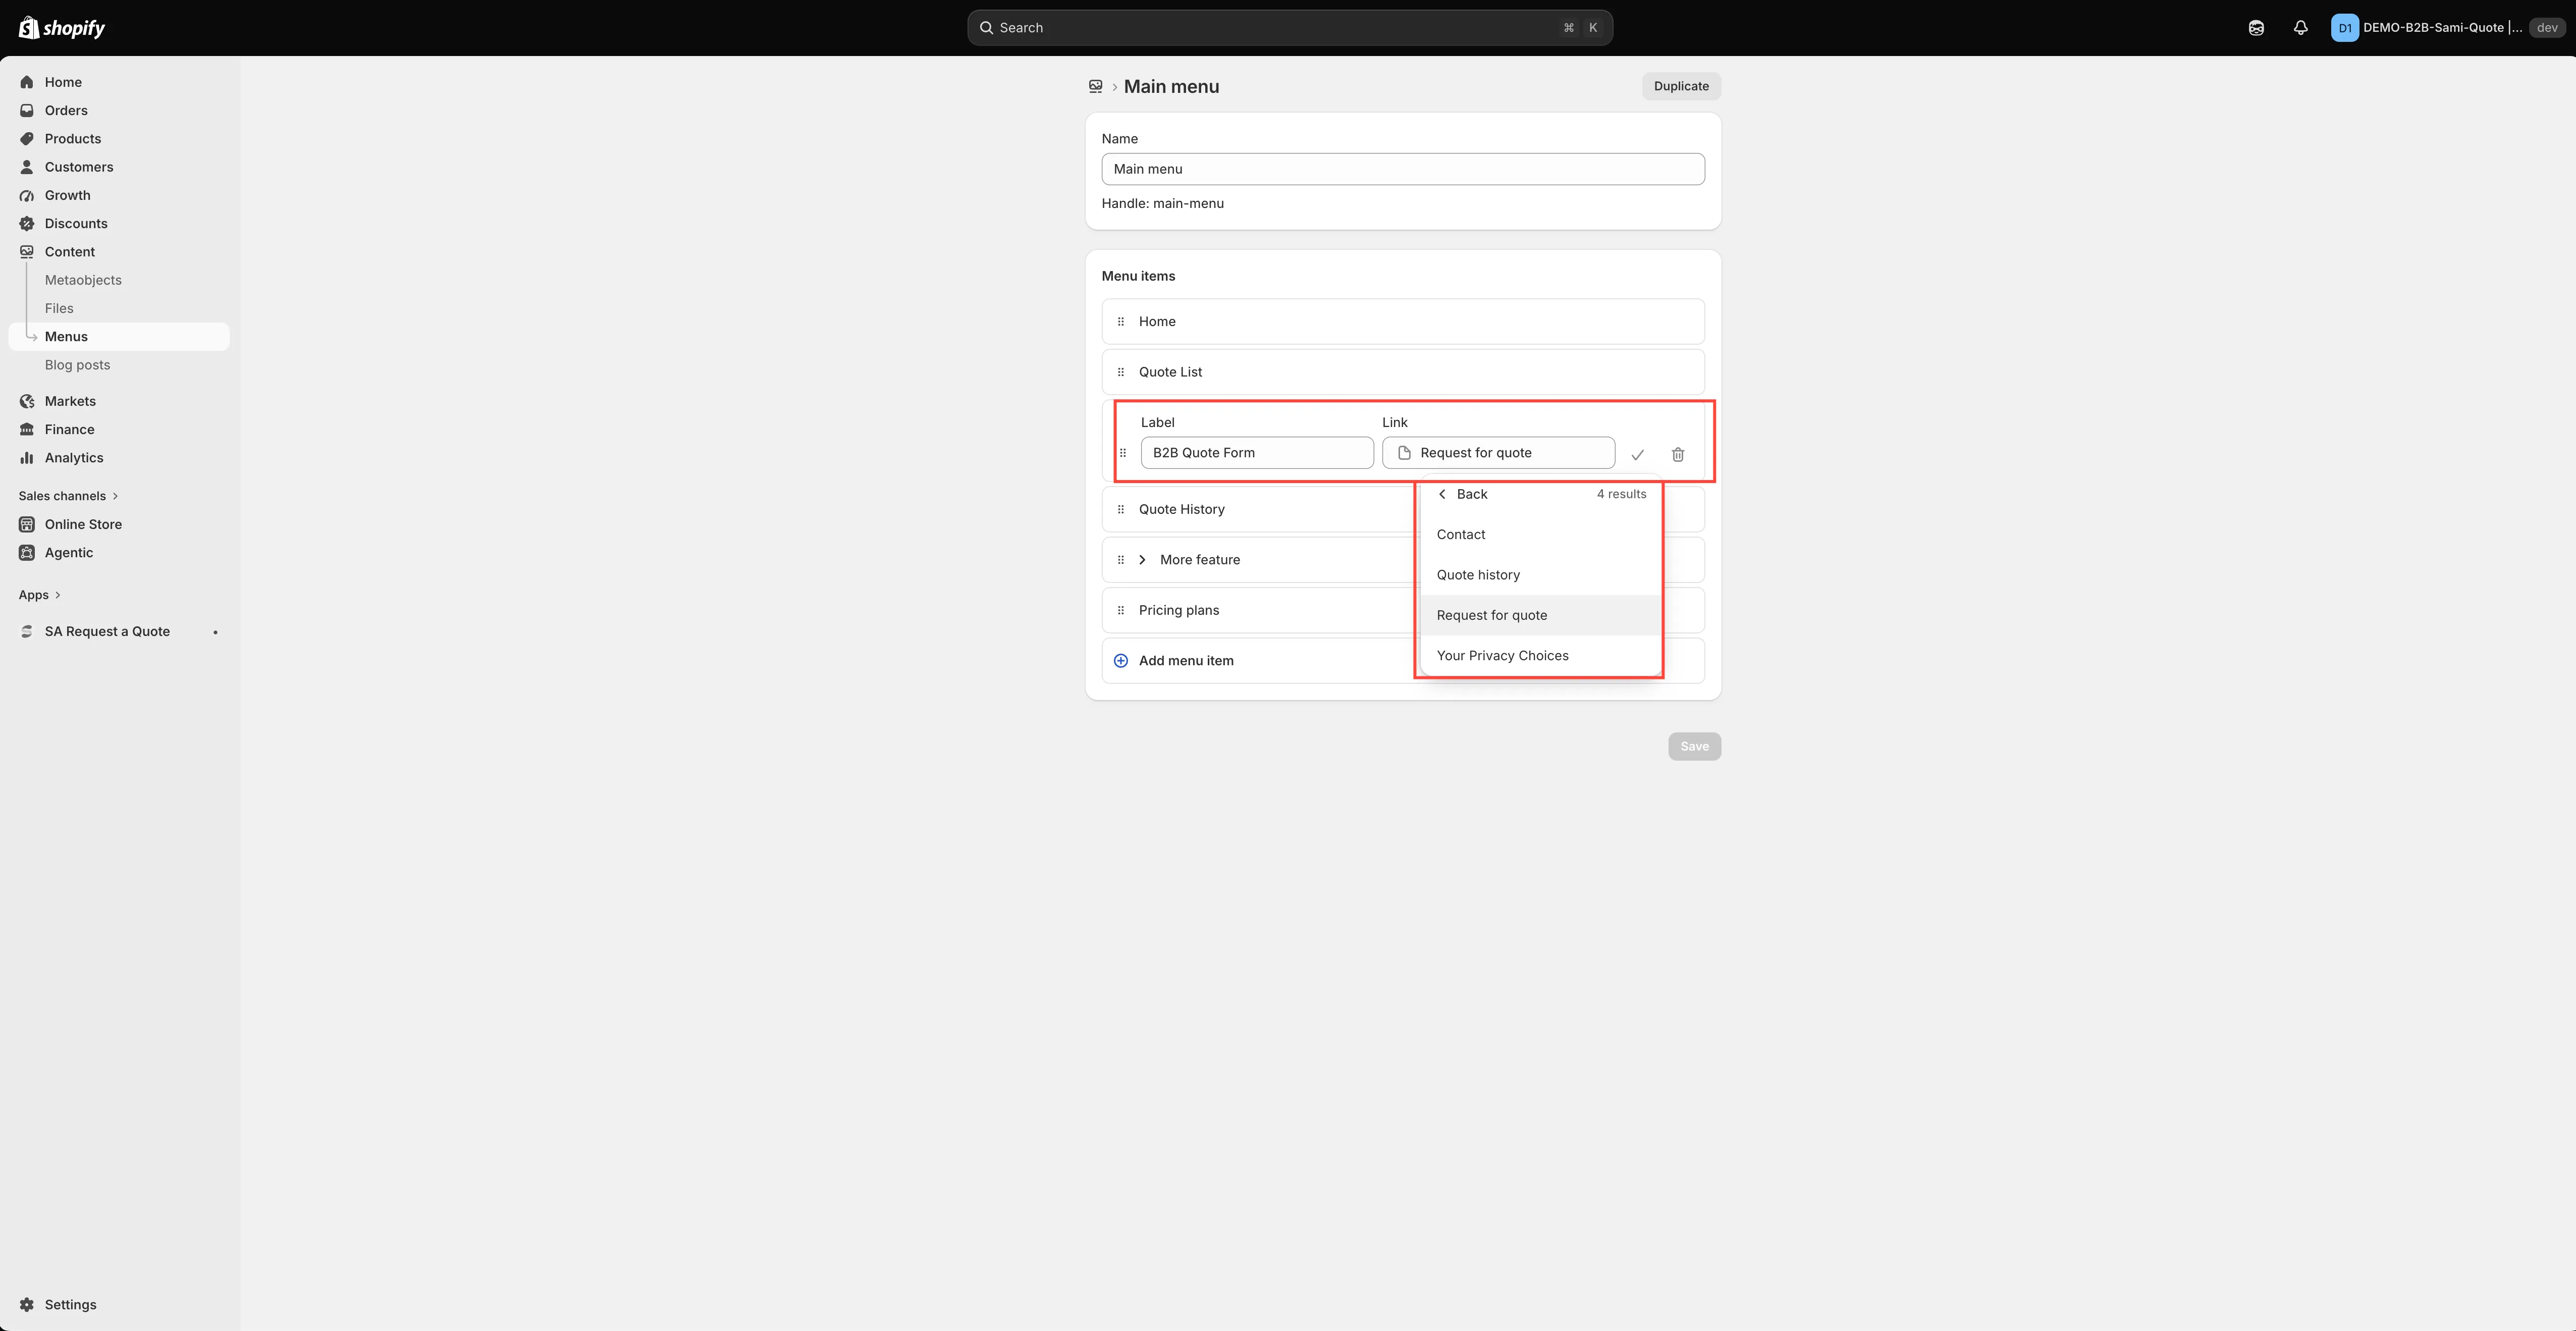
The link is added in Shopify, not in the app.
-
Confirm the item, then save the menu
Section titled “Confirm the item, then save the menu”These are two separate clicks, and skipping the second is the usual way people lose the work:
- Confirm the row with the tick (✓) at the end of it. That commits the item to the list.
- Click Save to save the menu itself.
A tick without a save leaves you with a menu that looks right in the admin and unchanged on the storefront.
-
Check it on your storefront
Section titled “Check it on your storefront”Open your storefront, find the new item and click it. You should land on the page you picked, at the path in the table above.
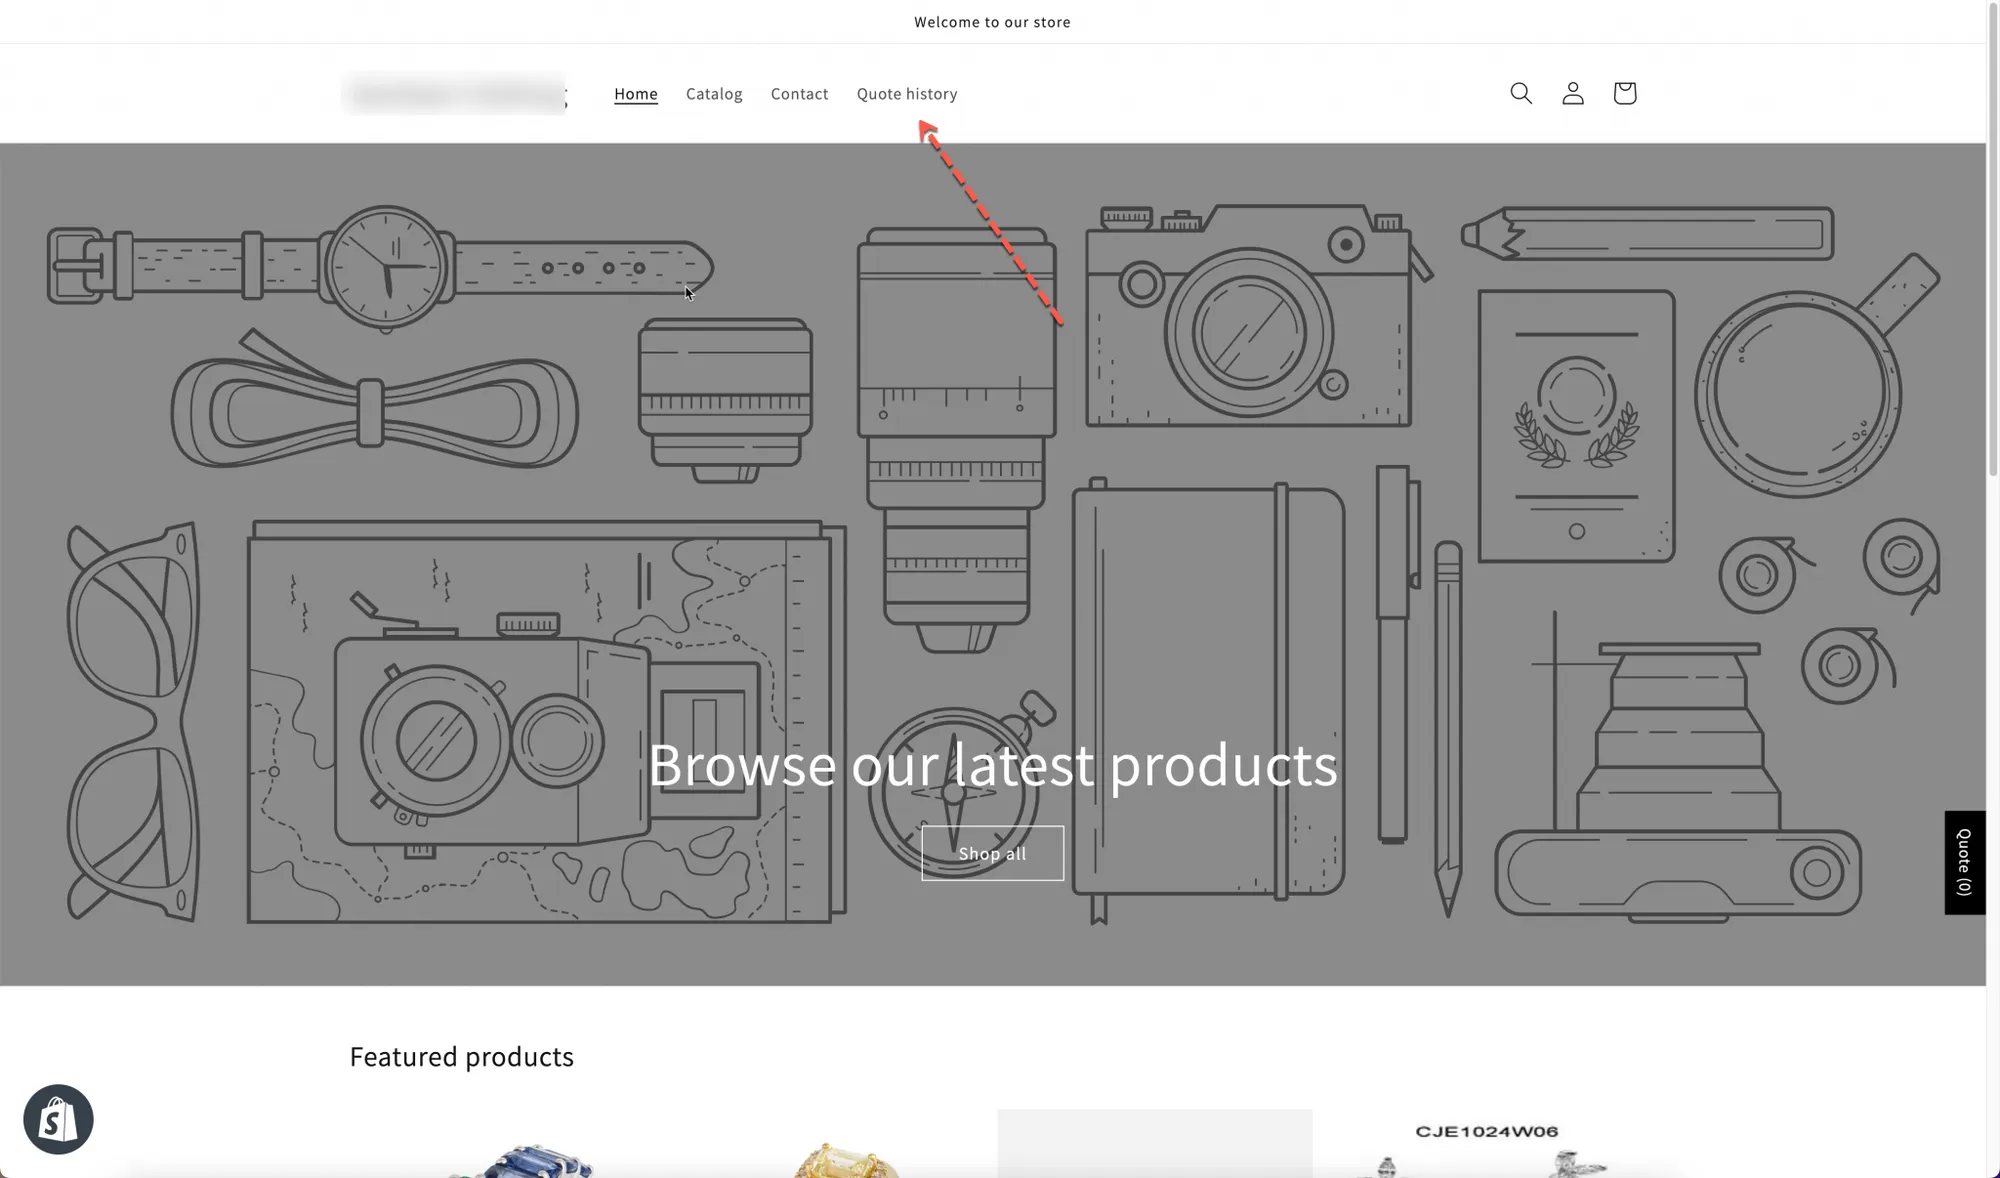
The finished link, where every customer can reach it.
Repeat the whole sequence for the second page if you want both. They are separate menu items, and they usually belong in different menus — see below.
Where to put each one
Section titled “Where to put each one”| Page | Where it works best |
|---|---|
| "Request for quote" | Your main menu or header. Customers need to reach it mid-shop, so make it prominent. |
| "Quote history" | Your footer or account menu. It is only useful to logged-in customers who have already sent something. |
Naming the link
Section titled “Naming the link”Use words your customers use. “Request a quote” is clear. “RFQ” is jargon that only trade buyers recognise, and not all of them.
If you have changed Button text on the Button & widget tab — its default is Add to Quote — match the wording here so the whole journey reads consistently.
Next steps
Section titled “Next steps”- Edit quote page text — add your own wording to the pages
- Request a Quote page — set up the quote cart page itself
- Floating quote widget — an alternative that needs no menu space