
Add reCAPTCHA
Connect Google reCAPTCHA v2 to your quote form to stop automated spam submissions.
A public form with an email field attracts bots. Google reCAPTCHA adds a check that stops most automated submissions without getting in a real customer’s way. The app describes it as “reCAPTCHA offers more than just spam protection”.
Setting it up is two jobs: register your store with Google, then add the keys Google gives you to the app. You’ll need a Google account.
Step 1 — Get your keys from Google
Section titled “Step 1 — Get your keys from Google”-
Open the reCAPTCHA admin console
Section titled “Open the reCAPTCHA admin console”Go to Google reCAPTCHA and sign in with your Google account.
You can also get there from inside the app: the Google reCAPTCHA page carries the line “Click here to create your own reCAPTCHA site key and secret key for your website”, and here is a link to the same console.
-
Fill in the registration form
Section titled “Fill in the registration form”Google asks for five things. The second one is the one that decides whether this works at all:
Field What to enter Label A name that tells you which site this key belongs to when you come back to it in a year. Your store name is the obvious choice. reCAPTCHA type reCAPTCHA v2, then the "I'm not a robot" Checkbox option beneath it. Not v3, and not the invisible badge or the Android options. Domain Your Shopify store domain — the address the quote form is served at. Owners Leave it. Google sets it to the account you signed in with. Add more addresses only if a colleague should also administer the key. Alerts Worth switching on. It emails the owners when Google spots a problem on your site — a misconfigured reCAPTCHA, or a rise in suspicious traffic. The first of those is precisely the failure this page is about, so let Google tell you rather than waiting for a customer to. Fill all of it in correctly, then submit the form.
-
Copy the two keys
Section titled “Copy the two keys”Google then shows you a pair of keys: a site key and a secret key. Keep the page open; you’ll paste both into the app in a moment, into fields with those same two names.
Step 2 — Add the keys to the app
Section titled “Step 2 — Add the keys to the app”-
Open the integration settings
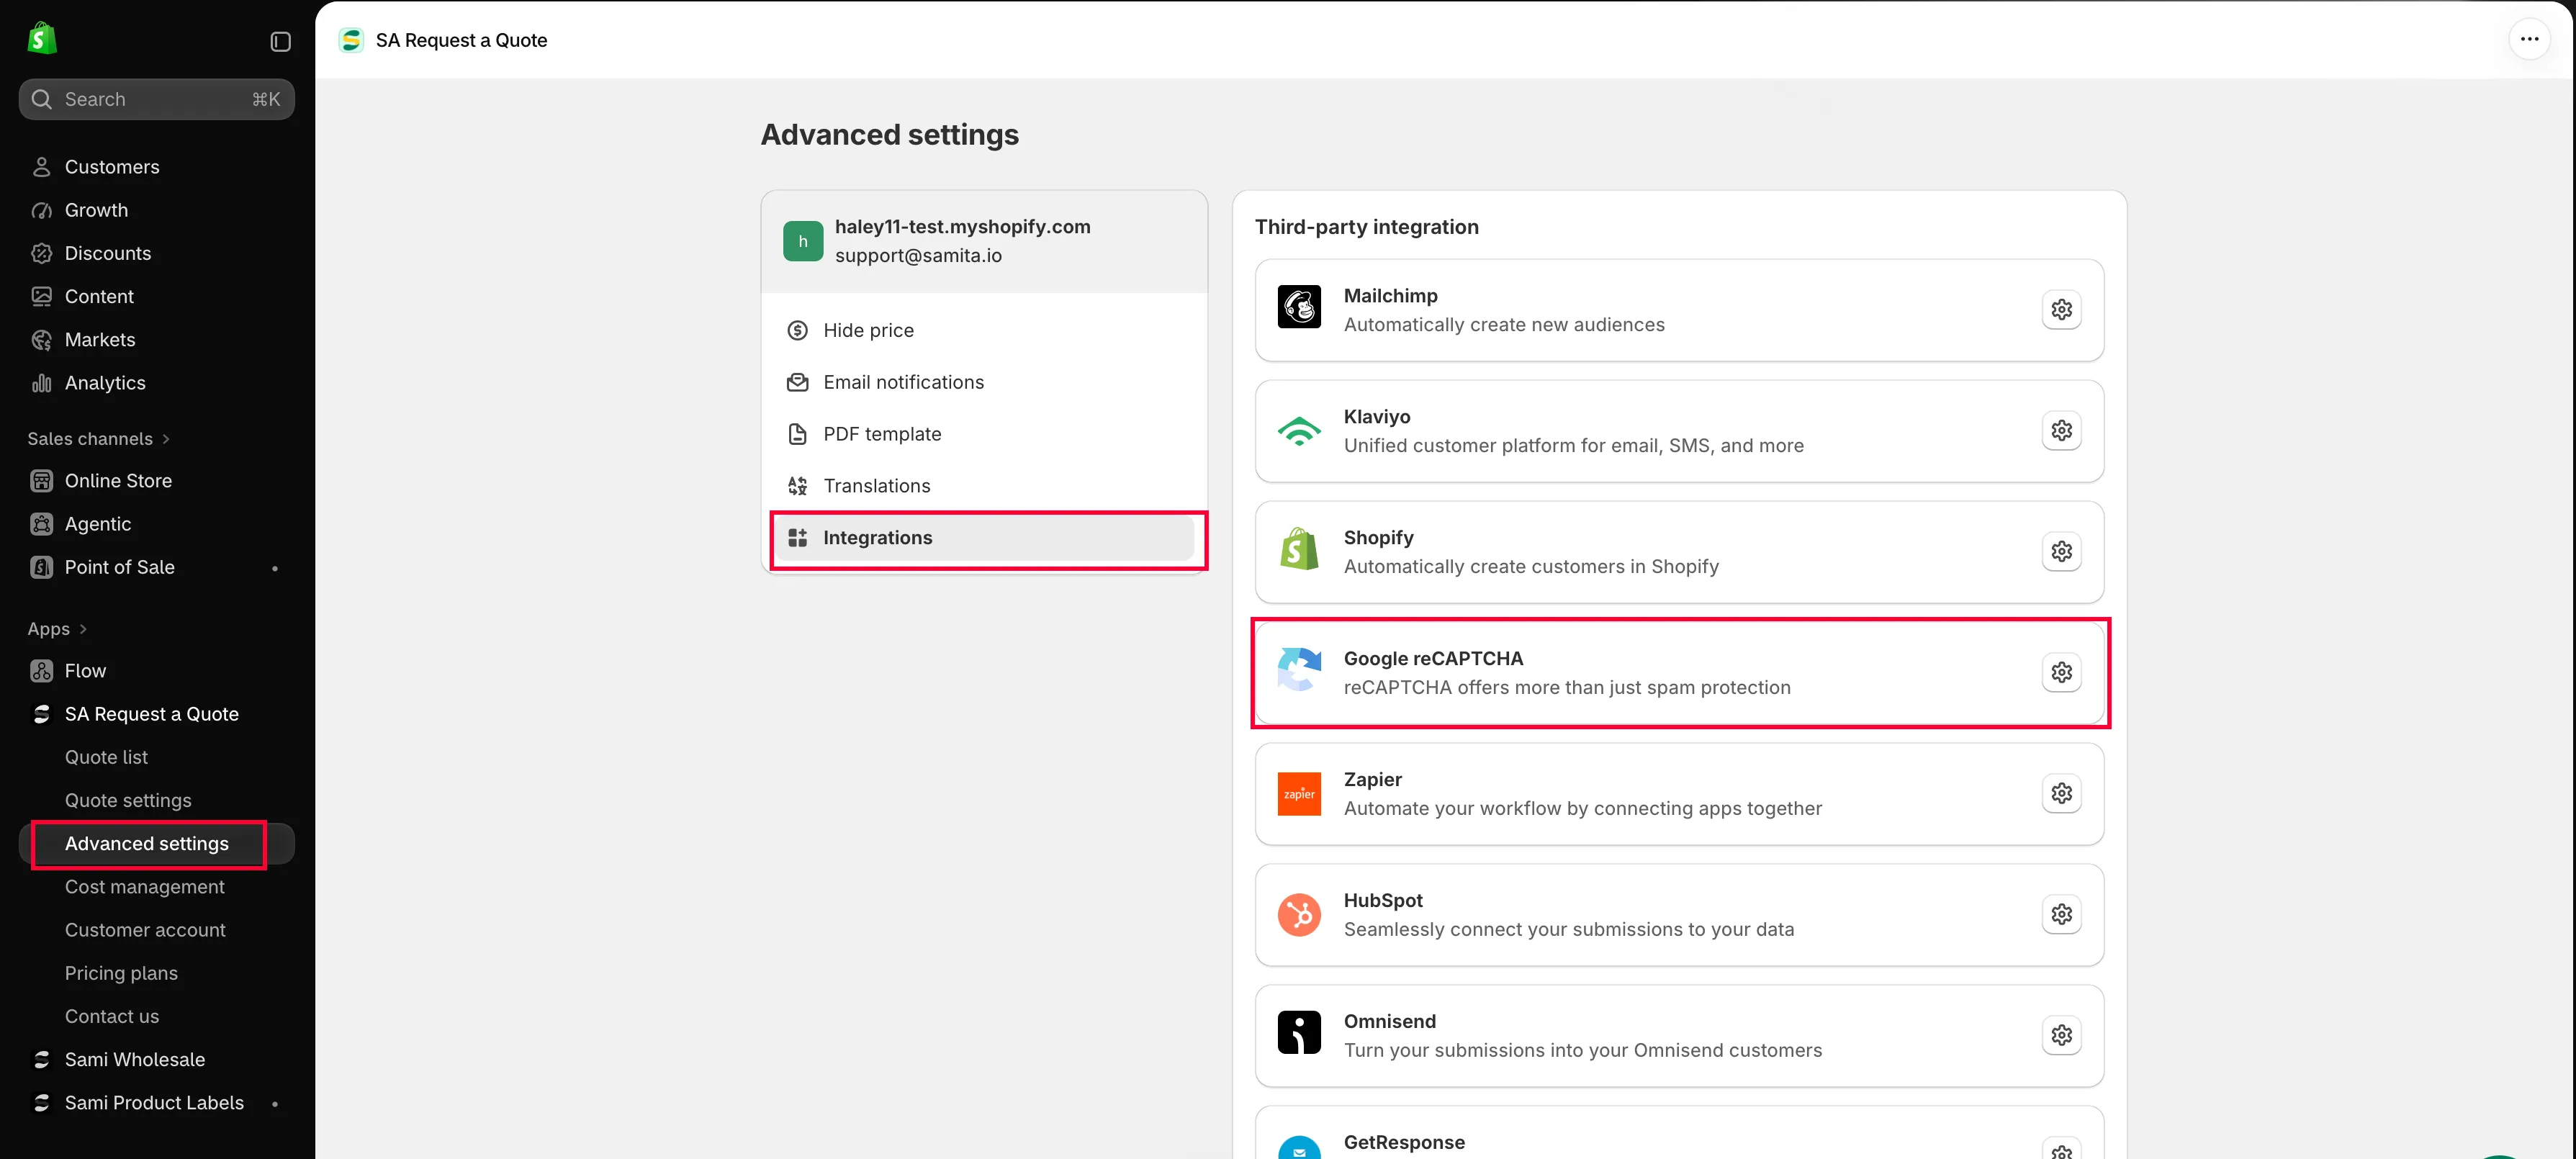
Section titled “Open the integration settings”In the app, go to Advanced settings and open the Integrations tab. Under Third-party integration, find Google reCAPTCHA and open it — each integration has its own page.
-
Paste your keys
Section titled “Paste your keys”The page has exactly two fields, one under the other:
Field in the app What goes in it Site key The site key Google issued — the public half of the pair. Secret key The secret key Google issued — the private half. Don't paste it anywhere else or share it outside your team. Google names its two keys the same way the app does, so this is a straight copy across. They are not interchangeable, so take care not to swap them over — that is the mistake people make most often. Copy one, paste it, then go back for the other, rather than copying both and trusting your memory.
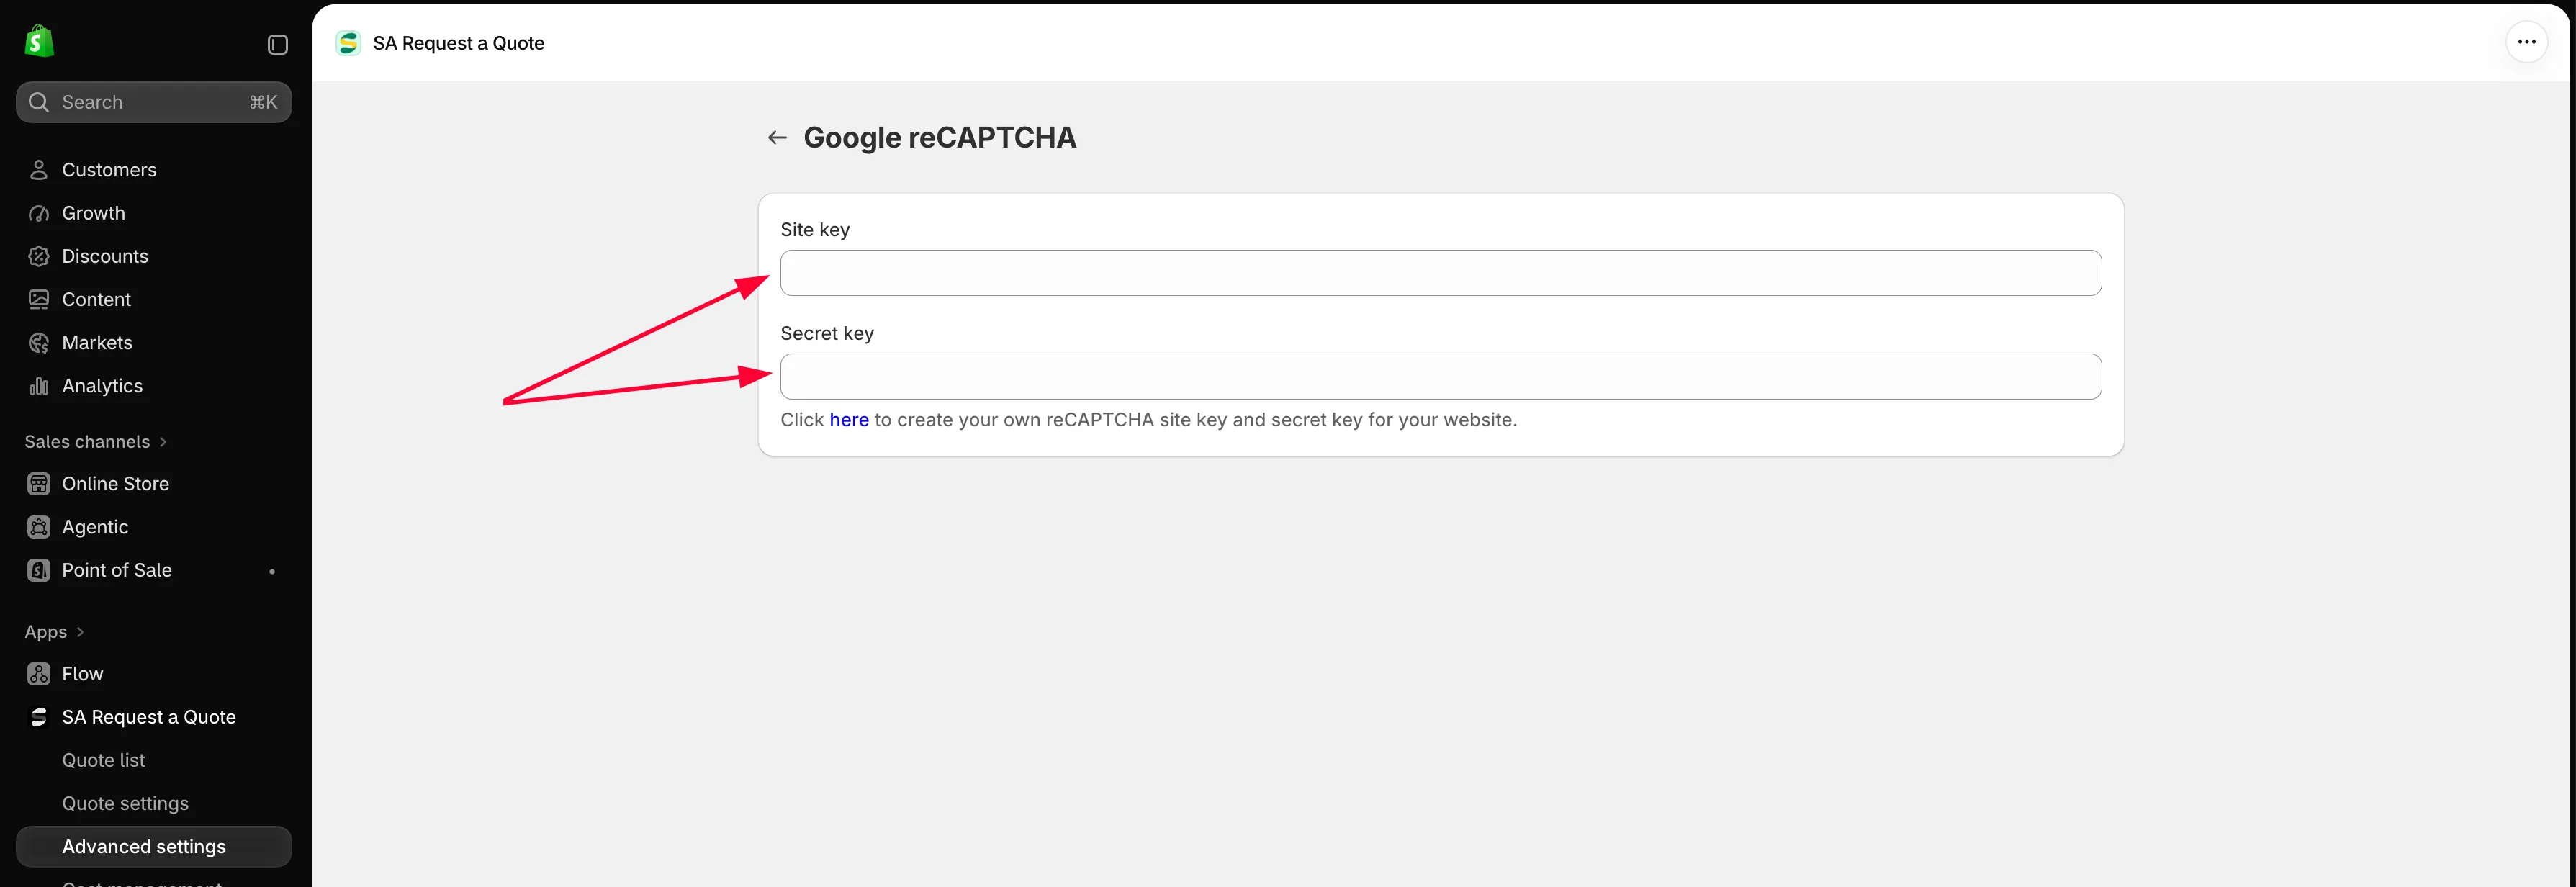
Paste both keys from Google, then save.
-
Save and check the result on your storefront
Section titled “Save and check the result on your storefront”Save your changes, then open the quote form on your storefront as a customer would. The “I’m not a robot” checkbox should be sitting on the form.
Send a real test request through it. Seeing the checkbox only proves the site key works; completing a submission is what proves the secret key does too.
If the check doesn’t appear
Section titled “If the check doesn’t appear”- Check you registered v2, not v3. A v3 key pair produces no visible checkbox — that is what v3 is for. Open your site in the Google reCAPTCHA console and look at the type it was registered as. If it says v3, register a new v2 “I’m not a robot” Checkbox site and replace both keys.
- Check the domain matches. The domain registered with Google must match the domain customers actually use.
- Check both keys were saved, and the right way round. The app’s Site key field takes Google’s site key and the Secret key field takes Google’s secret key. Paste them again from Google if you’re unsure, then save.
- Check the app is switched on in your theme. On the app dashboard, the Setup guide shows App embed is enabled or App embed is disabled, with an Enable app embed button.
- Check the fields aren’t locked. If they are greyed out with a padlock line reading “🔐 This feature is available on …”, the integration belongs to a higher plan. That is your plan, not a fault — open Pricing plans in the app.
Next steps
Section titled “Next steps”- Build a standard form — the rest of your form
- Integrations overview — connect quote data to your other tools
- Allow file uploads — which file types the app accepts, and the storage uploads use