
Request a Quote page
Set up the quote cart page, where customers review the products they have collected and send you their request.
The app calls this the Quote cart page. On your storefront it is the page titled “Request for quote” at /pages/request-for-quote, and the app describes it as: “Shows the quote form and the customer’s quote cart.”
It is where a request is actually sent from. Customers see everything they have added, adjust it, fill in your form and submit.
Find the page settings
Section titled “Find the page settings”-
Open the Customize editor
Section titled “Open the Customize editor”Go to Quote settings. On the Request a Quote page, click Customize.
-
Open the Quote cart page tab
Section titled “Open the Quote cart page tab”The editor has four tabs — Button & widget, Quote form, Quote cart page and Success message. Everything on this page lives on the Quote cart page tab.
-
Point the Pages section at the right page
Section titled “Point the Pages section at the right page”This is a setting to check, not just to read. Pages holds two page pickers: Quote cart page (“Shows the quote form and the customer’s quote cart.”) and Quote history page (“Shows a logged-in customer’s past quotes.”).
Click Quote cart page. A panel opens with a Search by page title or URL box and a Select page list of your store’s pages, each showing its title, its path and a Published or Draft badge. Choose Request for quote —
/pages/request-for-quote.If your search finds nothing, the panel offers Create page automatically instead of the list.
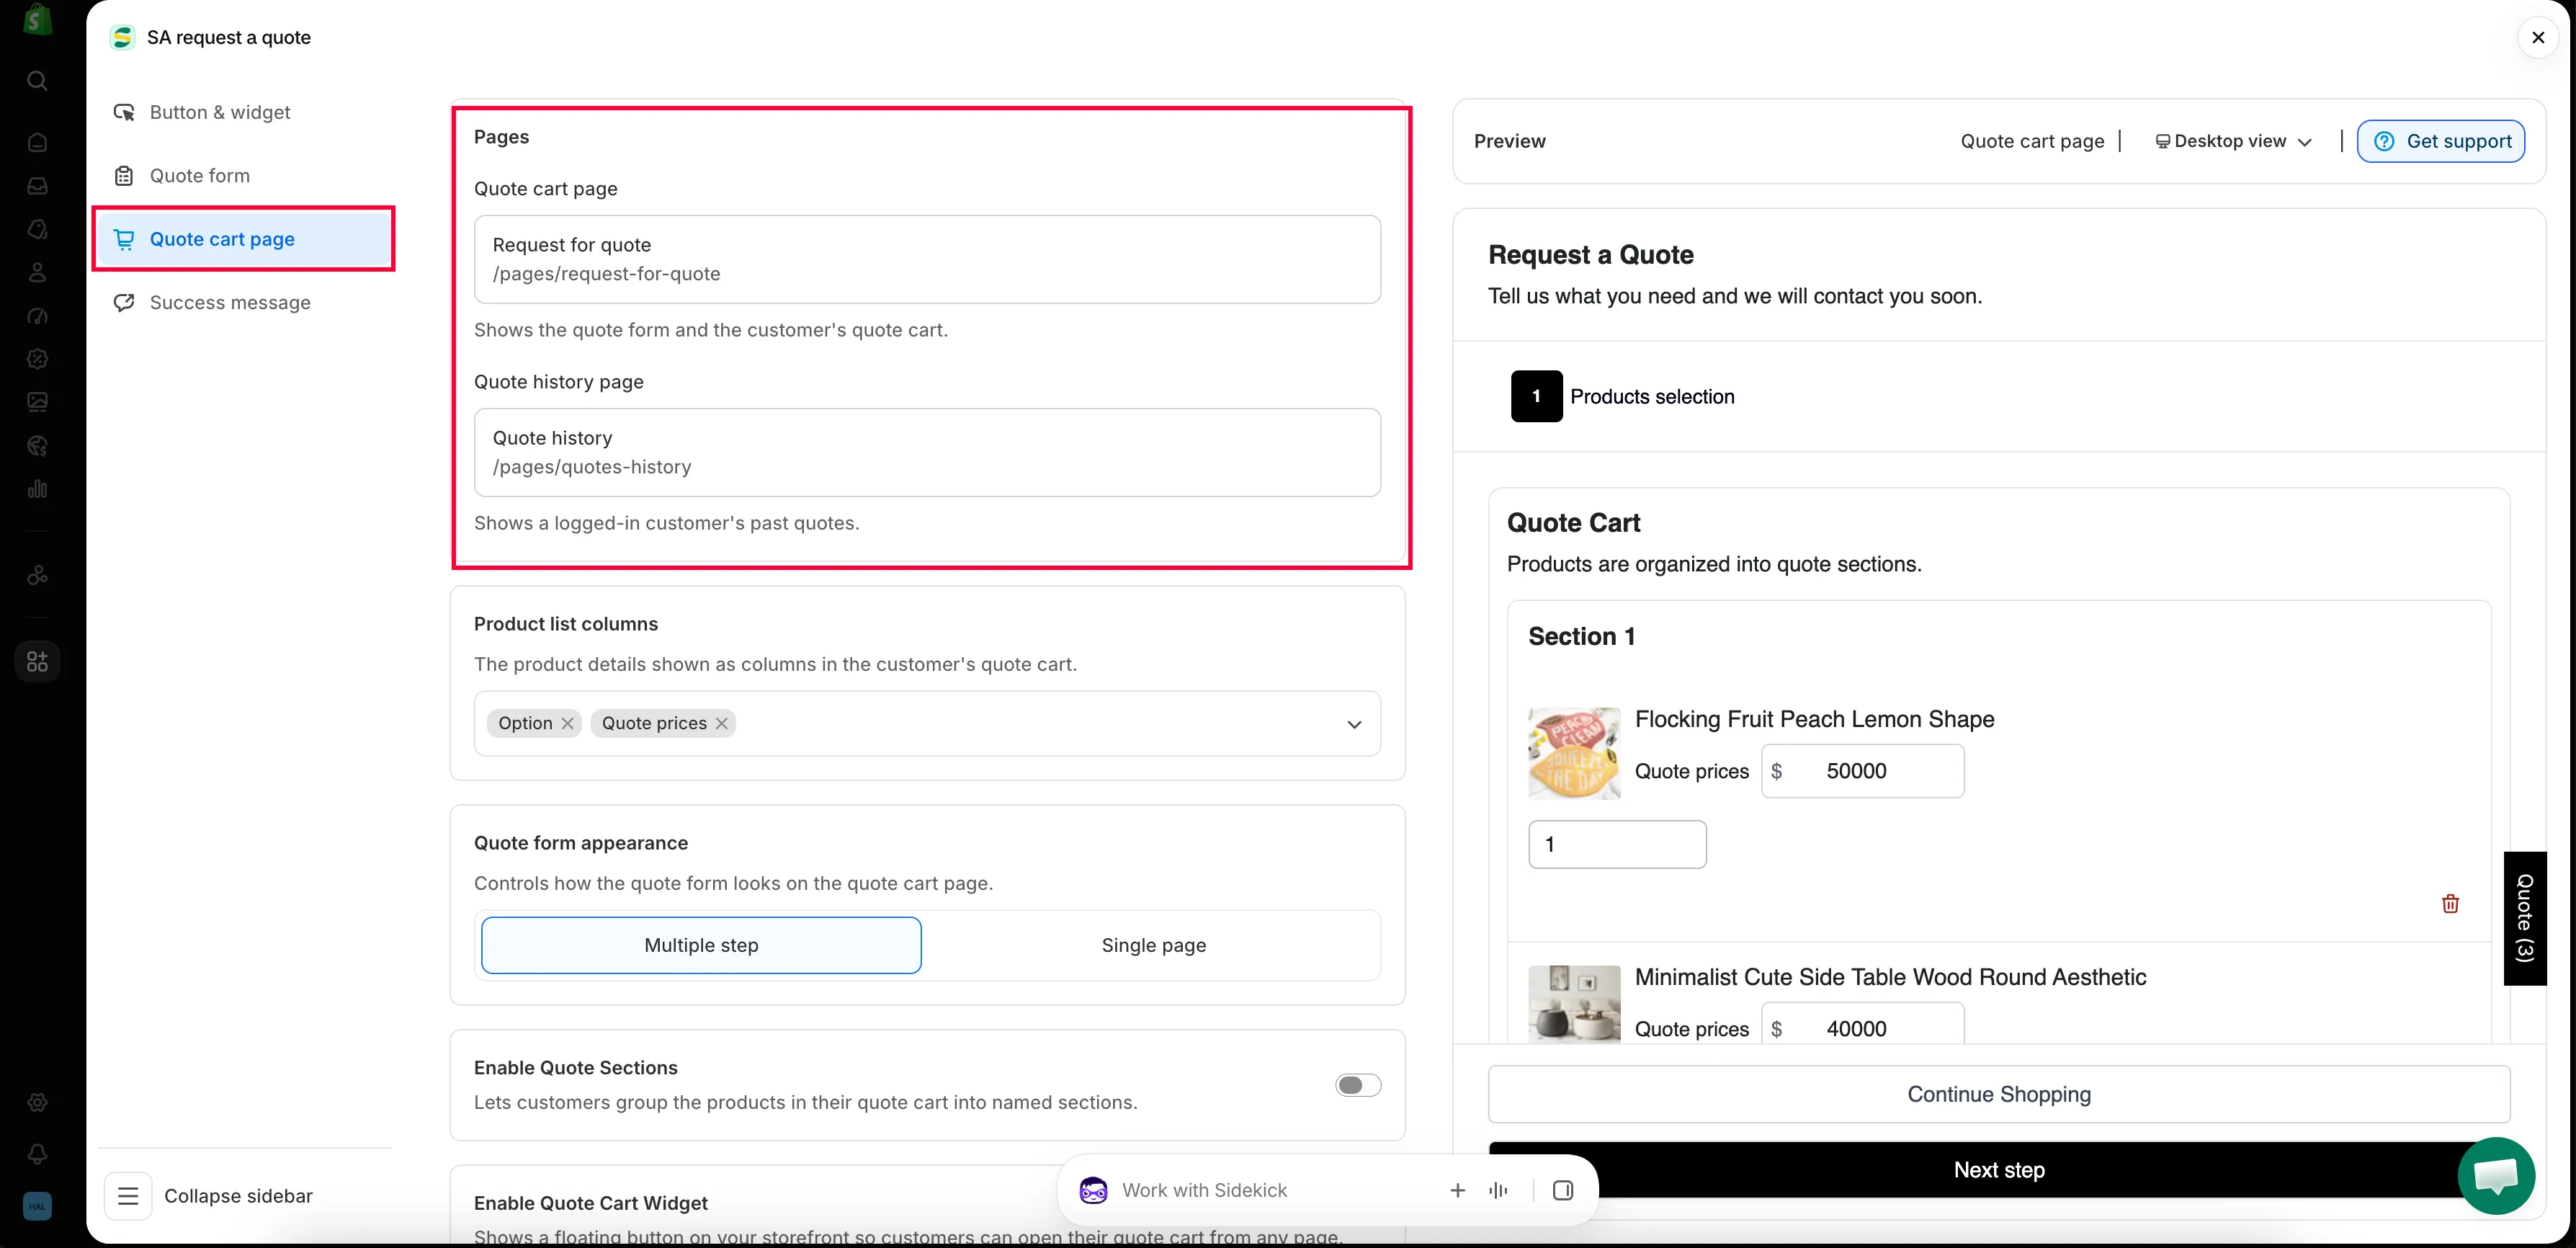
The quote cart page is configured on this tab.
-
Nothing you change in the editor is live until you save. The save bar appears at the top as soon as you change anything — click Save on it.
If you try to leave with unsaved work the app asks “Discard all unsaved changes”, warning that “If you discard changes, you’ll delete any edits you made since you last saved.” Choose Continue editing and save, unless you really do mean to throw the edits away.
Send customers to this page
Section titled “Send customers to this page”Setting the page up does not put anyone on it. There are two routes to configure, and each one is finished by a Save and checked on your storefront.
Route 1 — send them straight there from the quote button
Section titled “Route 1 — send them straight there from the quote button”-
Open the Button & widget tab
Section titled “Open the Button & widget tab”In Customize, click the Button & widget tab.
-
Set Click action to Redirect to quote page
Section titled “Set Click action to Redirect to quote page”Under the Click action heading, choose Redirect to quote page — the app’s own note on it reads “Go directly to quote cart page”. The other two choices keep the customer where they are: Open quote form popup and Add product to quote cart.
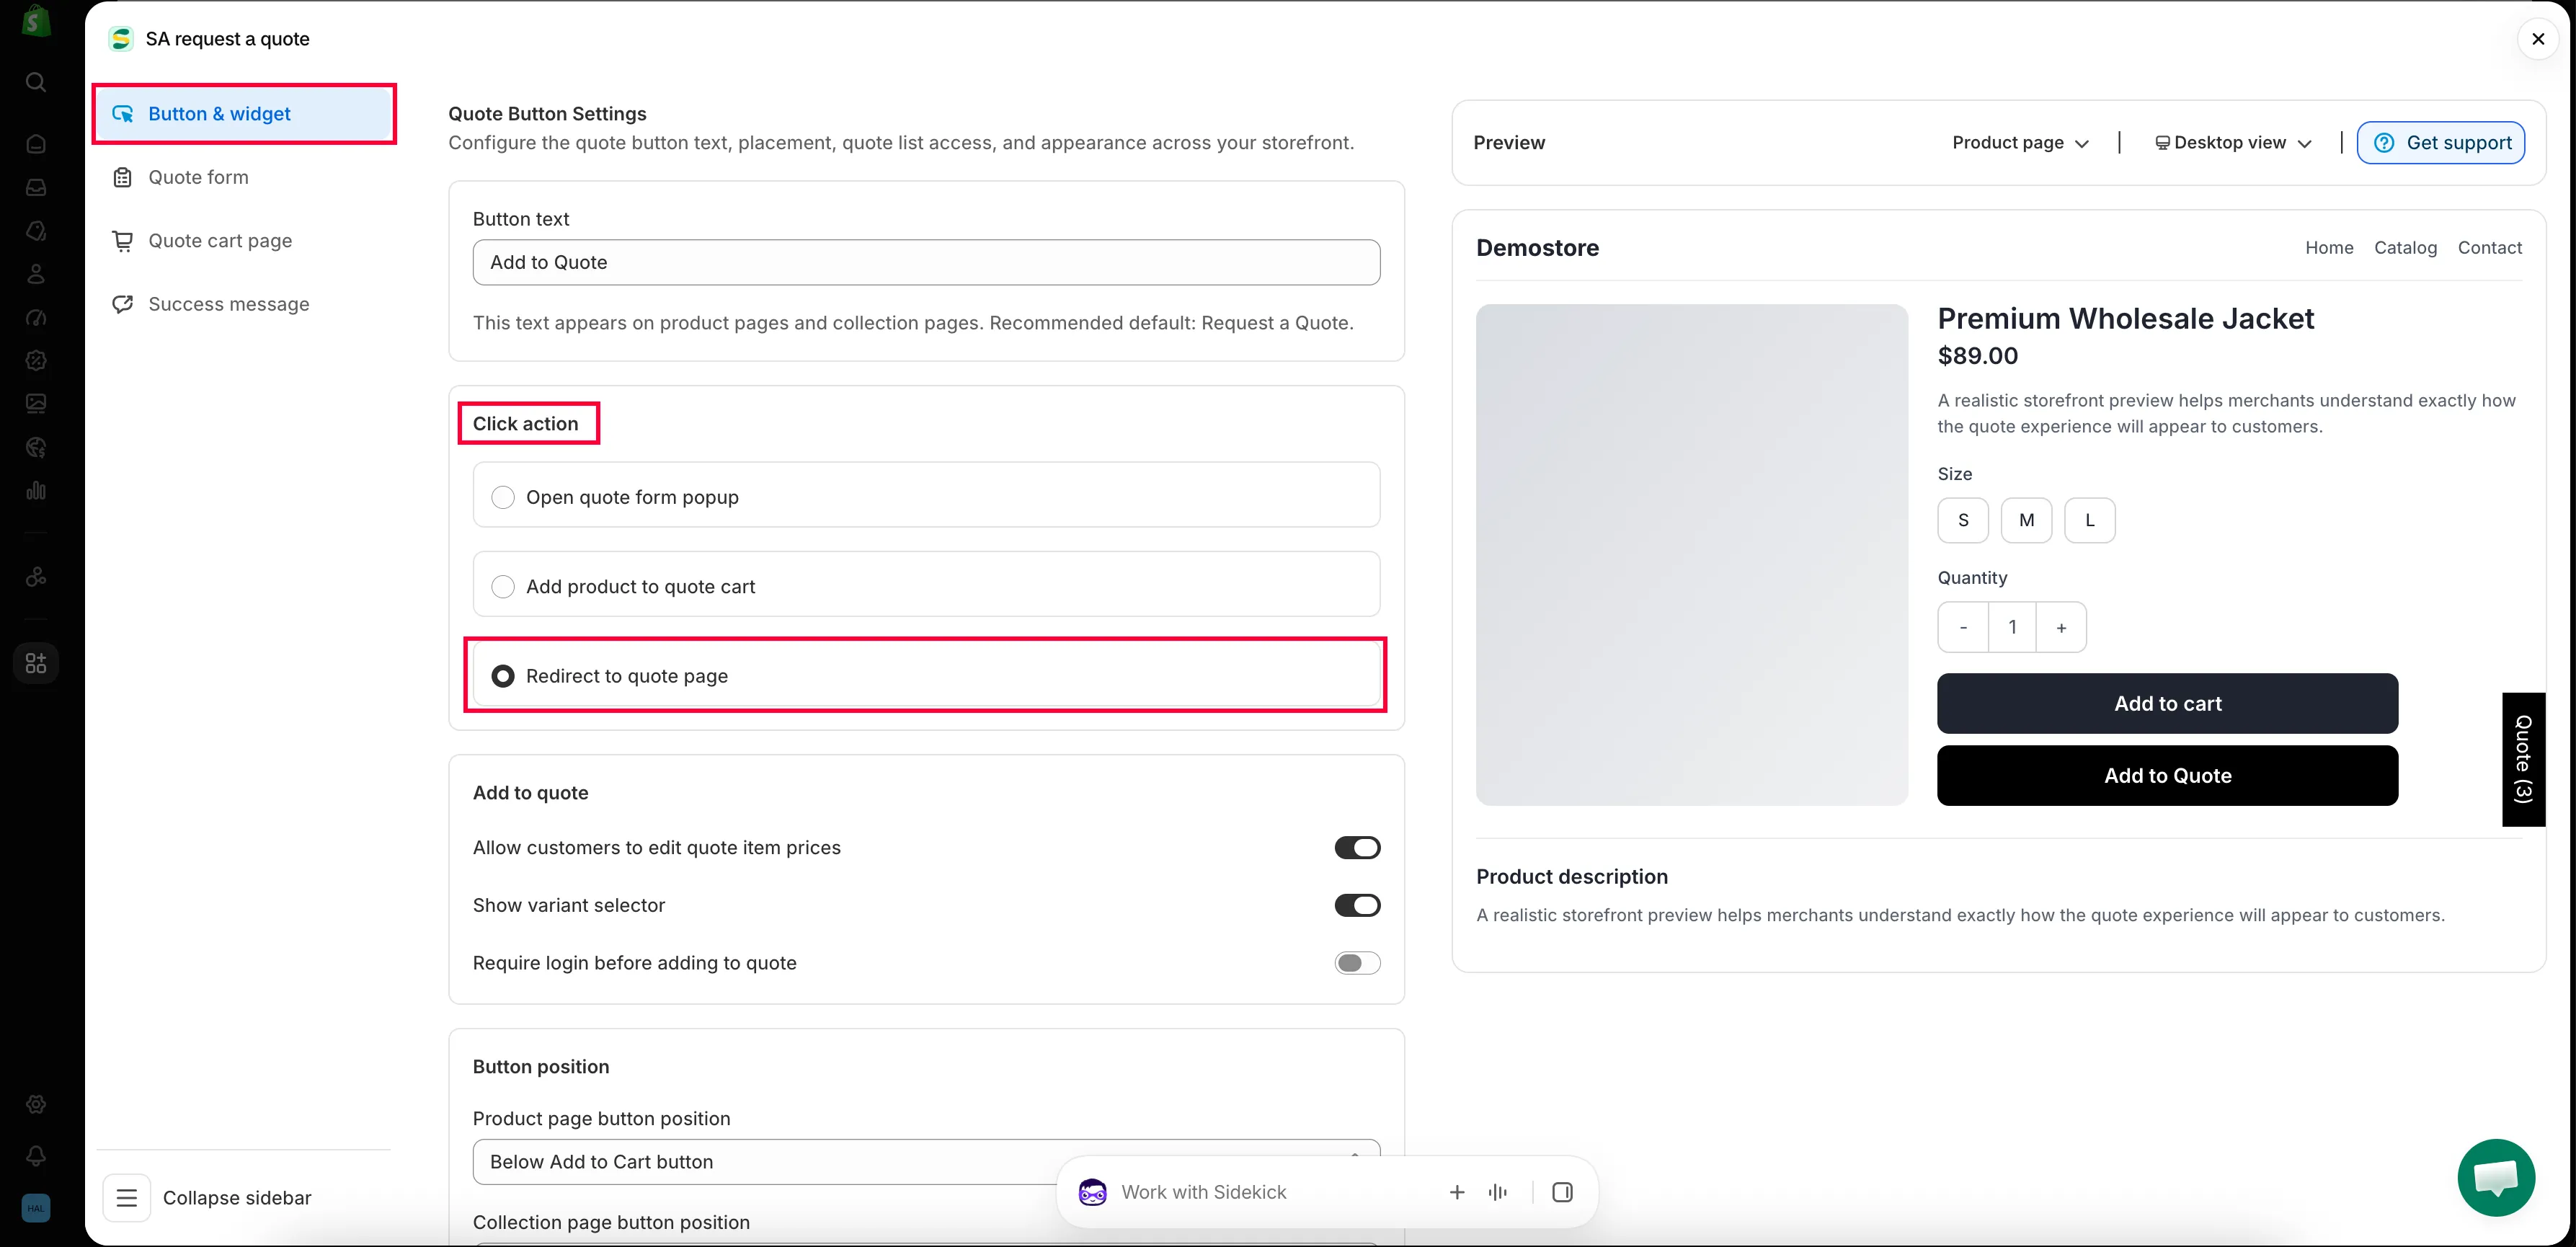
-
Confirm the page it lands on
Section titled “Confirm the page it lands on”Go back to the Quote cart page tab and make sure Pages > Quote cart page is pointing at Request for quote, as above. The redirect and the page setting are one job in two places — set one without the other and the button sends customers nowhere useful.
-
Save, then try it as a customer
Section titled “Save, then try it as a customer”Click Save. Then open a product page on your storefront and click your quote button. It should take you to
/pages/request-for-quotewith that product already in the quote cart.
Route 2 — let them open it from the floating widget
Section titled “Route 2 — let them open it from the floating widget”-
Open Enable Quote Cart Widget
Section titled “Open Enable Quote Cart Widget”On the Quote cart page tab, scroll to Enable Quote Cart Widget — “Shows a floating button on your storefront so customers can open their quote cart from any page.”
-
Turn the widget on
Section titled “Turn the widget on”Switch on Enable quote cart widget. The rest of its settings only appear once it is on.
-
Set the Action to the quote cart page
Section titled “Set the Action to the quote cart page”Action decides what a click does. Choose Go to quote cart page — some versions of the app label the same option Go to quote page. The alternative, Open quote popup, opens the quote in a popup and never brings the customer to this page, so pick it only if that is what you want.
This is the setting people miss. A widget that is switched on but left on Open quote popup looks like a broken link to the quote page.
-
Set its wording and look
Section titled “Set its wording and look”Text is the label on the widget itself. Position places it: Bottom right, Half bottom right, Half top right, Bottom left, Half bottom left or Half top left. Border radius, Text color and Background color finish the styling, and Quote popup primary color applies if you chose the popup action.
-
Save, then try it as a customer
Section titled “Save, then try it as a customer”Click Save. Open any page of your storefront: the floating widget should be there, reading Quote (n) with the number of items in it by default. Clicking it should take you straight to the quote cart page.
Choose which product details customers see
Section titled “Choose which product details customers see”Product list columns controls “The product details shown as columns in the customer’s quote cart.” Click it to open the picker, which has a Search product columns box and the list of columns under Choose Product list columns. Each column you pick is added as a chip you can remove again.
The full list is Vendor, SKU, Option, Price, Quote prices, Total, Subtotal and Note. If you have never touched this setting, Option and Price are the ones in use.
| Column | Show it when |
|---|---|
| Vendor | You resell several brands and buyers order by brand. |
| SKU | Your buyers order by code — trade and wholesale customers usually do. |
| Option | Your products have variants and customers need to see which one they picked. |
| Price | You publish list prices and want customers to see them while they build a request. |
| Quote prices | You let customers name the price they are hoping for — see Let customers propose a price. |
| Total | Customers order in quantity and a running line total helps them judge the size of the request. |
| Subtotal | You want a figure for the whole request, not just per line. |
| Note | Customers need to say something about an individual line — a finish, a deadline, a substitution. |
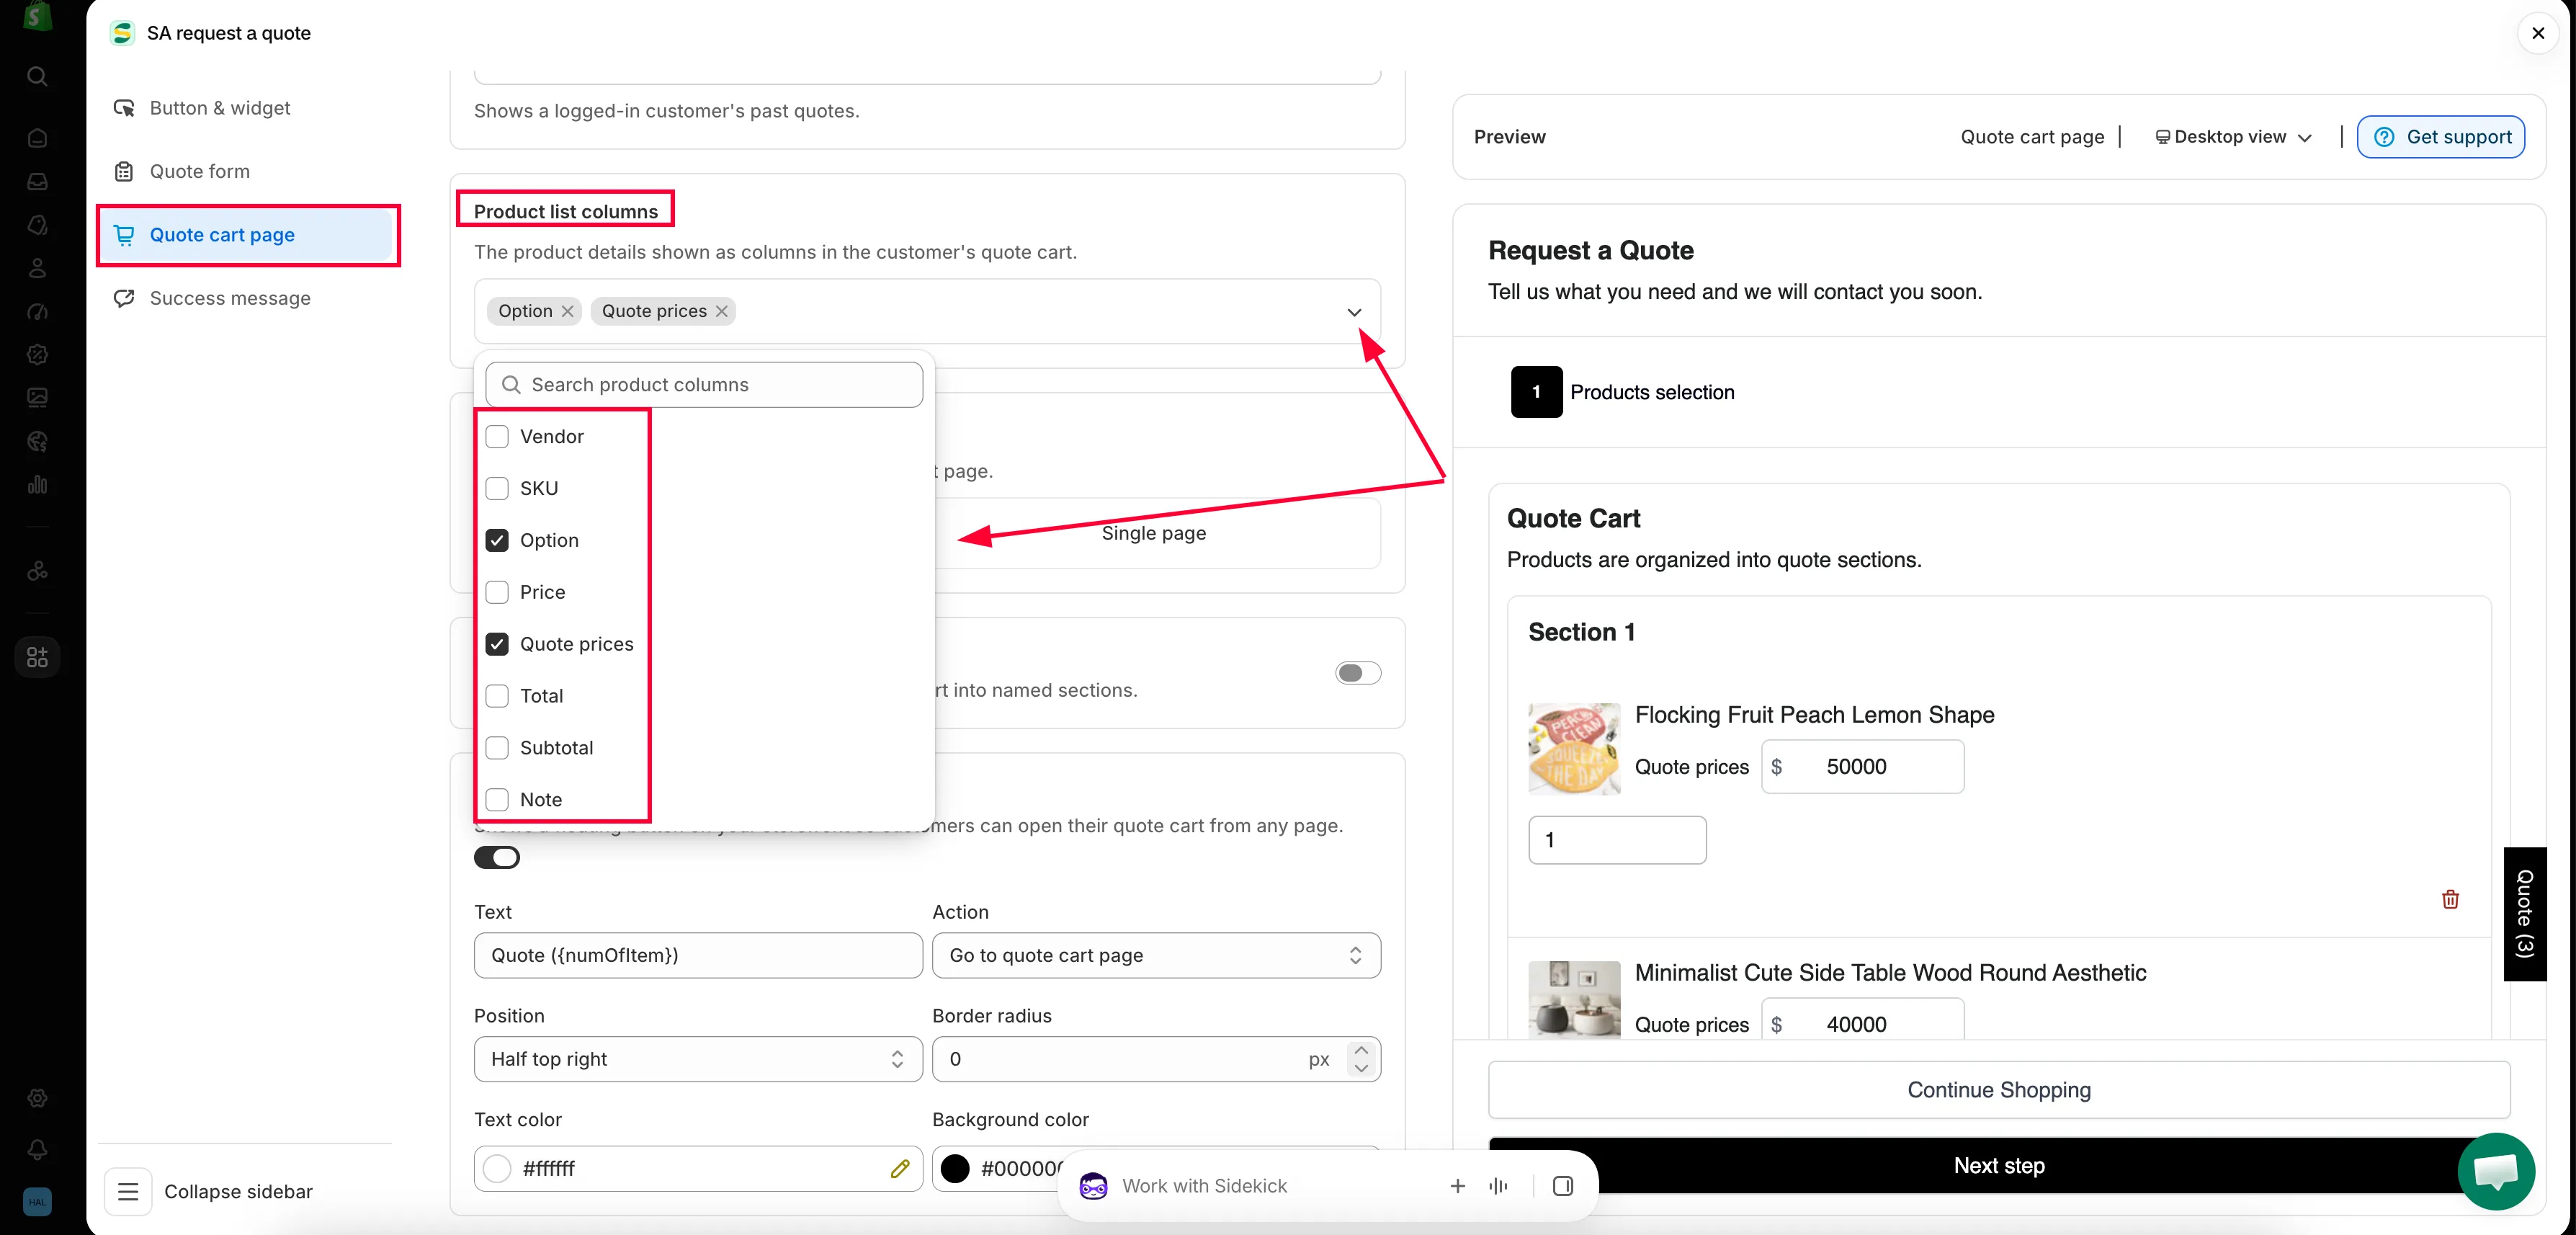
Choose which storefront page the quote cart uses.
Choose how the form is laid out
Section titled “Choose how the form is laid out”Quote form appearance “Controls how the quote form looks on the quote cart page.” There are two choices.
| Option | What the customer sees | Best for |
|---|---|---|
| Multiple step | The form is broken into steps the customer moves through one at a time. | Longer forms — company details, shipping and billing addresses, payment terms. |
| Single page | Every field on one screen, top to bottom. | Short forms where a customer can see the whole thing at a glance. |
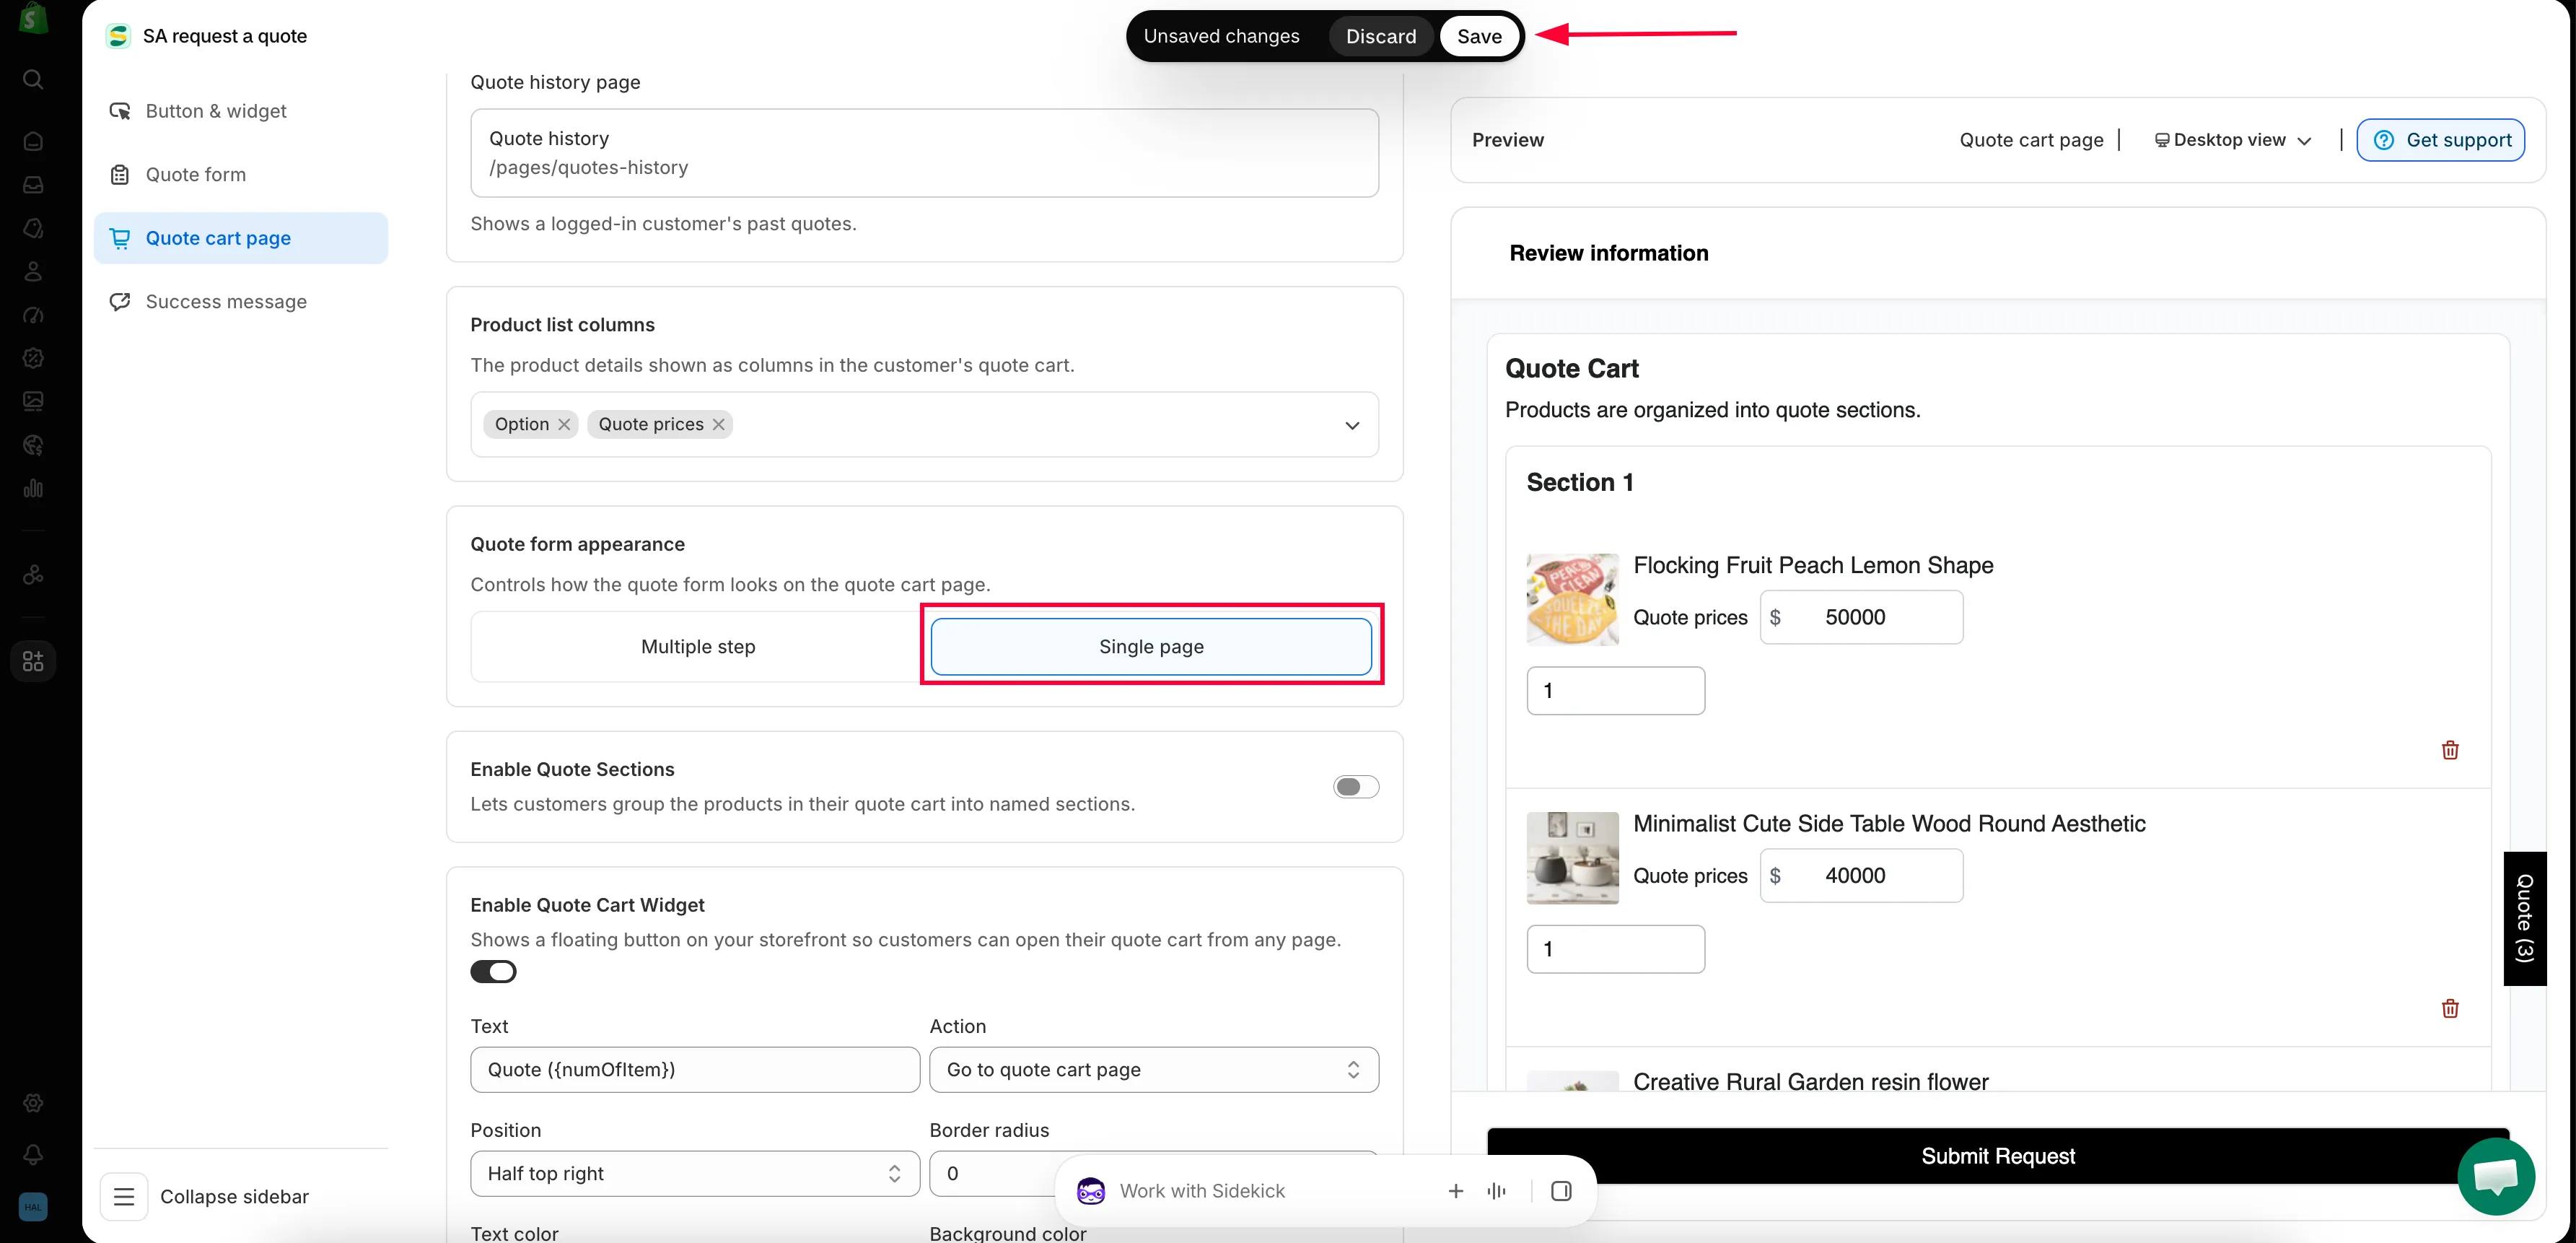
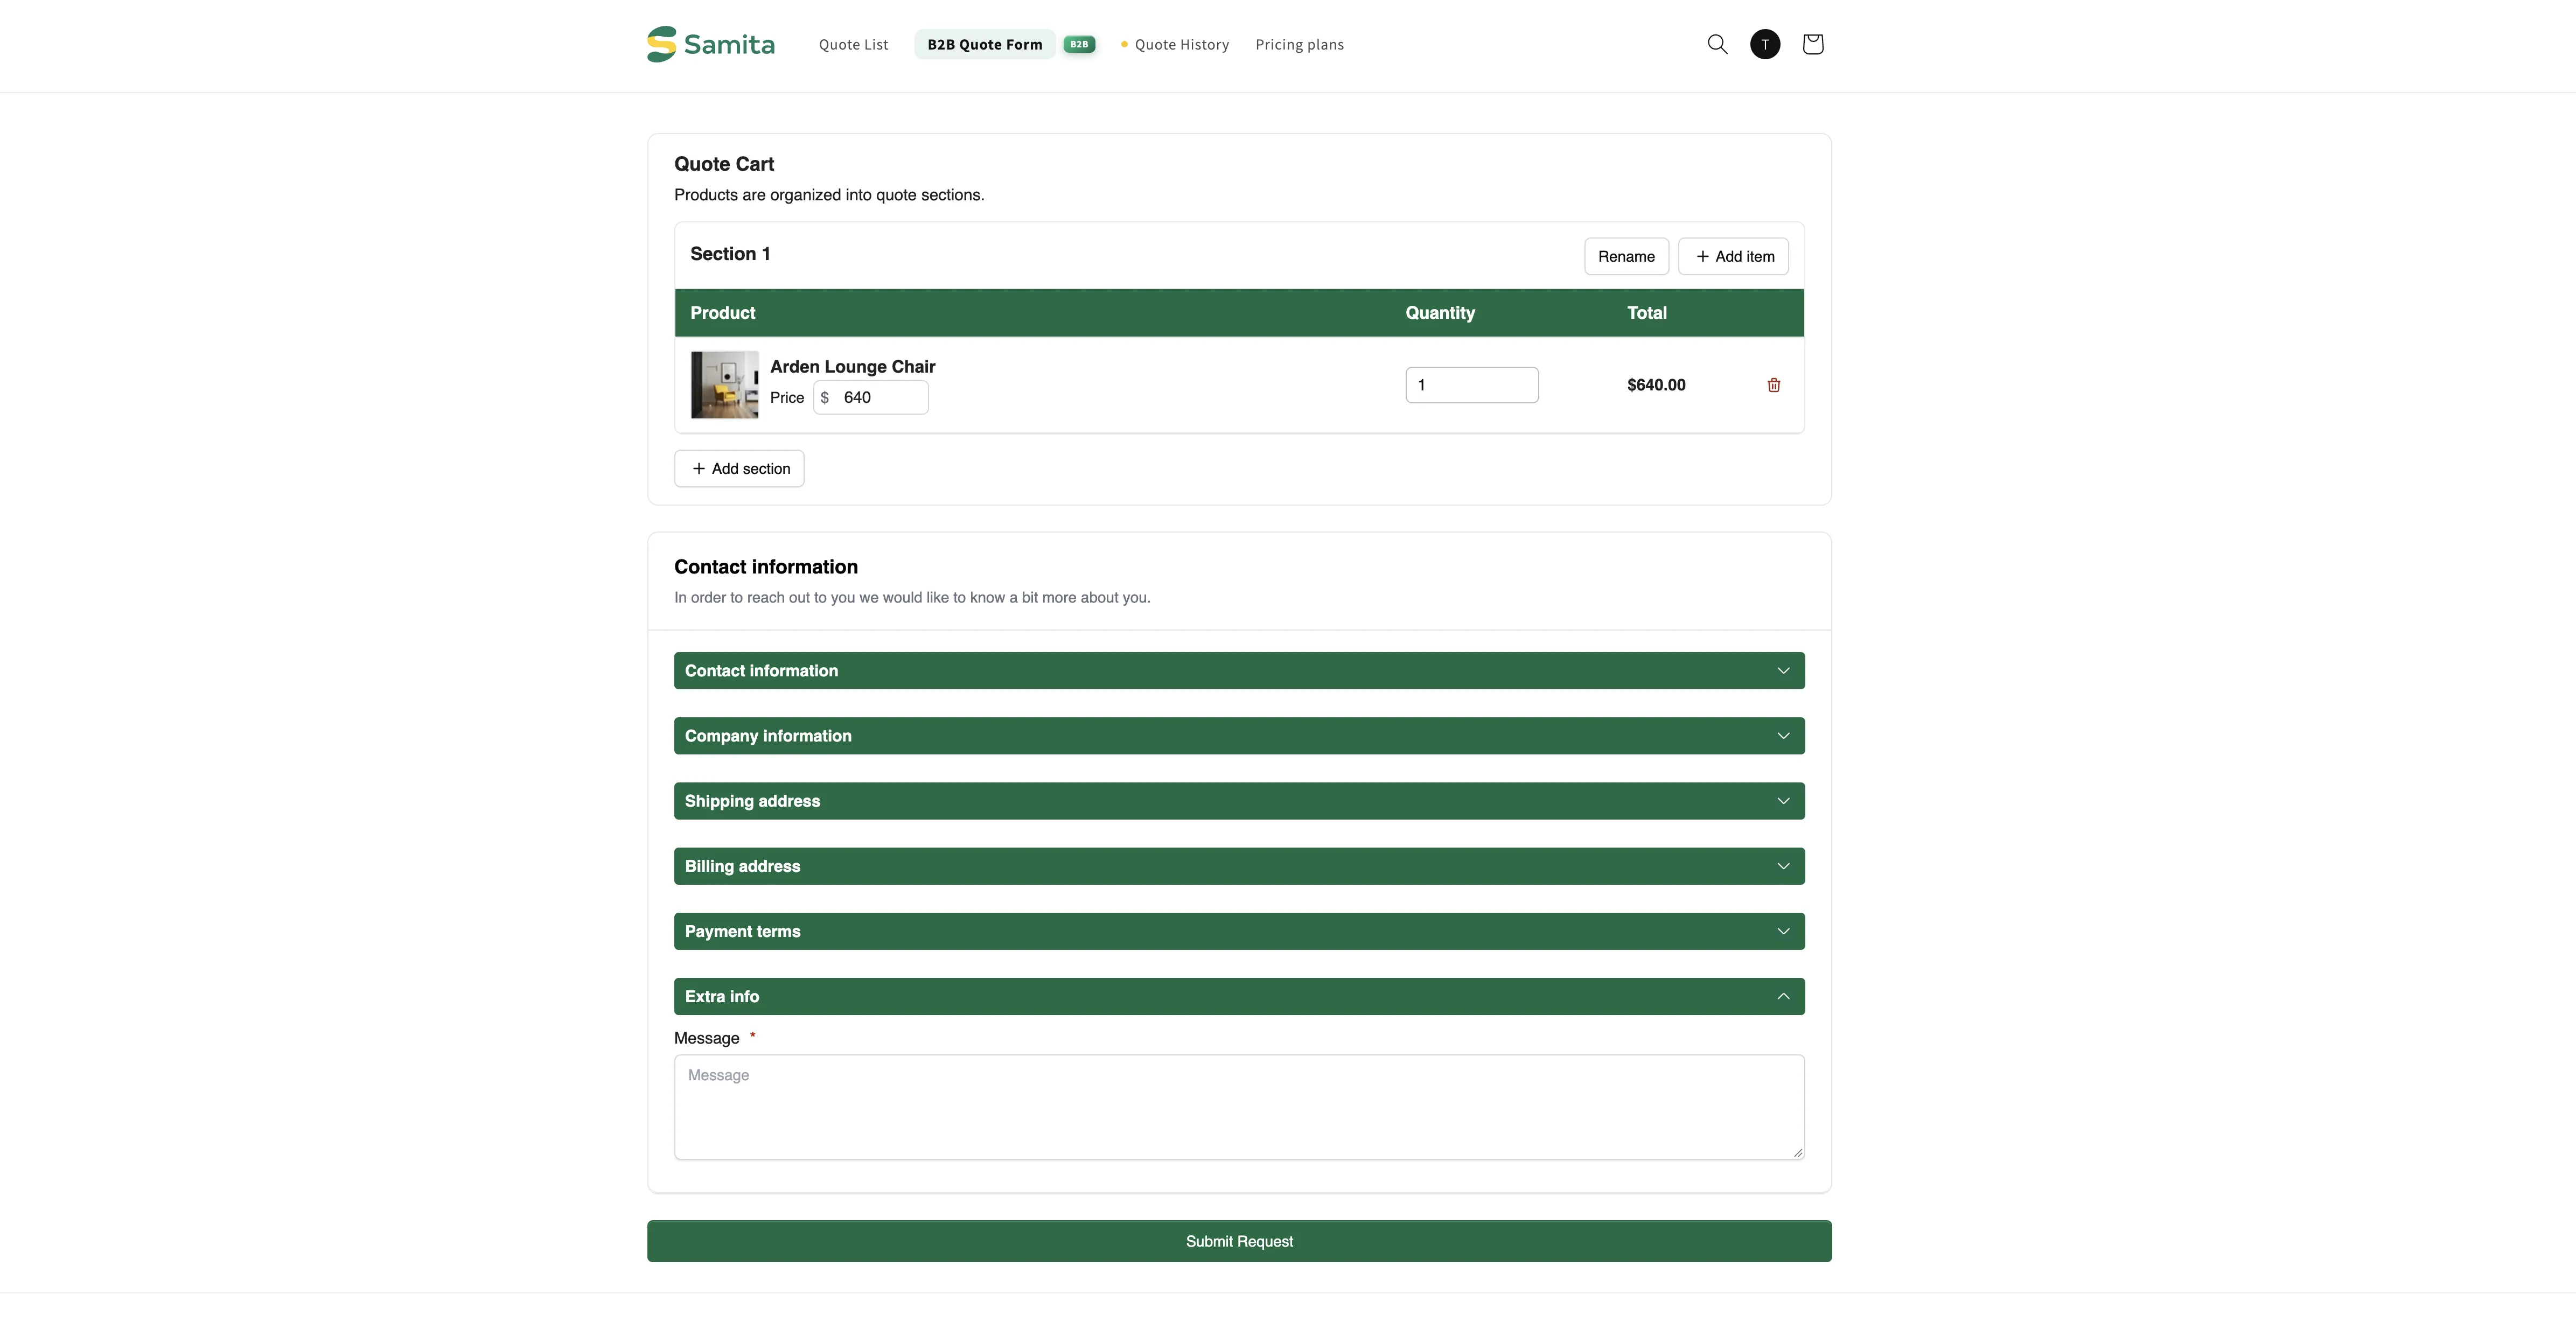
What the Multiple step form looks like
Section titled “What the Multiple step form looks like”With Multiple step selected, the storefront page opens with the heading Request a Quote and the line “Tell us what you need and we will contact you soon.”, followed by three numbered steps.
-
Products selection
Section titled “Products selection”Quote Cart lists everything the customer has collected, with the columns Product, Quantity, Price and Total. With Enable Quote Sections switched on, the cart is introduced with “Products are organized into quote sections.” and the first group is named Section 1.
The step ends with Continue Shopping and Next step.
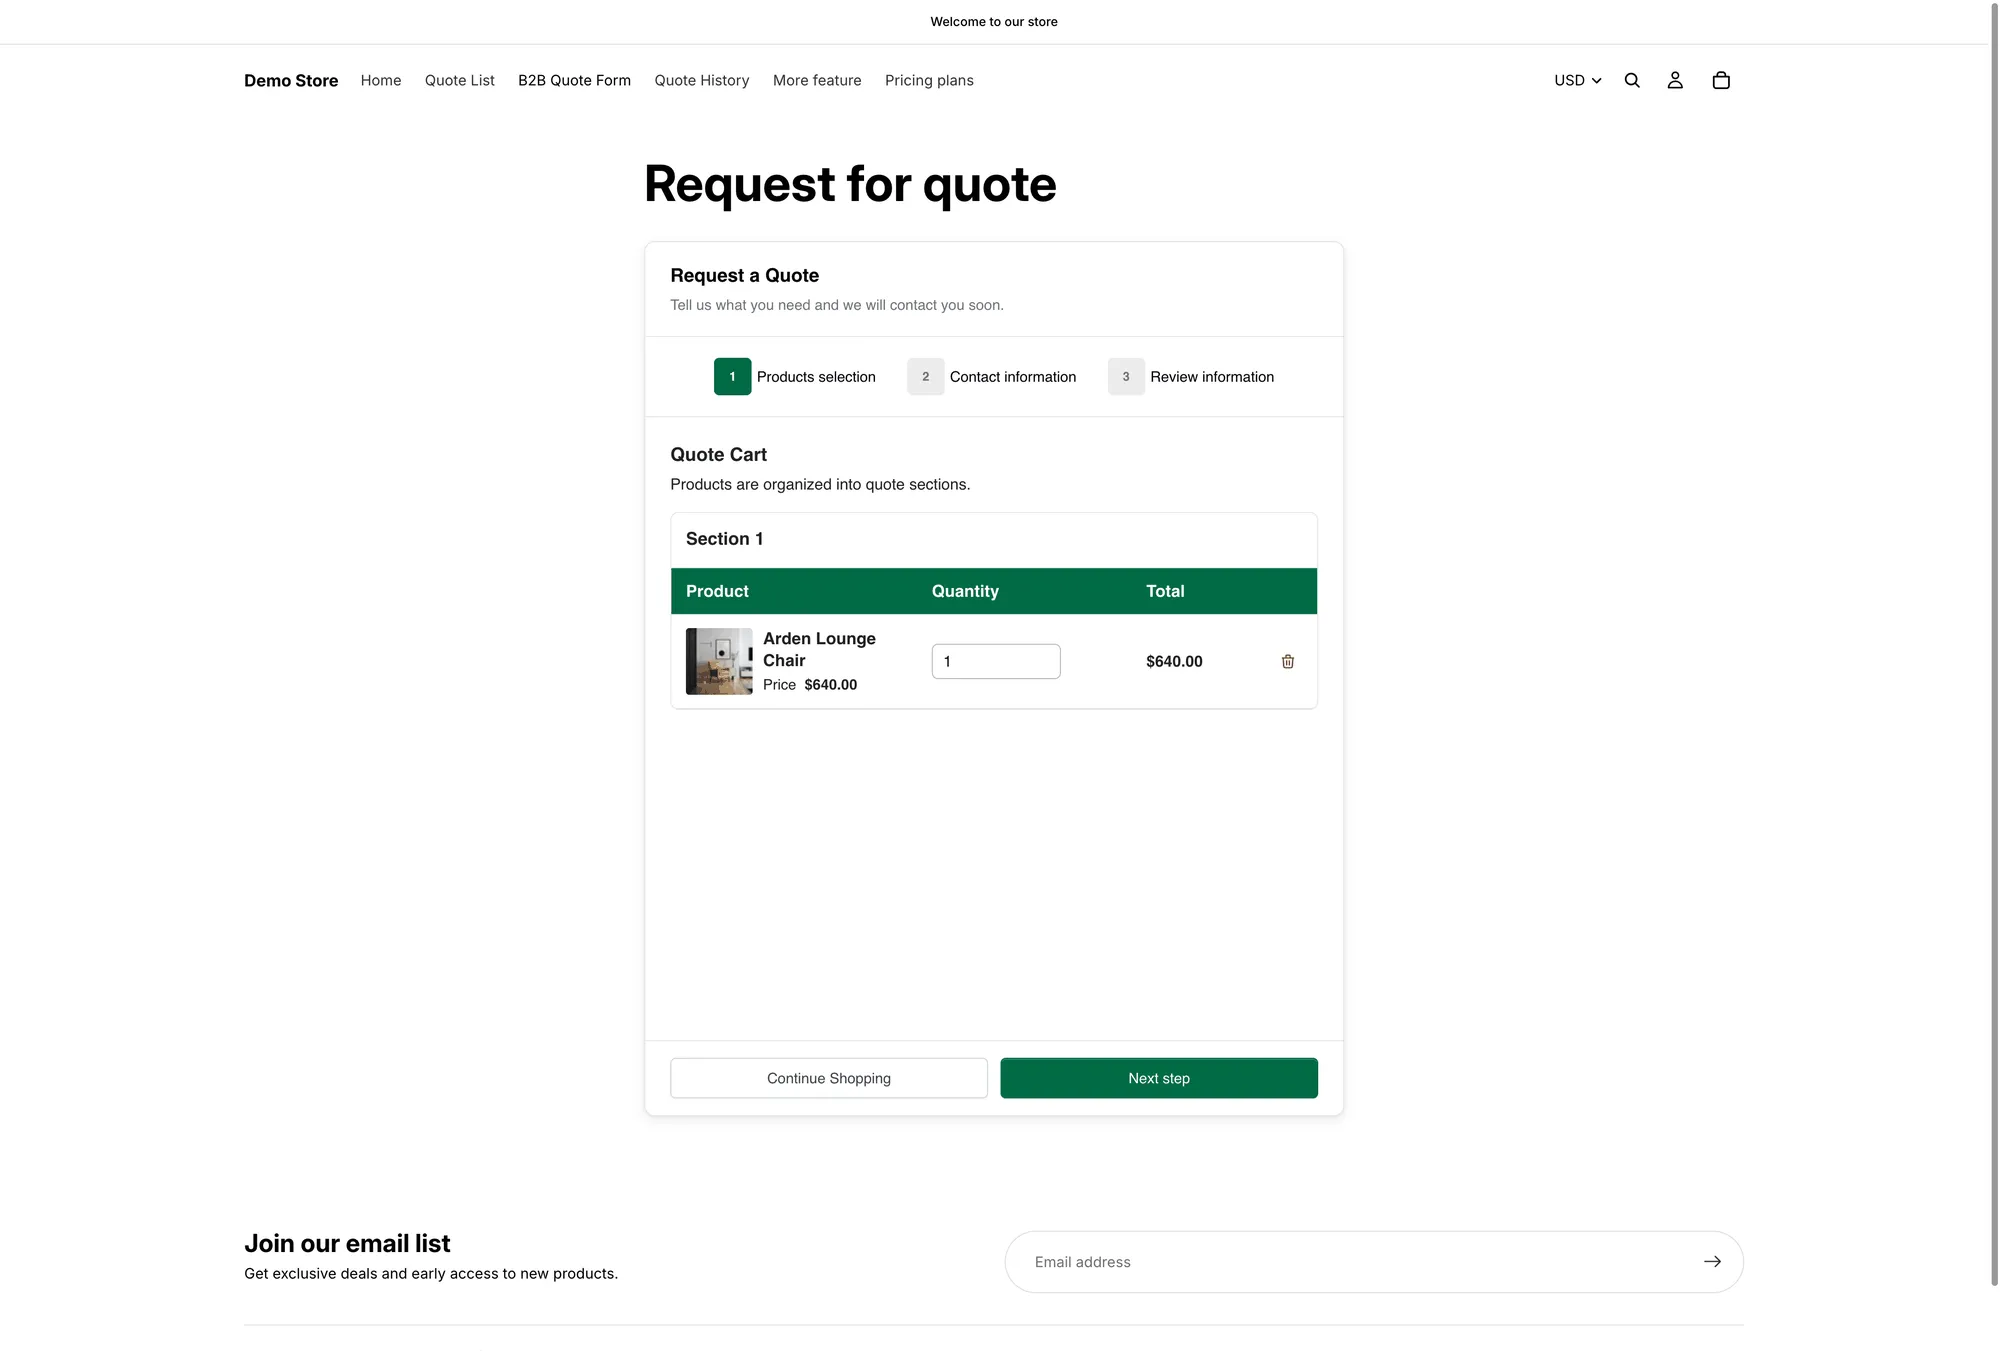
Step 1, Products selection, at /pages/request-for-quote.
-
Contact information
Section titled “Contact information”This step shows the sections you built in Form builder — Contact information, Company information and Shipping address.
Above them sits the prompt “Already have an account? Log in to auto-fill your contact and company information.” with a Login link.
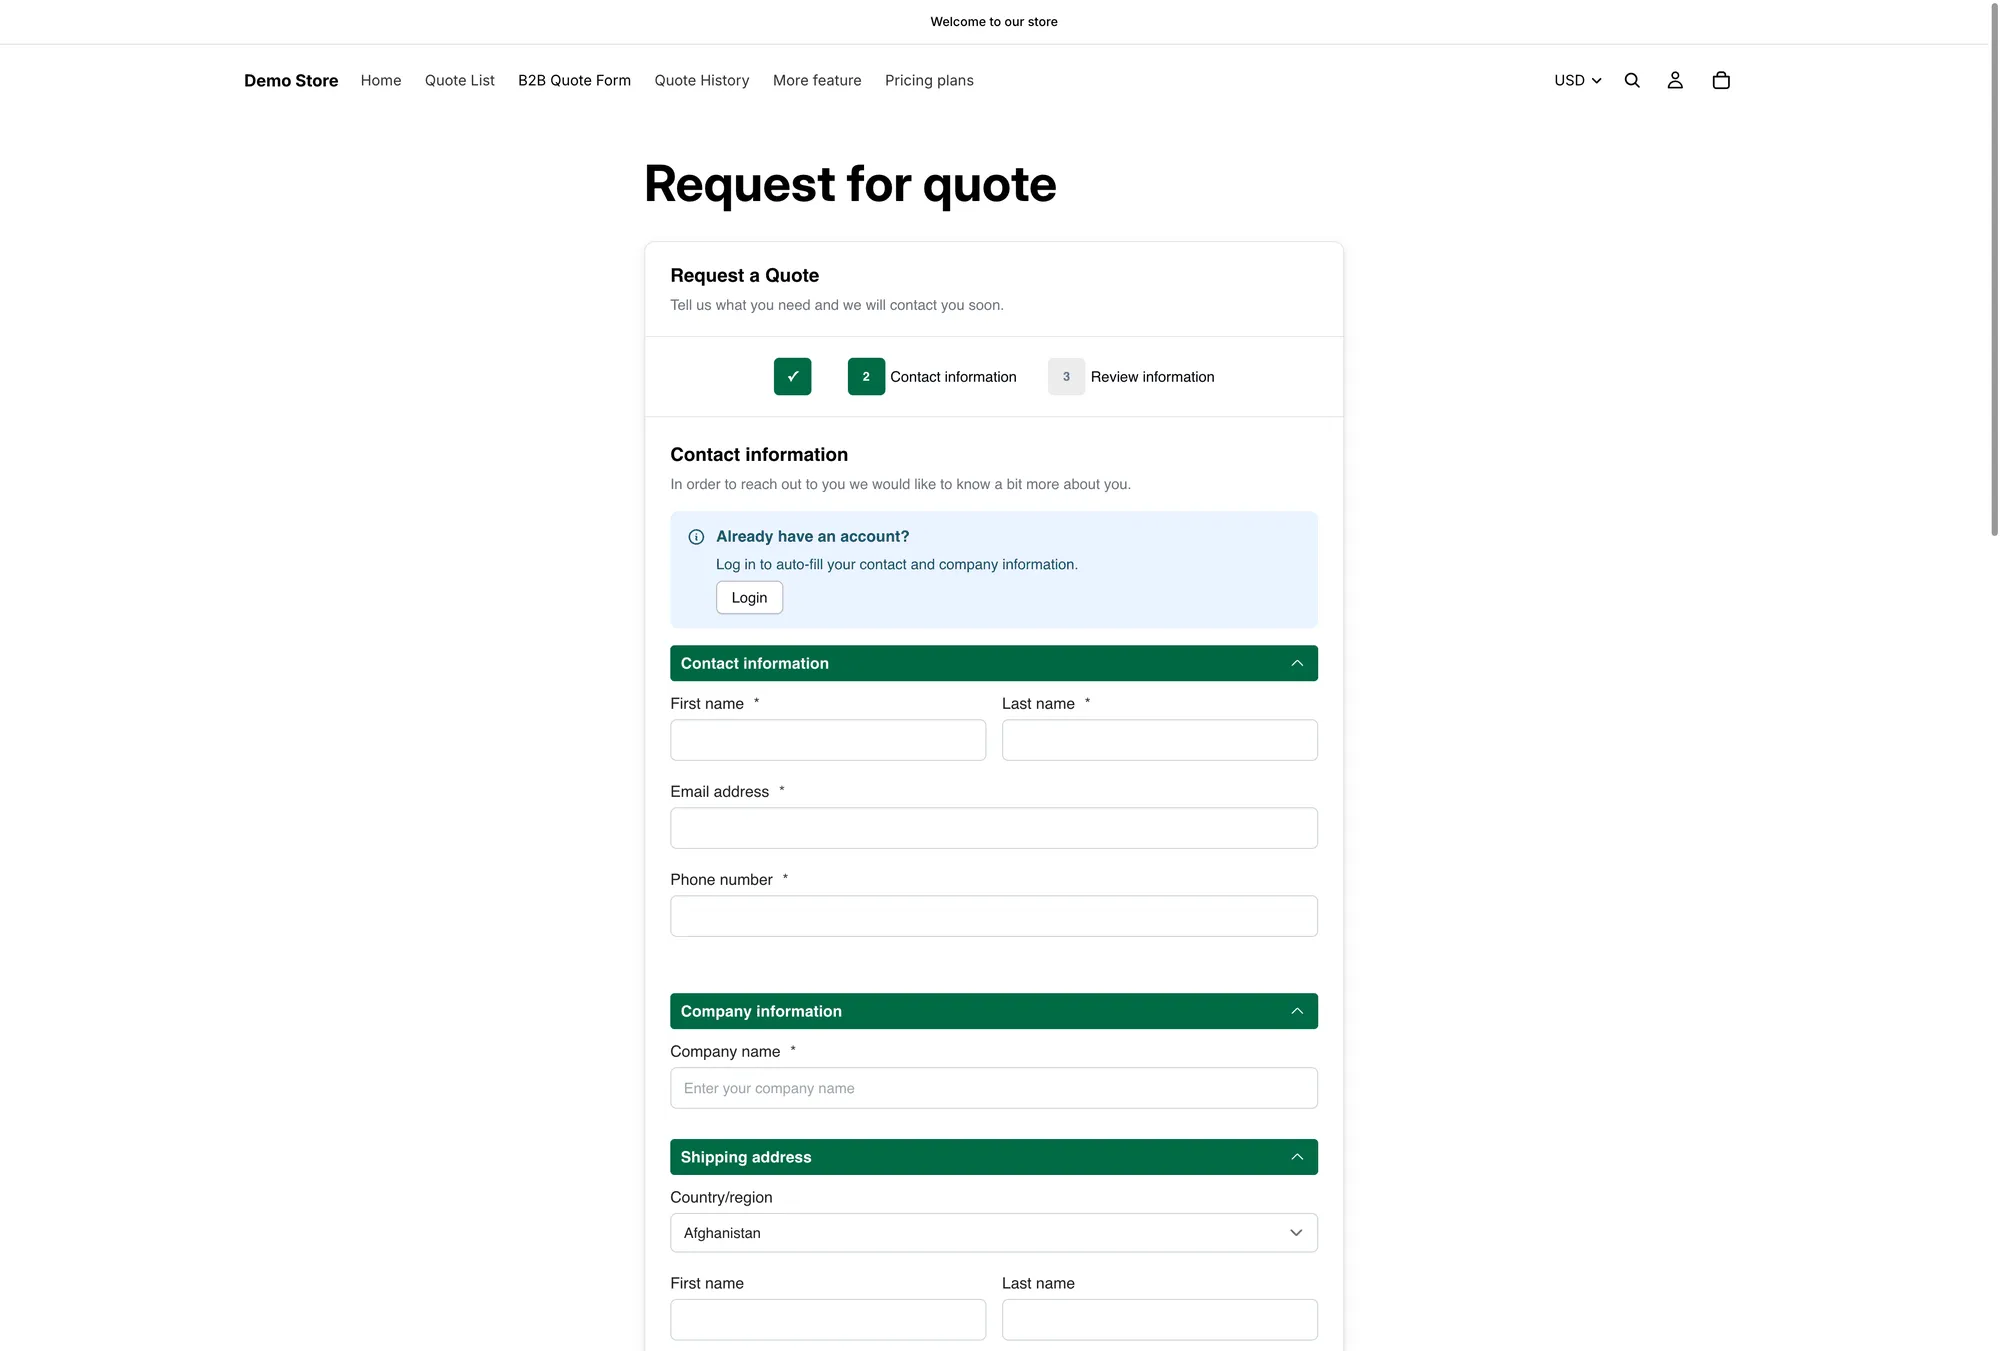
Step 2, Contact information, with the log-in prompt above the fields.
-
Review information
Section titled “Review information”The last step is Review information, where the customer checks the products and the details they typed before sending the request.
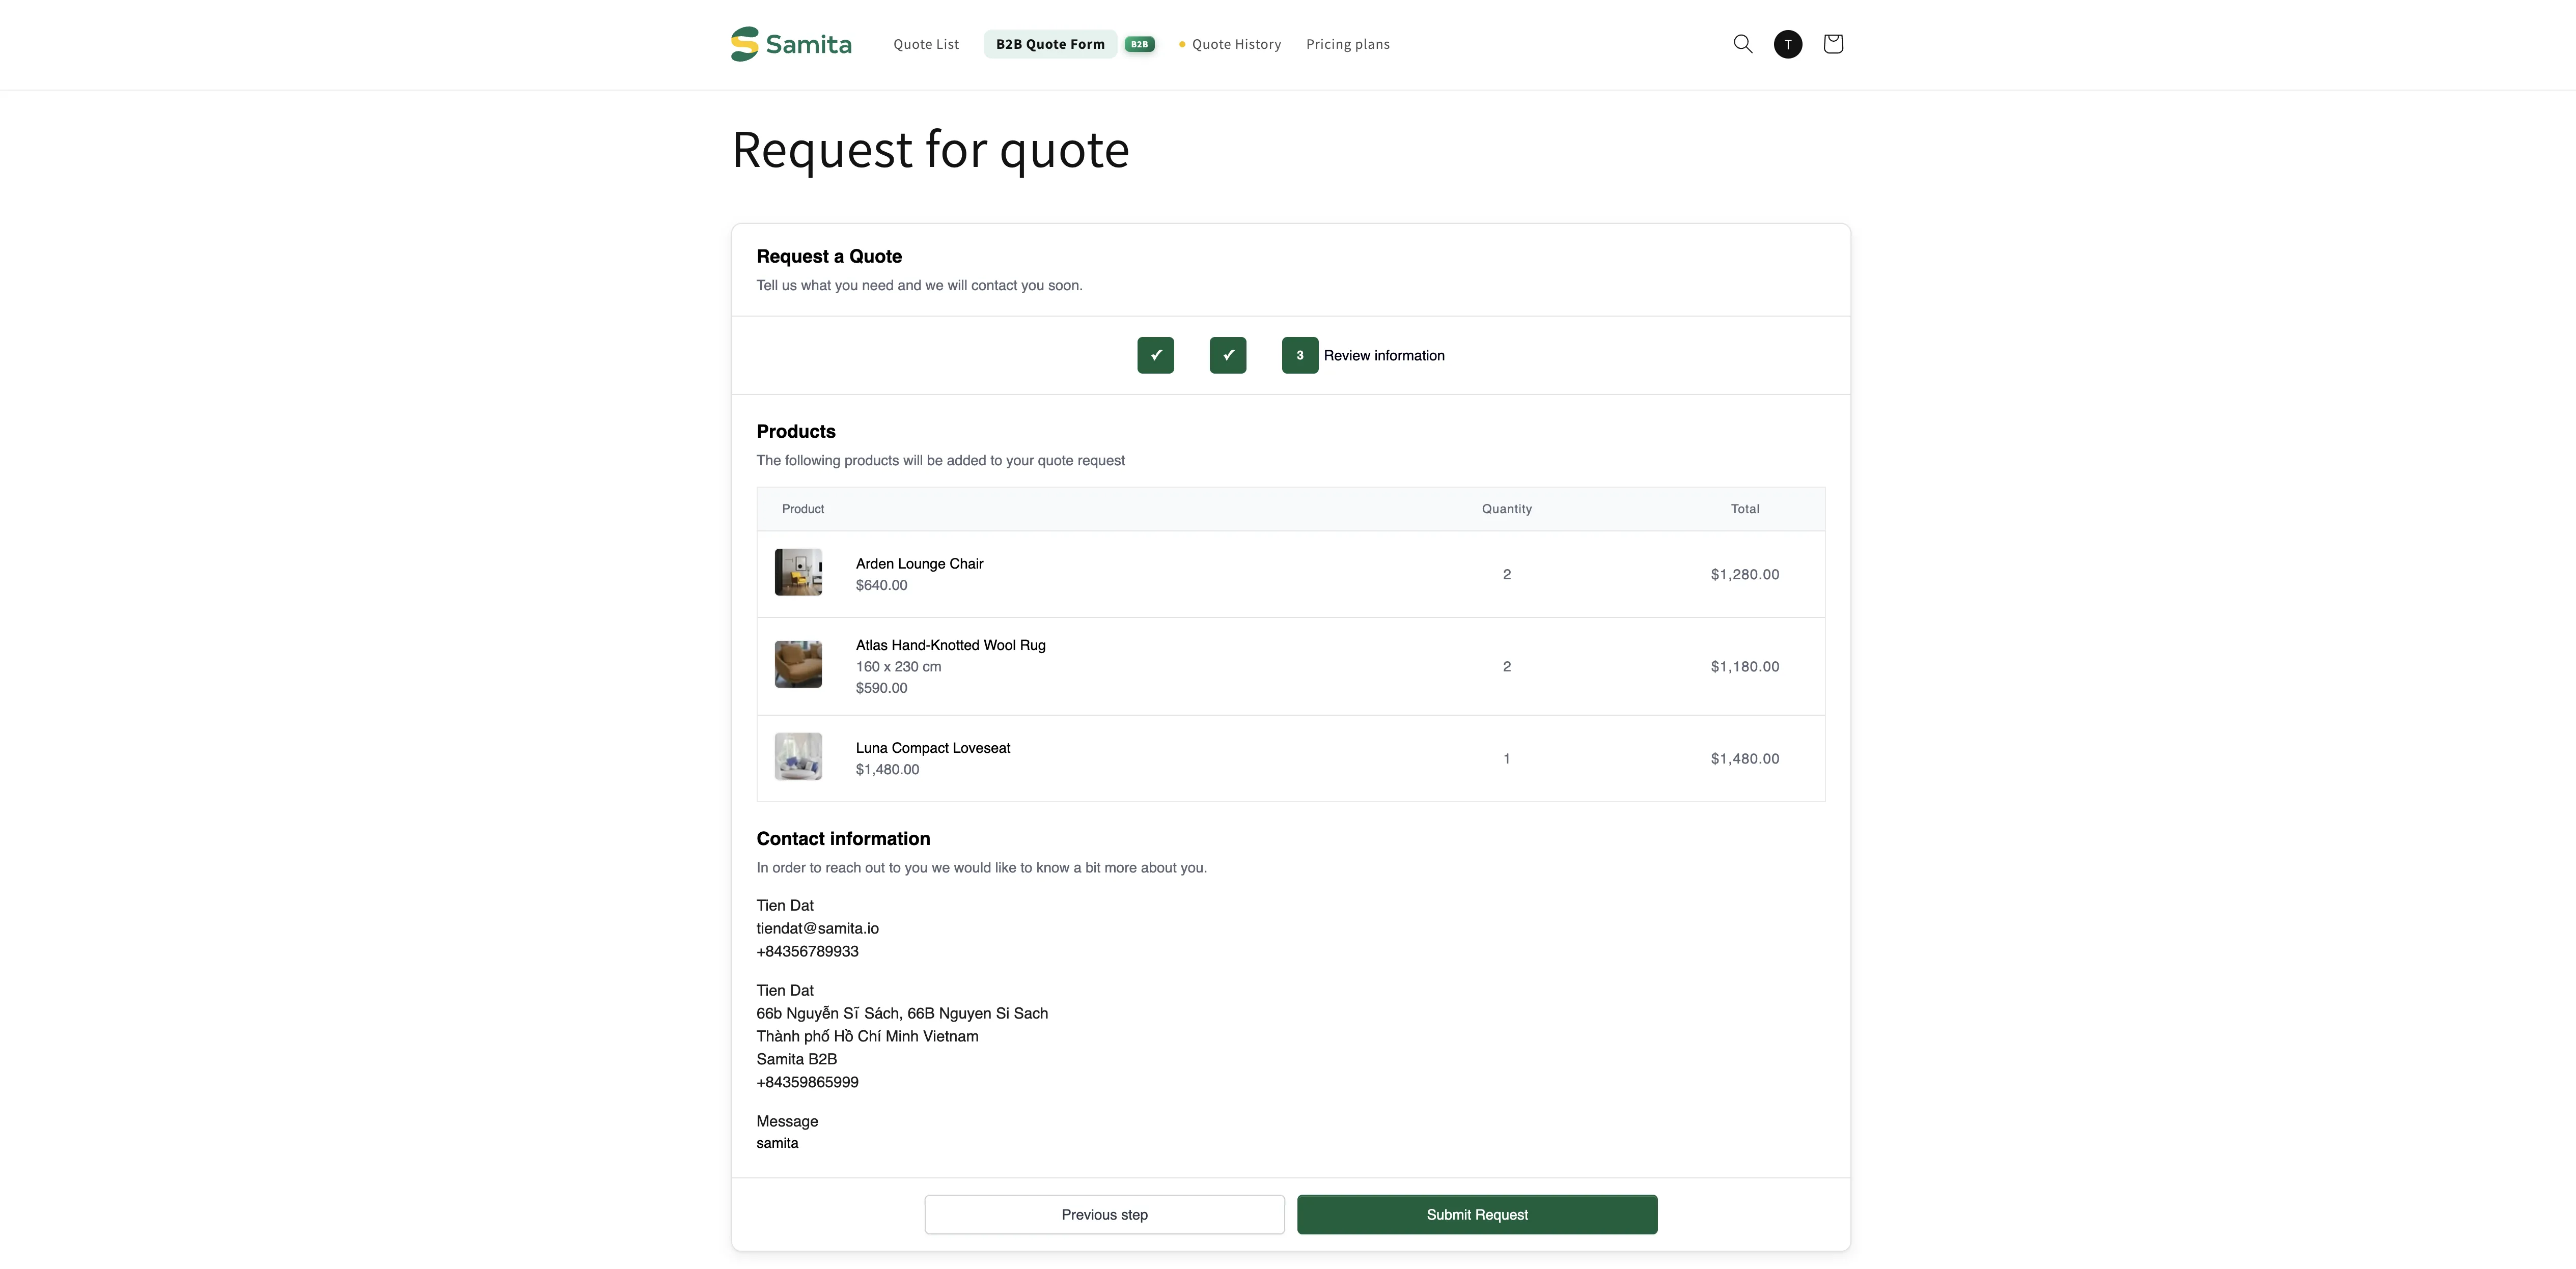
The customer checks the request before it is sent.
What the customer sees after submitting
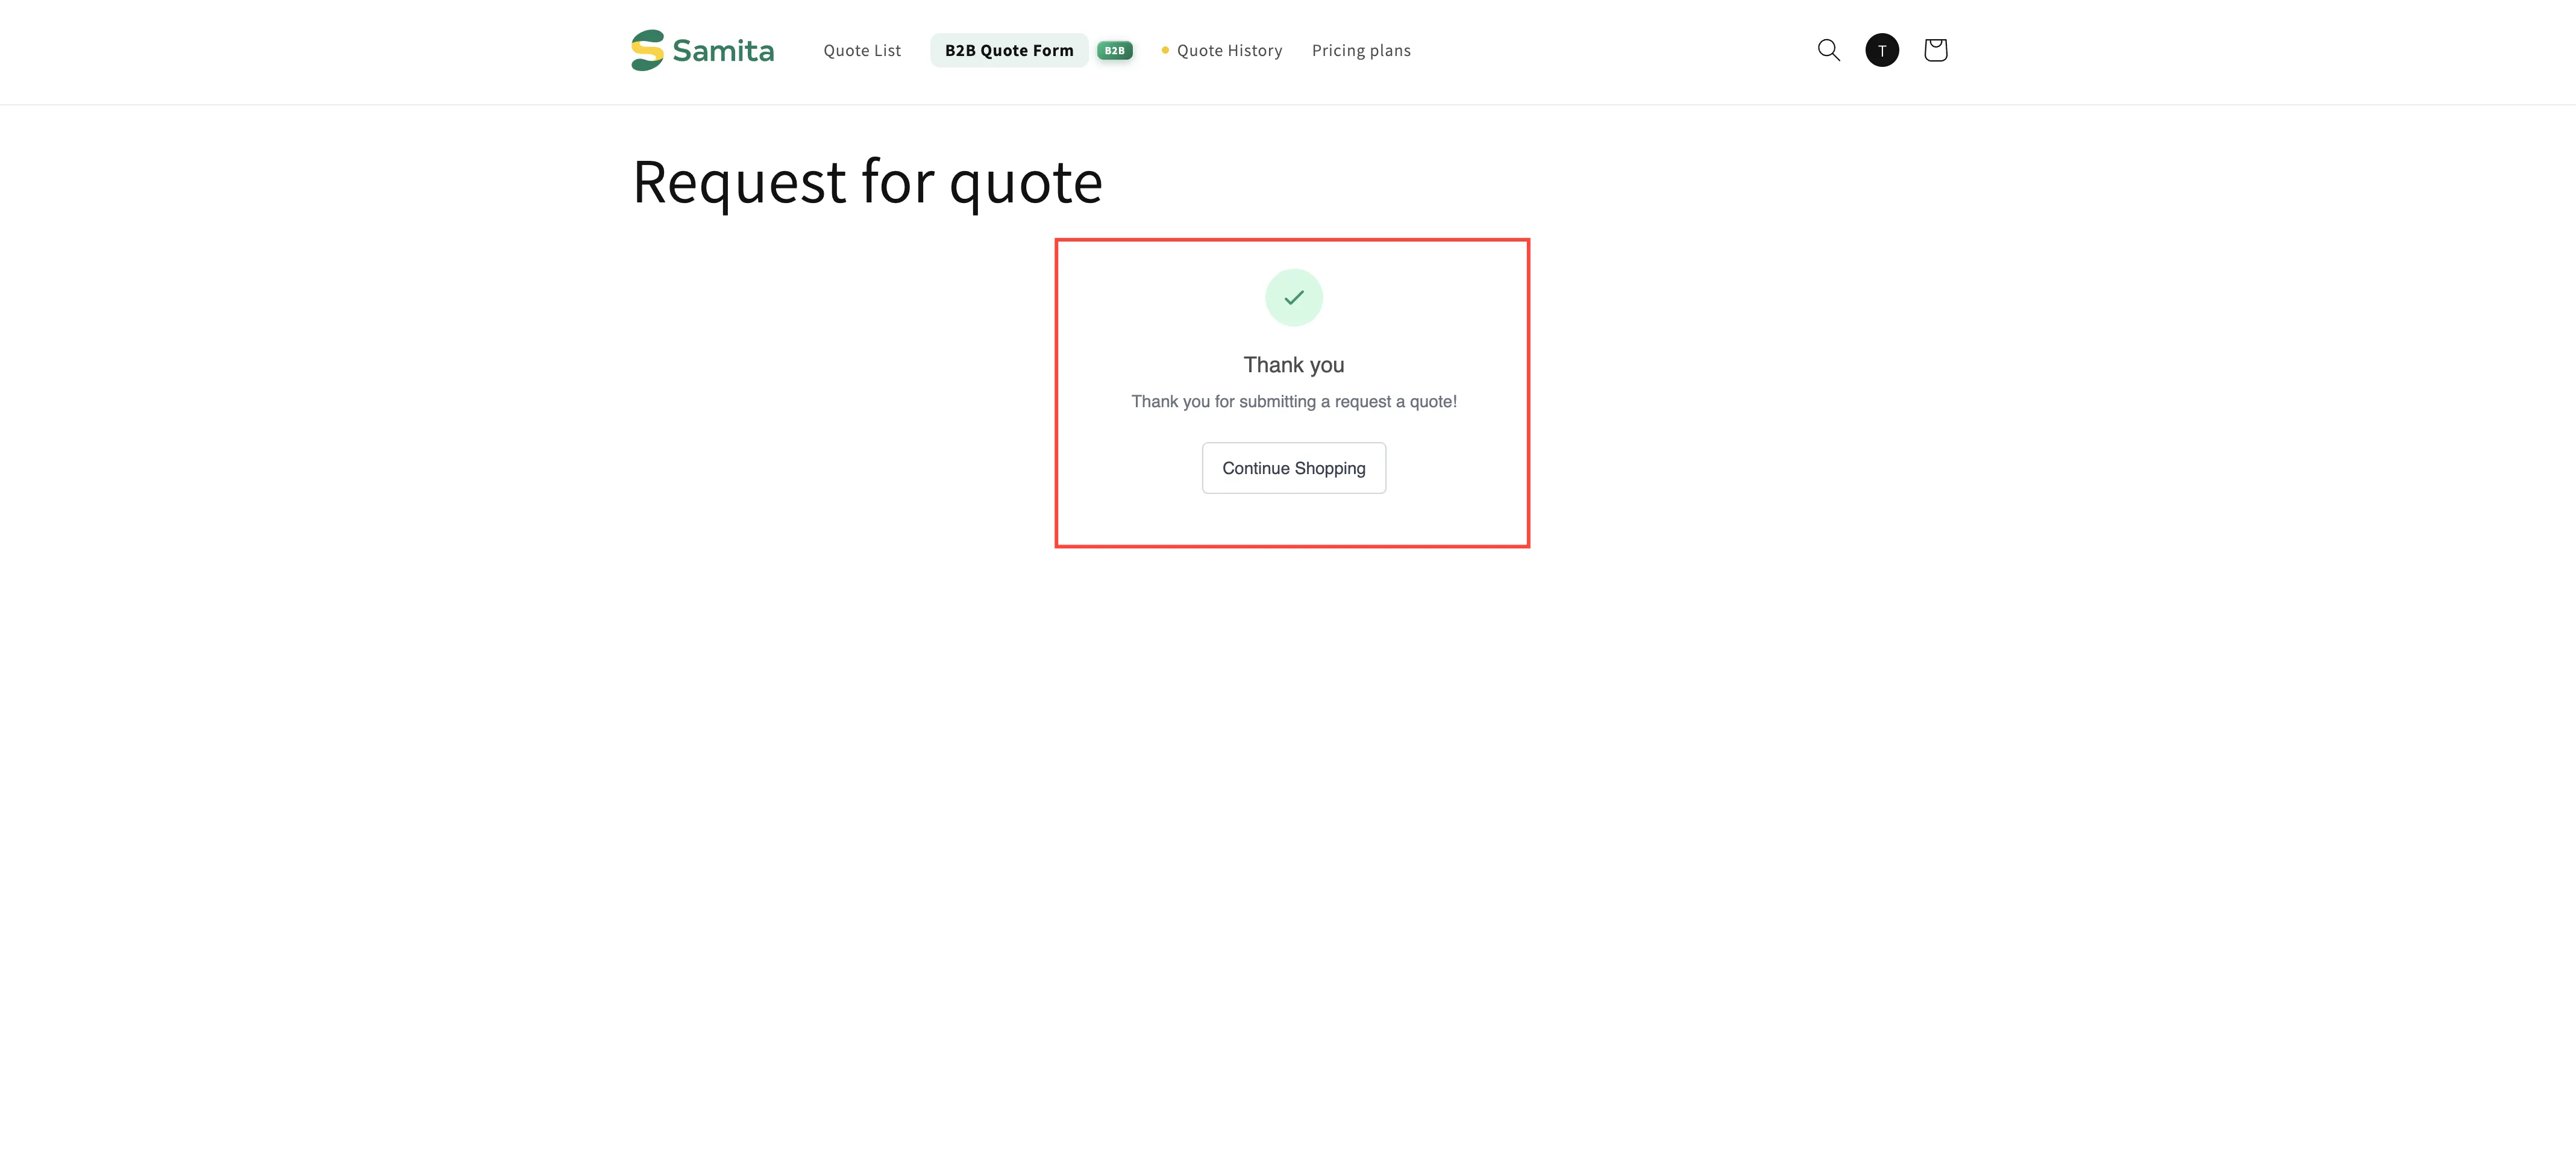
Section titled “What the customer sees after submitting”Once the request is sent, the app shows your success message — by default Thank you, “Thank you for submitting a request a quote!” and a Continue Shopping button.
That wording is not part of this tab. It lives on the Success message tab of the same Customize editor, which also has After submit with Redirect to custom URL if you would rather send customers to a page of your own.
The rest of the tab
Section titled “The rest of the tab”| Setting | What it does |
|---|---|
| Enable Quote Sections | "Lets customers group the products in their quote cart into named sections." See Quoted product group |
| Enable Quote Cart Widget | "Shows a floating button on your storefront so customers can open their quote cart from any page." Set up in Route 2 above, and covered in full in Floating quote widget |
Turning on Enable quote sections opens a few more controls: Default section name, and under Customer options, Add new sections and Rename sections. Two further options, Move products between sections and Add note per section, are marked Coming soon.
How customers get to the page
Section titled “How customers get to the page”| Route | Best when |
|---|---|
| Click action set to Redirect to quote page | Customers usually quote one product at a time, so there is nothing to collect first. |
| Click action set to Add product to quote cart, then the floating widget | Customers gather several products as they browse, then review the lot together. |
The popup's Primary button, default View Quote | You show a confirmation each time a product is added. |
| A link in your navigation menu | Always worth adding as well, so customers can return at any time. |
Set the first three on the Button & widget tab — see Set the after-click behavior. The menu link is a Shopify setting — see Add quote links to your menu.
Next steps
Section titled “Next steps”- Quote history page — where customers find quotes they have already sent
- Add quote links to your menu — link to the page from your navigation
- Edit quote page text — add your own wording to the page