
How it works
What happens at each stage of a quote — from the moment a customer clicks your quote button to the order you get paid for.
Most settings in this app make more sense once you know where they sit in the journey. This page walks the whole path once, and points to the page that controls each stage.
The journey
Section titled “The journey”-
The customer finds a quote button
Section titled “The customer finds a quote button”The app adds a quote button to your storefront, labelled with your Button text — Add to Quote unless you change it. Three dropdowns decide where it appears: Product page button position, Collection page button position and Cart page button position.
Select quote products decides which products show it, and Who can see the RFQ button? decides which shoppers do — All customers, Logged-in customers, Guest (non-logged) customers or Logged-in customers with specific tags.
If you hide prices, the price no longer shows, and you can also Hide Add To Cart button and Hide Buy Now button, so asking for a quote is the only way forward.
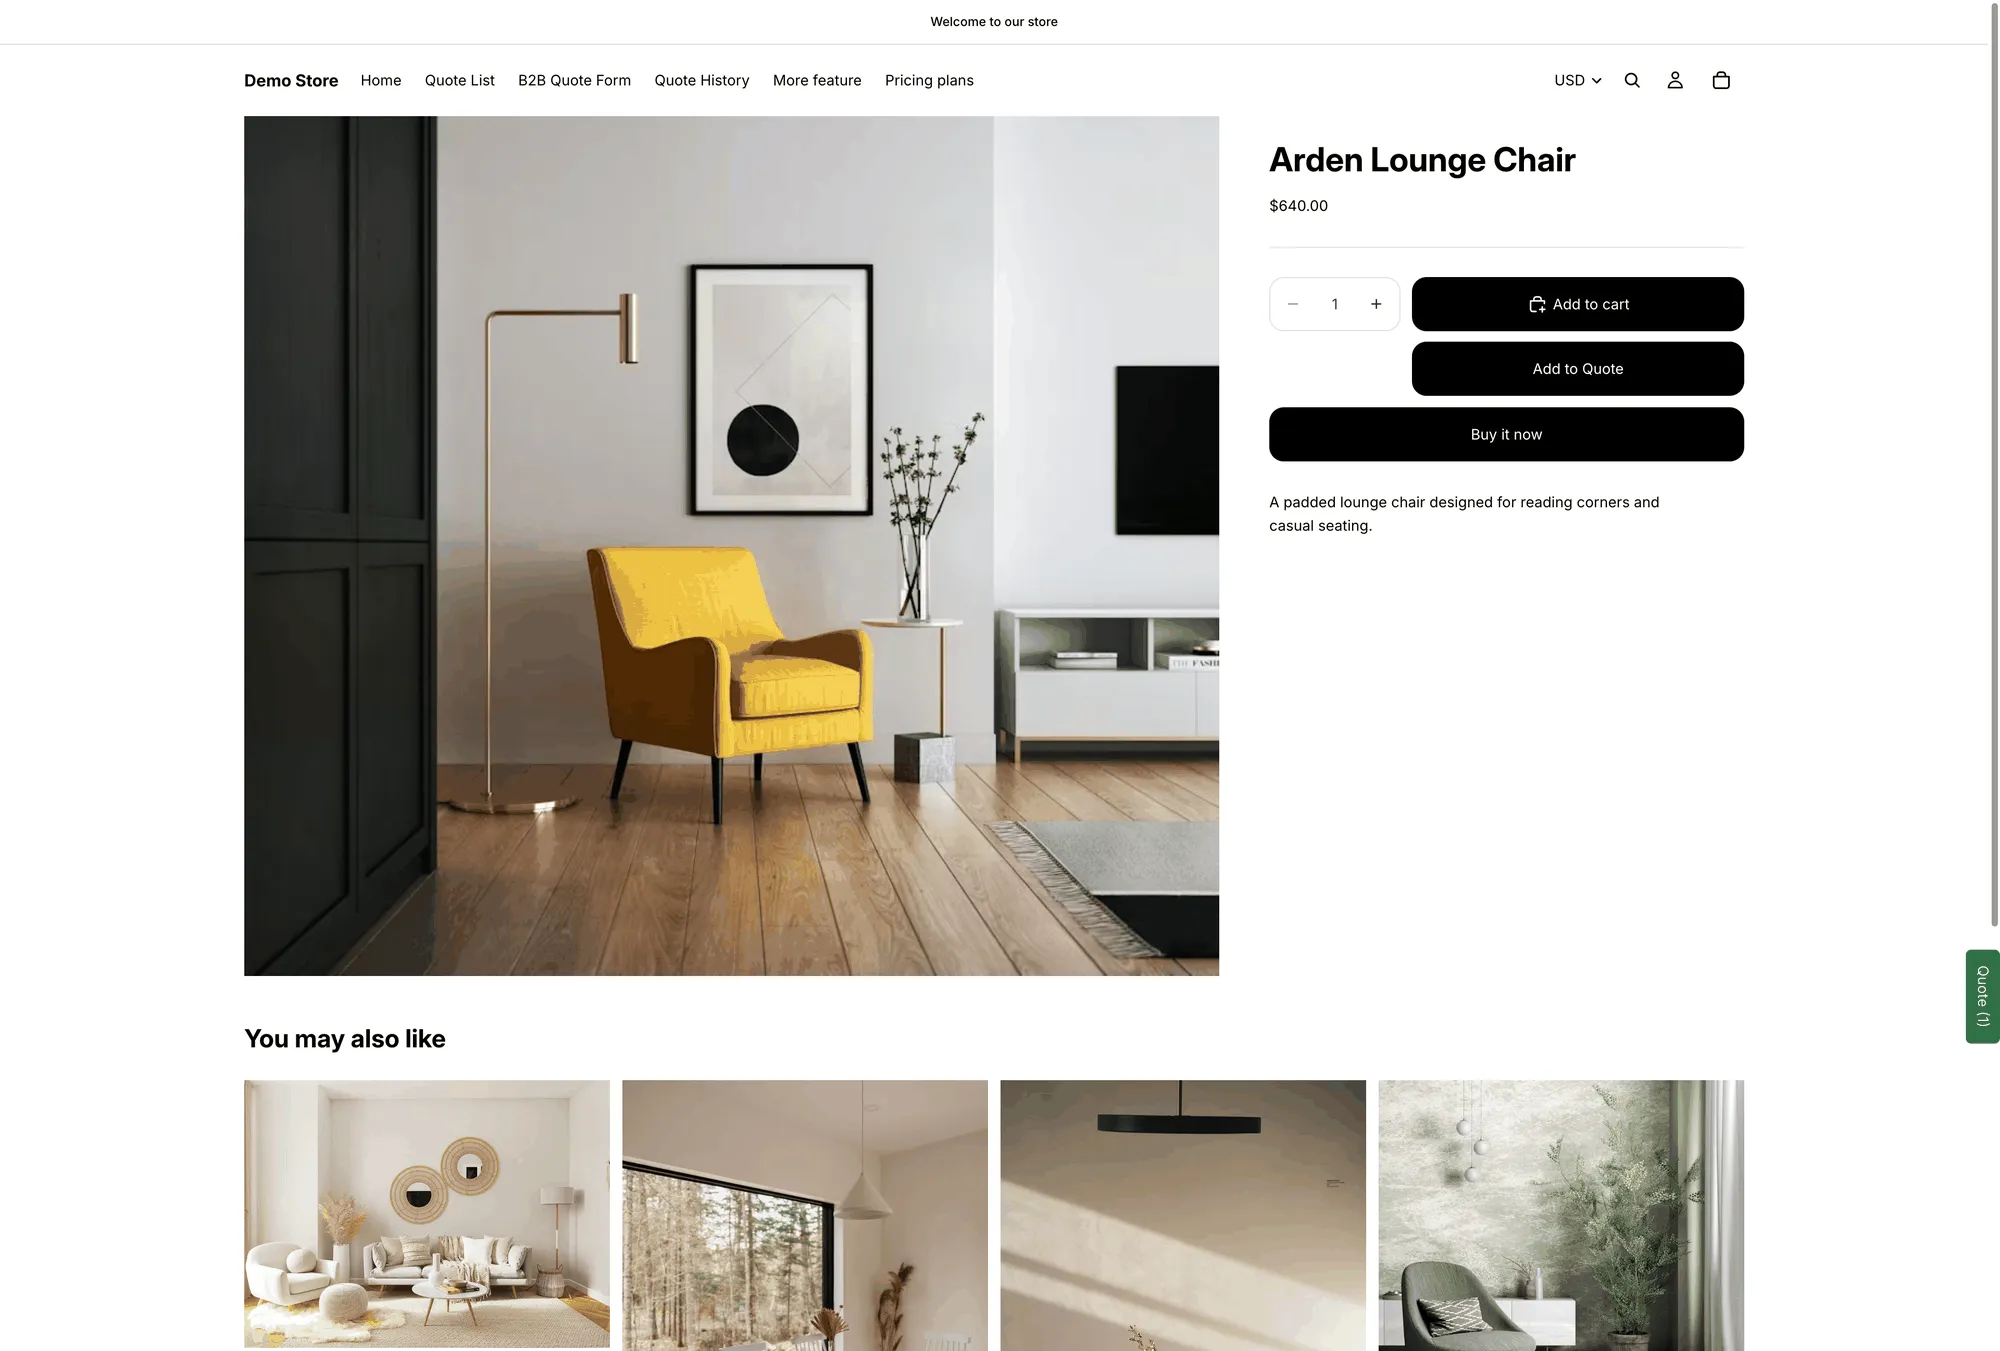
The quote button on a product page, in the position you choose.
Controls this: Collecting quote requests overview and Hiding prices overview
-
They click it, and you choose what happens next
Section titled “They click it, and you choose what happens next”Click action decides the moment after the click: Open quote form popup, Add product to quote cart or Redirect to quote page.
If you turn on Show popup message after adding product, the customer sees your Message with two buttons — View Quote to go straight to their quote, and Continue Shopping to carry on browsing.
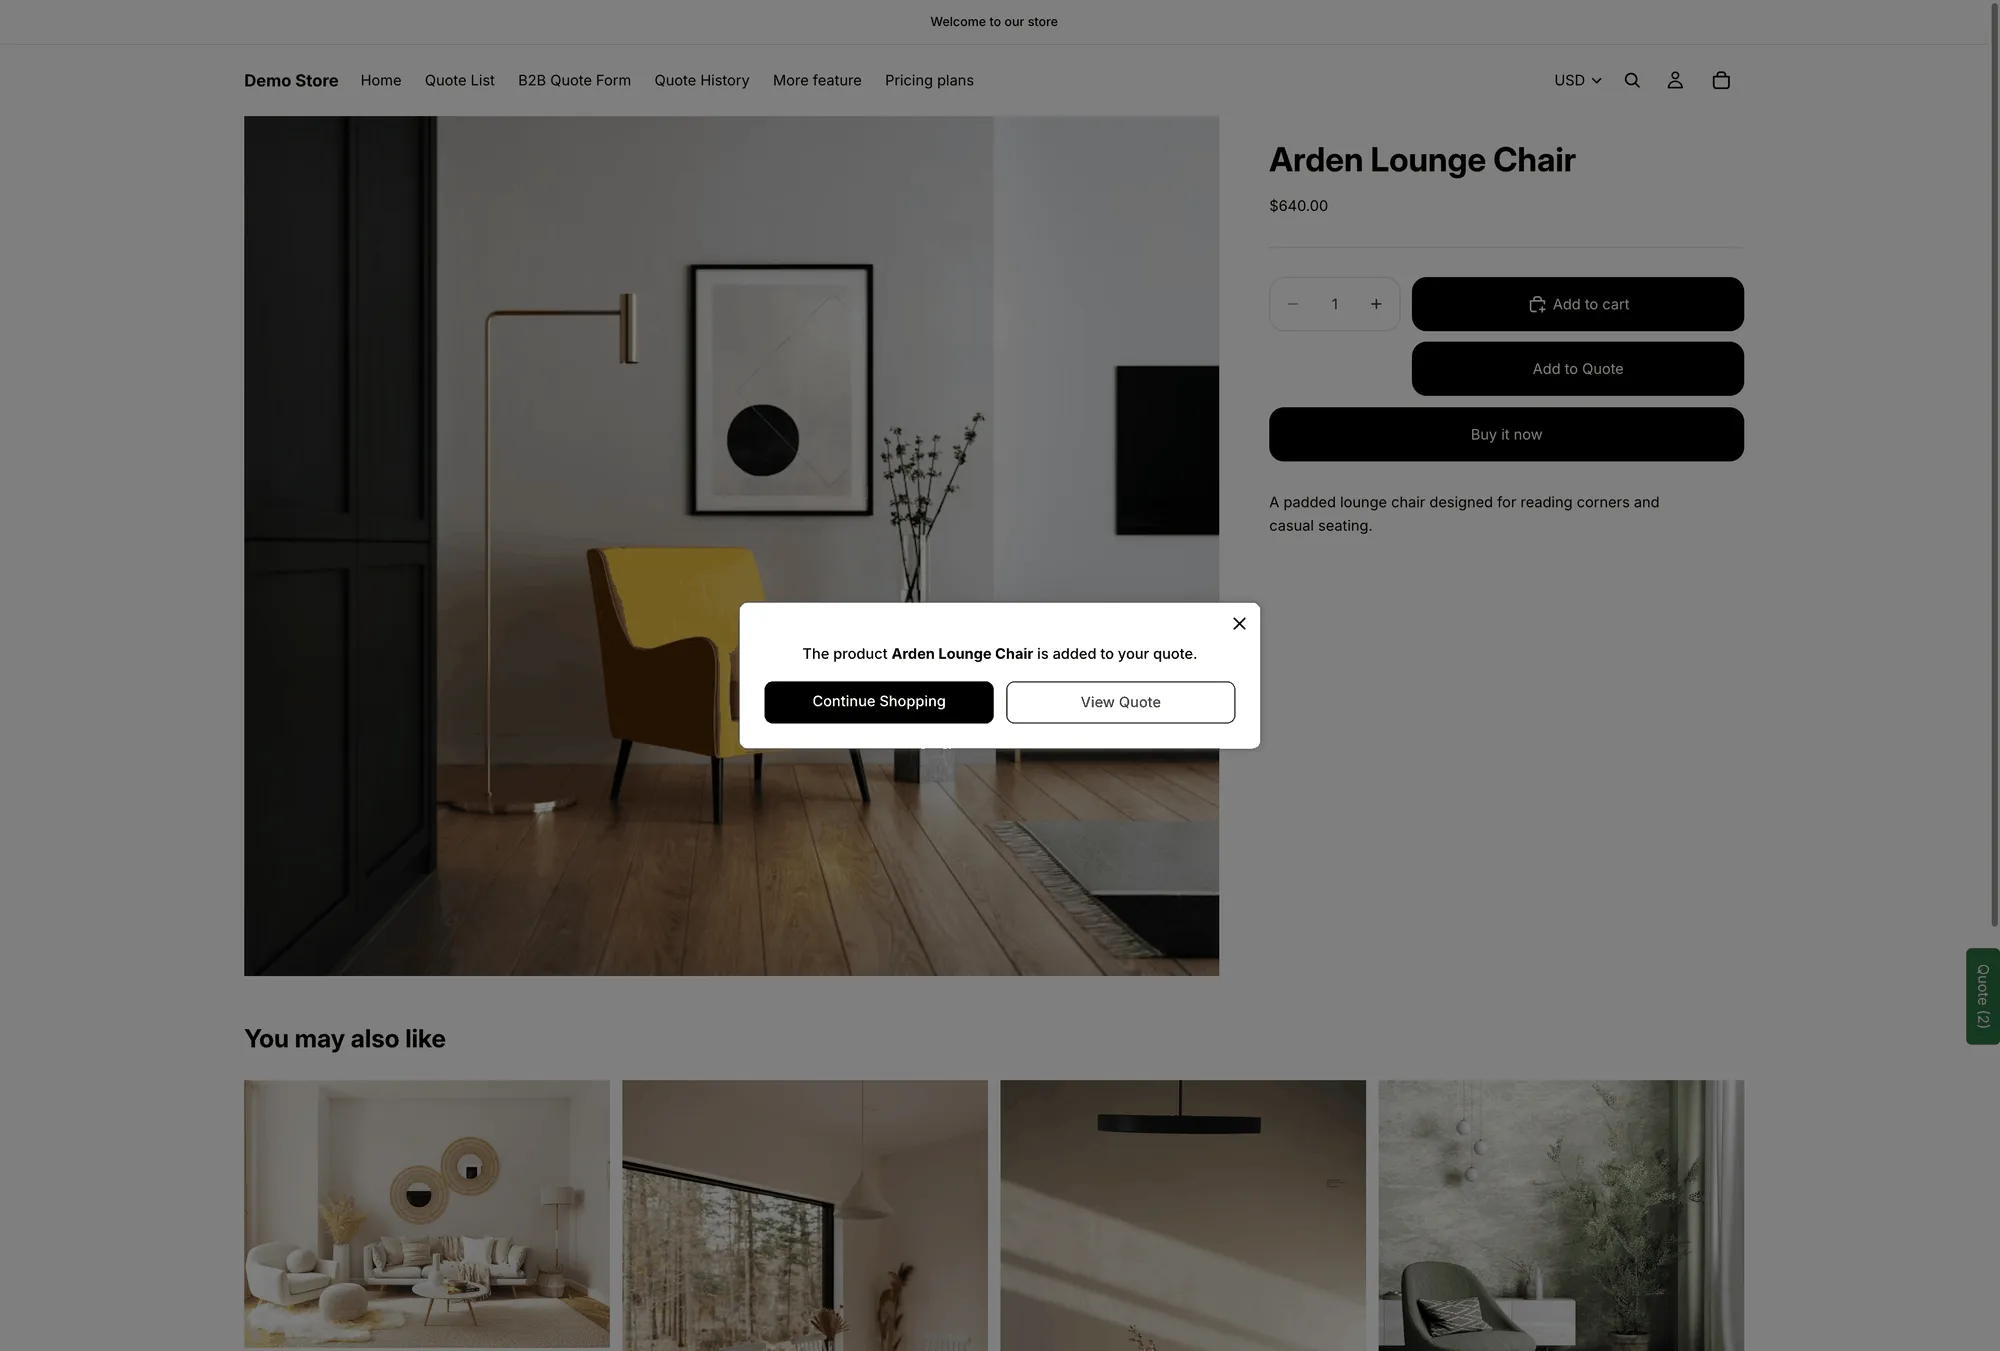
The popup after a product is added, with your own message and both buttons.
Controls this: Set the after-click behavior
-
Products collect in their quote cart
Section titled “Products collect in their quote cart”The quote cart works like a shopping cart: customers keep browsing and keep adding before they send anything. It lives on the Quote cart page, titled Request for quote, at
/pages/request-for-quote— “Shows the quote form and the customer’s quote cart.”If you turn on Enable Quote Cart Widget, a floating Quote (n) button follows them around the store so they can reopen the quote from any page.
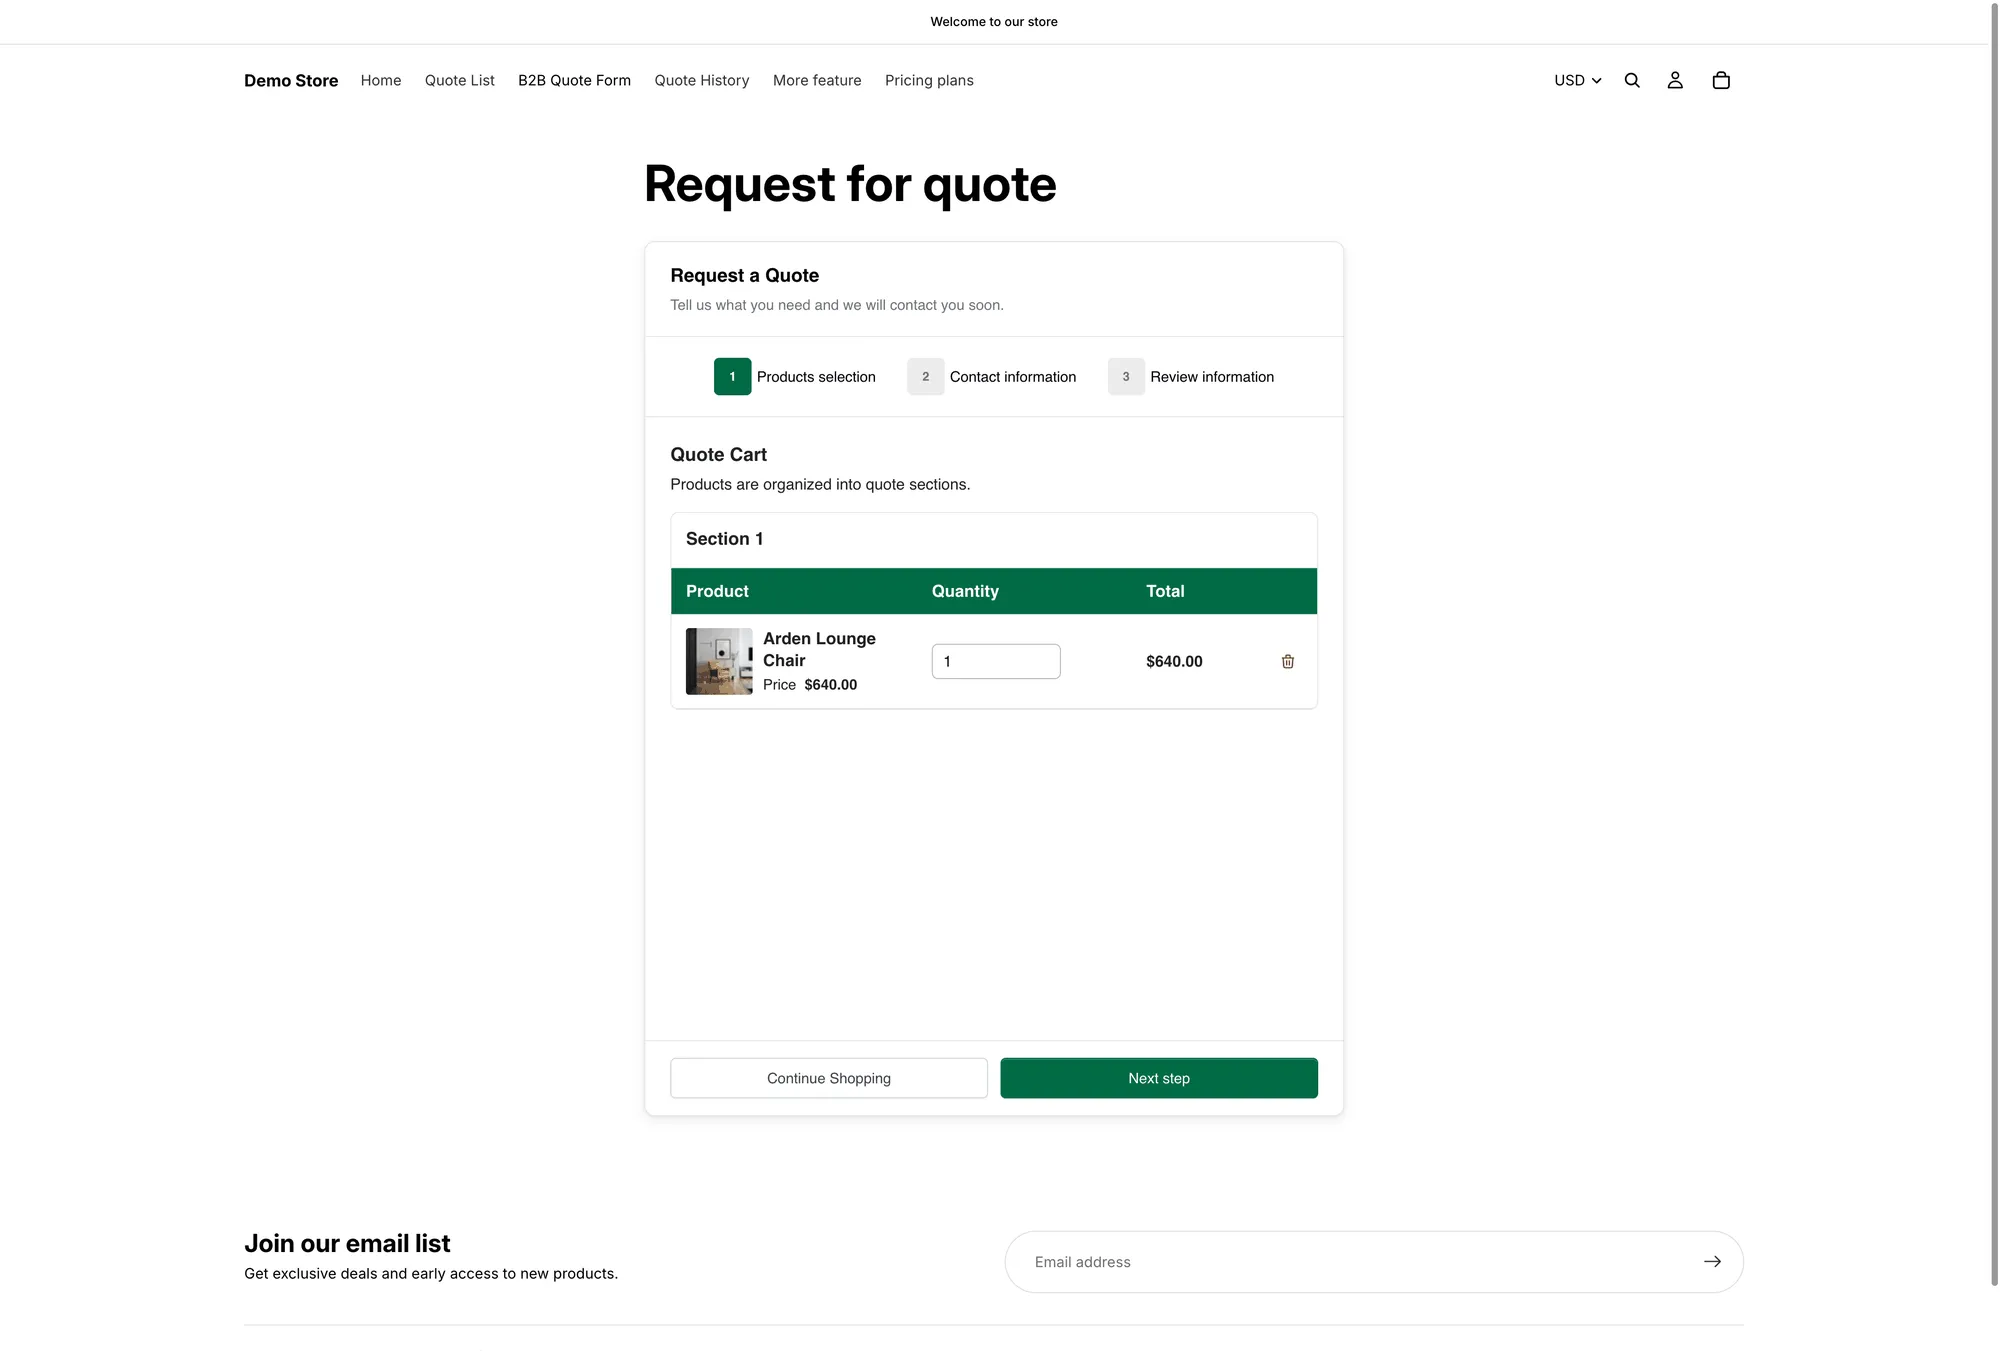
The quote cart at /pages/request-for-quote.
Controls this: Request a Quote page and Floating quote widget
-
They fill in your form
Section titled “They fill in your form”When they’re ready, they complete the quote form. Your Form template and the Form builder decide what it asks for, section by section. Templates don’t all ask for the same things: the B2B customer form has Contact information, Company information, Shipping address, Billing address, Payment terms and Extra info, while the Detailed quote form has Contact information, Shipping address and Extra info. Changing the template replaces the current field list.
Quote form appearance decides whether they work through it as Multiple step or Single page.
Signed-out customers see “Already have an account? Log in to auto-fill your contact and company information.” on the form, so returning buyers don’t retype everything.
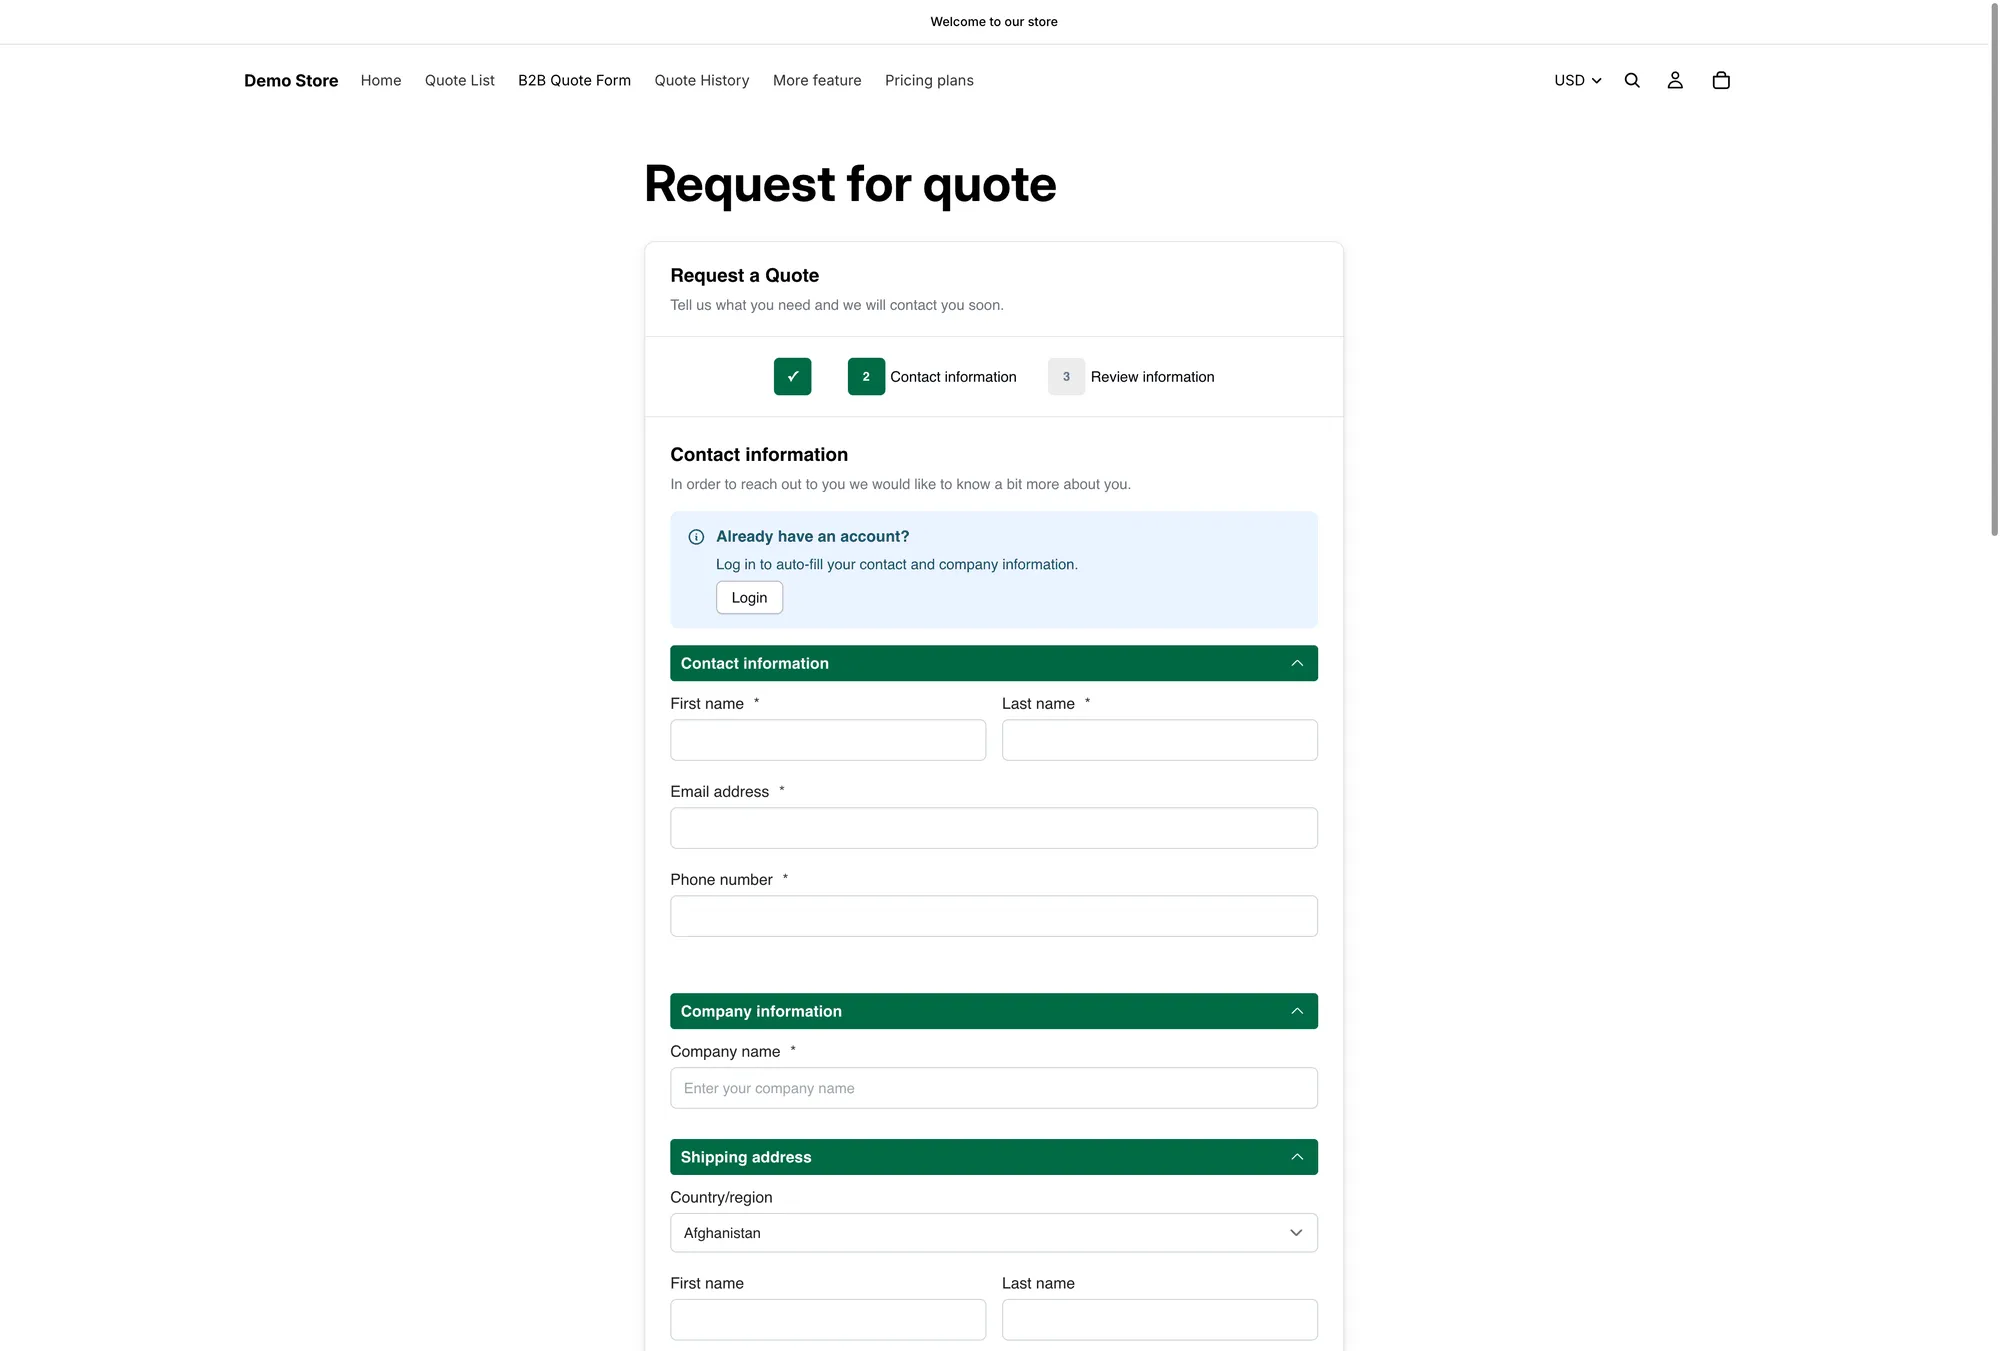
The contact step of the form, as a signed-out customer sees it.
Controls this: Quote form overview
-
The quote reaches you
Section titled “The quote reaches you”The request appears in Quote list, on the page headed Quotes. Nothing is charged and no order exists yet — this is a request, not a sale.
If Mail notifications is on, the app emails you about it. If Auto response email is on, the customer gets a confirmation at the same time.
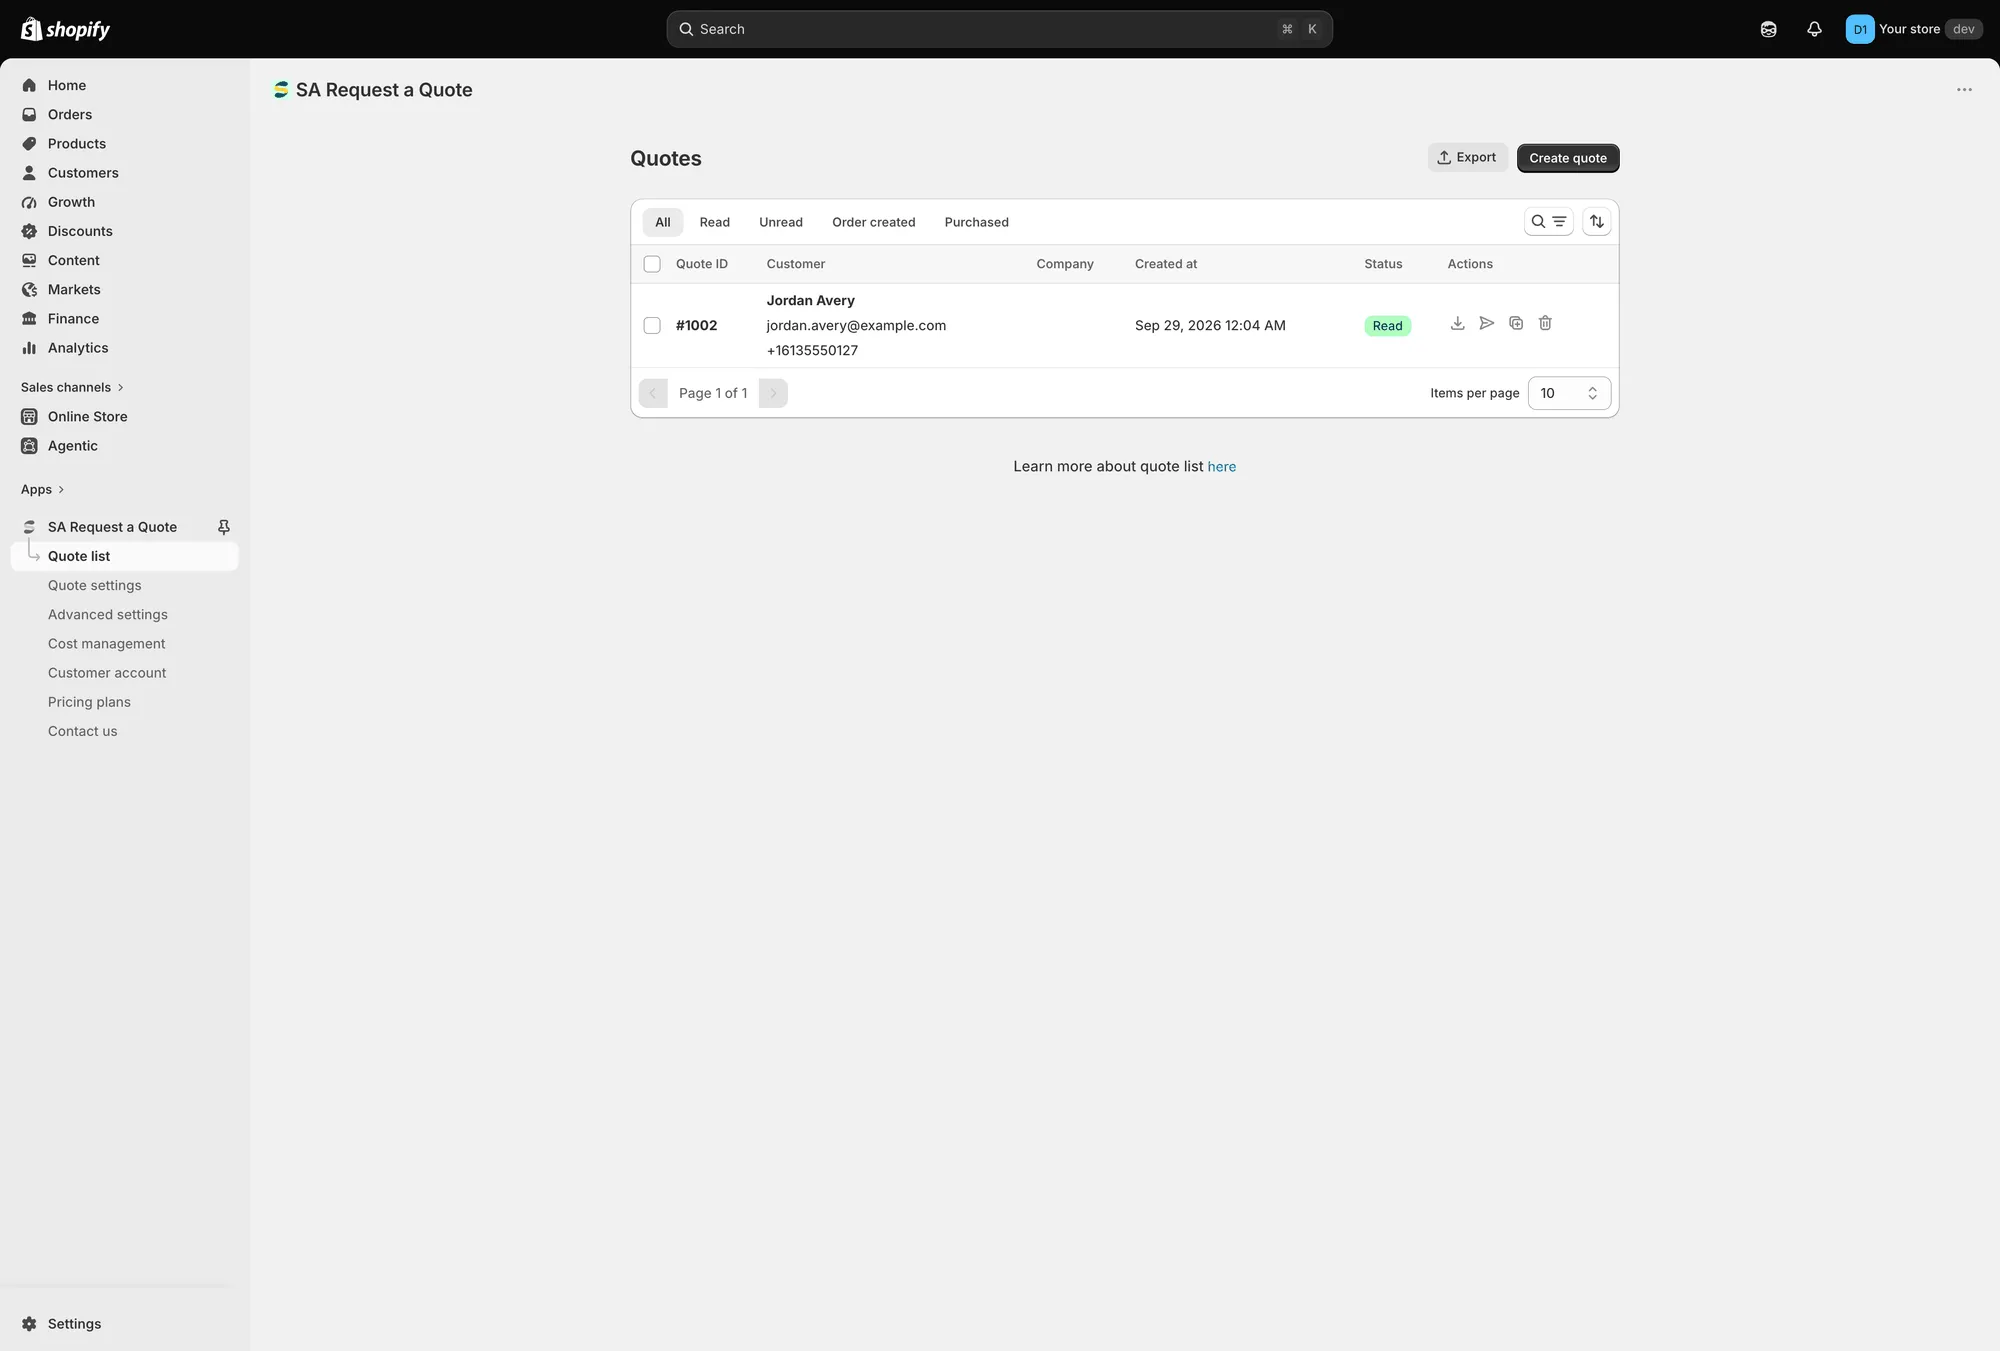
Every request lands in Quote list.
Controls this: Emails sent to admin
-
You price it and reply
Section titled “You price it and reply”Opening a request gives you its own page, headed Quote # followed by its number, with an Update line showing when it last changed.
The line-item table has three columns — Products, Price & quantity and Total. Each line shows the product and its SKU, and both the price and the quantity can be edited, so what you send is your offer rather than your list price. Each line also carries Duplicate items and a delete control.
To change what’s on the quote, use Search products or the Browse products button beside it, Manage products, and Create section to group a long quote.
The Payment panel adds it all up: Subtotal, then Edit discount, Edit shipping and Edit tax rate, then Total. Those three links work from Cost management, which has the Discount, Shipping and Tax tabs.
Everything the customer sent sits down the right-hand column: Customer, Email, Contact information, Company information, Shipping address, Billing address, Payment terms, Extra info and Tags.
At the bottom, Timeline takes a comment and a Post — “Only you and your staff can see comments” — which is where notes on the negotiation belong. Mark as unread, Mark as paid and Resend an email sit alongside it.
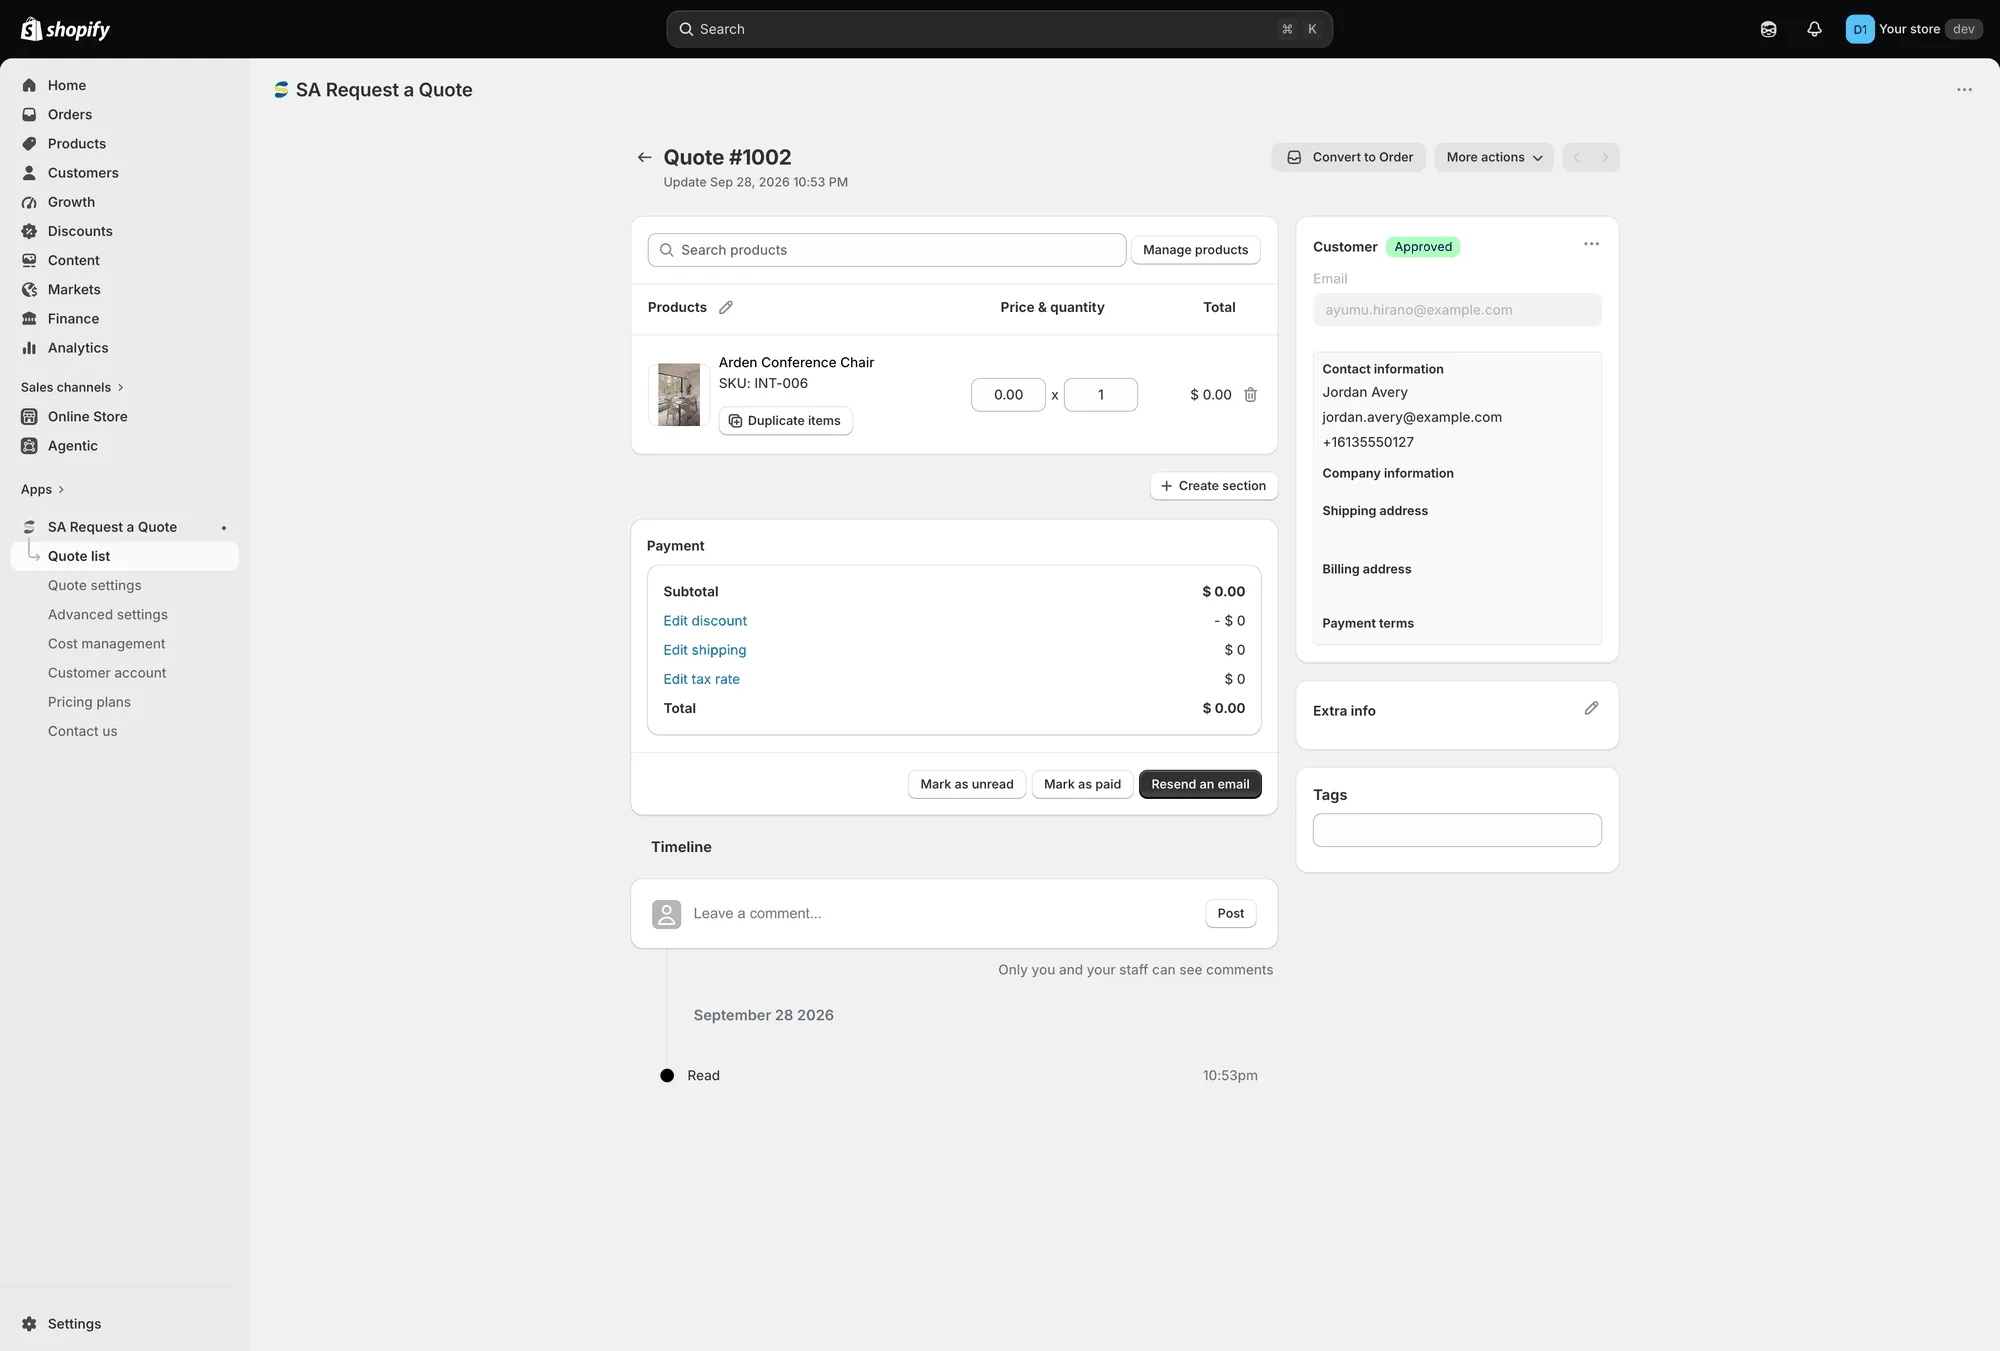
A quote opened from the list, with prices and quantities ready to edit.
Back in Quote list, each row also has four quick actions in the Actions column: download the quote as a PDF, send an email, duplicate it and delete it.
Controls this: View and edit a quote and Send a quotation
-
The quote becomes an order
Section titled “The quote becomes an order”Convert to Order sits at the top of the quote, next to More actions. It turns the quote into a Shopify draft order, and from there it behaves like any Shopify order — you send the invoice, they pay, and it appears in your normal Shopify Orders.
Controls this: Convert to a draft order
-
The customer can look back at it
Section titled “The customer can look back at it”Logged-in customers can review what they’ve sent on the Quote history page, titled Quote history, at
/pages/quotes-history. If your store uses Shopify’s new customer accounts, quotes can appear there too.Controls this: Storefront quote pages overview
Where quotes live
Section titled “Where quotes live”Quotes are kept in the app, not in your Shopify Orders, until you convert one. That’s deliberate — a quote is a negotiation, and you don’t want unsold requests polluting your sales reporting.
Five status tabs sit above the Quote list table and narrow it as the list grows: All, Read, Unread, Order created and Purchased.
Alongside them there’s a search and filter, a sort control, and Items per page at the bottom — 10, 20, 30 or 50. The Export and Create quote buttons sit at the top of the page. The table itself shows Quote ID, Customer, Company, Created at, Status and Actions.
Keeping an eye on the whole thing
Section titled “Keeping an eye on the whole thing”The dashboard summarises the same journey. Recent activity shows Total quotes for the last 7 days and Pending quotes that need review, with View all to jump into the list. Analytics overview — “Track quote performance and conversion.” — has a date range picker and four figures: Quote number, Completed orders, Total draft orders and Order value.
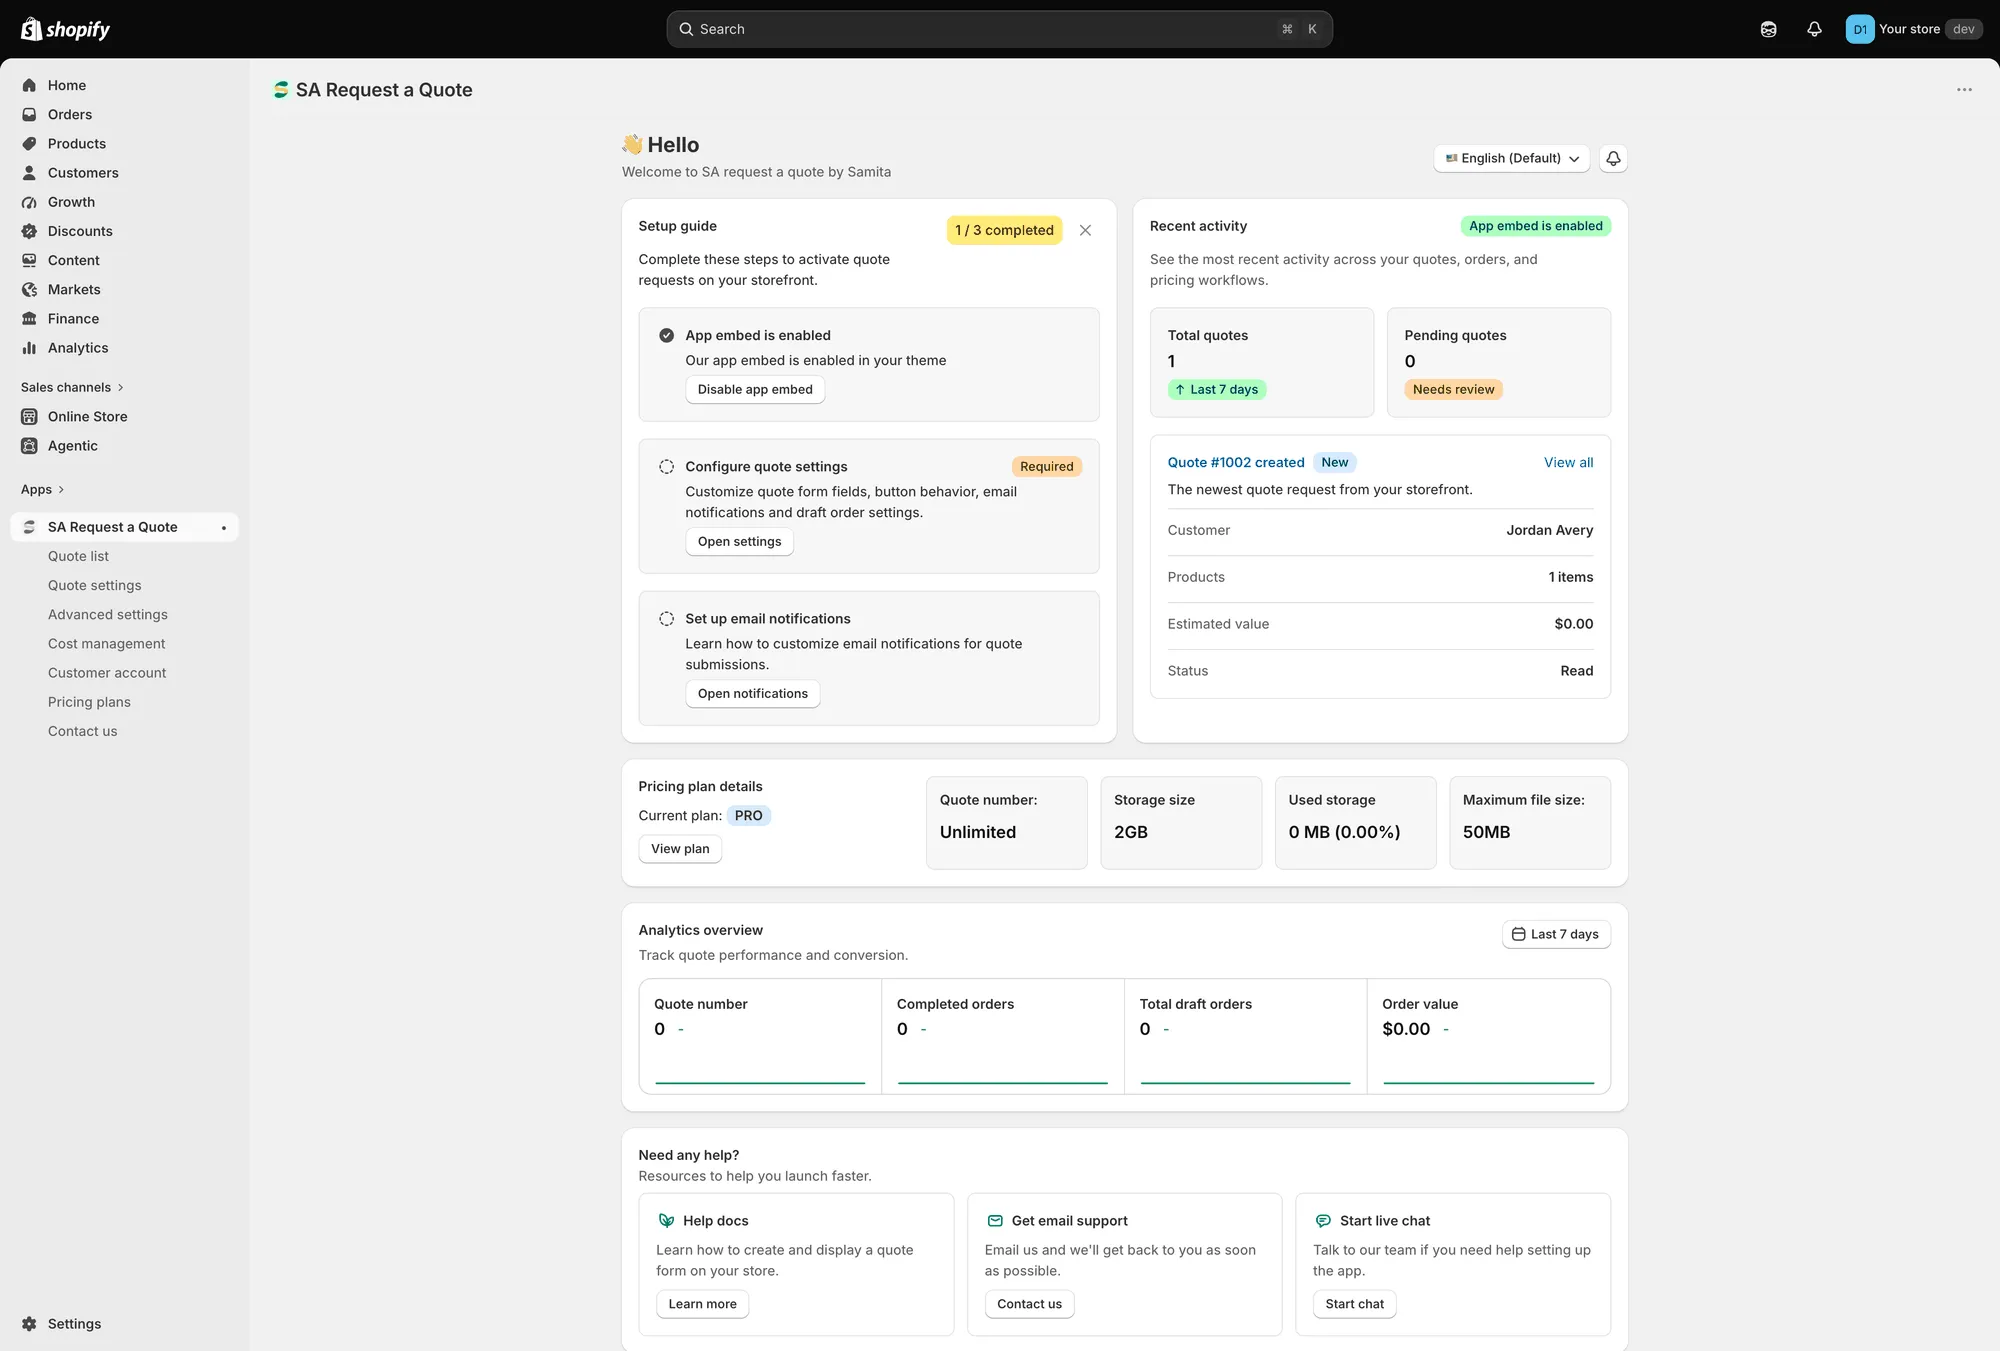
The dashboard is the app’s landing page.
The Setup guide at the top of the same page is the short version of everything above — enable the app embed in your theme, configure quote settings, set up email notifications.
What each plan can do
Section titled “What each plan can do”Some stages need a paid plan — converting a quote to an order and exporting to CSV are on PRO, for example. See Plan comparison for the full breakdown, or open Pricing plans in the app.
You’ll know when you meet one. The app leaves the control on the page, greys it out and shows a padlock line reading “🔐 This feature is available on …”, with a link to the plan that includes it. A disabled control is your plan, not a fault in the app or your theme.
Next steps
Section titled “Next steps”- Quickstart — set this up on your own store
- Plan comparison — which stages your plan covers
- Permissions and data — what the app accesses and stores