
Payment Term and Payment Invoice
Let B2B customers pay for their order later or on a specific date, instead of paying immediately at checkout.
Payment Term lets your B2B customers pay later — either by a specific date or within a set number of days — instead of paying immediately at checkout.
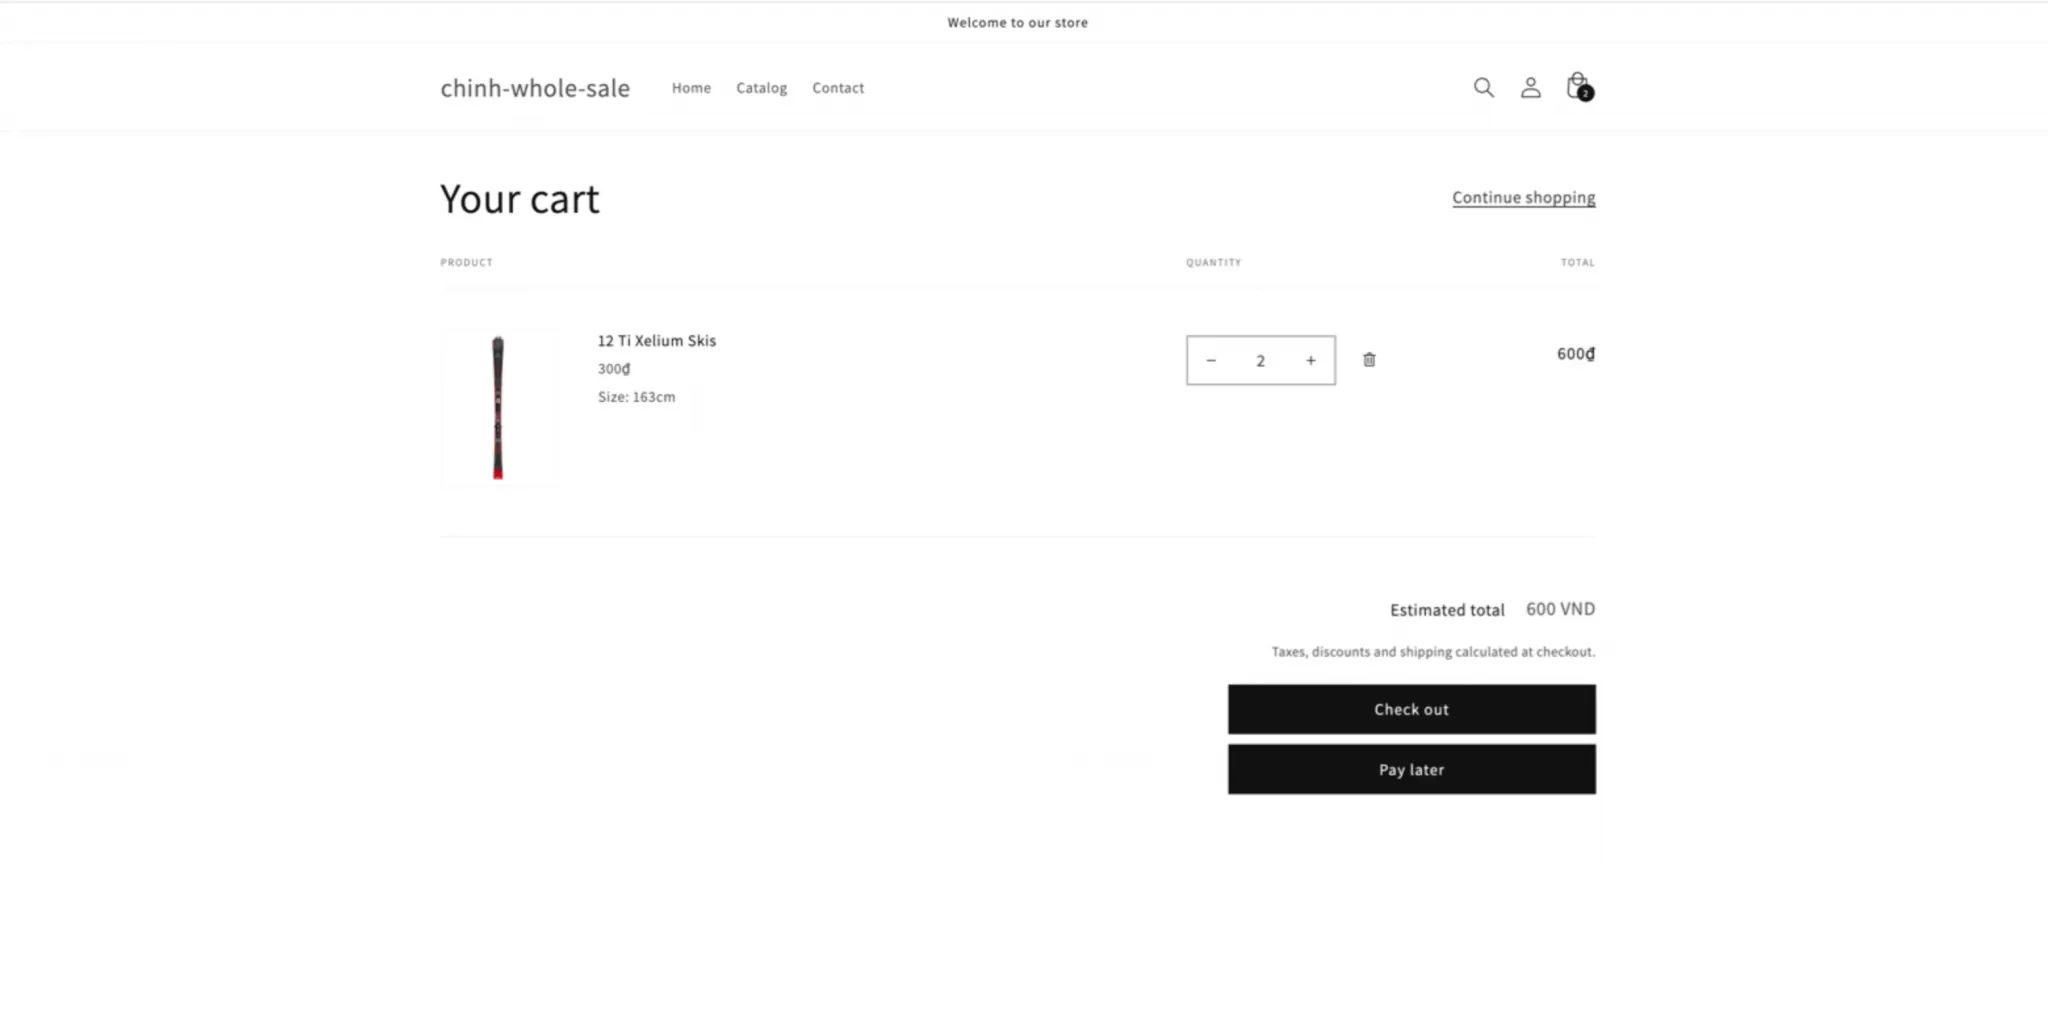
Once enabled, a Pay Later button appears on your cart page. Clicking it creates a draft order and clears the cart.
Steps to manage
Section titled “Steps to manage”-
Open Payment term
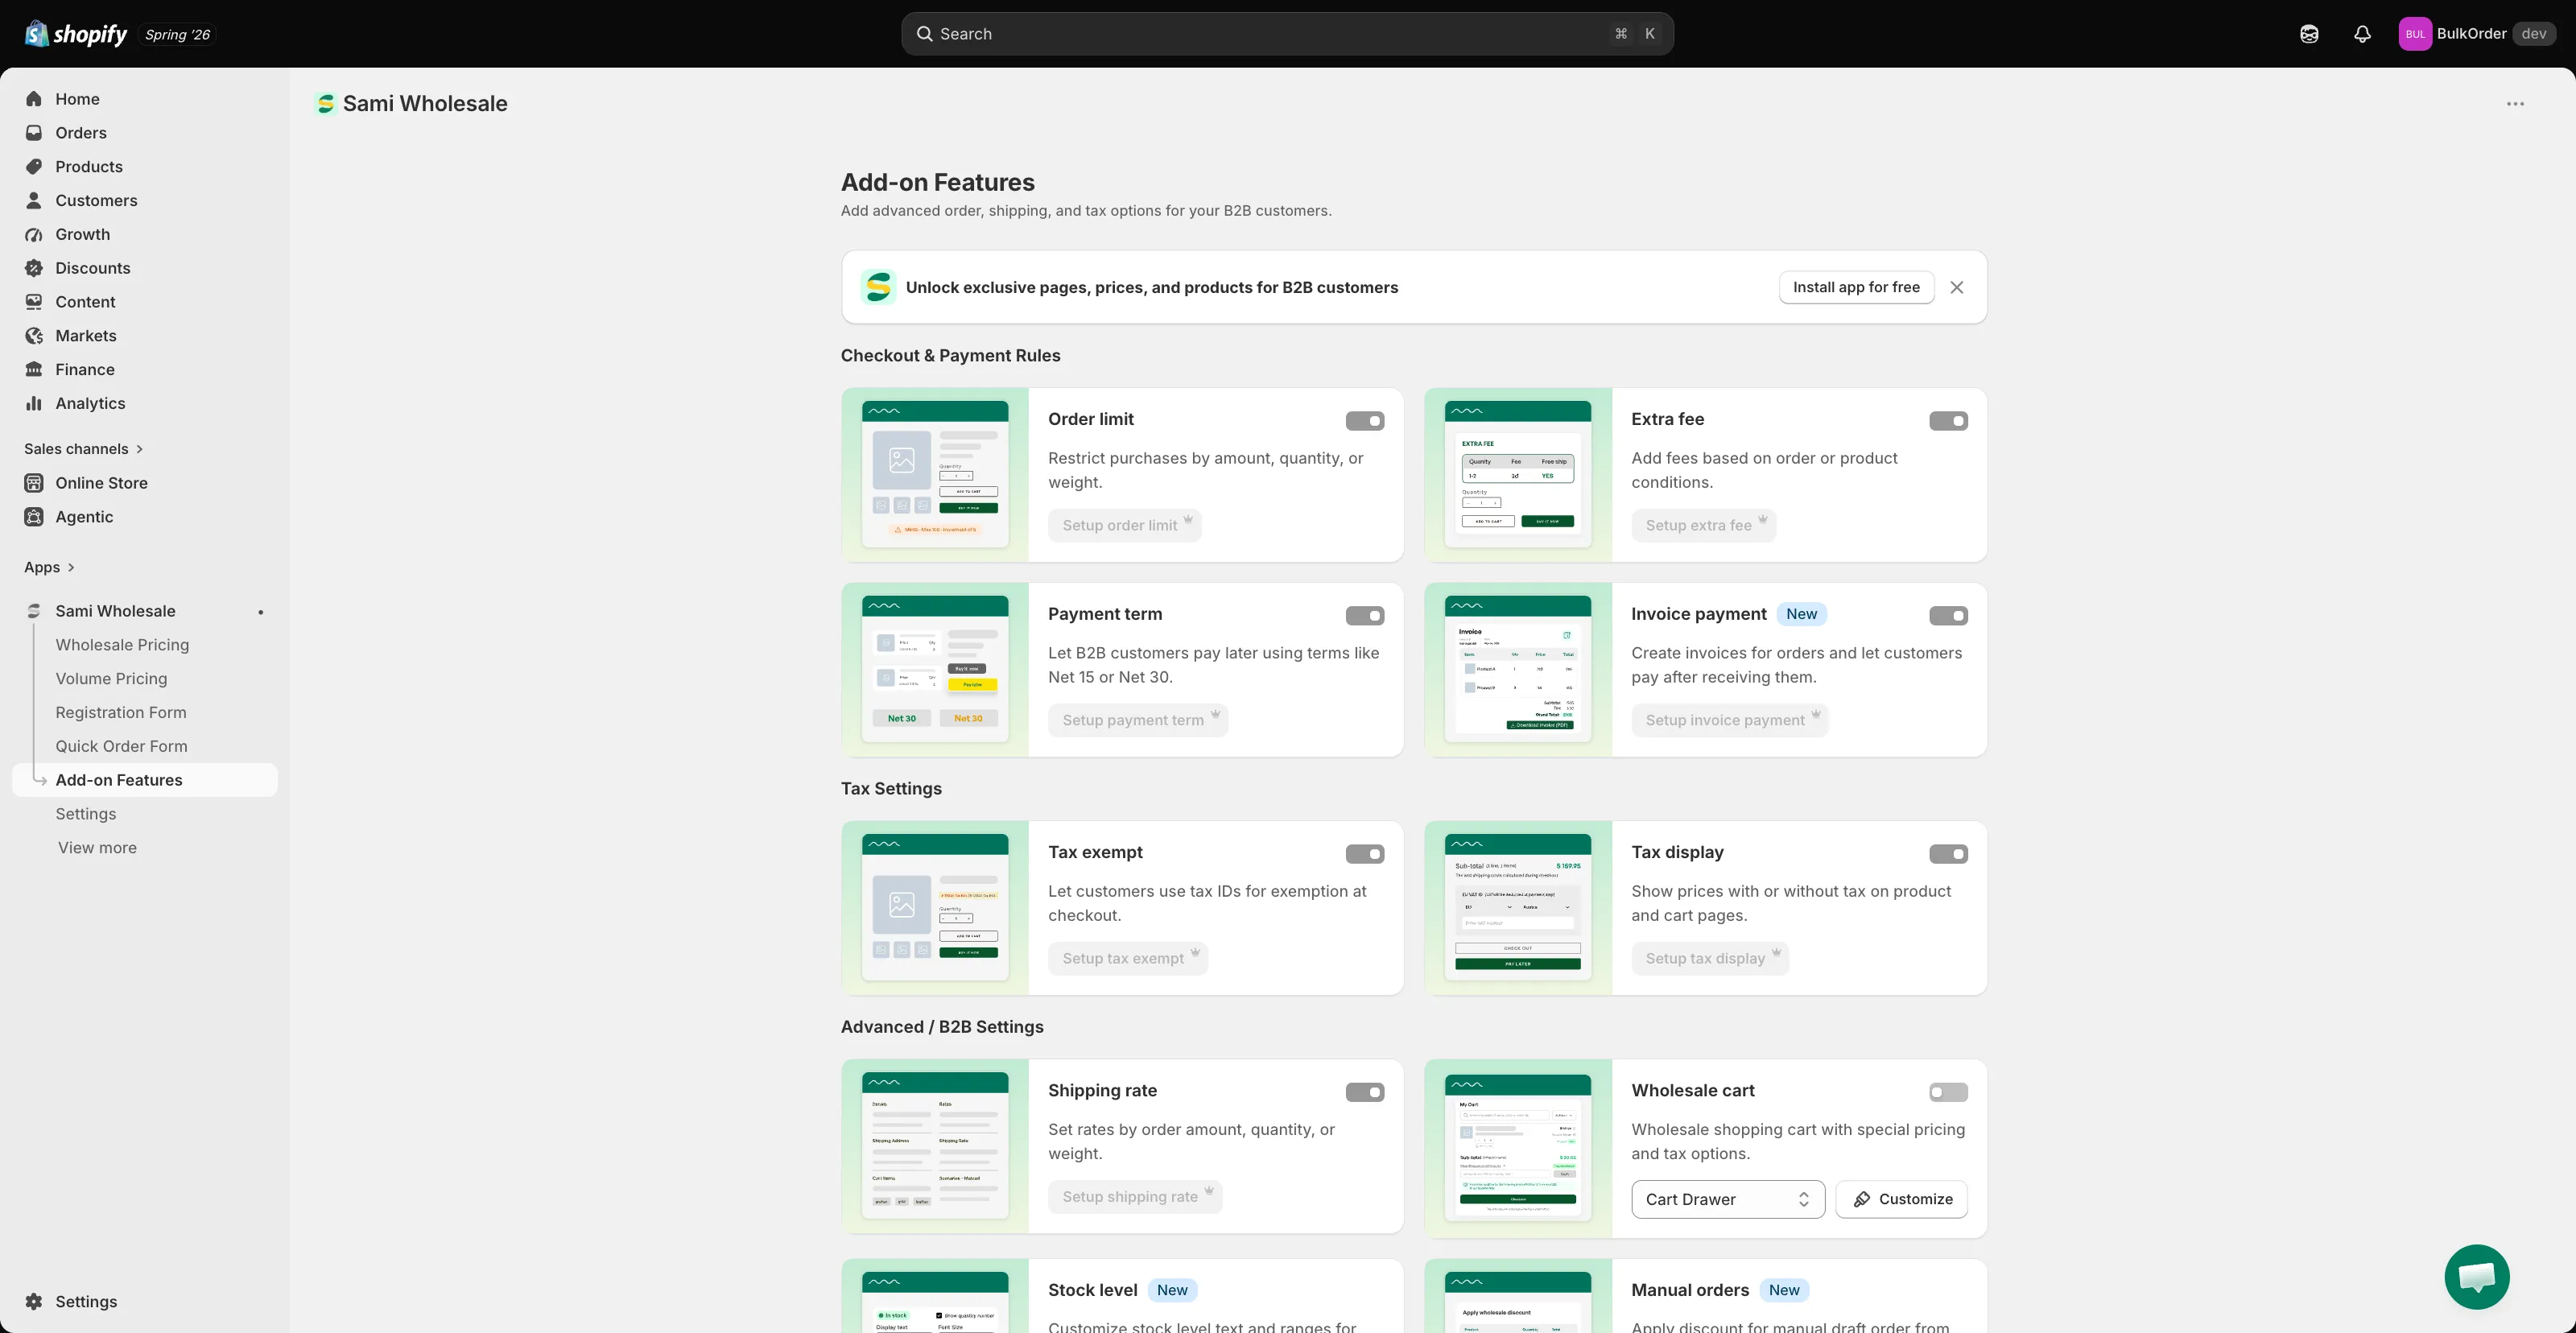
Section titled “Open Payment term”Open the app, go to Add-on Features, then click Payment term > Setup payment term.
-
Start a new payment term
Section titled “Start a new payment term”Click Add new payment term.
-
Configure the term
Section titled “Configure the term”- Status and Title — enable the payment term and give it a name (only visible to you).
- Payment term — choose when the customer must pay: Due on receipt, Due on fulfillment, a fixed number of days (Within 7/15/30/45/60/90 days), a Fixed date, or After checkout.
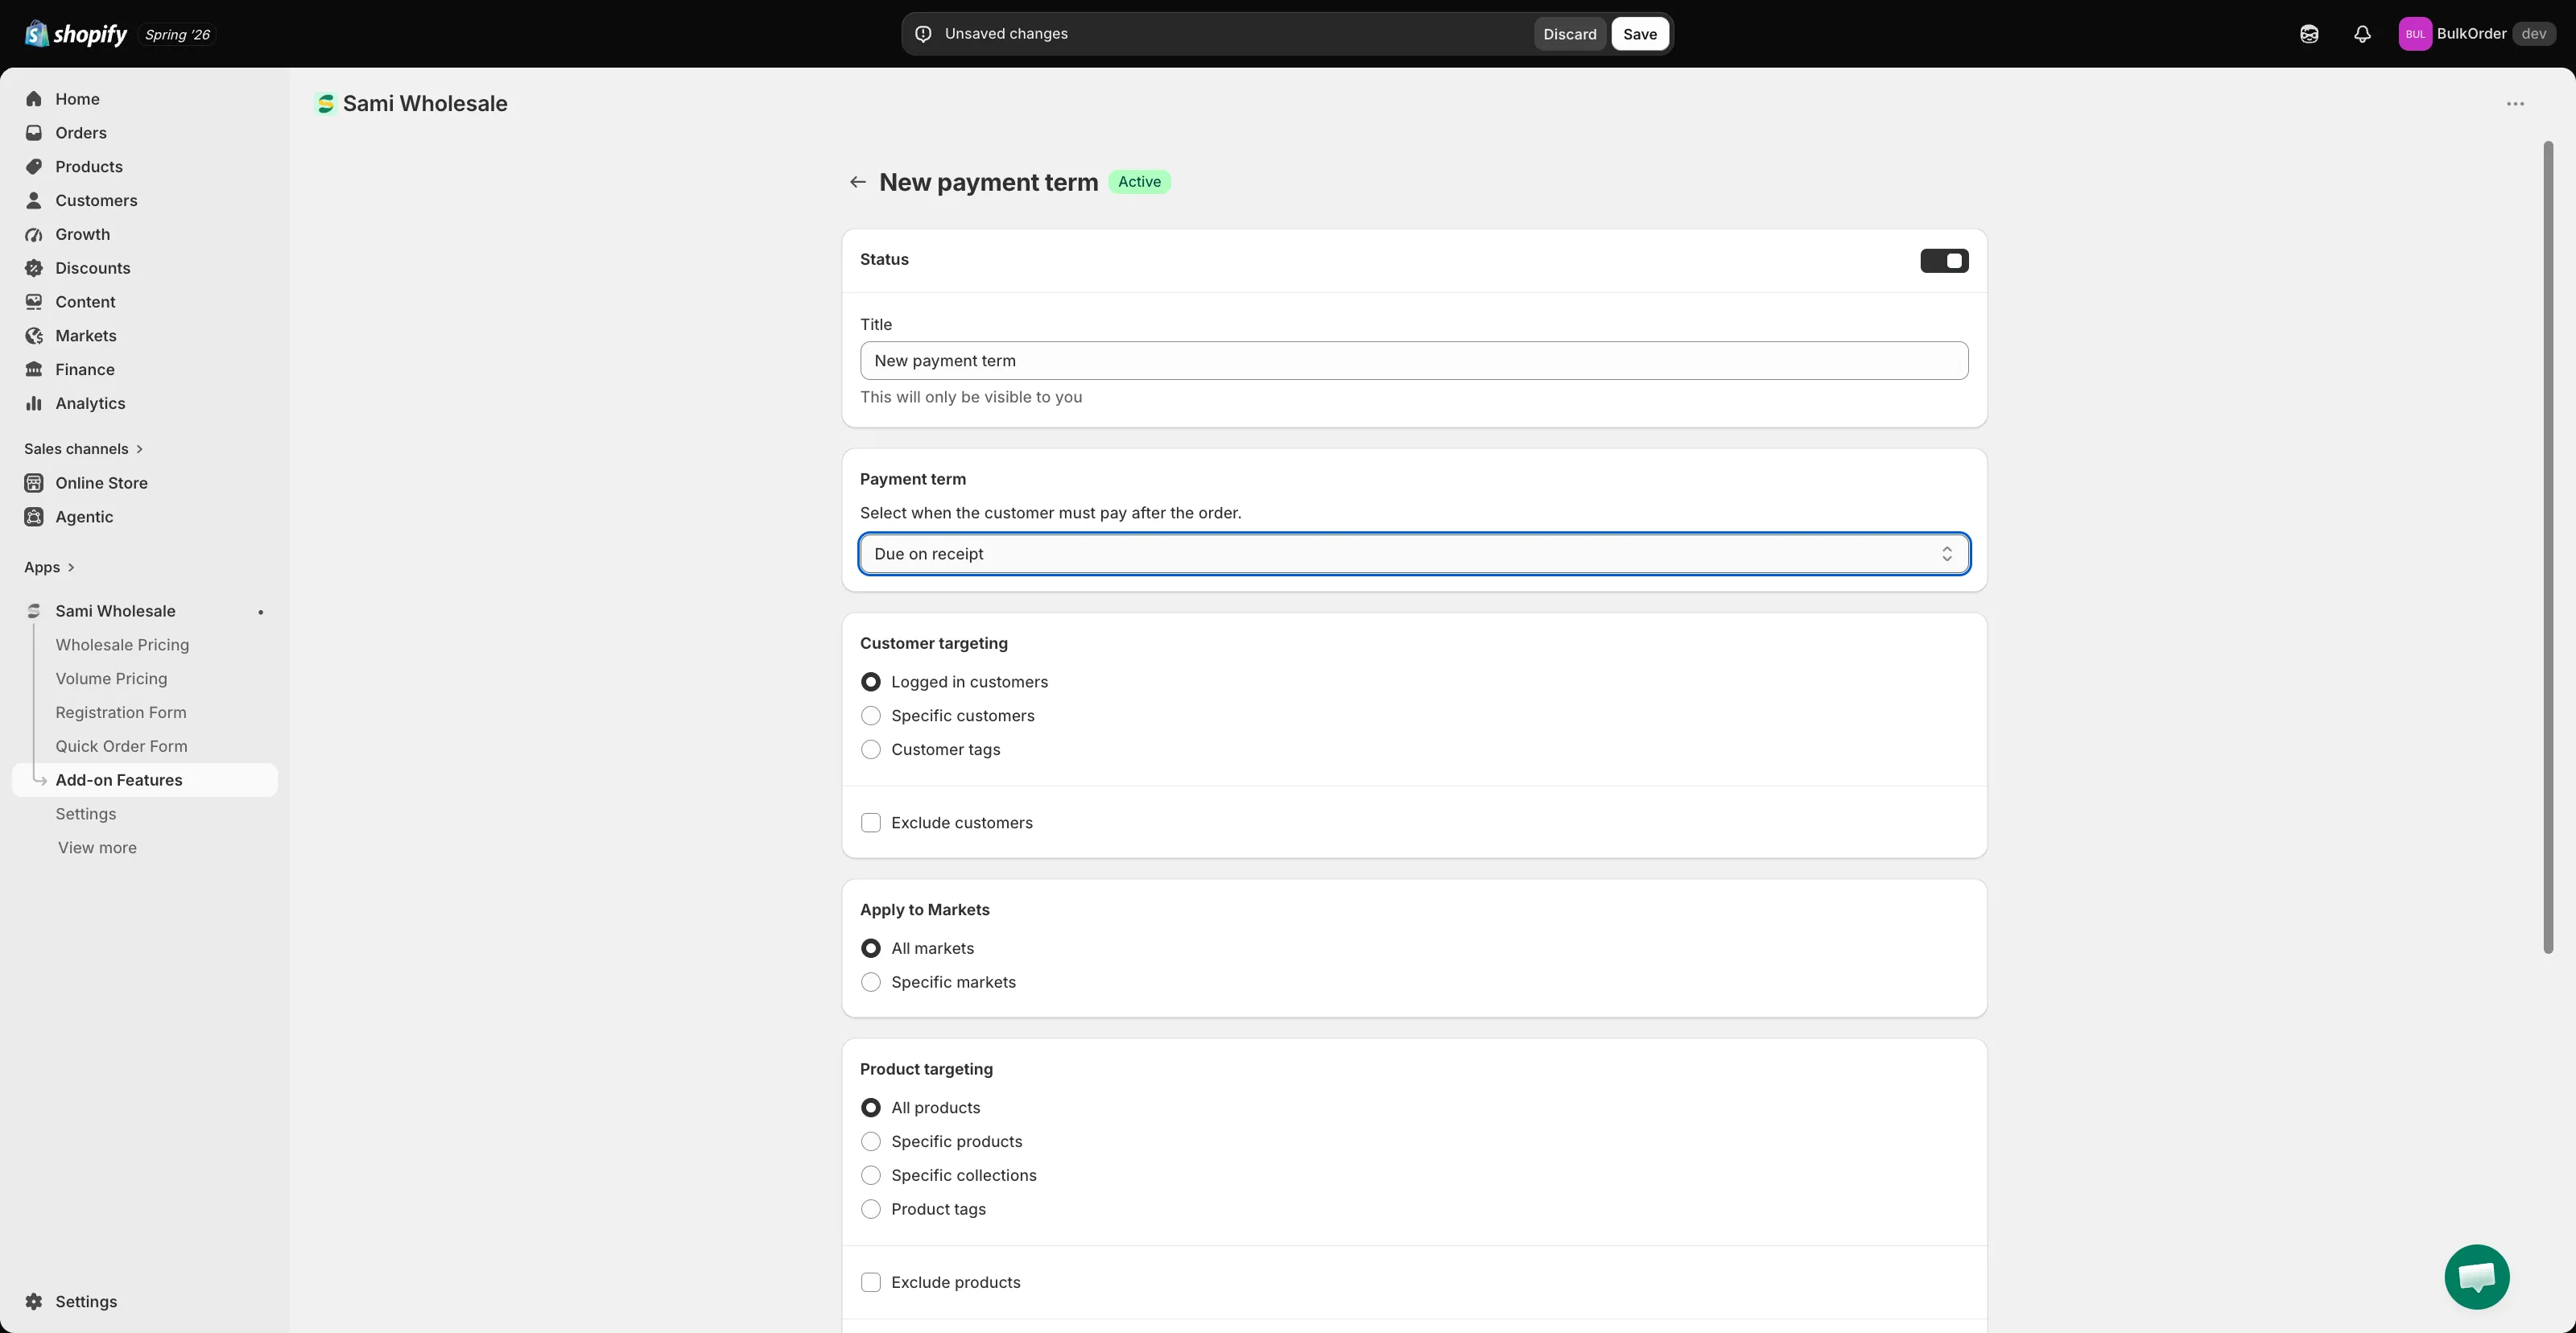
- Customer targeting — choose Logged in customers, Specific customers, or Customer tags. Tick Exclude customers to hide it from certain customers.
- Apply to Markets — choose All markets or Specific markets.
- Product targeting — choose All products, Specific products, Specific collections, or Product tags, and optionally Exclude products.
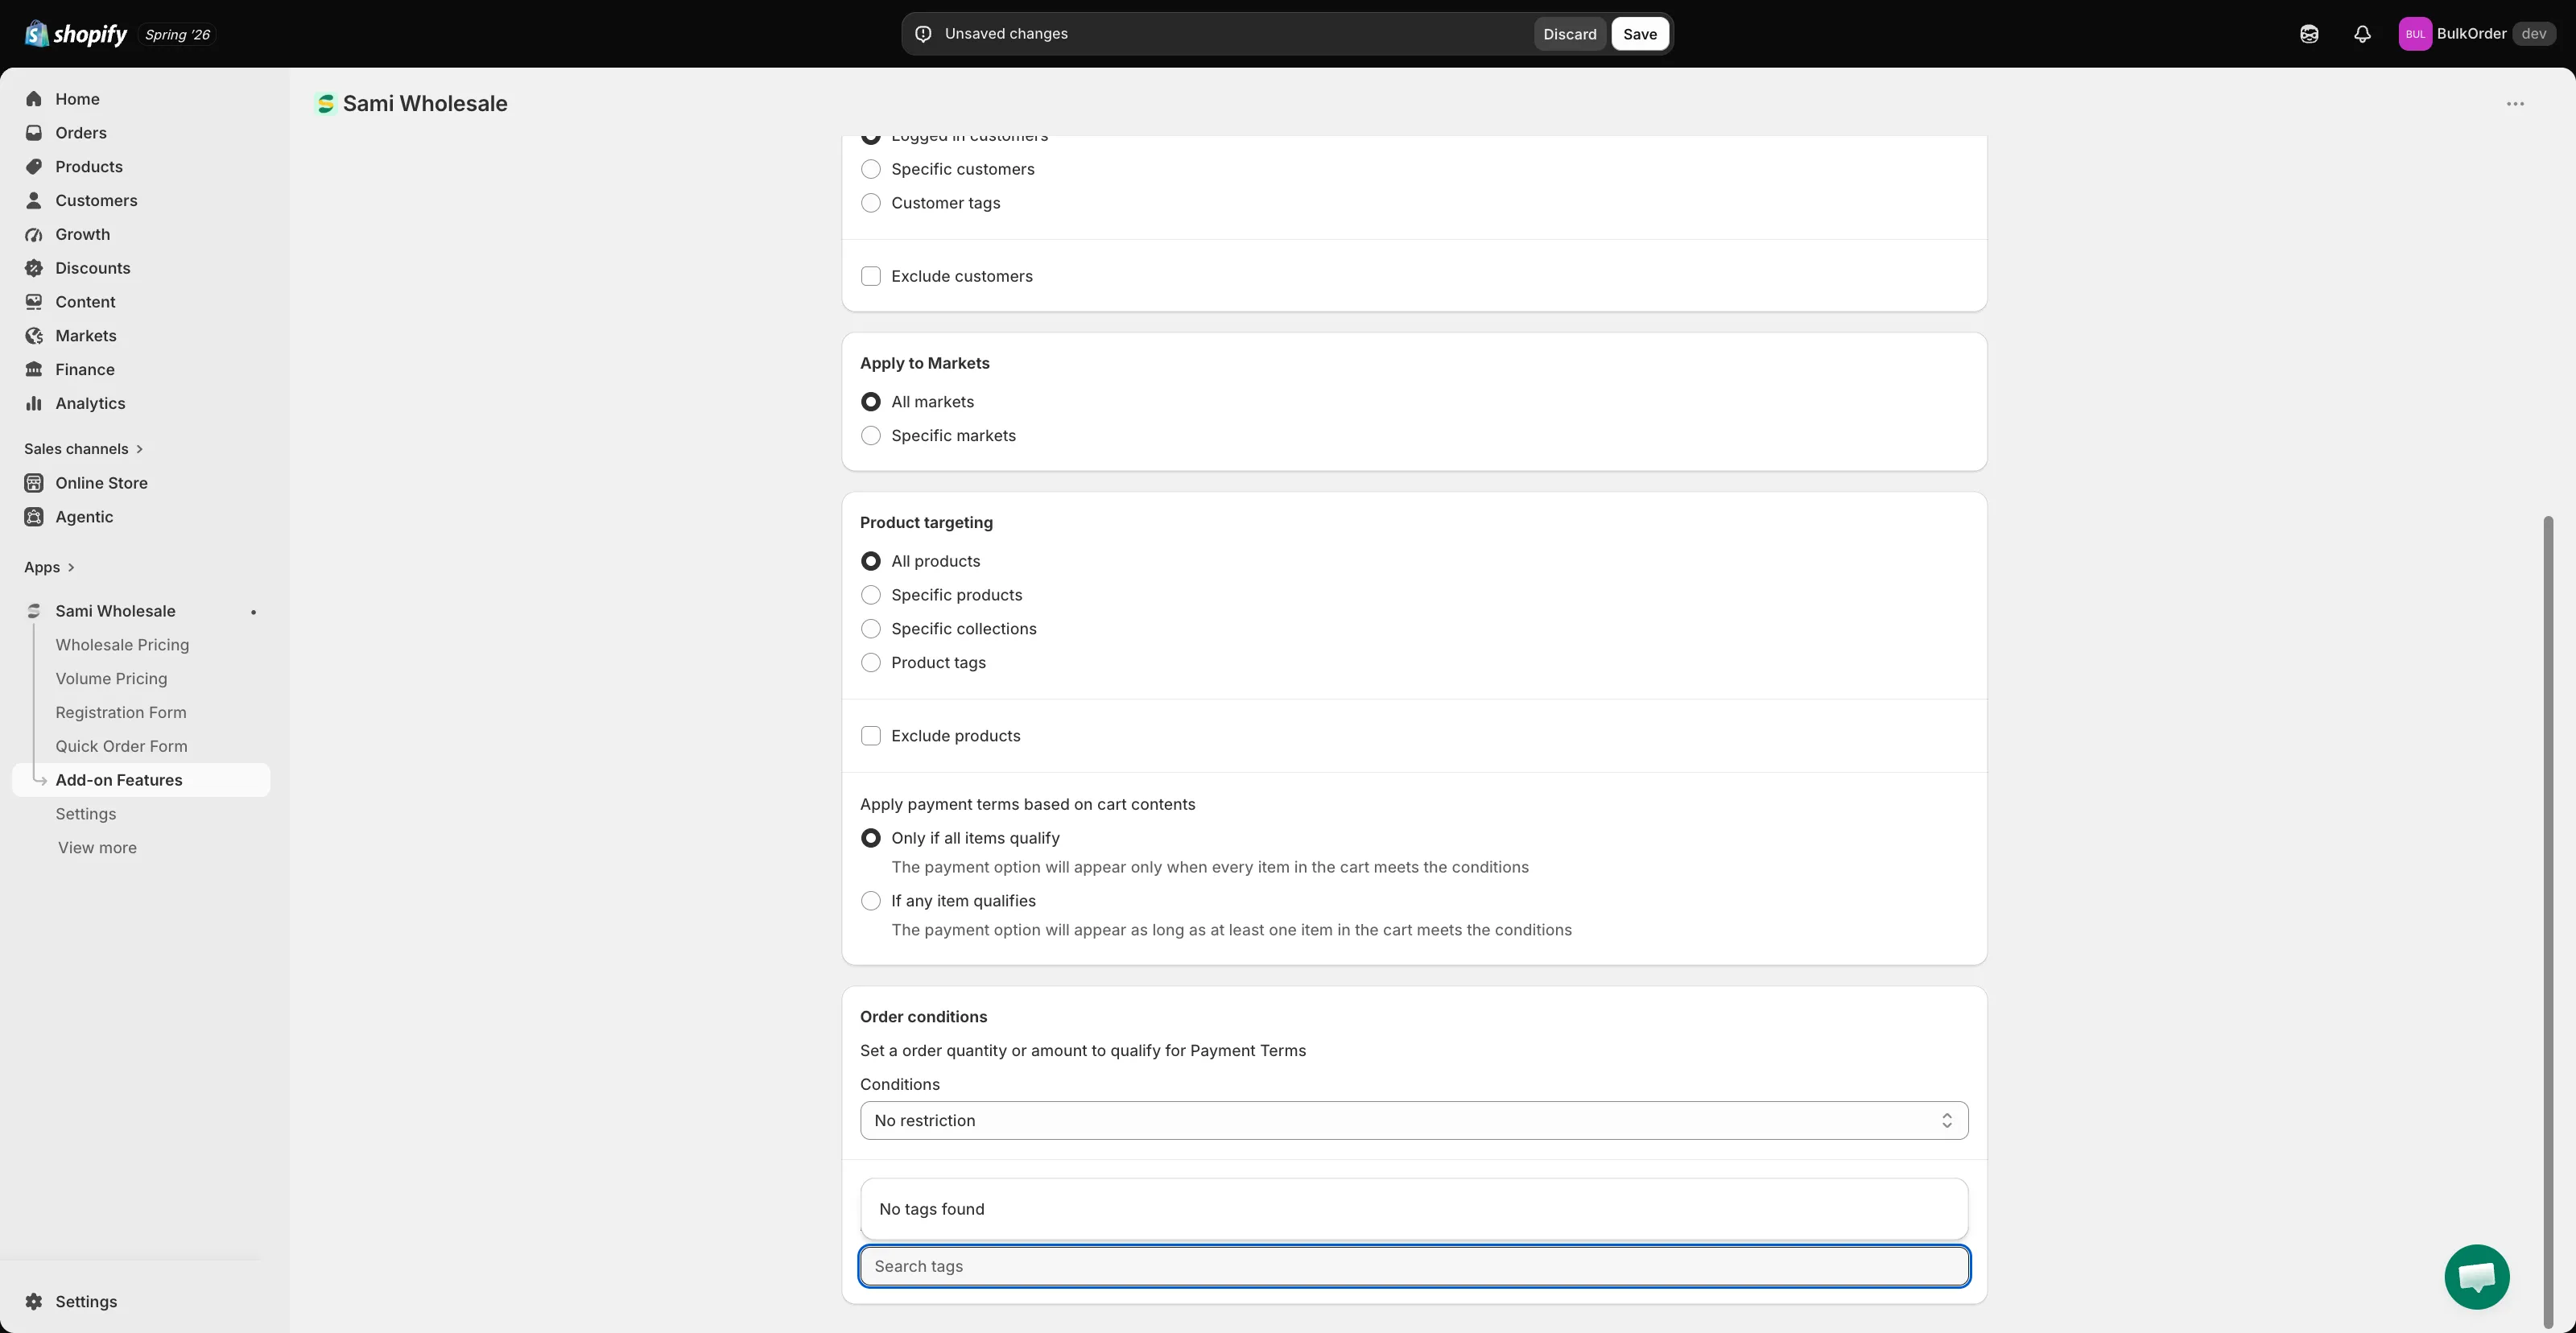
- Apply payment terms based on cart contents — choose Only if all items qualify or If any item qualifies.
- Order conditions — choose No restriction, or set a minimum/maximum order amount or quantity that triggers this term.
- Order tagging — search for a tag to automatically apply to orders that use this payment term. Create the tag in Shopify first, and it’ll appear in this list.
-
Click Save.
You can also style the Pay Later button — see Customize Payment term button.
Need support?
Section titled “Need support?”If you do encounter any difficulty while proceeding these steps, don’t show any hesitation to contact us promptly via the email address [email protected].