
Trigger Shopify Flow on Registration Form submission
Send a Shopify Flow trigger every time a customer is created or updated through your Registration Form, so you can automate what happens next.
Once enabled, every time a customer is created or updated through a Registration Form, the app sends an event to Shopify Flow — Shopify’s free, no-code automation tool. You can then build a workflow in Flow to react to that event however you like: notify your sales team in Slack, tag or segment the customer, create a task, sync the customer to another system, and so on.
Steps to manage
Section titled “Steps to manage”-
Open the form’s integration settings
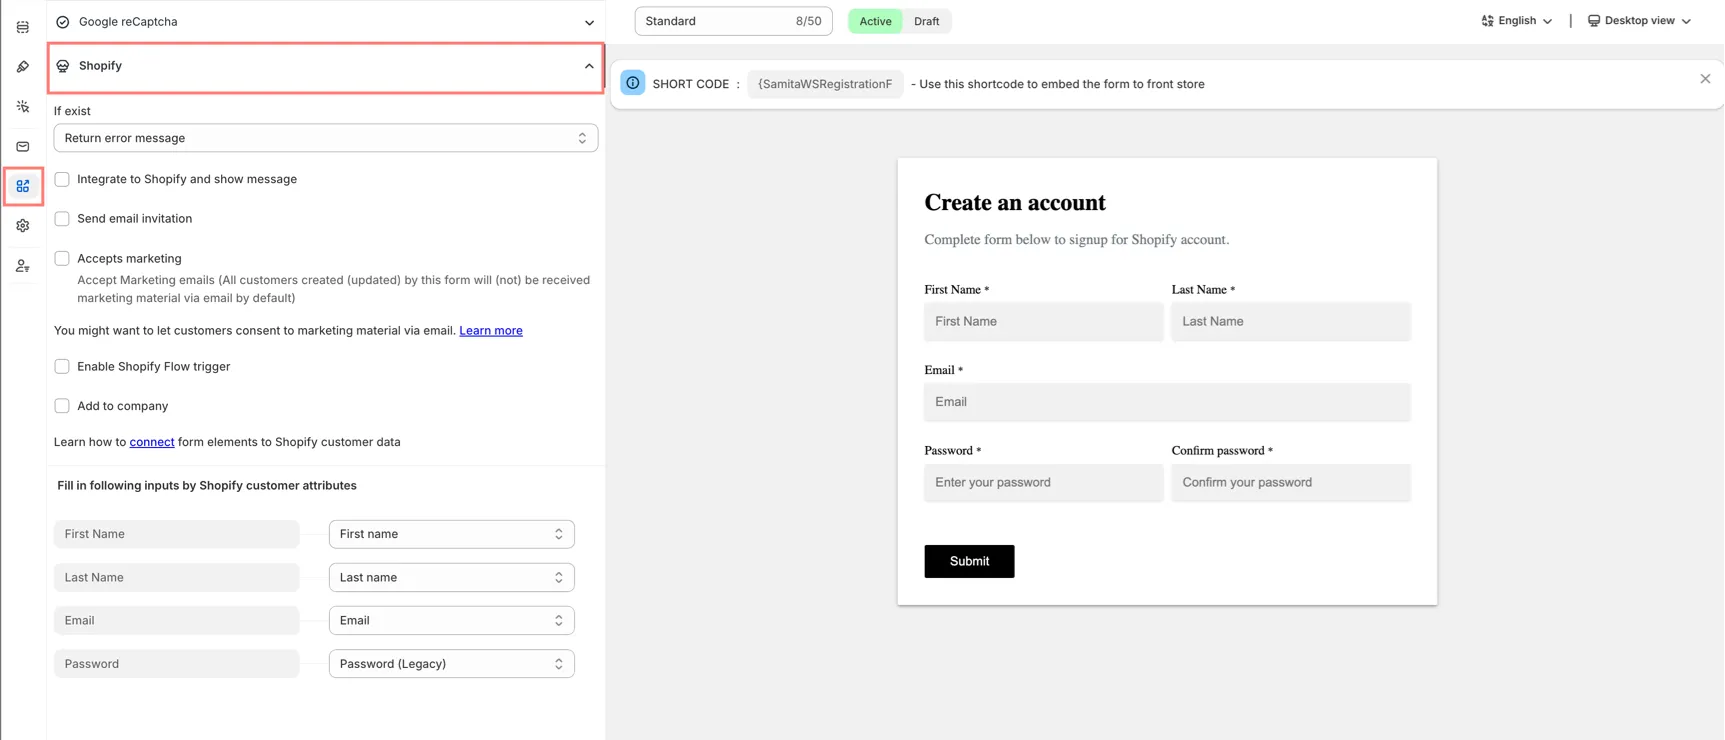
Section titled “Open the form’s integration settings”From the app, click Registration Form, open the form you want, then click the Integration tab and choose Shopify.
-
Enable the Flow trigger
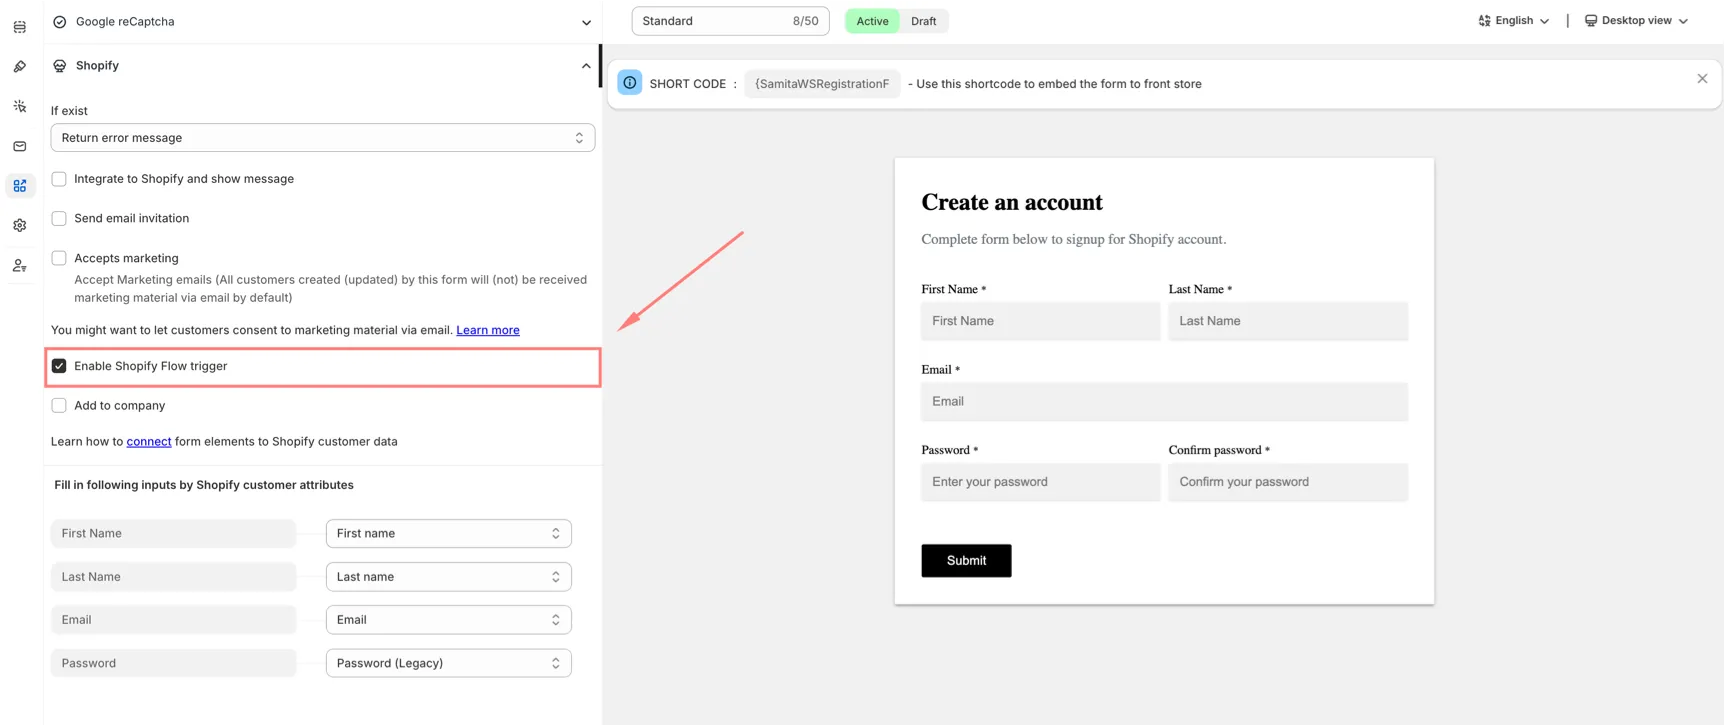
Section titled “Enable the Flow trigger”Turn on Enable Shopify Flow trigger.
-
Click Save.
Build a workflow in Shopify Flow
Section titled “Build a workflow in Shopify Flow”-
Install Shopify Flow
Section titled “Install Shopify Flow”Go to Shopify Admin > Apps > Flow. It’s free and available on every Shopify plan; install it if you haven’t already.
-
Create a workflow
Section titled “Create a workflow”Click Create workflow.
-
Choose the trigger
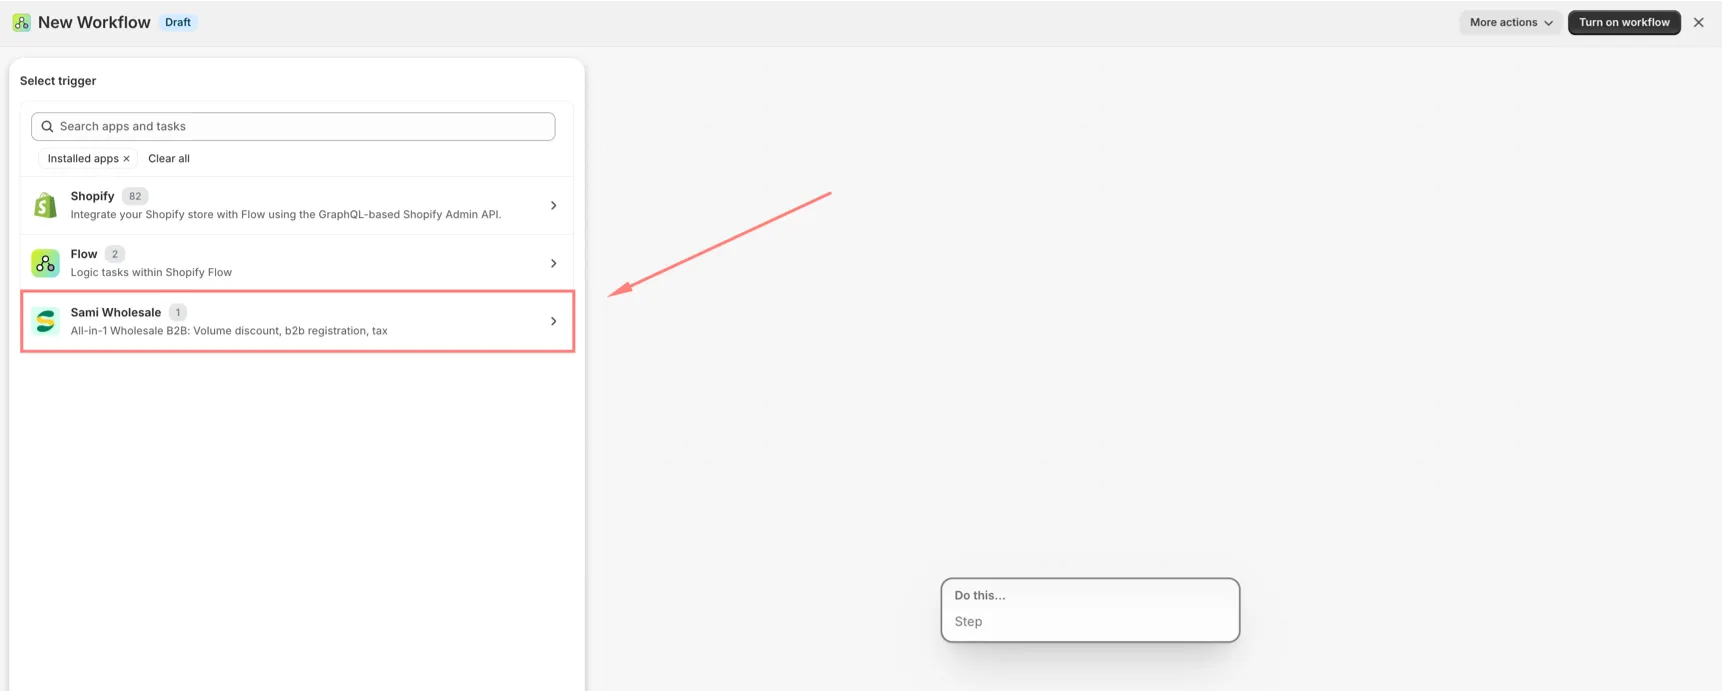
Section titled “Choose the trigger”In the trigger step, search for Sami Wholesale (listed as “All-in-1 Wholesale B2B: Volume discount, b2b registration, tax”) and open it. Inside, select the trigger named Sami B2B Wholesale Pricing — its description reads “Triggers when a customer is created or updated via a Wholesale registration form.”
-
Add actions
Section titled “Add actions”Add whatever actions you need — Flow ships with hundreds of built-in actions: send a notification, add a tag, call a webhook, branch on a condition, and more.
-
Turn the workflow on
Section titled “Turn the workflow on”Click Turn on.
Data available in the workflow
Section titled “Data available in the workflow”When building your workflow, you can insert the following variables into any step:
| Variable | Description |
|---|---|
| Customer | The Shopify customer that was created or updated — use it directly with any customer-related action (add tag, add to segment, send email, etc.). |
| Form > Name | The name of the Registration Form that was submitted — useful if you have multiple forms and want the workflow to behave differently depending on which one was used. |
| Registration customer > Data | Everything the customer filled in on the form (field label and value), packed into a single JSON string. See below to split it into individual fields. |
Reading individual fields from “Registration customer > Data”
Section titled “Reading individual fields from “Registration customer > Data””The submitted form data is sent as one JSON string (for example: {"Email": "[email protected]", "First Name": "John", "Company name": "ABC Co."}), with every field bundled into a single variable. To split it into individual fields you can use later in the workflow, add a Run code step right after the trigger.
Step 1 — Add the “Run code” action
In your workflow, click Add action, then find and select Run code.
Step 2 — Fill in Input (GraphQL query)
In the Input box, paste:
{ registrationCustomer { data }}Step 3 — Fill in Function (JavaScript)
In the Function box, paste:
export default function main({ registrationCustomer }) {  const formData = JSON.parse(registrationCustomer.data);
return { email: formData['Email'] || '', firstName: formData['First Name'] || '', companyName: formData['Company name'] || '', };}Step 4 — Fill in Output (return type)
In the Output box, paste a type declaration matching what you returned in Step 3:
type Output { email: String! firstName: String! companyName: String!}Step 5 — Use the result in later steps
After saving, this Run code step becomes a new variable source for the actions after it — insert email, firstName, companyName (or whatever you named them) into an email body, a Slack message, a condition, etc.
- Requires the Shopify Flow app on your store (free, available on every Shopify plan).
- After a customer submits the form, the workflow may take up to a couple of minutes to fire — this is expected, not an error.
- This feature is available depending on your app’s pricing plan; if you don’t see Enable Shopify Flow trigger, check your current plan or contact support.
Need support?
Section titled “Need support?”If you do encounter any difficulty while proceeding these steps, don’t show any hesitation to contact us promptly via the email address [email protected].