
Export registration customers to CSV
Download the customers submitted through your Registration Forms as a CSV file — the selected customers, the current page, or everything matching your filters — with every form field in its own column.
The Registration Form / Customers page lists everyone who has applied through one of your Registration Forms. You can download that list as a CSV file — for example to review applications in a spreadsheet, share them with your sales team, or load them into another system.
Steps to manage
Section titled “Steps to manage”-
Open the Customers list
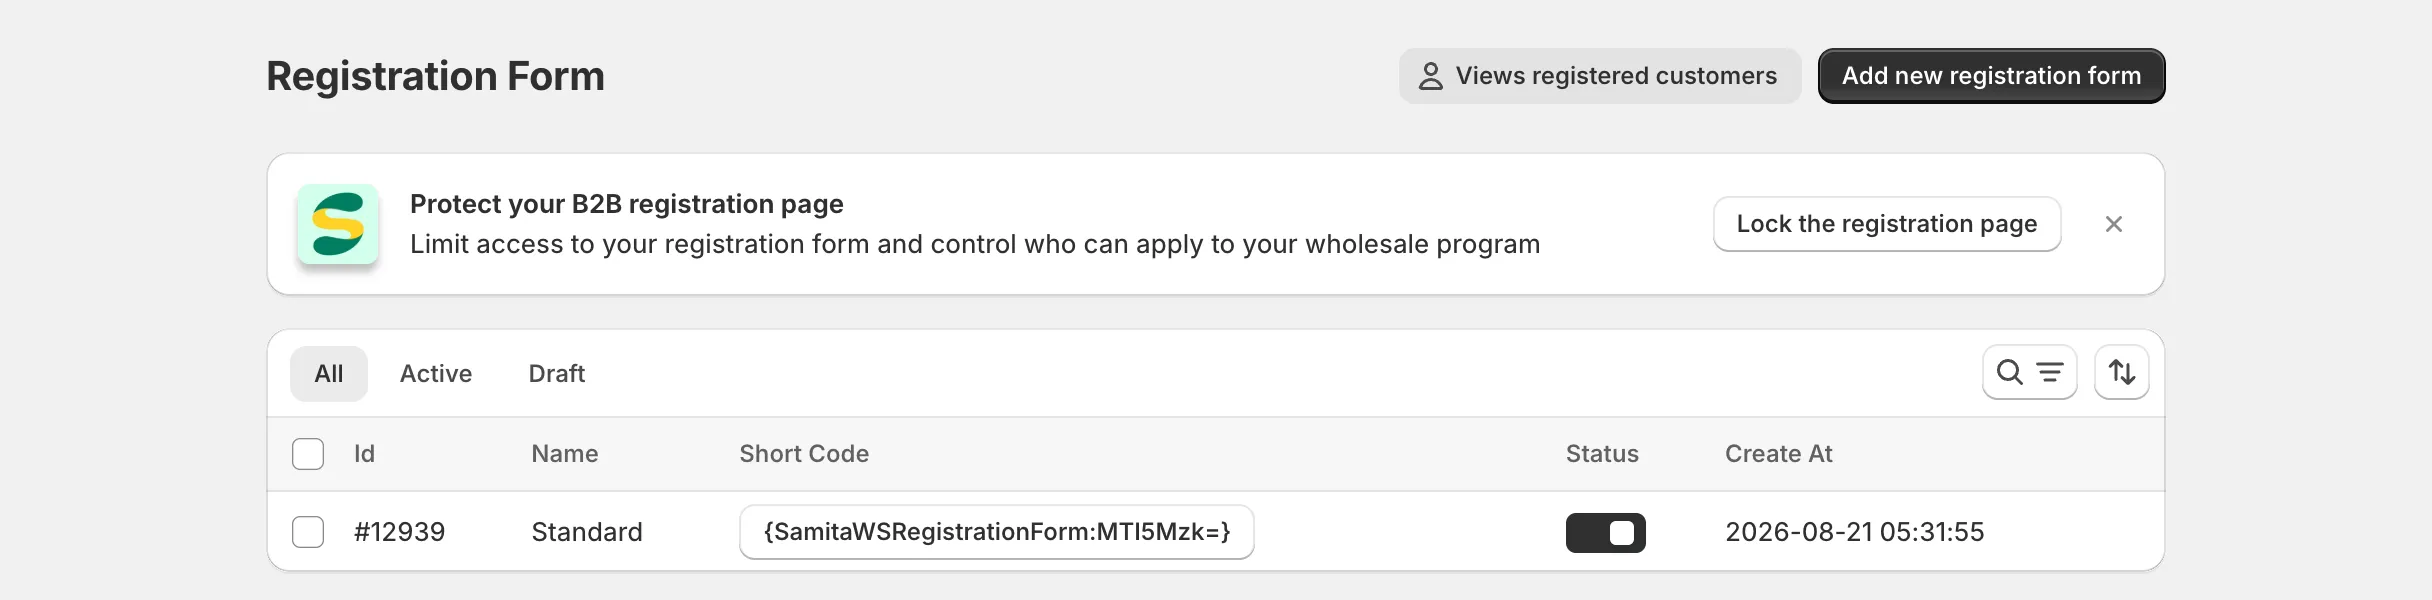
Section titled “Open the Customers list”From the app, click Registration Form, then click Views registered customers at the top of the page.
-
Narrow down the list (optional)
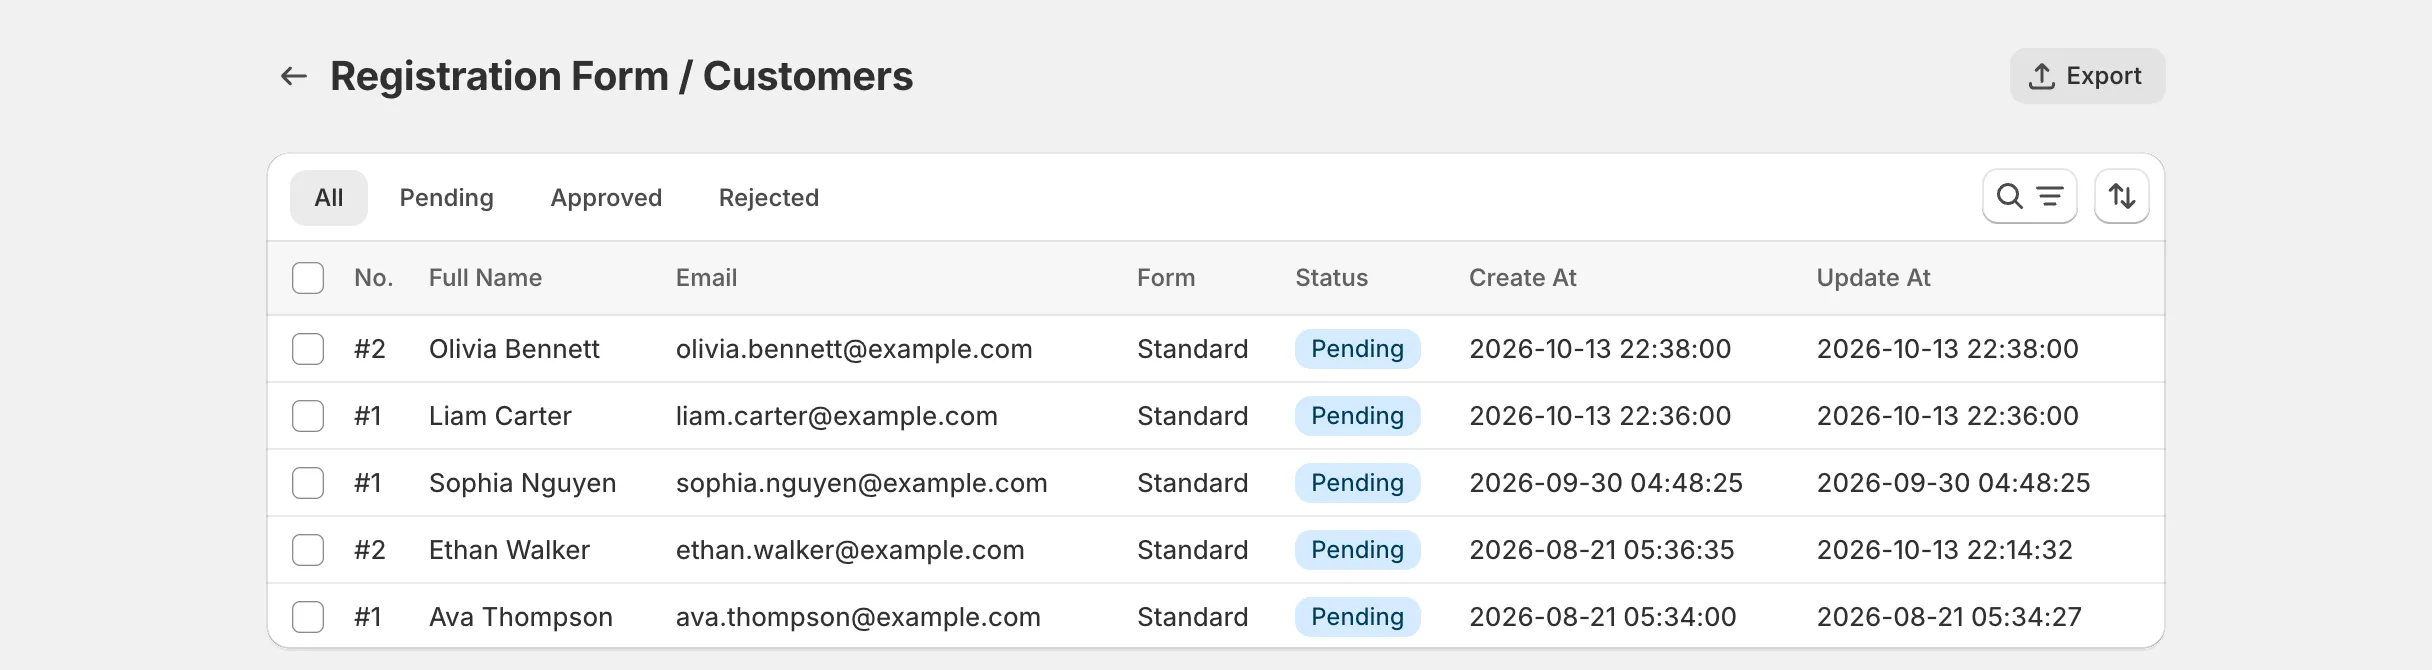
Section titled “Narrow down the list (optional)”Use the All / Pending / Approved / Rejected tabs, the Status and Registration Form filters, the search box, and the sort order (Newest first or Oldest first). The All … matching current filters option in the next step exports exactly what these filters return — across every page, not just the rows on screen.
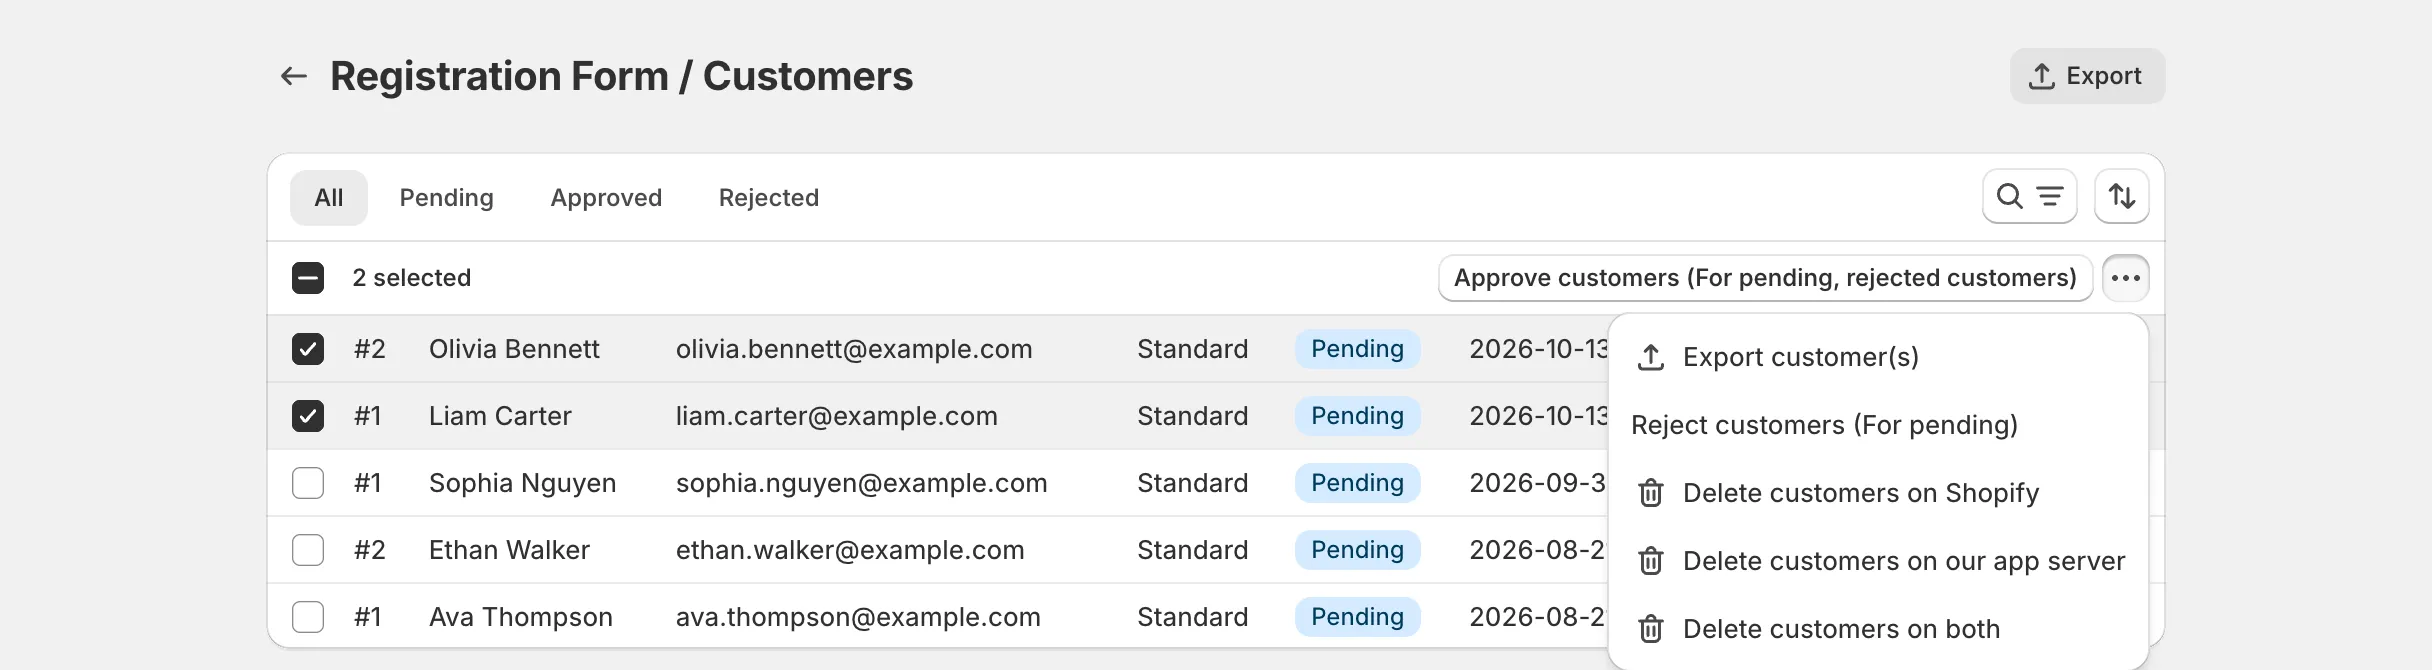
If you only want a handful of customers, tick the checkbox next to each one instead.
-
Click Export
Section titled “Click Export”Click Export at the top right of the page. Or, after ticking one or more customers, choose Export customer(s) from the bulk actions bar that appears above the table.
-
Choose what to export
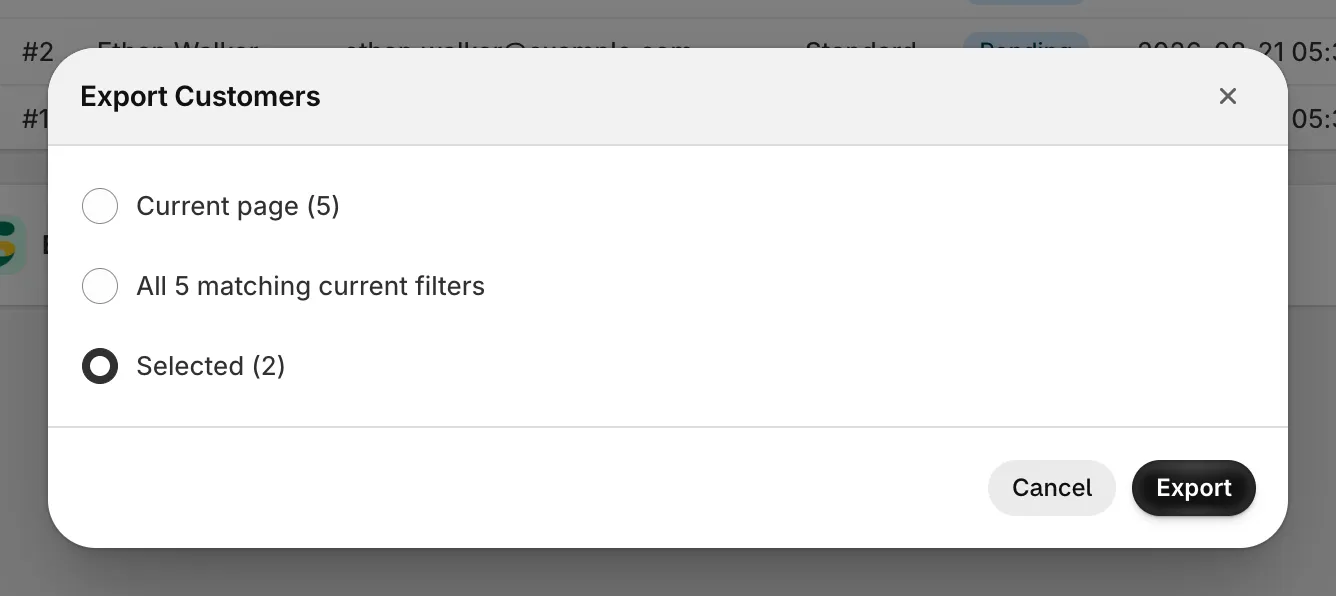
Section titled “Choose what to export”In the Export Customers dialog, choose one of:
- Current page (N) — the customers currently shown on the page (up to 20).
- All N matching current filters — every customer that matches your current tab, filters, and search, across all pages.
- Selected (N) — only the customers you ticked. This option only appears when at least one customer is selected.
Then click Export.
What’s in the CSV
Section titled “What’s in the CSV”Rows follow the sort order of the list (newest first by default). The file starts with a fixed set of columns, followed by one column per form field.
Fixed columns
Section titled “Fixed columns”| Column | Description |
|---|---|
| Registration Form ID | The ID of the form the customer submitted — the same number shown in the Id column of the Registration Form list. |
| Customer ID | The Shopify customer ID, once a Shopify customer account exists for this submission. Blank until then. |
| First Name, Last Name, Email | Taken from the form fields you mapped to these Shopify customer properties. See Integrate Registration Form with Shopify customer data. |
| Status | pending, approved, rejected, or deleted (the customer was deleted from Shopify, but the submission is still kept in the app). |
One column per form field
Section titled “One column per form field”Every other field on your form gets its own column, headed with the field’s label as it appears in the form editor. If you export customers from several forms at once, fields with the same label share a single column, and the cell is left blank for customers whose form doesn’t have that field.
Values are written as follows:
- Checkbox / multi-select — the chosen options, separated by commas (for example
Retail, Online). - File upload — the file name followed by its link, for example
business-license.pdf (https://…). Multiple files are separated by commas. - Date — exactly as the customer entered it on the form.
- Password fields, reCAPTCHA data, and other technical data are never exported.
- Export is available on every pricing plan, and staff accounts can use it too.
- There’s no limit on the number of customers in one export. A very large All … matching current filters export may take a few seconds to download.
- The form name isn’t included — only the Registration Form ID. To export one form at a time, use the Registration Form filter before exporting.
- If you rename a field after some customers have already submitted the form, the export uses the field’s current label, so old and new submissions stay in the same column.
- Column headers are always in English, whatever language the app is displayed in.
- To keep your spreadsheet safe from formula injection, values that start with
=,+,-, or@are prefixed with an apostrophe ('). Phone numbers and negative numbers are left as they are.
Need support?
Section titled “Need support?”If you do encounter any difficulty while proceeding these steps, don’t show any hesitation to contact us promptly via the email address [email protected].