
Customize Payment term button
Style the Pay Later button to match your theme, and edit or translate its text.
Design the button
Section titled “Design the button”-
Open Payment term settings
Section titled “Open Payment term settings”From the app, click Payment term > Setup payment term, then click Settings.
-
Enable the button
Section titled “Enable the button”Under Pay Later settings, enable Enable Pay Later button.
-
Choose its style
Section titled “Choose its style”Under Button style, tick Same style as checkout button to match your theme’s checkout button automatically.
To use different colors instead, untick it to reveal Background color button, Text color button, Border, and Font size settings.
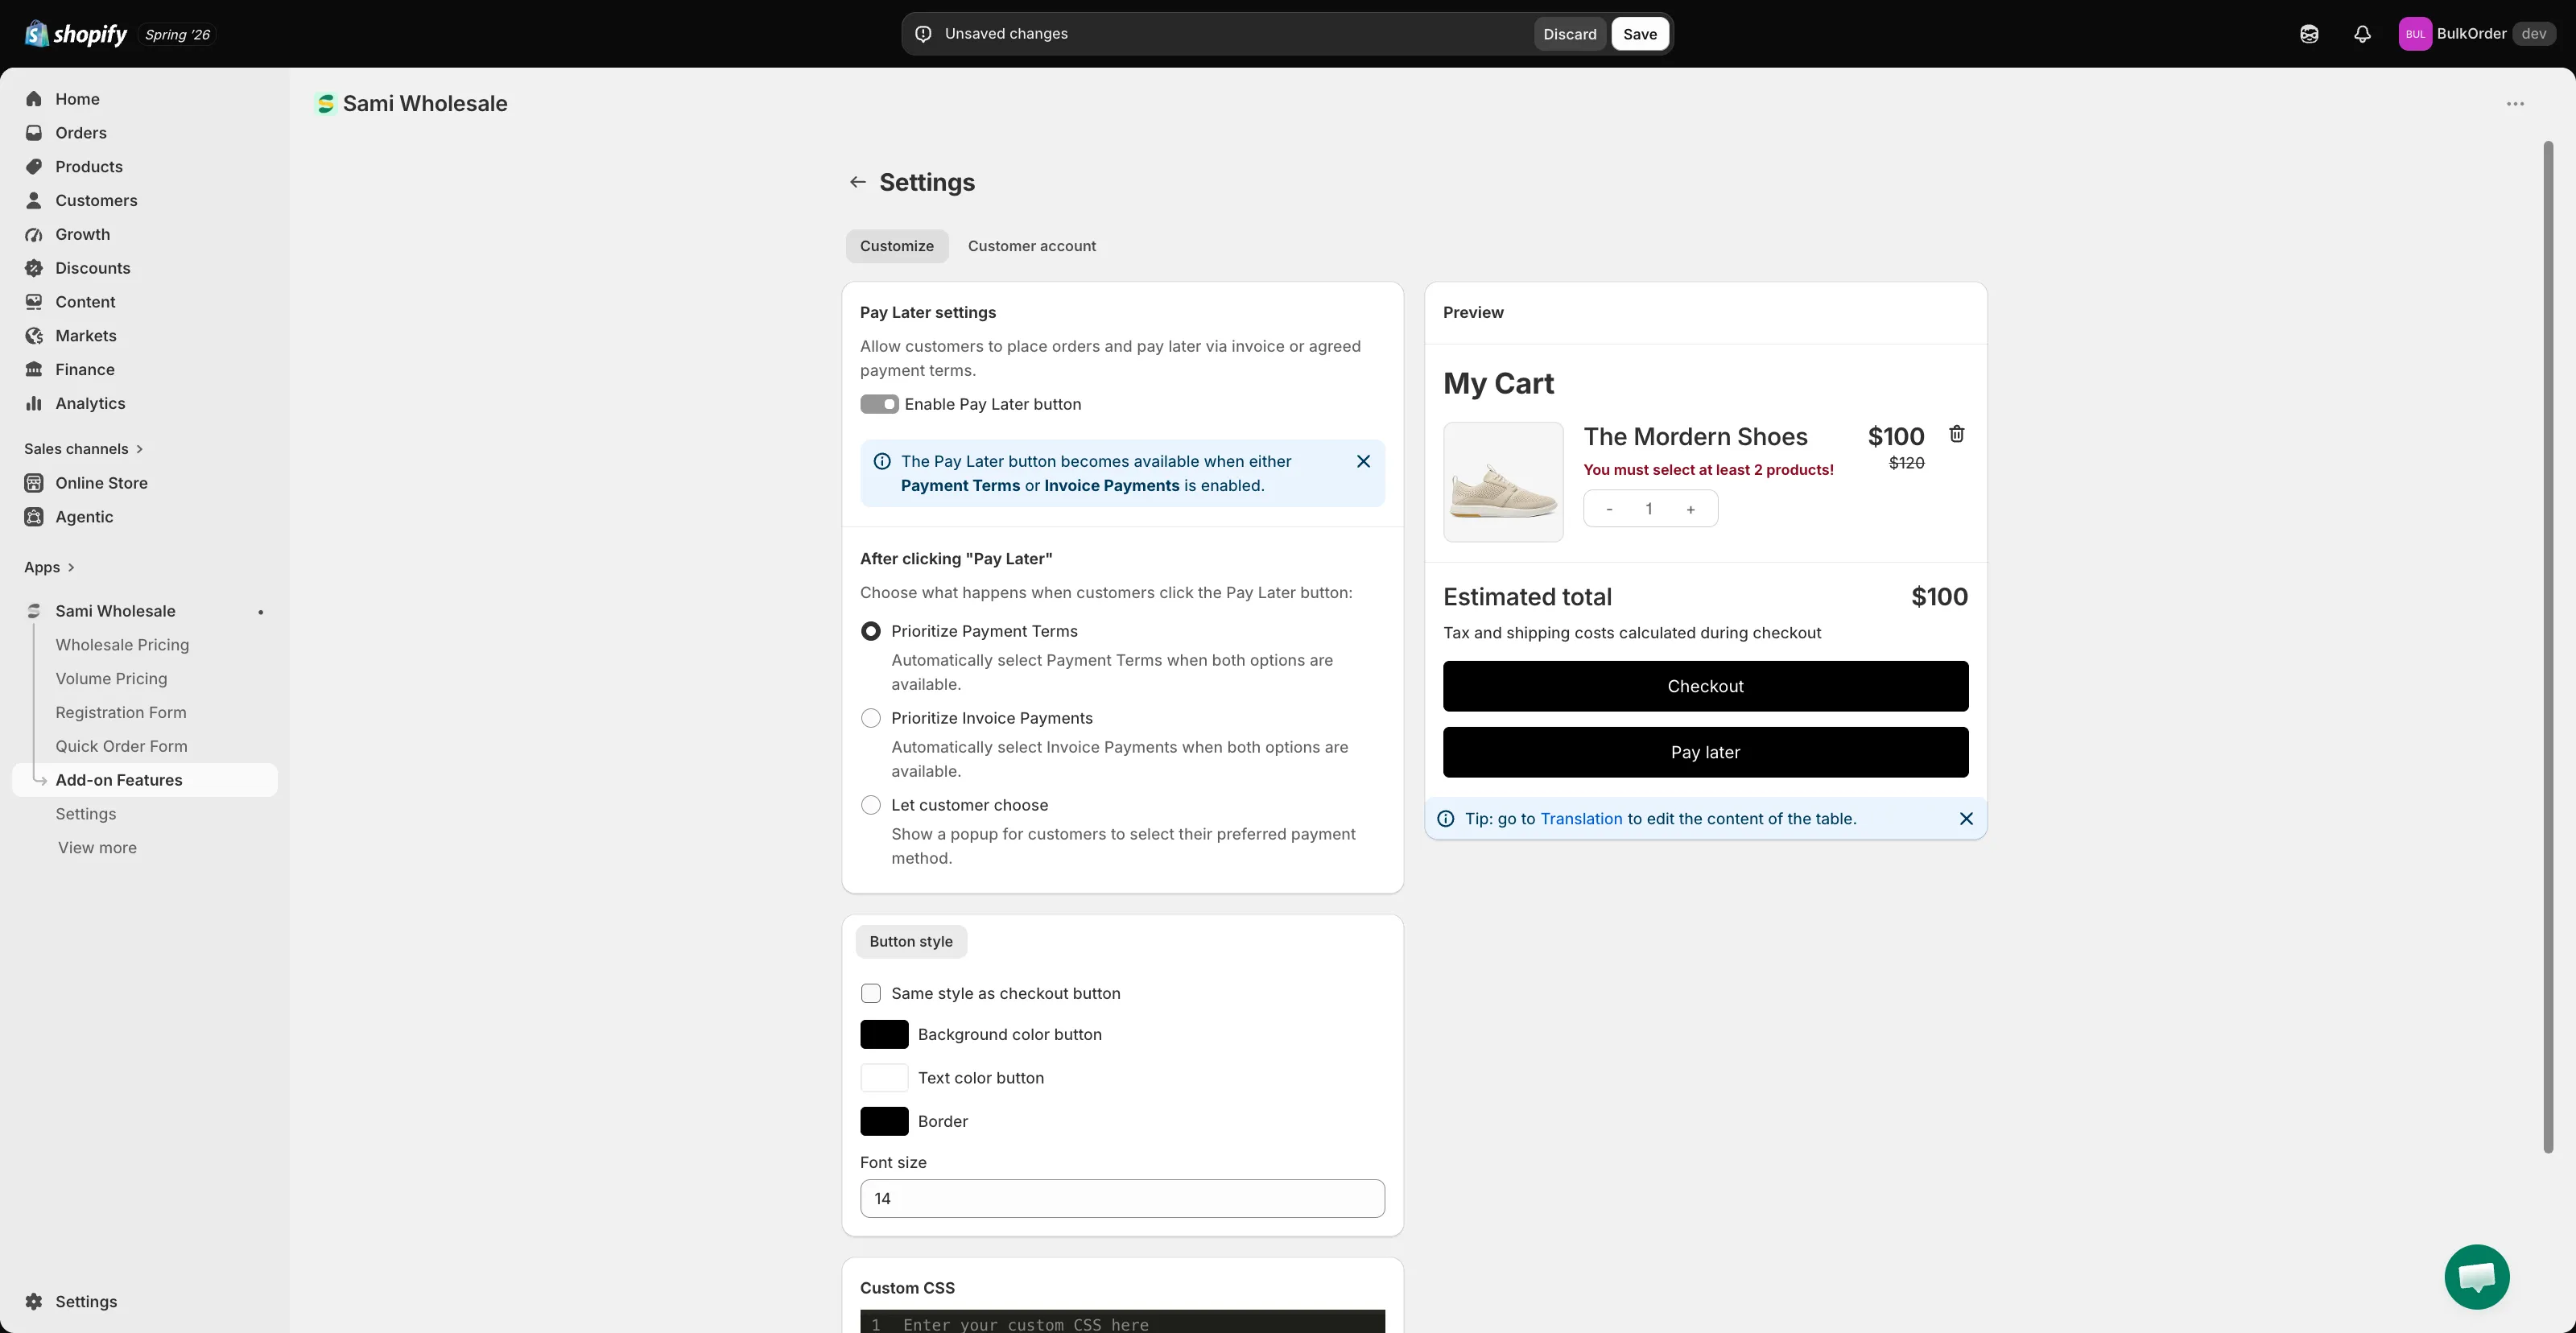
For further customization, use the Custom CSS box (developer zone). Check the Preview panel to see your changes live.
-
Click Save.
Edit the button text and add translations
Section titled “Edit the button text and add translations”You can also edit the button’s text and add translations in the app’s Translation setting.
Go to Settings > Translations, click the pencil icon next to a language, then choose Payment method from the list. This also covers the popup text shown when Let customer choose is selected.
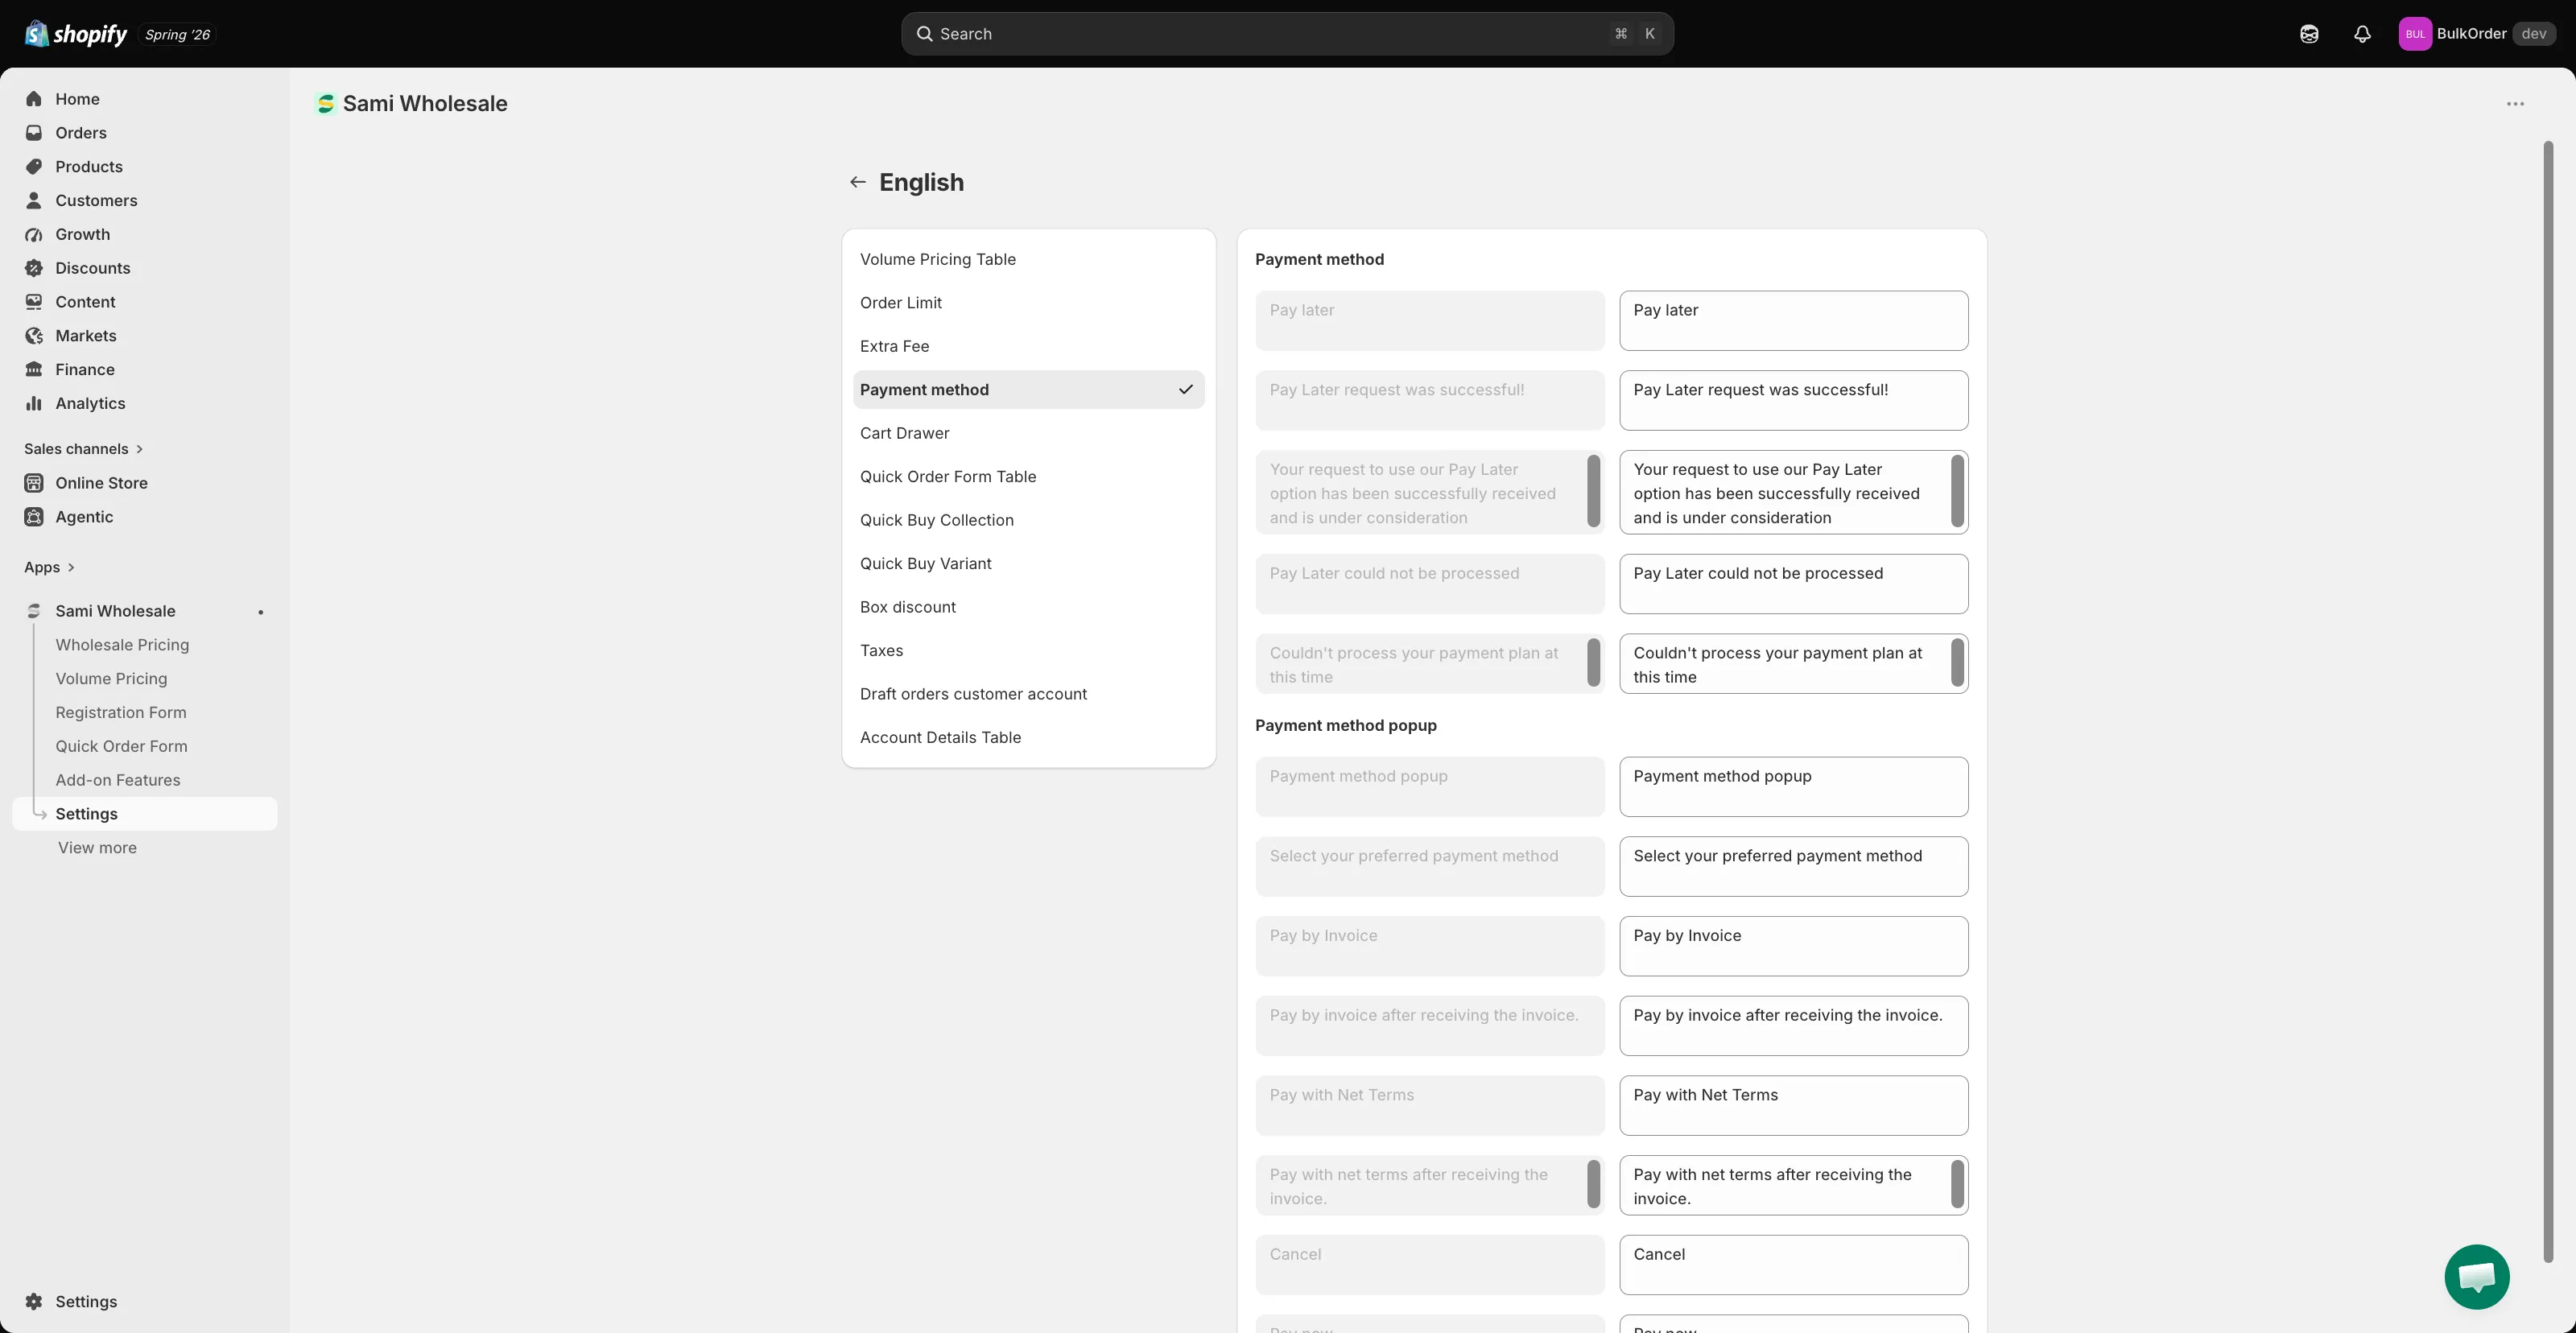
Click Save to keep your changes.
Need support?
Section titled “Need support?”If you do encounter any difficulty while proceeding these steps, don’t show any hesitation to contact us promptly via the email address [email protected].