
Create an offer
Start an offer from a template or from blank, name it, and save it.
이 콘텐츠는 아직 번역되지 않았습니다.
Every offer starts in the template gallery. You pick a starting point, adjust it in the offer editor, and save. This page walks through those steps; the settings themselves are covered in the offer editor pages and on each offer type page.
-
Open the template gallery
Section titled “Open the template gallery”In the app, go to Offers and click Create offer. If you have no offers yet, the button is in the middle of the page.
The Offer templates page opens. Its subtitle sums up how it works: Pick a starting point. Nothing is created until you save. Browsing and opening templates doesn’t change your store.
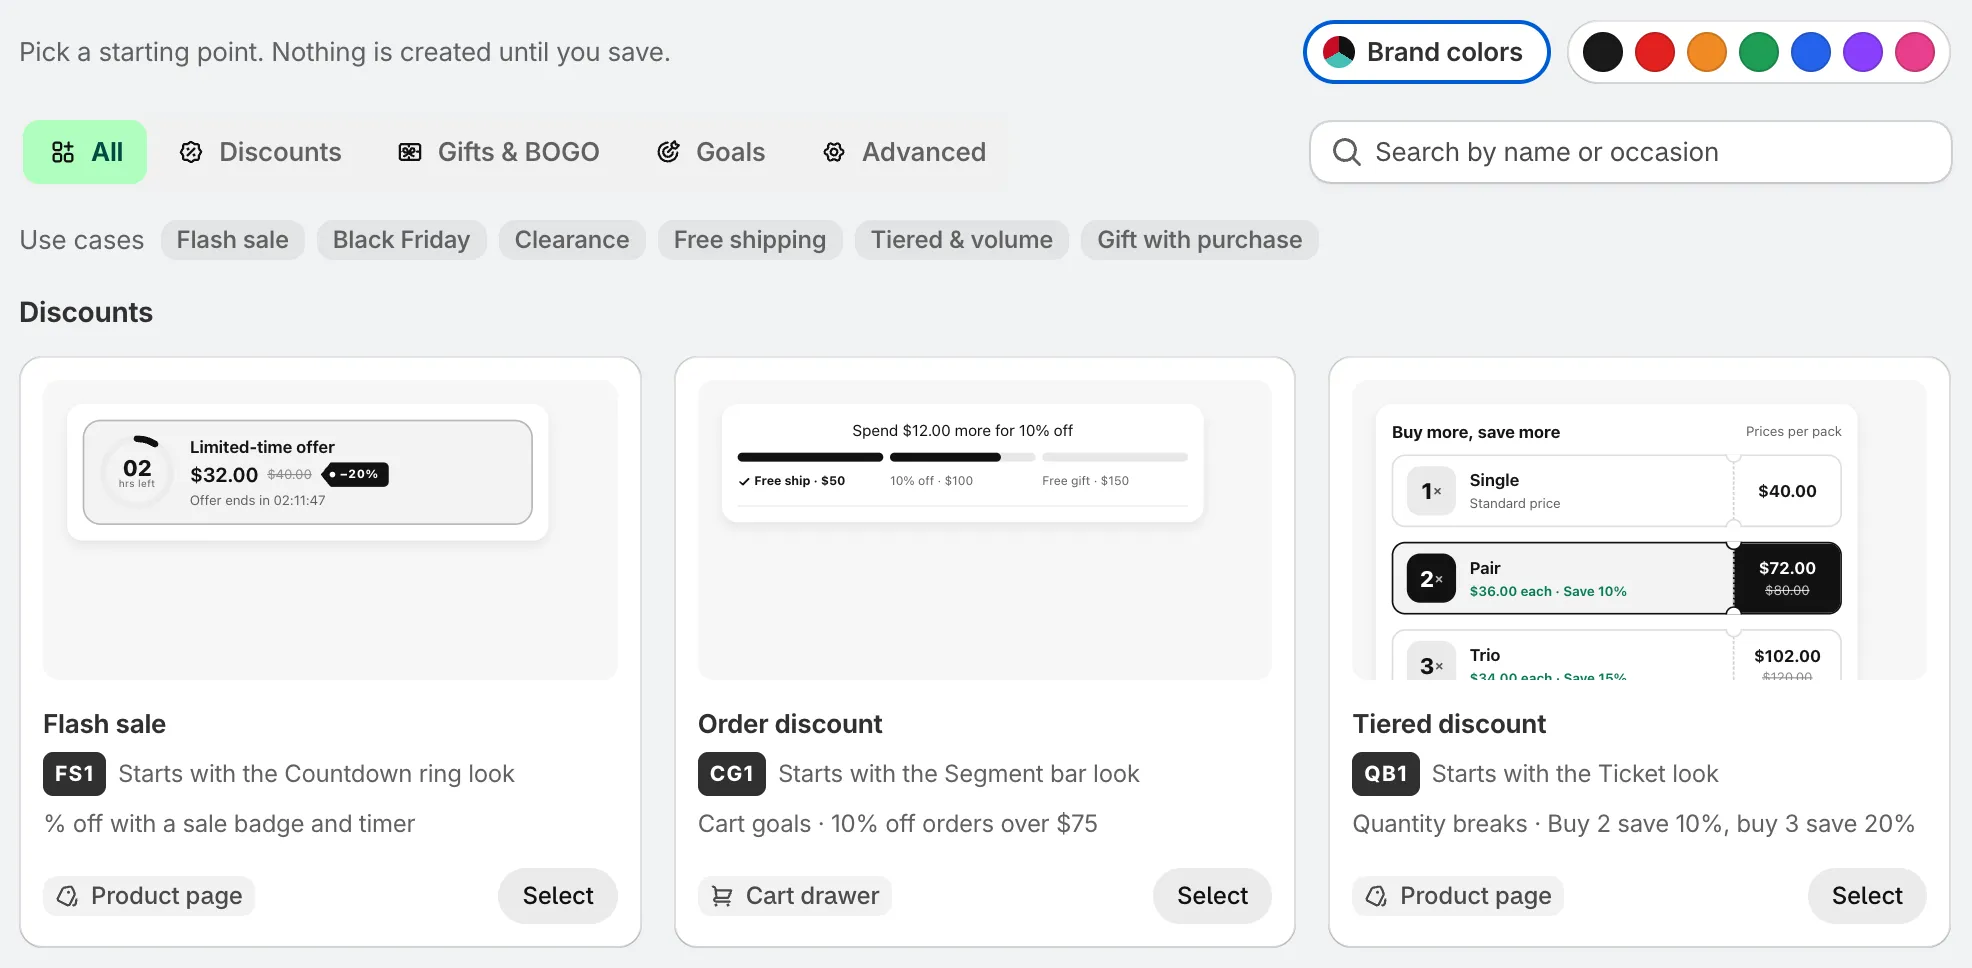
The template gallery.
-
Find a template
Section titled “Find a template”Narrow the gallery down in any of three ways:
- Category tabs — All, Discounts, Gifts & BOGO, Goals and Advanced.
- Search — type a name or an occasion, for example
black fridayorclearance. - Use cases — click a chip such as Flash sale, Black Friday, Clearance, Free shipping, Tiered & volume or Gift with purchase. Click it again to clear it.
Each card shows a preview, the template name, the look it starts with, and a short description such as “Buy 2 save 10%, buy 3 save 20%”. The badge at the bottom says where the offer shows: Product page or Cart drawer.
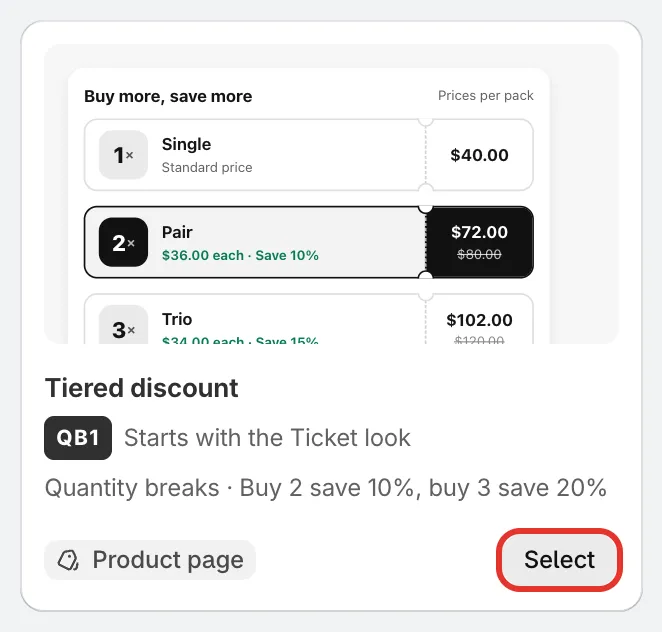
A template card: preview, description, where it shows, and Select.
-
Choose a preview color
Section titled “Choose a preview color”The colors at the top right change the previews, and the color you pick becomes the new offer’s accent color.
- Brand colors — uses your store’s own colors. Clicking it opens Brand your offers, which shows the colors the app read from your live theme. Change any of them, then click Use brand colors. Click Rescan brand colors to read your theme again.
- Black, Red, Orange, Green, Blue, Purple, Pink — a fixed color.
You can change every color later in the editor’s Design tab. To manage brand colors for all offers, see Brand colors.

Brand colors, or one of seven fixed colors, for the previews and the new offer.
-
Select a template
Section titled “Select a template”Click Select on the card you want. The offer editor opens full screen with the template already filled in: its rules, its look, and its name.
Nothing is saved yet. If you close the editor now, no offer is created.
-
Or start from blank
Section titled “Or start from blank”Each category ends with a dashed Start from blank card. Click it to pick the offer type yourself, then click Continue.
The window lists only the types in that category. For example, Discounts offers Flash sale, Order discount, Tiered discount, Cheapest item free, Free shipping and Complete the bundle.
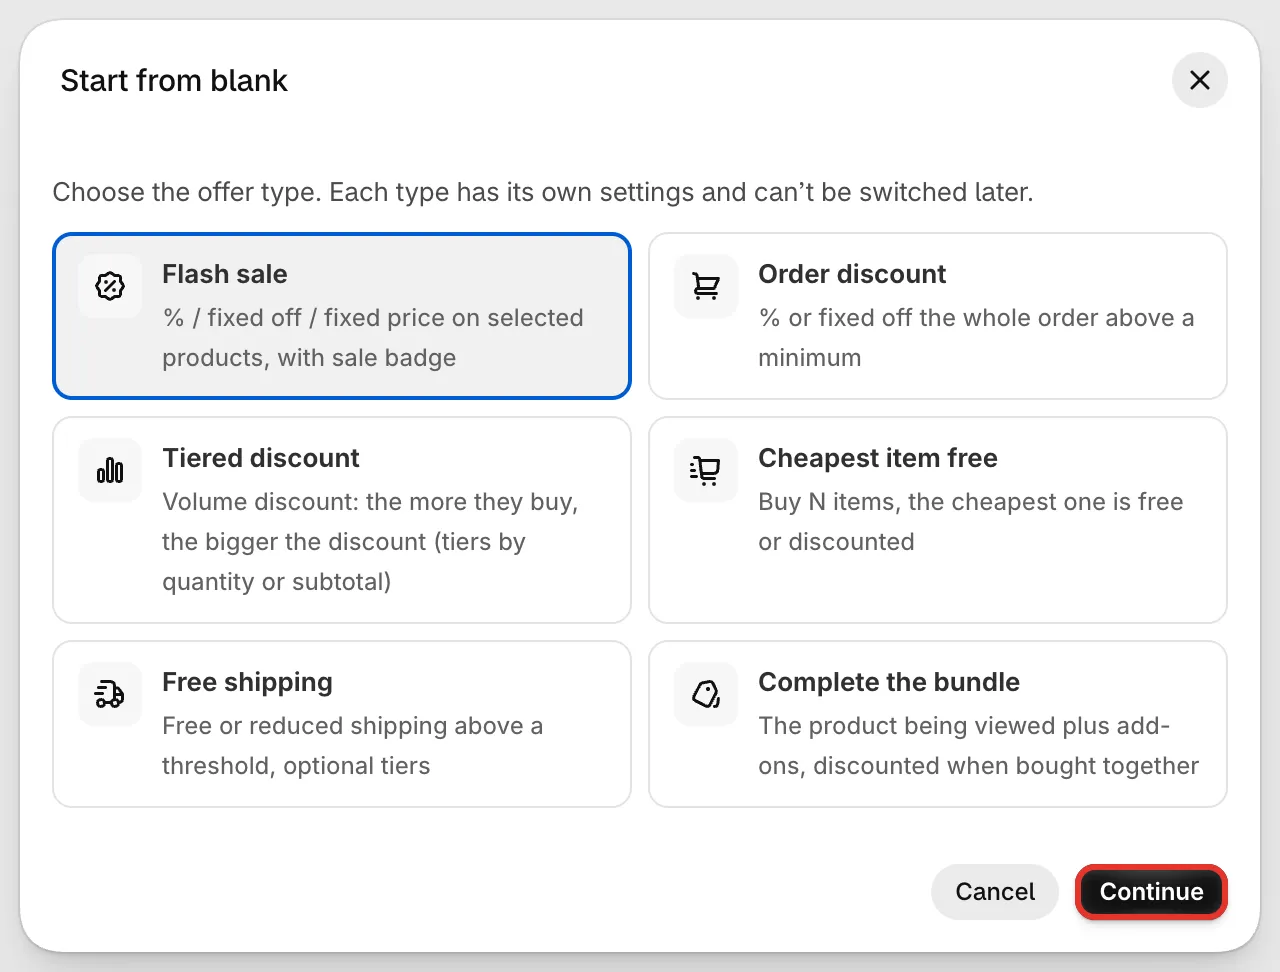
Start from blank: pick the offer type, then Continue.
-
Name the offer
Section titled “Name the offer”At the top left of the editor, the Internal name field holds the template name. Change it to something you’ll recognise, like “Summer sale 20% off”. It can be up to 50 characters.
Only you see the internal name. The name shoppers see in the cart and at checkout is the Discount name, under Settings › Advanced › Discount name and method. A new offer sets both to the template or type name, so change the discount name too. See Discount method.

The internal name is for you; shoppers see the discount name.
-
Set it up
Section titled “Set it up”Work through the editor’s left menu: Offer for the products and rules, Settings for dates and the discount, Design, Placement and Translation. The preview on the right updates as you go.
The offer editor overview explains each part.
-
Choose Active or Draft, then save
Section titled “Choose Active or Draft, then save”A new offer starts as Draft. Click Active next to the name if you want it on your store as soon as you save, or leave it on Draft to finish it later.
Click Save. The app saves the offer and shows Offer created. When the offer is Active, the app also creates its discount in Shopify. If anything needs fixing first, a Fix these before saving list appears instead; click an item to jump to the field.

Pick Active or Draft, then Save.
When you close the editor after saving, you land on the Offers list with your new offer in it.