
Create your first offer
Build a flash sale end to end, from the template to the sale price on your product page and the discount in the cart.
本頁內容尚未翻譯。
This walkthrough builds one complete offer: a flash sale that takes 20% off a few products until a set end date, with a timer on the product page. It touches every tab of the offer editor without the advanced options. When you’re done, you’ll see the sale price on your product page and the discount in the cart.
Make sure you’ve turned on the app embed first, or the offer won’t show on your storefront.
-
Open the offer templates
Section titled “Open the offer templates”In the app’s menu, click Offers, then Create offer. The Offer templates page opens, with the templates grouped by Discounts, Gifts & BOGO, Goals and Advanced.
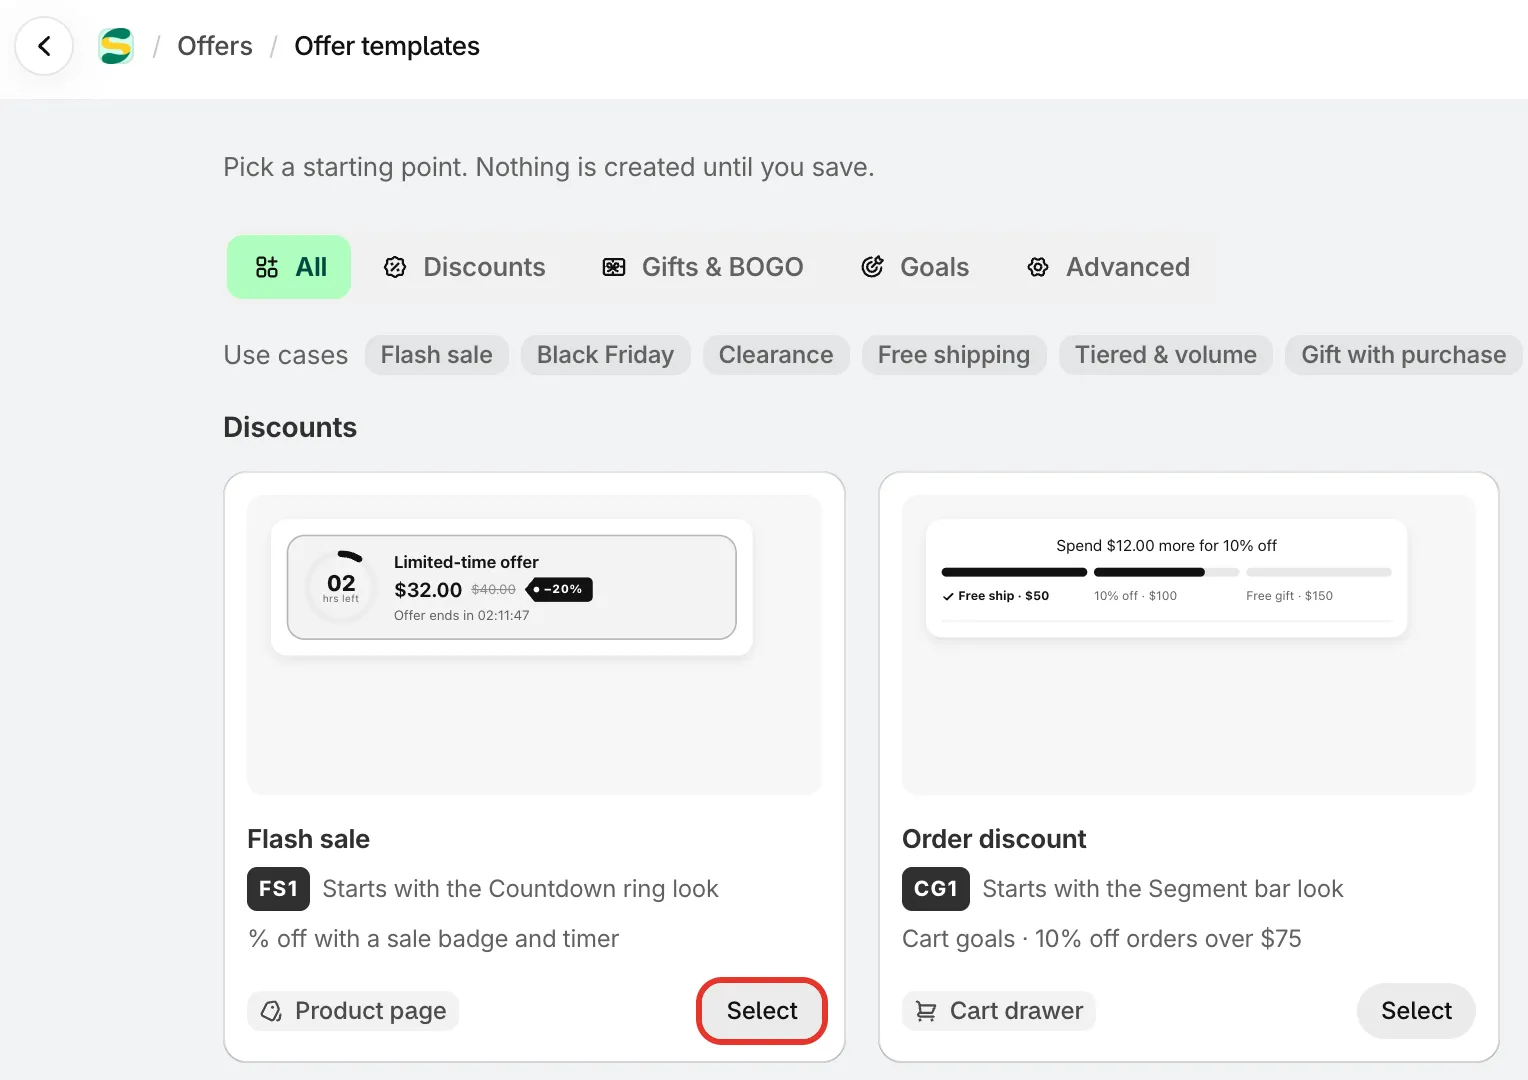
Every offer starts from a template. Nothing is created until you save.
-
Pick the Flash sale template
Section titled “Pick the Flash sale template”Find Flash sale (“% off with a sale badge and timer”) and click Select. The offer editor opens full screen, already filled in from the template, with a live preview of your store on the right.
The editor has five tabs on the left: Offer, Settings, Design, Placement and Translation. The next steps go through them in order.
-
Name the offer
Section titled “Name the offer”At the top left, replace the name with something you’ll recognise, like “Summer sale 20% off”. This Internal name is only for you.
Shoppers see the Discount name instead, in the cart and at checkout. It starts as “Flash sale”. You can change it under Settings › Advanced › Discount name and method.
-
Choose the products
Section titled “Choose the products”On the Offer tab, the Products section says what the offer applies to. A new flash sale starts on All products, so every product in your store would be on sale.
To limit it, click Change and pick Specific products, Collections or Product tags. For specific products, click Add products and choose them in the Shopify picker. You can also leave some products out with Exclude products, Exclude collections or Exclude tags.
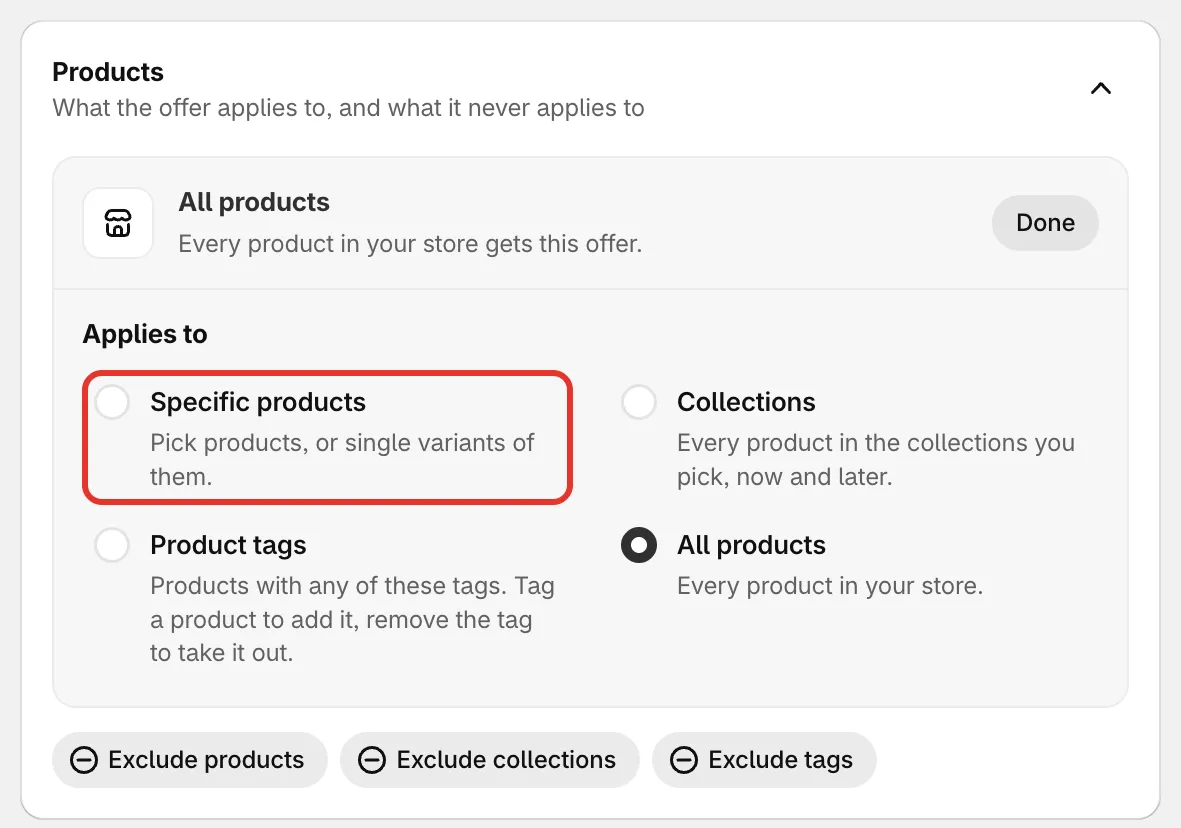
Choose which products get the flash sale.
-
Set the discount
Section titled “Set the discount”Below, in Rules, leave Discount on Percentage off and Percentage at
20, or type your own number. Keep Show compare-at price ticked, so shoppers see the old price crossed out next to the sale price.You can also pick Fixed amount off or Fixed price. See Flash sale.
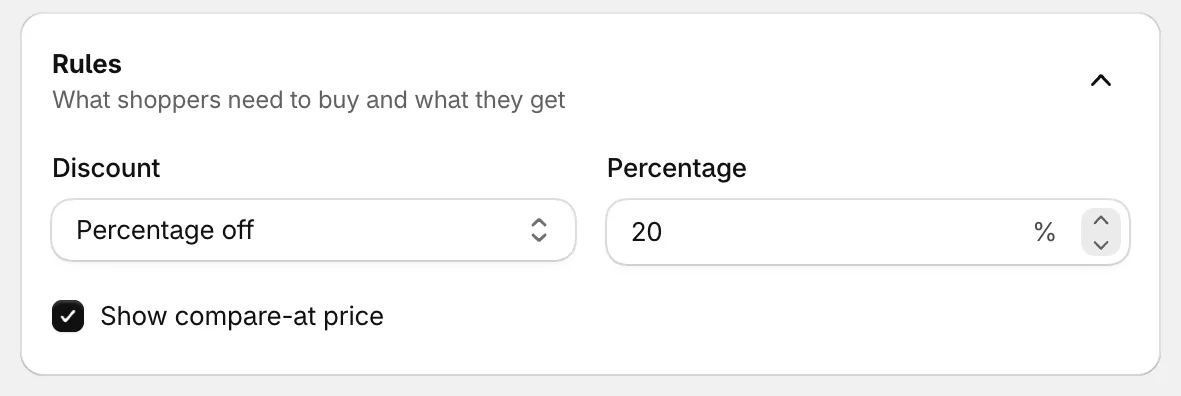
20% off each product in the offer.
-
Set the dates
Section titled “Set the dates”Open the Settings tab. Under Active dates, a new offer is Always on: it runs from the moment you turn it on until you turn it off. A flash sale needs an end, so click Add a schedule.
- Start date and Start time start at the next full hour. To start the sale as soon as you save, set them to now.
- Tick Set an end date, then set End date and End time to when the sale finishes.
Times are in your store’s time zone, shown under the fields. Leave Timer mode on Fixed dates, so every shopper sees the same end time and the timer counts down to your end date.
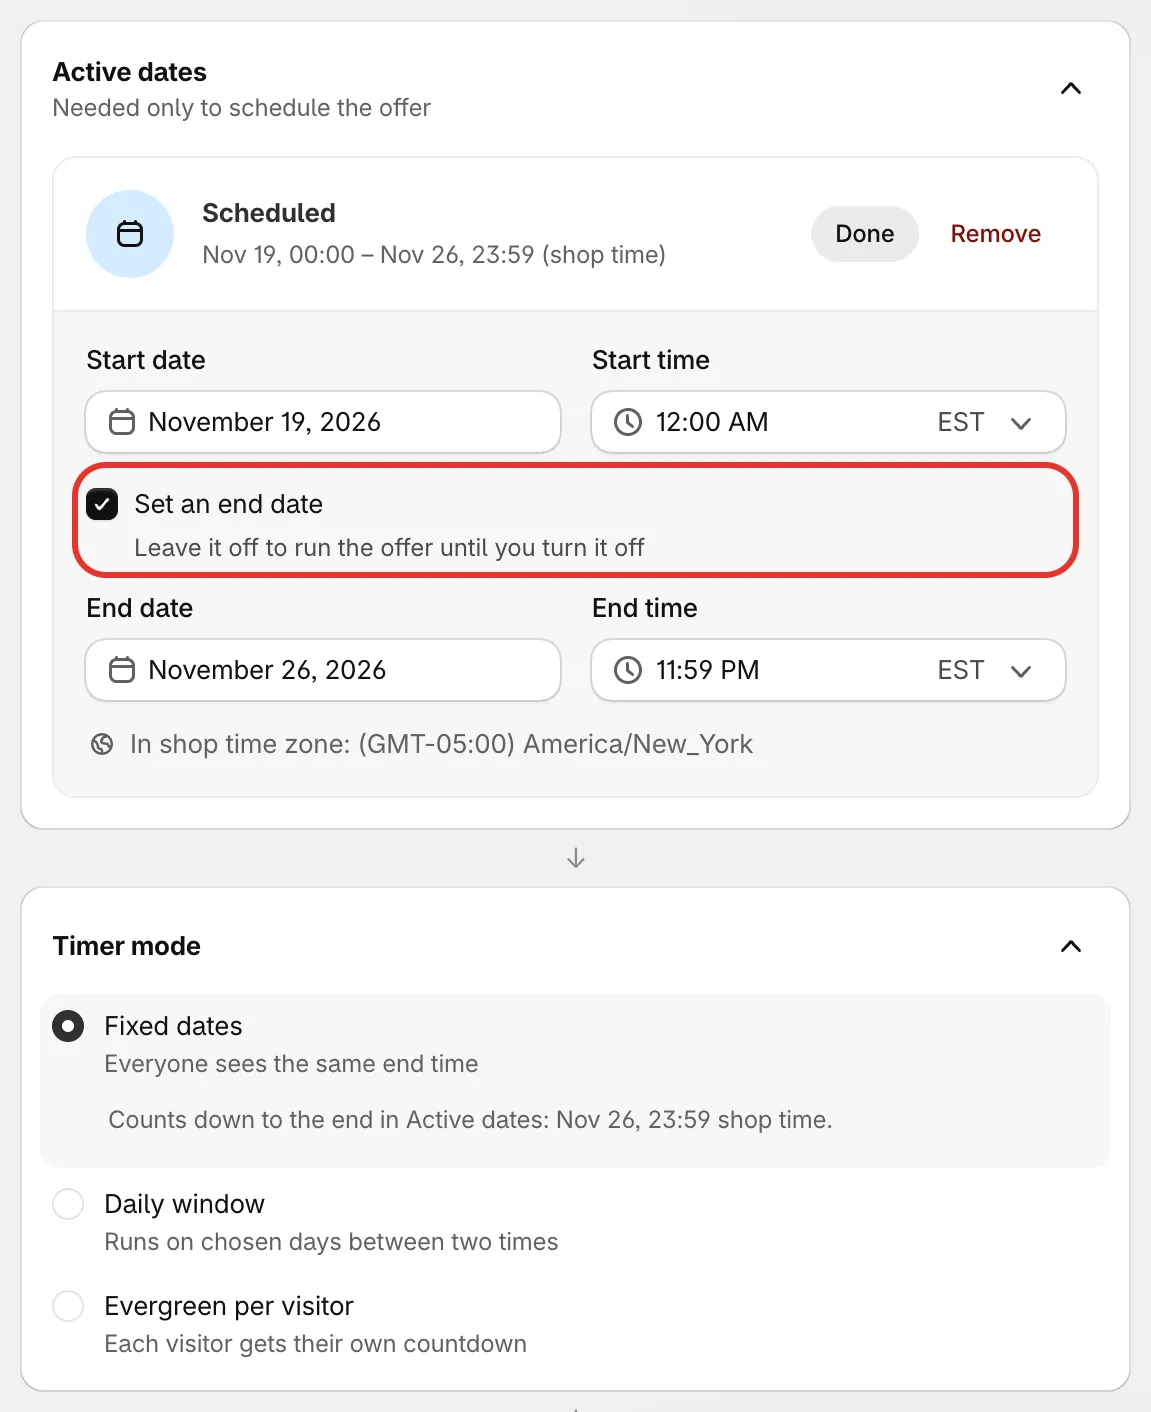
The end date is what the flash sale timer counts down to.
-
Check the design (optional)
Section titled “Check the design (optional)”The Design tab sets how the offer looks on your store: its look, colors, fonts and the parts of the offer block, like the timer. Click Brand colors to use your theme’s colors. The template’s design works as it is, so you can skip this for now. See Design and looks.
-
Choose where it shows
Section titled “Choose where it shows”Open the Placement tab. Where it shows lists the spots a flash sale can use, each with a switch:
Place What shoppers see On by default Product page offer block The offer block with the timer on the product page Yes Collection page badge A sale badge on product cards in collections and search No Cart line labels A label under each discounted line in the cart Yes Discounted price on product page The sale price next to the product price Yes Turn on Collection page badge if you want the sale to stand out on collection pages too. Customize on each row changes where and how that spot looks. See Placement.
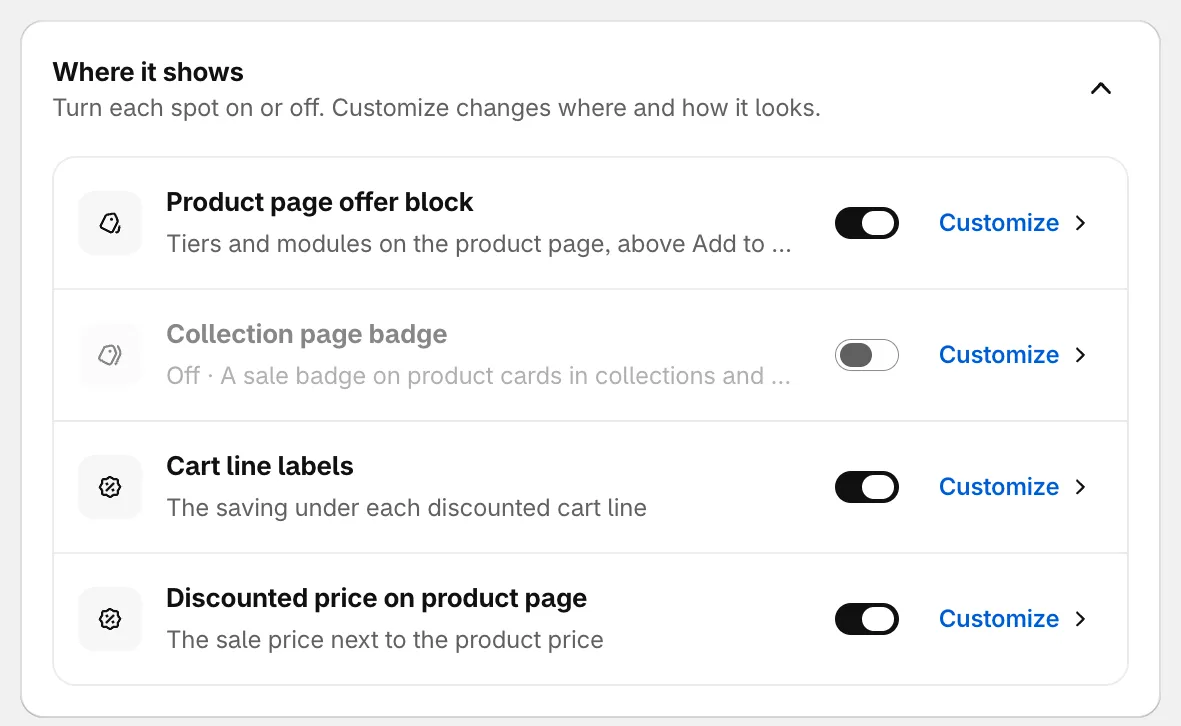
Switch each spot on or off.
-
Turn it on and save
Section titled “Turn it on and save”A new offer starts as a Draft, which never shows on your store. At the top of the editor, next to the name, click Active. Then click Save.

Set the offer to Active, then save.
If something is missing, a Fix these before saving list appears. Click a line to jump to the field. When the save goes through, the app creates the Shopify discount for the offer. If you set a start time in the future, the offer shows as Scheduled until then.
-
Check the product page
Section titled “Check the product page”Click View in store at the top of the editor. Your store opens in a new tab, on the first product you picked for the offer. You should see:
- the sale price, with the old price crossed out and the saving, such as Save 20%,
- the offer block, with the timer counting down to your end date.
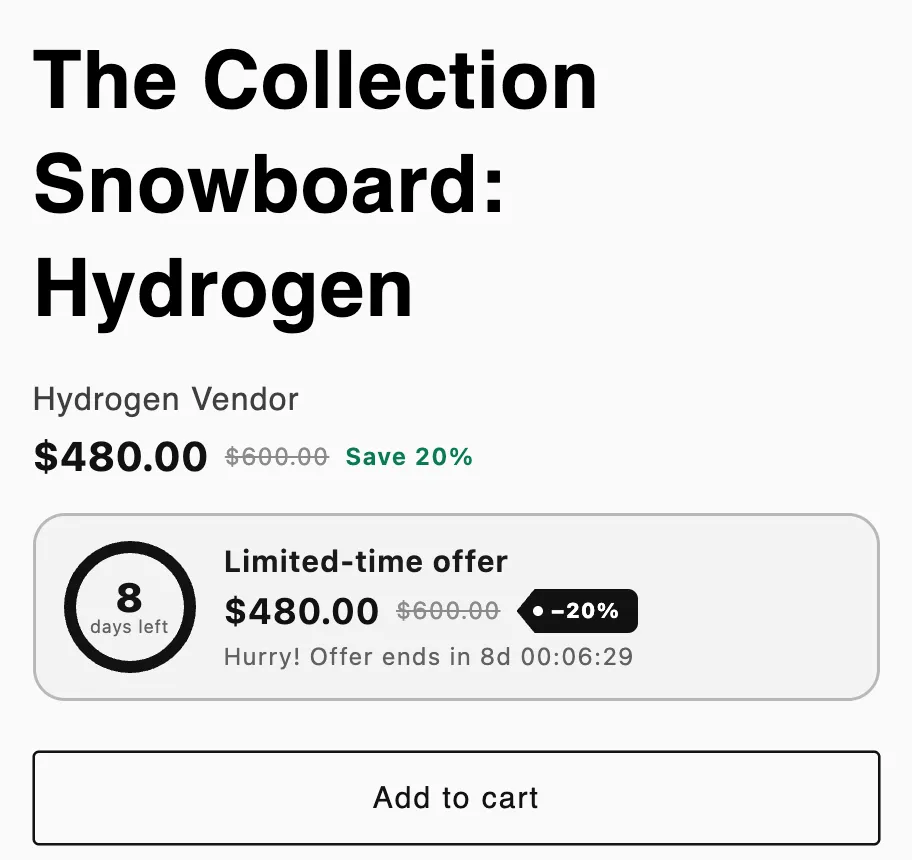
The flash sale on a product page.
-
Check the cart
Section titled “Check the cart”Add the product to the cart and open the cart. The line shows the discounted price and a label that the offer is applied, such as Flash sale applied. At checkout, Shopify lists the discount under its Discount name.
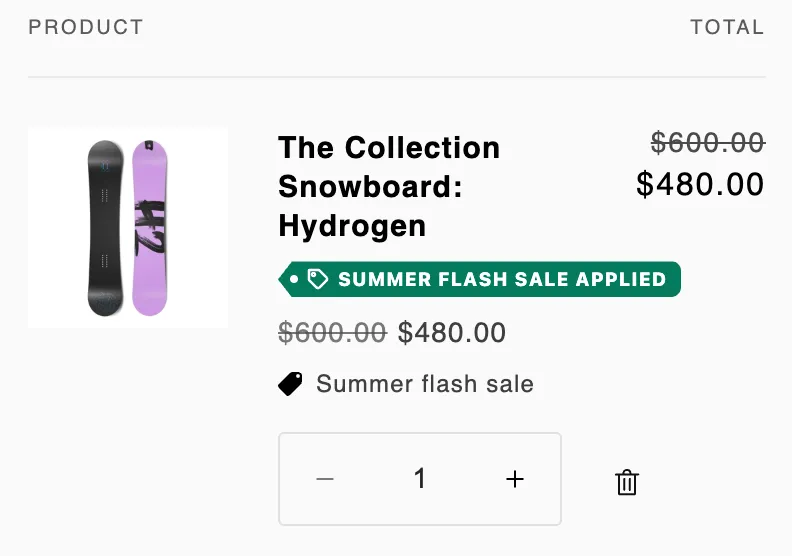
The discount is applied in the cart.