> For the complete documentation index, see [llms.txt](https://docs.samita.io/llms.txt). Markdown versions of documentation pages are available by appending `.md` to page URLs; this page is available as [Markdown](https://docs.samita.io/sami-b2b-onboarding/add-a-form-to-your-store/use-the-form-page.md).

# Use the form page the app creates

Find the page the app makes for your form, add it to your store's menu and check it on the storefront.

For each application form, Sami B2B Onboarding makes a page on your online store that holds the form. It's the quickest way to take applications: copy the page's link, add it to your store's menu, and buyers can apply.

{% hint style="info" %}
Before you start: the app embed must be on, or the page shows no form. See [Turn on the app embed](/sami-b2b-onboarding/getting-started/turn-on-the-app-embed.md).
{% endhint %}

## The page the app makes

* **When.** The **Wholesale application** form the app creates at install gets its page when you install the app. A form you create gets its page the first time you save it.
* **Where.** The page is listed in **Online Store › Pages**, with the form's name as its title. Its address is `/pages/` followed by a handle made from the form's name, for example `/pages/wholesale-application`. A form you create gets a short code at the end of its handle, for example `/pages/reseller-application-x7k2`.
* **An existing page.** If your store already has a page at that address, the app uses it rather than making a second one. It adds the form only if the page is empty, and otherwise leaves the content as it is. In that case the page has no form until you add one: paste the form's embed code into the page, as described in [Paste the embed code](/sami-b2b-onboarding/add-a-form-to-your-store/embed-code.md).
* **Visible or hidden.** The page is visible on your store while the form is published (**Active** in **Forms**), and hidden while it's a **Draft**.

The handle can differ from what you expect, so always copy the link from **Forms** rather than typing it.

<figure><img src="https://3844812229-files.gitbook.io/~/files/v0/b/gitbook-x-prod.appspot.com/o/spaces%2FRrf4pQPgjvb3GW7IN3Ci%2Fuploads%2Fgit-blob-a1f871ccd9ea3d575af050d2622d656d7eda5b34%2Fscreenshot-shopify-pages-wholesale-application.png?alt=media" alt="Shopify&#x27;s Pages list with a visible page named Wholesale application above the store&#x27;s Your Privacy Choices and Contact pages."><figcaption><p>The app's page for each form is a normal Online Store page, titled with the form's name.</p></figcaption></figure>

## Copy the page's link

{% stepper %}
{% step %}

### Find the form

In the app, go to **Forms**. Under **Application forms**, each row shows the form's number of steps and fields, then its page address, for example `/pages/wholesale-application`.
{% endstep %}

{% step %}

### Copy the link

Click **Copy link** beside the address. A **Link copied** message appears, and the page's full address is ready to paste.
{% endstep %}
{% endstepper %}

The same link is in the builder: open the form, click **…** (More actions) in the toolbar and choose **Copy public link**.

## Add the page to your store's menu

{% stepper %}
{% step %}

### Open your menus

In your Shopify admin, go to **Online Store › Navigation** (newer admins call it **Content › Menus**) and click the menu you want, for example **Main menu**.
{% endstep %}

{% step %}

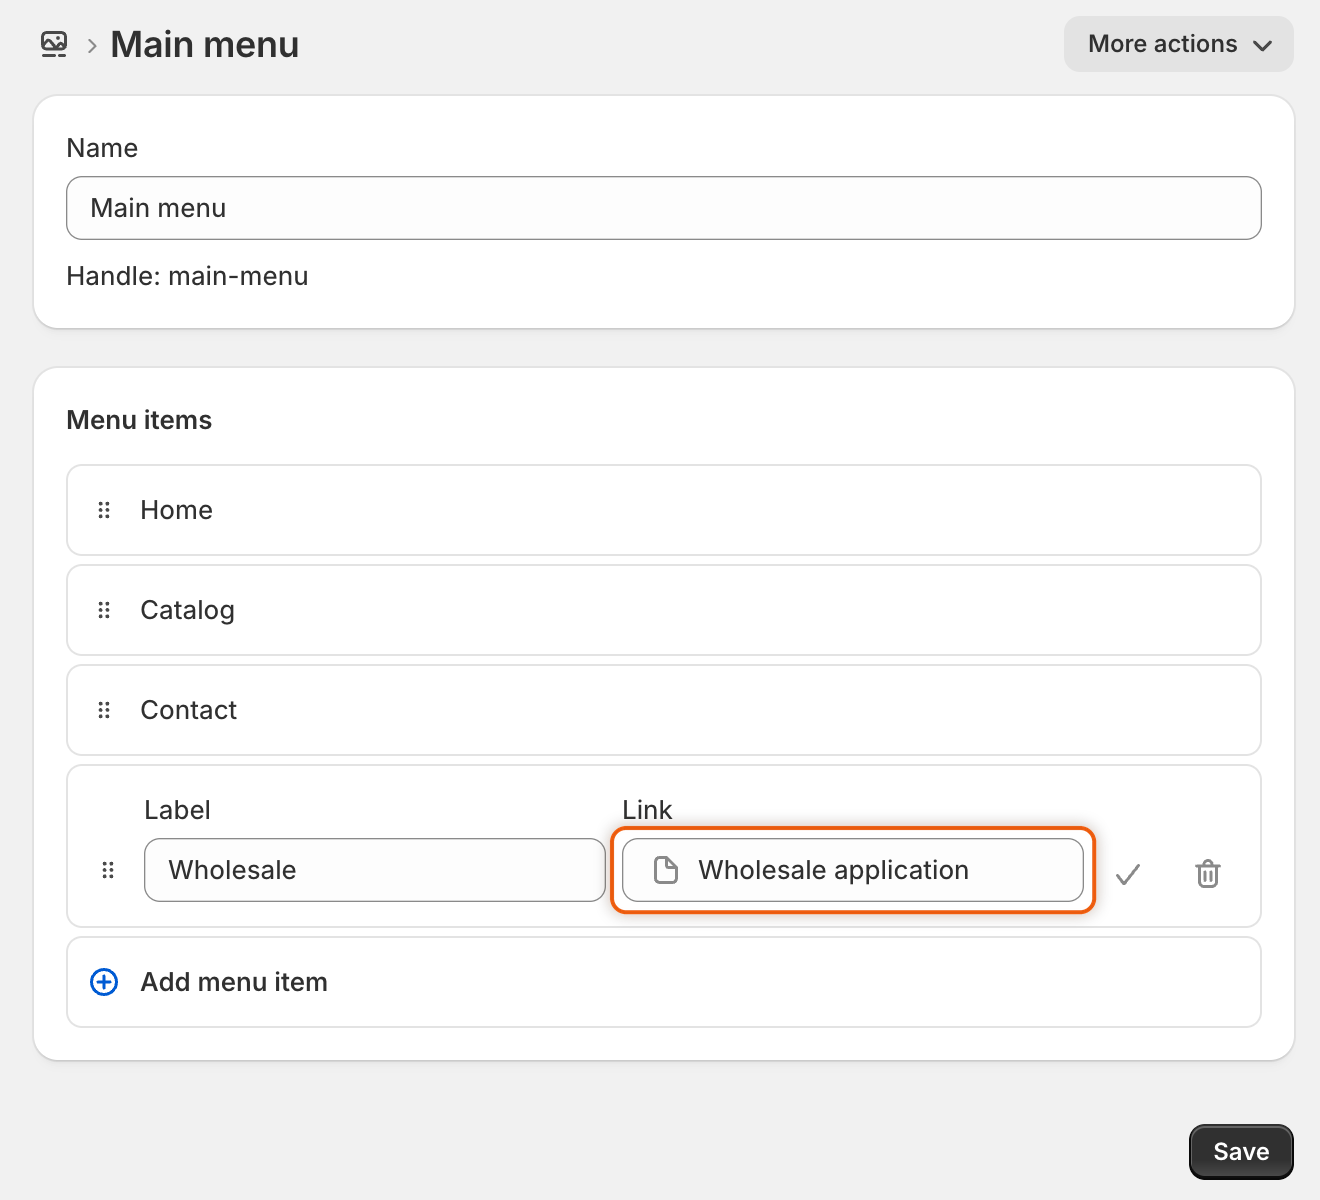
### Add a menu item

Under **Menu items**, click **Add menu item**. A new row opens in the list. In **Label**, type the words buyers will see, for example `Wholesale`.
{% endstep %}

{% step %}

### Link it to the form's page

Click **Link**, choose **Pages**, then pick the page with your form's name, for example **Wholesale application**. You can also paste the link you copied from **Forms**.

<figure><img src="https://3844812229-files.gitbook.io/~/files/v0/b/gitbook-x-prod.appspot.com/o/spaces%2FRrf4pQPgjvb3GW7IN3Ci%2Fuploads%2Fgit-blob-0fbe652dd501739c7e47dbe92f98d882c9d347f7%2Fscreenshot-shopify-navigation-add-form-page.png?alt=media" alt="Shopify&#x27;s Main menu editor with Home, Catalog and Contact, plus a new menu item labeled Wholesale whose Link is the Wholesale application page."><figcaption><p>Link the menu item to the page that has your form's name.</p></figcaption></figure>
{% endstep %}

{% step %}

### Save the menu

Click the check mark beside the new item, then click **Save**.
{% endstep %}
{% endstepper %}

## Check it on your store

{% stepper %}
{% step %}

### Open your store as a guest

Open your store in a private browser window, so you see it as a buyer who isn't signed in. A signed-in customer who has already applied sees a message about their application instead of the form.
{% endstep %}

{% step %}

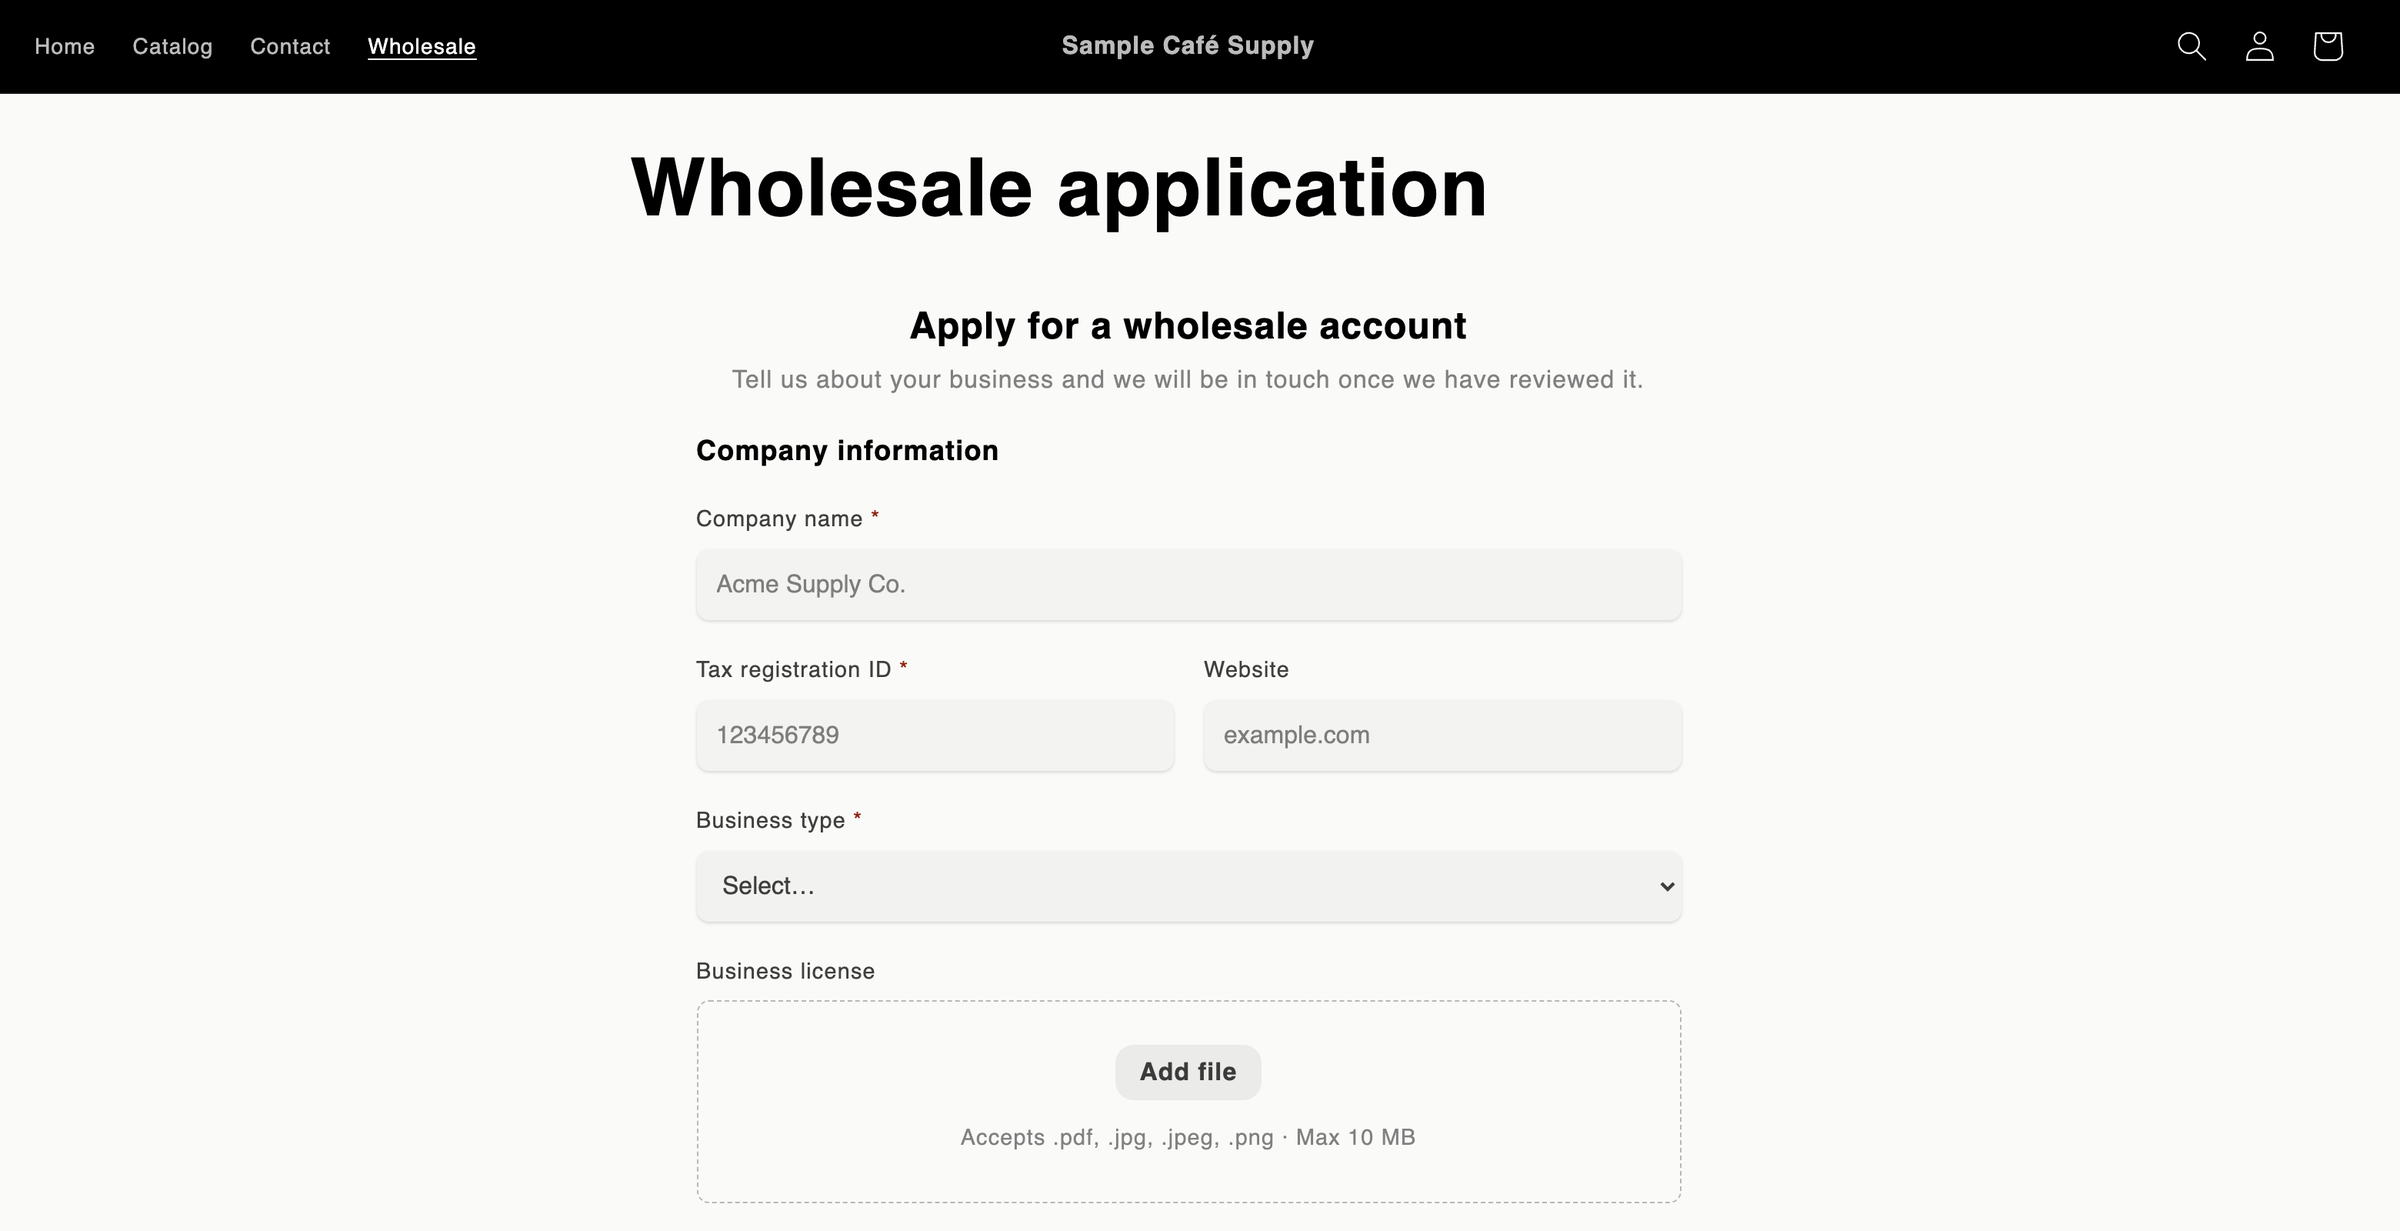
### Open the page

Click the new **Wholesale** item in your menu. The page opens with your form on it. While the form loads, a light outline of it shows in its place.

<figure><img src="https://3844812229-files.gitbook.io/~/files/v0/b/gitbook-x-prod.appspot.com/o/spaces%2FRrf4pQPgjvb3GW7IN3Ci%2Fuploads%2Fgit-blob-1e6a95d8dcd4296d36b11ff051b80c1fb1b853dc%2Fscreenshot-storefront-form-page-from-menu.png?alt=media" alt="The store&#x27;s header with Wholesale after Home, Catalog and Contact in the main menu, and the Wholesale application page open below it showing the Apply for a wholesale account form."><figcaption><p>Wholesale, the new last item in your main menu, opens the page the app created with your form on it.</p></figcaption></figure>
{% endstep %}
{% endstepper %}

If something is wrong:

* **Your store's "page not found" page opens.** The form is a **Draft**, so its page is hidden. Go to **Forms**, click **…** (More actions) on its row and choose **Publish**.
* **The page shows no form at all.** Check that the app embed is on.
* **The page reads This form is not available right now.** Make sure the form is **Active** in **Forms**, then reload the page.

## When you change the form

| You                        | What happens to the page                                                                                                                   |
| -------------------------- | ------------------------------------------------------------------------------------------------------------------------------------------ |
| Rename the form and save   | The page's title changes to the new name. Its address stays the same, so your menu item and shared links keep working.                     |
| Unpublish the form         | The page is hidden. Anyone who opens its link gets your store's "page not found" page.                                                     |
| Publish it again           | The page is visible again, at the same address.                                                                                            |
| Delete the form            | The page is hidden, not deleted, so anything you wrote on it is kept. Delete it yourself in **Online Store › Pages** if you don't need it. |
| Delete the page in Shopify | The app makes a new page at the same address the next time you rename, publish or unpublish the form.                                      |

{% hint style="warning" %}
Change the page's title through the form's name. If you change the page's title or address in **Online Store › Pages**, the app sets them back to match the form the next time you rename, publish or unpublish it.
{% endhint %}

If you lock your store, the pages of all published forms stay open to visitors, and the lock's link to apply goes to your default form's page. See [Lock the store](/sami-b2b-onboarding/store-access/lock-the-store.md).

## Next steps

* [Add the form block in the theme editor](/sami-b2b-onboarding/add-a-form-to-your-store/theme-editor-block.md) — show the form inside a page you design, between other sections.
* [Paste the embed code](/sami-b2b-onboarding/add-a-form-to-your-store/embed-code.md) — put the form in a page builder or a custom section.
* [Lock the store](/sami-b2b-onboarding/store-access/lock-the-store.md) — keep the store private while the form stays open.


---

# Agent Instructions
This documentation is published with GitBook. GitBook is the documentation platform designed so that both humans and AI agents can read, navigate, and reason over technical content effectively. Learn more at gitbook.com.

## Querying This Documentation
If you need additional information that is not directly available in this page, you can query the documentation dynamically by asking a question.

Perform an HTTP GET request on the current page URL with the `ask` query parameter, and the optional `goal` query parameter:

```
GET https://docs.samita.io/sami-b2b-onboarding/add-a-form-to-your-store/use-the-form-page.md?ask=<question>&goal=<endgoal>
```

`ask` is the immediate question: it should be specific, self-contained, and written in natural language.
`goal` is optional and describes the broader end goal you are ultimately trying to accomplish on behalf of the user. GitBook uses it to tailor the answer towards what is most useful for that goal.

The response will contain a direct answer to the question and relevant excerpts and sources from the documentation.

Use this mechanism when the answer is not explicitly present in the current page, you need clarification or additional context, or you want to retrieve related documentation sections.