> For the complete documentation index, see [llms.txt](https://docs.samita.io/llms.txt). Markdown versions of documentation pages are available by appending `.md` to page URLs; this page is available as [Markdown](https://docs.samita.io/sami-b2b-onboarding/reviewing-applications/decide-several-at-once.md).

# Decide several applications at once

Approve or reject a batch of applications from the list, retry the ones that are refused, and export applications to CSV.

When several applications need the same decision, tick them in the list and decide them together. Sami B2B Onboarding sends each one in turn and tells you which ones didn't go through, and why.

## Select applications

{% stepper %}
{% step %}

### Open the list

In the Shopify admin, open **Sami B2B Onboarding** and click **Companies** in the app menu. The **Applications** tab opens. Pick a view, search or filter to narrow the list first if you like.
{% endstep %}

{% step %}

### Tick the rows

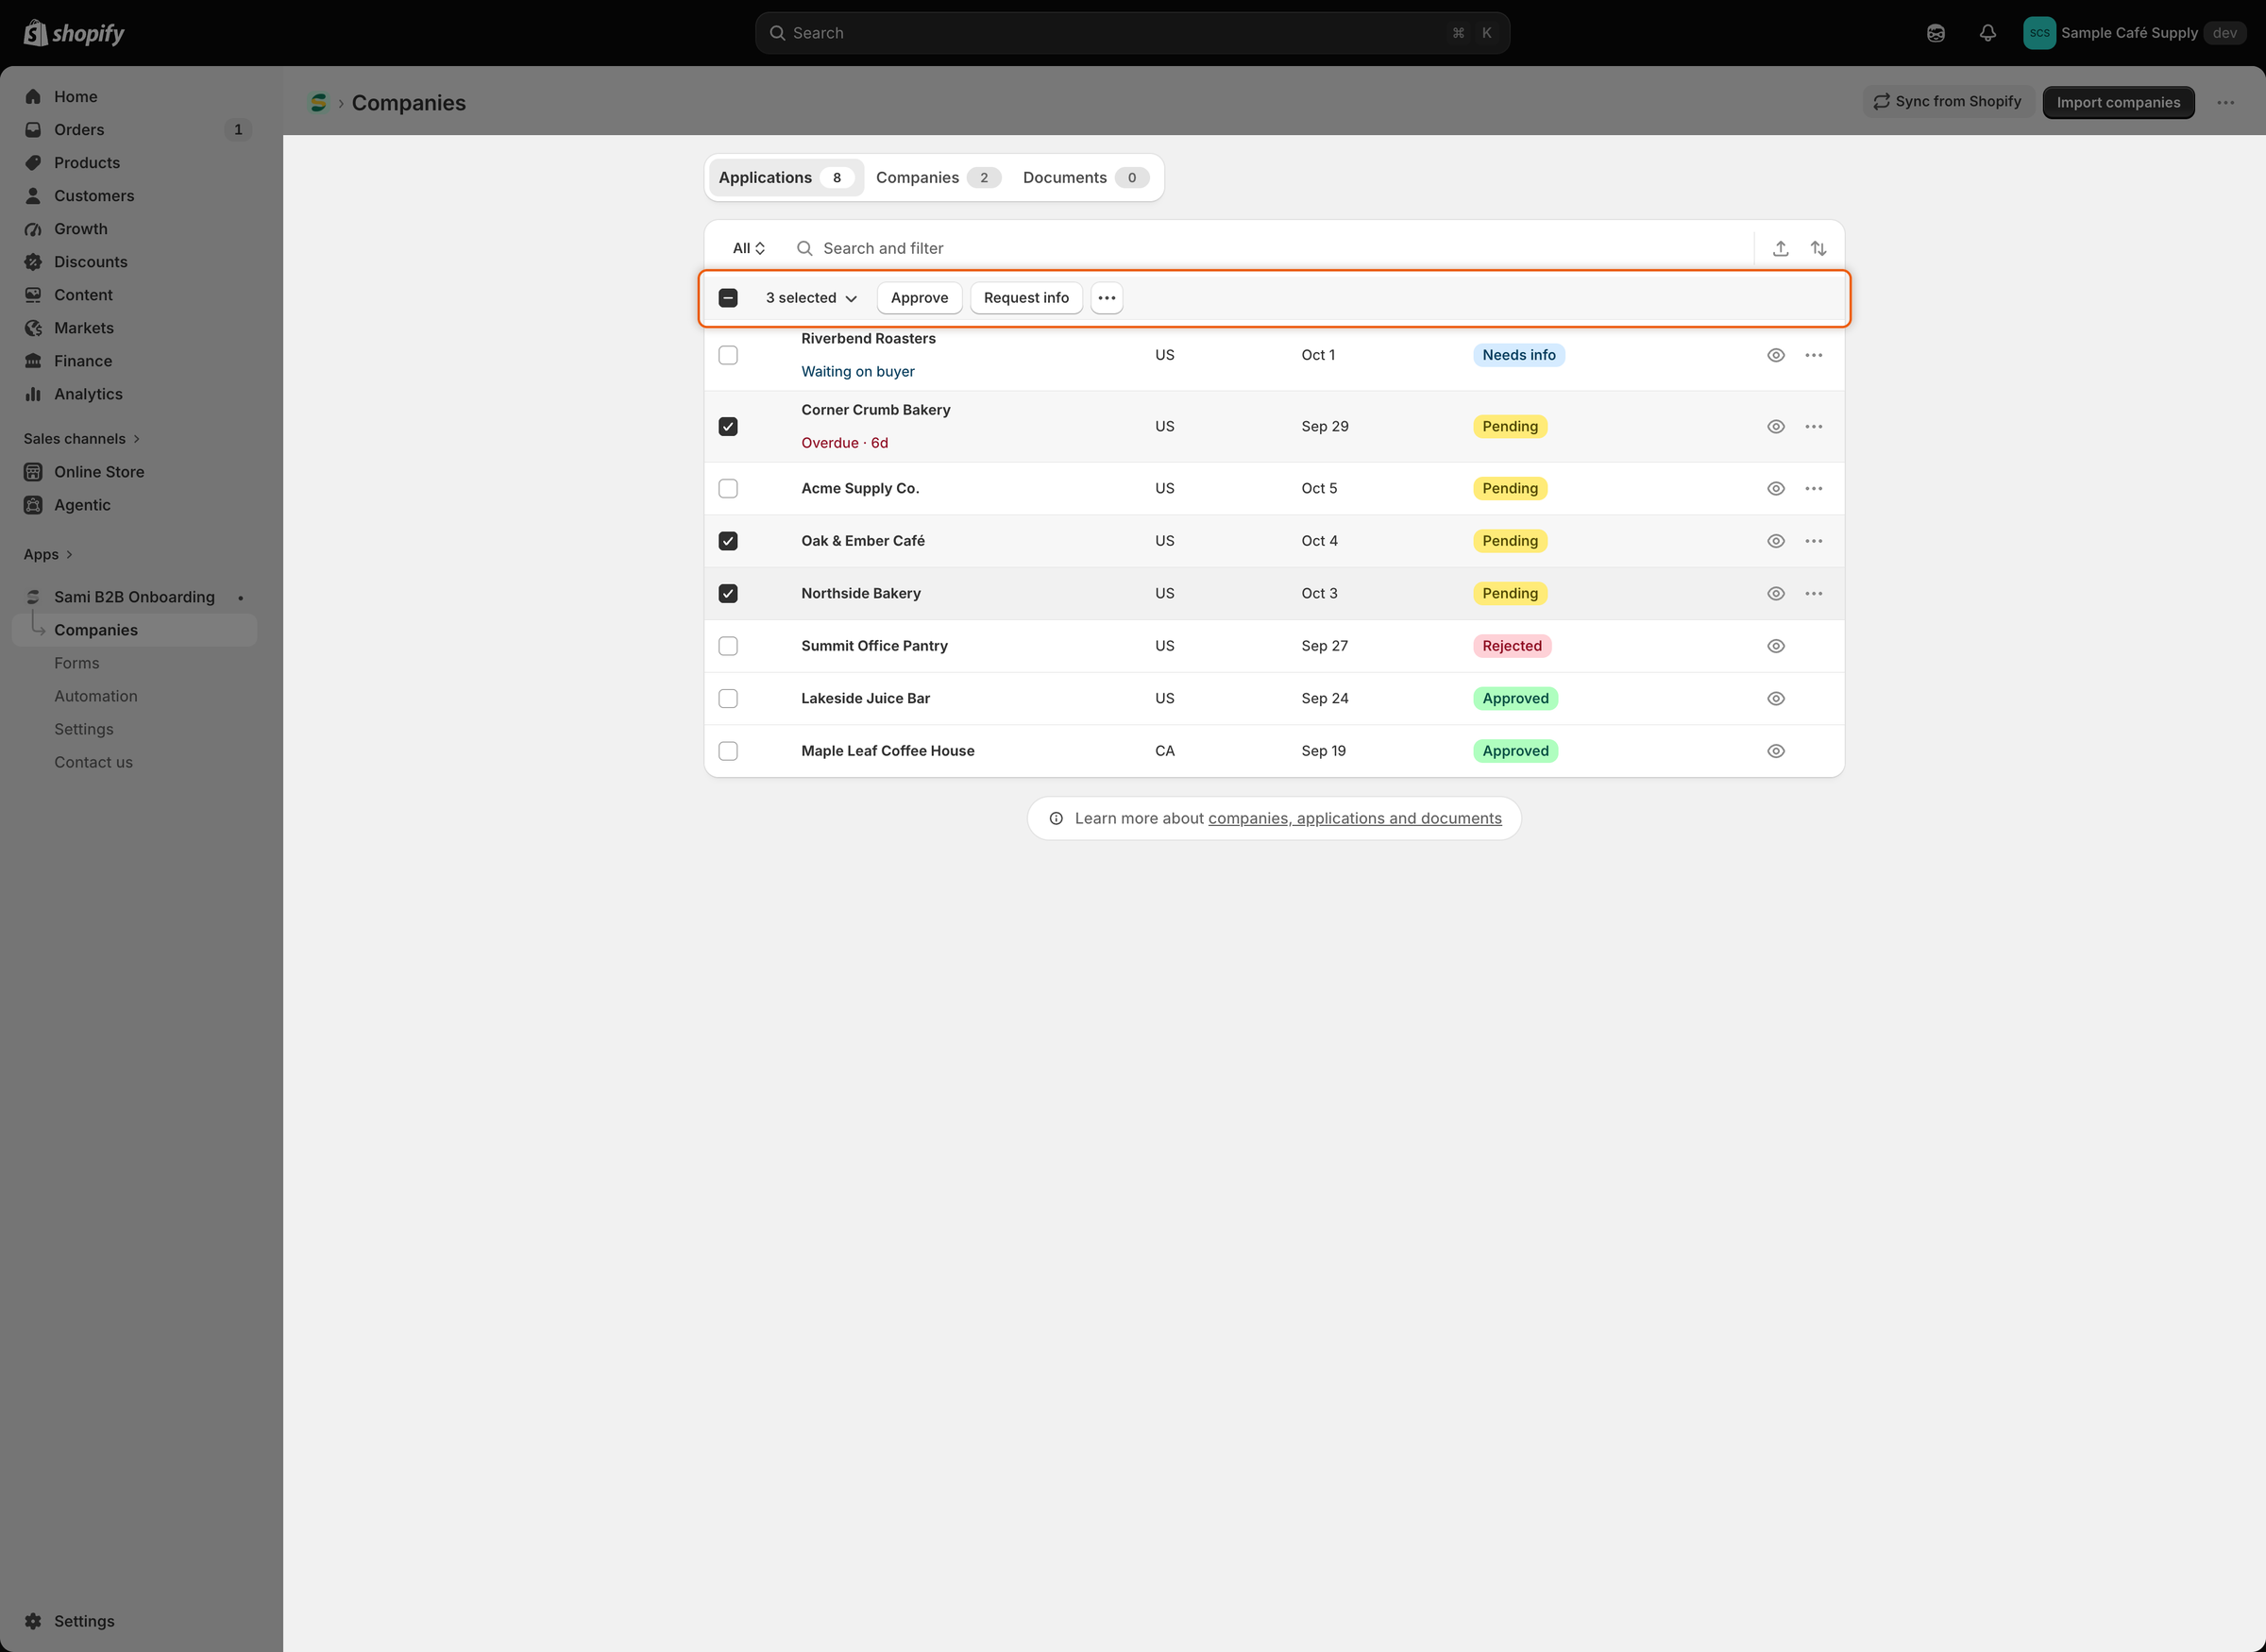
Tick the checkbox at the start of each row you want. The header row turns into a selection bar: **3 selected**, **Approve**, **Request info** and a **…** menu with **Export selected** and **Reject**. Ticked rows are tinted.
{% endstep %}

{% step %}

### Adjust the selection

Click **3 selected** to pick **Select all 25 on page** or **Unselect all**. The checkbox in the header ticks or clears every row on the page.
{% endstep %}
{% endstepper %}

Your selection covers the rows on the page you're looking at. On a narrow screen, the selection bar sits under the search bar instead of the header row.

{% hint style="warning" %}
The selection bar acts on every ticked row, including applications that are already decided. Pick the **Needs your action** view before you tick, so you only decide applications that are waiting for you.
{% endhint %}

<figure><img src="https://3844812229-files.gitbook.io/~/files/v0/b/gitbook-x-prod.appspot.com/o/spaces%2FRrf4pQPgjvb3GW7IN3Ci%2Fuploads%2Fgit-blob-d8138b059d51e1c1376b5893a19b0f9897286340%2Fscreenshot-applications-bulk-selection-bar.png?alt=media" alt="The Applications list with three rows ticked and a bar reading 3 selected with Approve, Request info and a more actions button."><figcaption><p>Ticking rows turns the header into a bar with the actions for the whole selection.</p></figcaption></figure>

## Approve several with one preset

{% stepper %}
{% step %}

### Open the dialog

With the rows ticked, click **Approve** in the selection bar. The **Approve 3 applications** dialog lists the companies and says "Each application gets the preset you choose below. You can change any application individually afterwards."
{% endstep %}

{% step %}

### Pick the preset

Under **Apply a preset**, your default preset is already picked. Pick another one, or **No preset**. With **No preset**, each application uses the terms saved on its own **Approval** card, if any.
{% endstep %}

{% step %}

### Approve

Click **Approve 3 applications** and leave the dialog open while the app works. "Approved 3 applications" confirms it.
{% endstep %}
{% endstepper %}

Each application gets everything a single approval does: the Shopify customer and company, the terms, the approved flag and the **Account approved** email. See [Approve an application](/sami-b2b-onboarding/reviewing-applications/approve-an-application.md#what-happens-when-you-approve).

**Approve** is turned off when your Shopify staff account lacks the **Companies** or **Customers** permission.

## Reject several

{% stepper %}
{% step %}

### Open the dialog

With the rows ticked, click **…** in the selection bar and pick **Reject**. The **Reject 3 applications** dialog opens.
{% endstep %}

{% step %}

### Fill it in once

Pick the **Reason**, add **Details**, choose under **After rejecting** and decide on **Email the buyer about this decision**. Your choices apply to every application in the batch. See [Reject an application](/sami-b2b-onboarding/reviewing-applications/reject-an-application.md) for what each option does.
{% endstep %}

{% step %}

### Reject

Click **Reject 3 applications**. "Rejected 3 applications" confirms it.
{% endstep %}
{% endstepper %}

The **Application declined** email is off by default. The bulk dialog can't tell whether it's on, so the email tick starts ticked either way. Before you rely on it, turn the email on in each form's **Email** section in the form builder. See [Reject an application](/sami-b2b-onboarding/reviewing-applications/reject-an-application.md#turn-on-the-declined-email).

## Request information

**Request info** goes to one application at a time. If several rows are ticked, it goes only to the first ticked row, and the dialog doesn't name it. Tick only one row before you click it, or use the row's **…** menu. See [Request more information](/sami-b2b-onboarding/reviewing-applications/request-more-information.md).

## When some are refused

The app sends the applications one after another, and a refusal doesn't stop the rest. Common reasons are answers the form requires before approval, or a Shopify permission your staff account lacks.

When some are refused:

1. The ones that went through are saved, and a message says how many.
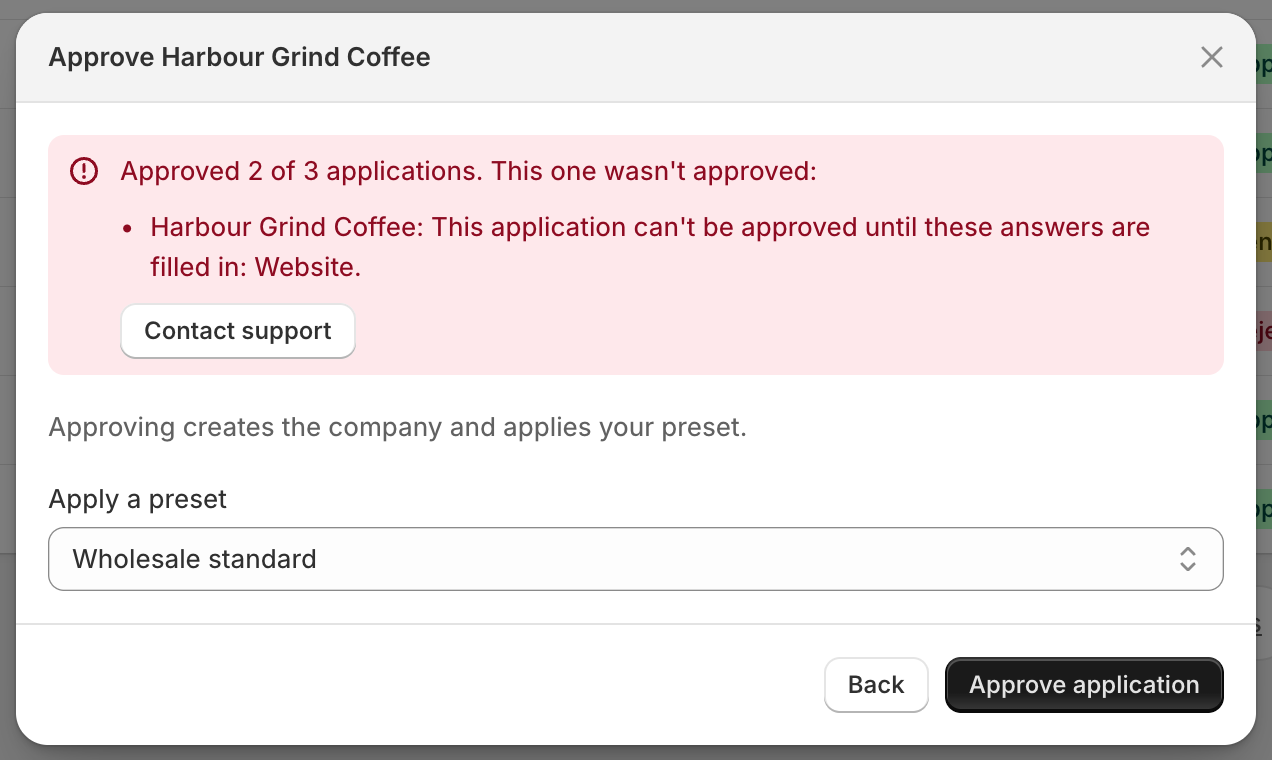
2. The dialog stays open with a red banner, for example "Approved 2 of 3 applications. This one wasn't approved:", followed by a line per refused application with its company name and the reason.
3. Only the refused applications stay ticked.
4. Click the dialog's button again to retry only the refused ones, for example once the store owner has added a missing permission to your Shopify account. For missing answers, close the dialog, fill them in with **Edit answers** on each application's page, then approve it there or tick it again in the list.

If you close the dialog before the app has finished, the refusals appear in a banner on the page instead.

<figure><img src="https://3844812229-files.gitbook.io/~/files/v0/b/gitbook-x-prod.appspot.com/o/spaces%2FRrf4pQPgjvb3GW7IN3Ci%2Fuploads%2Fgit-blob-4b96c11b3d3c804d8410dfa7579bade3de7ffac9%2Fscreenshot-applications-bulk-refused-banner.png?alt=media" alt="The Approve Harbour Grind Coffee dialog with a red banner reading &#x22;Approved 2 of 3 applications. This one wasn&#x27;t approved:&#x22; and saying Harbour Grind Coffee can&#x27;t be approved until Website is filled in."><figcaption><p>The banner names each application that wasn't approved and says why, and only those stay ticked for another try.</p></figcaption></figure>

## Export applications to CSV

{% stepper %}
{% step %}

### Choose the rows

Tick rows, or search, filter or pick a view, to narrow what you export. You can also export everything.
{% endstep %}

{% step %}

### Open the export dialog

Click the export icon (**Export**) at the end of the search bar, or **… › Export selected** in the selection bar. The **Export applications** dialog opens.
{% endstep %}

{% step %}

### Pick the scope and format

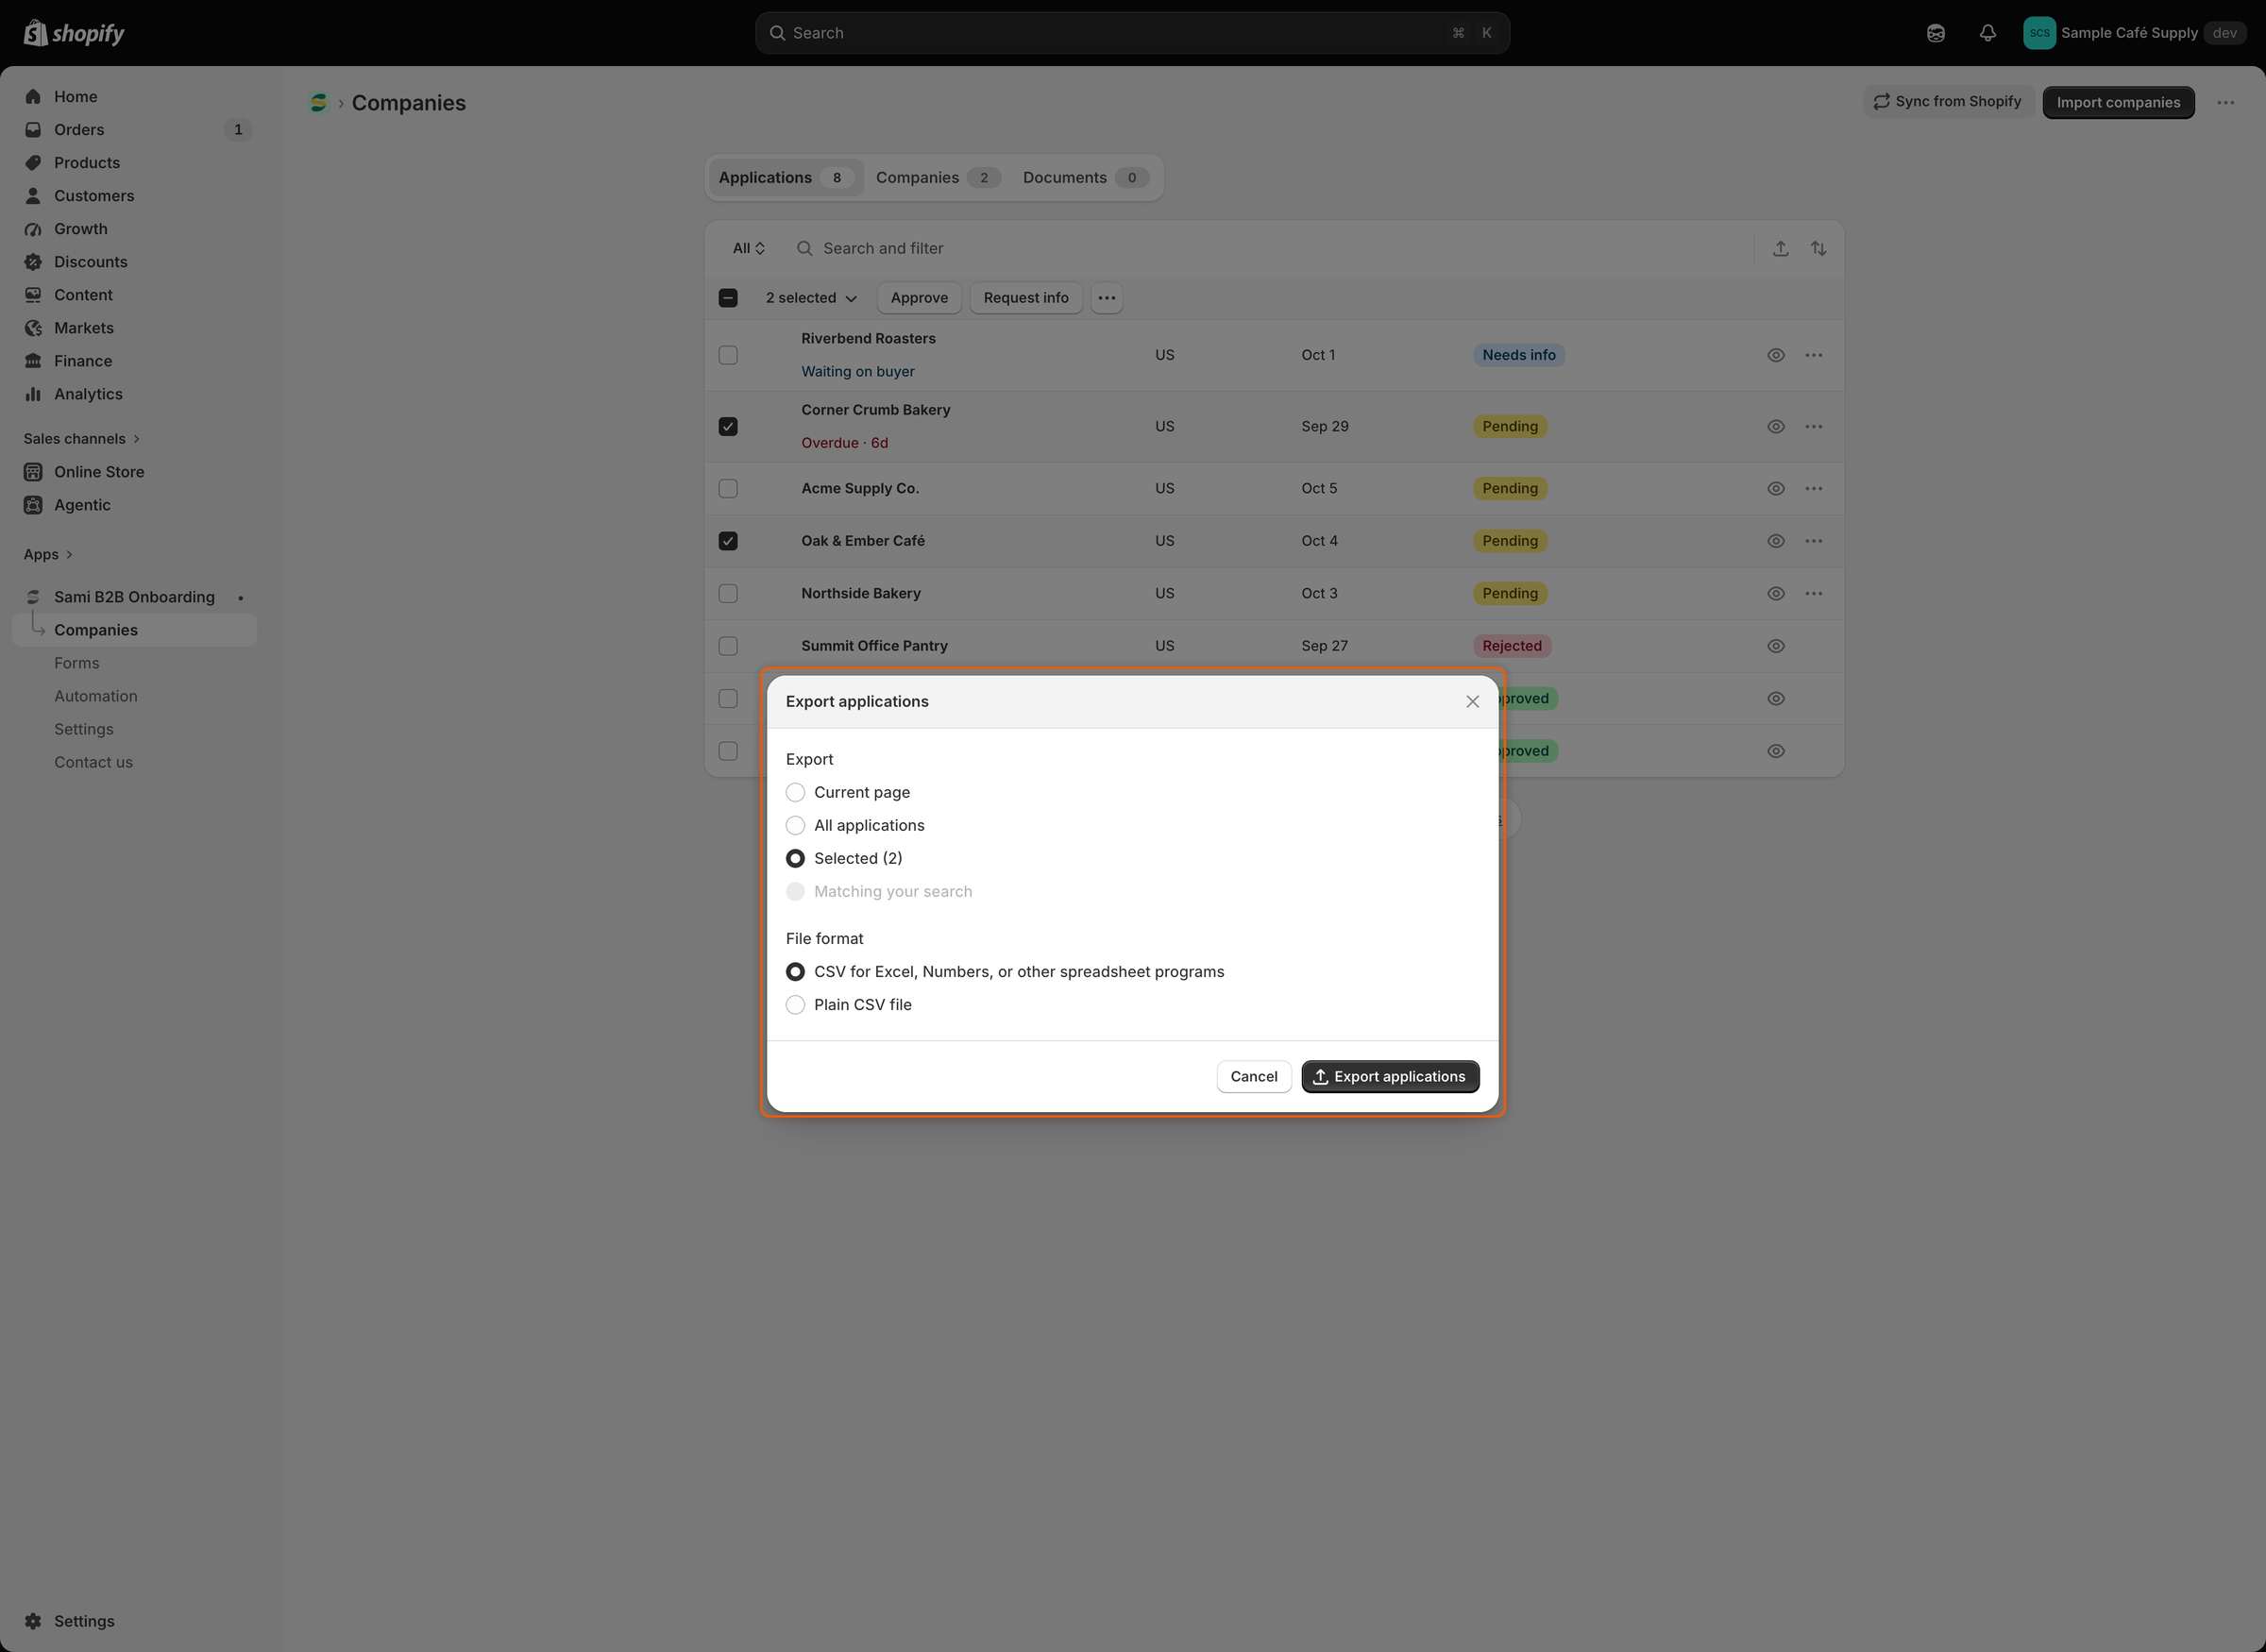
Under **Export**, pick **Current page**, **All applications**, **Selected** (with the number ticked) or **Matching your search** (with the number found). Under **File format**, pick **CSV for Excel, Numbers, or other spreadsheet programs** or **Plain CSV file**.
{% endstep %}

{% step %}

### Export

Click **Export applications**. Your browser downloads a file named applications.csv.
{% endstep %}
{% endstepper %}

**Selected** is available when rows are ticked, and **Matching your search** when a search, a filter or a view other than **All** is active. The dialog starts on **Selected** when rows are ticked, then on **Matching your search** when the list is narrowed, and otherwise on **All applications**.

The file has one row per application, with these columns:

| Column       | What it holds                                                                                                                                    |
| ------------ | ------------------------------------------------------------------------------------------------------------------------------------------------ |
| Reference    | The application's reference.                                                                                                                     |
| Company      | The company name.                                                                                                                                |
| Contact      | The contact's name.                                                                                                                              |
| Email        | The contact's email.                                                                                                                             |
| Country      | The buyer's country.                                                                                                                             |
| Status       | The application's status as a short lowercase code, for example pending, info\_requested (**Needs info**) or auto\_applied (approved by a rule). |
| Submitted at | When the buyer submitted it.                                                                                                                     |
| Assignee     | The reviewer it's assigned to.                                                                                                                   |

<figure><img src="https://3844812229-files.gitbook.io/~/files/v0/b/gitbook-x-prod.appspot.com/o/spaces%2FRrf4pQPgjvb3GW7IN3Ci%2Fuploads%2Fgit-blob-5210d0f24400ce487f1388d9248654934b66e7fc%2Fscreenshot-applications-export-dialog.png?alt=media" alt="The Export applications dialog with Selected (2) chosen under Export, Matching your search greyed out, and CSV for Excel, Numbers, or other spreadsheet programs chosen under File format."><figcaption><p>With rows ticked, the dialog starts on Selected; choose the CSV format that suits your spreadsheet program.</p></figcaption></figure>

## Next steps

* [Approval presets](/sami-b2b-onboarding/automation/approval-presets.md) — set up the preset you'll apply to a batch.
* [Rules that decide applications](/sami-b2b-onboarding/automation/rules.md) — let rules decide routine applications for you.
* [Applications](/sami-b2b-onboarding/reviewing-applications/applications.md) — views, statuses and filters for narrowing the list.


---

# Agent Instructions
This documentation is published with GitBook. GitBook is the documentation platform designed so that both humans and AI agents can read, navigate, and reason over technical content effectively. Learn more at gitbook.com.

## Querying This Documentation
If you need additional information that is not directly available in this page, you can query the documentation dynamically by asking a question.

Perform an HTTP GET request on the current page URL with the `ask` query parameter, and the optional `goal` query parameter:

```
GET https://docs.samita.io/sami-b2b-onboarding/reviewing-applications/decide-several-at-once.md?ask=<question>&goal=<endgoal>
```

`ask` is the immediate question: it should be specific, self-contained, and written in natural language.
`goal` is optional and describes the broader end goal you are ultimately trying to accomplish on behalf of the user. GitBook uses it to tailor the answer towards what is most useful for that goal.

The response will contain a direct answer to the question and relevant excerpts and sources from the documentation.

Use this mechanism when the answer is not explicitly present in the current page, you need clarification or additional context, or you want to retrieve related documentation sections.