
报价请求页面
设置报价购物车页面,客户可在此查看已选产品并向您发送报价请求。
应用将此页面称为 Quote cart page。在您的店面中,它是路径为 /pages/request-for-quote、标题为“Request for quote”的页面,应用对它的描述是:“Shows the quote form and the customer’s quote cart.”
报价请求正是从这里发出的。客户可以查看已添加的所有产品,进行调整,填写您的表单并提交。
找到页面设置
Section titled “找到页面设置”-
打开 Customize 编辑器
Section titled “打开 Customize 编辑器”前往 Quote settings。在 Request a Quote 页面中,点击 Customize。
-
打开 Quote cart page 标签页
Section titled “打开 Quote cart page 标签页”编辑器中有四个标签页:Button & widget、Quote form、Quote cart page 和 Success message。本页介绍的所有设置都在 Quote cart page 标签页中。
-
在 Pages 部分选择正确的页面
Section titled “在 Pages 部分选择正确的页面”这是需要您检查的设置,而不只是用来阅读的内容。Pages 中有两个页面选择器:Quote cart page(“Shows the quote form and the customer’s quote cart.”)和 Quote history page(“Shows a logged-in customer’s past quotes.”)。
点击 Quote cart page。此时会打开一个面板,其中有 Search by page title or URL 搜索框和您商店页面的 Select page 列表,每个页面都会显示标题、路径以及 Published 或 Draft 标记。请选择 Request for quote —
/pages/request-for-quote。如果搜索不到任何结果,面板会显示 Create page automatically,而不是页面列表。
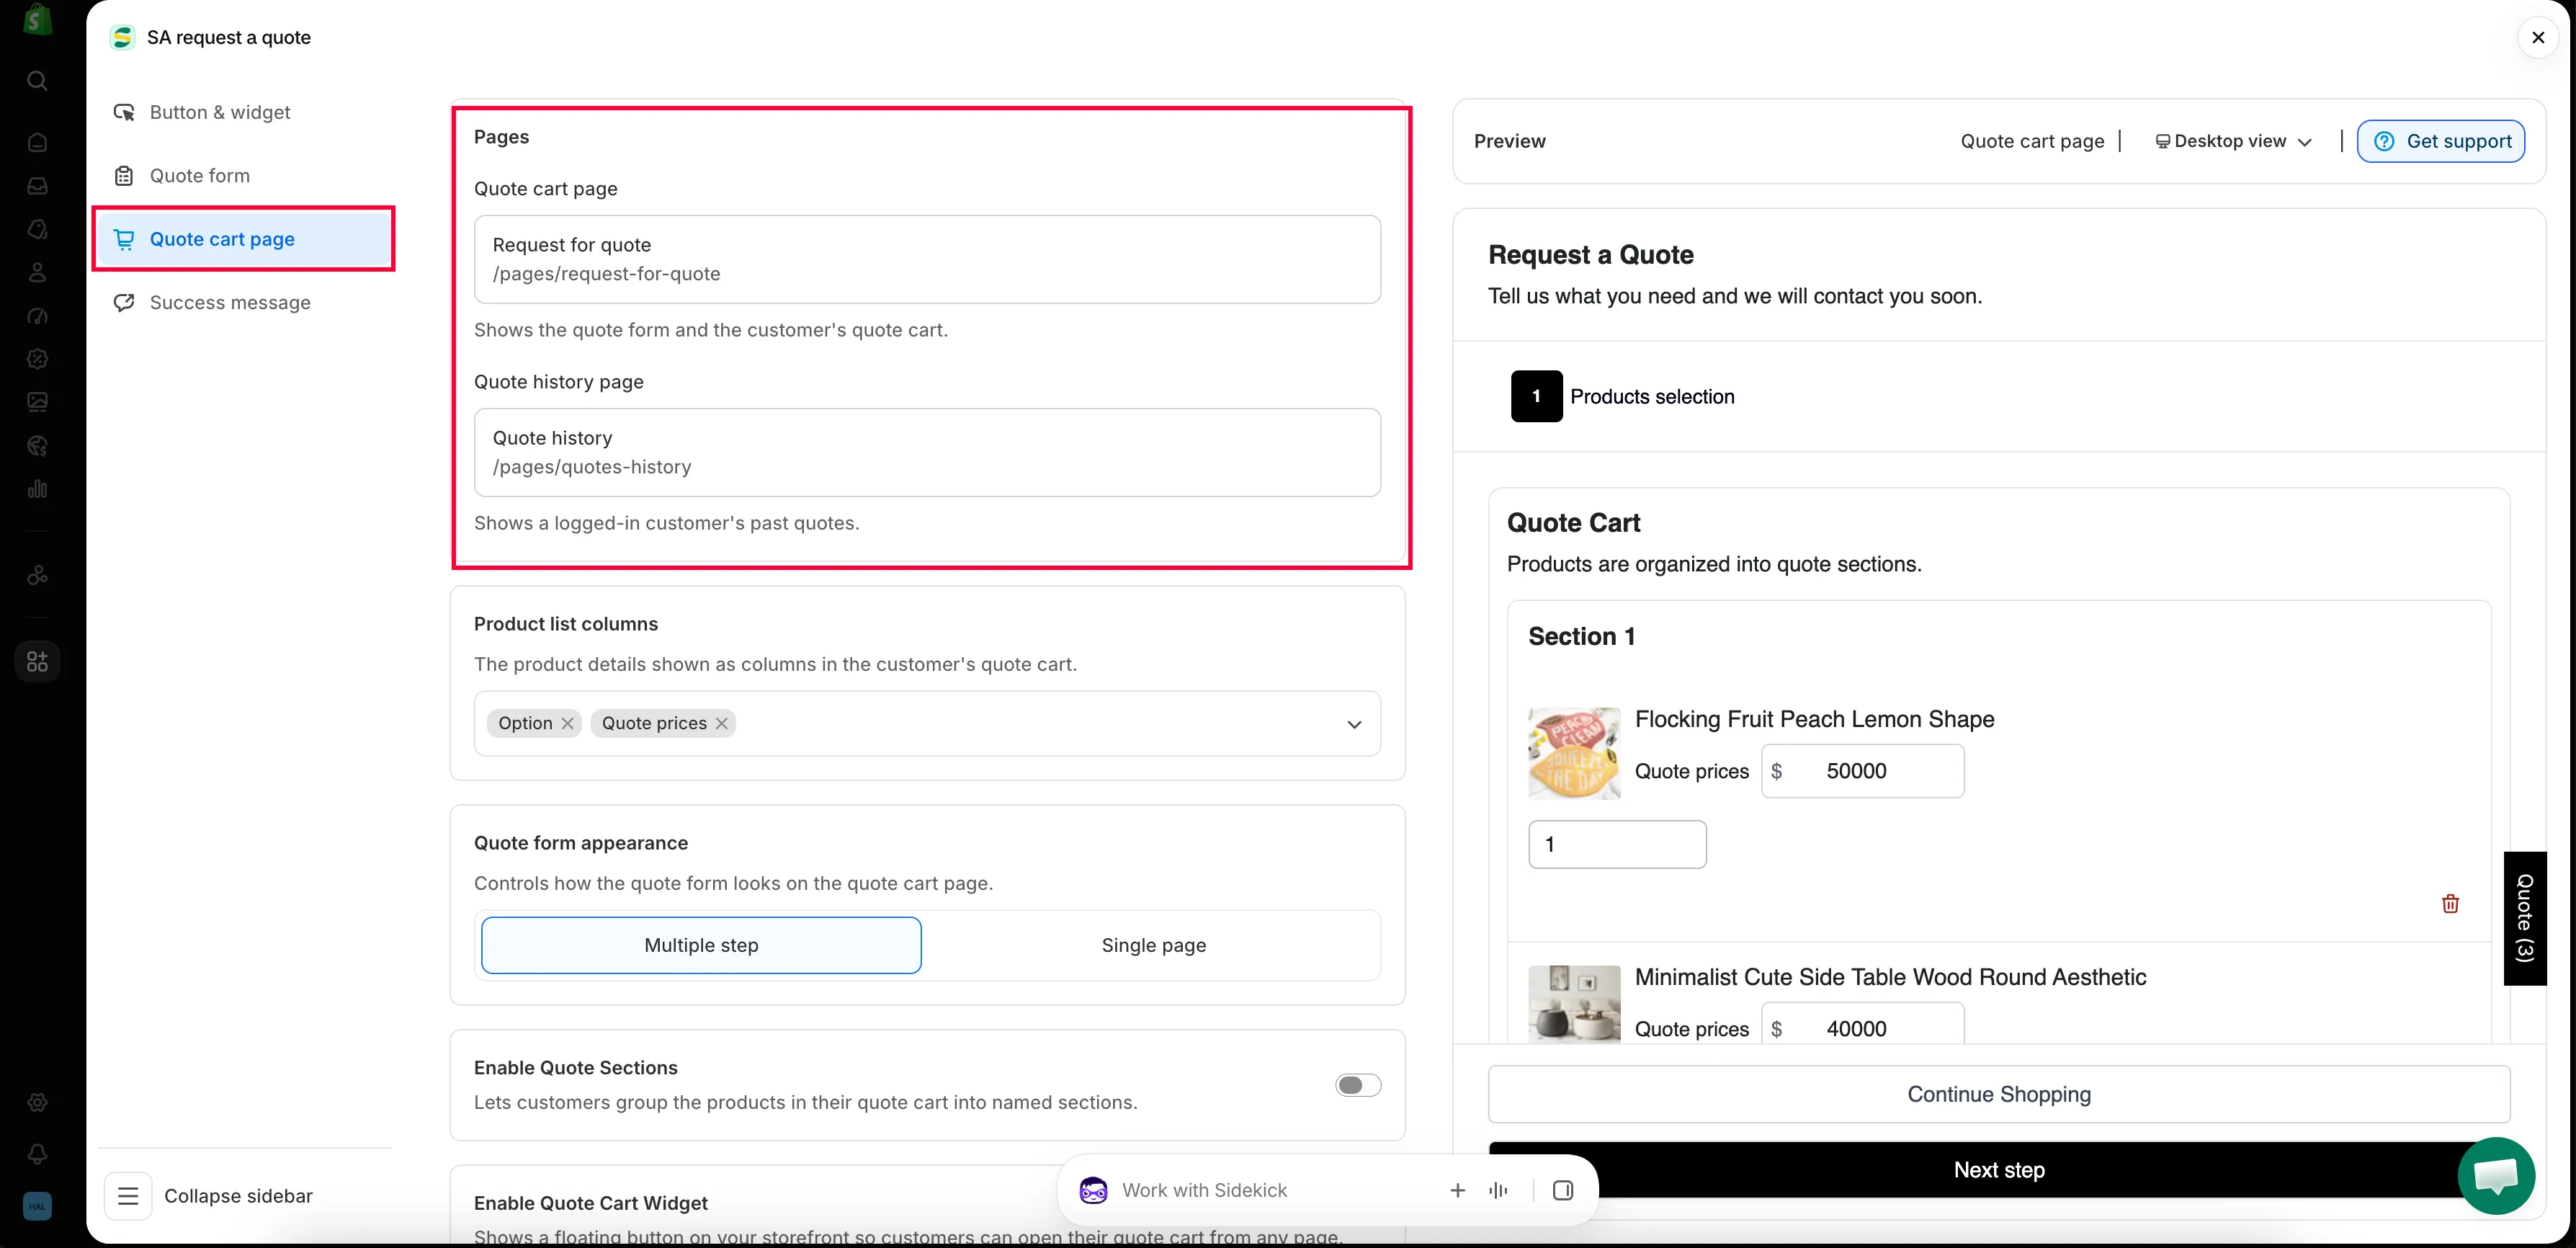
在此标签页中配置报价购物车页面。
-
在编辑器中所做的更改只有保存后才会生效。只要您更改了任何内容,顶部就会出现保存栏,请点击其中的 Save。
如果您在有未保存的修改时尝试离开,应用会询问“Discard all unsaved changes”,并提示“If you discard changes, you’ll delete any edits you made since you last saved.”除非您确实想放弃这些修改,否则请选择 Continue editing 并保存。
将客户引导到此页面
Section titled “将客户引导到此页面”设置好页面并不会自动把客户带到该页面。您需要配置两种方式,每种方式都要通过 Save 完成,并在店面中检查效果。
方式 1:通过报价按钮直接跳转
Section titled “方式 1:通过报价按钮直接跳转”-
打开 Button & widget 标签页
Section titled “打开 Button & widget 标签页”在 Customize 中,点击 Button & widget 标签页。
-
将 Click action 设置为 Redirect to quote page
Section titled “将 Click action 设置为 Redirect to quote page”在 Click action 标题下,选择 Redirect to quote page,应用对它的说明是“Go directly to quote cart page”。另外两个选项会让客户停留在当前页面:Open quote form popup 和 Add product to quote cart。
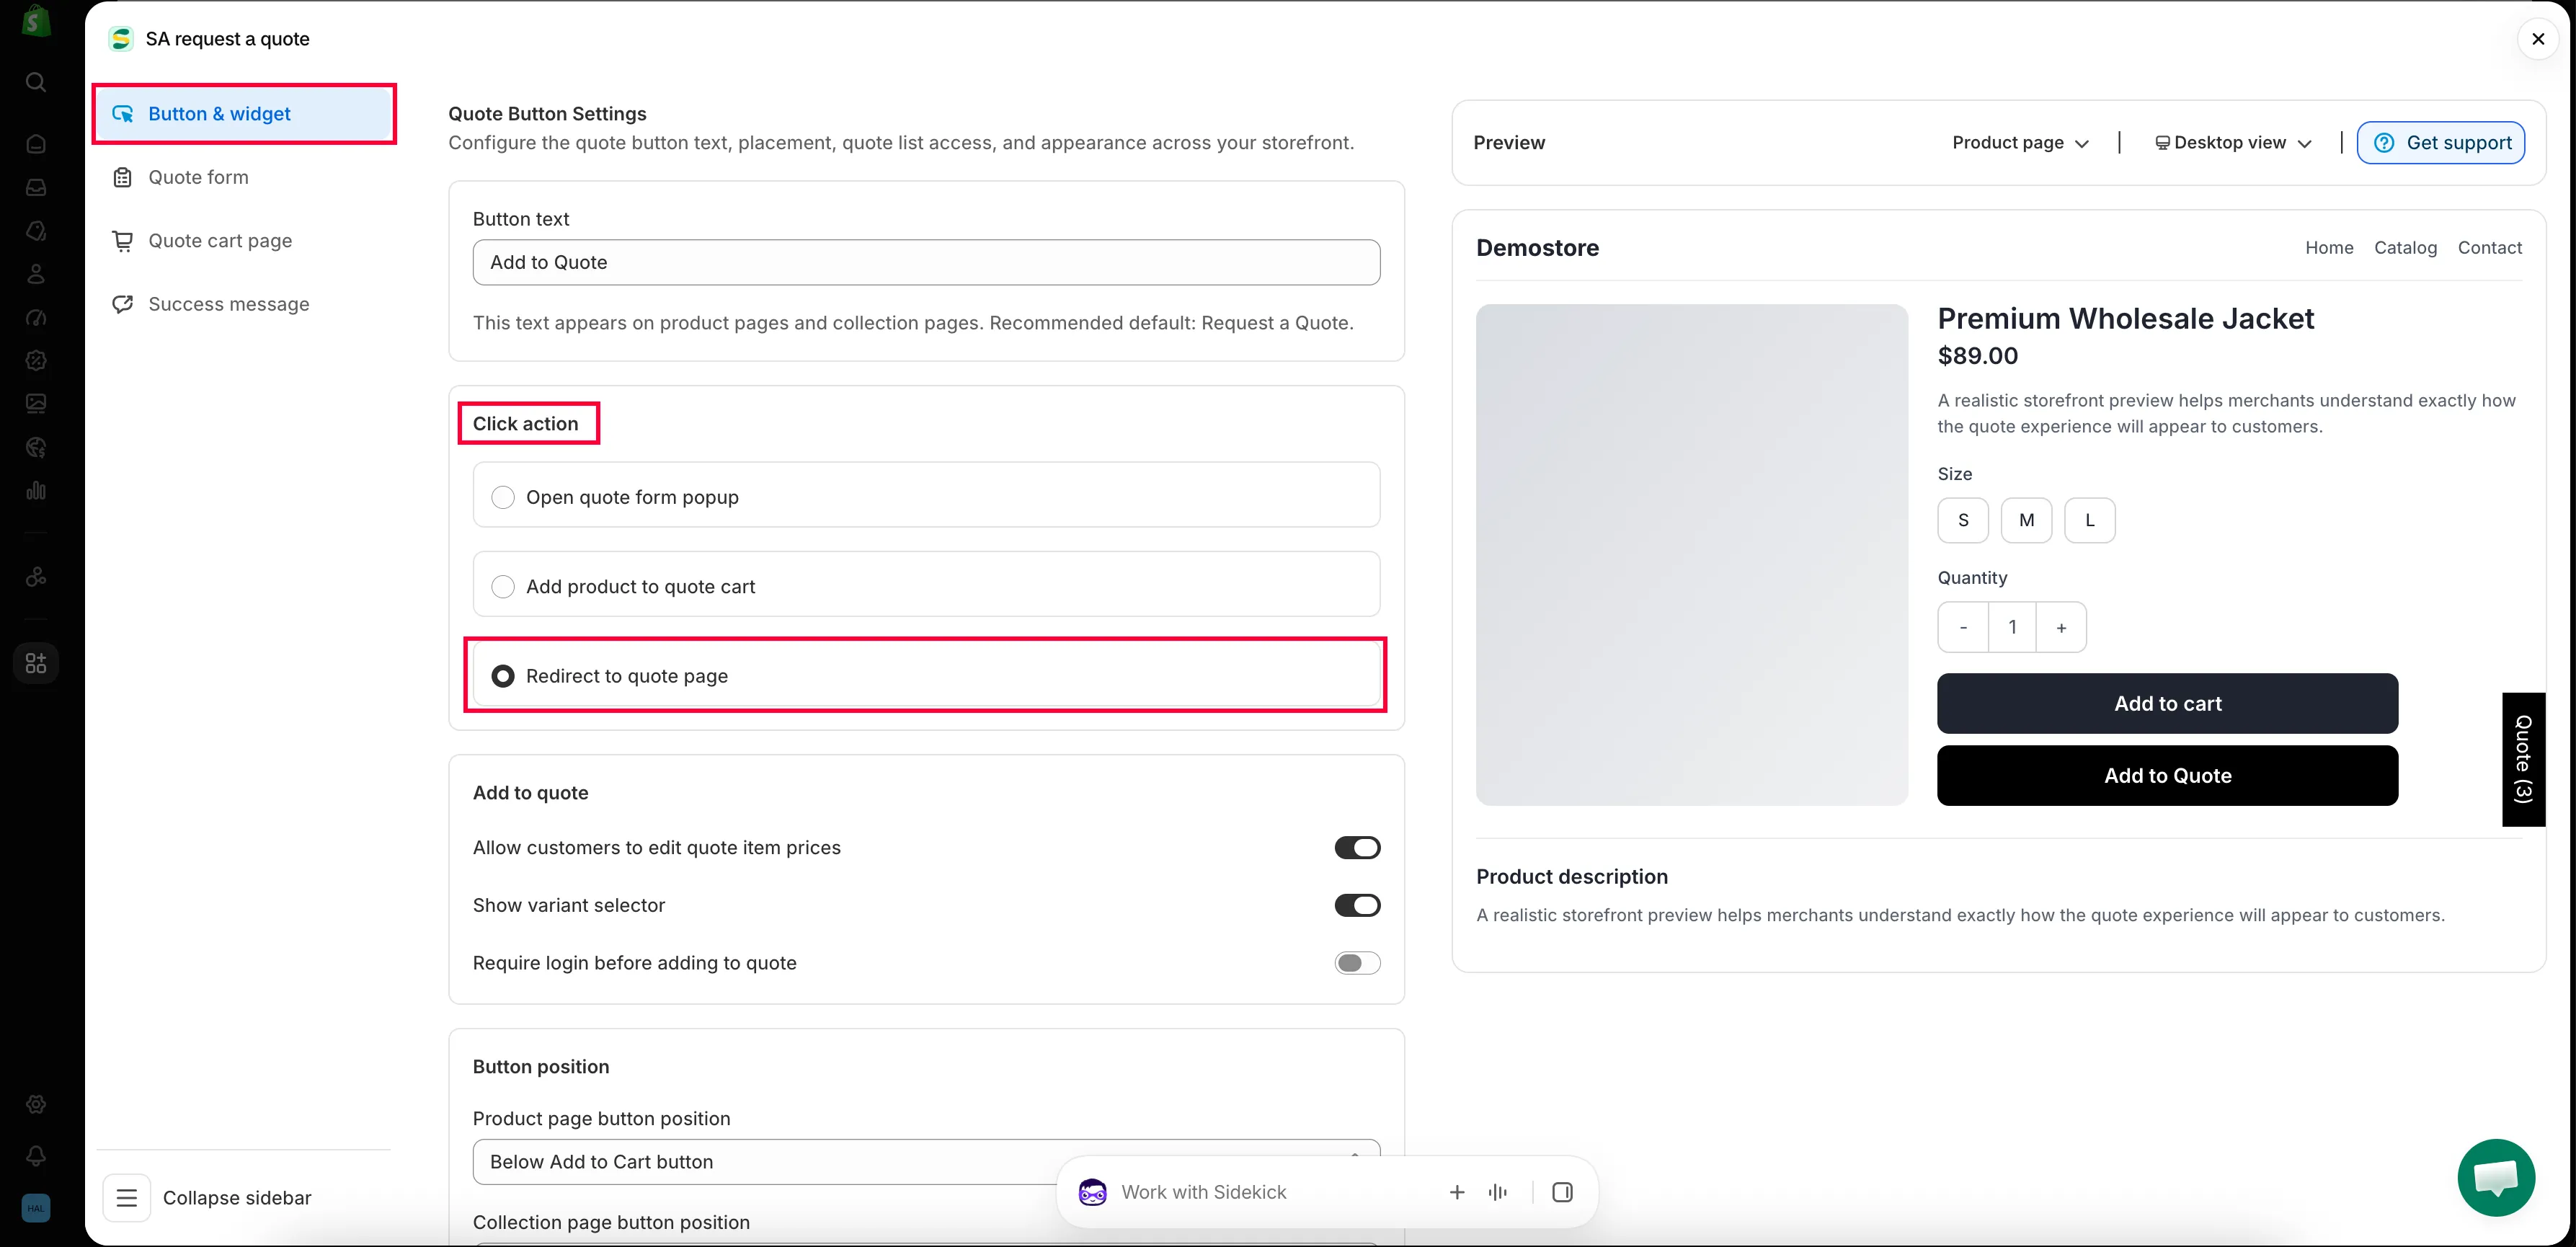
-
确认跳转到的页面
Section titled “确认跳转到的页面”返回 Quote cart page 标签页,确认 Pages > Quote cart page 已指向 Request for quote,如上所述。跳转设置和页面设置是分处两个位置的同一件事:只设置其中一个,按钮就无法把客户带到有用的页面。
-
保存,然后以客户身份试用
Section titled “保存,然后以客户身份试用”点击 Save。然后在店面中打开一个产品页面并点击报价按钮。它应将您带到
/pages/request-for-quote,并且该产品已在报价购物车中。
方式 2:通过悬浮小组件打开
Section titled “方式 2:通过悬浮小组件打开”-
打开 Enable Quote Cart Widget
Section titled “打开 Enable Quote Cart Widget”在 Quote cart page 标签页中,滚动到 Enable Quote Cart Widget:“Shows a floating button on your storefront so customers can open their quote cart from any page.”
-
打开 Enable quote cart widget。开启后,其余设置才会显示。
-
将 Action 设置为报价购物车页面
Section titled “将 Action 设置为报价购物车页面”Action 决定点击后的行为。请选择 Go to quote cart page,某些版本的应用将同一选项标为 Go to quote page。另一个选项 Open quote popup 会在弹窗中打开报价,不会将客户带到此页面,因此仅在您确实需要时才选择它。
这是人们最容易忽略的设置。小组件已开启但仍保持 Open quote popup 时,看起来就像是通往报价页面的链接失效了。
-
设置文字和外观
Section titled “设置文字和外观”Text 是小组件上显示的文字。Position 决定它的位置:Bottom right、Half bottom right、Half top right、Bottom left、Half bottom left 或 Half top left。Border radius、Text color 和 Background color 用于完成样式设置,如果您选择了弹窗操作,Quote popup primary color 也会生效。
-
保存,然后以客户身份试用
Section titled “保存,然后以客户身份试用”点击 Save。打开店面的任意页面:悬浮小组件应已显示,默认文字为 Quote (n),其中包含其中的商品数量。点击它应会直接进入报价购物车页面。
选择客户可见的产品详情
Section titled “选择客户可见的产品详情”Product list columns 控制“The product details shown as columns in the customer’s quote cart.”点击它可打开选择器,其中有 Search product columns 搜索框,以及 Choose Product list columns 下的列列表。您选择的每一列都会作为标签添加,之后可以再次移除。
完整列表包括 Vendor、SKU、Option、Price、Quote prices、Total、Subtotal 和 Note。如果您从未修改过此设置,默认使用的是 Option 和 Price。
| 列 | 适合显示的情况 |
|---|---|
| Vendor | 您转售多个品牌,买家按品牌下单。 |
| SKU | 买家按编码下单,贸易和批发客户通常如此。 |
| Option | 您的产品有多属性,客户需要确认自己选了哪一个。 |
| Price | 您公布了标价,并希望客户在创建报价请求时能看到。 |
| Quote prices | 您允许客户提出期望价格,请参阅允许客户提出价格。 |
| Total | 客户按数量下单,实时显示的行合计有助于他们判断请求的规模。 |
| Subtotal | 您希望显示整个请求的金额,而不只是每一行的金额。 |
| Note | 客户需要对某一行补充说明,例如表面处理、交付期限或替换产品。 |
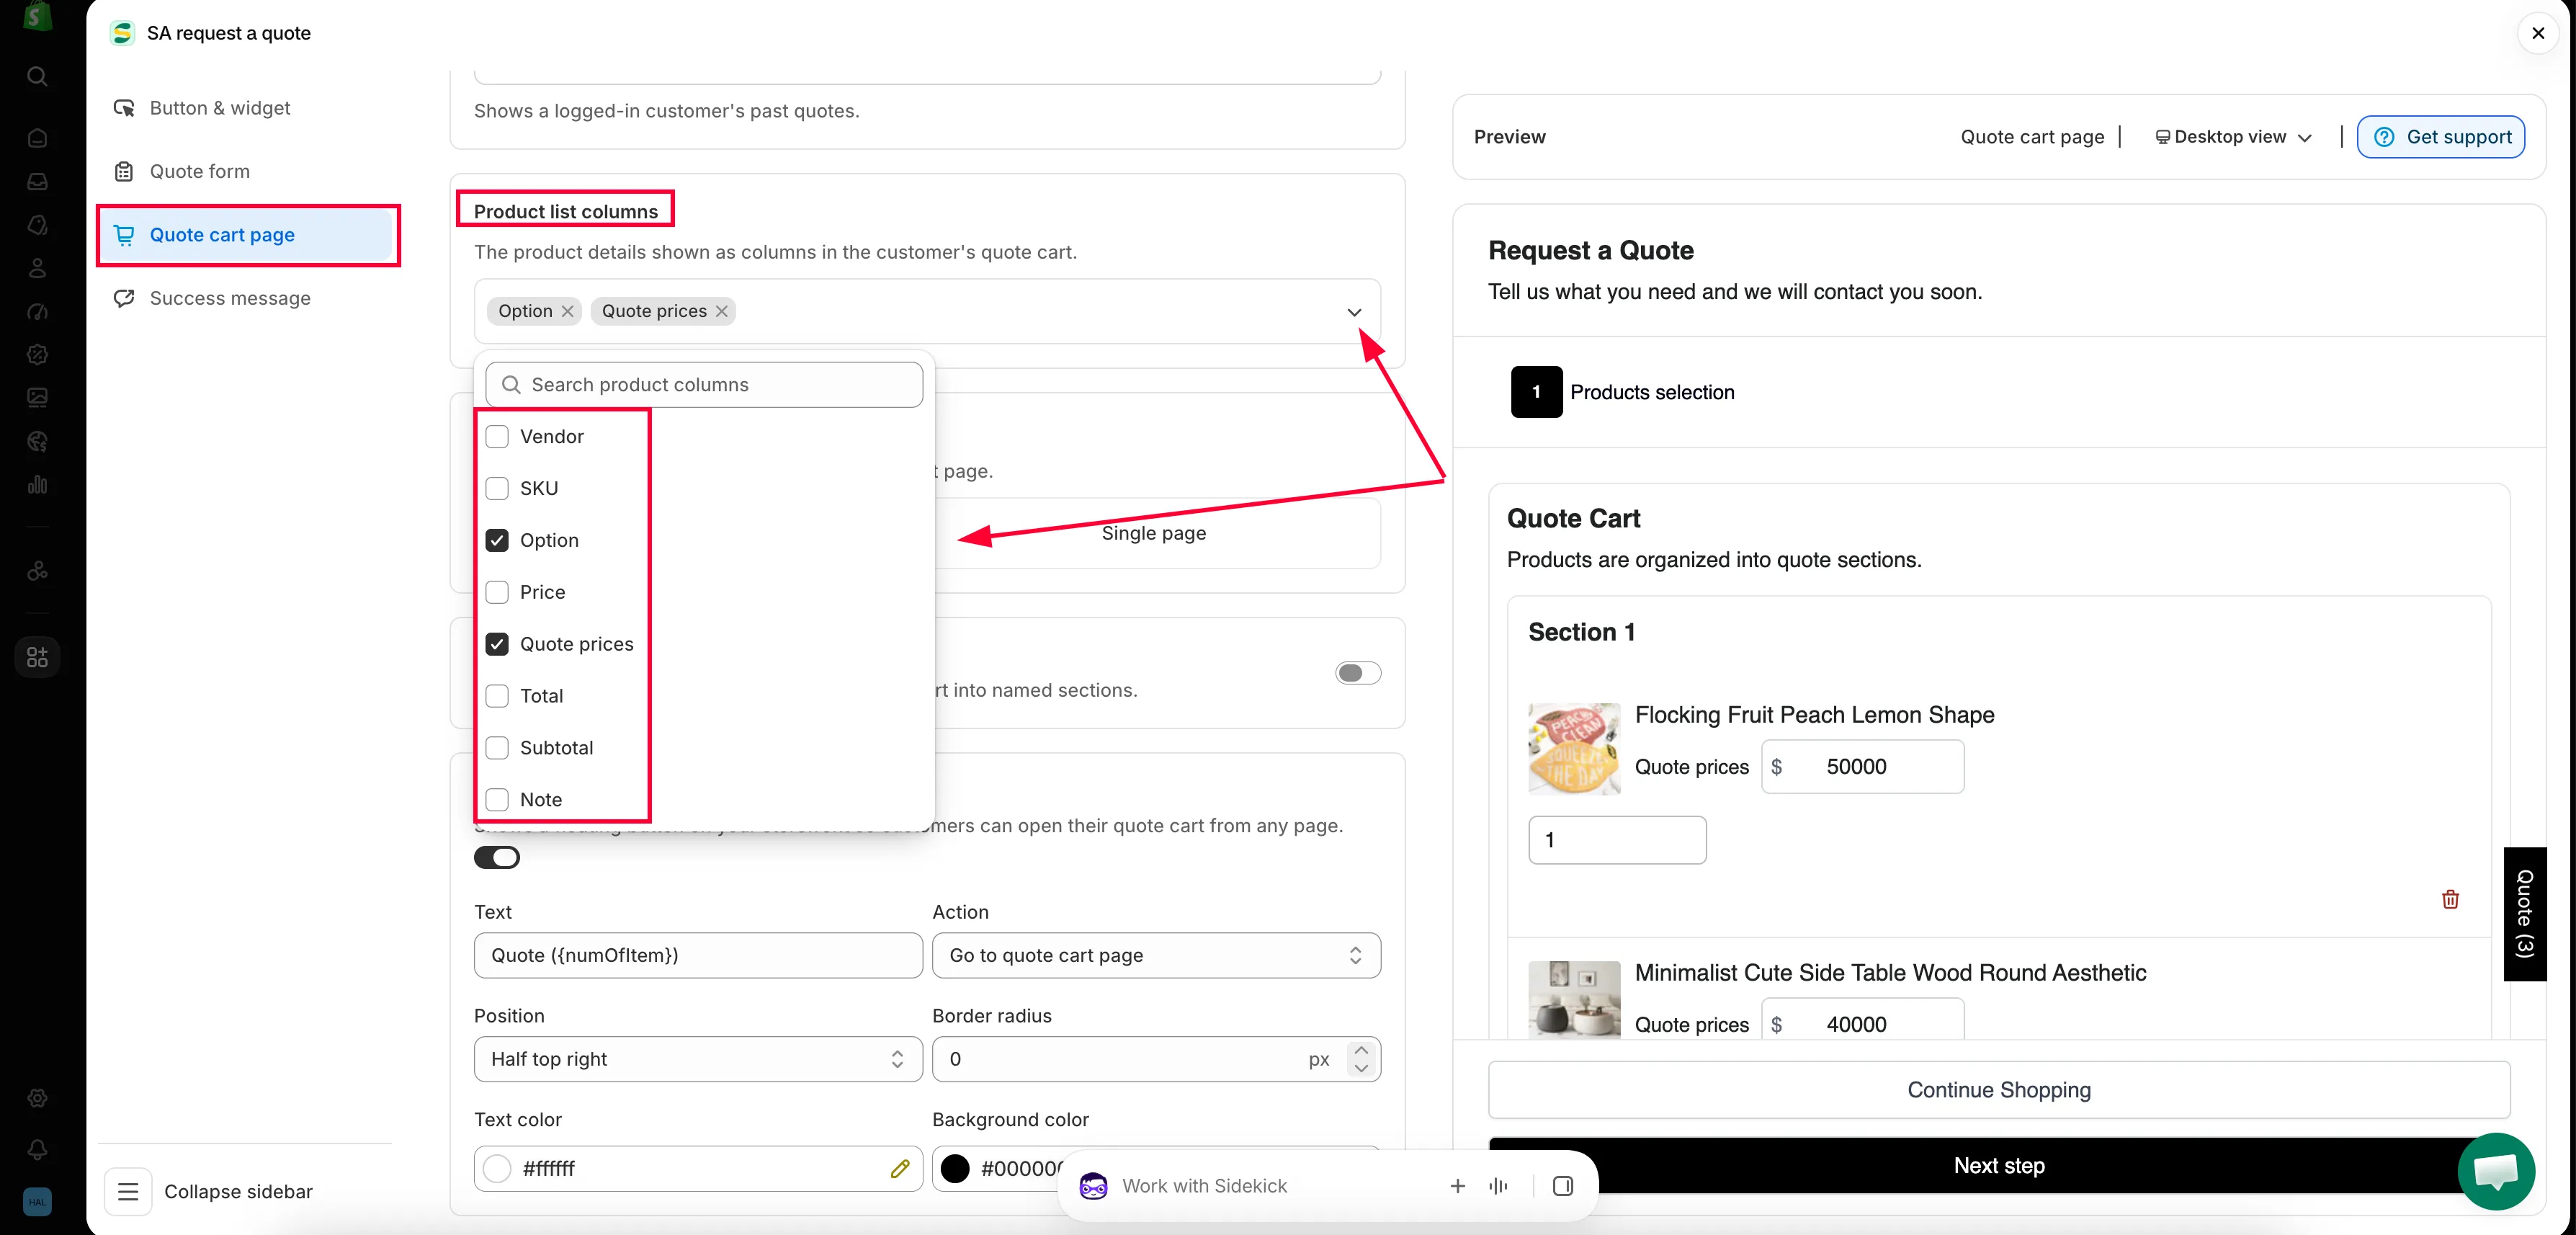
选择报价购物车使用哪个店面页面。
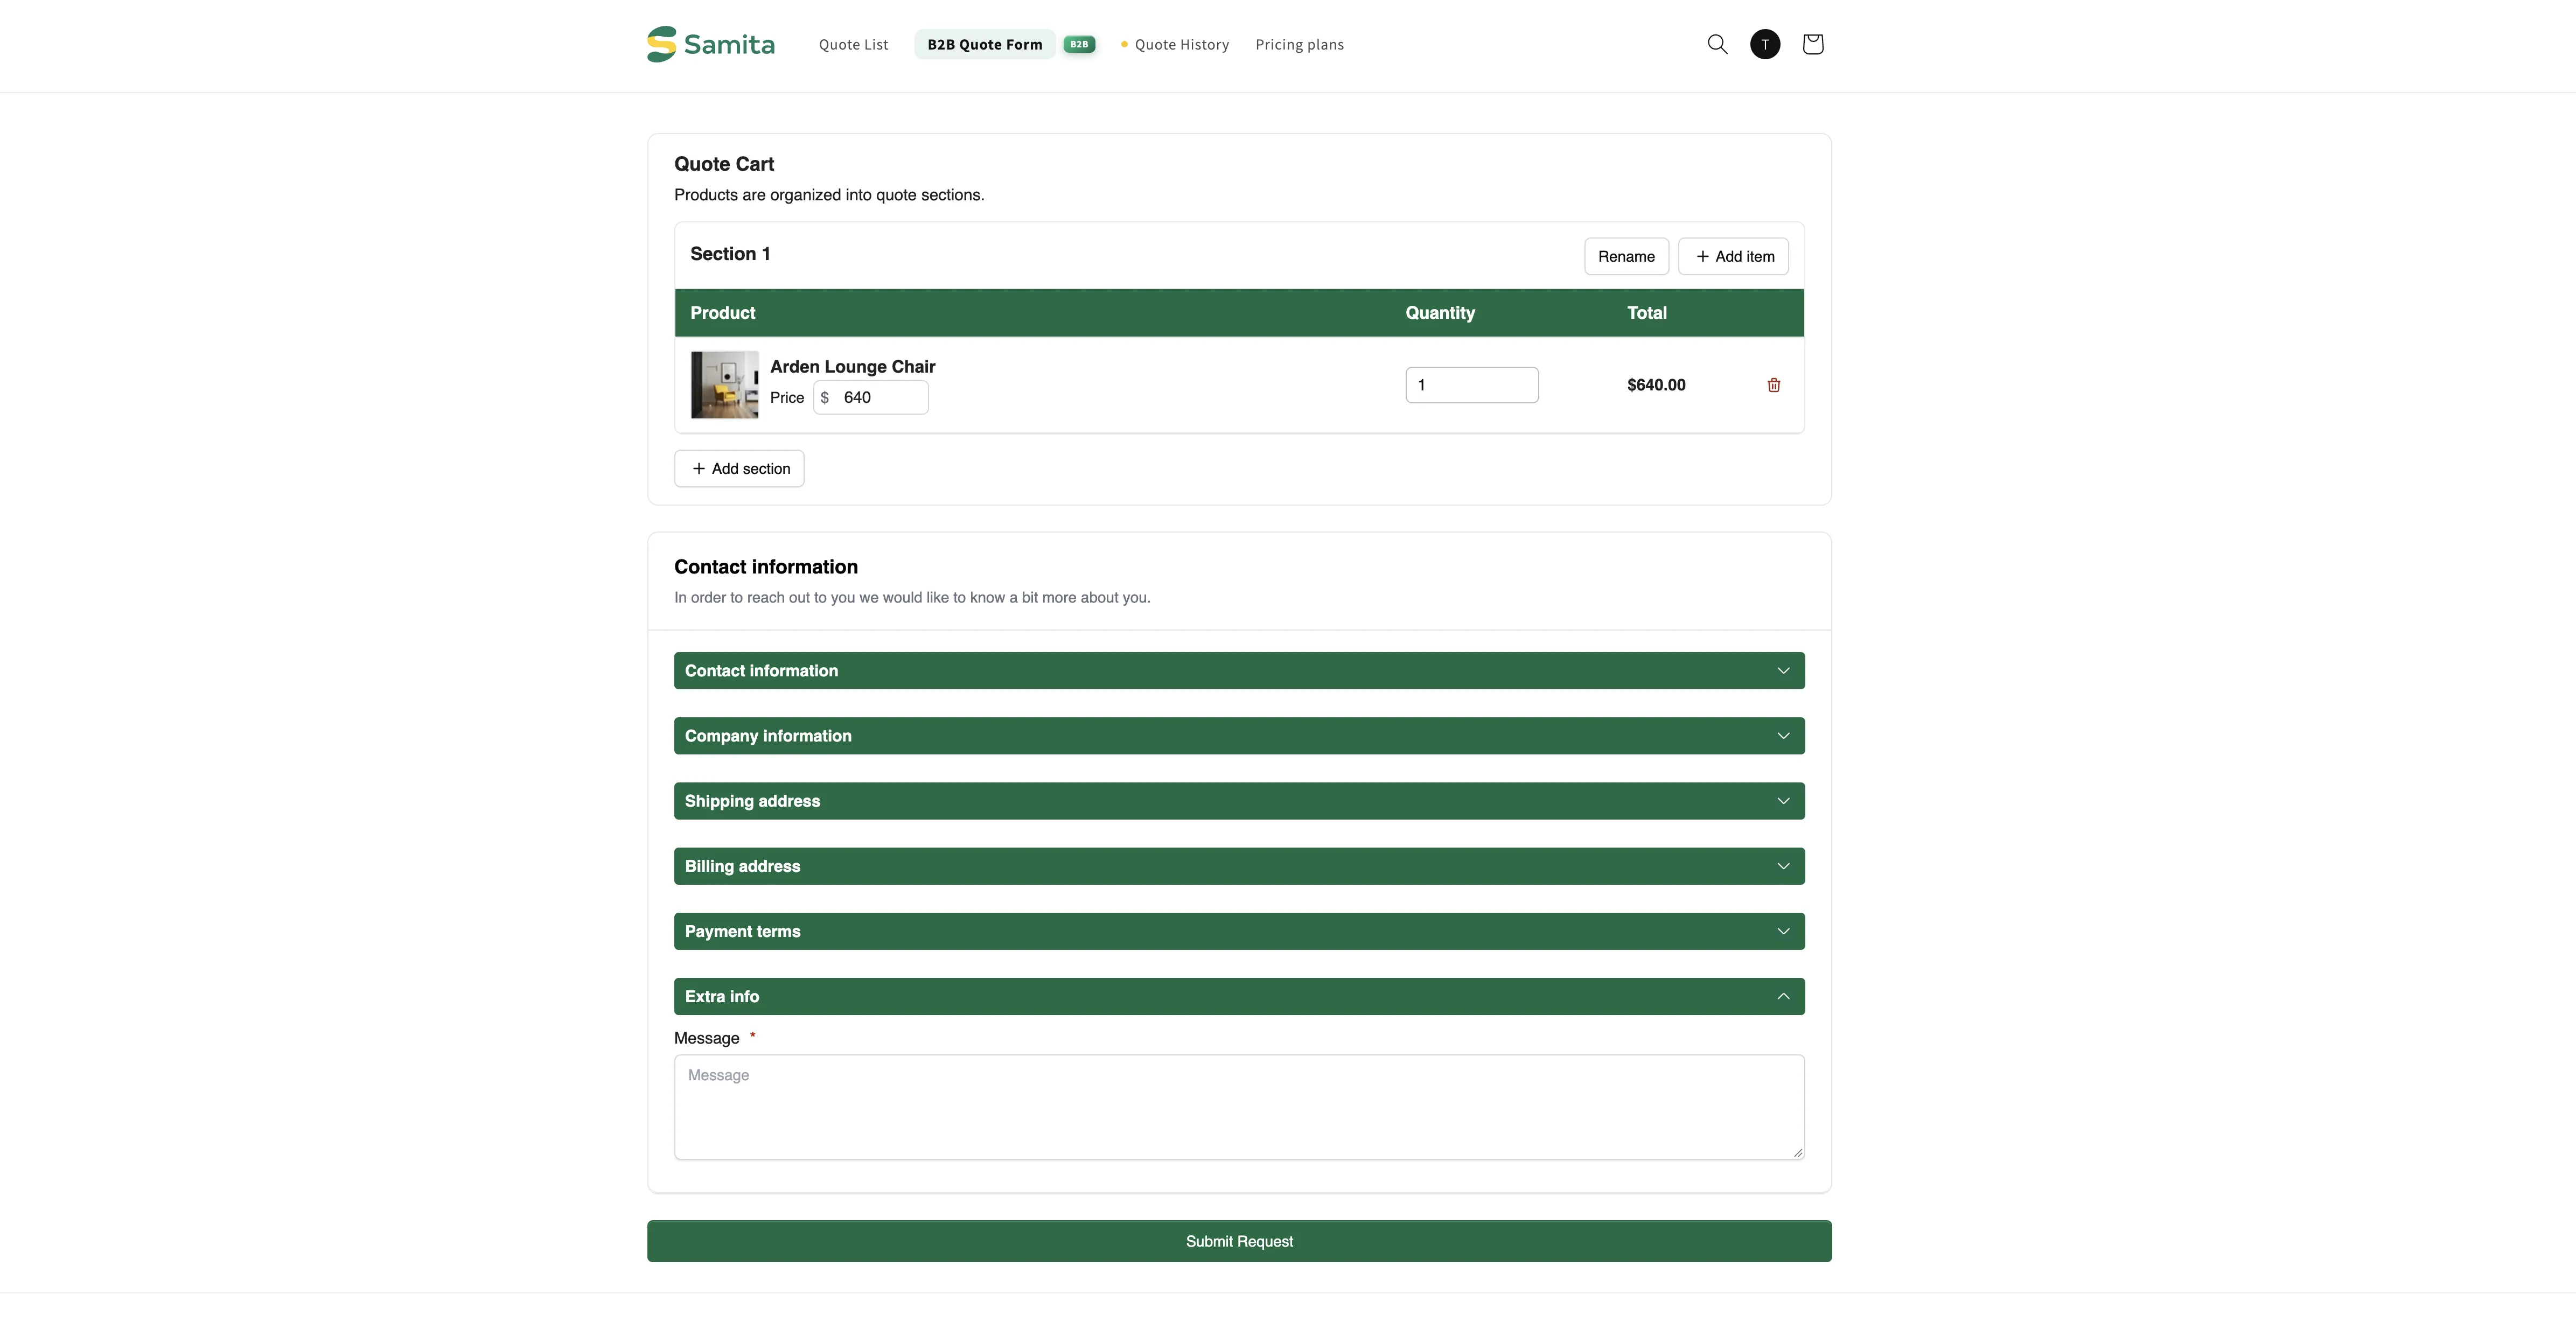
选择表单的布局方式
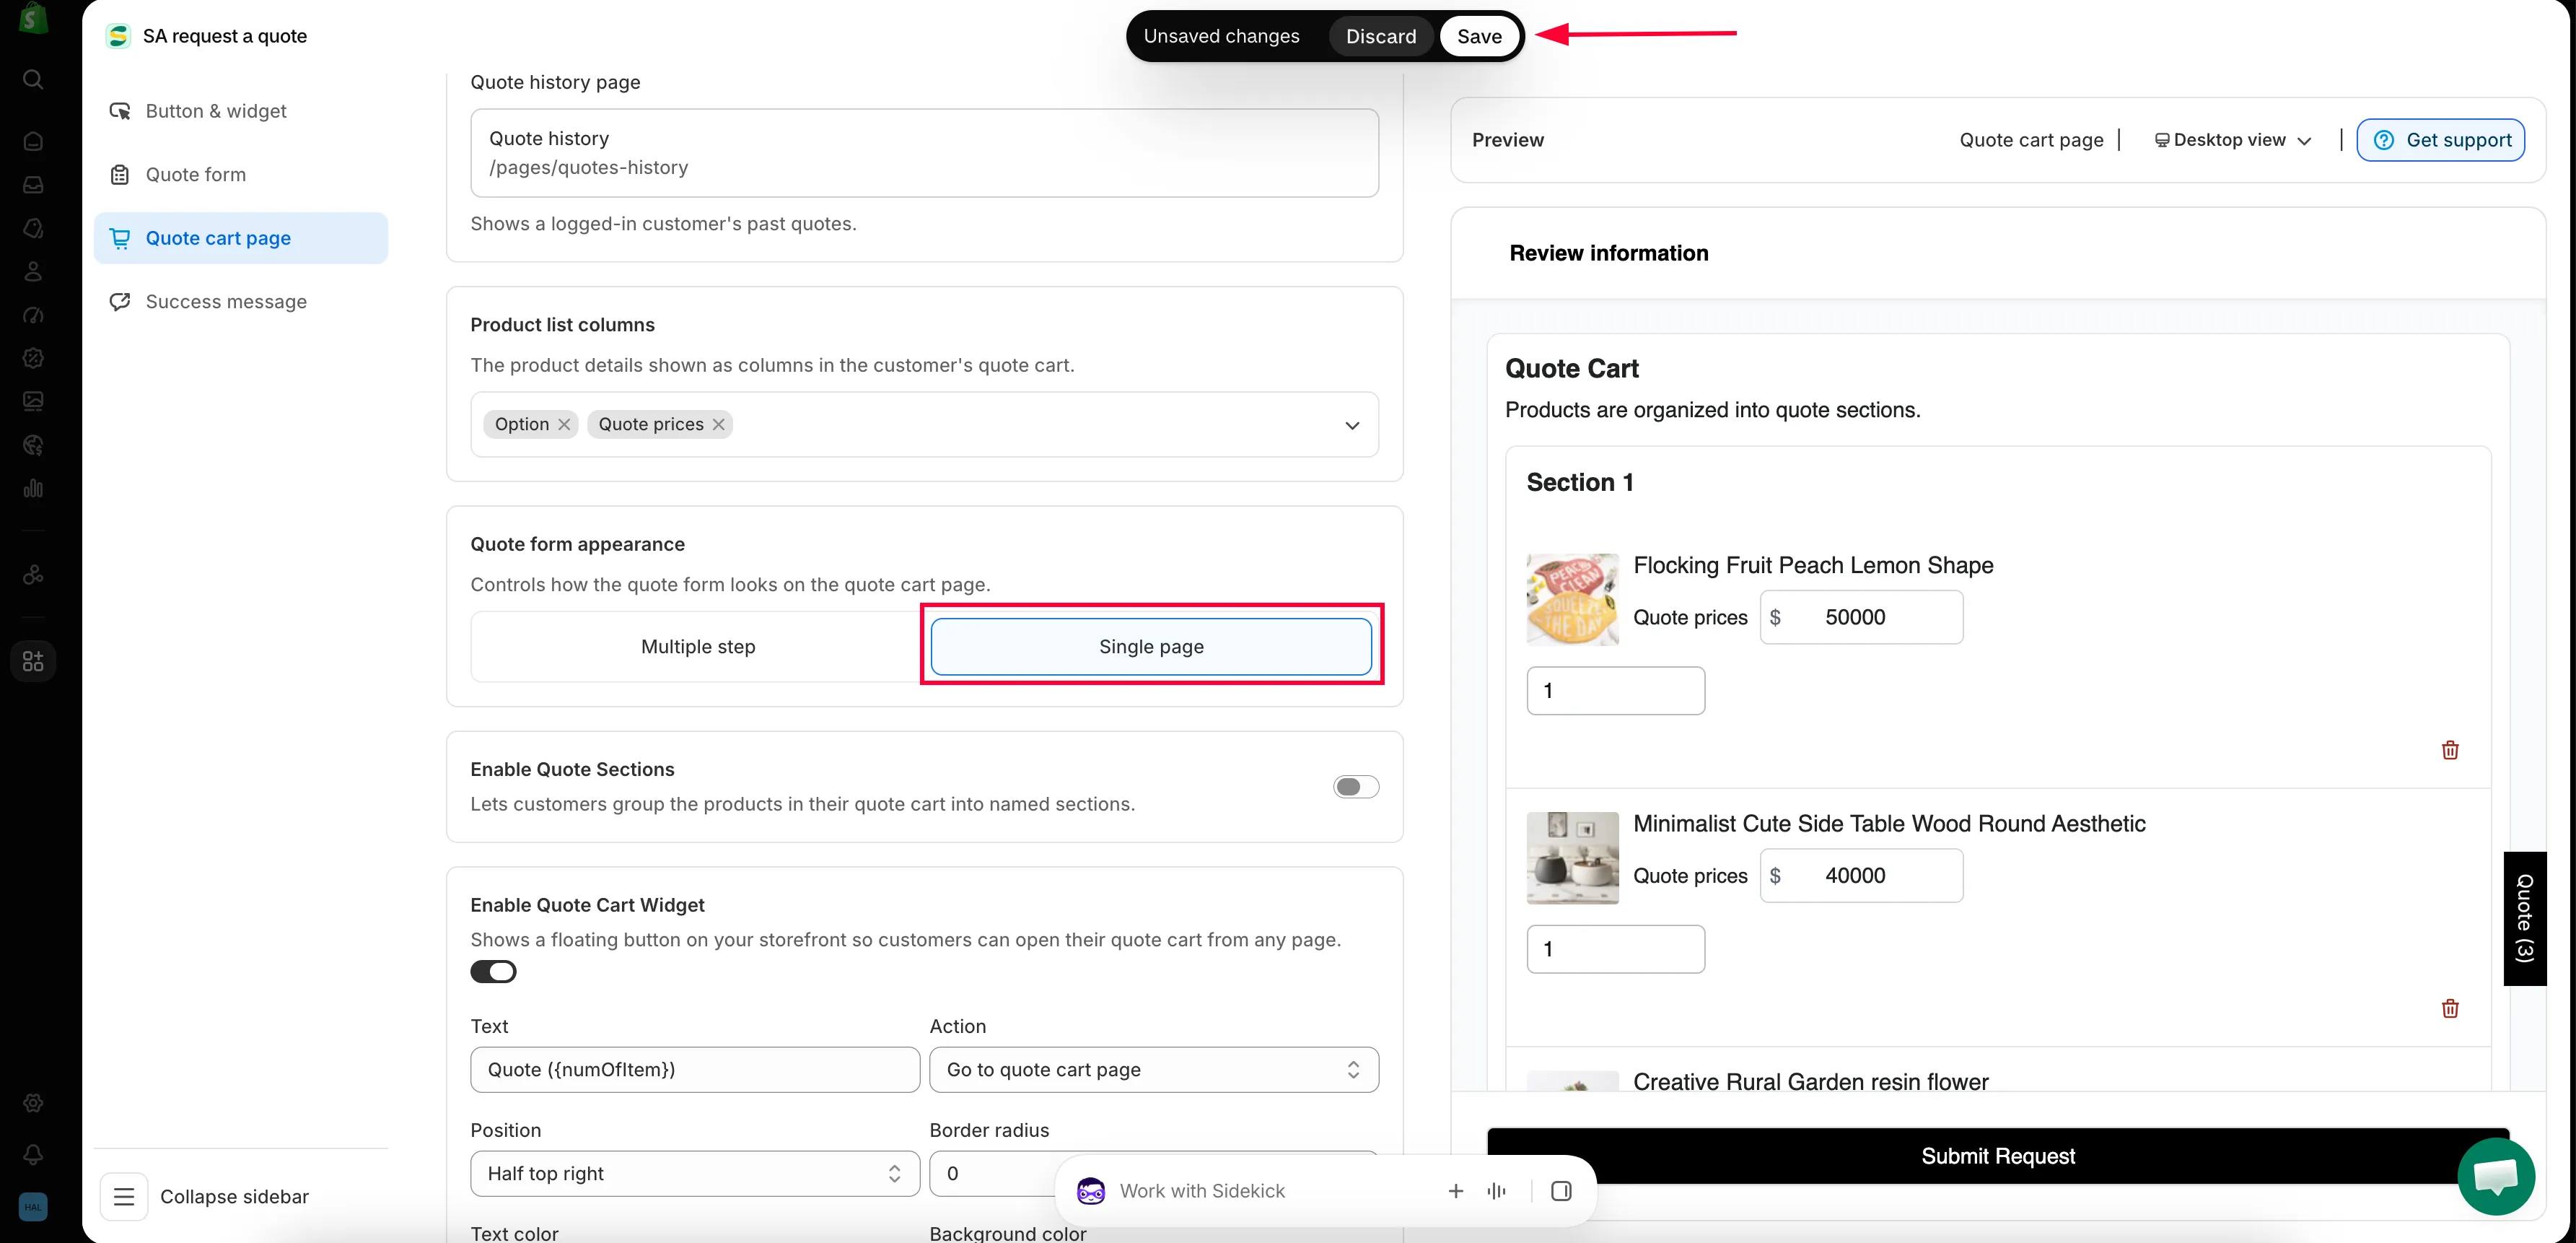
Section titled “选择表单的布局方式”Quote form appearance “Controls how the quote form looks on the quote cart page.”有两个选项。
| 选项 | 客户看到的内容 | 最适合 |
|---|---|---|
| Multiple step | 表单分为多个步骤,客户逐步完成。 | 较长的表单,例如公司详情、发货和账单地址、付款条款。 |
| Single page | 所有字段自上而下显示在同一屏。 | 较短的表单,客户可以一眼看完。 |
Multiple step 表单的外观
Section titled “Multiple step 表单的外观”选择 Multiple step 后,店面页面会打开,显示标题 Request a Quote 和一行文字“Tell us what you need and we will contact you soon.”,下方是三个带编号的步骤。
-
Products selection
Section titled “Products selection”Quote Cart 列出客户已选的所有产品,包含 Product、Quantity、Price 和 Total 列。开启 Enable Quote Sections 后,购物车开头会显示“Products are organized into quote sections.”,第一个分组名为 Section 1。
此步骤以 Continue Shopping 和 Next step 结束。
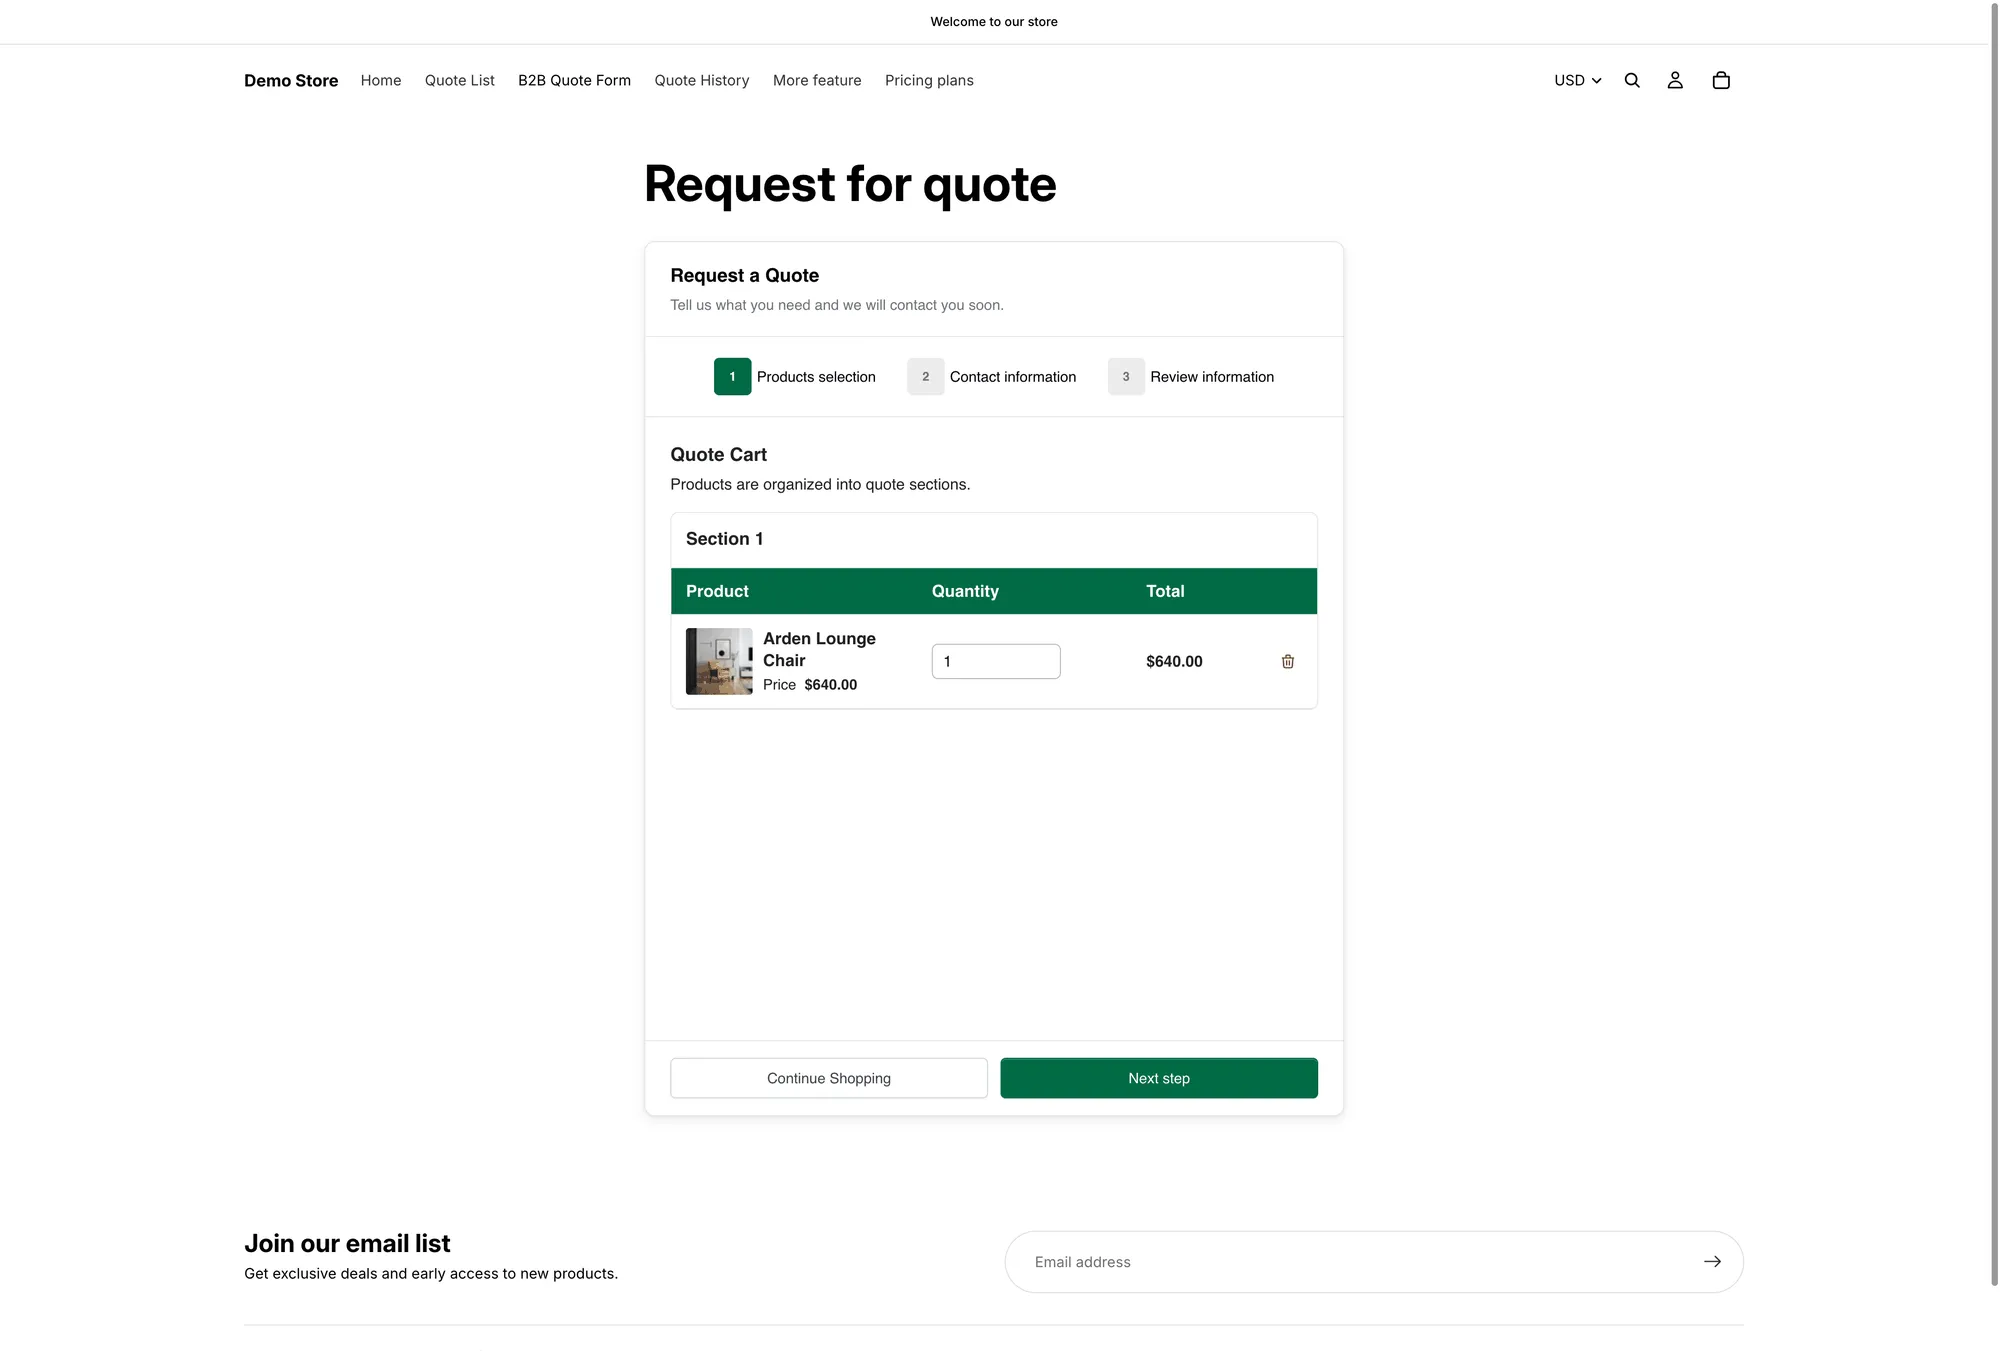
第 1 步 Products selection,位于 /pages/request-for-quote。
-
Contact information
Section titled “Contact information”此步骤会显示您在 Form builder 中创建的各个部分:Contact information、Company information 和 Shipping address。
它们上方有提示“Already have an account? Log in to auto-fill your contact and company information.”,并带有 Login 链接。
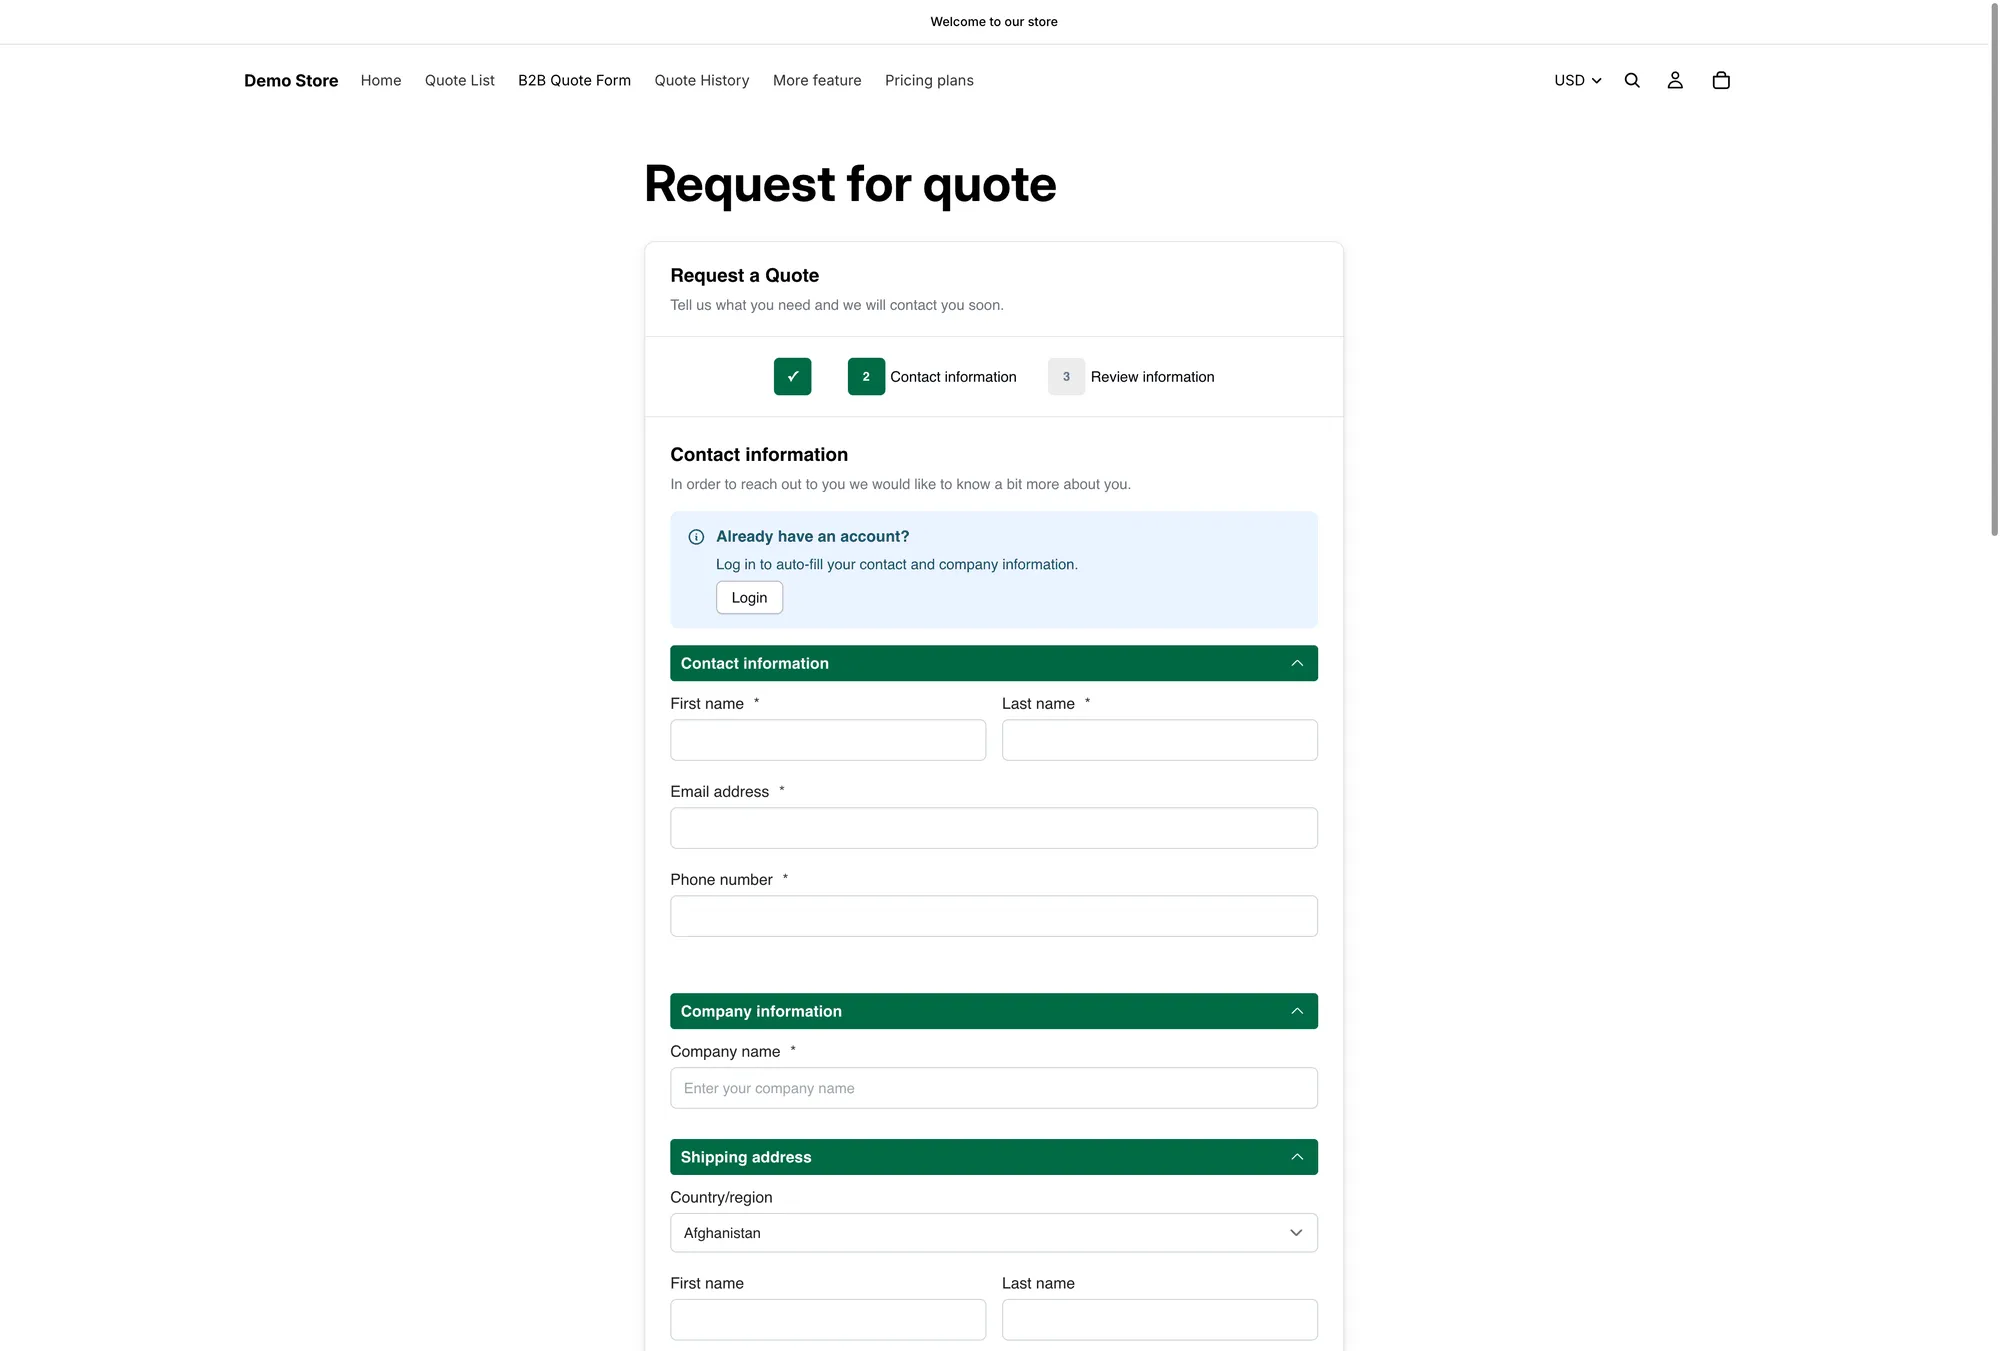
第 2 步 Contact information,字段上方显示登录提示。
-
Review information
Section titled “Review information”最后一步是 Review information,客户在发送请求前在此核对产品和填写的详情。
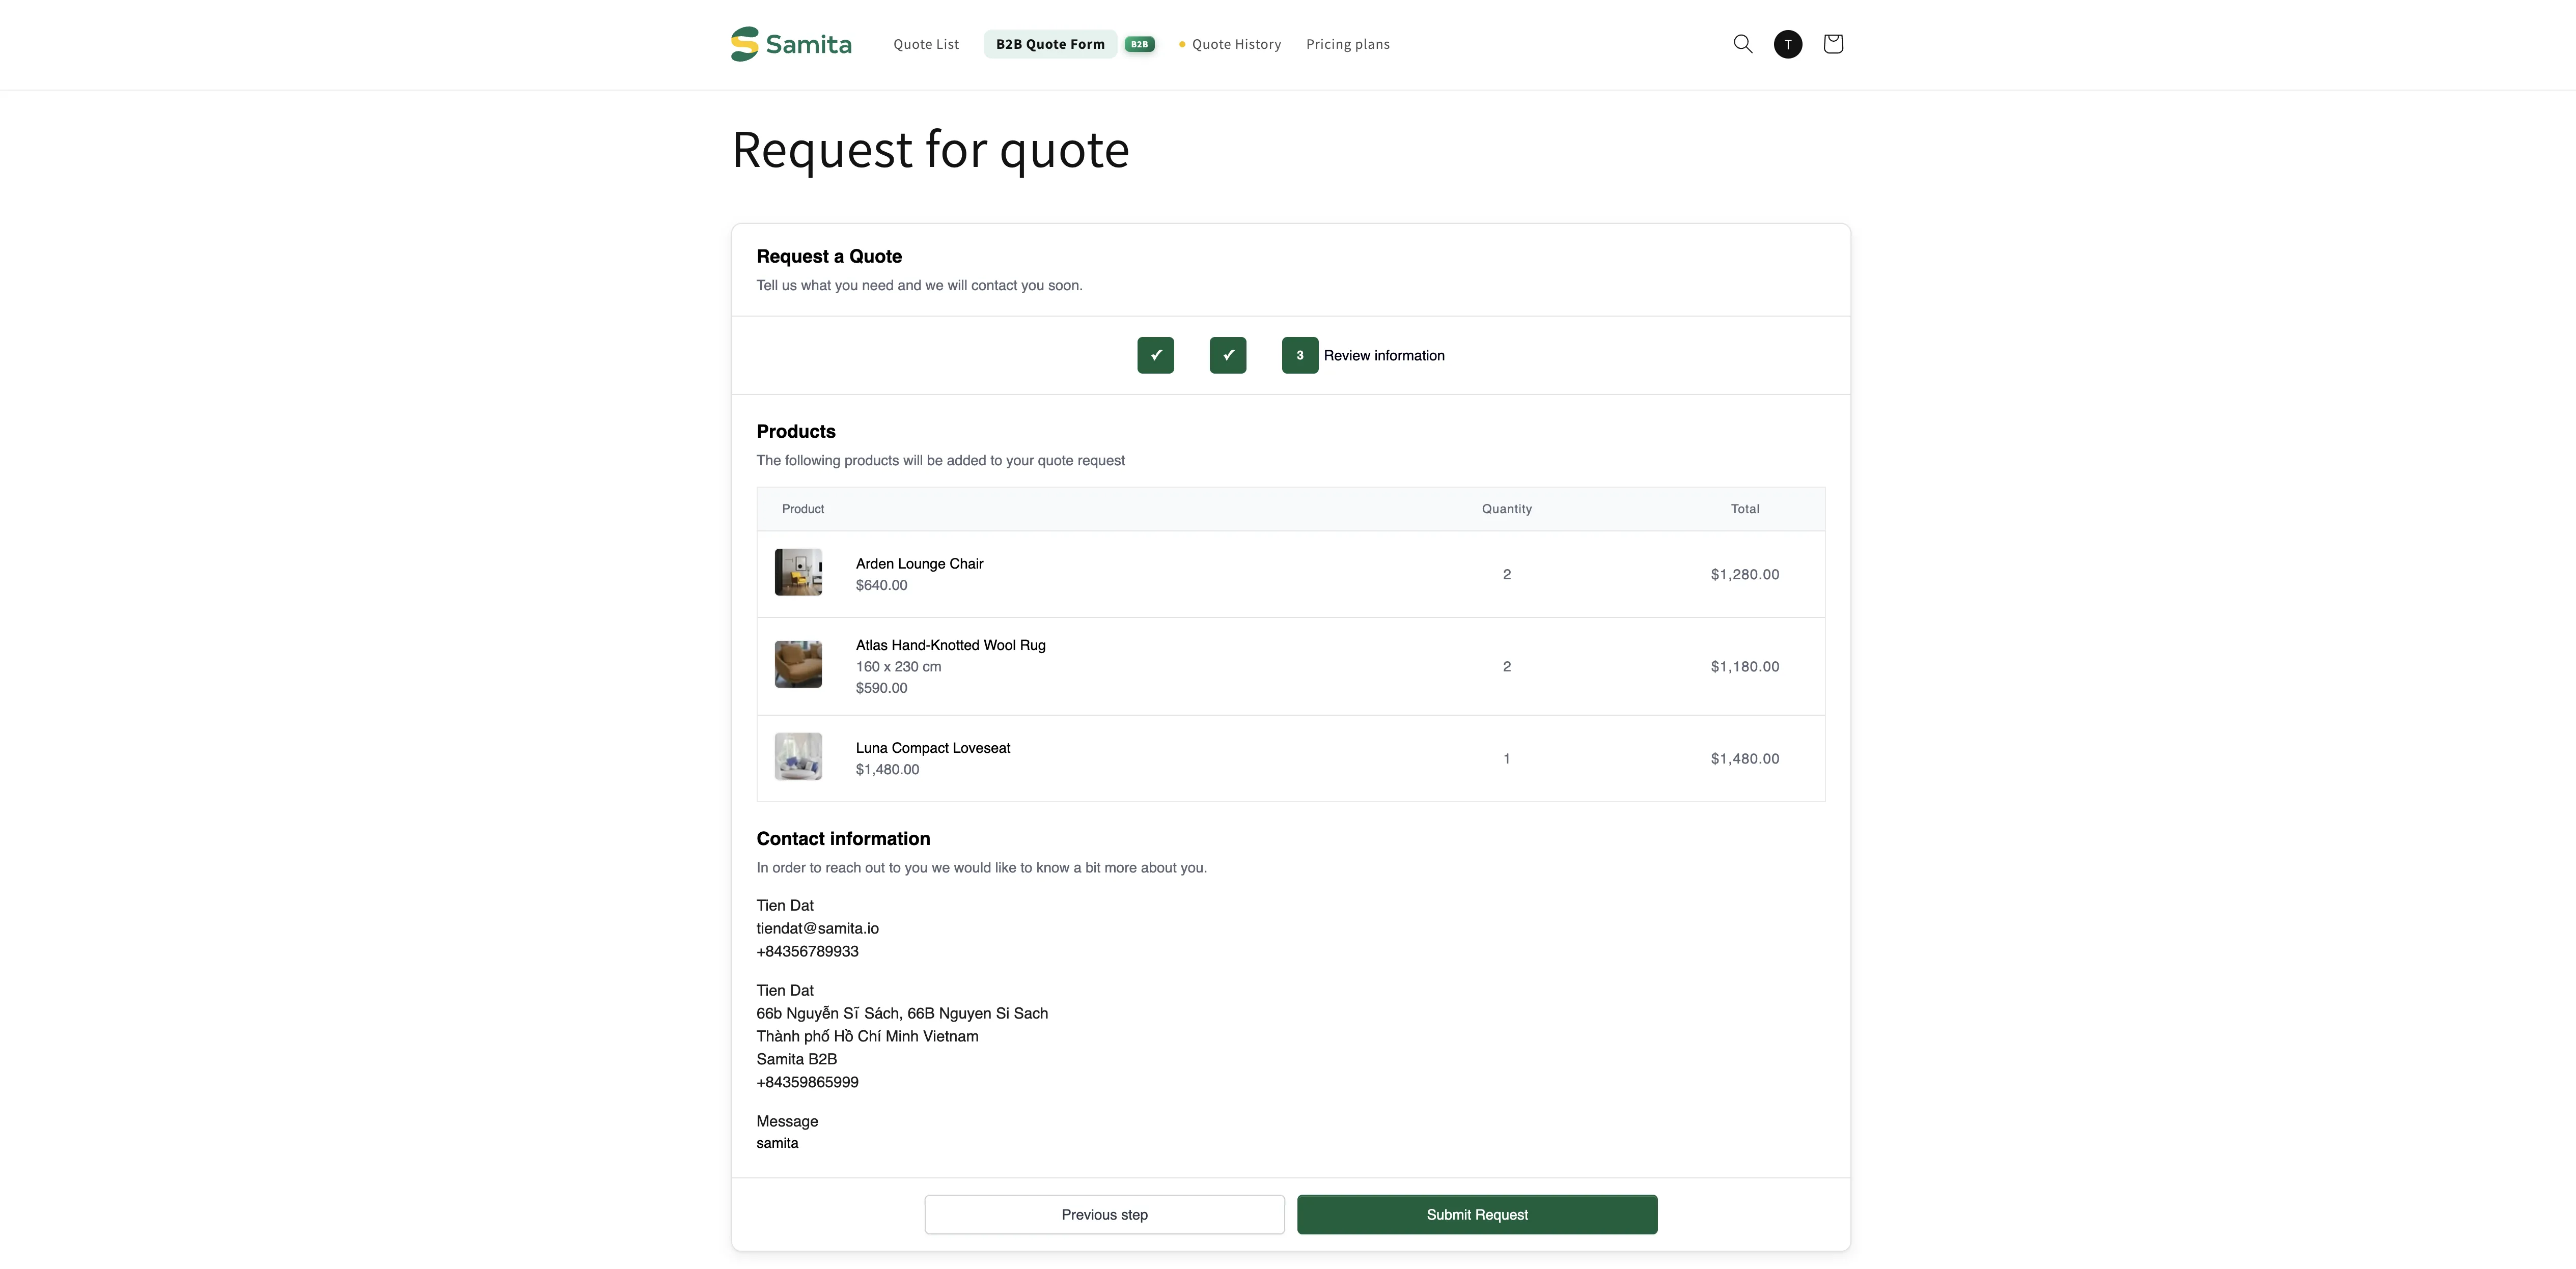
客户在发送前核对请求。
客户提交后看到的内容
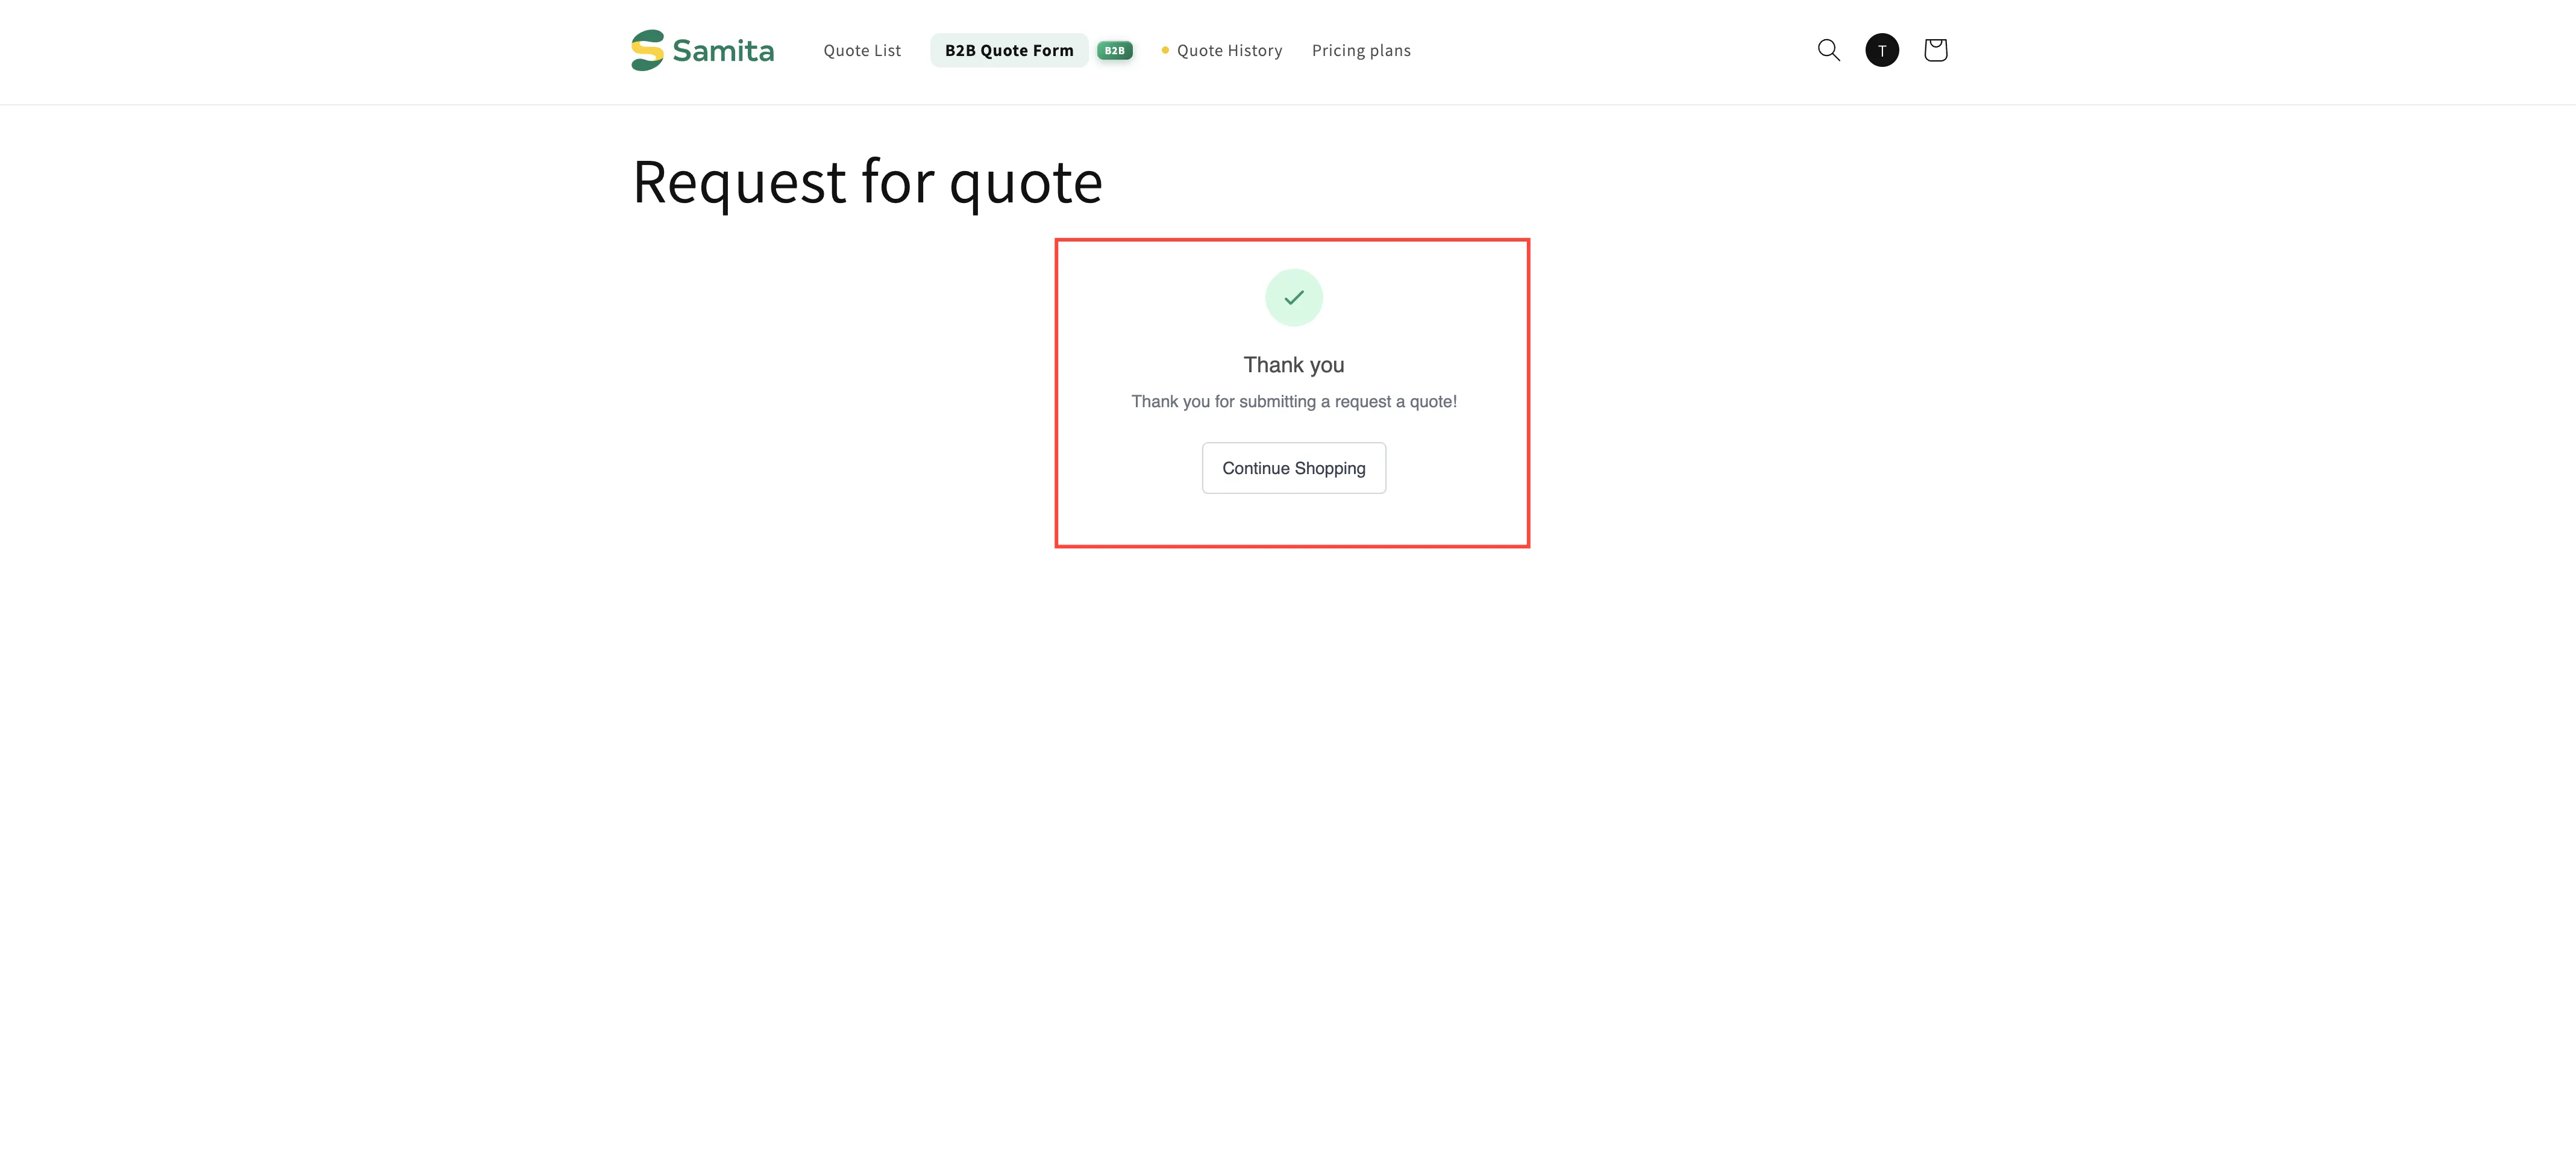
Section titled “客户提交后看到的内容”请求发送后,应用会显示您的成功消息,默认为 Thank you、“Thank you for submitting a request a quote!”和一个 Continue Shopping 按钮。
这些文字不在此标签页中设置,而是在同一个 Customize 编辑器的 Success message 标签页中。该标签页还有 After submit,其中的 Redirect to custom URL 可让您把客户引导到自己的页面。
标签页中的其余设置
Section titled “标签页中的其余设置”| 设置 | 作用 |
|---|---|
| Enable Quote Sections | “Lets customers group the products in their quote cart into named sections.”请参阅报价产品分组 |
| Enable Quote Cart Widget | “Shows a floating button on your storefront so customers can open their quote cart from any page.”已在上文方式 2中设置,详见悬浮报价小组件 |
开启 Enable quote sections 后会出现更多控件:Default section name,以及 Customer options 下的 Add new sections 和 Rename sections。另有两个选项 Move products between sections 和 Add note per section 标有 Coming soon。
客户如何进入该页面
Section titled “客户如何进入该页面”| 方式 | 最适合 |
|---|---|
| Click action 设置为 Redirect to quote page | 客户通常一次只报价一个产品,因此无需先收集。 |
| Click action 设置为 Add product to quote cart,再配合悬浮小组件 | 客户在浏览时收集多个产品,然后一起查看。 |
弹窗的 Primary button,默认为 View Quote | 您希望每次添加产品时都显示确认信息。 |
| 导航菜单中的链接 | 始终值得额外添加,方便客户随时返回。 |
前三项在 Button & widget 标签页中设置,请参阅设置点击后的行为。菜单链接是 Shopify 的设置,请参阅将报价链接添加到菜单。
- 报价历史页面:客户可在此查看已发送的报价
- 将报价链接添加到菜单:从导航链接到该页面
- 编辑报价页面文字:为页面添加您自己的文字