
拒絕申請
附上原因駁回申請,選擇買家是否可以再試一次,並決定是否寄送電子郵件通知他們。
當您不打算為買家開設 B2B 帳號時,請拒絕申請。Sami B2B Onboarding 會記錄您的原因、可寄送電子郵件通知買家,並讓您選擇他們是否可以修改申請後再次送出。Shopify 中不會建立任何內容。
如果只是缺少某些資料,請改為要求更多資訊。
-
開啟拒絕對話框
Section titled “開啟拒絕對話框”使用下列任一方式:
- 在 Applications 分頁上,點擊該列尾端的 …,並選擇 Reject。
- 在快速審核側邊欄中,點擊 Reject,或按
R。 - 在完整的申請頁面上,點擊 More actions › Reject。
Reject application 對話框會開啟。
-
在 Reason 下,選擇 Doesn’t meet requirements、Information doesn’t check out、Duplicate application 或 Other。
-
新增詳細資料
Section titled “新增詳細資料”在 Details 下,寫下買家應該知道的內容。這些內容和原因會被拒絕電子郵件引用。
-
選擇接下來的處理
Section titled “選擇接下來的處理”在 After rejecting 下,選擇其中一項:
- Let them update it and send it again(預設):“Their account shows your reason and reopens the application for them to change.”
- Close the application:“They can’t change it or apply again from their account.”
-
選擇是否寄送電子郵件通知買家
Section titled “選擇是否寄送電子郵件通知買家”保持勾選 Email the buyer about this decision 以寄送 Application declined 電子郵件,或取消勾選以靜默拒絕。
-
點擊 Reject application。“Application rejected” 會確認已拒絕。狀態會變成 Rejected,申請會移到 Decided 檢視,時間軸會顯示 “Rejected Acme Supply Co.” 及原因。
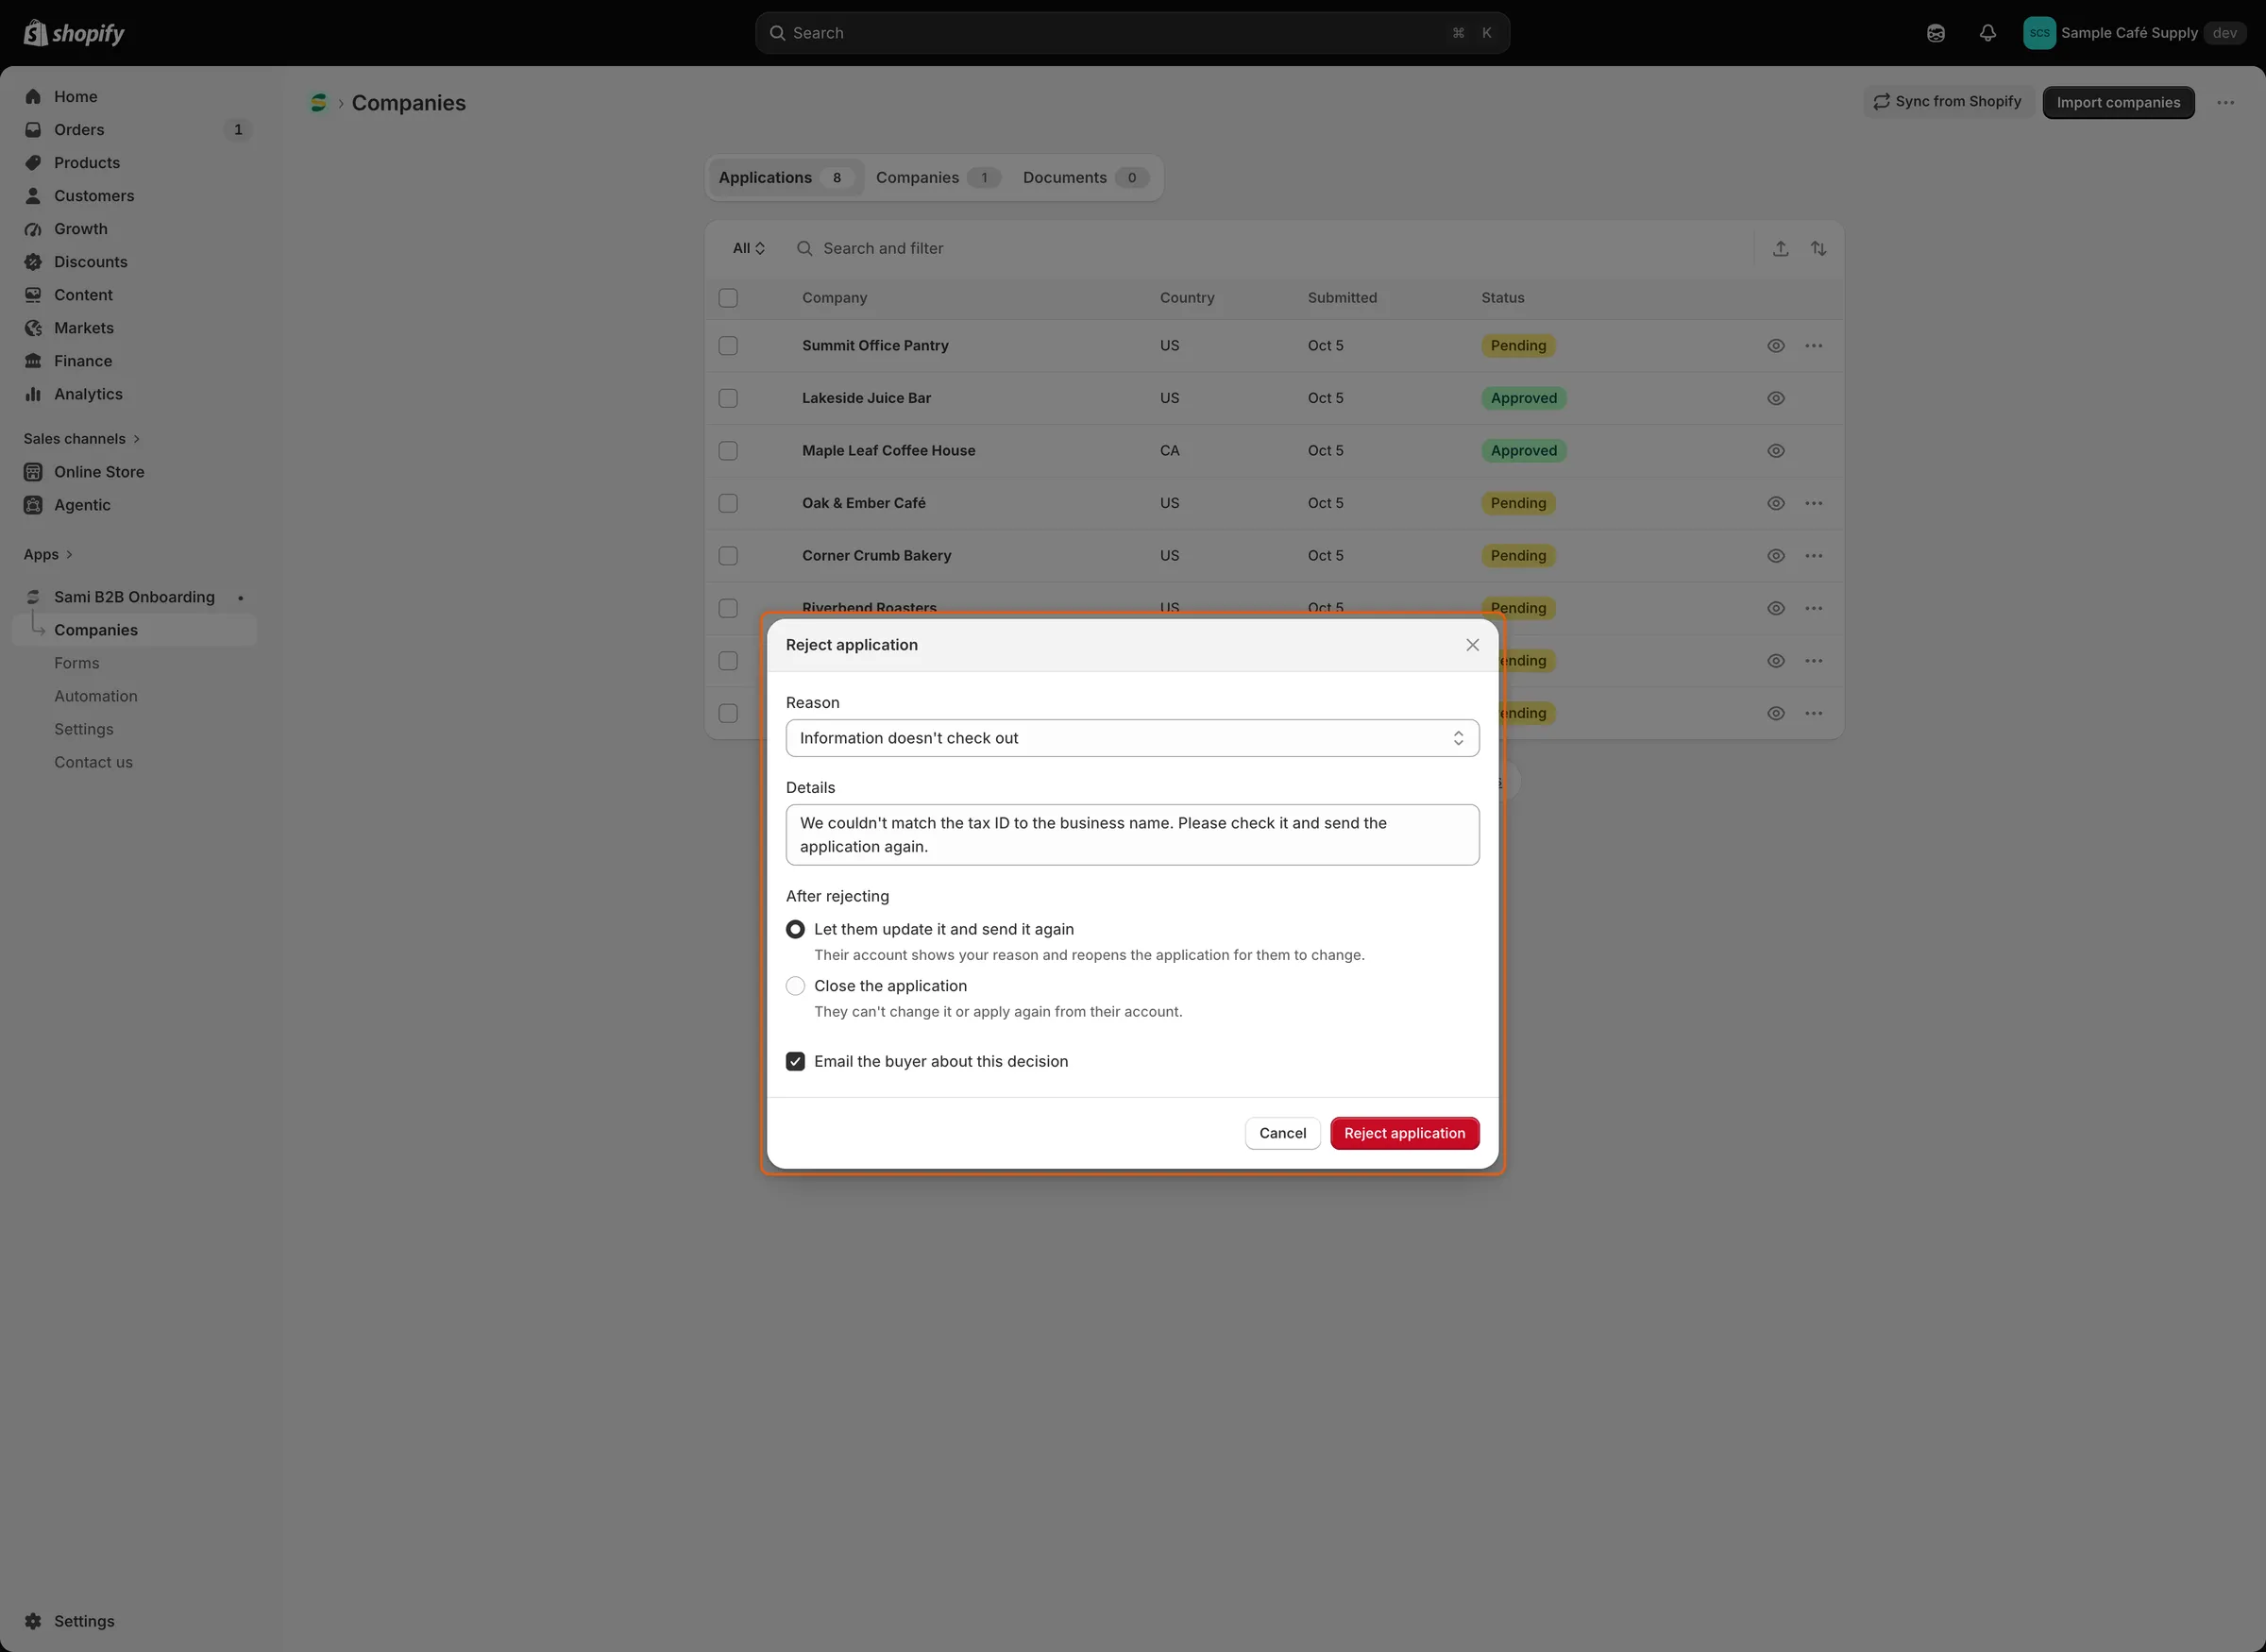
原因和詳細資料會傳送給買家;After rejecting 決定他們是否可以再次送出申請。
開啟拒絕電子郵件
Section titled “開啟拒絕電子郵件”每份申請表單都有自己的這封電子郵件的開關。
-
開啟表單的電子郵件
Section titled “開啟表單的電子郵件”前往 Forms,點擊表單旁的 Edit,例如 Wholesale application。在建置工具左側的導覽列中,點擊 Email。Application declined 列在 Sent to buyers 下。
-
開啟 Application declined 旁的開關,然後點擊建置工具儲存列中的 Save。
請為每份您希望被拒絕的買家收到通知的表單執行此操作。Automation › Automations 下的 Application rejected 也必須開啟。它預設是開啟的。當它關閉時,建置工具中該電子郵件所在的列會顯示 “Its automation trigger is off, so this won’t send.”
這封電子郵件 “About your application” 會感謝買家、說明您目前無法核准其申請,並引用您的原因和詳細資料。它會告訴他們仍可以原價購物,且若資料有變更可以再次申請,並附有 Visit the store 按鈕。若要變更其文字,請參閱編輯電子郵件範本。
買家會看到什麼
Section titled “買家會看到什麼”當買家已登入時,其顧客帳號和您的表單頁面會顯示 “Your application wasn’t approved”。在其帳號中,下方的文字是您的原因和詳細資料。在您的表單頁面上:
- 如果您選擇了 Let them update it and send it again,他們會讀到 “You can update your application and send it again.”,並看到 Update your application 按鈕,其帳號中也會顯示該按鈕。他們送出後,申請會以 Resubmitted 狀態回到您手上,決定權留給您的團隊。請參閱要求更多資訊。
- 如果您選擇了 Close the application,他們會讀到 “Get in touch if you think this was a mistake.”,且沒有按鈕。
請參閱公司申請頁面。
申請會如何處理
Section titled “申請會如何處理”被拒絕的申請會留在 Decided 檢視中。Automation › Automations 下開啟時,Shopify Flow 的 Application rejected 觸發條件會執行,且您設為傳送拒絕事件的整合也會收到。
被拒絕的申請會在 Settings › Application rules › Data retention › Rejected applications 中設定的時間後,連同其檔案和時間軸一併永久刪除:Keep for 1 year(預設)、Keep for 90 days 或 Keep indefinitely。請參閱申請規則。
您仍可核准被拒絕的申請。從清單中開啟它。完整頁面仍保有 Approve application 按鈕。請先檢查 Approval 卡片:被拒絕的申請不會從您的預設組合開始,因此請用鉛筆圖示設定條款並點擊 Save。然後點擊 Approve application。當摘要顯示 Ready to approve 時,申請會直接核准,不會出現對話框。請參閱核准申請。
只有在申請尚未決定時,申請頁面、側邊欄和該列的 … 選單才會提供 Reject。